Introduction
This feature is introduced to add or edit course payment details while creating or editing the Course-name. You can find this feature in Categories modules and at the time of creating a class.
How is it useful?
You can pre-define the course fee details while creating the Course-name. So, when you select this Course-name while creating a class, these charges will automatically show up in the Class Payment Details section.
Also, you can add a level-based fee structure to the Course-name.
How to Add levels?
To add a level-based fee structure to the Course-name, you need to Add levels under school information. To know How to add levels Click here.
How to Update a Student with School level?
- Go to the Student module.
- From the Student listing, click on the particular student record.
- On the student view details page, in the Student information section, click on Edit details.
- Scroll down to school details and add School level from the dropdown.
- Click on Save button.
How to Activate the Round Robin feature?
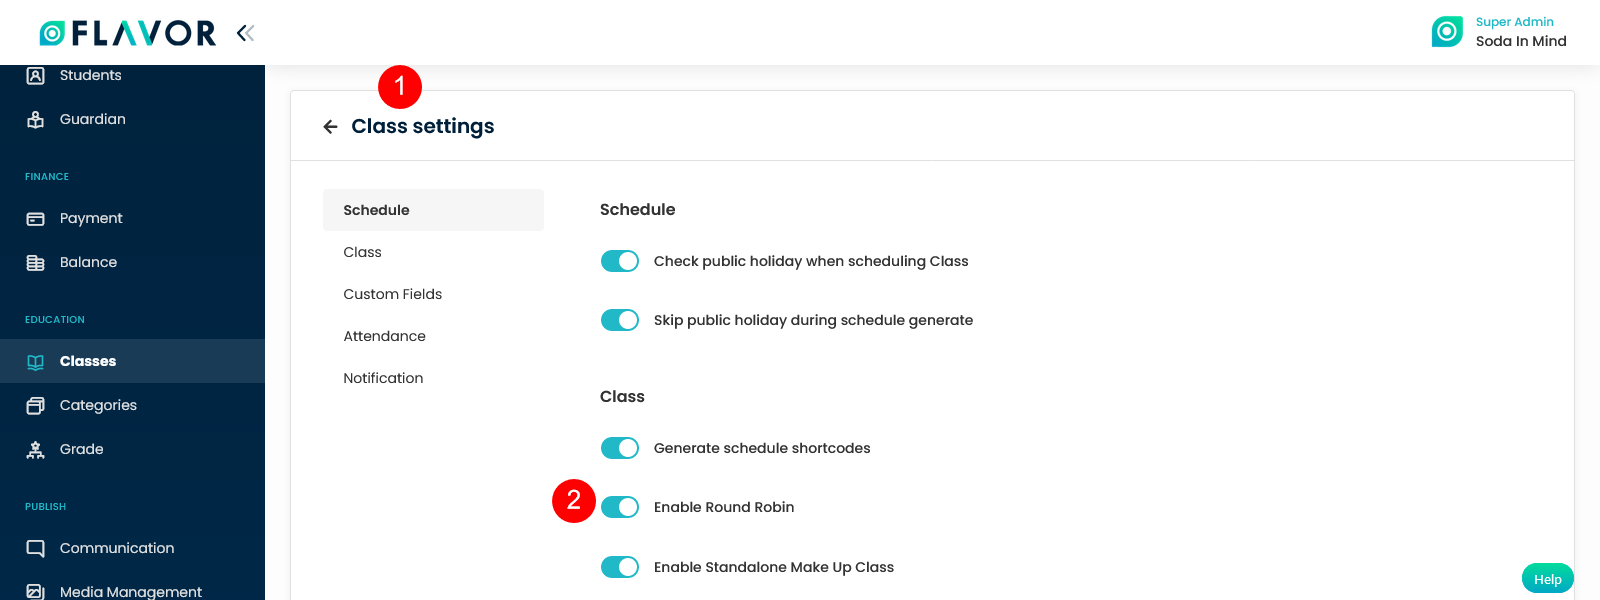
- Go to the Classes module, then click on the Settings icon to navigate to Class settings.
- Underclass section, enable the switch Enable Round Robin.
How to Add payment details by using the Round Robin feature?
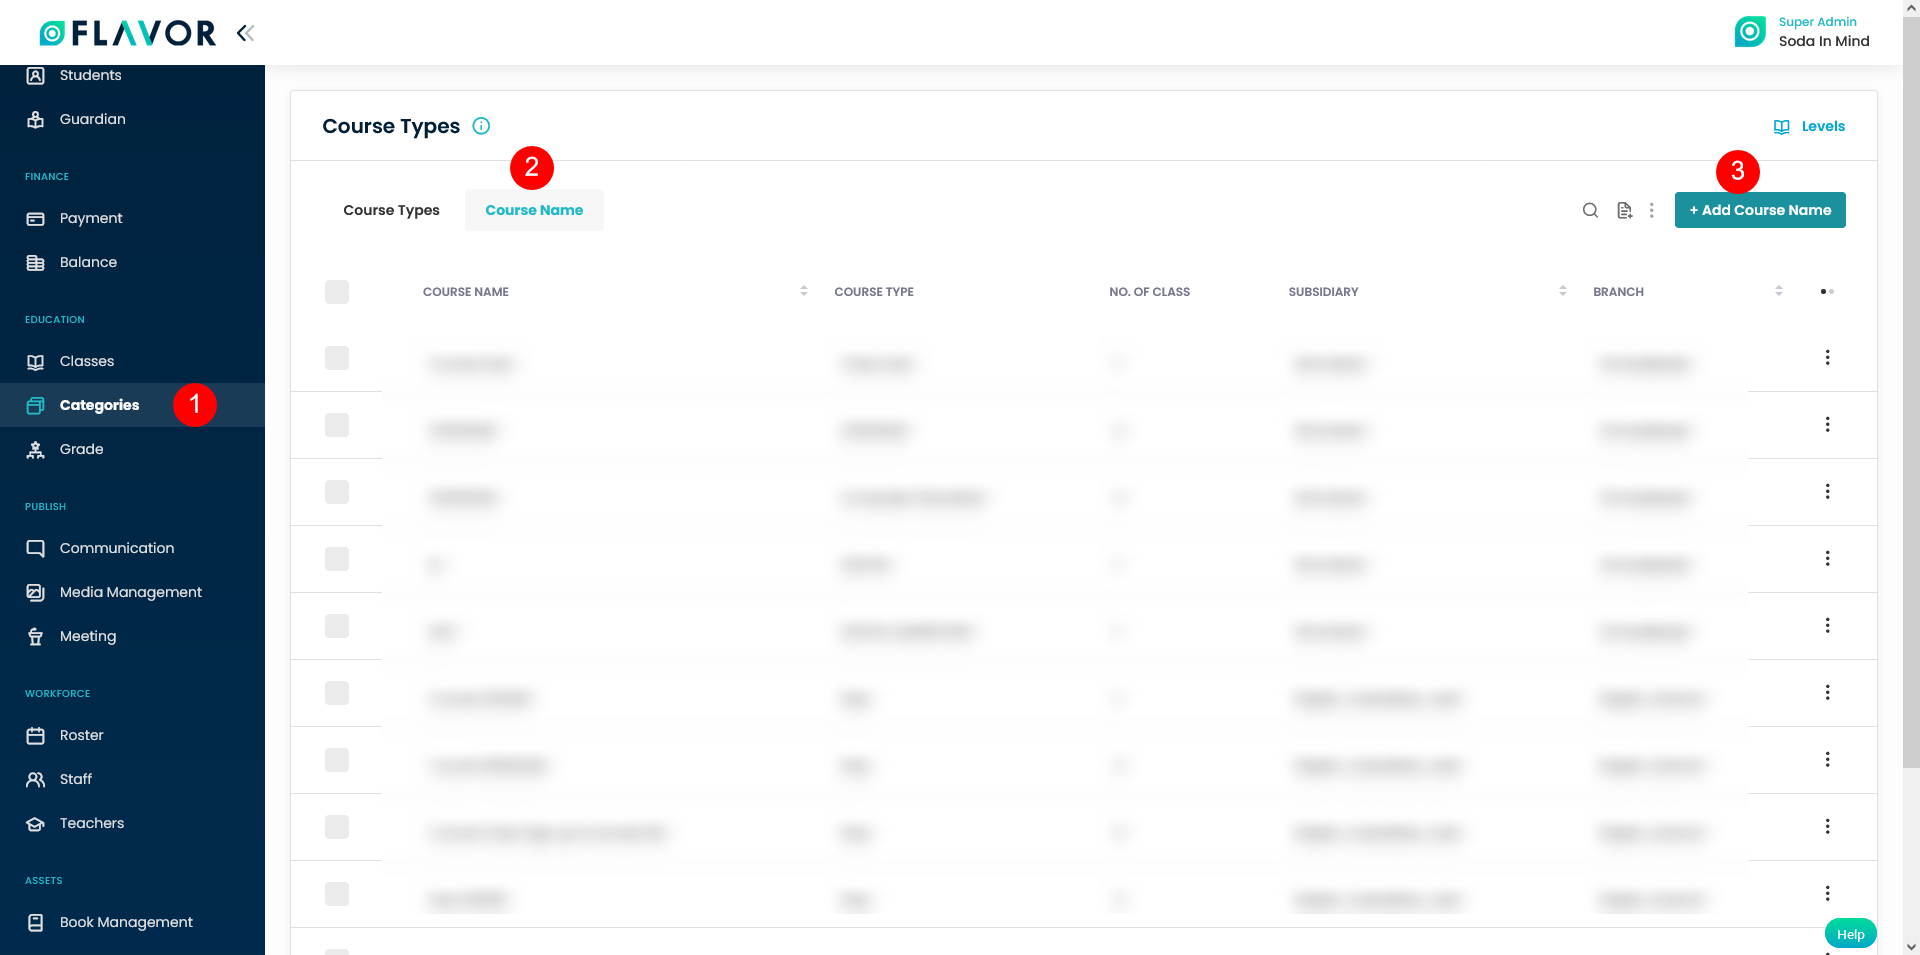
- Go to the Categories module.
- Click on the Course Name tab.
- To Add a new Course Name, click on Add Course Name.
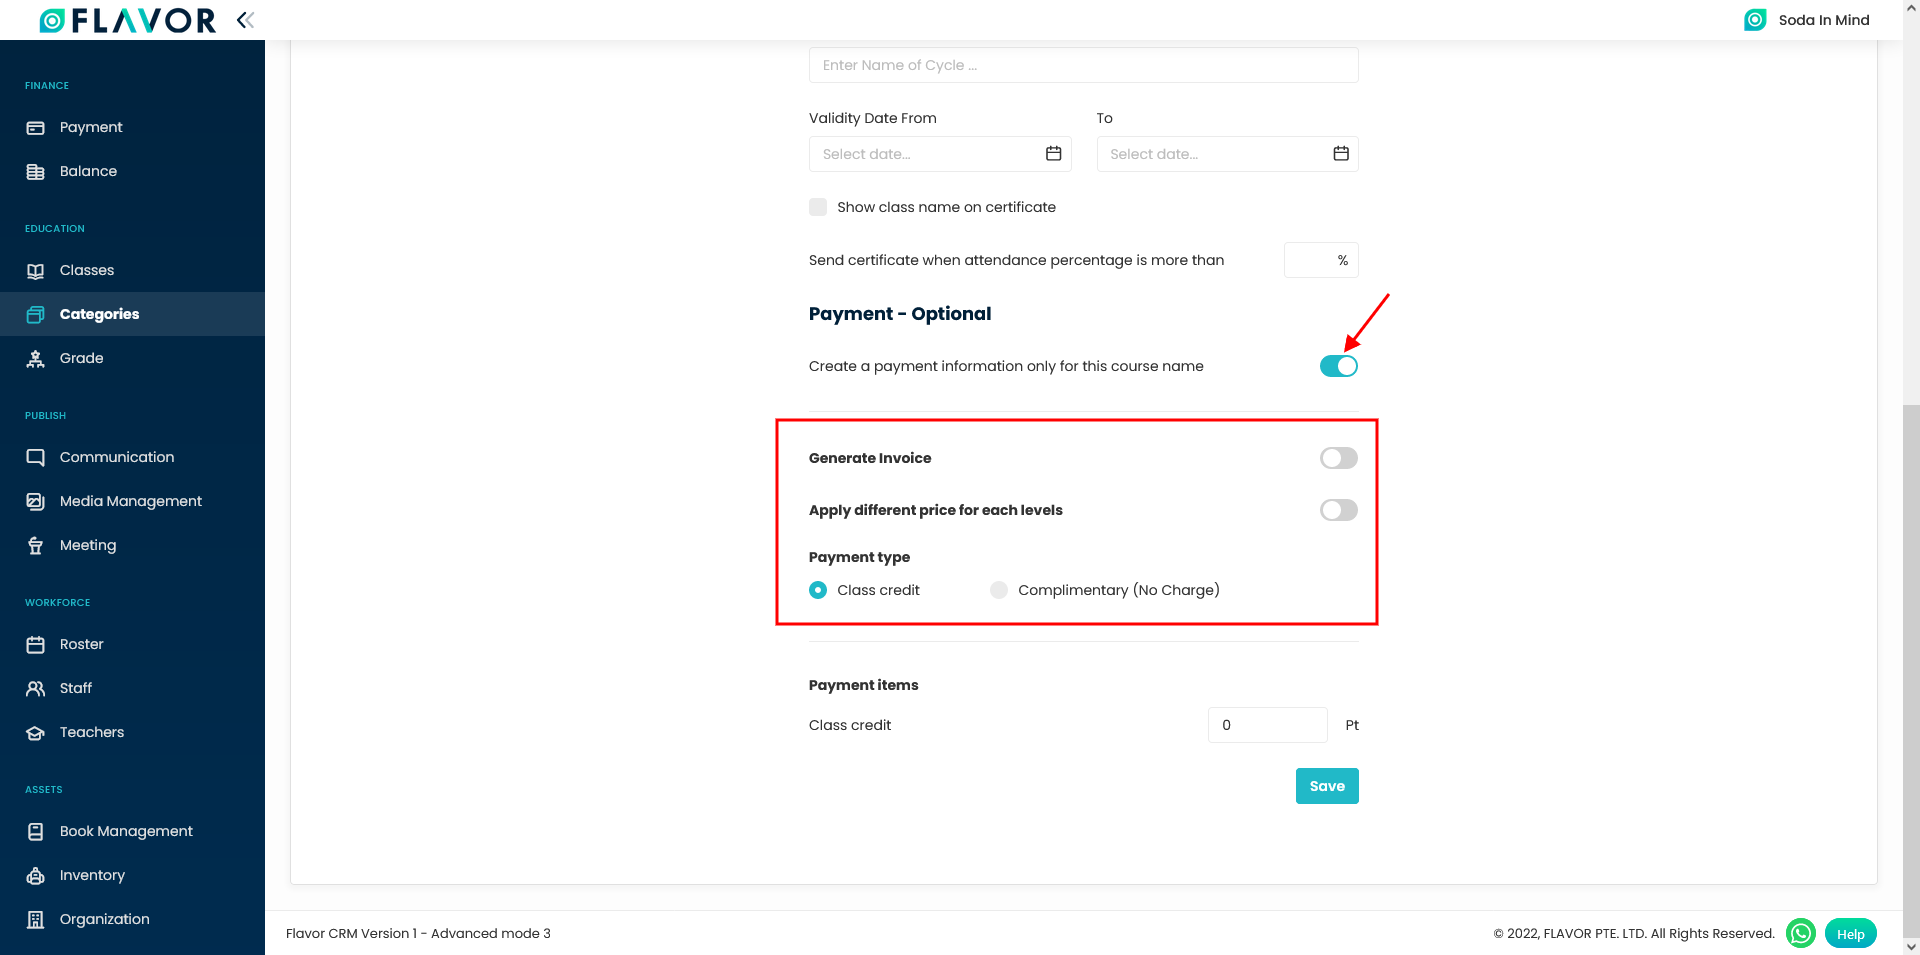
- Scroll down to the Payment – Optional section on that page.
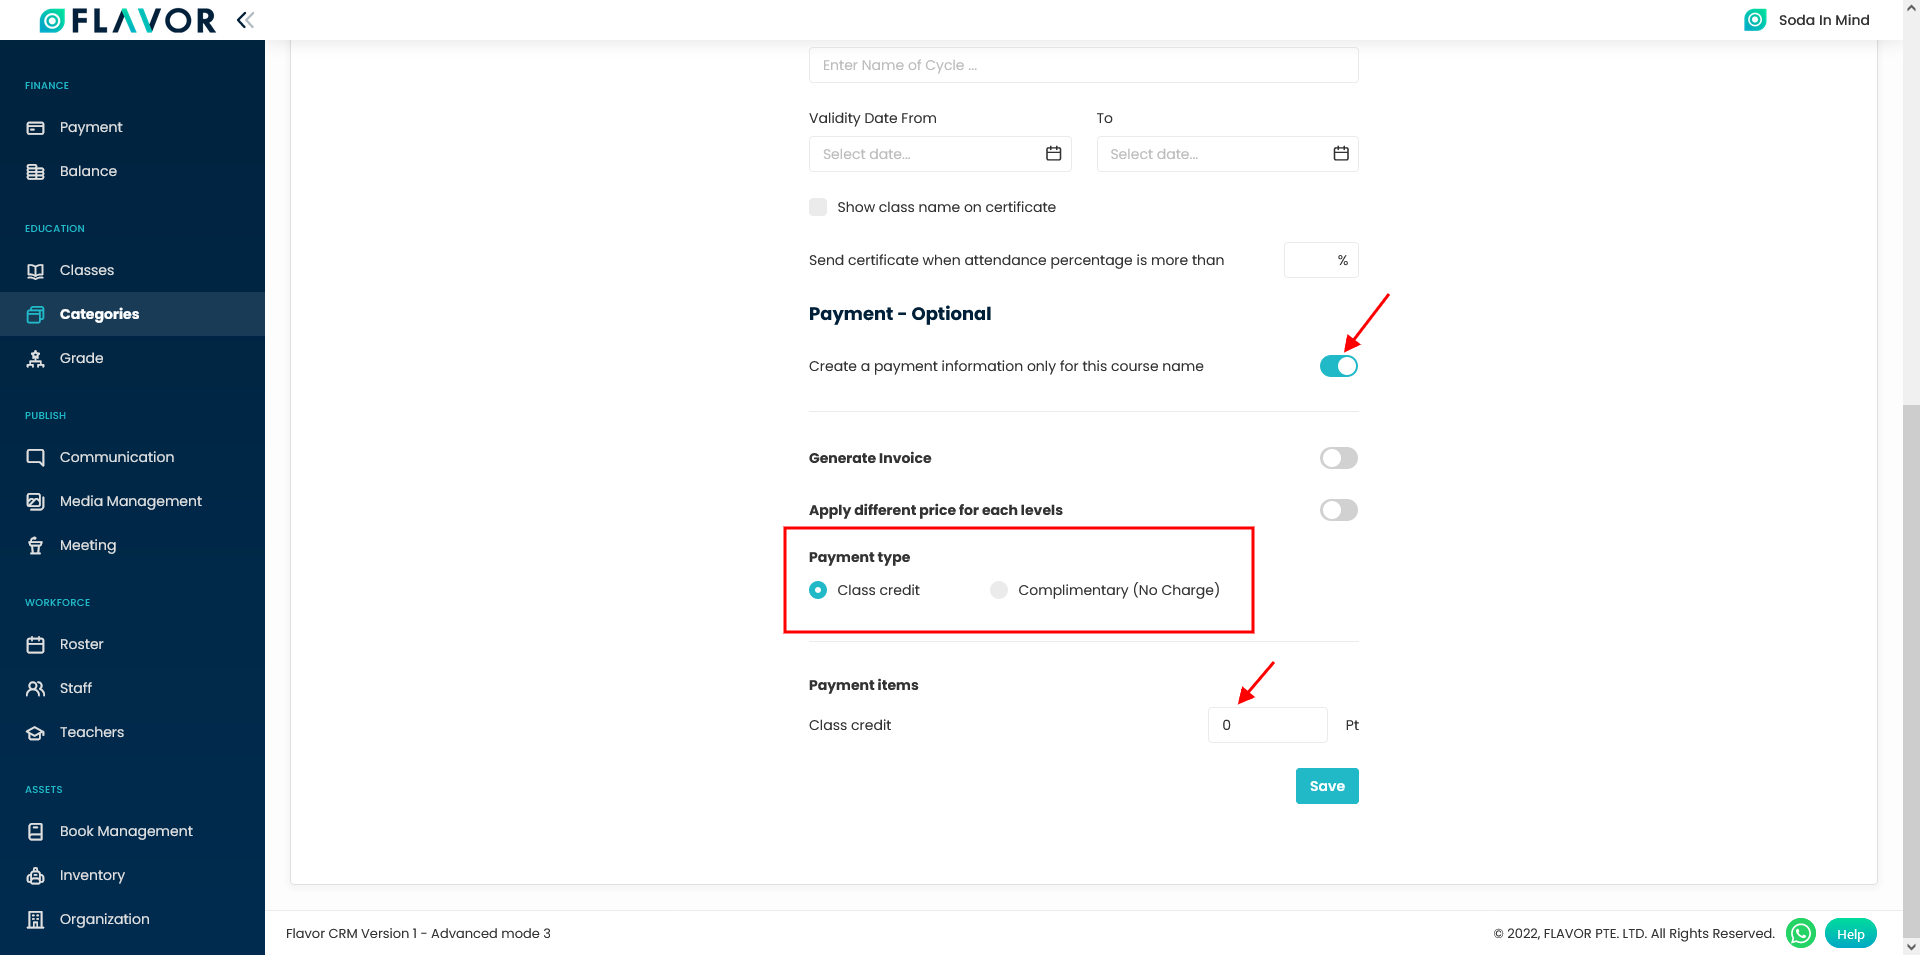
- Enable the switch for Create payment information only for this course name button.
- You can see three items viz Generate Invoice, Apply different prices for each level & Payment type.
Payment Type
Payment Type has two options i.e. Class credit and Complimentary(No charge).
When you choose a Class credit, then you need to enter the Class credit points under the Payment items. And no charges are required in case of Complimentary.
Generate Invoice
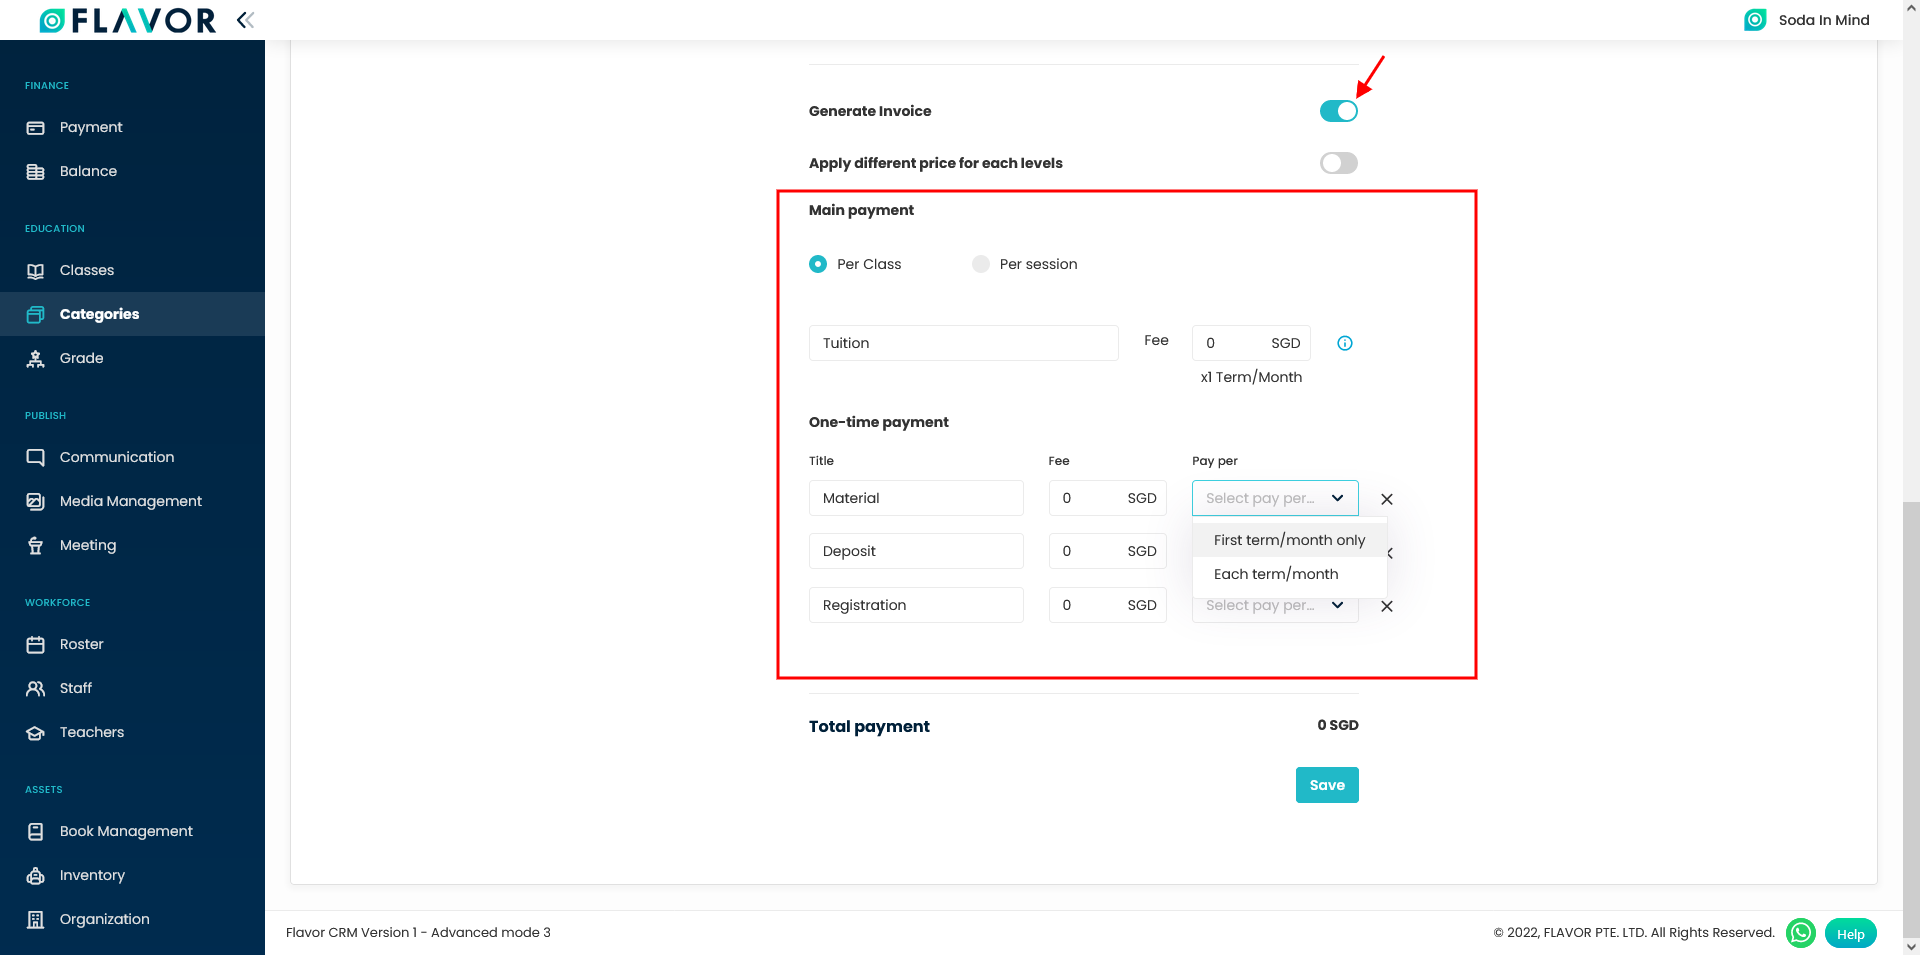
By default, it is disabled. If you enable the switch, you can see two sections Main payment and One-time payment.
- Main payment: It has got two options: i.e. Per class and Per session. You can enter the title of the payment and then the payment fee amount per term/month. The Main payment cannot be deleted.
- One-time payment: One Time payment option which consists of paying per each term/class and paying for a first-term/class only.
One-time payments can be deleted if users do not need a one-time payment.
Apply different prices for each level
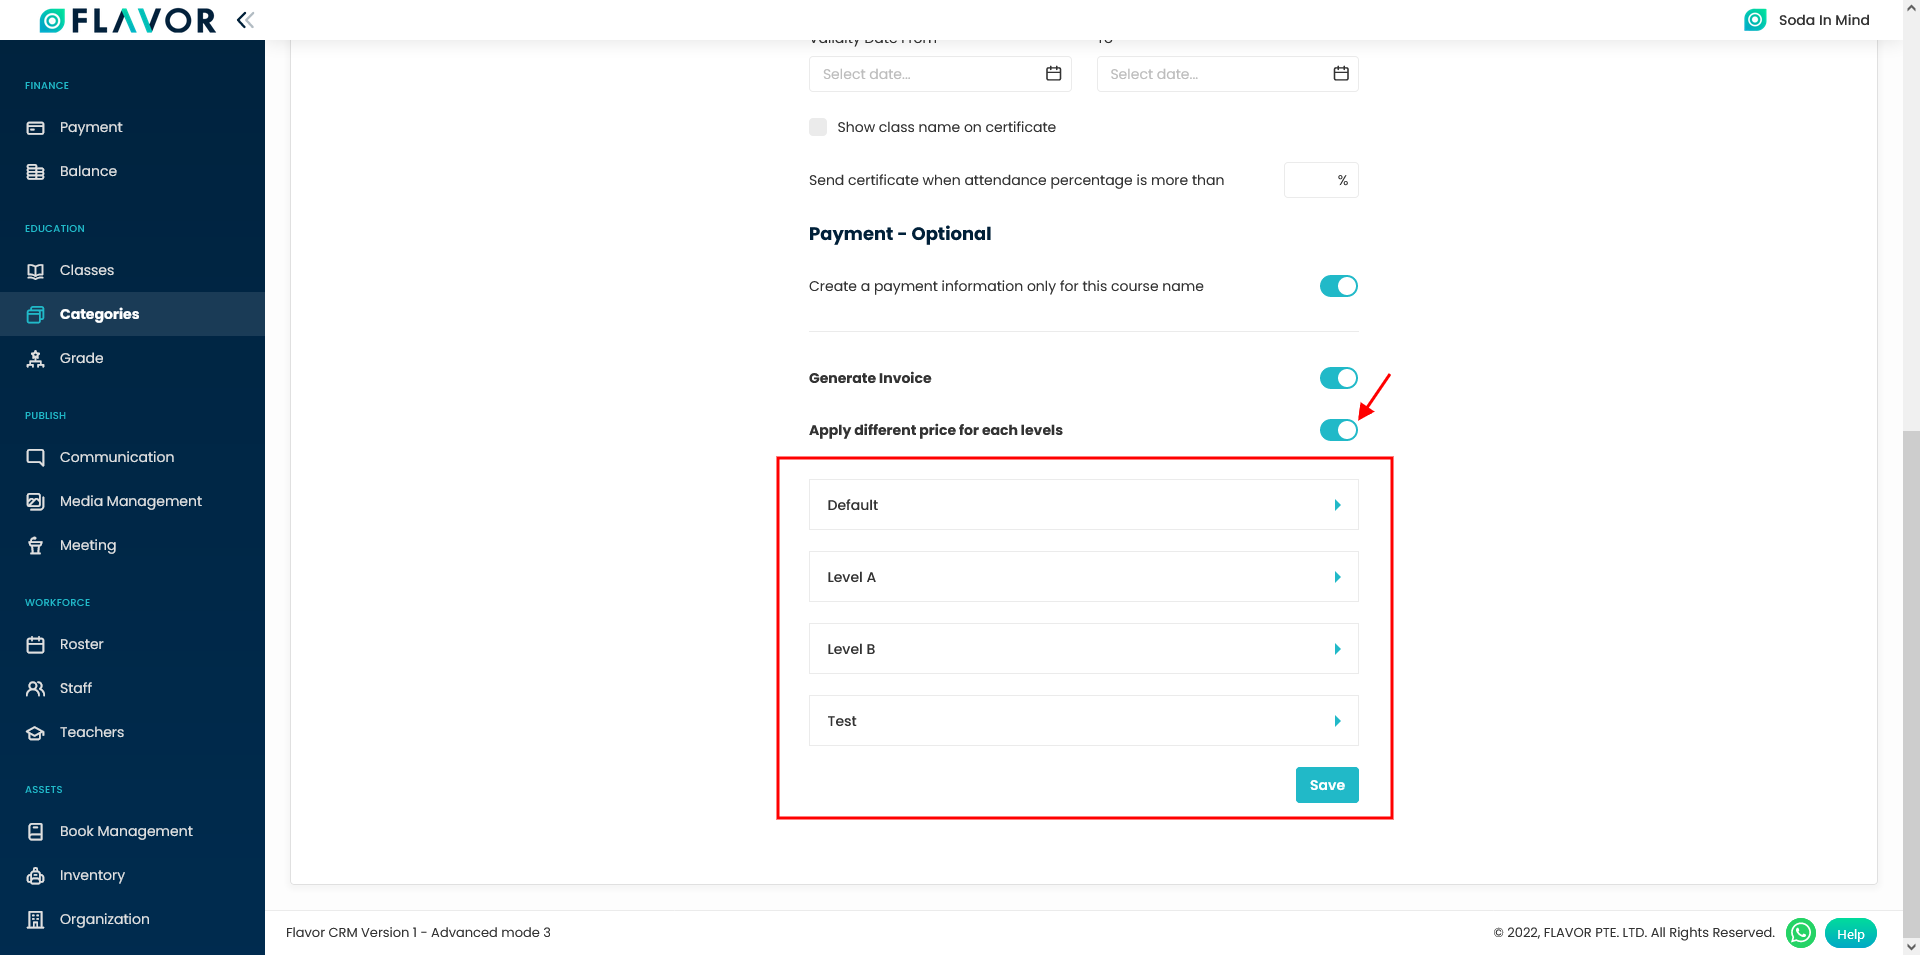
You can define the level fee structure for the Course-name. The Student level which is mentioned here can be defined in the school information under Organization.
Apply different prices for each level- Default
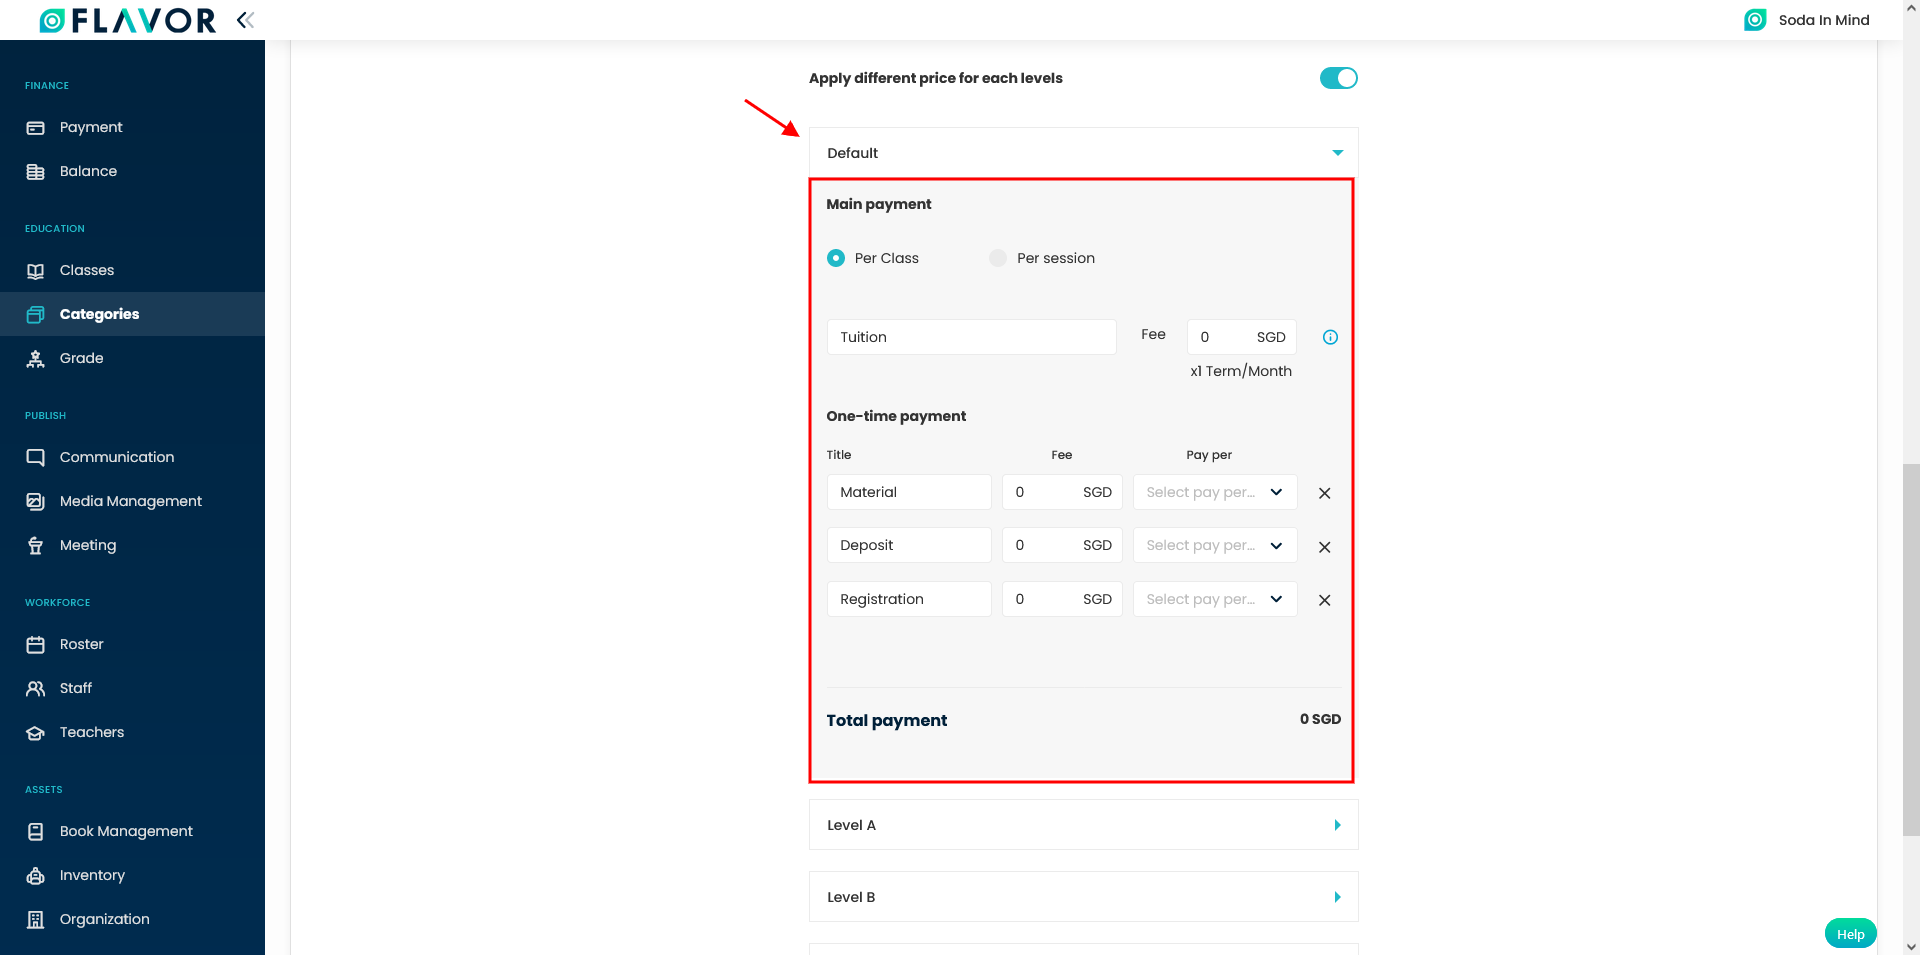
For each level, you can define the Main-payment and One time Payment as discussed earlier.
Note:
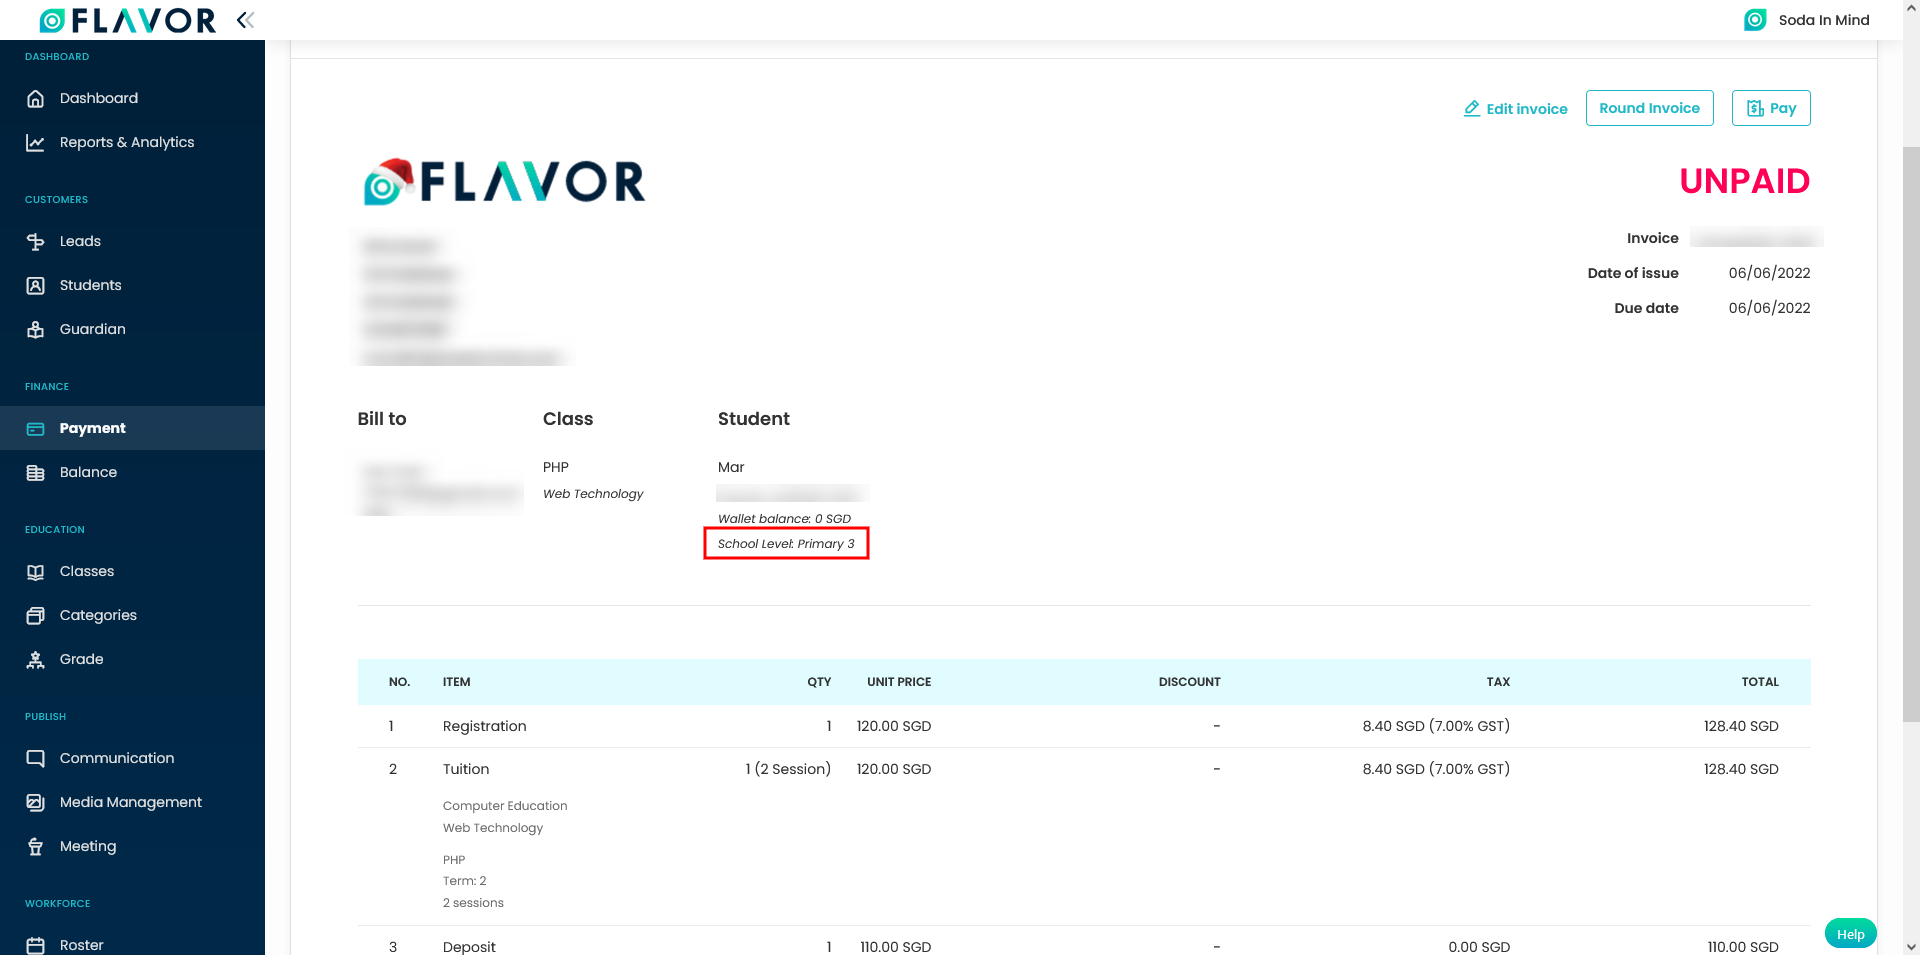
When Round Robin is enabled from Classes Settings & School Level is set in the student profile then the level information in shown under the generated class invoice & it’s receipt.
How Billing is done to a student assigned to a particular School Level?
Till now, you have seen how to apply prices for different levels.
Case Study:
- Consider a student named Jan having assigned school level as Primary 3.
- The same student is registered with a class named as Class A with the price defined for the school level Primary 3.
- So, the student will be registered with the fee structure defined for level Primary 3.
To see details as to how to add schedule to a student, click here.
How to use Round Robin feature in edit payment?
You can edit payment for a class level-wise by enabling the Robin Robin feature from the class settings.
- Go to the particular class view.
- Under the Payment tab, click on Edit Payment button.
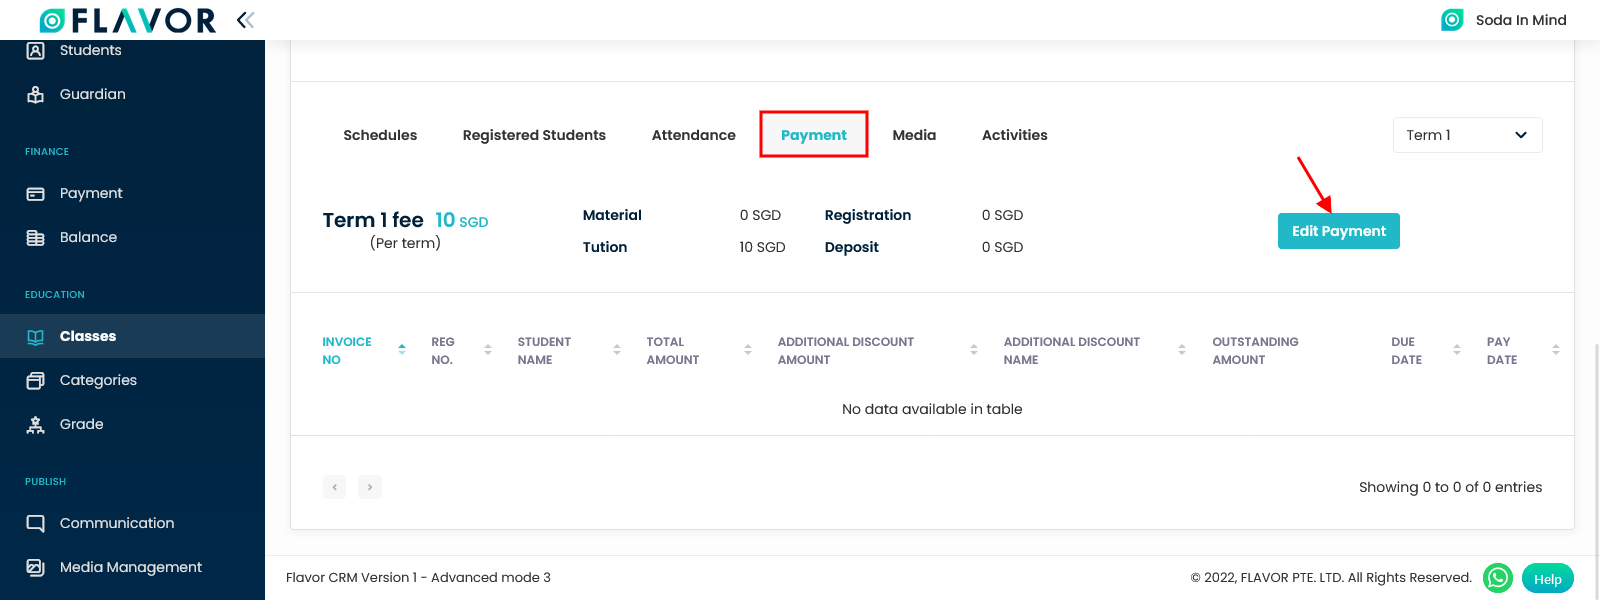
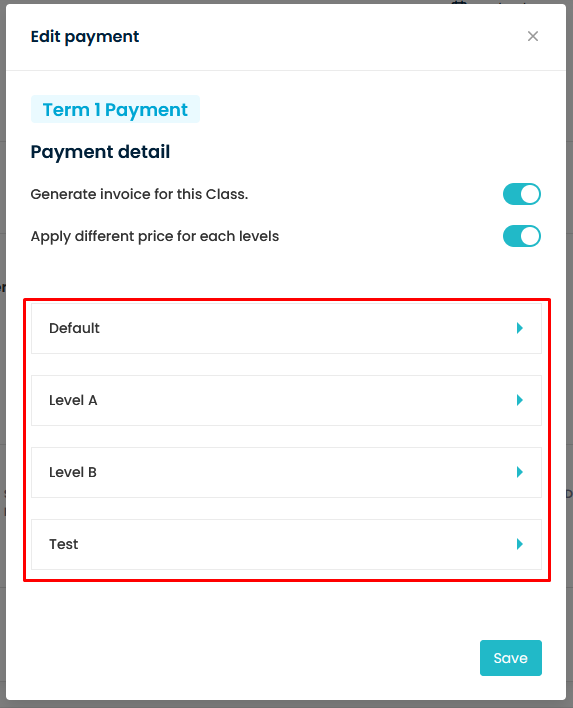
- On clicking Edit payment, a popup form named Edit payment will appear on the screen.
- Enable the switch for Apply different price for each levels.
- You can see different levels as defined under School Information in Organization module.
- You can edit payment level wise and click on Save button.
Need more help? Ask us a question
Please let us know more of your details and our team will reach out to you very shortly.
