
Information on Class Settings
Schedule
Schedule setting is applied when you want to schedule for a class and wants to be flexible with holidays.

- Check public Holiday while scheduling a Class: This option will display the public holiday while scheduling a class. This is only to check public holidays.
- Skip public holiday during schedule generate: This option only ignores public holidays.
Class
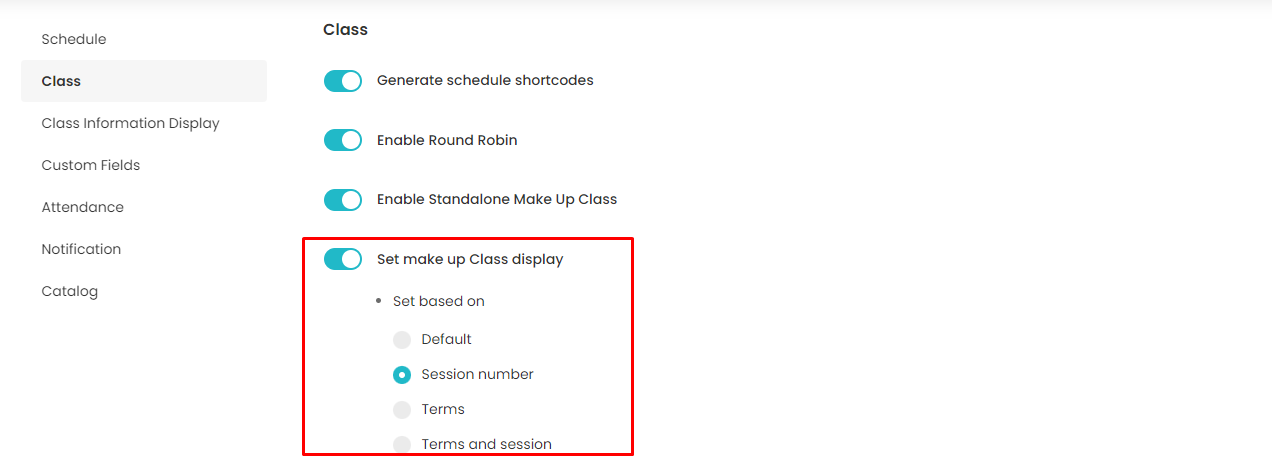
- Generate schedule shortcodes: Enable the toggle switch to show the session code in the class view. The session code is only for the client, who wants a unique code for the class.
- Enable Round Robin: This feature is introduced to add or edit course payment details while creating or editing the Course-name. Also, while creating or editing the class.
- Enable Standalone Makeup class: Turn on the Enable standalone Makeup class setting to be separated between the makeup class and the original class when the makeup class capacity is filled or more than 0. By default, this setting is off. The makeup class tab will be showing up in the class listing if the standalone makeup class setting is on.
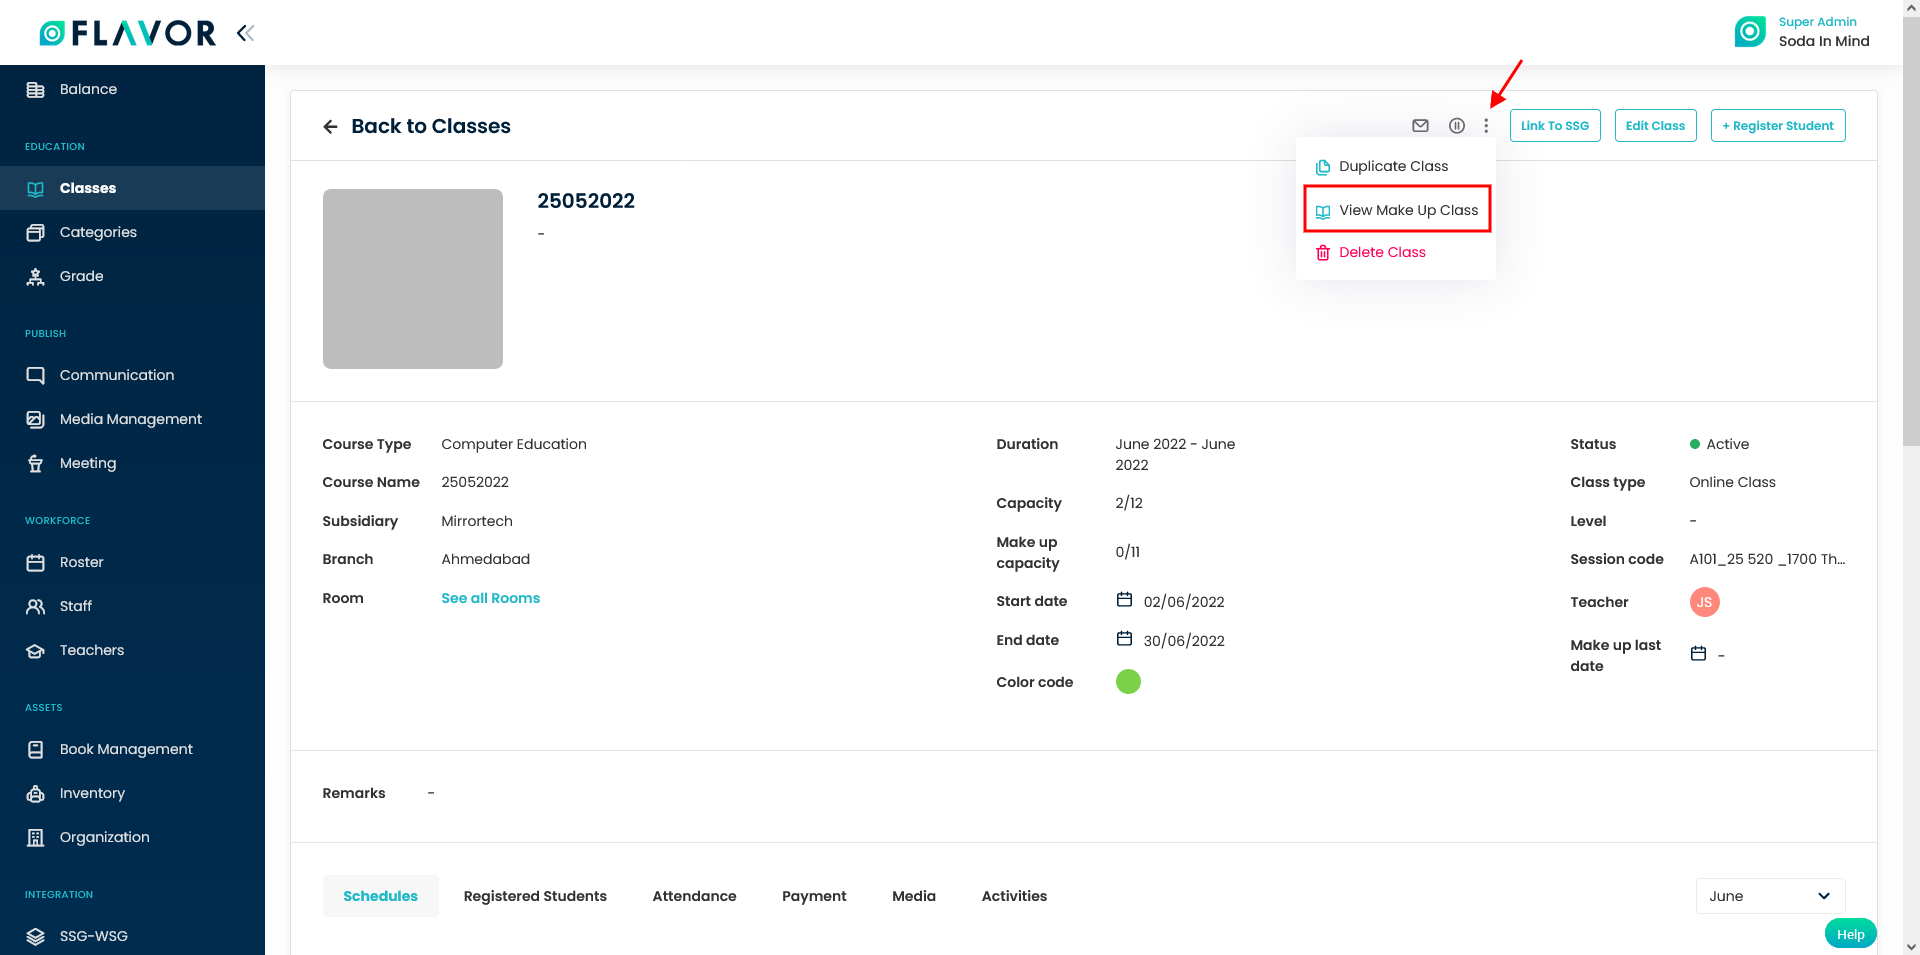
If the class is an original class, then when the user clicks the view make-up class it will redirect to the makeup class page. If the class is the make-up class, then this button will redirect the user to the original class. This button will be there if and only if the setting standalone makeup class is on.
- Set makeup Class display: This option is off by default, you can enable this option by switching it. After enabling this you can have a number of options through which you can set the makeup class.
-
- Default: The admin can make up the class based on their preference. Admin will select the date and the reschedule class will be listed based on the chosen original class session. By clicking on the radio button you can enable this option.
- Session Number: When the admin chooses the session number, then the admin can choose the same session number as the original make-up class.
- Terms: When an admin chooses a term, then the admin can choose the same term for the reschedule class as the original make-up class term
- Terms & Session: When the admin chooses a term and session, then the admin can choose the reschedule class as the admin has in the original class.
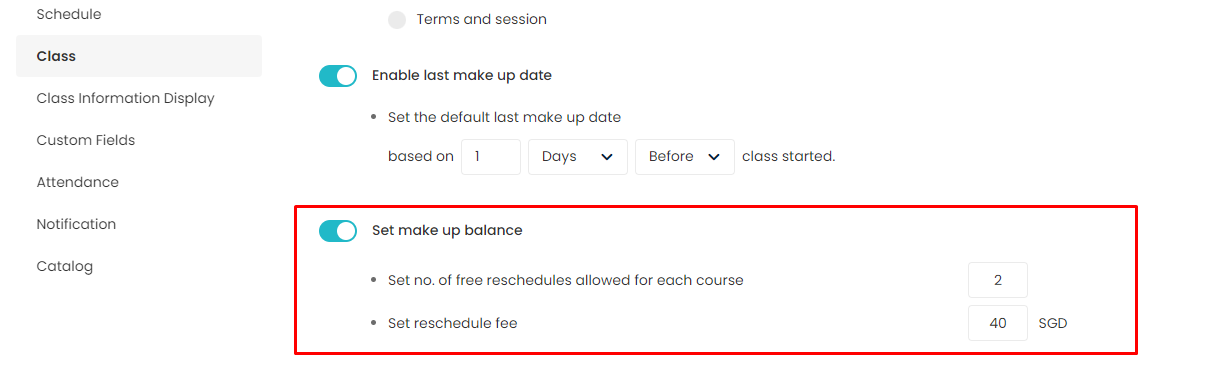
- Enable last makeup date: This switch is disabled by default. When you enable this switch, then you have the option to set the last makeup date. It can be set based on the number of days or hours, after or before the class starts. For example, if it is set as 2 days before class starts, then you can create a makeup class till two days before the class starts. After that, the session will not be visible to the user.

- Set makeup balance: By default, this is kept off. You can enable it by switching it on. When it is set ON, based on the conditions the user needs to pay for the makeup class.
- Set no. of free reschedules allowed for each course: Total free makeup class, by default it is 0
- Set reschedule fee: Makeup class fee after the free makeup class ran out. By default, it will 0.
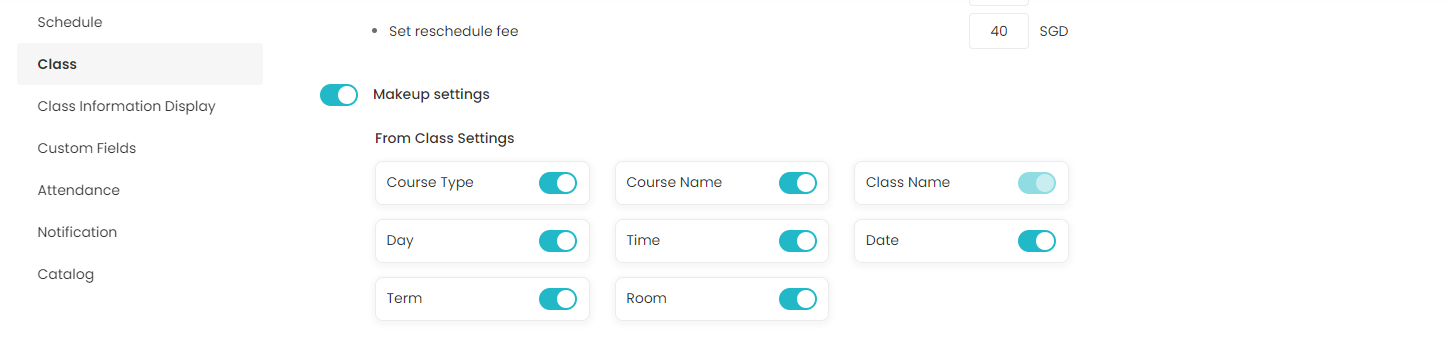
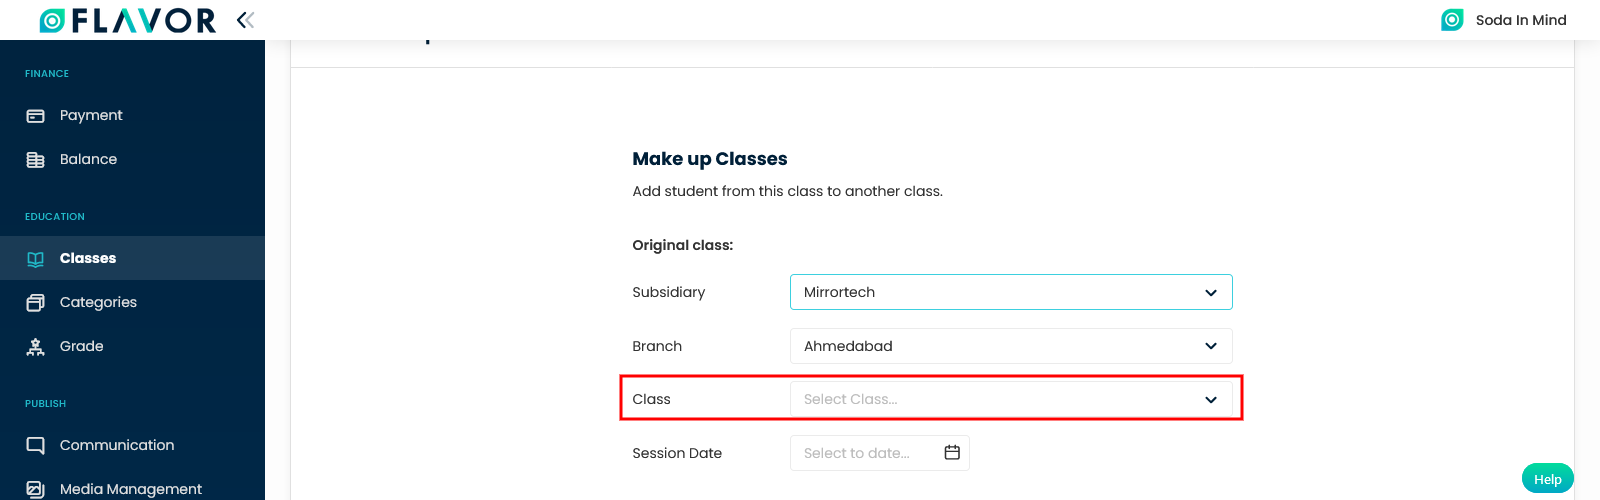
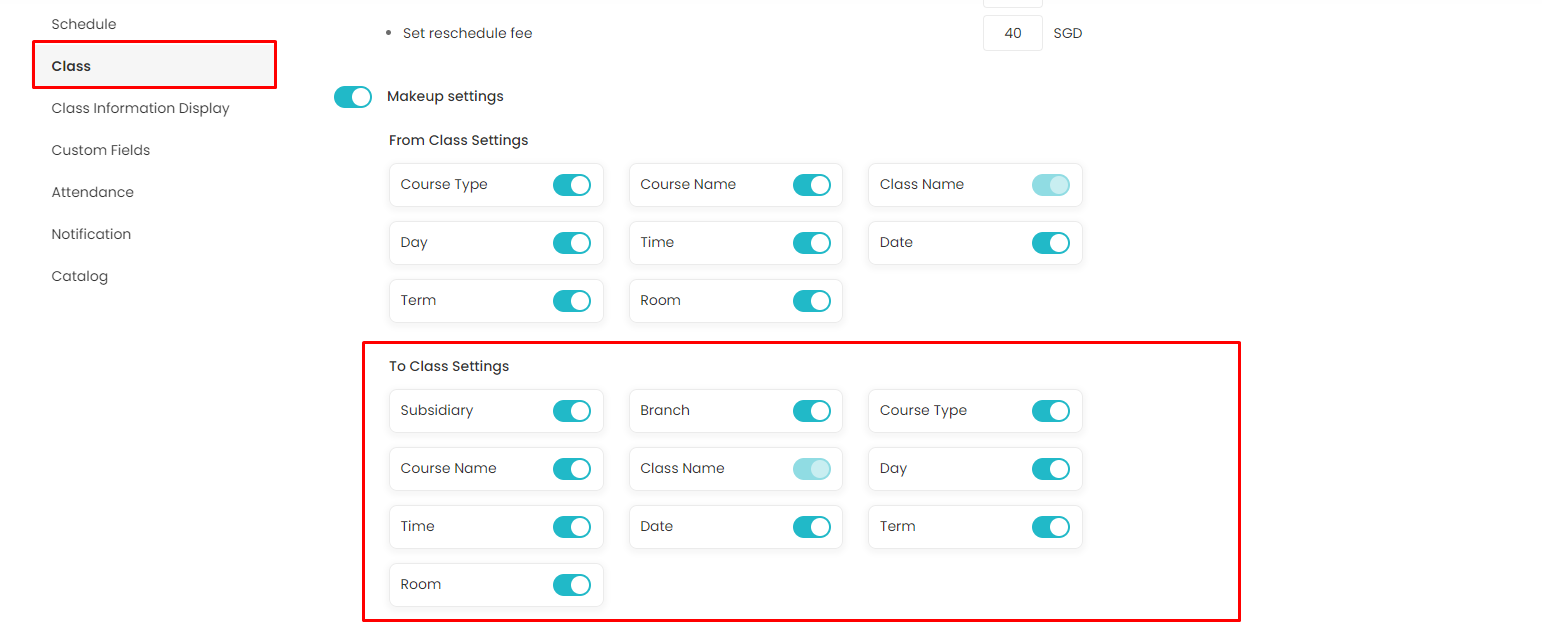
- Makeup settings:
From Class Settings
From the From Class Settings, you can enable/disable fields as per your need. While creating the makeup class, the Original Class section having the Class field will have all the following fields as items in that field.
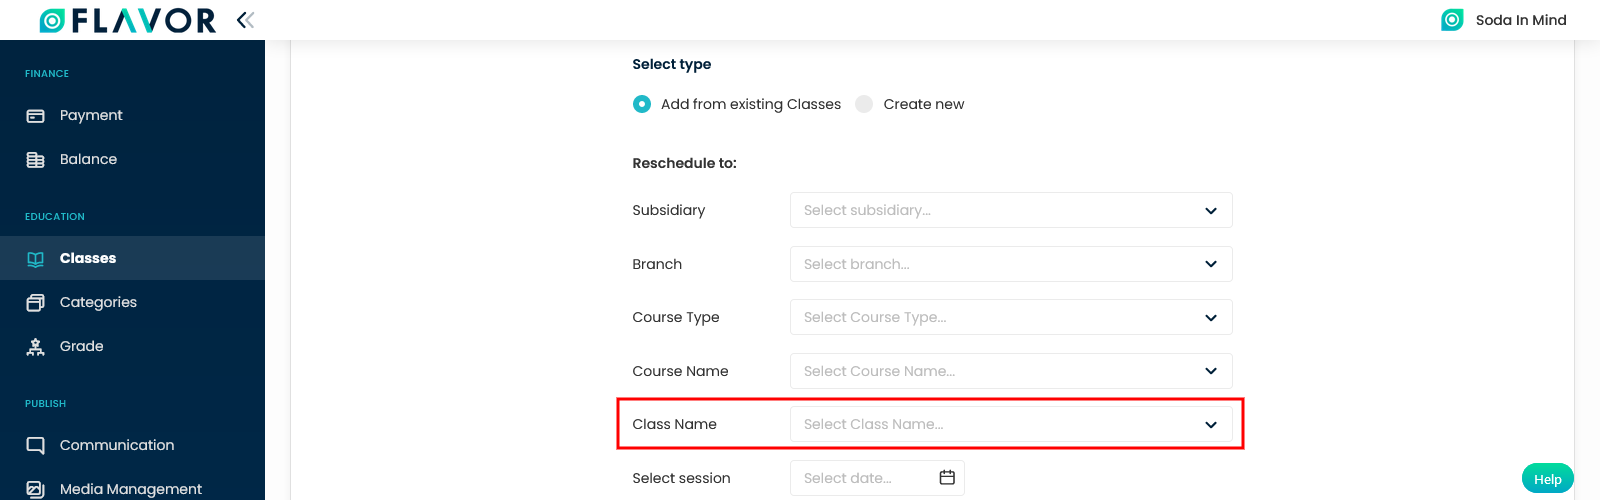
To Class Settings
From the To Class Settings, you can enable/disable the field as per your need. While creating the makeup class and selecting the type as Add from Existing Classes, the Reschedule to the section having Class field will have all the following fields as items in that field.
- Class Credit
To turn on the class credit system. If it is not set as on, then on create class > fill payment details > not generate invoice the class credit option will not appear and set complimentary (no charge) as the default value.
Credit has to be deducted per
- Session: To deduct the class credit per session of class that the student enrolled in.
- Hour: To deduct the class credit per hour of a session that the student enrolled in.
When to Deduct Balance
- When Schedule is Added: The class credit will be deducted once students enroll in the class.
- When Attendance is Marked: The class credit will be deducted once the student marked their attendance.
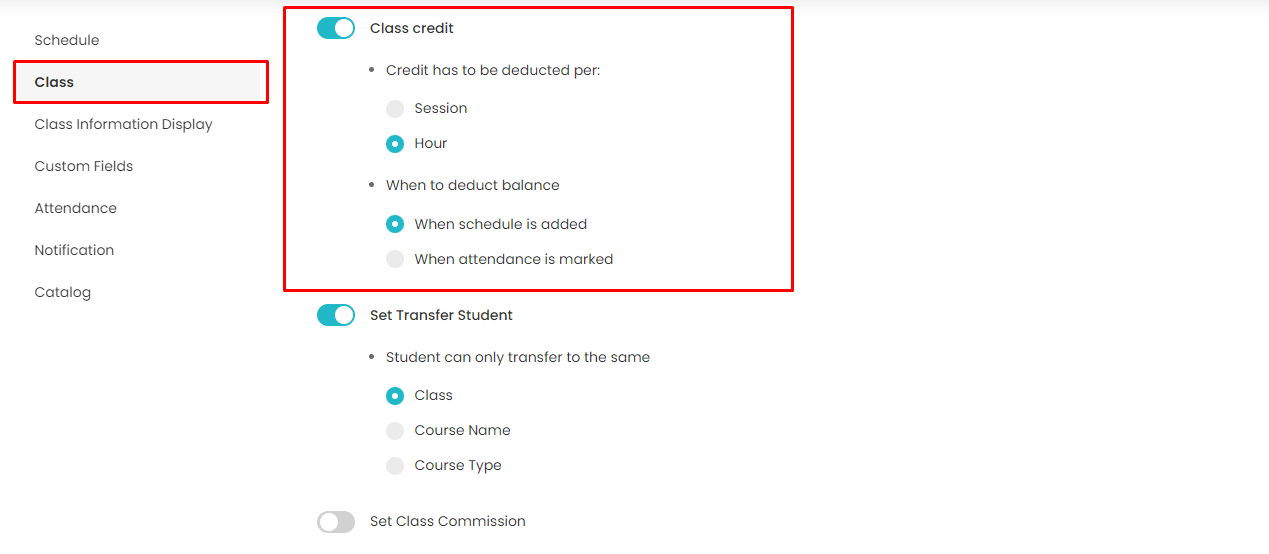
- Set transfer Student: Navigate to the set transfer students settings. Enable this option by switching it on. Once enabled, a list of options is displayed.
- Class: Enable this option to transfer students from one class to another.
- Course Name: Enable this option to transfer students from one course to another.
- Course Type: Enable this option to transfer students from one-course type to another.
![]()
- Set Class Commission:
Navigate to the Set Class Commission section. By default, this option is off you can make this on by switching. You can see this option in the Fill Payment Details. This is for a specific class for a specific teacher.

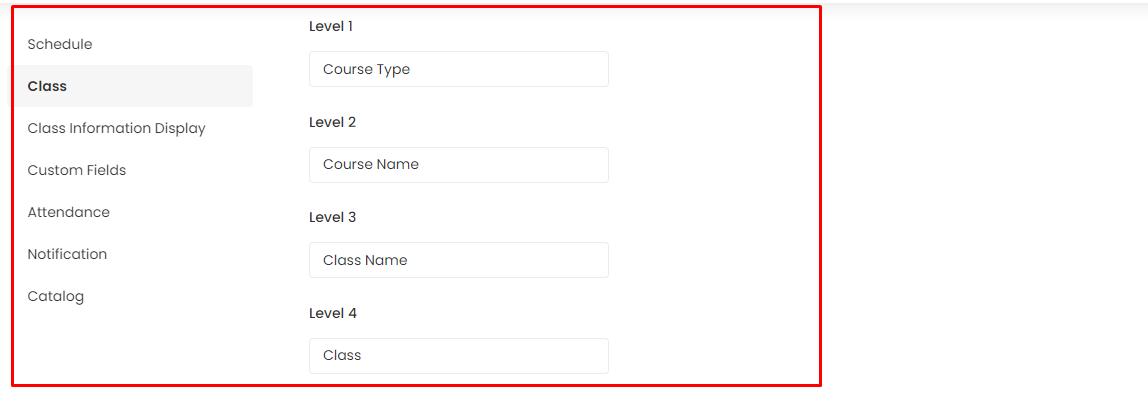
- Class Level Configuration
From here you can customize the class-level name. Example: Level 1, Level 2, etc. names can be changed from here.
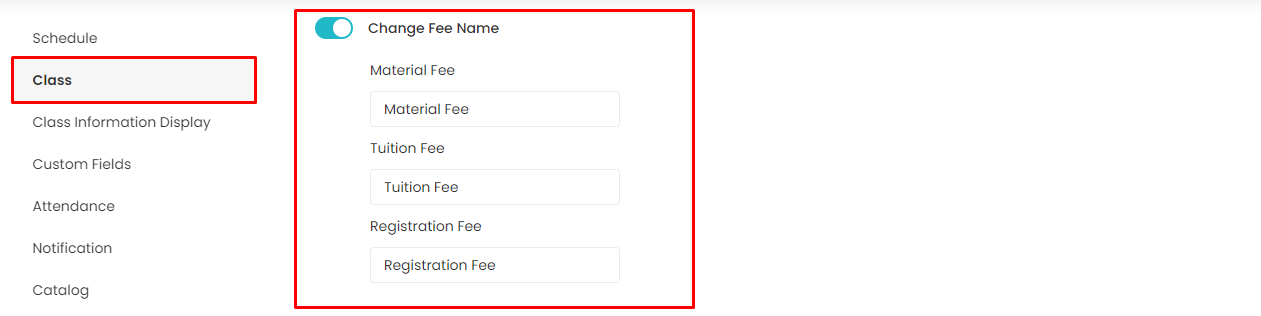
- Change Fee name
Navigate to the Change Fee Name. You can enable this option by switching. From here, you can change the name of the One-time payment fields.
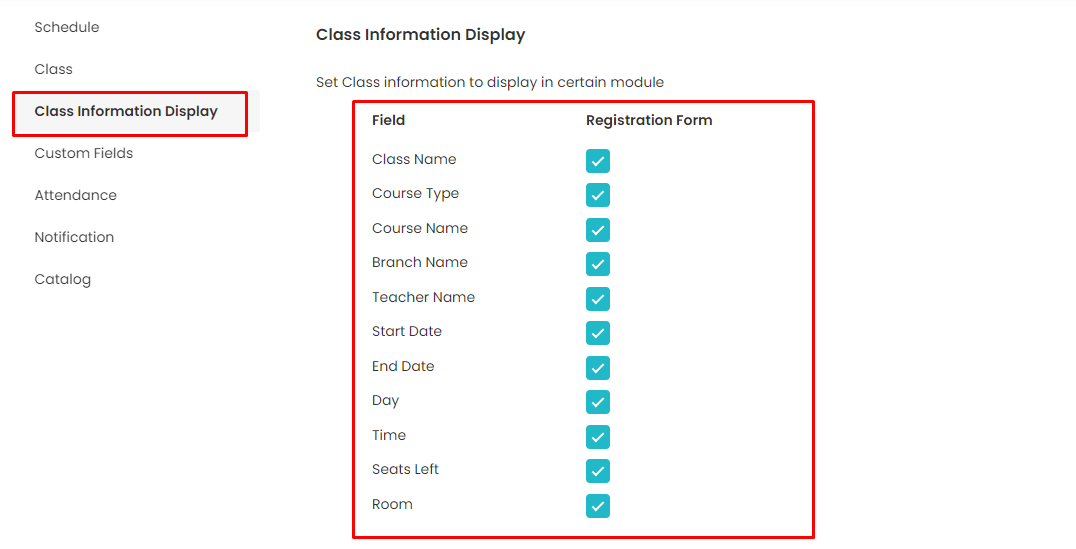
Class Information Display
Set Class information fields to be displayed in the Registration form. You can customize as per your need.
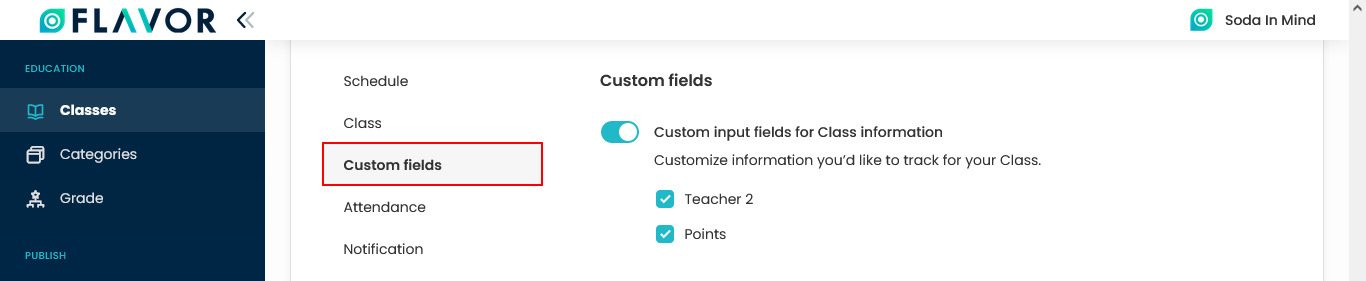
Custom Fields
Navigate to the Custom Fields. You can enable this option by switching. To set on additional fields in creating a class.
- Teacher 2:To add teacher 2 when creating a class.
- Points: To add max. point field in creating a class.
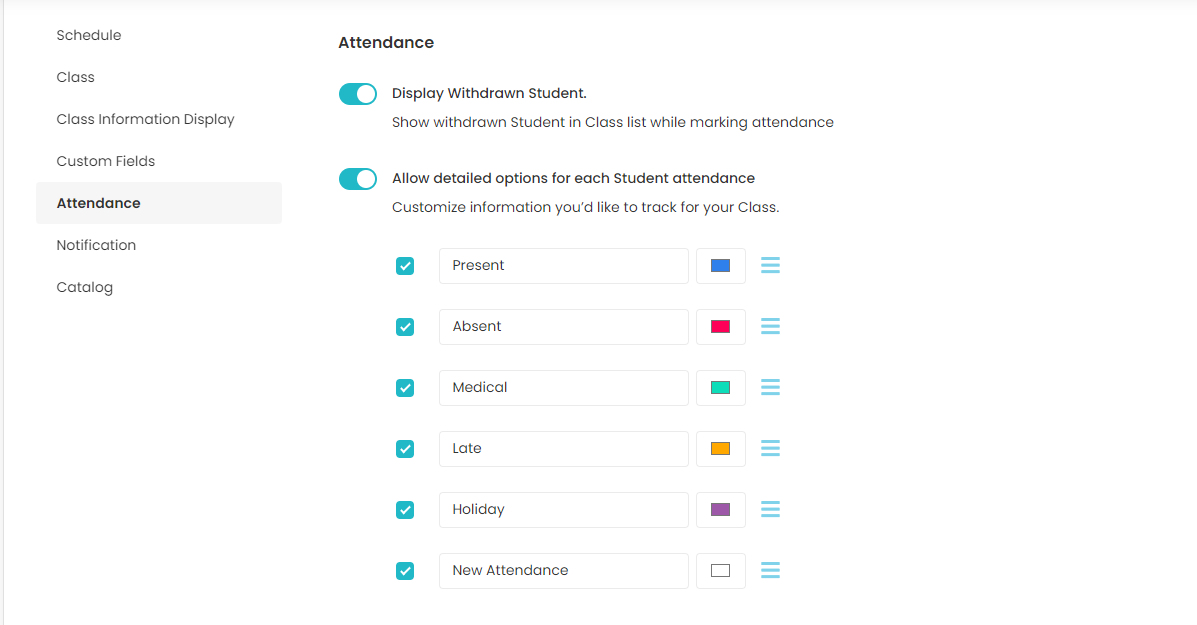
Attendance
- Display Withdrawn Student: Enable this toggle switch to show withdrawn students in the class list while marking attendance.
- Allow detailed options for each Student Attendance: You can customize the information you’d like to track for your Class. Here, you can see the list of relations Present, Absent, Late, etc. You can enable and disable these options by marking the checkboxes. You can change the sequence of the status of the attendance by clicking on the drag & drop icon.
- Generate Certificate: Navigate to the General Certificate. If you want to send certificates to students in each then enable this option by switching. It has got two formats viz. Default Template and New Template.
- Upload Signature: Upload the signature here.
- Signature on behalf of: Enter the name of the person on whose behalf will be signed.
- Position: Here, enter the position of the signatory.

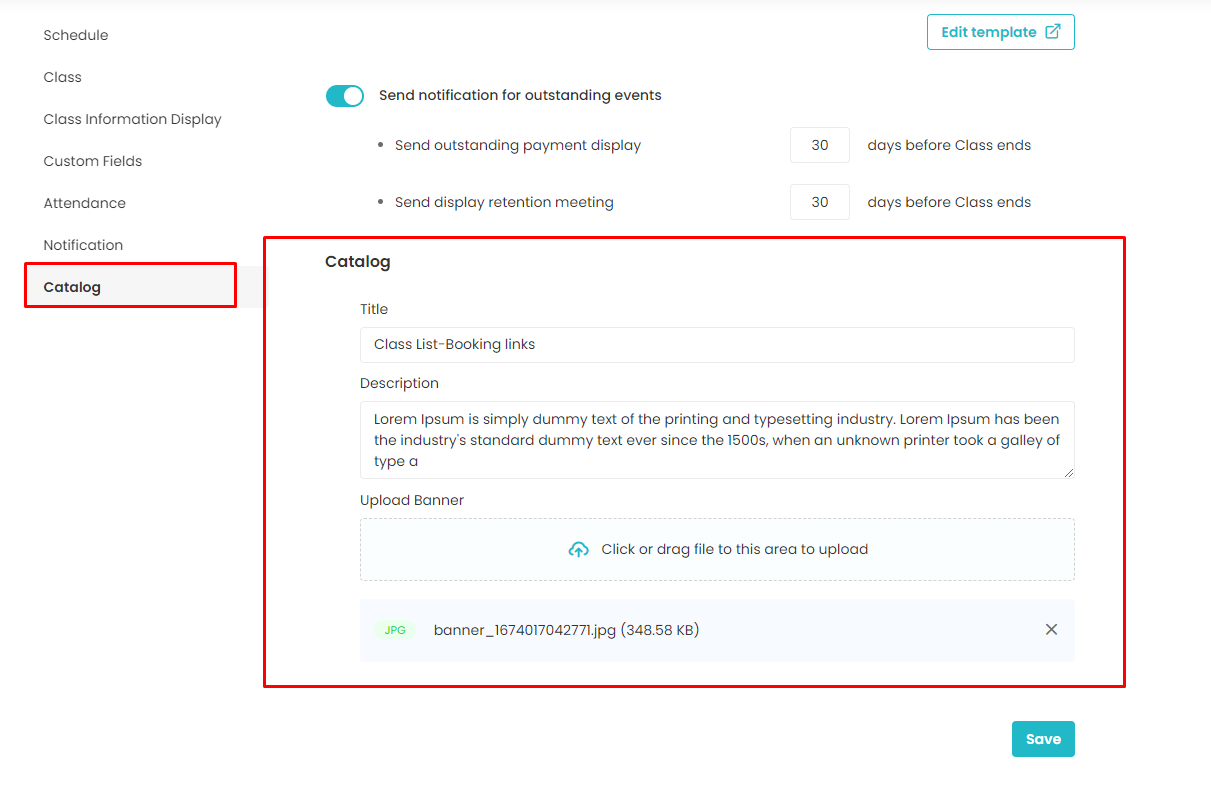
Catalog
The catalog setting is to customize for booking links.
- Title: To set the title in the booking link module.
- Description: To set the description of the booking link.
- Upload Banner: To set the banner in the booking link module.
Need more help? Ask us a question
Please let us know more of your details and our team will reach out to you very shortly.