
How to get the Schedule creation link?
Step 1
- Go to the Organization from the left side menu of the Flavor System.
- Click on the subsidiary Tab.
- Choose the subsidiary and click on the inline action button.
- A small popup will appear on your screen.

Step 2
- Click on the Schedule creation link.
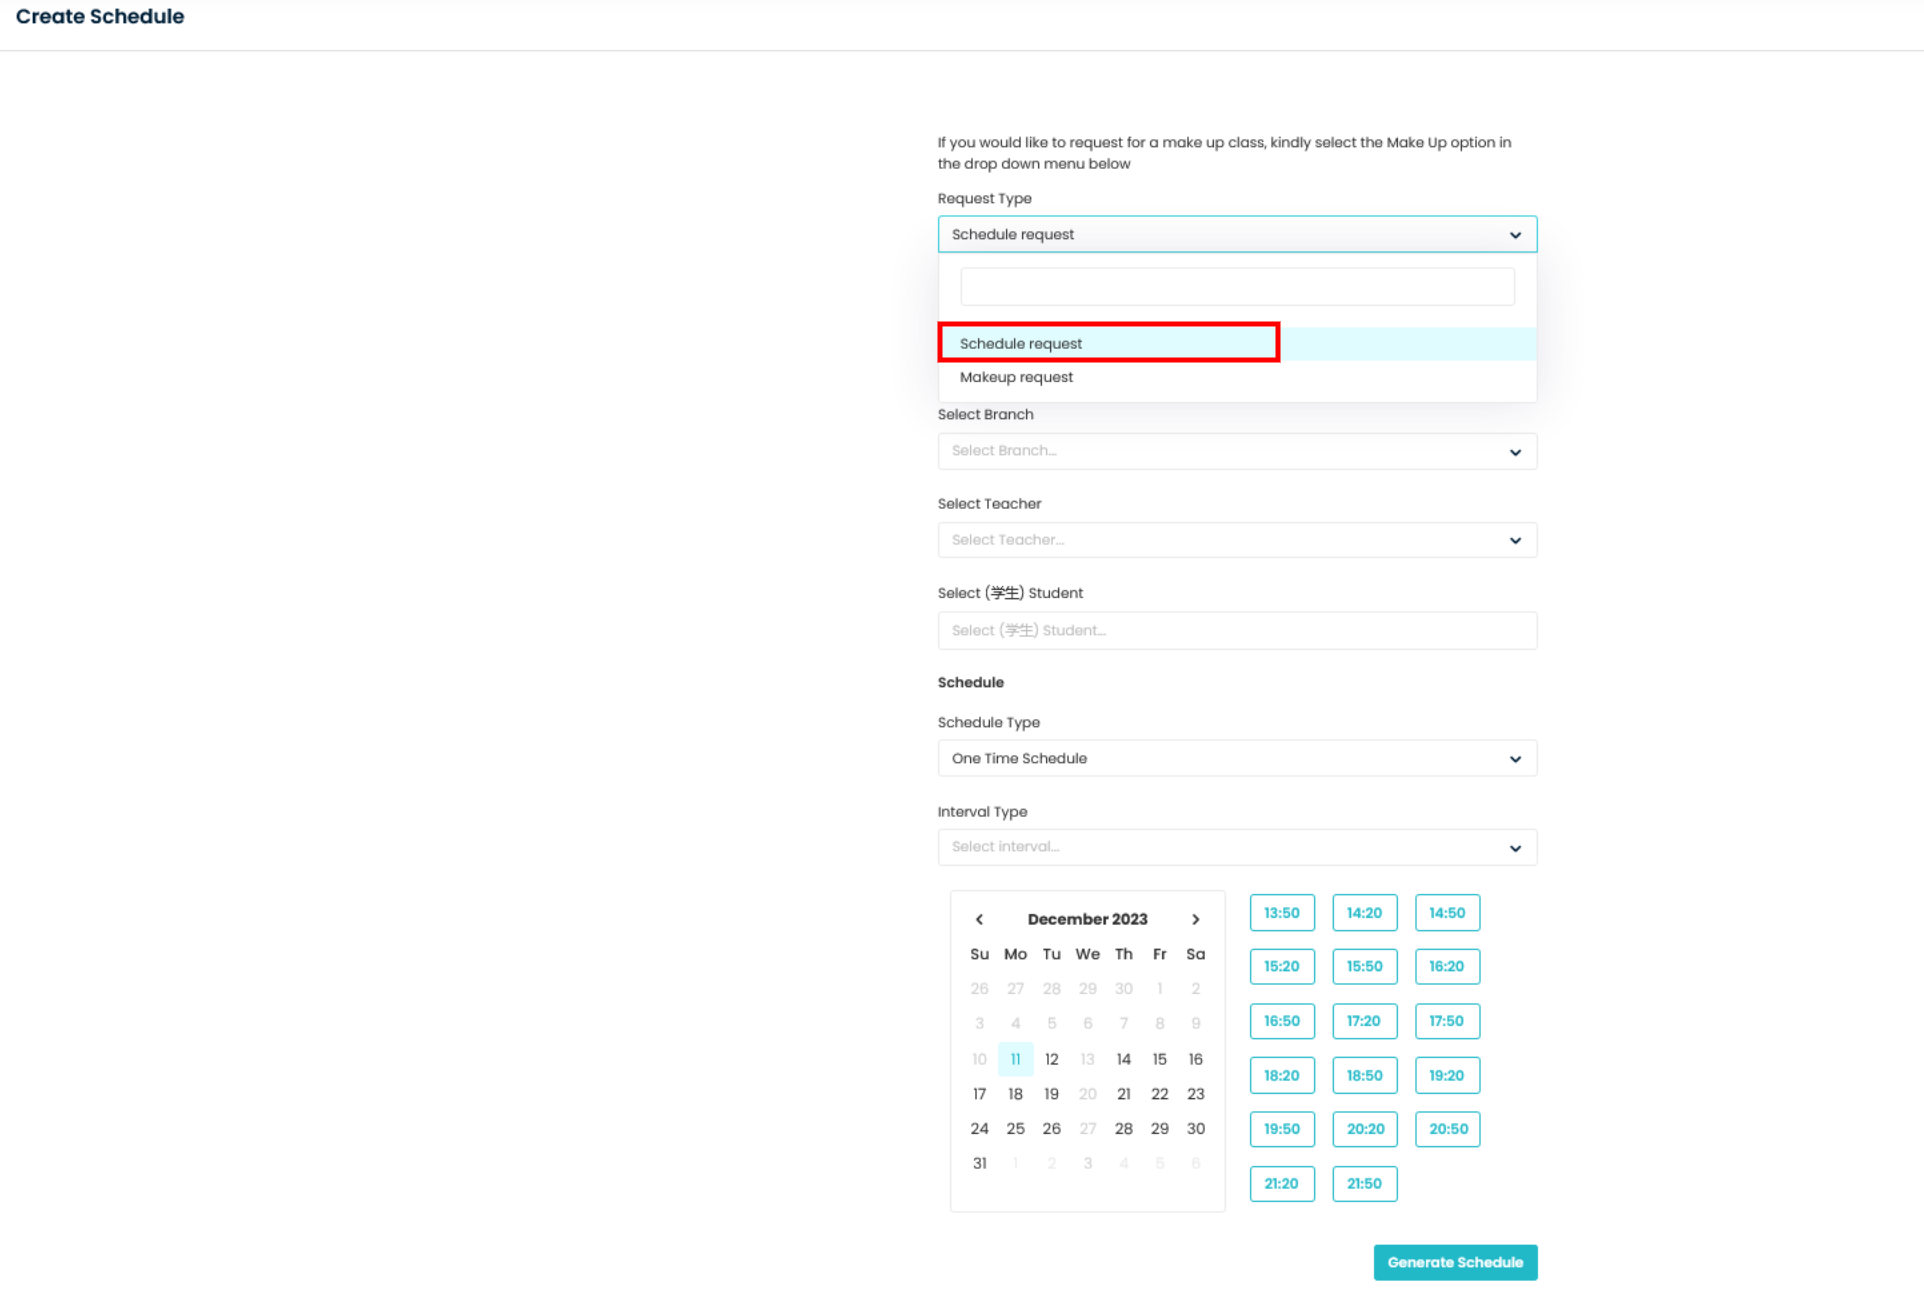
- A Create Schedule form will open in a new tab.
- Under Request type select schedule request.
- Fill up all the details and click on Generate Schedule.
- Once the schedule is generated, click on the Submit Request button.
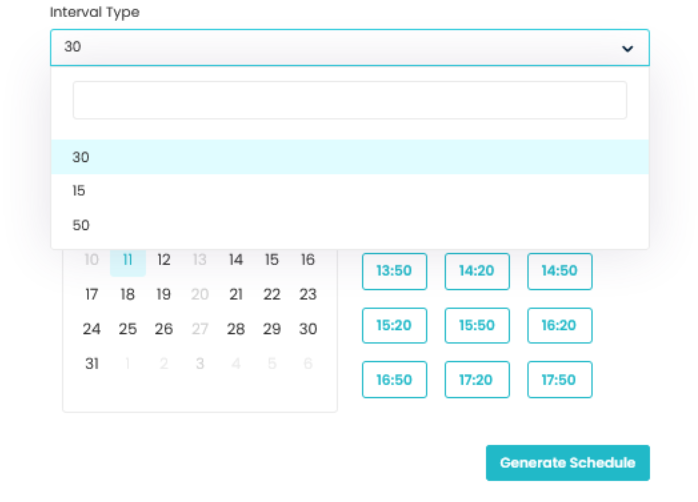
Interval Types reflected under Schedule Creation Link is based on Schedule Request Setting. Interval Selection are added In Minutes only and how to add it in the description below.
Note: Based on the settings (Explained below), the slot selection appears for the One Time Schedule Class.
Where to find and approve/reject the schedule requests?
Step 1
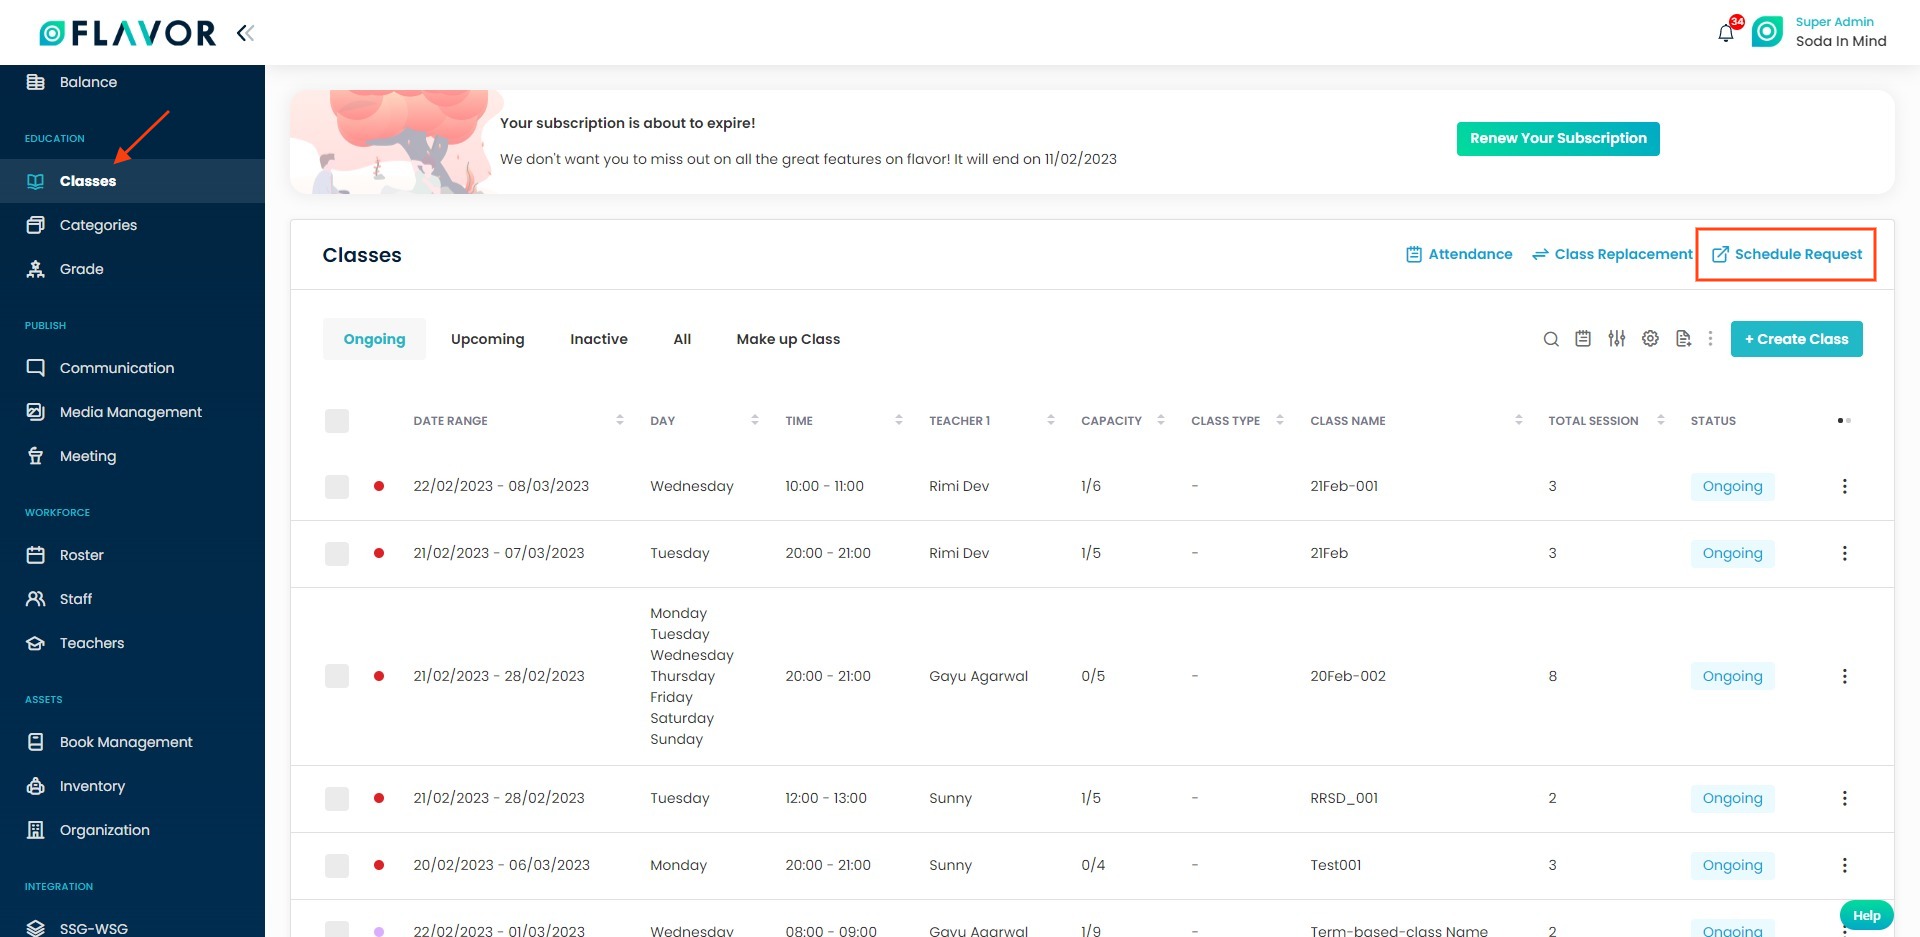
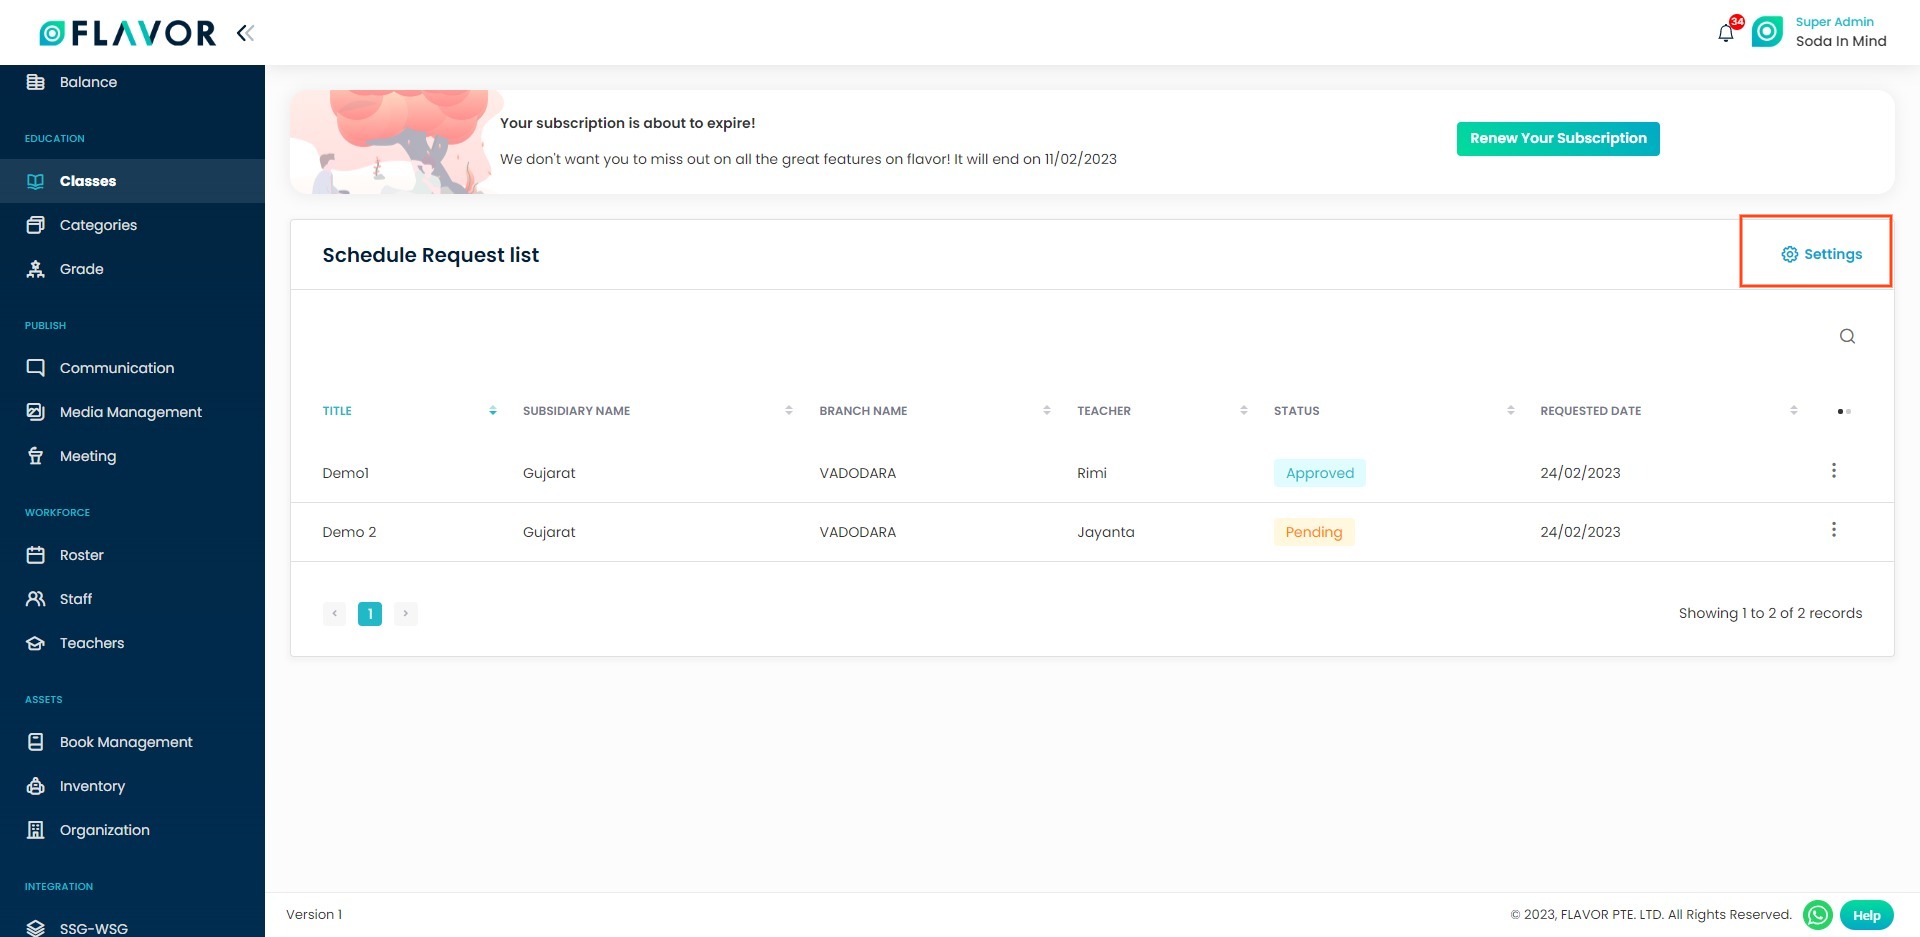
- Go to the classes from the left side menu of the Flavor System.
- Click on the Schedule Request link.
Step 2
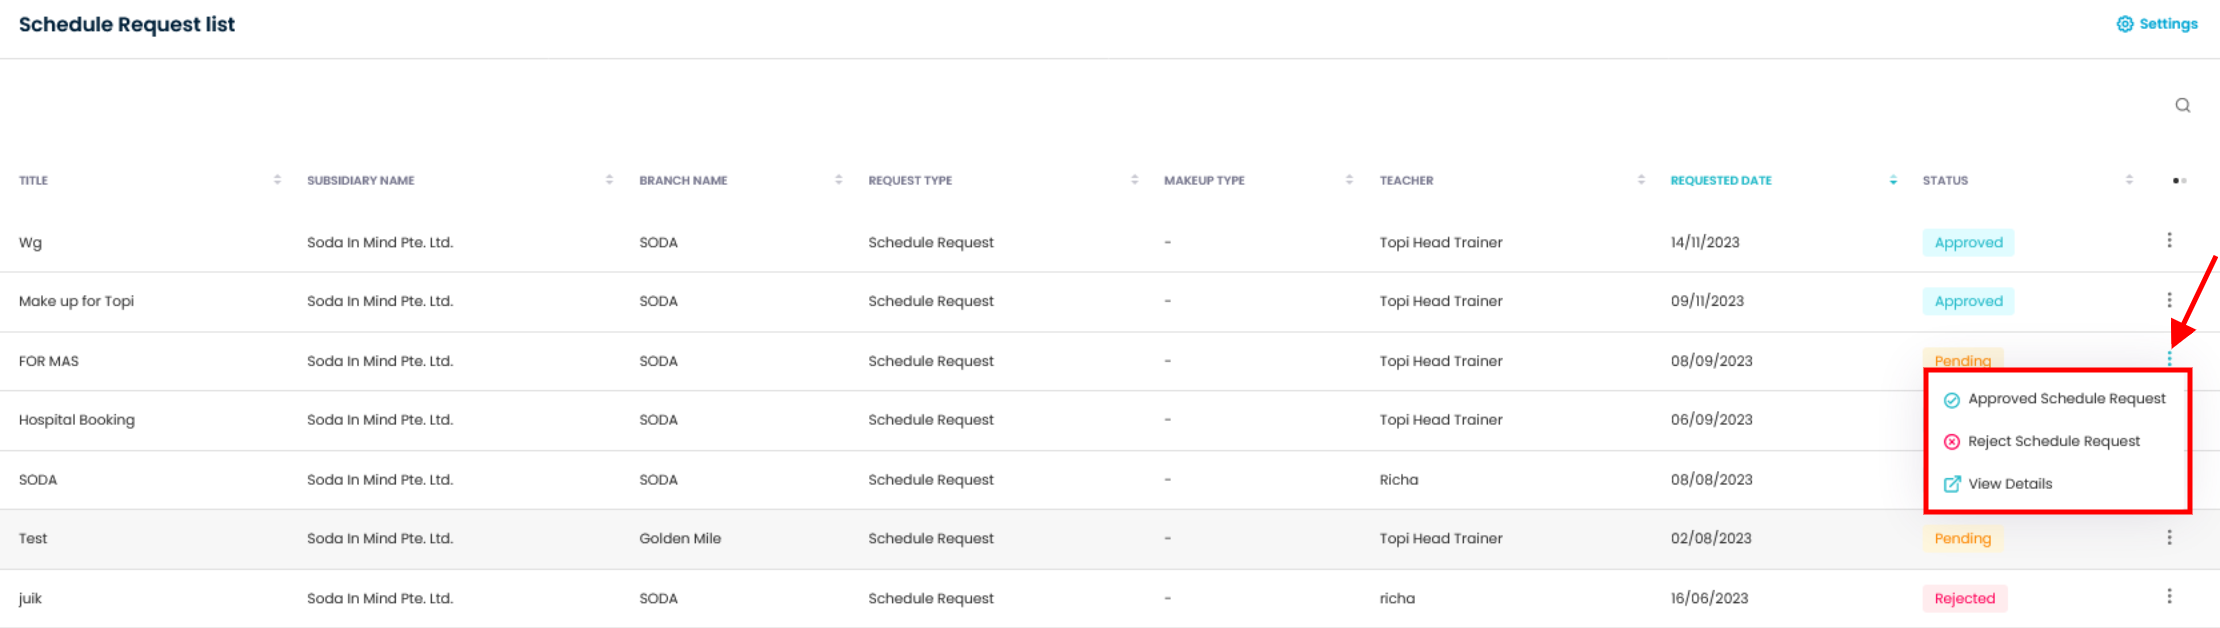
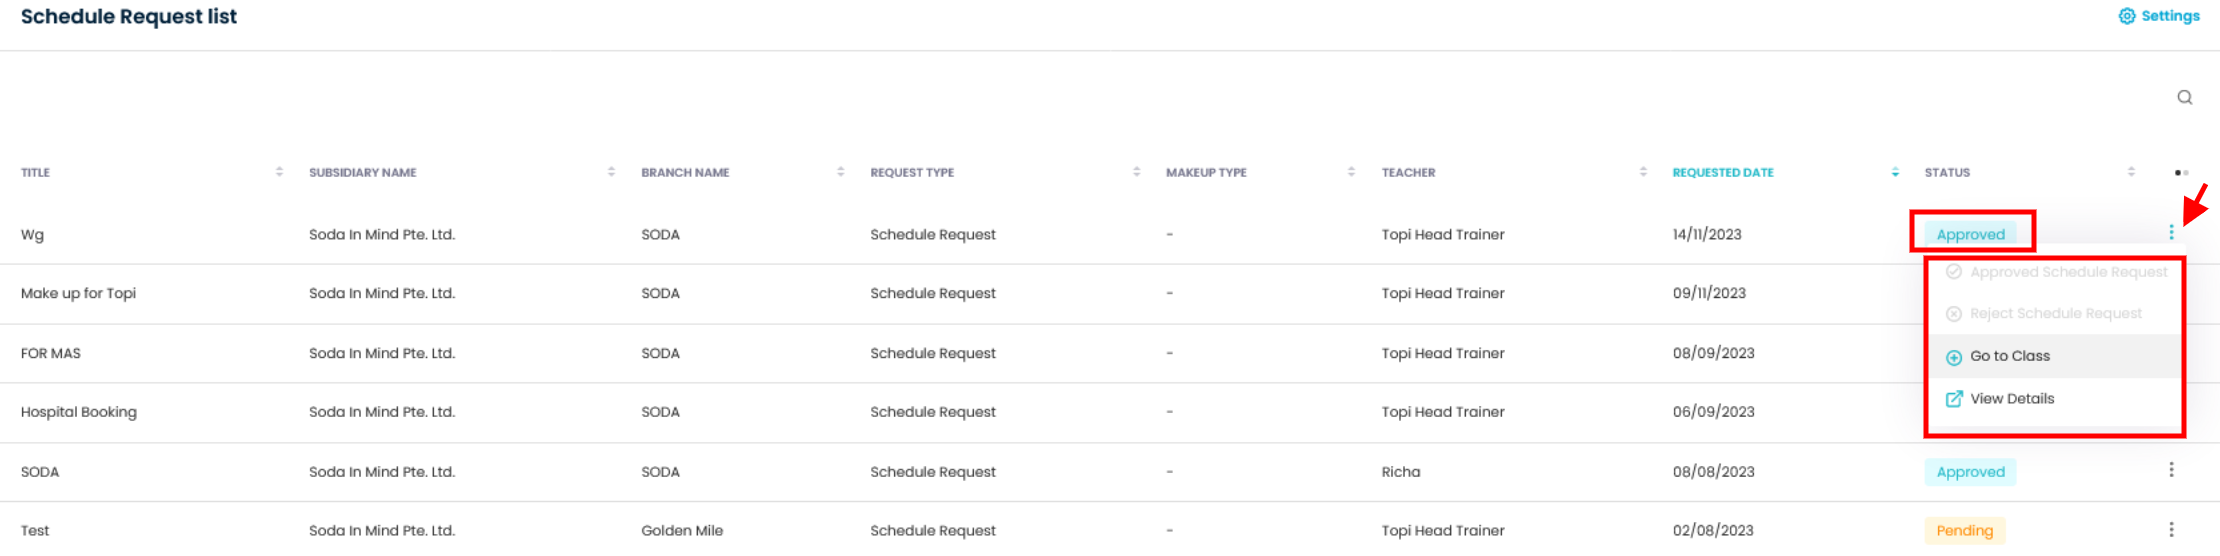
- It will navigate you to the Schedule Request List page.
- The super admin can approve, reject, and view the request data for pending requests.
- And for Approve status, the super admin can view the newly created class and view the request data.
Note: Before changing the status to Approve or Reject, the super admin needs to do the settings for that branch.
Settings to be done before Approve
Step 1
- Go to the settings from the Schedule Request List page.
- It will navigate you to the Schedule Request setting page.
Step 2
- Choose the Branch and fill rest of the details.
- Click on the Save button.
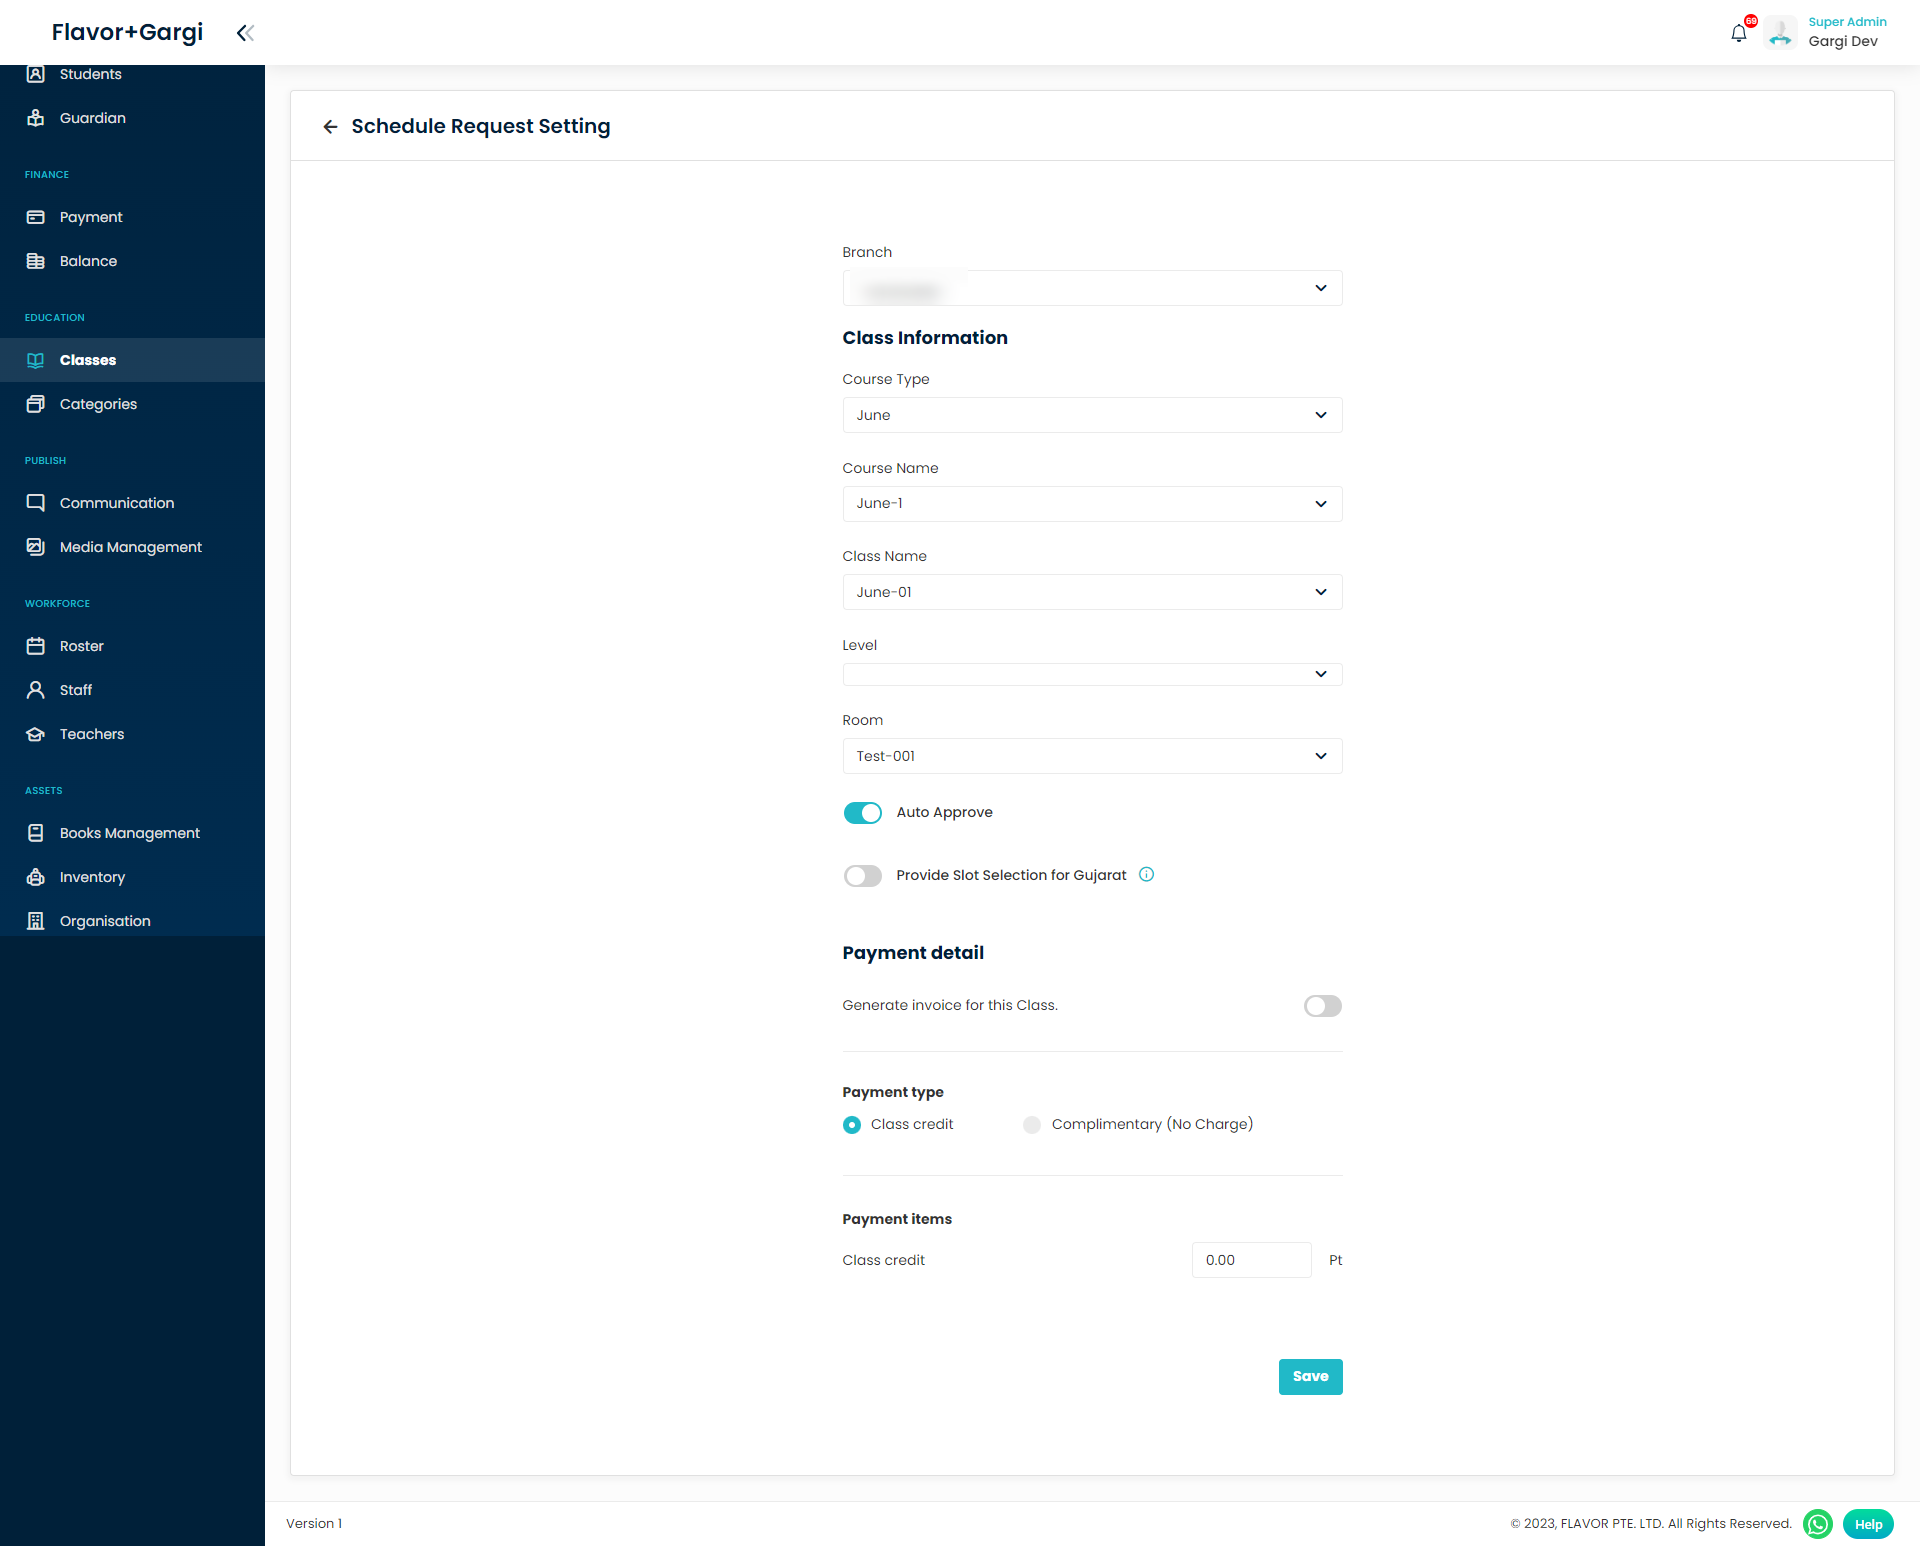
Note: Enable “Provide Slot Selection” setting if slot selection feature is required for One time Schedule class.
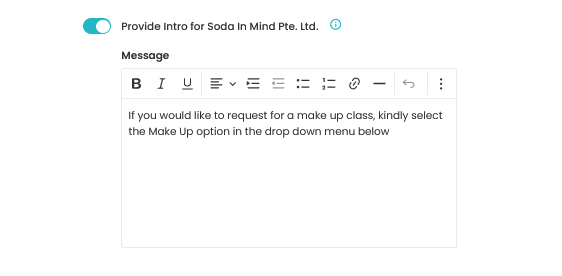
Introduction to Schedule creation link
through this setting can add the introduction to your schedule creation link
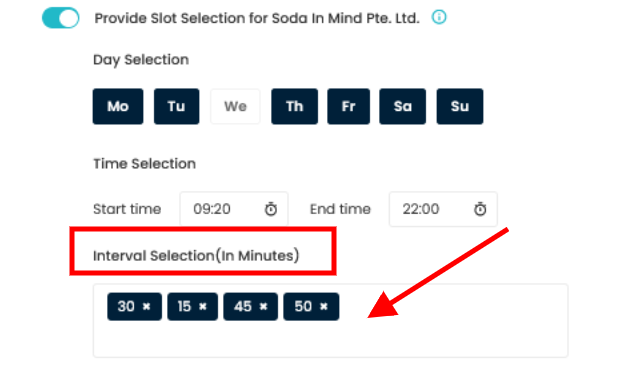
How Slot Selection for One Time Schedule Works?
Step 1
- On the Setting page, enable Provide Slot Selection for <Subsidiary Name>.
- Select the days, under the Day Selection.
- Select the time slots under Time Selection.
- Enter the Interval Selection(In minutes).
- Click on Save Button.
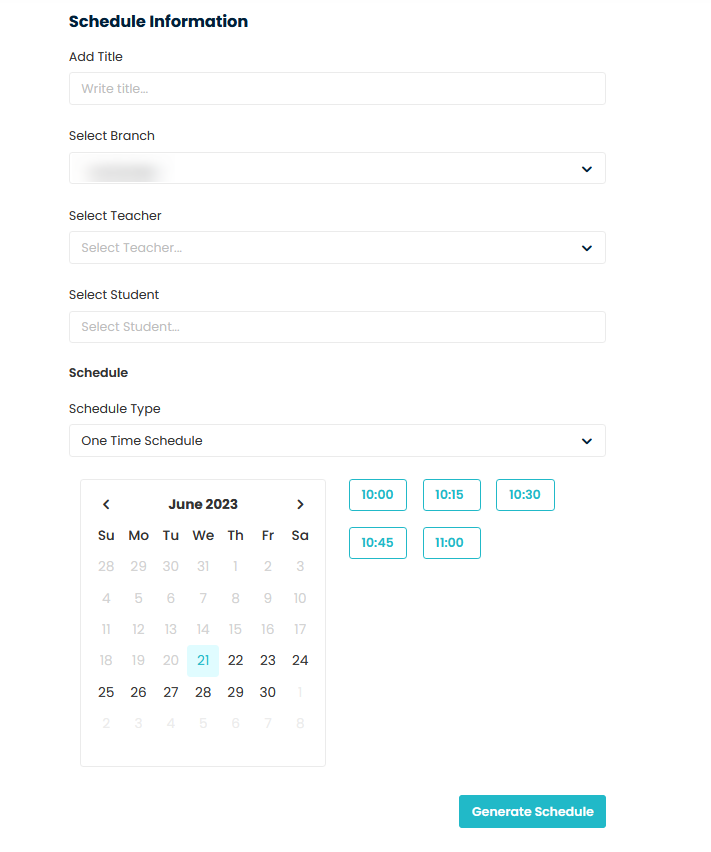
Step 2
- Once slots are saved for a branch, it will be applicable for the corresponding Subsidiary.
- When Schedule Creation Links (Organization->Subsidiary->Inline Action icon button) are clicked, Schedule create form will open in a new tab.
- On selecting the One Time Schedule, Slot Selection option will be visible.
How to use Subsidiary wise multiple slot Selection and separate link for subsidiary for one time schedule?
Step 1
- On the Setting page, enable Provide Slot Selection for <Subsidiary Name>.
- Scroll down to Add multiple intervals for a Subsidiary.
- Enter the Intervals in minutes and click on Save button.
Step 2
- Once the data is saved, the links besides the box gets activated.
- Click on the link icon button.
- A create schedule page opens up in a new tab.
Need more help? Ask us a question
Please let us know more of your details and our team will reach out to you very shortly.