
How to get the Makeup request under Schedule creation link?
Step 1
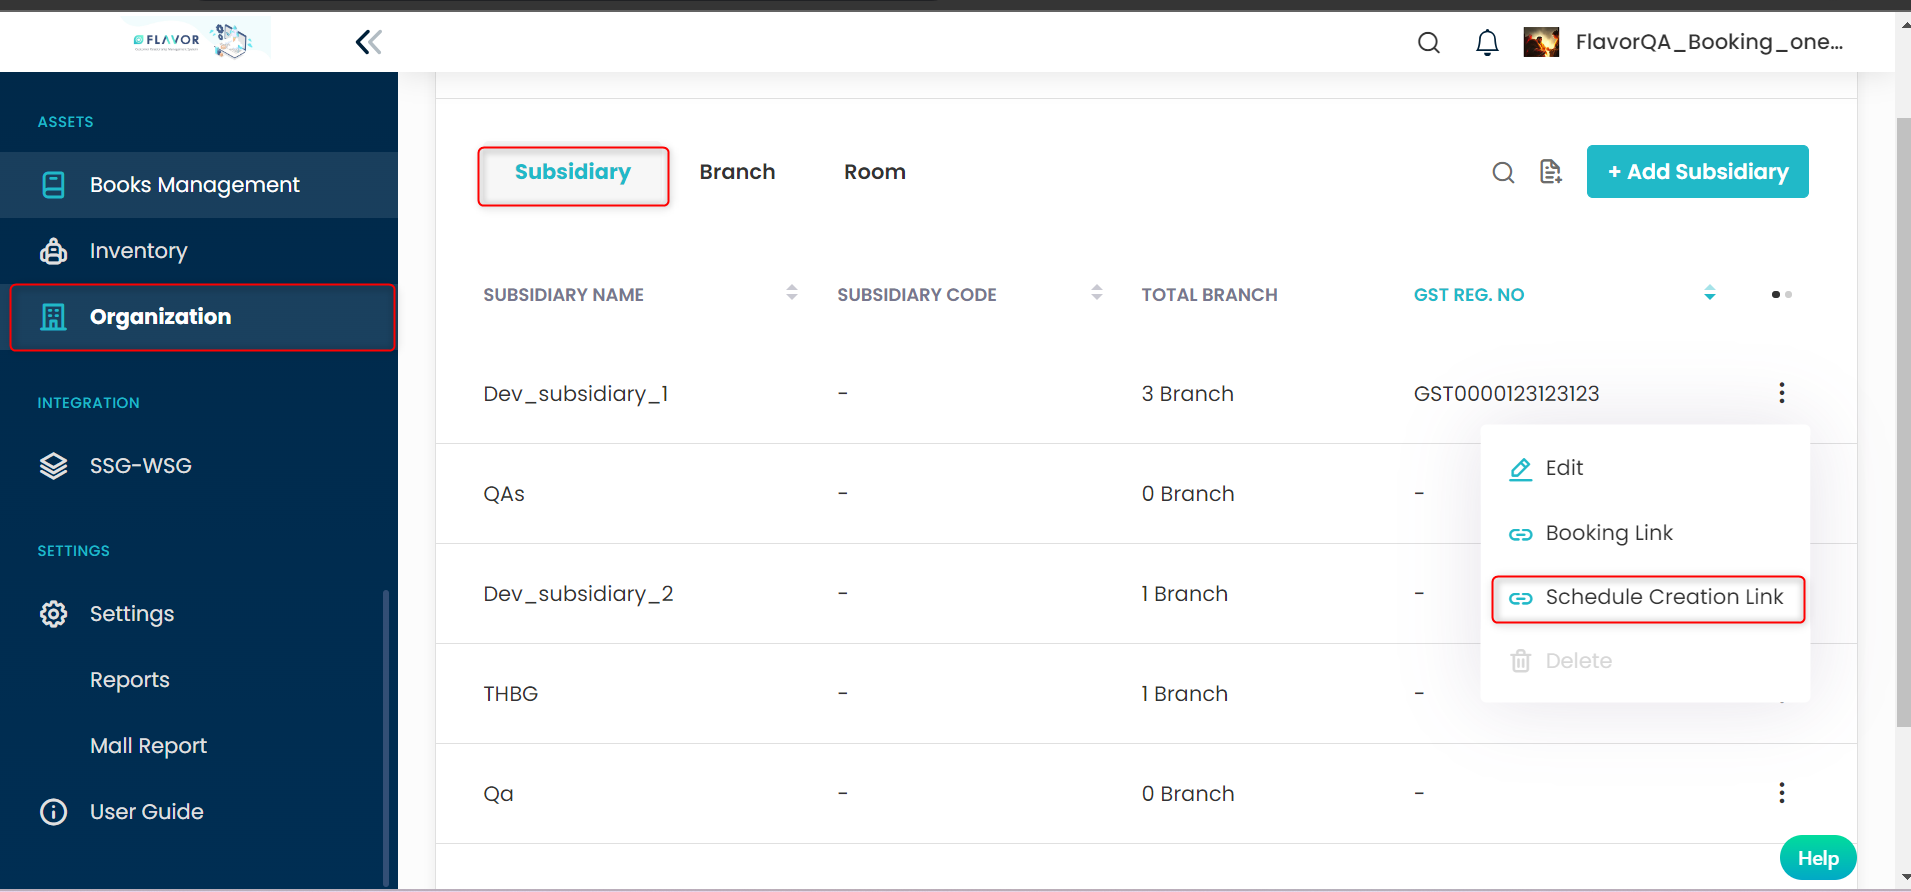
- Go to the Organization from the left side menu of the Flavor System.
- Click on the subsidiary Tab.
- Choose the subsidiary and click on the inline action button.
- A small popup will appear on your screen.
Step 2
- Click on the Schedule creation link.
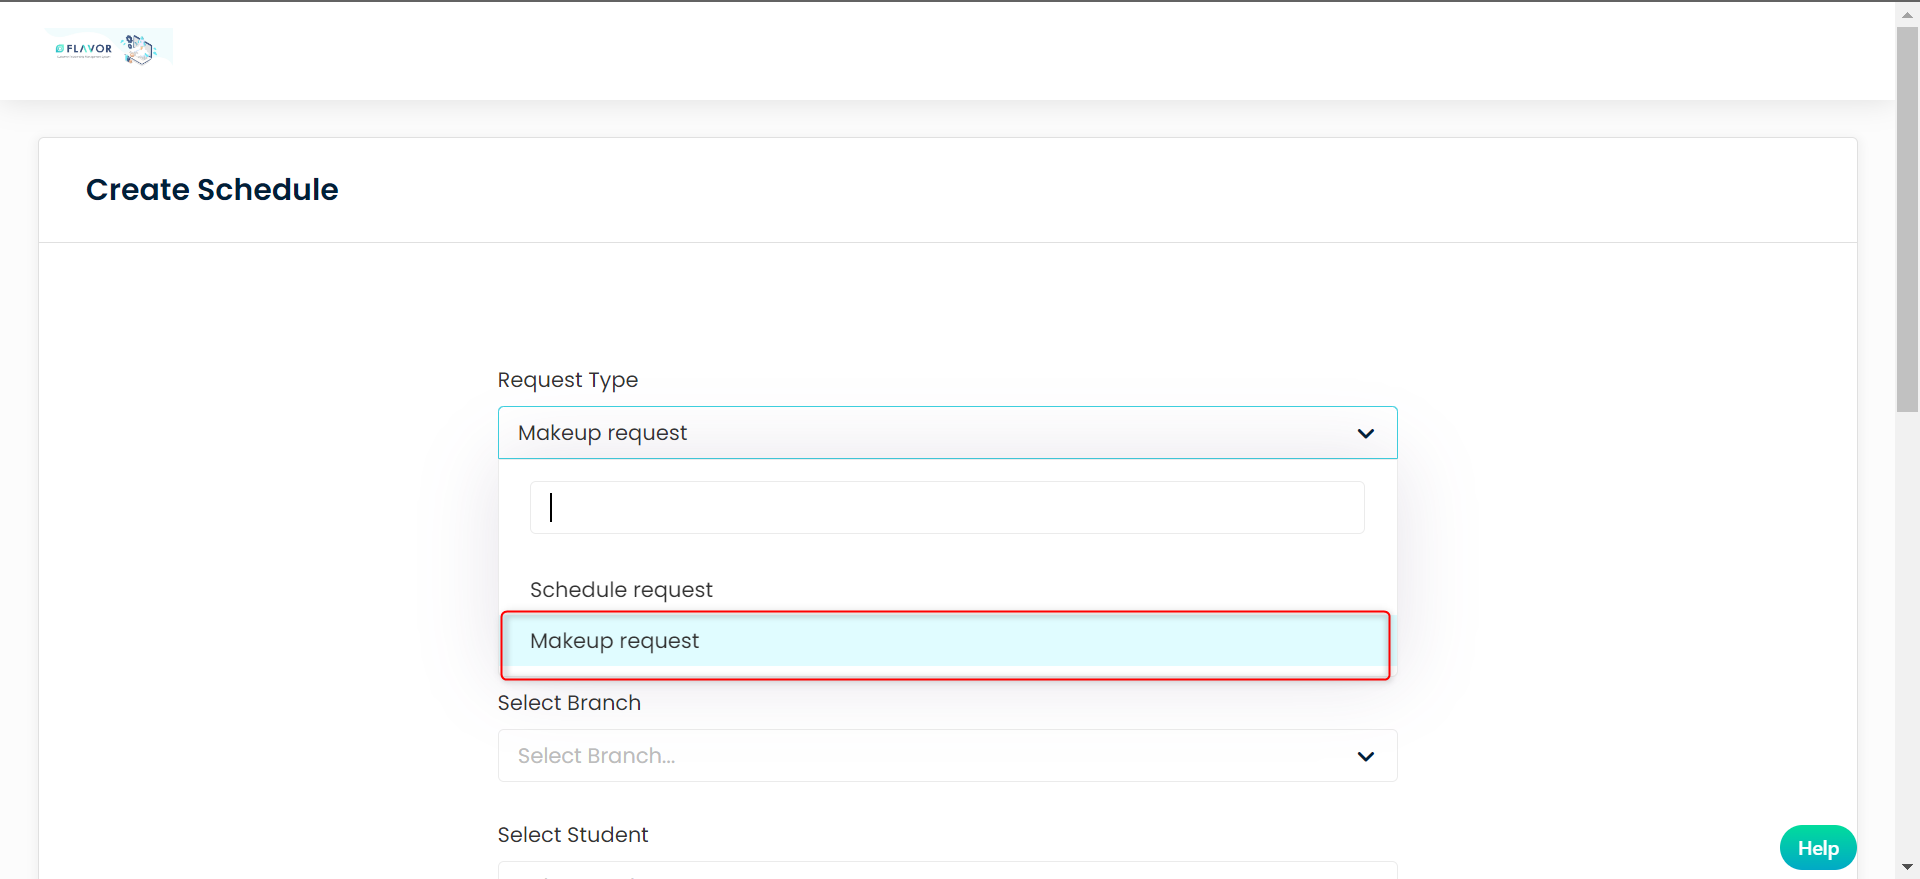
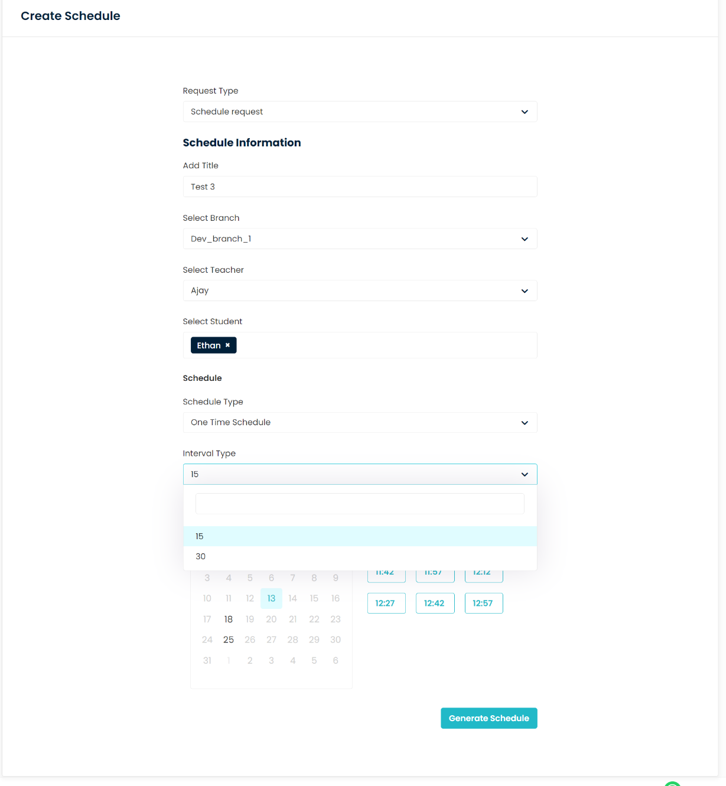
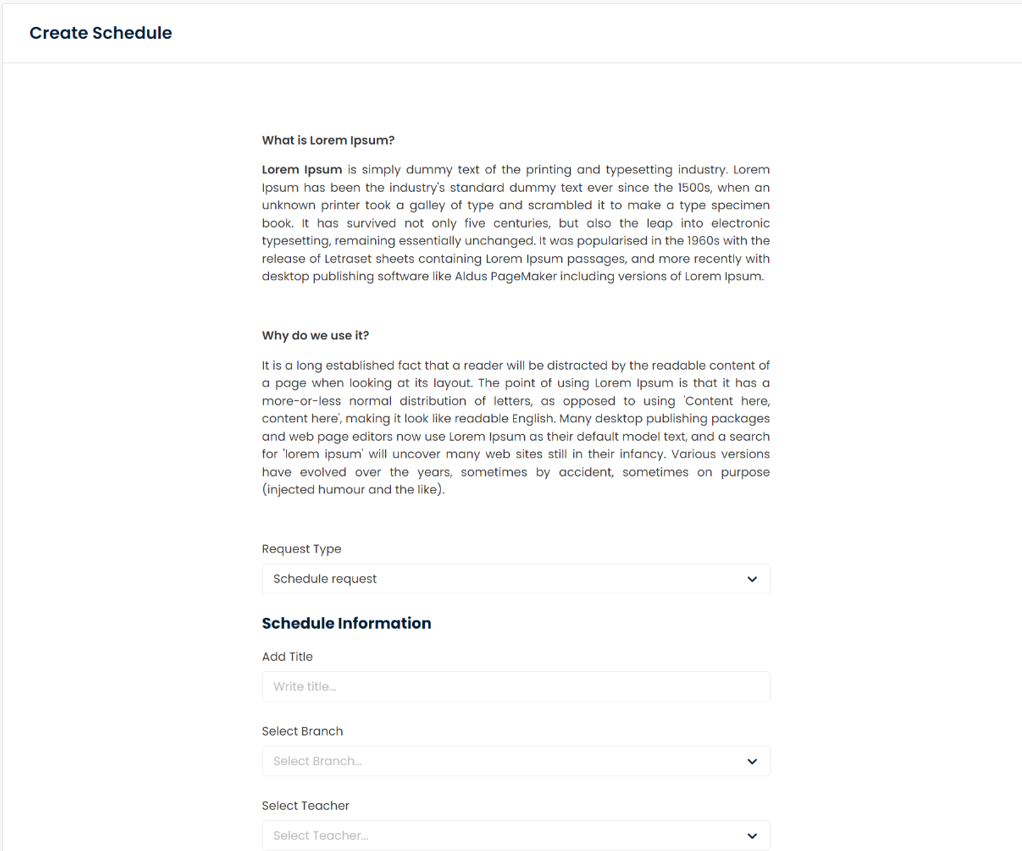
- A Create Schedule form will open in a new tab.
- Under Request type select makeup request.
Step 3
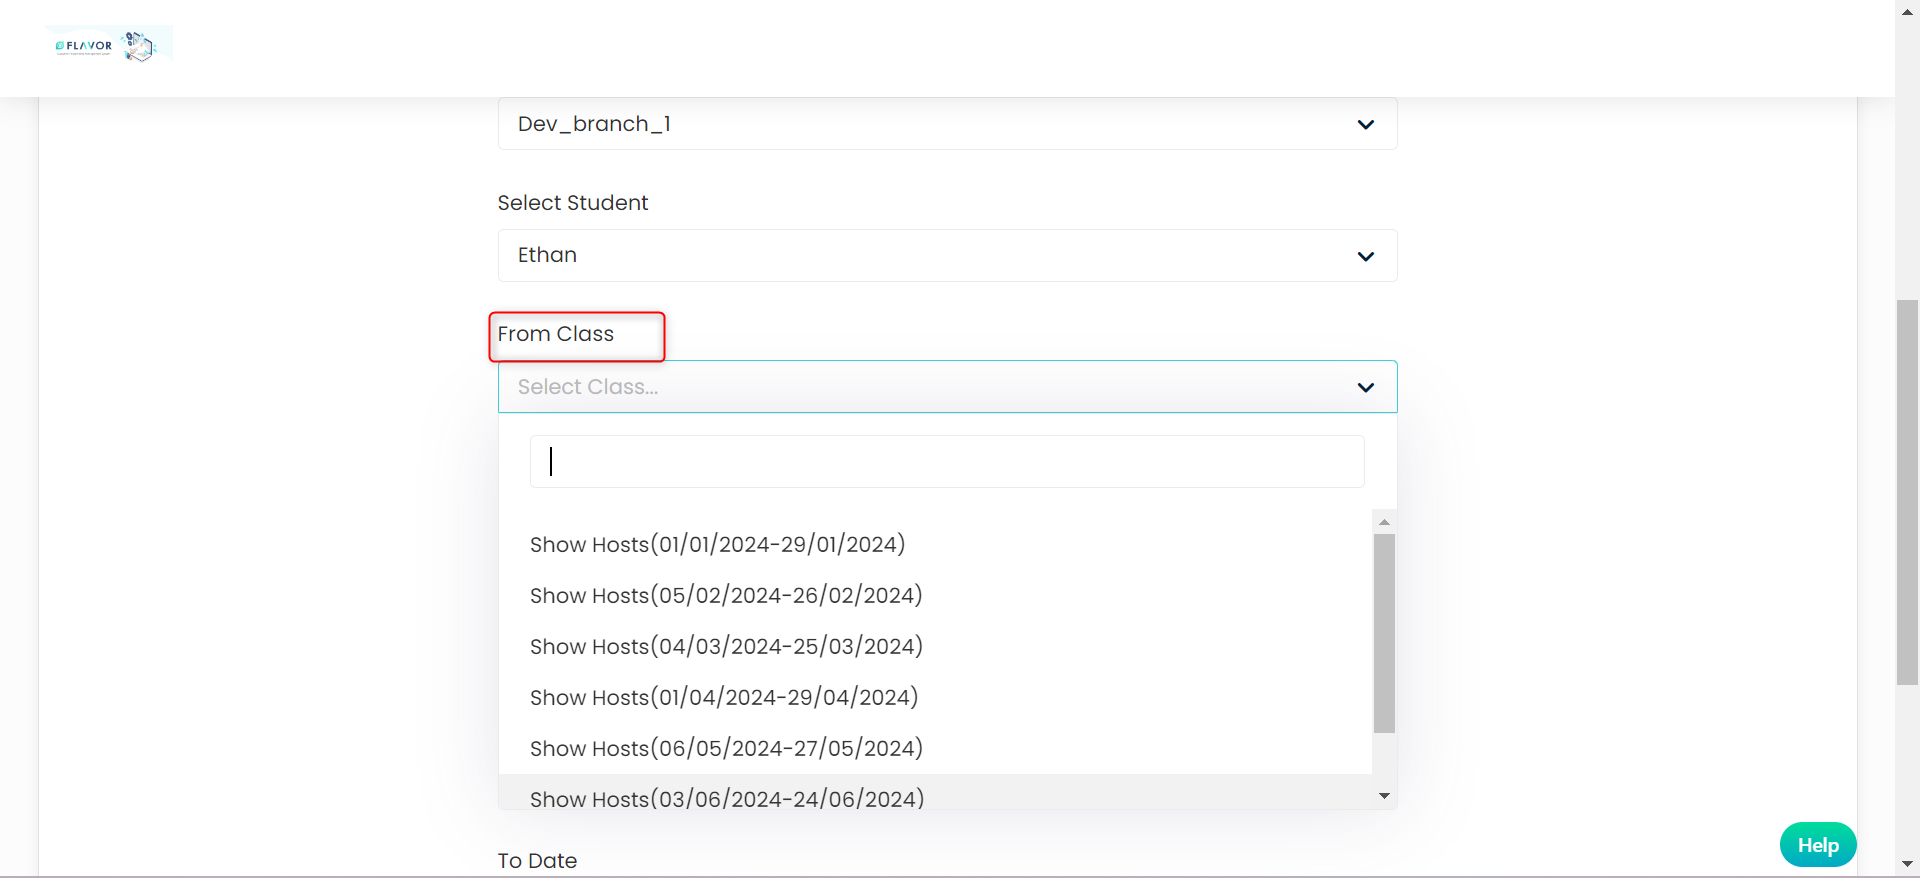
- Select the Branch and also select the student.
- From class – it will display all the classes in which student is registered and want to do makeup from.
Step 4
- Select the date for which you want to do the Makeup ( From Date will include the all dates that are present in that class )
- Next step is to select the Makeup Schedules:-
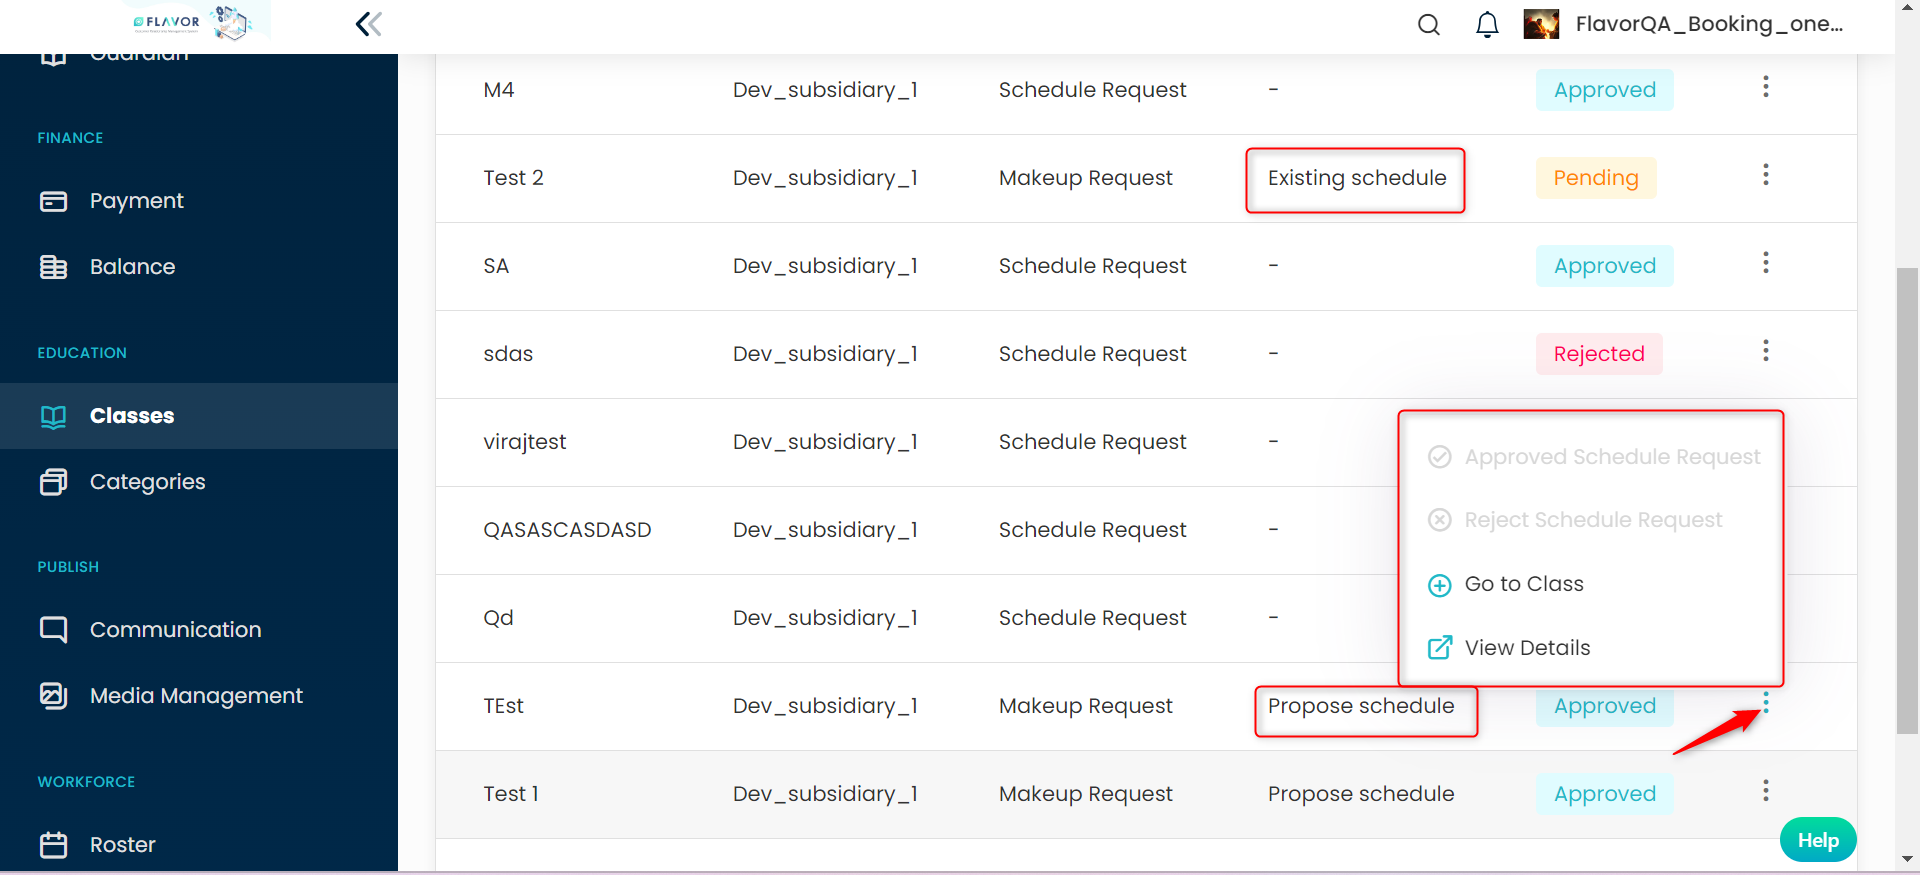
- Existing Schedule – will do makeup to the already existing class
- Propose Schedule – will do makeup to the new class
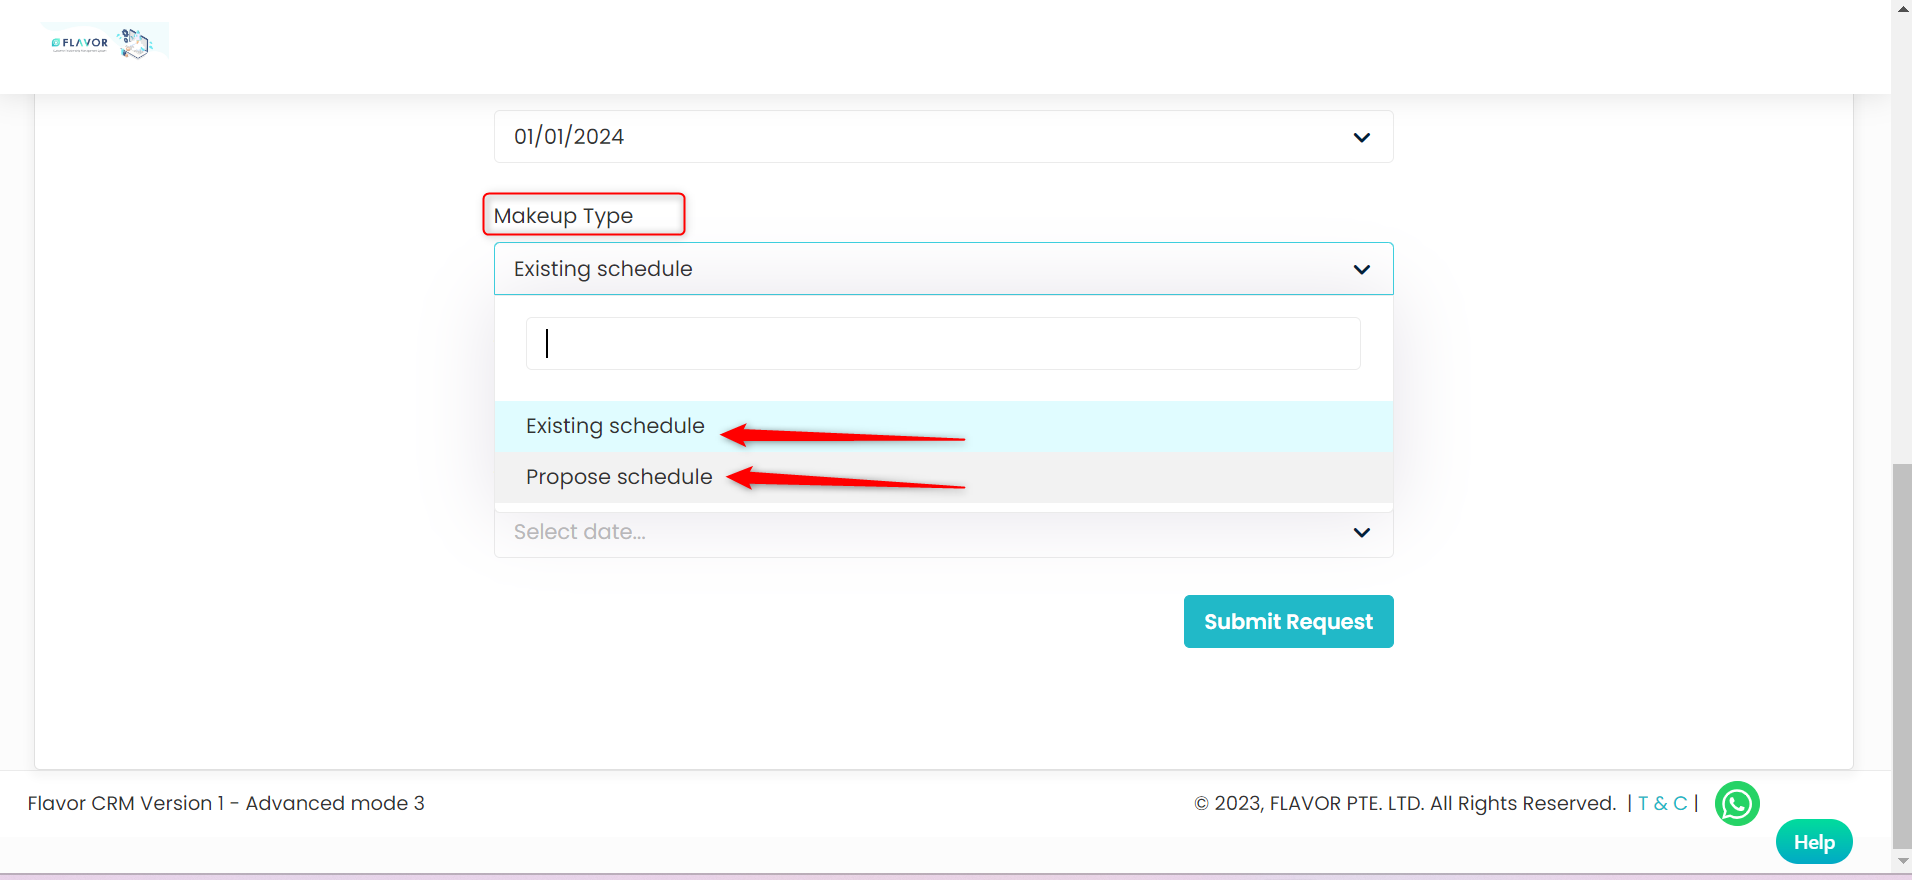
- Existing schedule
On selecting Existing schedule next step will be selecting the class and date from the dropdown if available based on the class already created,
- Propose Schedule
On selecting Propose schedule will lead to do makeup for the new class. Here you need to select the Schedule type, Interval type.

Once every fields are filled click on Generate Schedule.
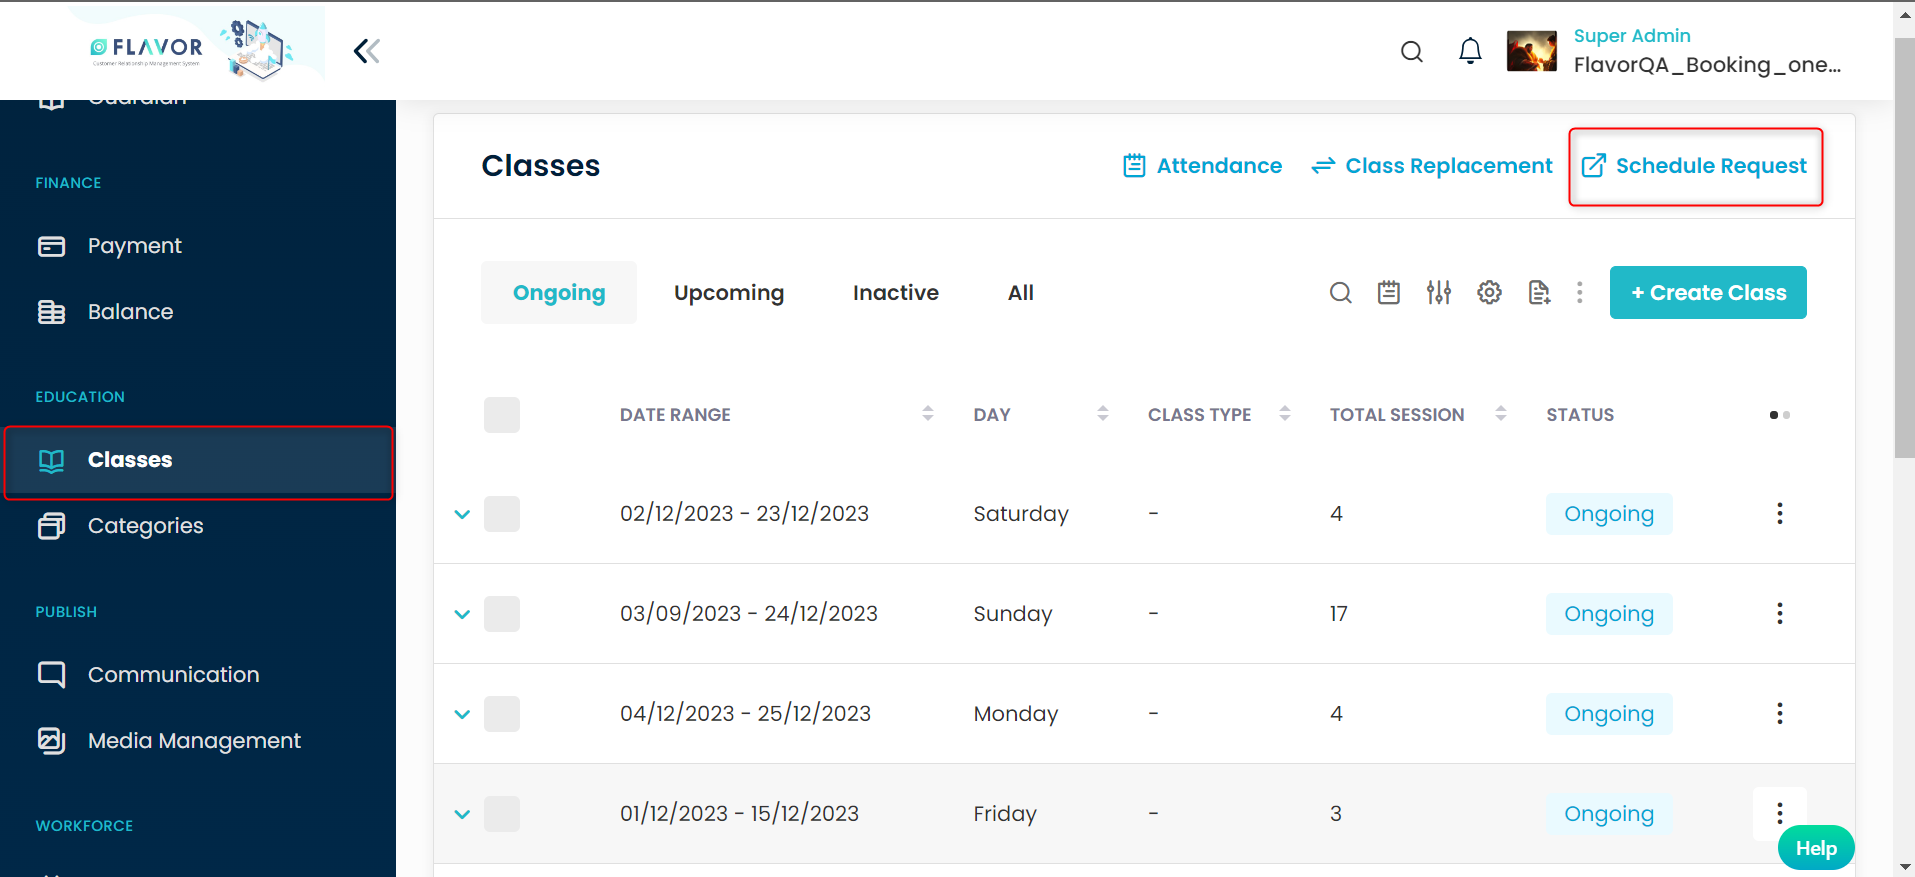
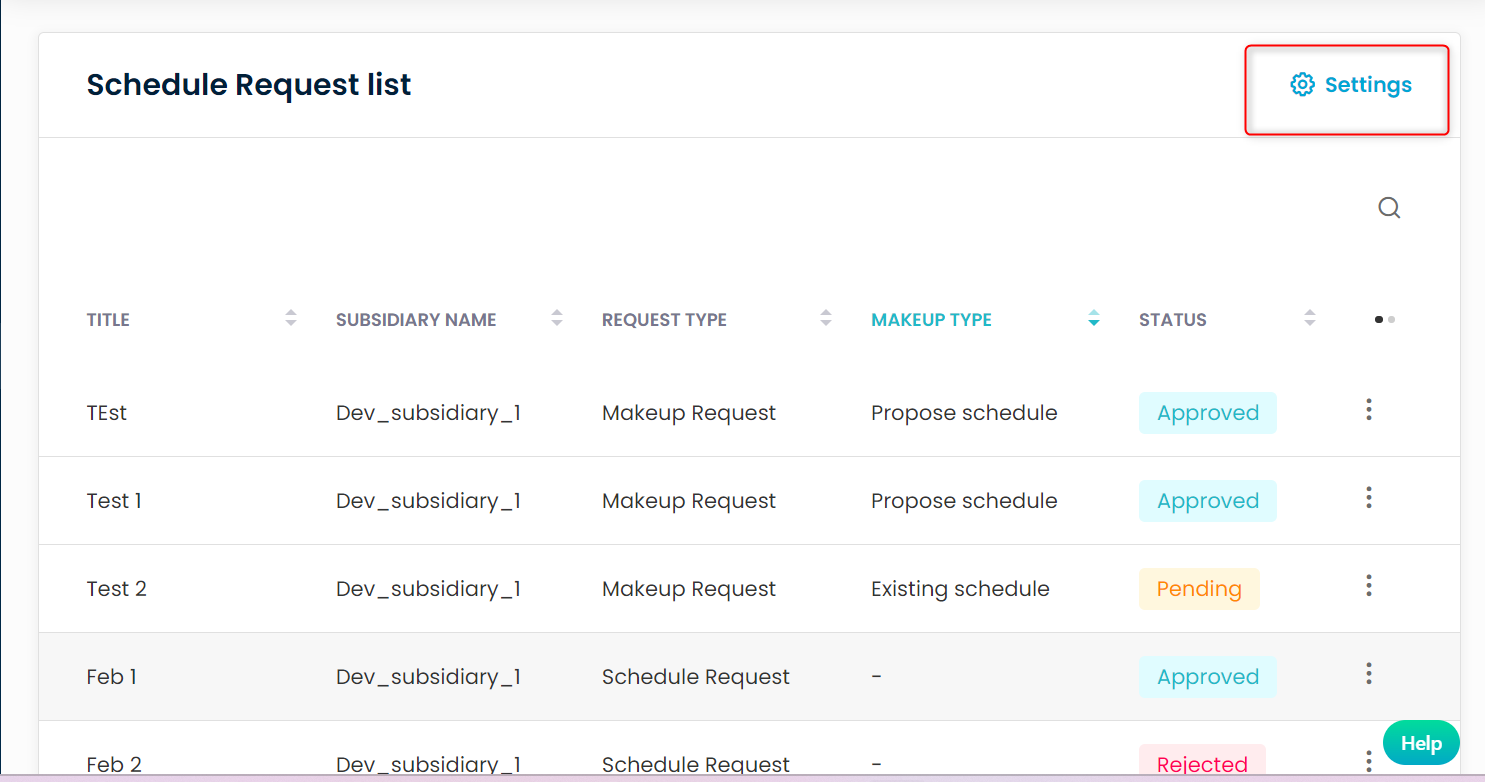
Where to find and approve/reject the schedule requests?
Step 1
- Go to the classes from the left side menu of the Flavor System.
- Click on the Schedule Request link.
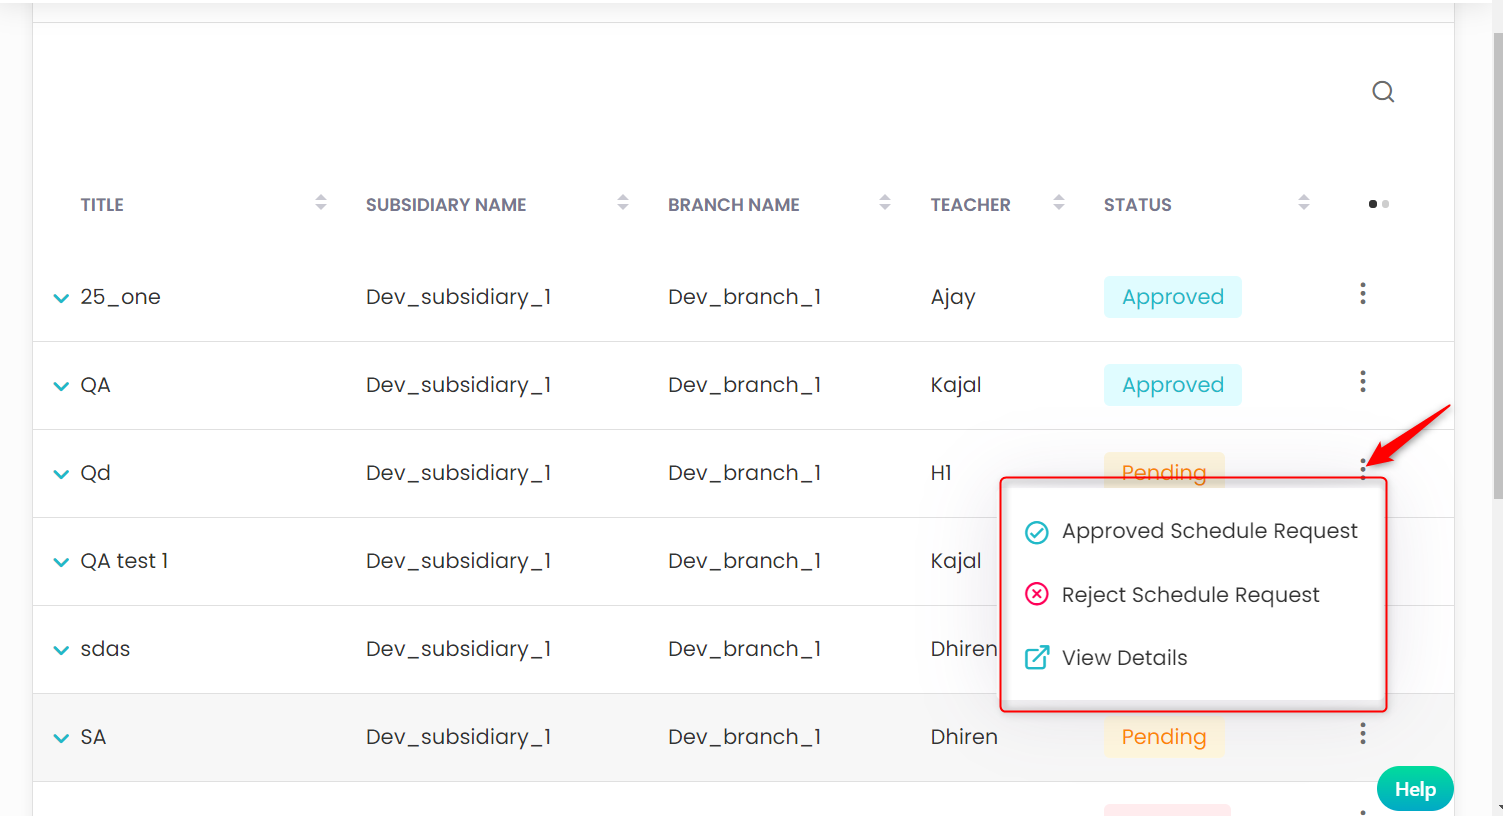
Step 2
- It will navigate you to the Schedule Request List page.
- The super admin can approve, reject, and view the request data for pending requests.
- And for Approve status, the super admin can view the newly created class and view the request data.
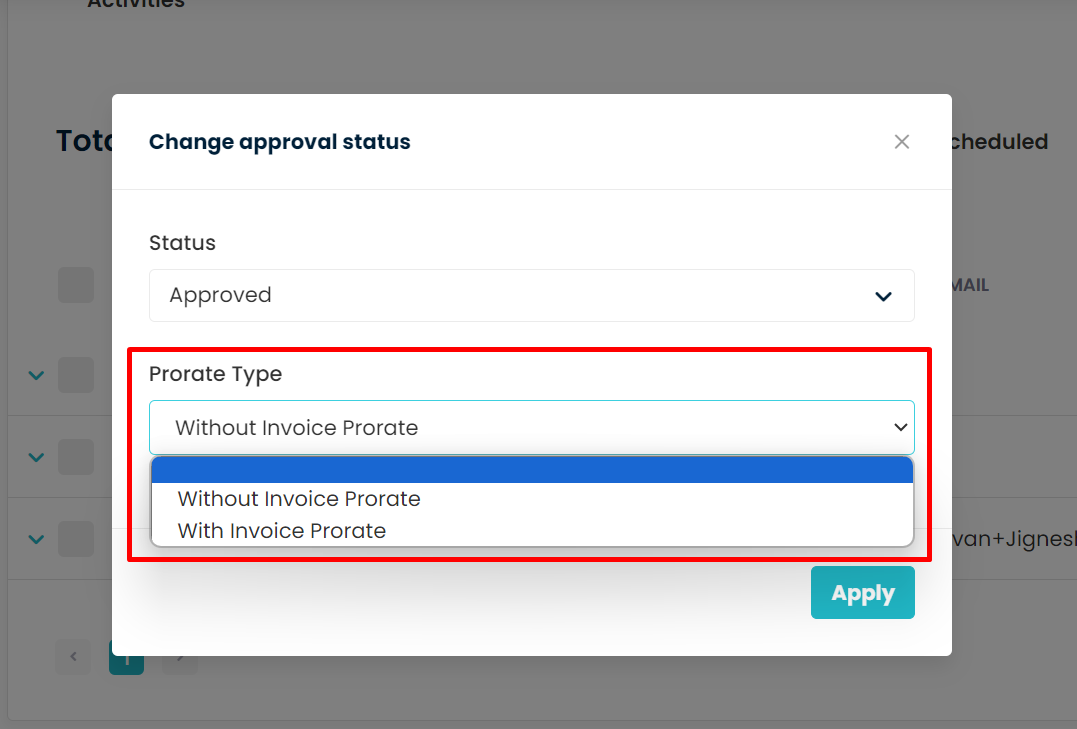
For Existing schedule while changing the status to Approval it will ask to select the Prorate Type
- Without Invoice Prorate – By selecting it invoice will not be generated
- With Invoice Prorate – By selecting it invoice will be generate
Note: Before changing the status to Approve or Reject, the super admin needs to do the settings for that branch.
Settings to be done before Approve
Step 1
- Go to the settings from the Schedule Request List page.
- It will navigate you to the Schedule Request setting page.
Step 2
- Choose the Branch and fill rest of the details.
- Click on the Save button.
Note: Enable “Provide Slot Selection” setting if slot selection feature is required for One time Schedule class.
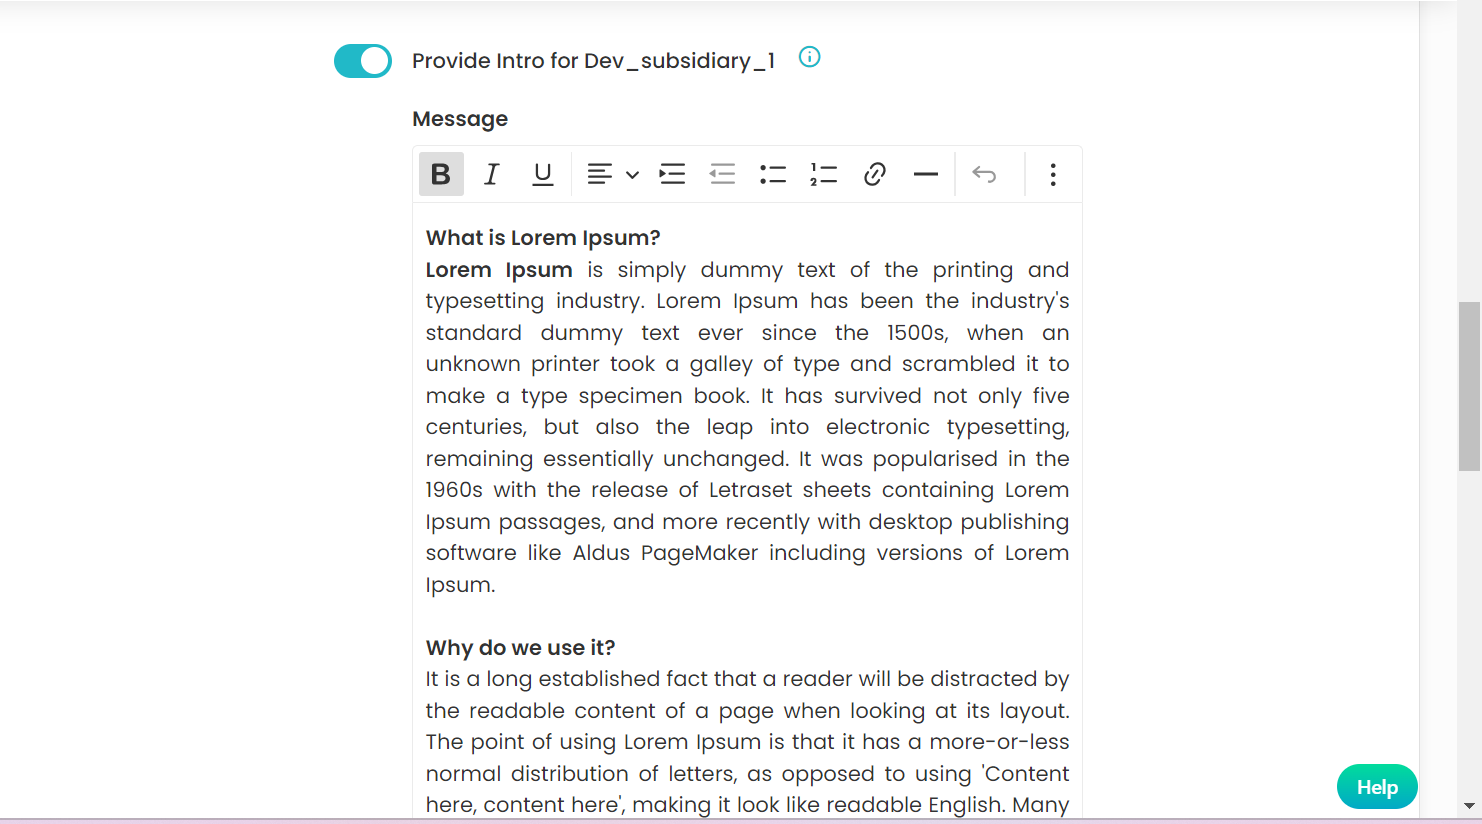
Introduction to Schedule creation link
Through this setting can add the introduction to your schedule creation link
Need more help? Ask us a question
Please let us know more of your details and our team will reach out to you very shortly.