
Step 1
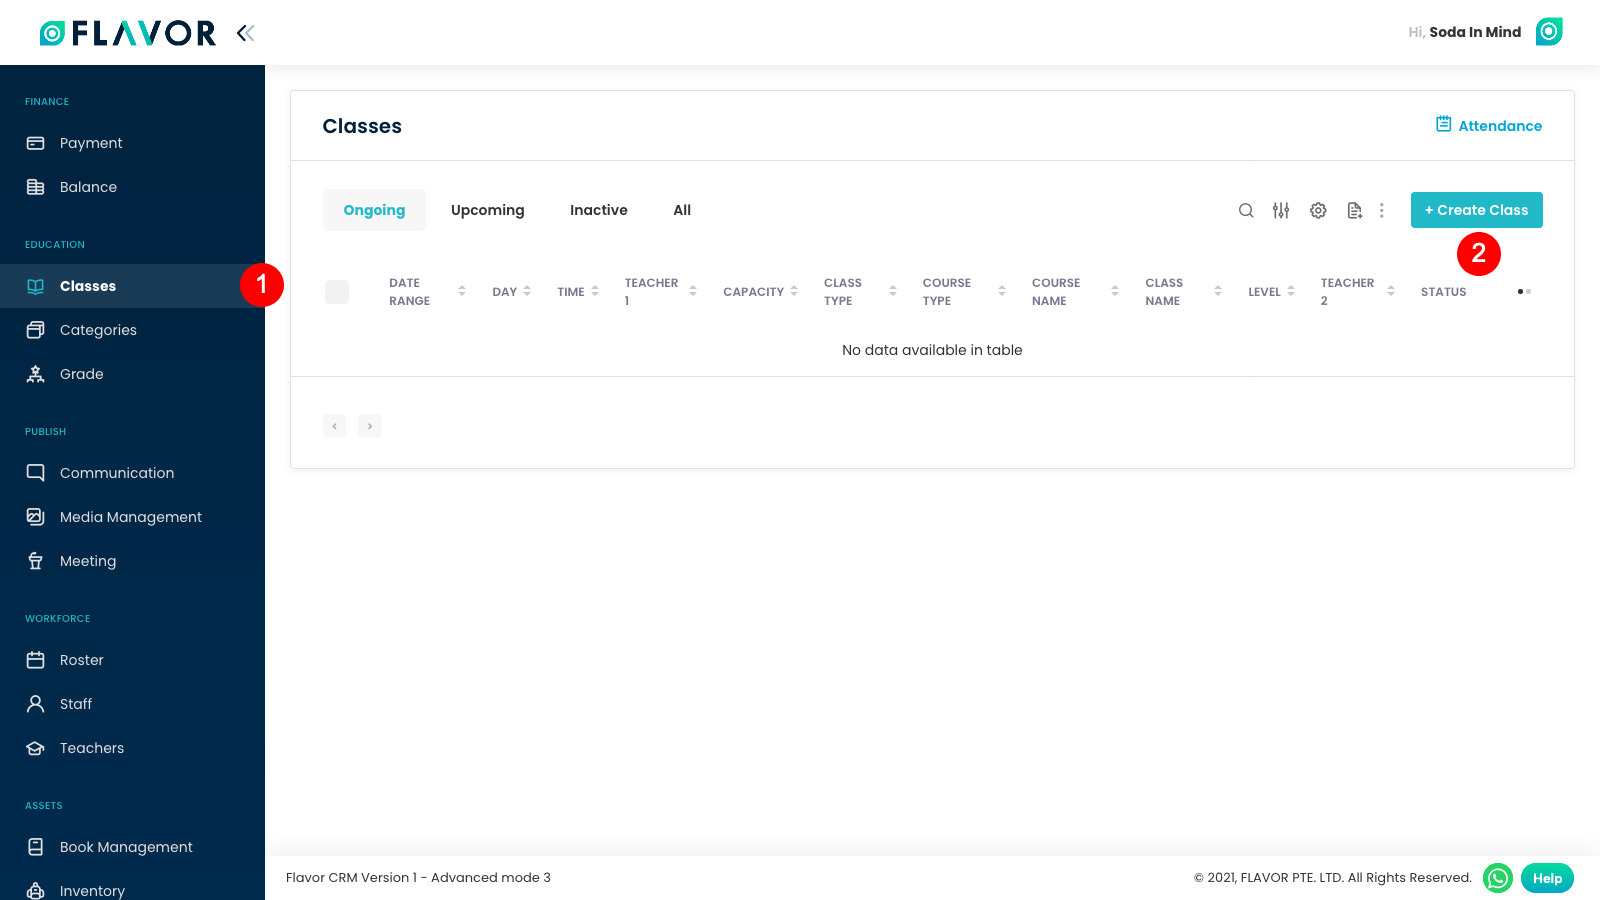
To create a new class, first go to Classes module and then click Create Class button.
Creating new class has 3 sections:
- Fill class Info
- Set schedule
- Fill payment details
Step 2
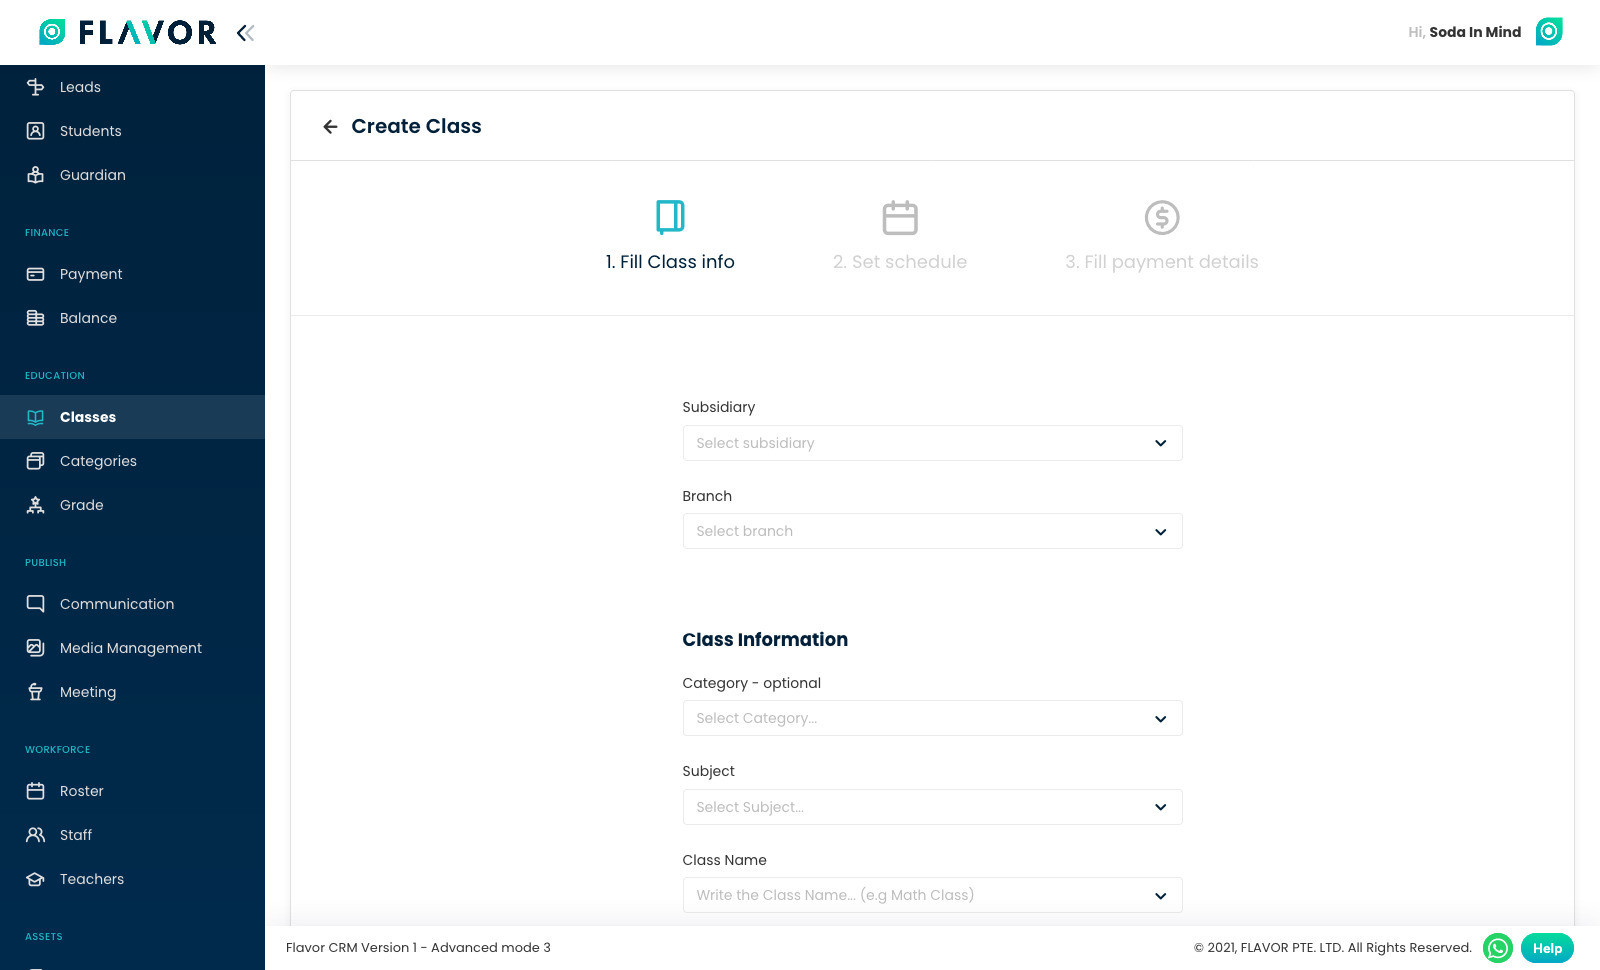
Fill class Info
- Select the Subsidiary under which class or subsidiary has to be created.
- Select the Branch under which class or subsidiary has to be created.
- Select the Course Type system that has to be followed by schedule or class.
- Select the Course Name under which this must go.
- Select the Class under which this schedule must go or you can type a new class name and click on enter and that will get updated here.
- Max No.of Students must be updated so that you create a limit on how many students can be updated.
- Makeup Capacity must be updated so that there is a limit on how many makeup cases can be added to the class
Step 3
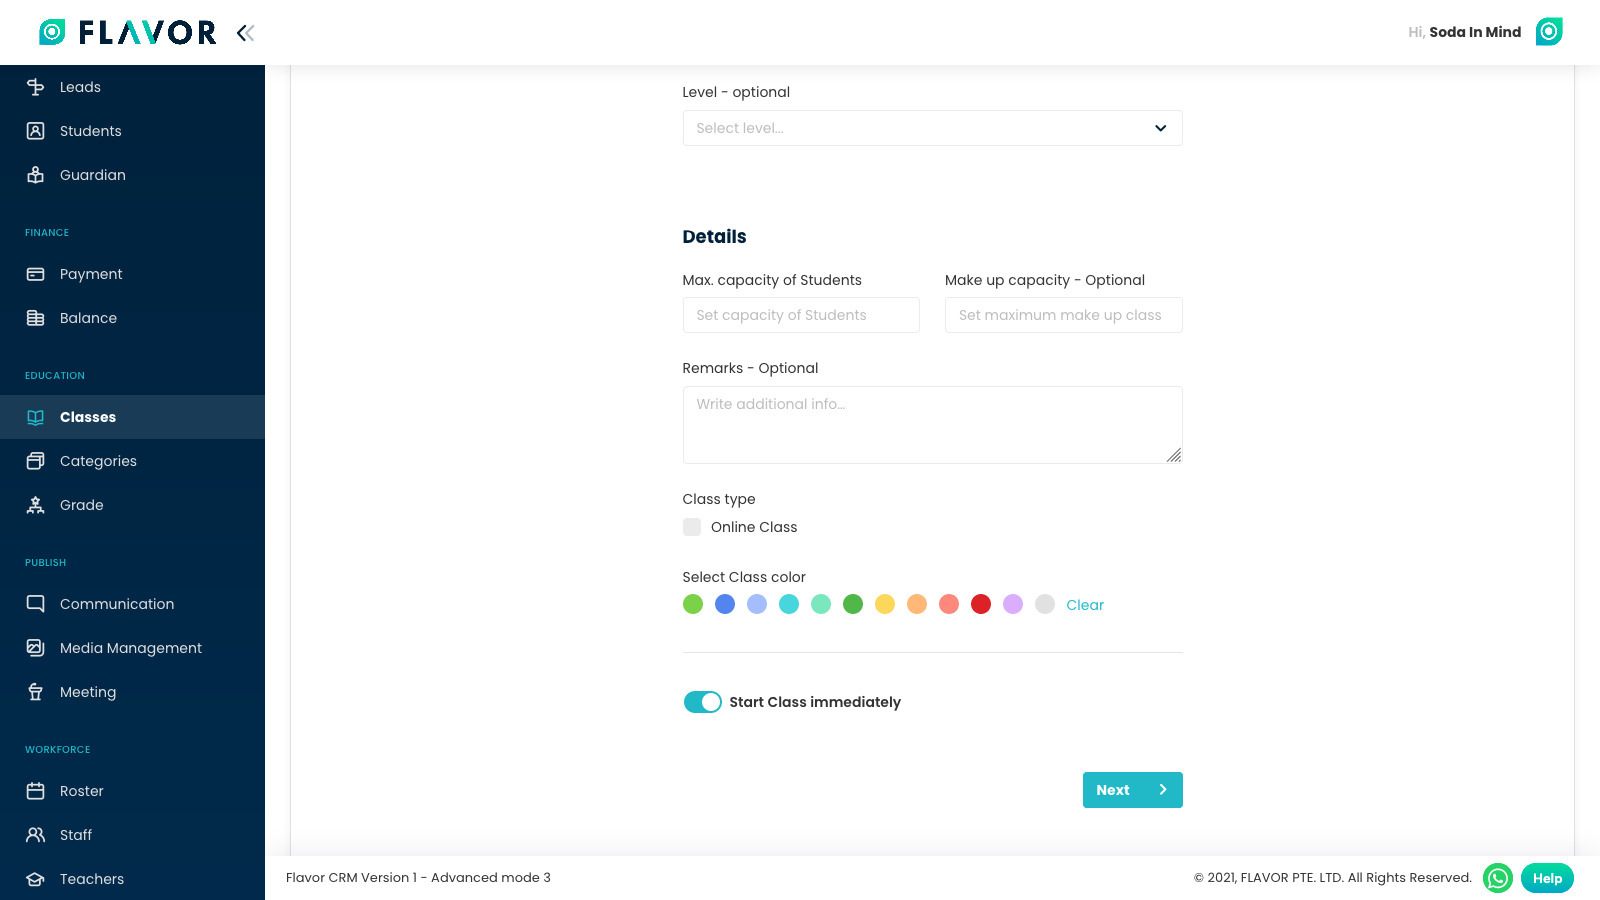
Fill class Info
- Select the Level of the class.
- Max No.of Students must be updated so that you create a limit on how many students can be updated.
- Makeup Capacity must be updated so that there is a limit on how many makeup cases can be added to the class.
- Enter remarks for the class if you want to.
- Select the Class type.
- You can also choose the Class color.
- If you want to start the class as soon as it created, check Start class immediately.
After that, click on Next button to go to Set schedule section.
Step 4
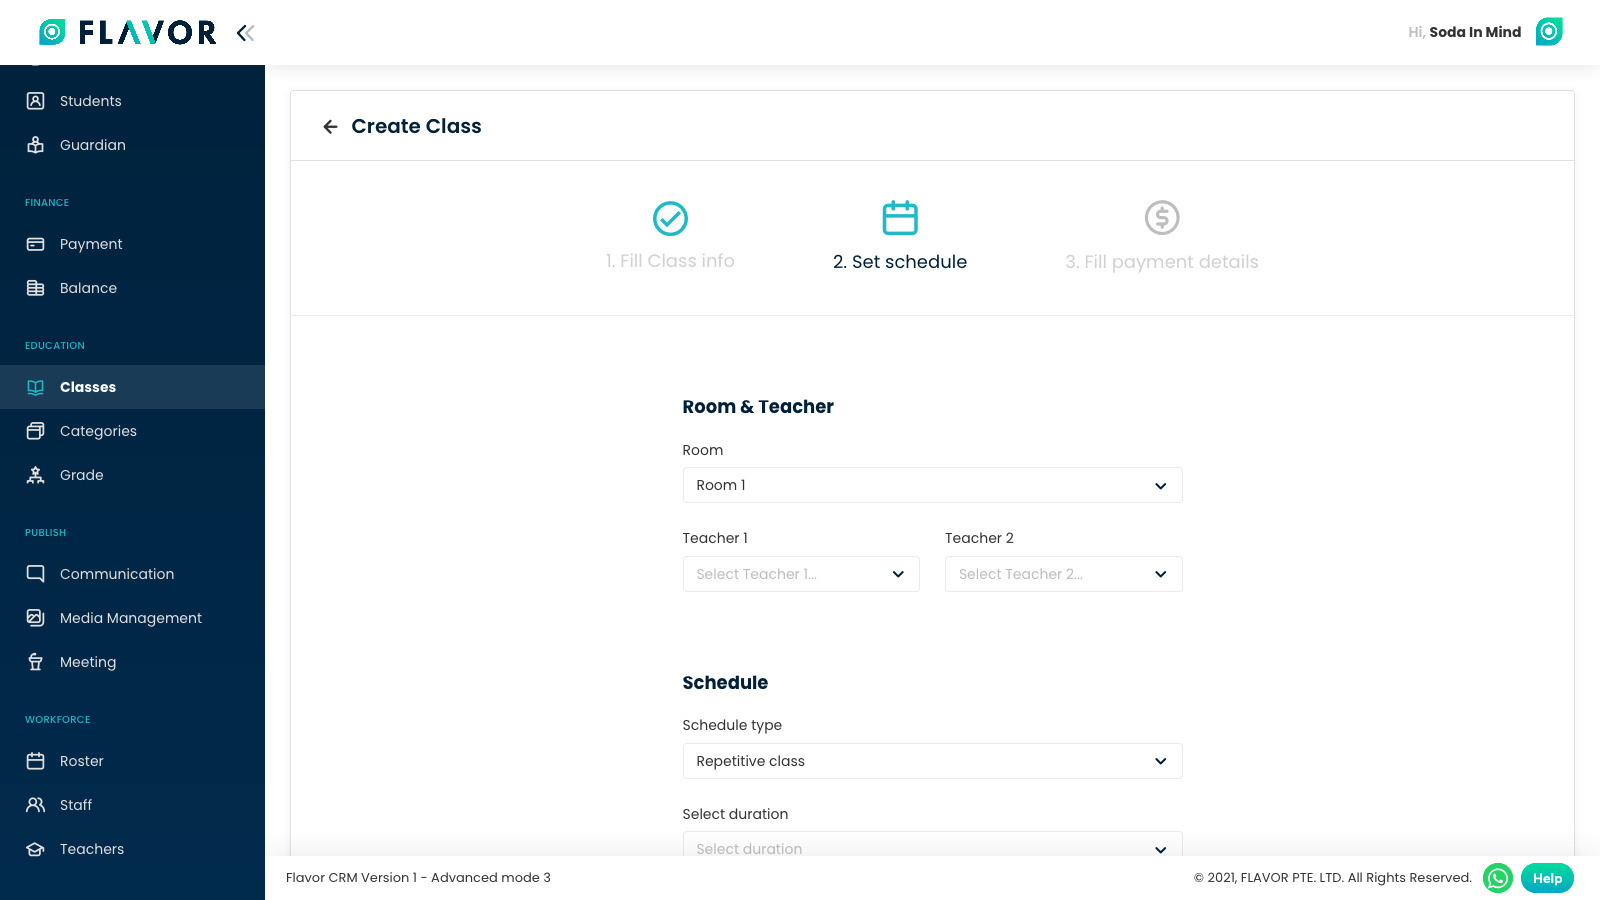
Set schedule
- In this section, fill the Room & Teacher’s detail.
- Schedule type: You can create Repetitive class or One time class.
- Select duration: For Repetitive class you can select Monthly smart schedule, Term-based or Custom period.
Step 5
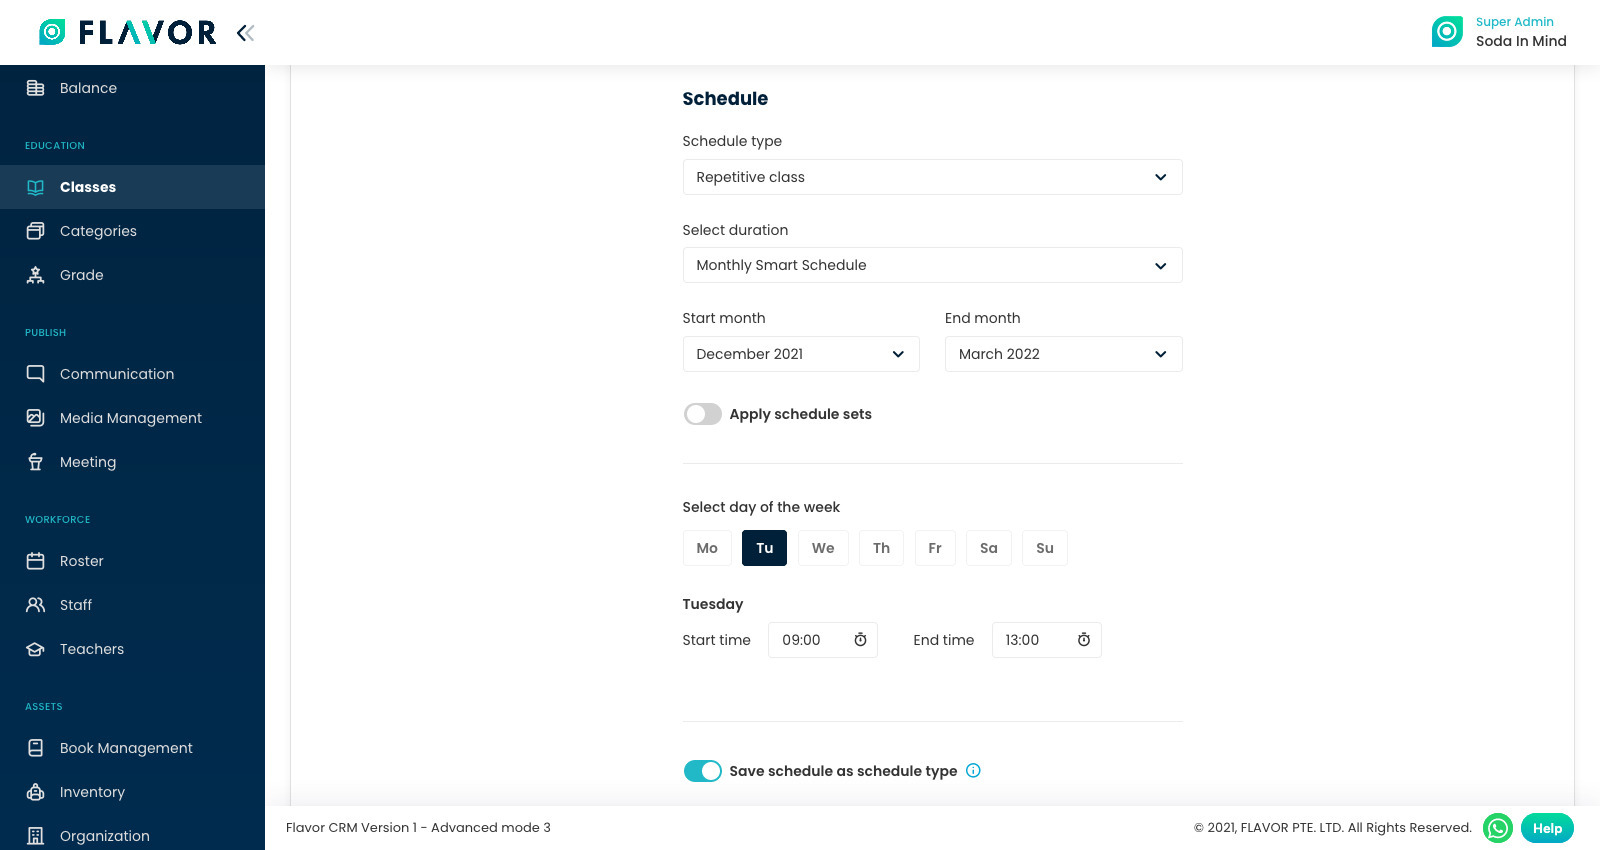
Set schedule
- Repetitive class – Monthly smart schedule.
For Monthly smart schedule, select Start month & End month.
After that, select days of the week on which you want to schedule a class.
Step 6
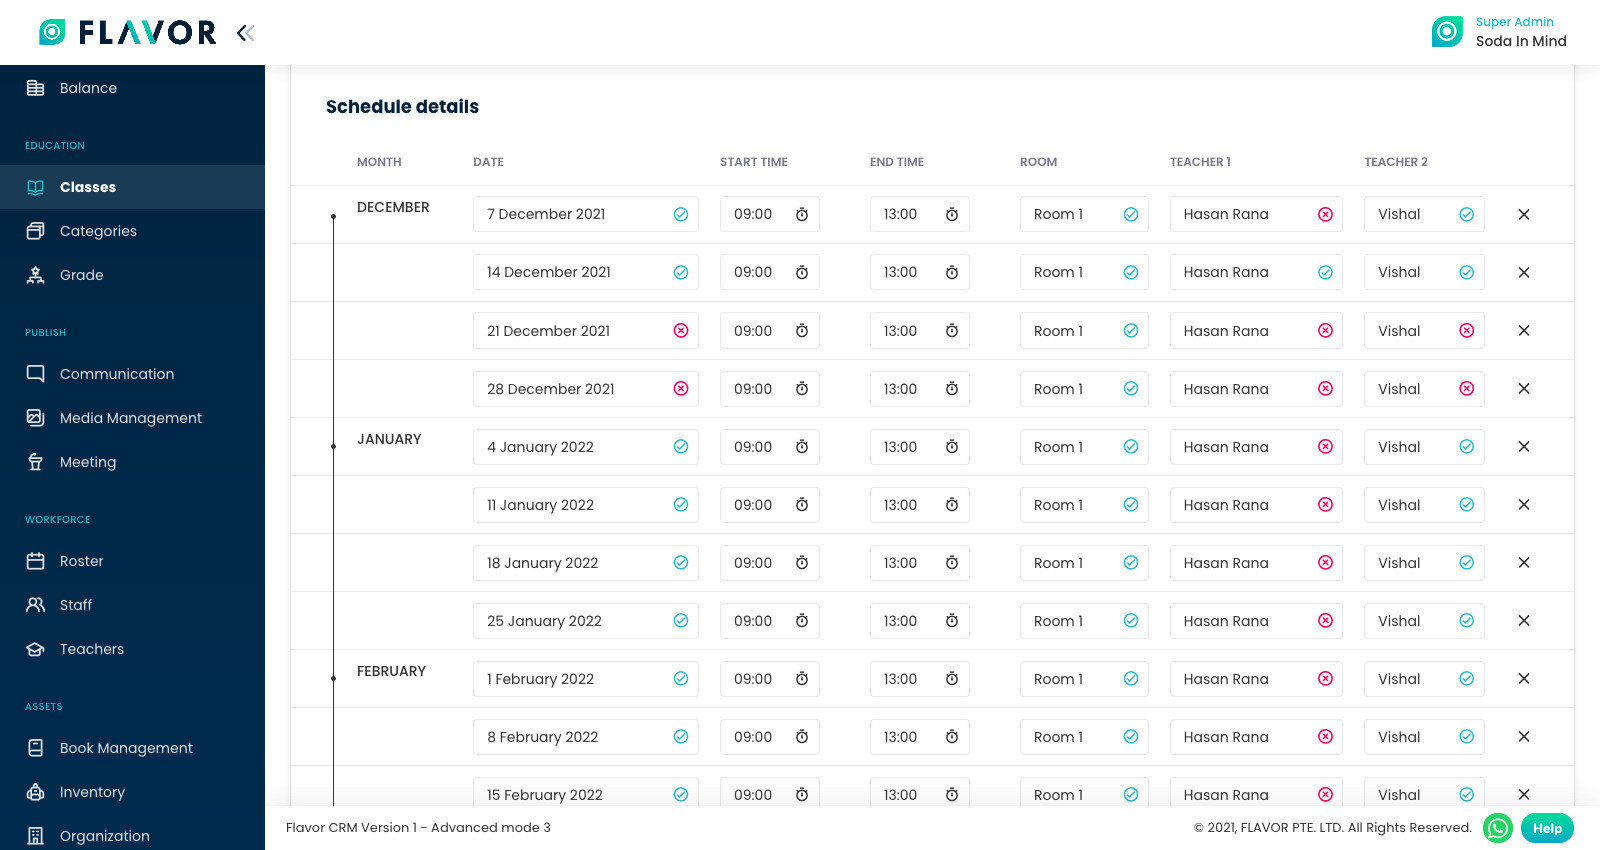
After filling all the info, click on Generate schedule button. You can check the generated schedule.
Click on Next button to go to Fill payment details section.
Step 7
Set schedule
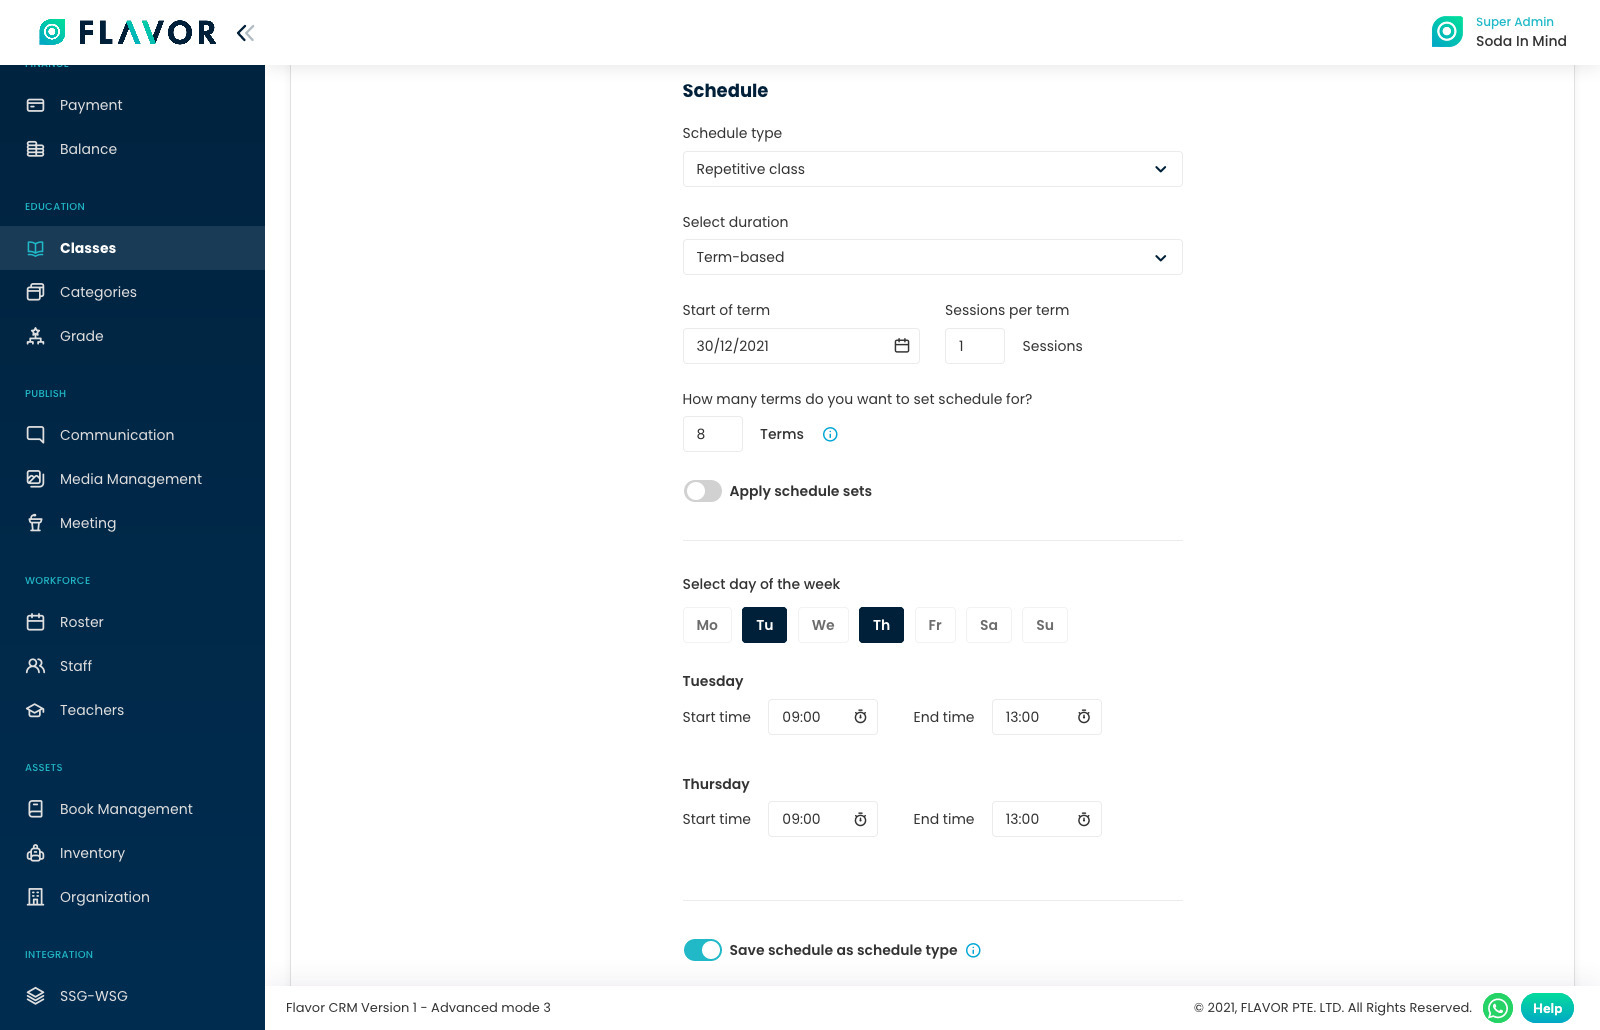
- Repetitive class – Term-based.
For Term-based, select
- Start of term
- Sessions per term
- How many terms do you want to set schedule for?
After that, select days of the week on which you want to schedule a class.
Step 8
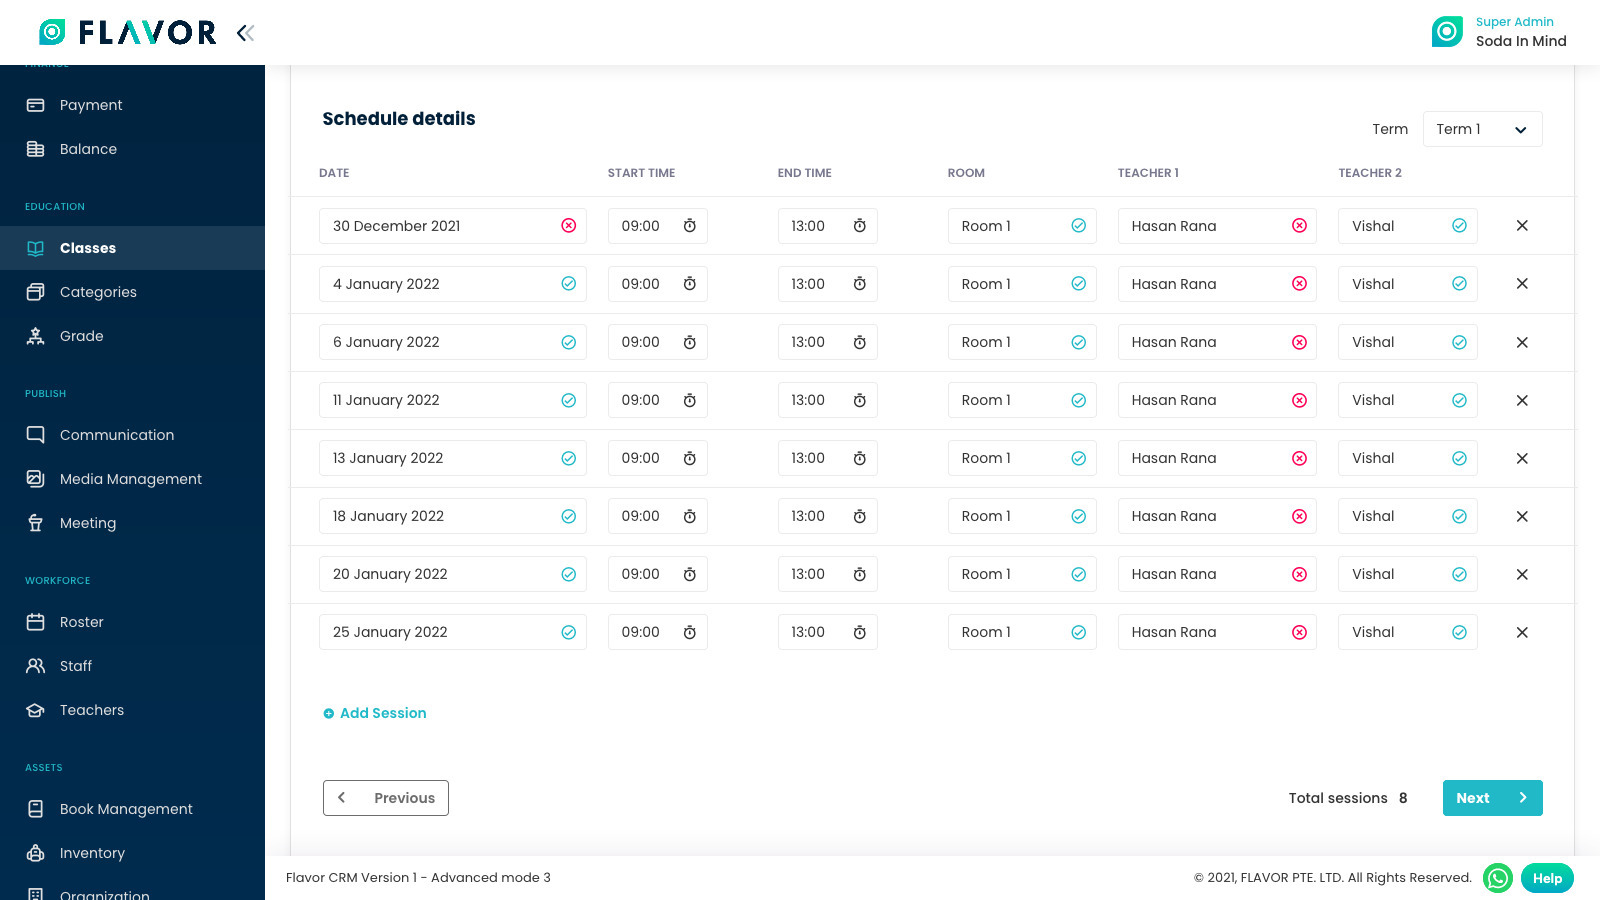
After filling all the info, click on Generate schedule button. You can check the generated schedule.
Click on Next button to go to Fill payment details section.
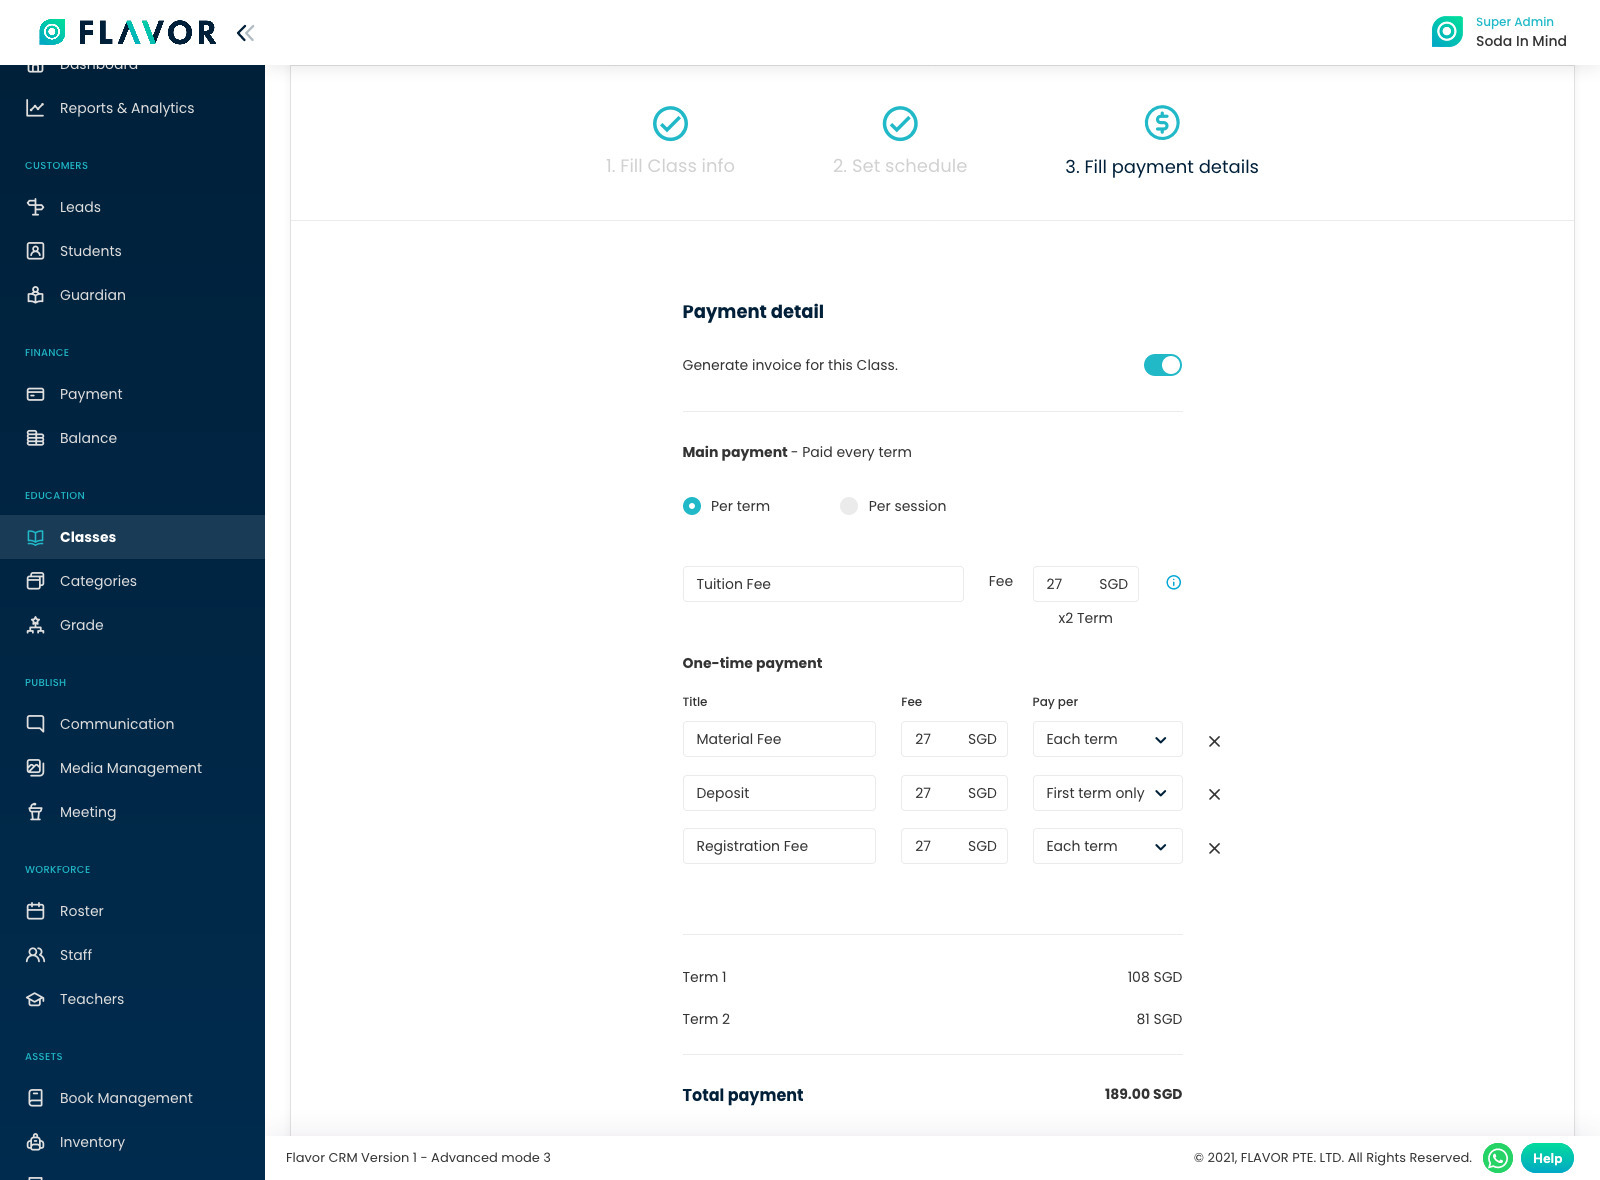
Step 9
Fill Payment Details
- Payment Detail
- Generate Invoice for this class: Here decide whether for students that are added for them must invoice get generated or not.
- Make Payment: Here selected whether the tuition fee be based on PER LESSON or PER SCHEDULE and then insert the fee amount in tuition fee section.
- One-Time Payment: Here add the fee that the students are supposed to pay one time like material fee, deposit, registration fee.
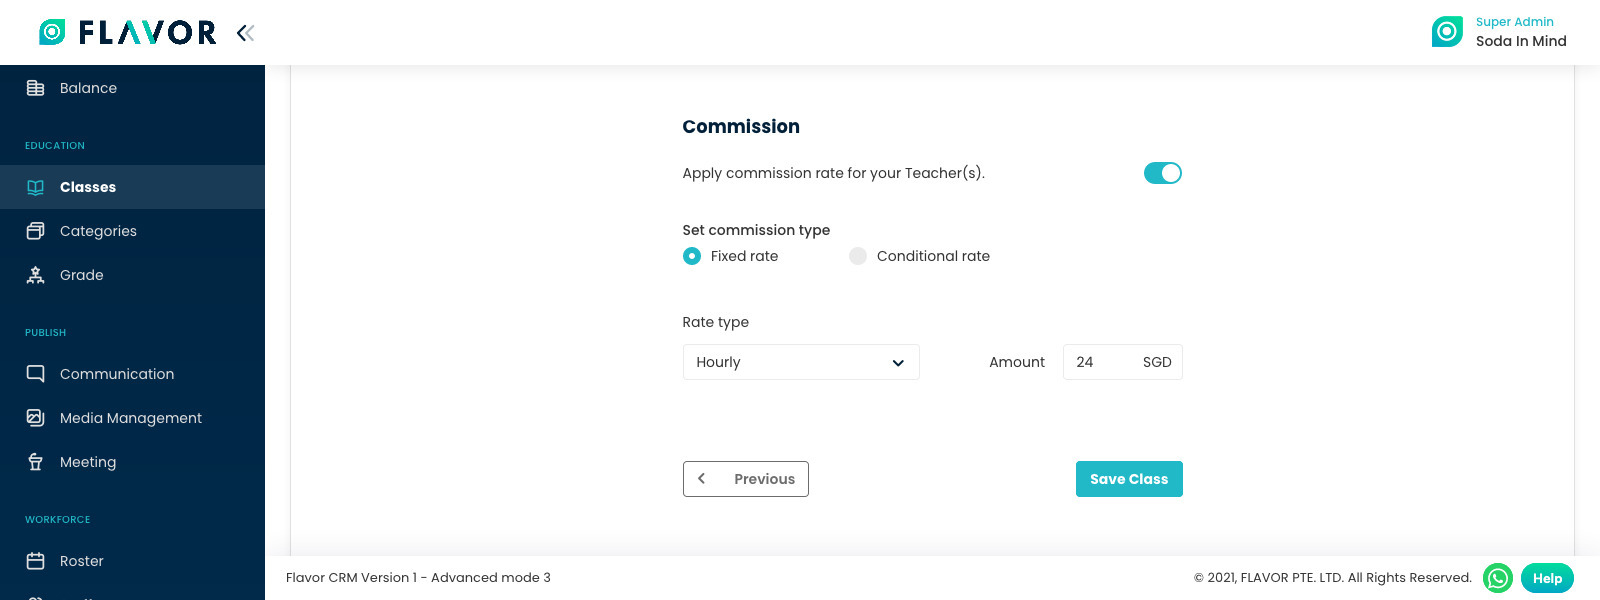
Step 10
Commission
- Apply commission rate to your teachers.
- Set Commission Type:
- Fixed Rate: Define whether the commission has to be kept fixed and follow one commission method.
- Conditional Rate: You can set slabs and define what slab has to follow what commission system.
- Fill Rate Type based on which commission will be calculated.
Need more help? Ask us a question
Please let us know more of your details and our team will reach out to you very shortly.