
Enabling and Configuring Certificate Hours for Certificate Generation
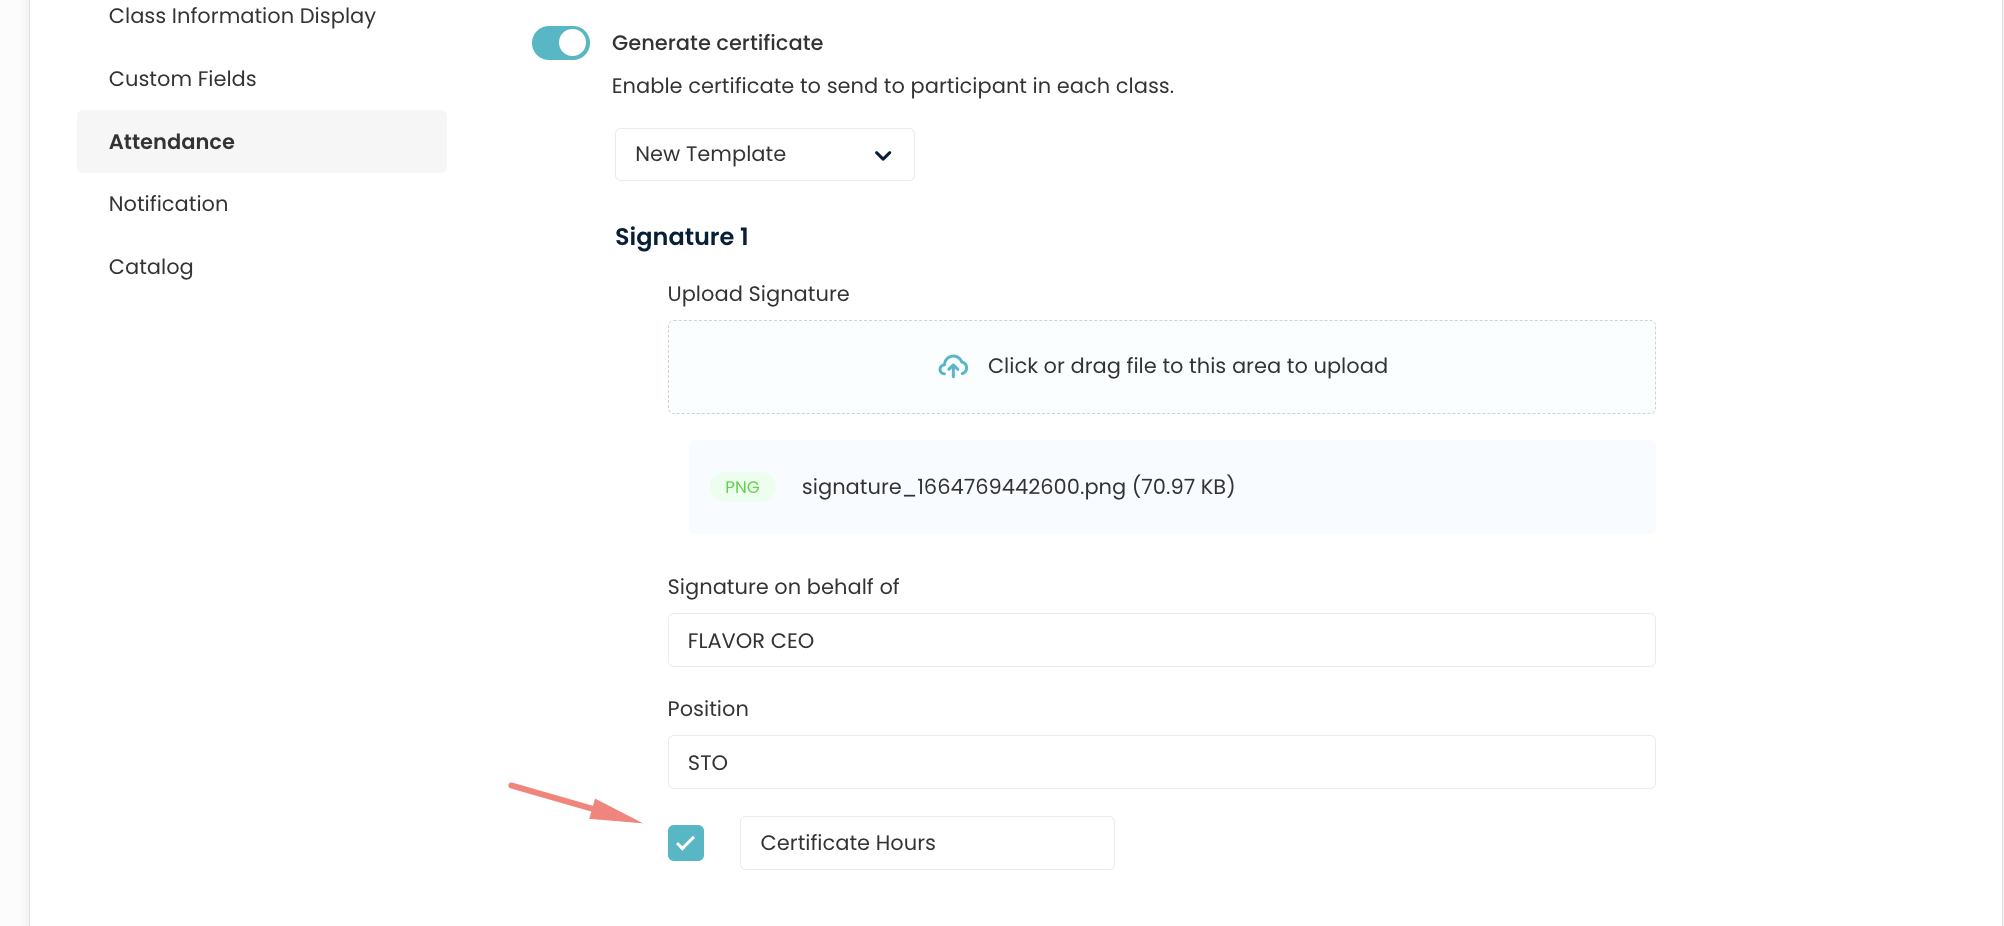
The “Certificate Hours” feature allows you to display the total hours of a class on the generated certificate. Follow the steps below to enable and configure this feature:
-
Navigate to the Certificate Hours Settings:
- Go to the Classes module.
- Select the Settings tab.
-
Enable Certificate Generation:
- Toggle the “Generate certificate” switch to enable the generation of certificates for participants in each class.
-
Select a Template:
- Choose the desired certificate template from the dropdown menu. You have two options:
- Default Template
- New Template
- Choose the desired certificate template from the dropdown menu. You have two options:
-
Upload Signature:
- Upload the signature image that will appear on the certificate. You can either click on the upload area or drag and drop the file.
- Ensure the signature file is in PNG format for best results.
-
Configure Signature Details:
- Fill in the “Signature on behalf of” field with the appropriate authority’s name (e.g., FLAVOR CEO).
- Enter the position of the authority in the “Position” field (e.g., STO).
-
Enable and Customize Certificate Hours:
- Check the box next to “Certificate Hours” to include the total hours of the class on the certificate.
- Optionally, you can change the label of the certificate hours by clicking on the text box below the checkbox and entering your preferred label.
-
Save Settings:
- Ensure all the settings are correct and save your changes.
By following these steps, the total hours of each class will be displayed on the generated certificates, providing a clear and professional record of attendance for participants.
Need more help? Ask us a question
Please let us know more of your details and our team will reach out to you very shortly.