
Introduction
The Feature allows Flavor System users to Tag Discounts to students profile so that when next time an invoice is generated then system is able to add discount automatically to tuition, material, registration fee or deposit.
Step 1
- Go to the student from the left-side menu of the Flavor System.
- Click on a particular student.
Step 2
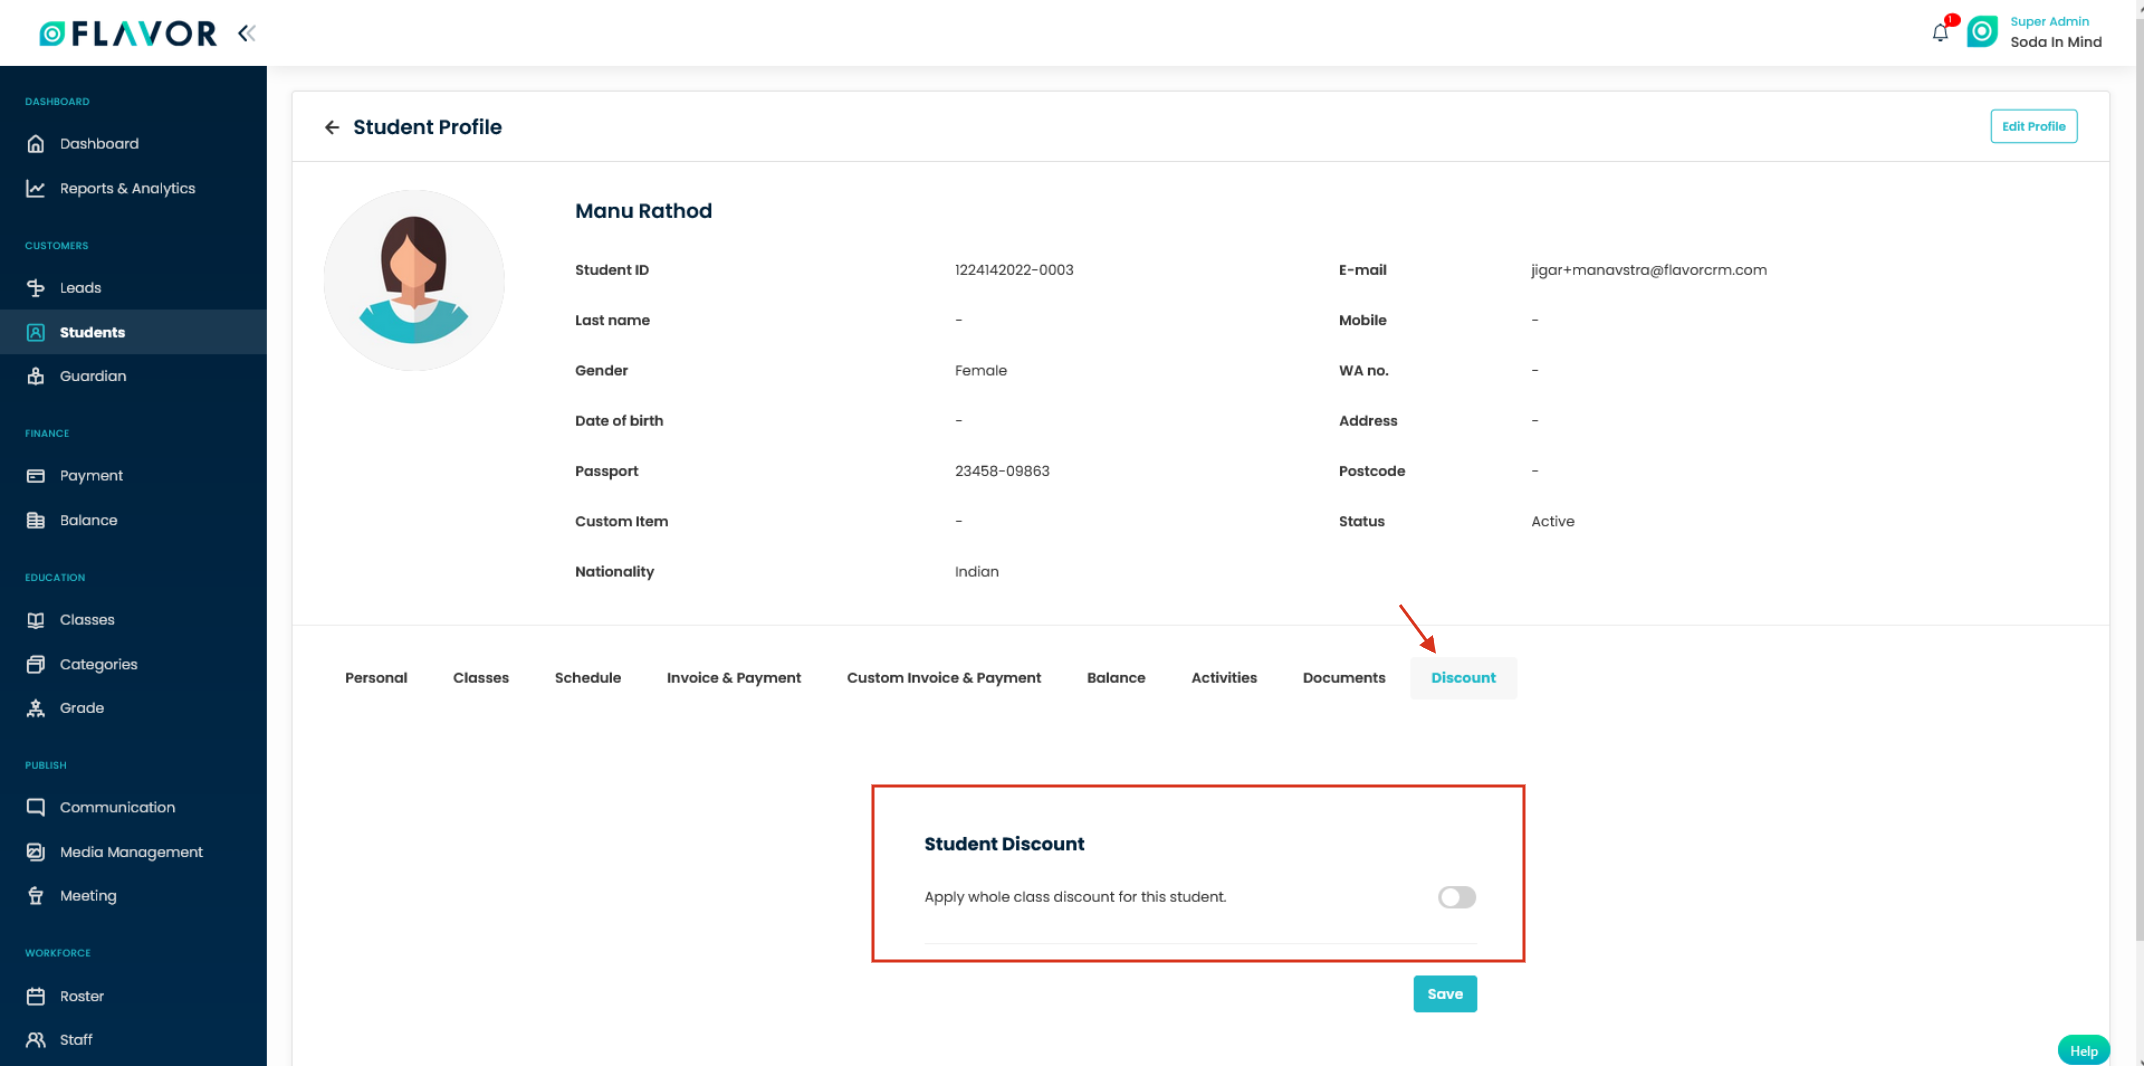
- It will navigate you to the Student view page.
- Scroll down and click on Discount Tab.
- This will open the Student discount section which can be enabled by switching the toggle button on.
Discount Tab Components
Step 3
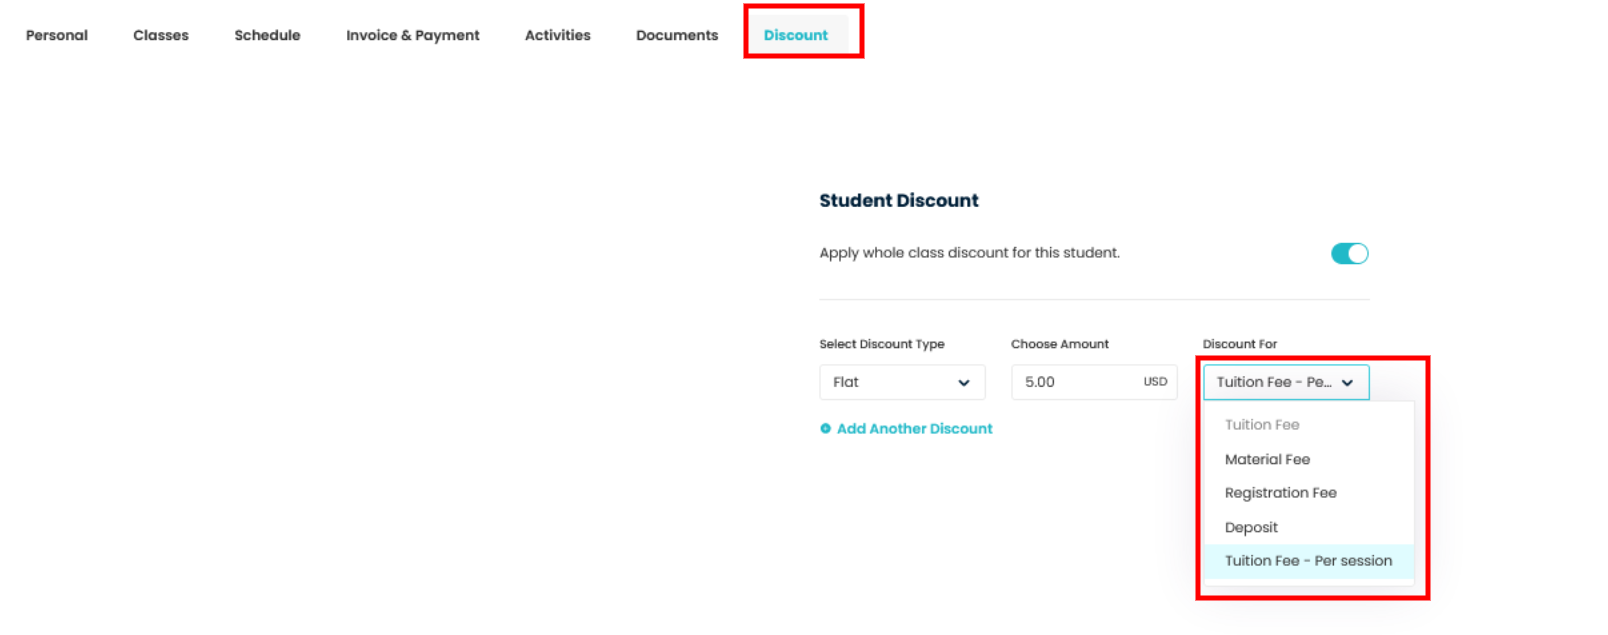
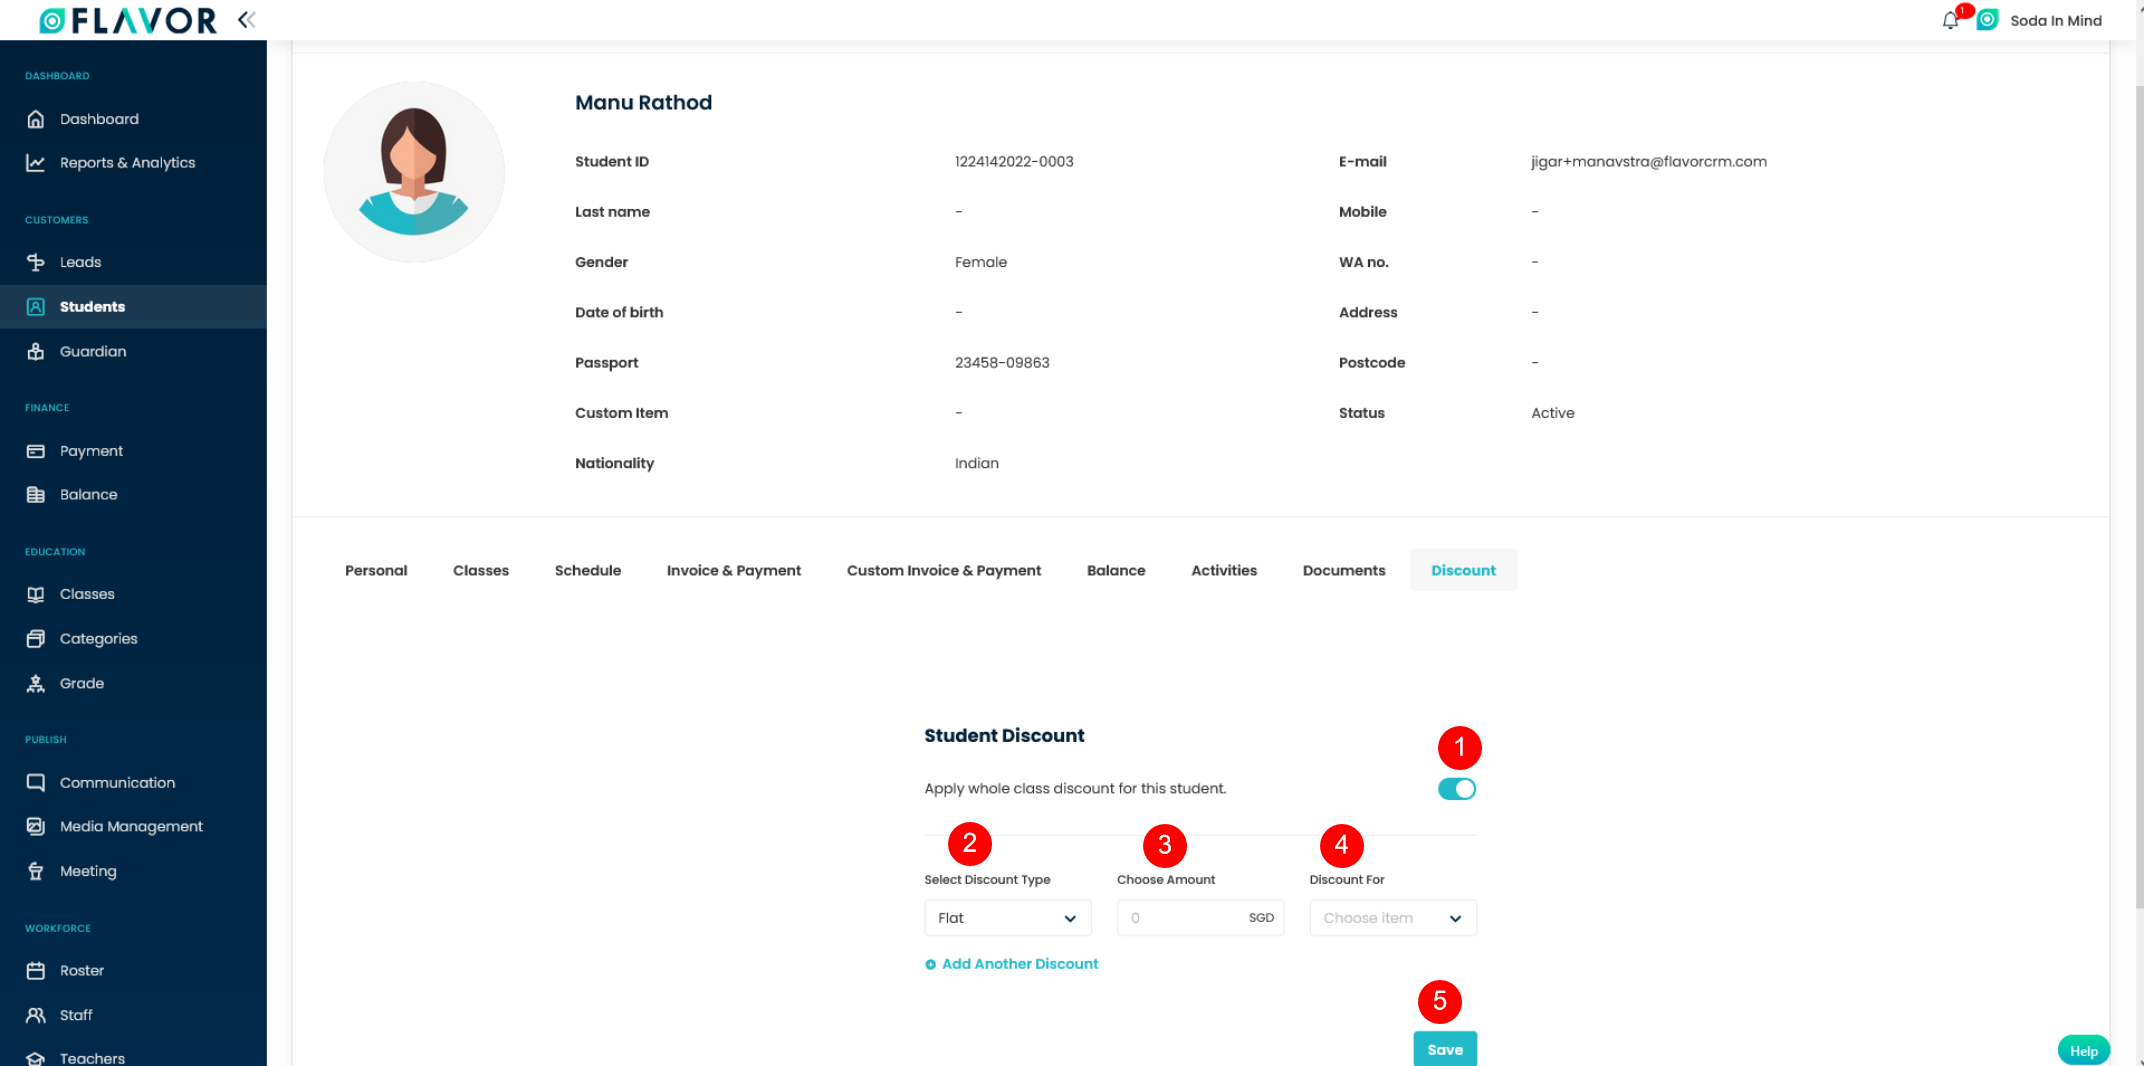
- Once Apply whole class discount for this student switch is enabled, the Student Discount section is activated to add various discounts to get automatically added to the student when invoice is generated.
- Select the Discount Type: The dropdown lets you select whether the discount must be FLAT or PERCENTAGE.
- Choose Amount / Add Percent : Depending on what discount type you select this box will change.
- Discount For: The Dropdown lets you select on what Invoice Item the discount must be given. You can select Tuition Fee, Material Fee, Registration Fee or Deposit.
- Add Another Discount: Clicking on this will add a new row within which you can tag another discount to the student. Discount added is based on:-
- Material Fees :- Added discount will be reflected under Material fees.
- Registration Fees :- Added discount will be reflected under Registration fees.
- Deposit :- Added discount will be reflected under Deposits.
- Tuition Fees – Per Session :- Discount will be added on the Tuition fees per session class only.
6. Click on Save button.
Discount List
Step 4
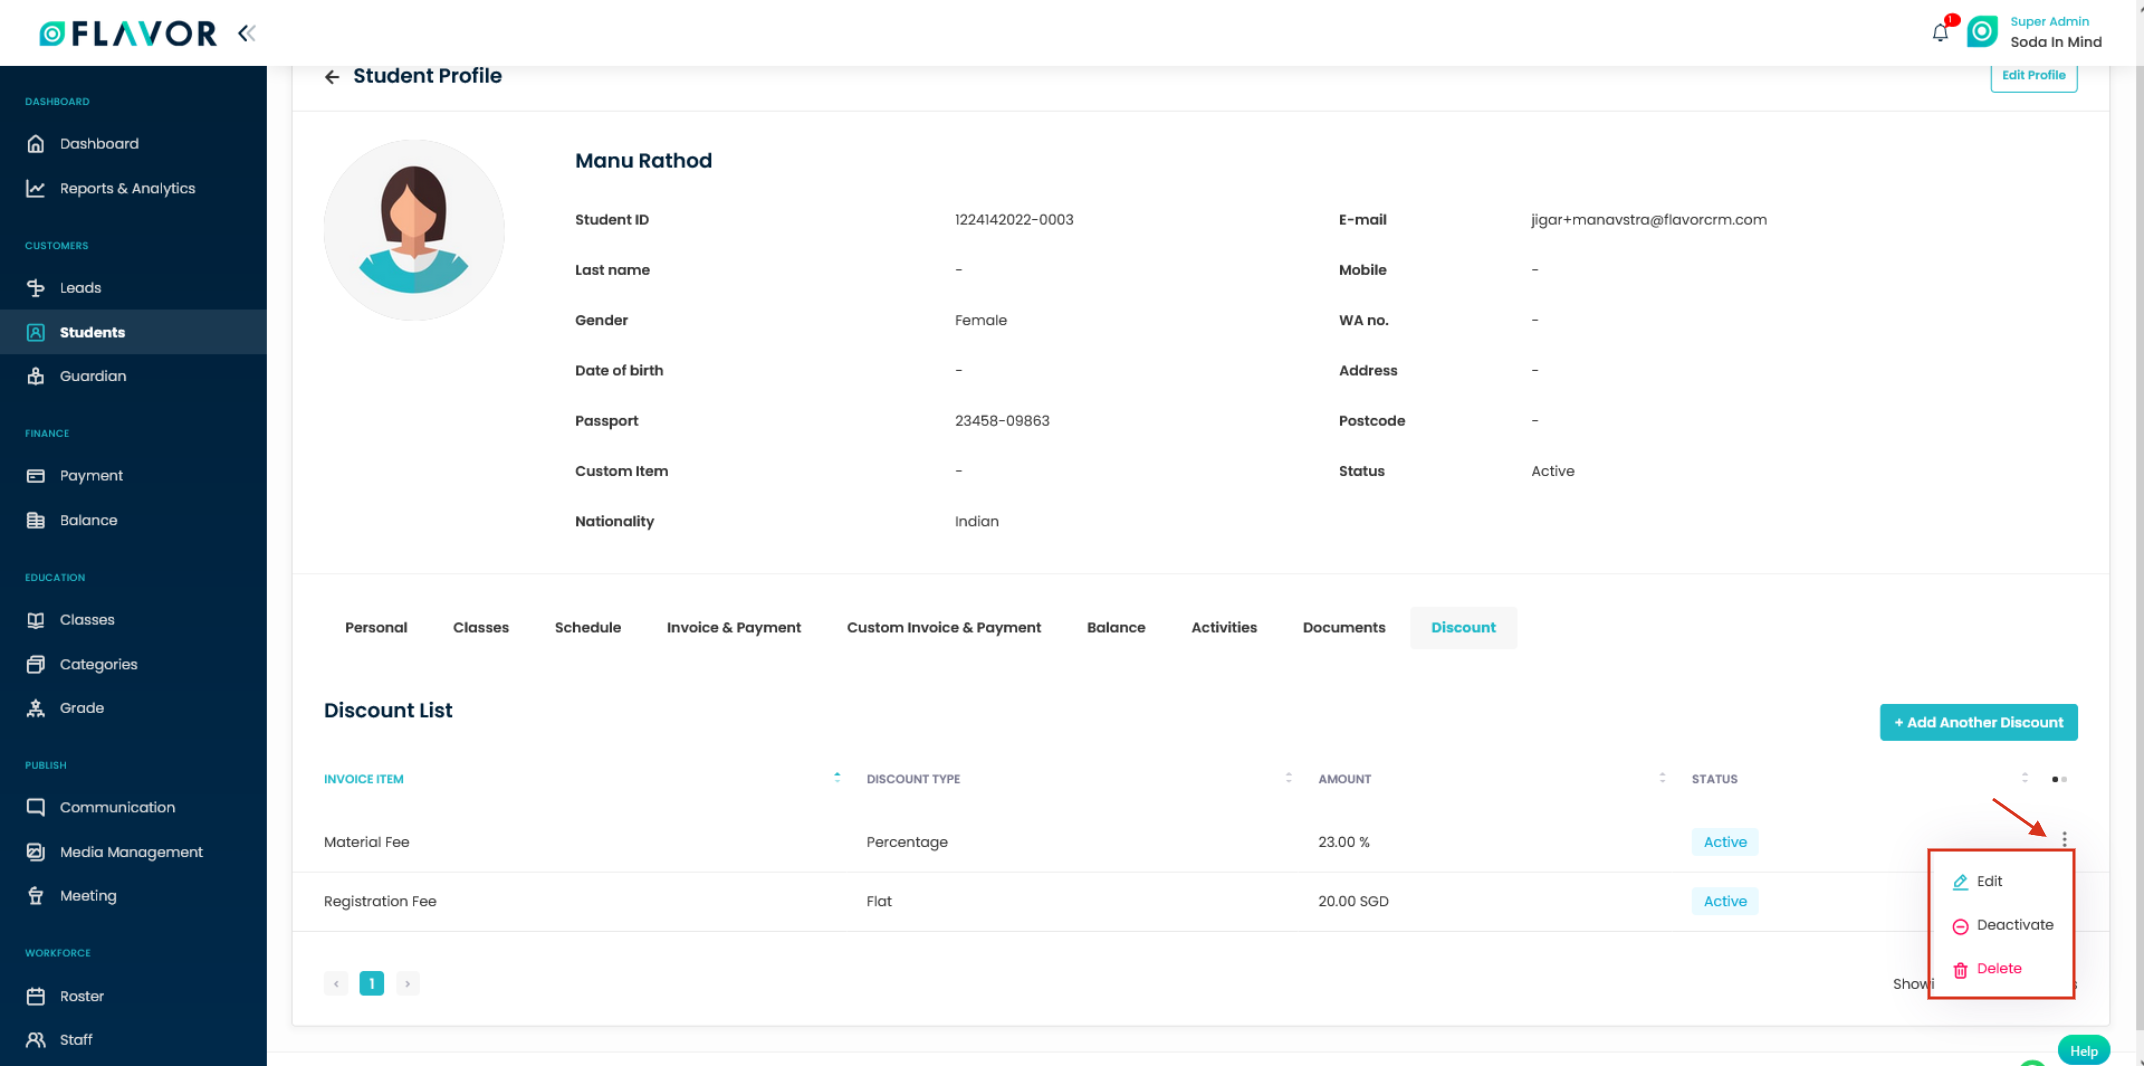
- Once the discounts are added, you can now see table showing your already created discount within discount tab.
- You can Edit, Deactivate or Delete by clicking on three dots against each discount in the table.
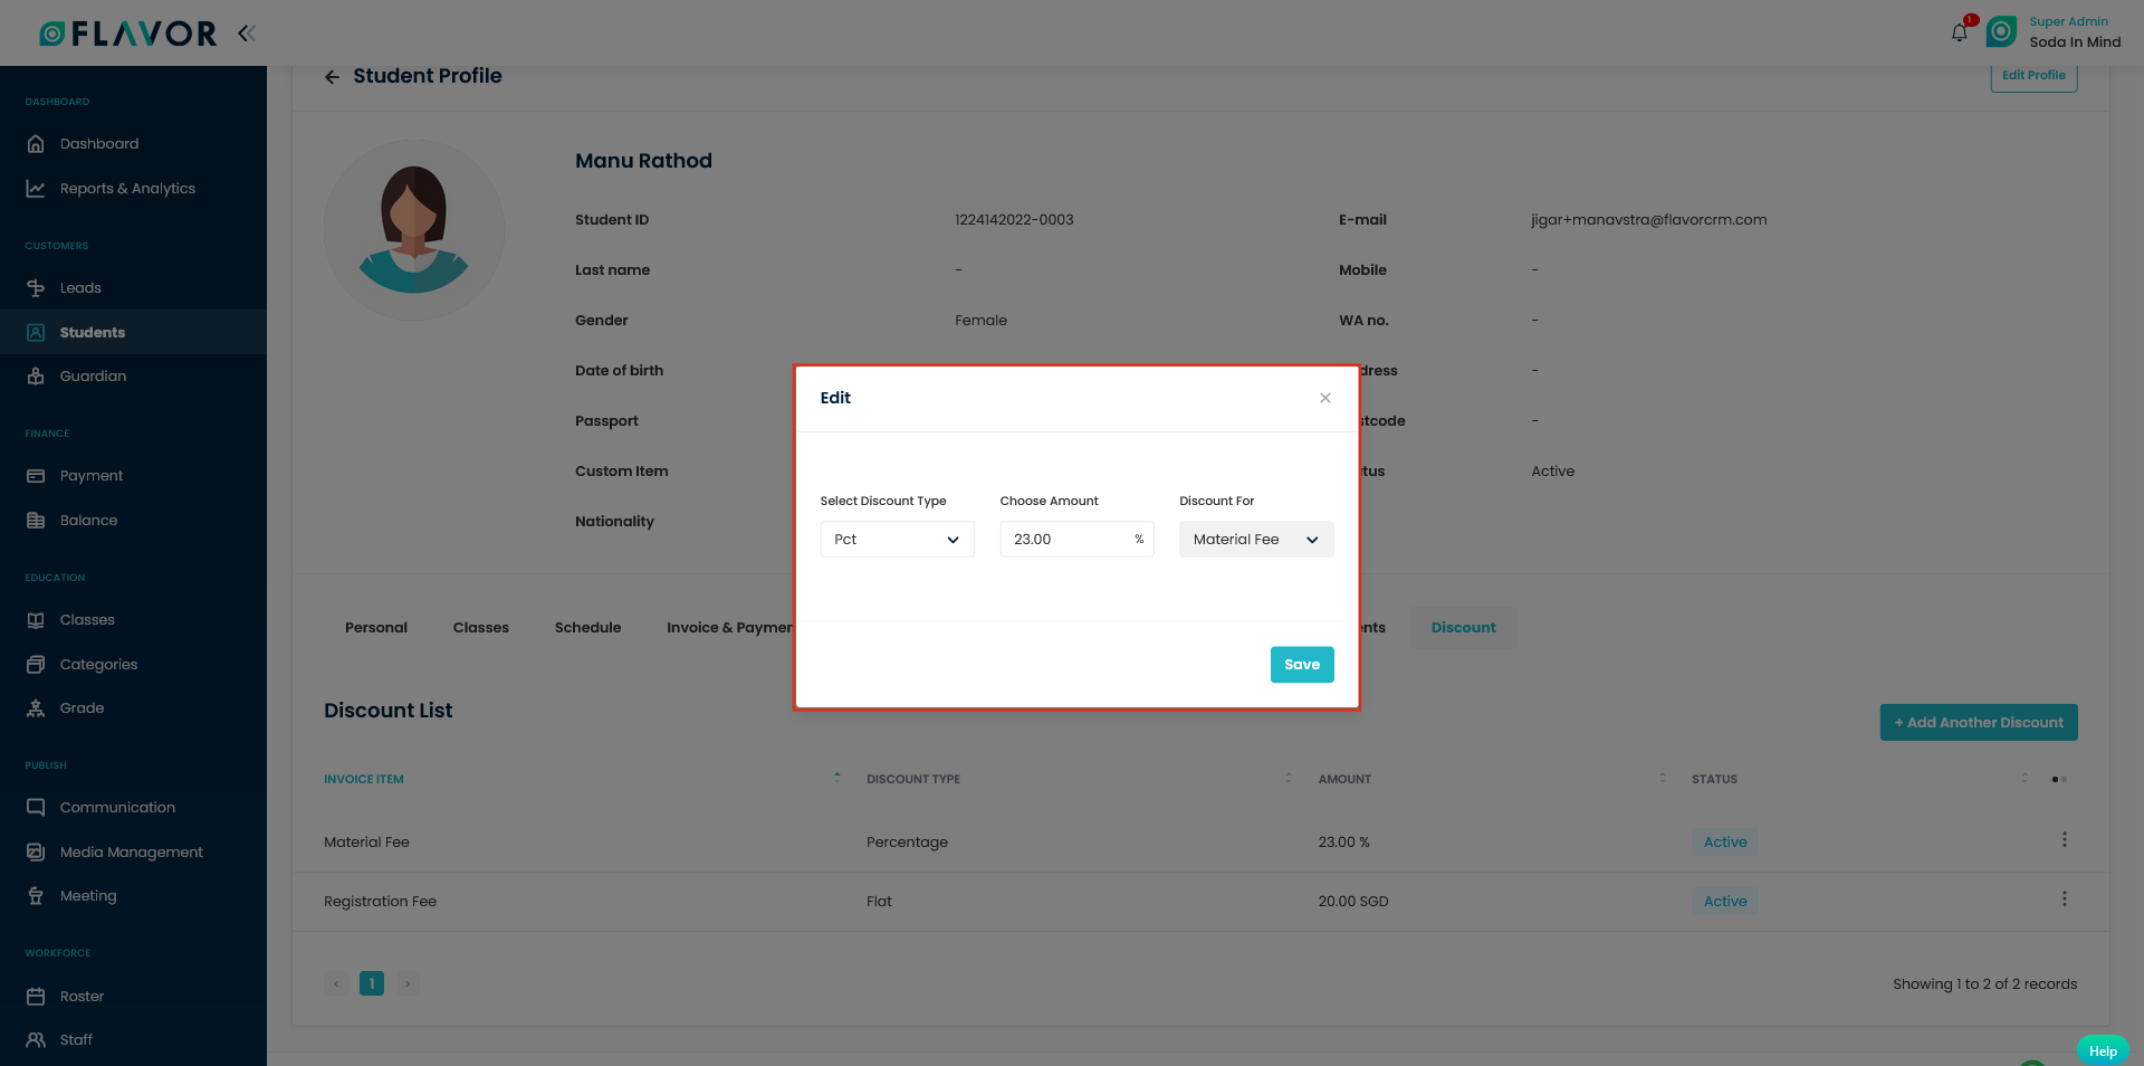
Step 5
- To edit the discount, click on the Edit option.
- A popup named Edit will appear on the screen.
- Set the parameters and click on Save button.
- If the student is no longer eligible for discounts, then you can deactivate discounts by clicking on Deactivate option.
- To remove the discount row entirely, click on the Delete option.
Step 6
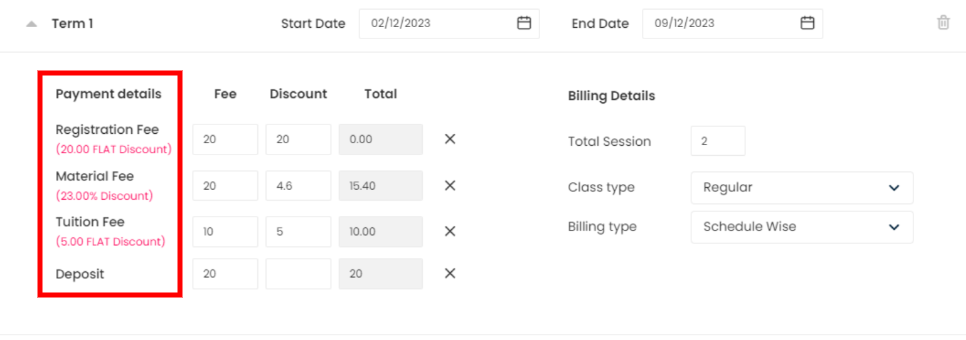
Reflection of Discount during enrollment in a class
- While enrolling for a class, the discount is reflected as shown in the screenshot.
- When the student discount is applied in percentage, then in the discount box the equivalent amount will be auto-populated.
- If there is a change in the fee, then discount amount will be updated based on the student discount percentage.
Need more help? Ask us a question
Please let us know more of your details and our team will reach out to you very shortly.