
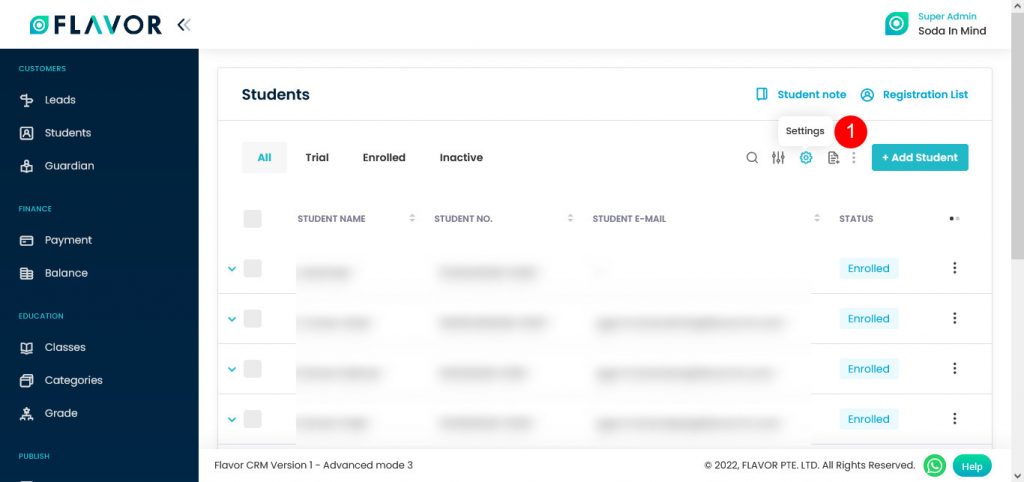
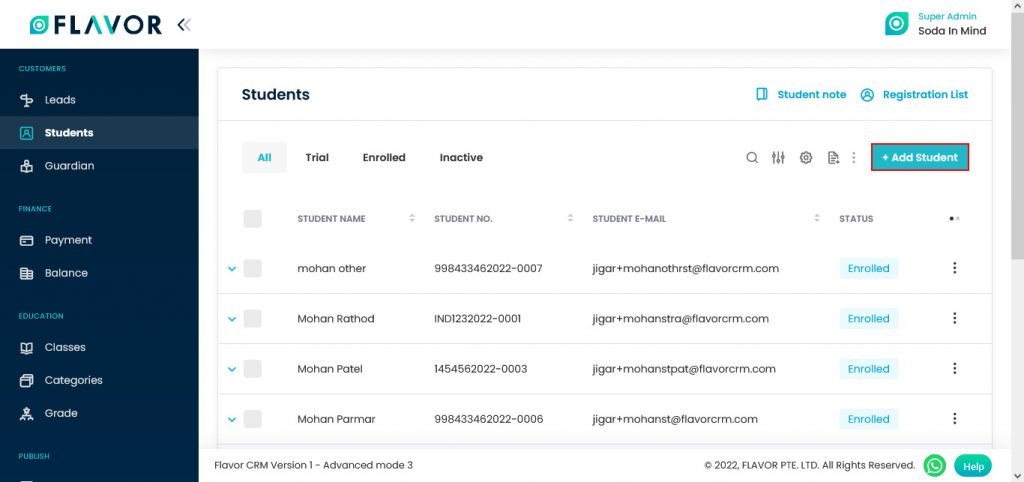
You can manage all your students from Student Module. You can navigate to the Students module by clicking on the Students from the left menu. You will get the details of all students who have enrolled for Flavor App.
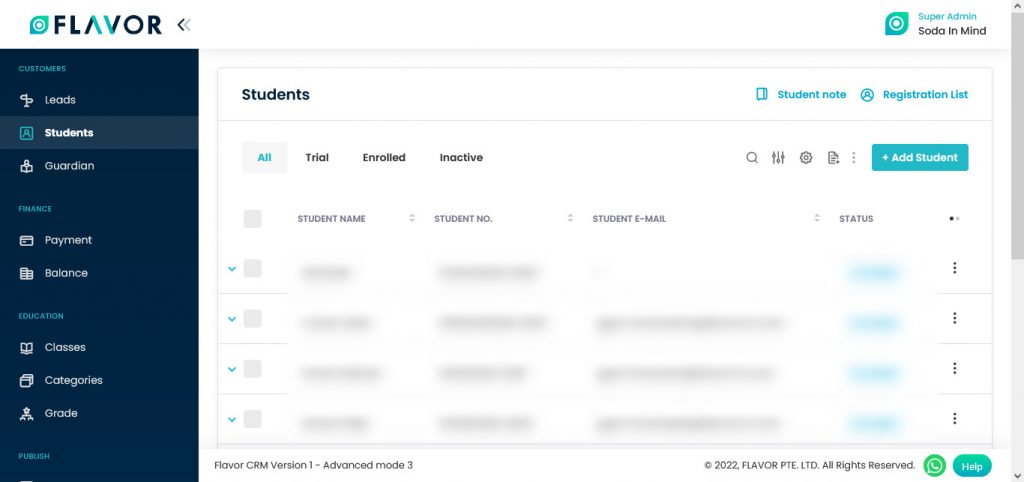
On the upper left corner of the Student’s Module you can see four tabs: All, Trial, Enrolled, Inactive.
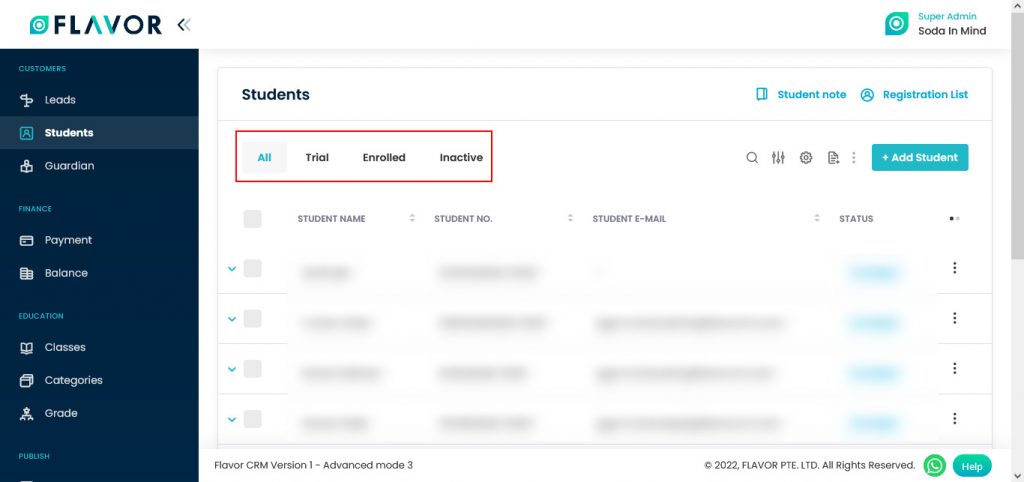
- All: Here, you will see the list of all the students, irrespective of their status which is Active, Inactive, Enrolled & Trial.

- Trial: Here, you will see the list of those students who have enrolled for trial classes.
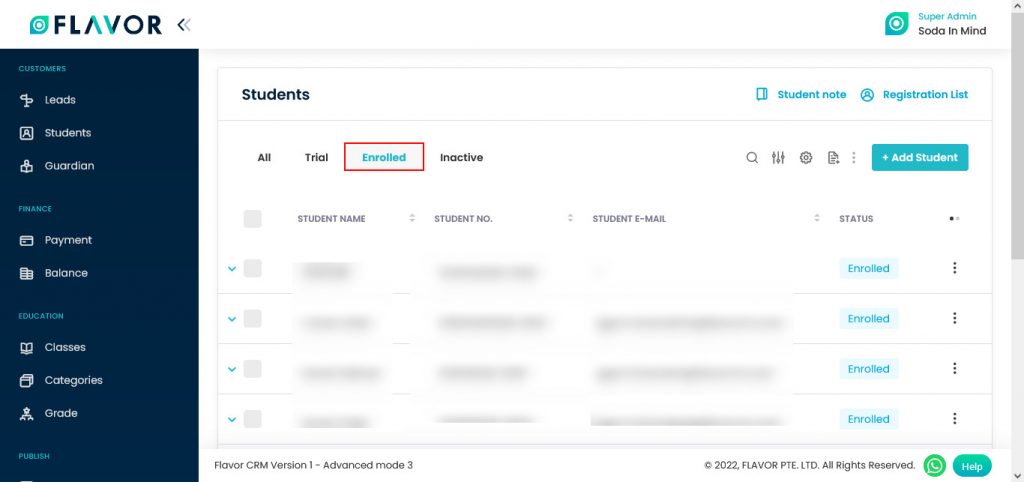
- Enrolled: Students, who have Enrolled for classes their data will be shown in the Enrolled Tab.
- Inactive: Students, whose classes have been finished will be seen in the Inactive Tab.
Students Options
Search
By clicking on the Search Icon, you can search the specific student’s record by entering Student Name, Student Email & Nationality in the search box. You can search the student by using the student’s translated name in Chinese.

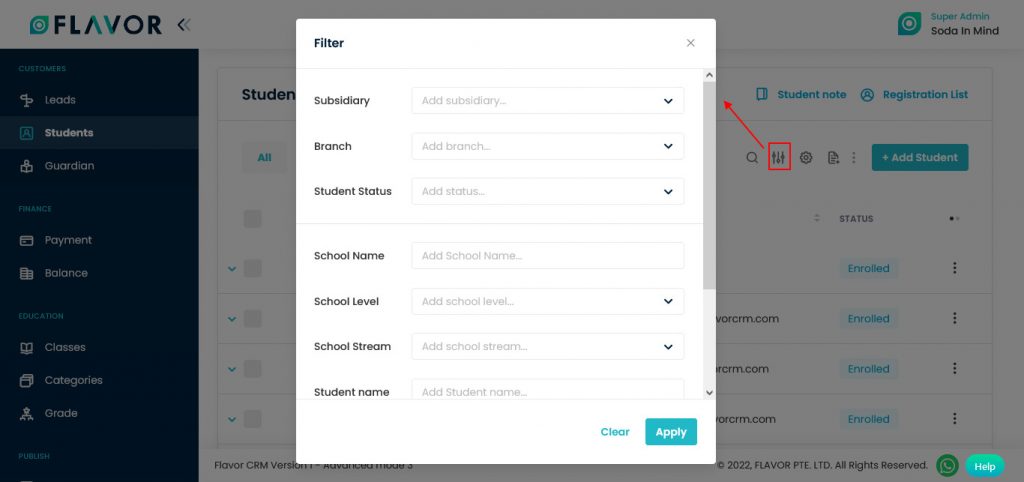
Filter
You can filter the student’s records based on specific parameters like subsidiary, Branch, Student status, etc. To open the filter popup, click on the Filter Icon. Select the data according to your need, then click on the Apply button to get the filtered records.
Settings
By clicking on the Settings icon, you will be redirected to Student’s Setting Page.
Setting page will be open after clicking on the Settings Option. Here, you will see General Settings, Section Settings, Field Settings & Search Settings options.
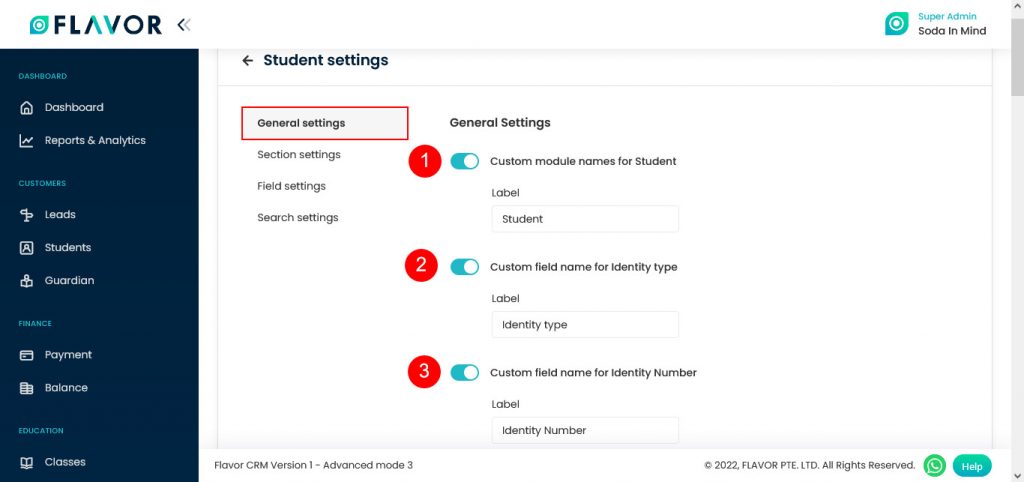
General Settings
Navigate to the General Settings. You can see the various option to customize.
- Custom Module Names for Students: By enabling the switch, you will see a Label Box. You can change the label from here, You can convert a student label to a client label from here.
- Custom Field Name for Identity Type: You can give a custom label to the Identity Type field from here. You can see the Identity Type field in Add Student form. Any label set here is reflected to this field’s label.
- Custom Field Name for Identity Number: This label for a Driving License, Passport, NRIC, FIN or Voter Id number.
- Custom Fields: You can add date, code and note as per your requirements. You can give custom labels to custom fields. As well as you can show this field to the student record list by enabling the switch in Listing.
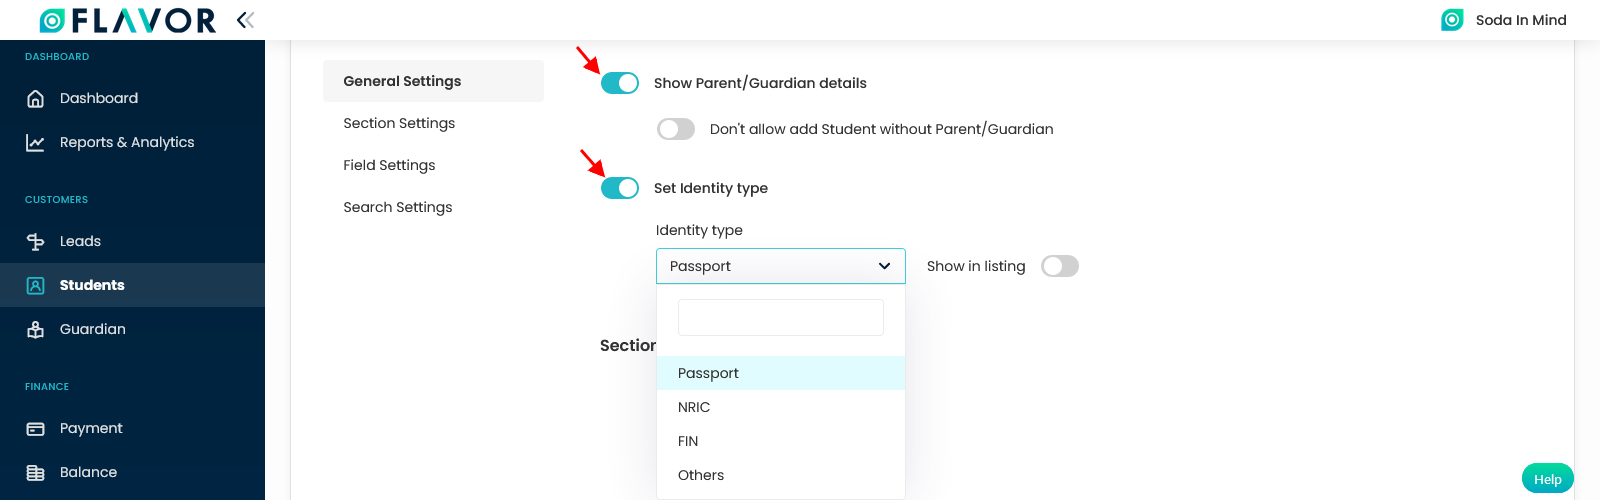
- Show Parent/Guardian details: If you enable the switch, then the Parent/Guardian details will be shown in the student details page.
- Don’t allow add Student without Parent/Guardian: If you enable this switch, then it is mandatory to add Parent/Guardian details while adding student.
- Set Identity Type: On the student view, we display a label Identity type. While Identity type setting is not enabled then on student view Identity type label will be displayed like NRIC/Passport. If Identity type setting is enabled, then you have the options like Passport, NRIC, FIN, Others to choose. Based on the selection, Identity type label will be displayed on the student view.
- Show in listing: You can enable this switch, if you want to have Identity type in the listing.
Section Settings
There are two options in Section Settings: Personal Details & Academic Details
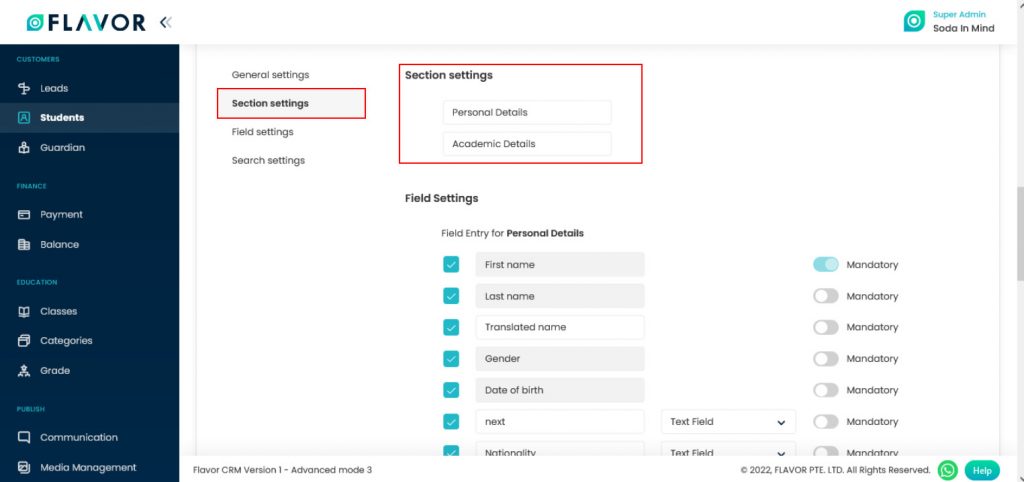
- Personal Details: You can enter the custom heading label for the Personal Details section on the add student form.
- Academic Details: You can enter the custom heading label for the Academic Details section on the add student form.
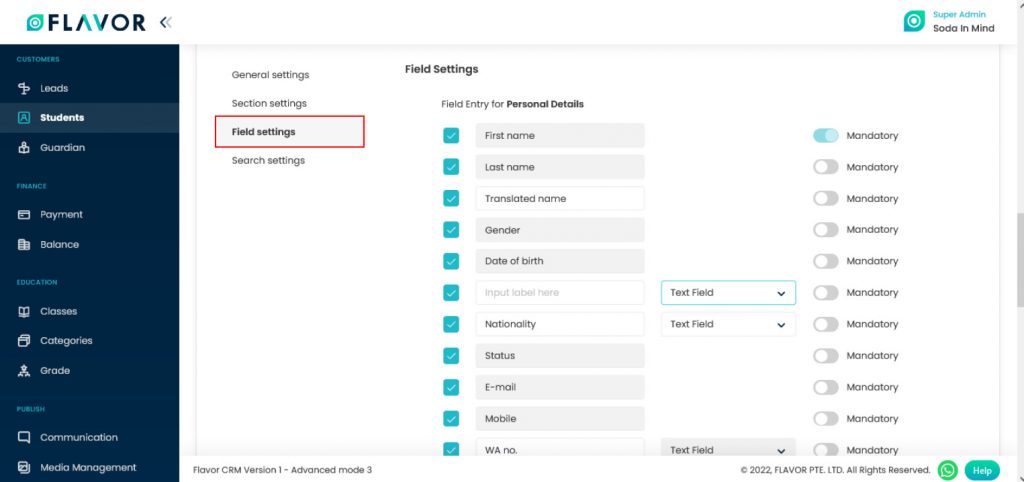
Field Settings
You can enable or disable Field for Personal Details & Academic Details for the “Add Student Form” You can also change the label of the field as well as make the field mandatory or optional. You can also add a custom field for this section. There are checkboxes before each field. You can mark and unmark the fields according to your need.
- Field Entry for Personal Details: First field in Personal Details “First Name”, you can’t uncheck this because it is mandatory & you cant change the labels of First Name, Last name, Date of Birth, Gender, Email, Mobile, Status.
- Field Entry for Academic Details: Subsidiary and Branch fields are mandatory, you can’t uncheck them & you can’t change the labels of these fields. You can make the rest of the fields mandatory by enabling the switch. You can also add multiple custom fields if needed.
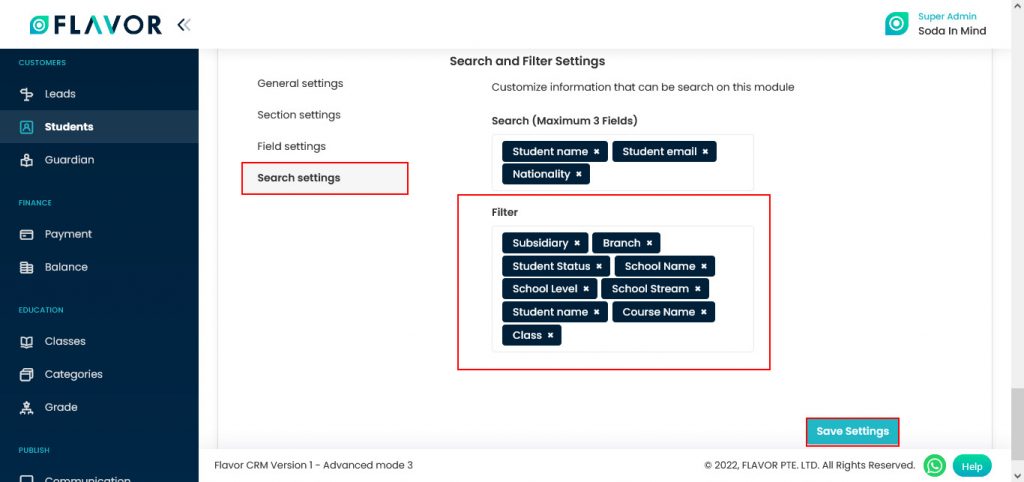
Search Settings
Search
A search bar allows you to search students quickly by user-selected fields. For search, you can insert only 5 Fields & you can change your preferences according to your need. If you want to search students by their parent name you have to add this option.
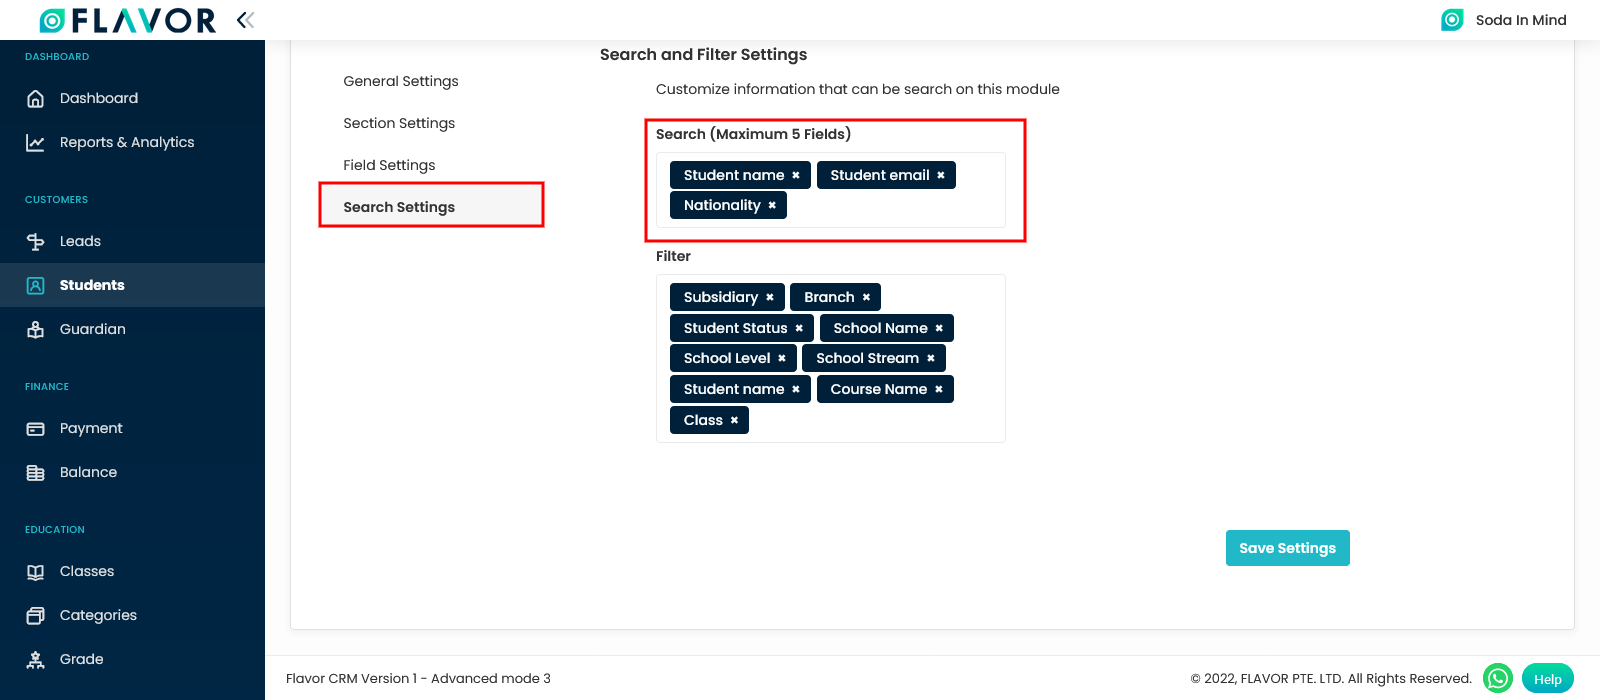
Filter
You can filter the students’ records based on specific parameters. If you want a user to filter student records by their school name you can add the school name filter field from the popup. You can remove any filter field by clicking on “x” icon beside the field name.
Import/Export
To Import & Export Student data, you have to click on the Import/Export Icon. By clicking on the icon, you will see the Export Data & Import Data options.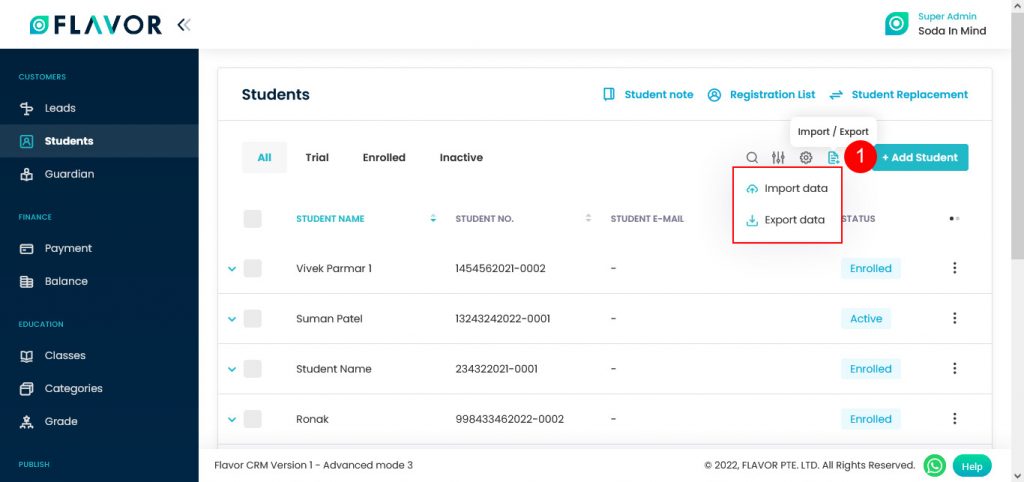
Import Data
To import the data click on the Import Data option, after clicking a popup named “Import Data” will appear on your screen.
- Download the Sample File: If you want to download the sample file, click on the Download button. After clicking on the Download button a File Download window will be open on your screen, choose the Save File and then click on the OK button.
- This file contains the format based on which you can create .CSV file to import student data.
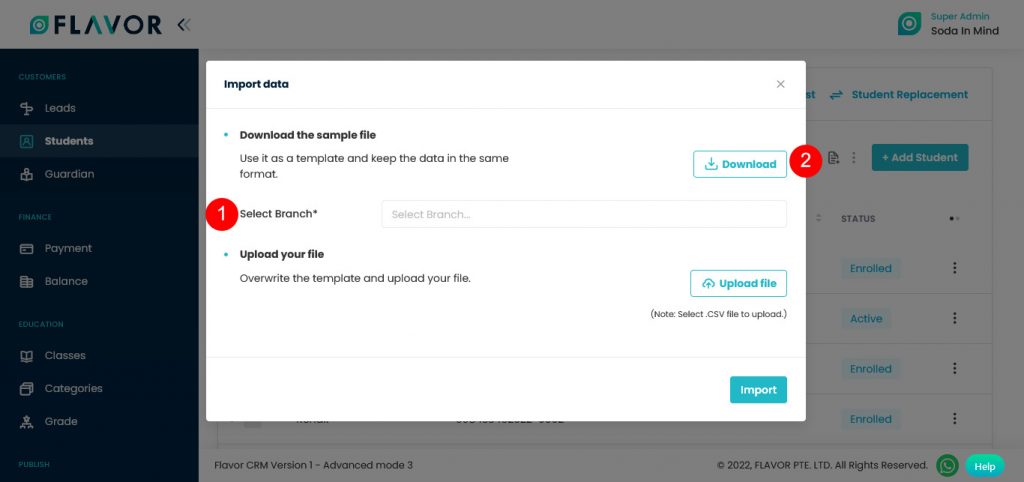
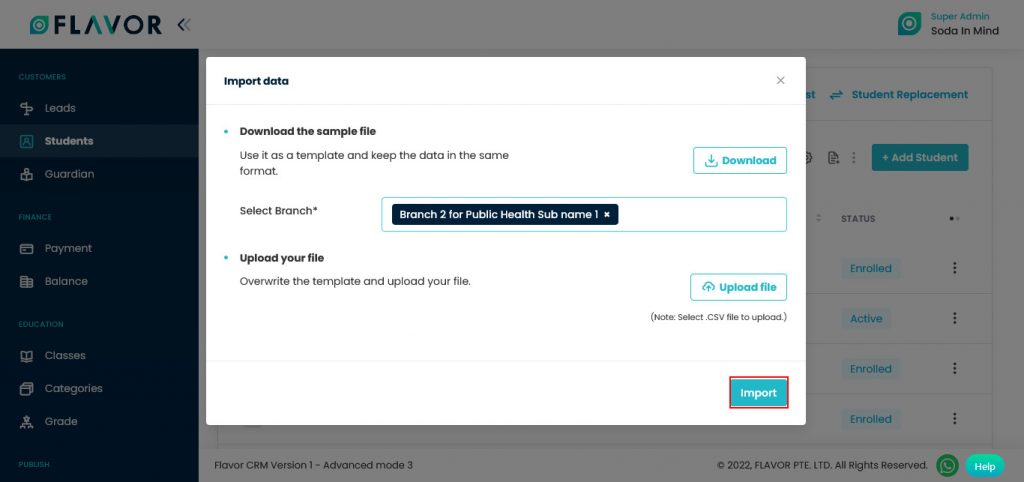
- Upload Your File: Select the Branch from the dropdown, In which branch do you want to upload a file. Then click on Upload File button. A File Selector Window will be open, choose a .CSV file to upload.
Export Data
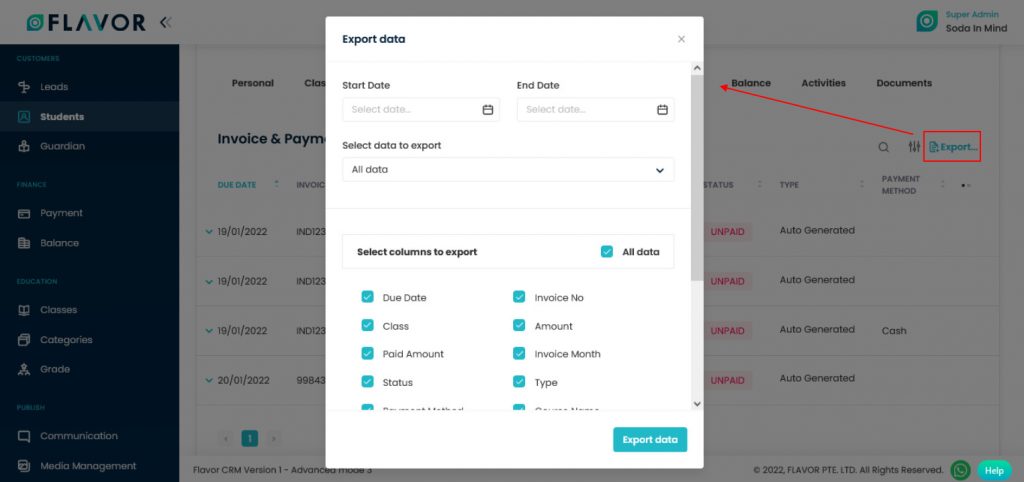
To export the Students Data you need to click on the Export icon. After clicking on the Export Data button, a pop-up named “Export Data” will appear.
- Start Date and End Date: Select the time period in the start date and end date column for which time period’s data you need.
- Select Data to Export: Here, you can export the data of all rows or 15 rows by simply clicking on the dropdown.
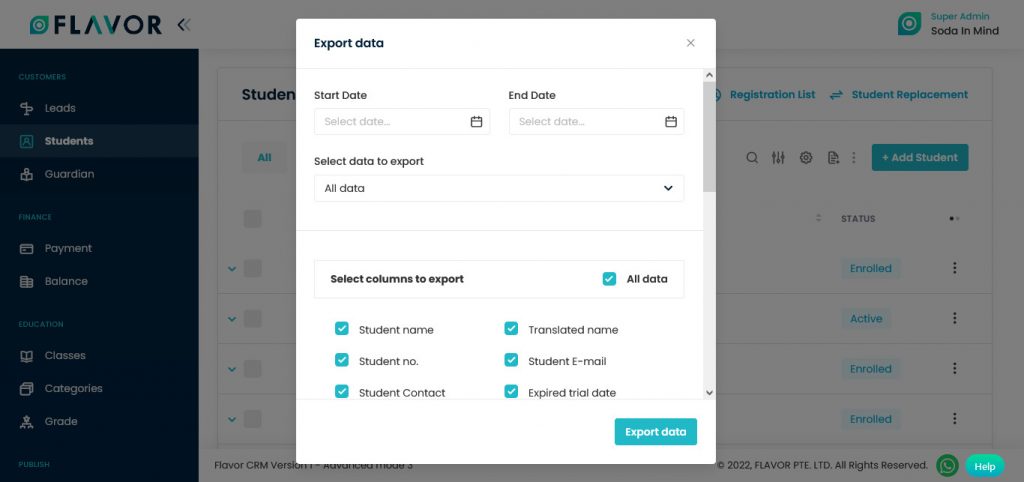
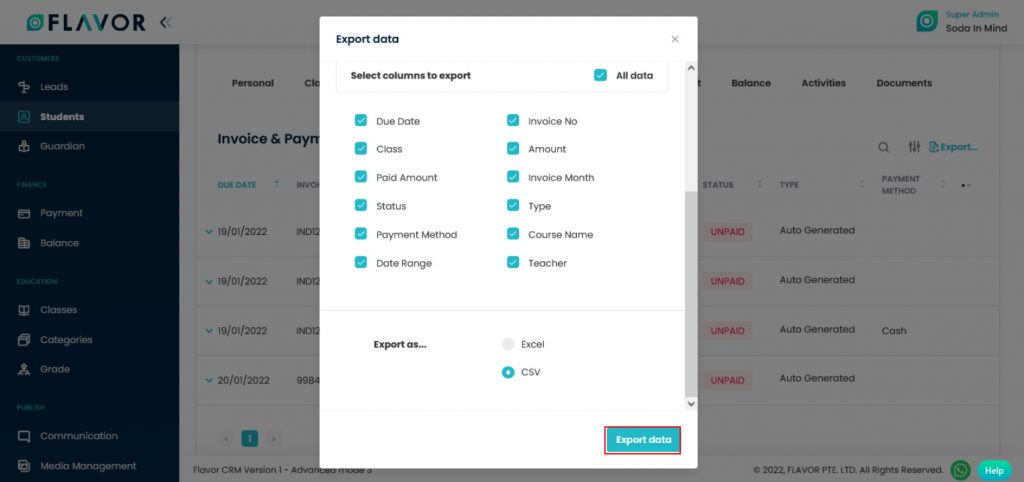
- Select Column to Export: Select columns which you need to export. Like if you want all the details of students, then simply click on “ALL DATA” and you will get all the records of students in your exported file.

- Export as: Then select a format in which you want to download your data i.e (EXCEL or CSV).
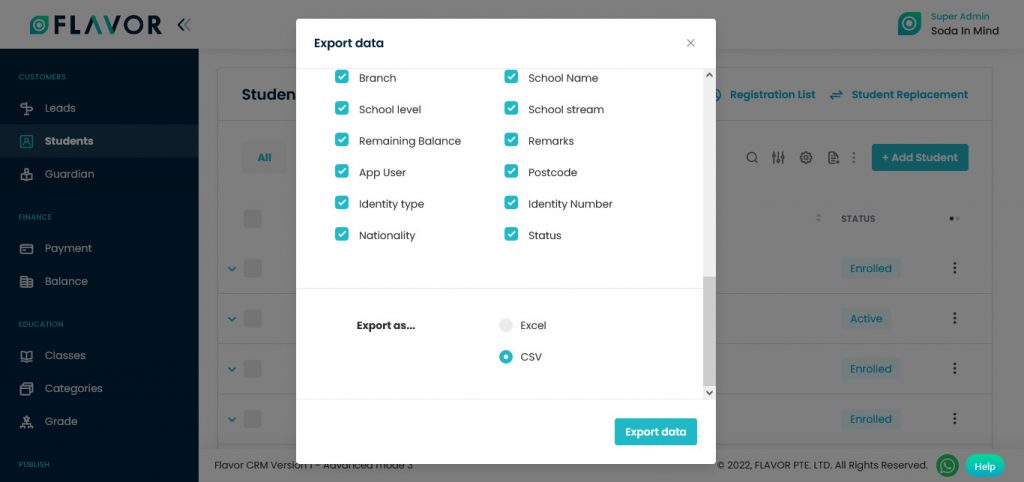
- After selecting the relevant options, click on the Export data button to export the registered student’s Records in the selected file (Excel/CSV).
Add Student
To add a new student, click on Add Student button. You will be redirected to the Add Student Form.
You will see the 3 steps of the registration form.
- Fill Student info: You have to fill the student’s information.
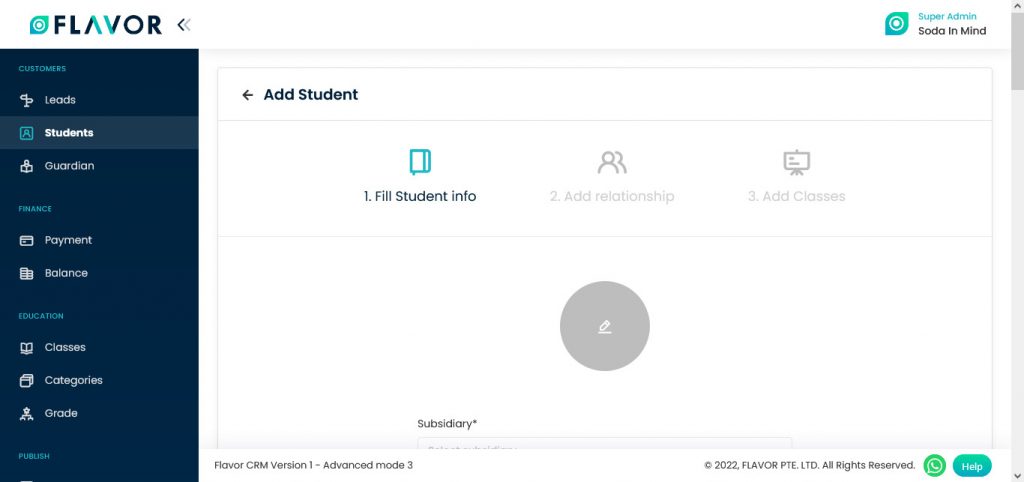
- Add Relationship: Add to the parents of the student. The relation of the student with the parent has to be mentioned.

- Add Classes: Assigns the class to the new student.
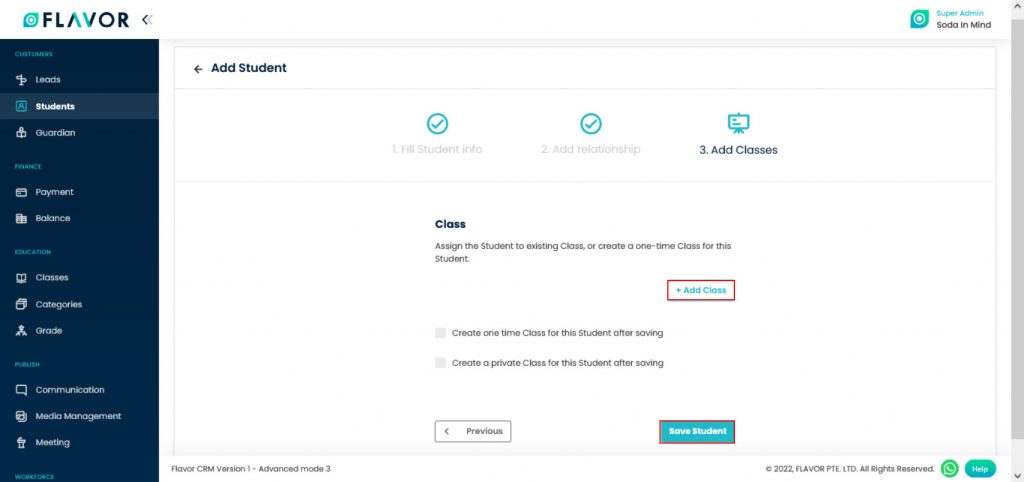
After completing all the steps, click on the Save Student button. A new student will be added.
Students Records
At the starting of all records, there is an Expand Button (Down Arrow), after clicking on this button a record will be expanded. From here will get the entire information of any student. You can collapse the record by clicking on the same button.
Column Sorting
Students records will be shown in Tabular Format. You can sort the data by clicking on column sorting arrows in Table Header.
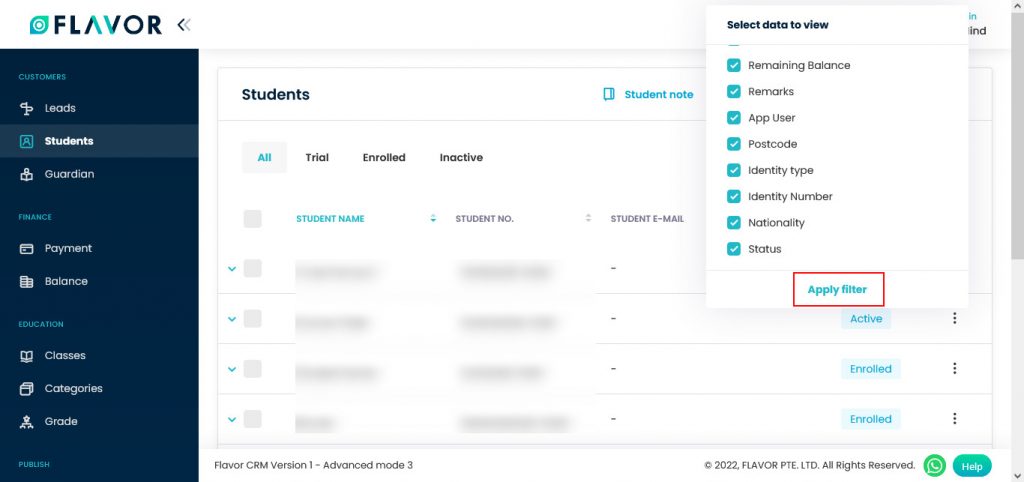
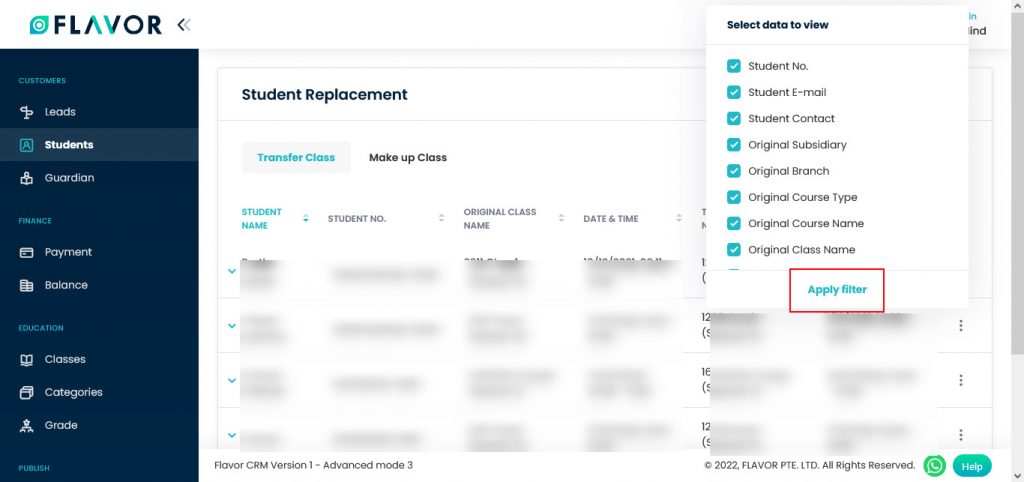
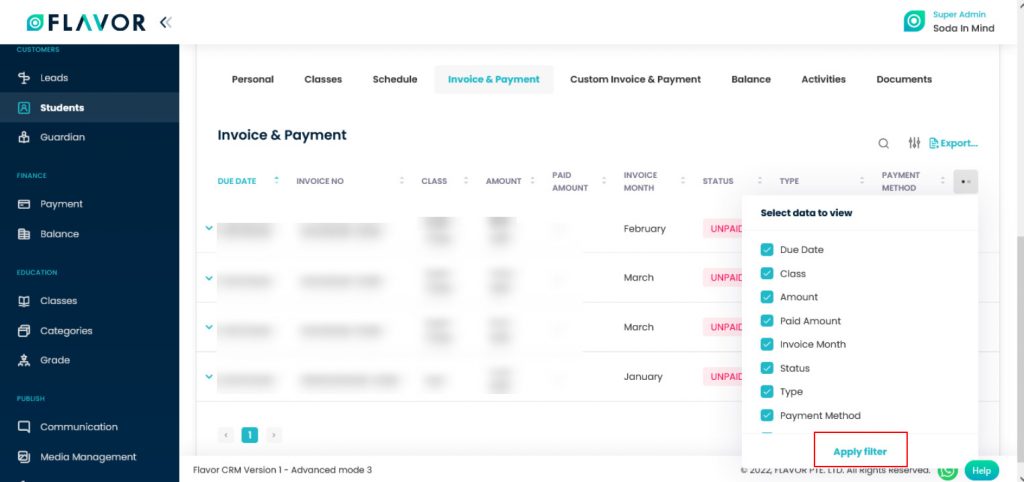
Column Visibility
You can sort columns by clicking on the Ellipse Icons, you will get the pop-up form name Select Data to View. Mark the columns you want to see and unmark the ones you don’t want to see on screen. After this procedure click on the Apply Filter button.
At the starting of all records, there is an Expand Button (Down Arrow), after clicking on this button a record will be expanded. From here will get the entire information of any student. You can collapse the record by clicking on the same button.
Students Record Options
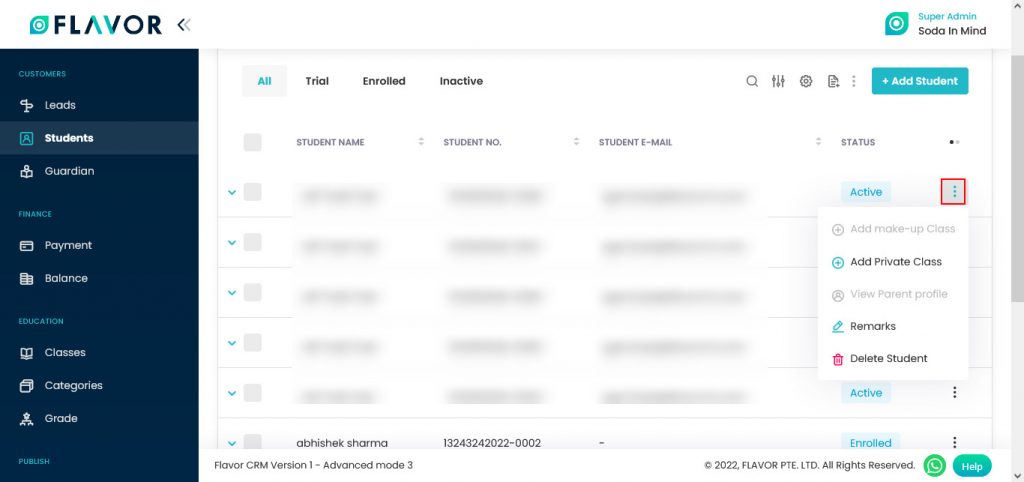
Action Buttons
Click on Action Button (Vertical Ellipse), a popup box will appear on your screen with Add Make-up Class, Add Private Class, View Parent Profile, Remarks & Delete Options.
Add Private Class
Click on Add Private Class, you will be redirected to the “Create Class Form”. Here, you can see 3 steps to fill the form.
- Fill Class Info

- Set Schedule
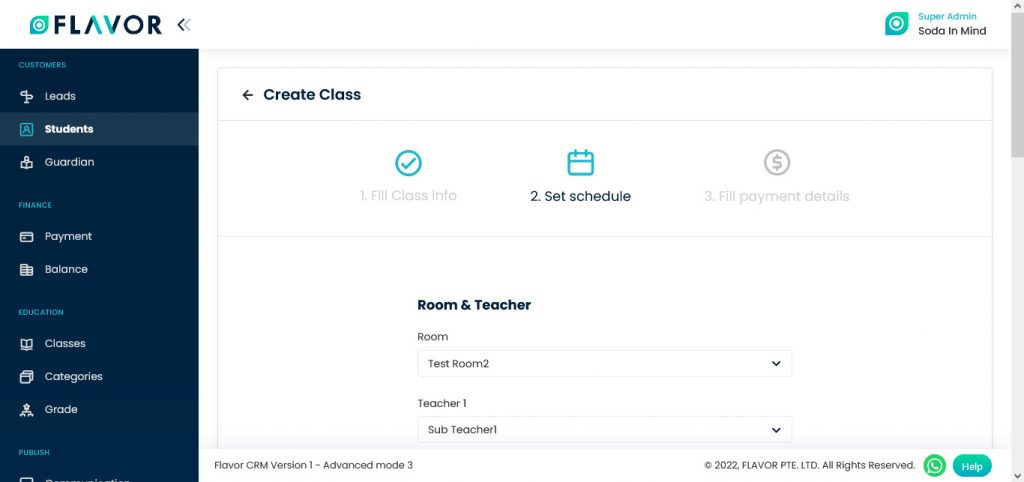
- Fill Payment Details.

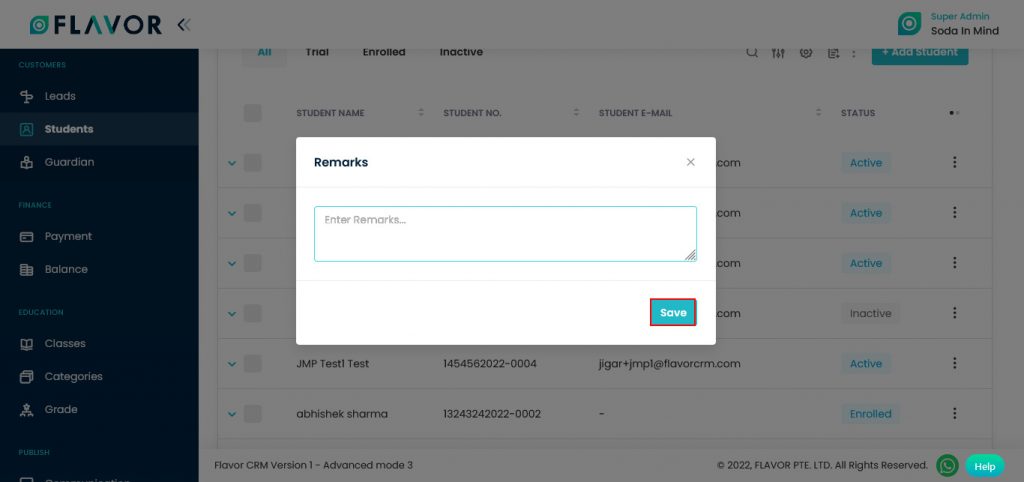
Remarks
Click on the Remarks, a popup box appear on your screen.
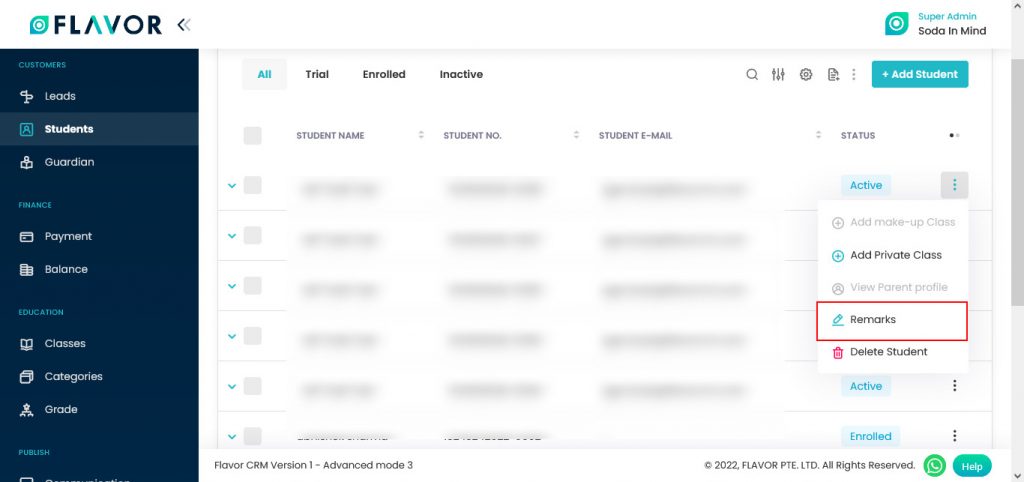
Here, you can add small information. After adding information click on the Save button.
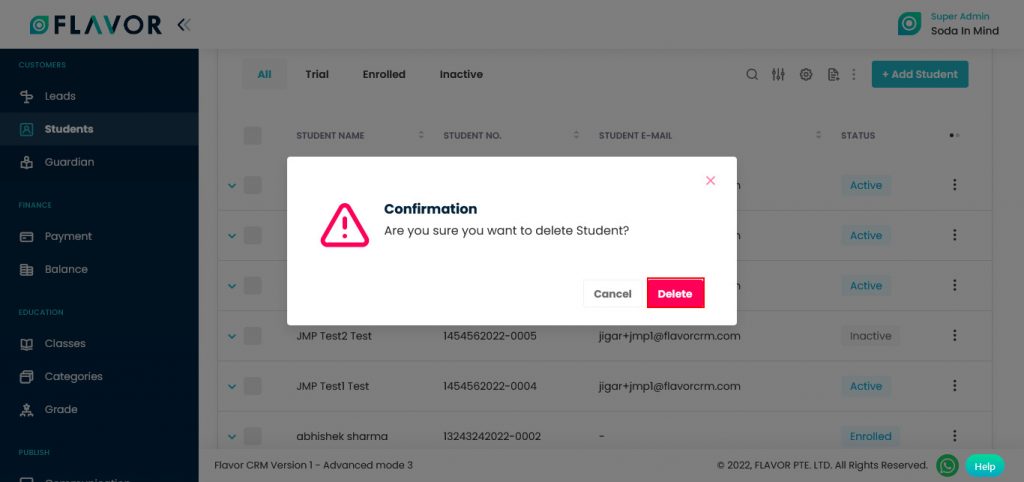
Delete Student
Click on the Delete Student button.

A confirmation box will appear on your screen. Click on the Delete button to delete the student.
Extra Actions
When you hover on the record you can see the Email, SMS, Registration link icons, we have students’ email id and contact no. to inform them about their classes and payment.
SMS
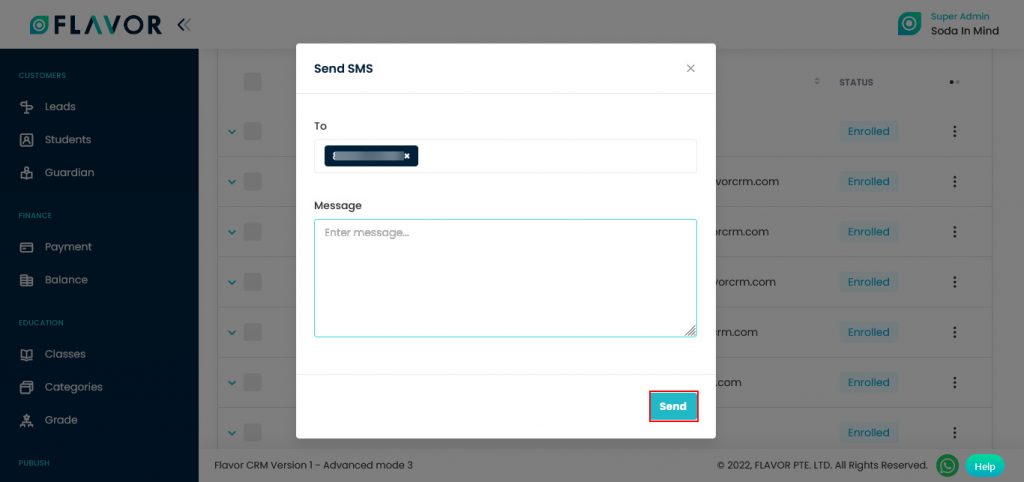
When you hover your cursor on any student’s record, you will see an SMS Icon, click on that icon to send a message to the registered student. After clicking on SMS Icon a popup form will appear on your screen named Send SMS will be open.
- The registered contact number will be automatically shown in the To field.
- Write your desired message to the Message Box.
- Then click on the Send button to send the message.
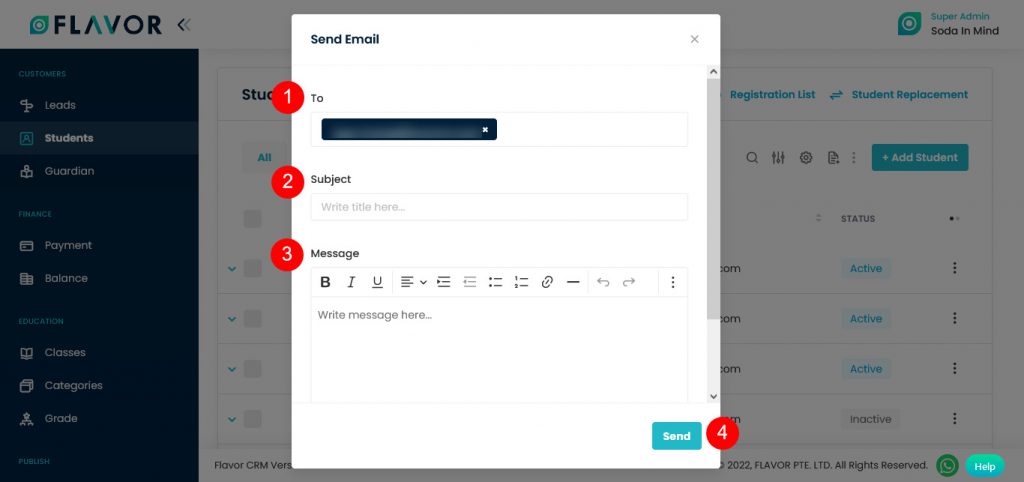
When you hover the cursor on any student’s name, you will see an Email Icon, click on that icon to send a message to the registered student. We have an email id that is associated with that account. After clicking on Email Icon a popup form named “Send Email” will appear on your screen.
Here, you can see 3 fields.
- Associated email id will automatically be shown in the To field, you can also add multiple emails to this field.
- Write subject in the Subject field.
- Write your message to the Message box.
- Then click on the Send button to send the message.
Registration Link
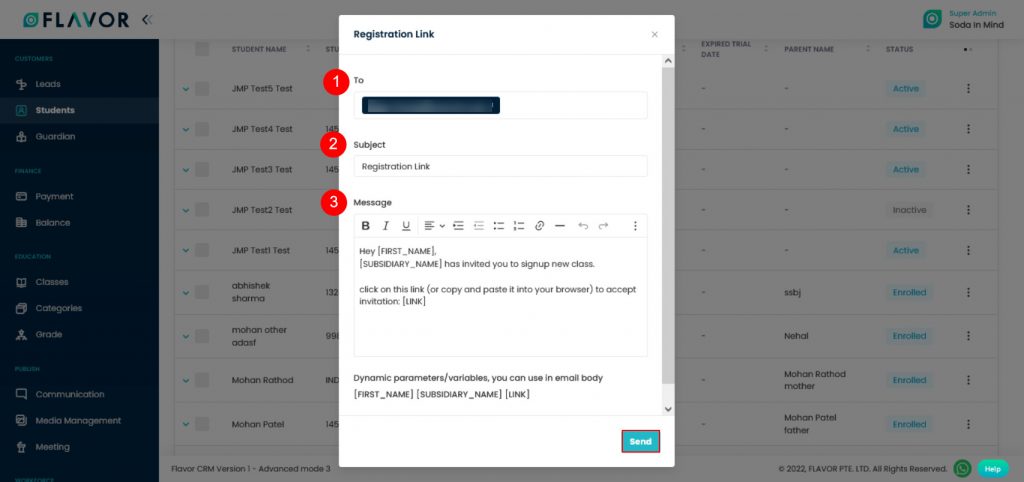
Navigate to the Registration Link, it is a private registration link, This link is sent to the students who want to register themselves for the class. Like, if a student wants to schedule their classes by themselves, this link will be sent to the respective student.
Click on the Registration Link icon. A popup form named “Registration Link” will be open.
- Associated email id will automatically be shown in the “To” field.
- Subject “Registration Link” will be added to the Subject field.
- A message with the First Name of the student and invitation link will be seen in the Message box.
- Then click on the Send button to send the message.
Registration List
After clicking on the Registration List link you will be redirected to the Registration List’s page. Here, you’ll see the list of Registered students who add themselves to the class.
Registration List Options
Upper left corner of the Registration List, you will see the 3 tabs of All, Approved & Rejected. The right upper corner of this section shows you the Search, Filter & Export options.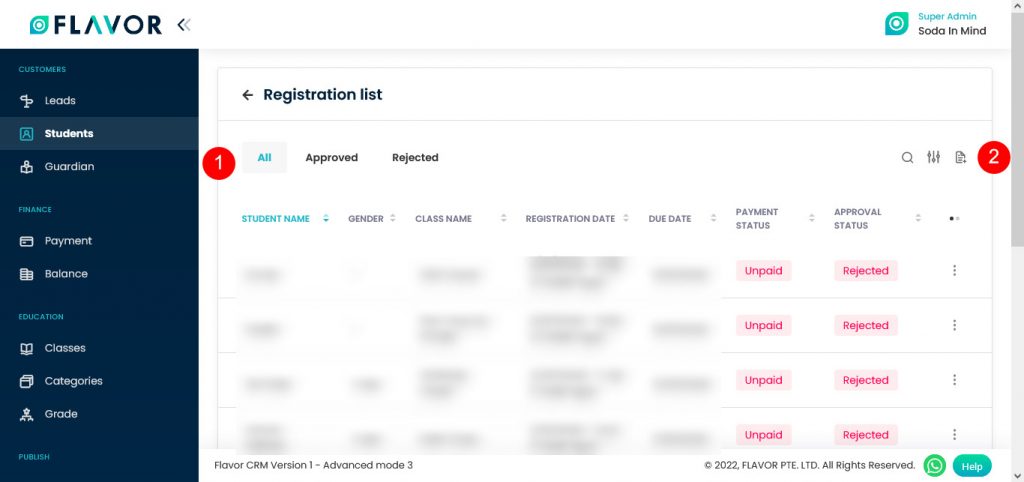
- All Tab: You will be redirected here by clicking on the All Tab, here you will see the list of all students with Paid, Unpaid, Pending, Rejected & Approved Status.

- Approved Tab: After clicking on Approved Tab, you will see the list of Approved Students.

- Rejected Tab: After clicking on Rejected Tab, you will see the list of Rejected Students.

Search
By clicking on the Search Icon, you can search the particular Student by entering Student Name, Gender & Class Name in the search box.
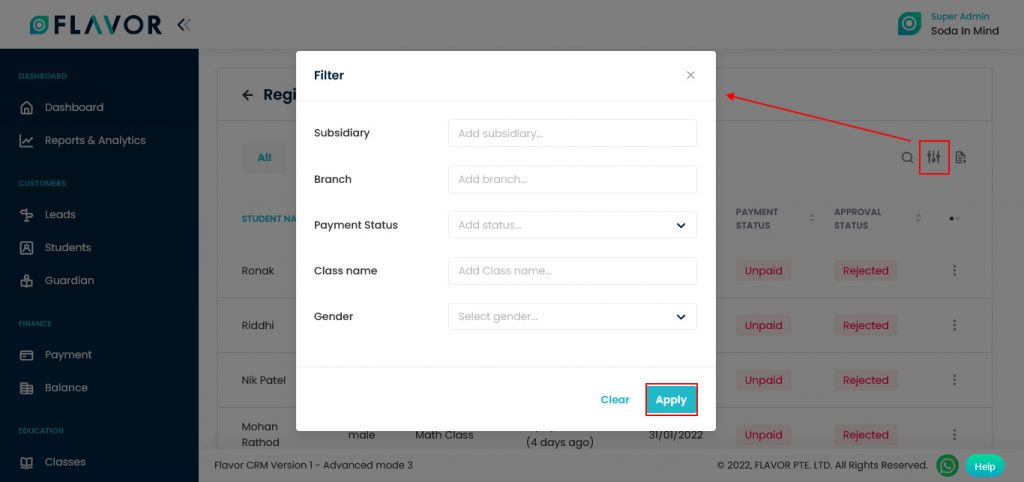
Filter
You can filter the students’ records based on specific parameters. Click on Filter Icon, after clicking, a popup form will appear on your screen. Select the data according to your need then click on Apply button to save.
Export
To export the Registered Student’s data, you need to click on the Export icon.
After clicking on the Export icon, a pop-up form will appear on your screen. From here you can download the records.
- Start Date and End Date: Select the time period in the start date and end date column for which time period’s data you need.
- Select Data to Export: Here, you can export the data of all rows or 15 rows by simply clicking on the dropdown.
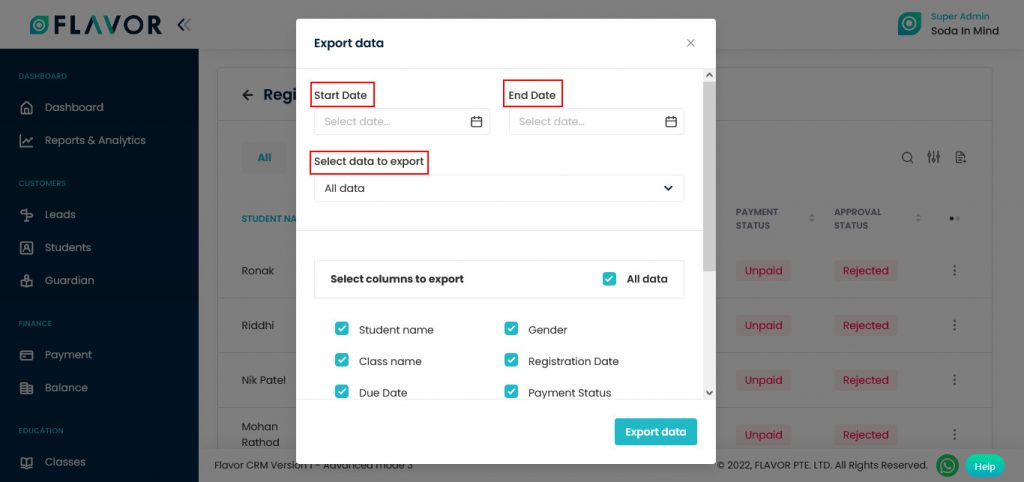
- Select Column to Export: Select columns which you need your data to export. Like if you want all the details of students, then simply click on “ALL DATA” and you will get all desired row’s information of students in your exported file.
- Export as: Then select a format in which you want to export your data i.e (EXCEL or CSV).
After selecting the relevant records/data, click on the Export data button to export the Registered Students Records in the selected file (Excel/CSV).
Column Sorting
You can sort columns by clicking on the Ellipse Icons, you will get the pop-up form name Select Data to View. Mark the columns you want to see and unmark the ones you don’t want to see on screen. After this procedure click on the Apply Filter button.

Student Note
After clicking on the Student Note link, you will be redirected to the Student’s Note page. Here, you can see the Add Note button, Search & Filter Option.
Student Note Options
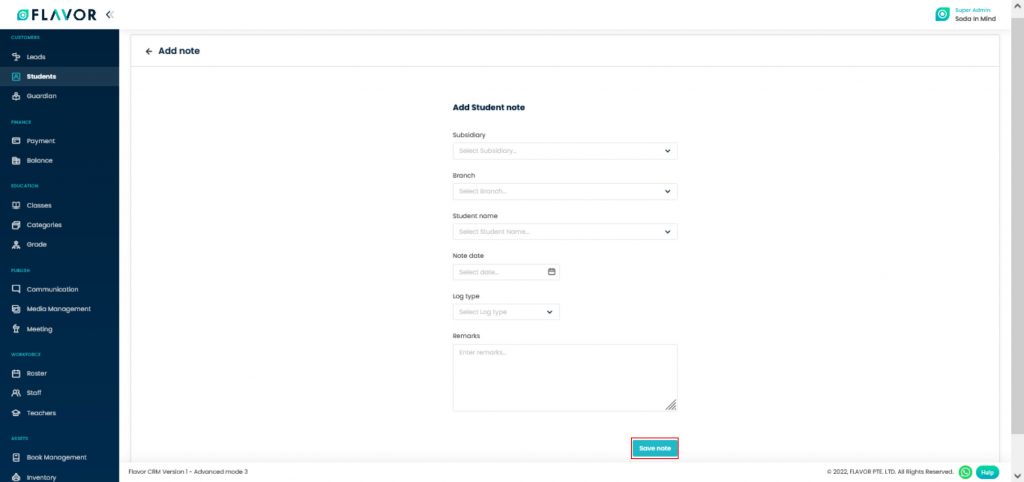
Add Note
If you want to add a New Student Note, you have to click on Add Note button.

After Clicking on Add Student button, you will be redirected to Student Note’s page. Fill in all the fields of Student Note then click on the Save Note button.
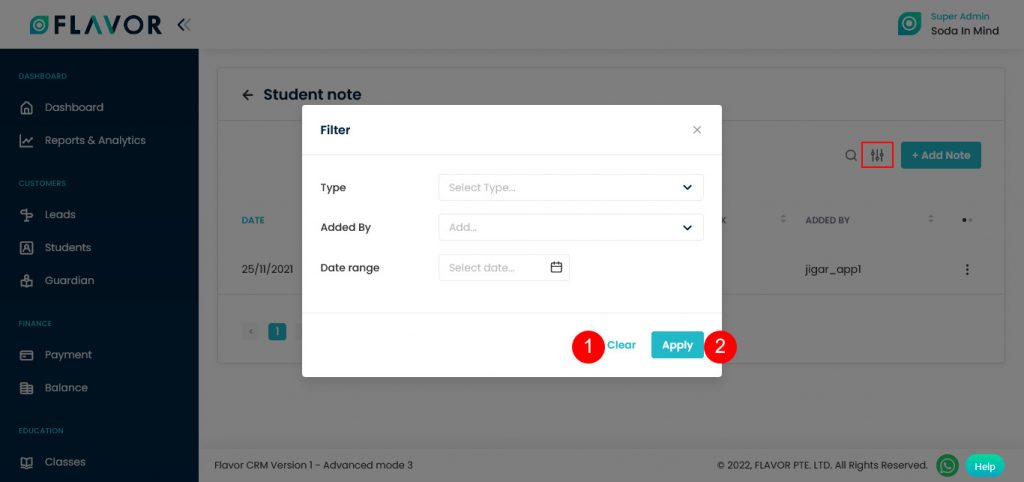
Filter Option
You can filter the student’s records based on specific parameters. Click on Filter Icon, after clicking, a popup form will appear on your screen. Select the data according to your need then click on Apply button to save or if you entered the wrong data you can click on the Cancel button.
Search
By clicking on the Search Icon, you can search the particular Student Note by entering Student Name, Note Type, Remark 0r Added by values in the search box.
Column Sorting
You can sort columns by clicking on the Ellipse Icons, you will get the pop-up form named Select Data to View. Mark the columns you want to see and unmark the ones you don’t want to see on screen. After this procedure click on the Apply Filter button.
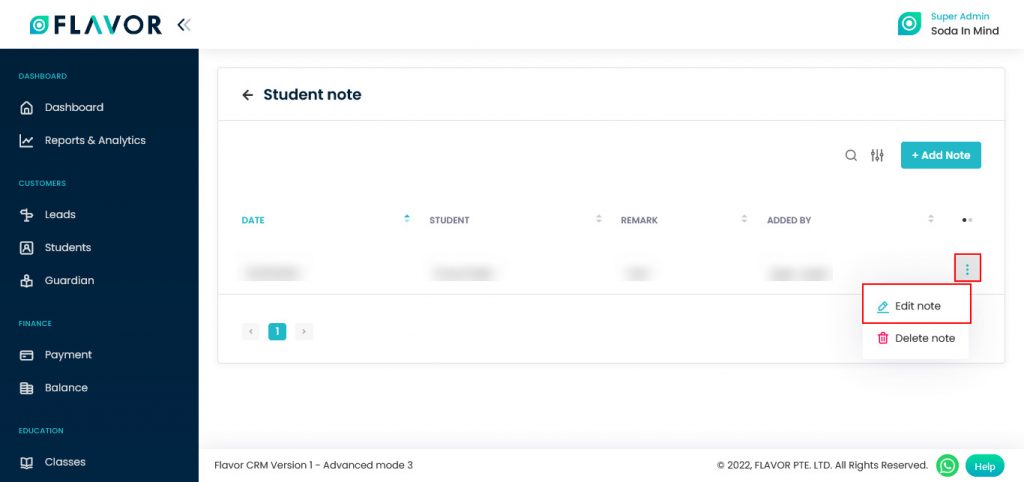
Edit Note
If you want to Student Note, you have to click on Action Button (3 Verticals Dots), after clicking a small popup will appear on your screen. Click on the Edit Note button.
After clicking on the Edit Note link, an Edit Pop-up form will appear on your screen. In the top right corner of the form, you will see the Edit Note link, click on that.
After editing the form click on the Save button.
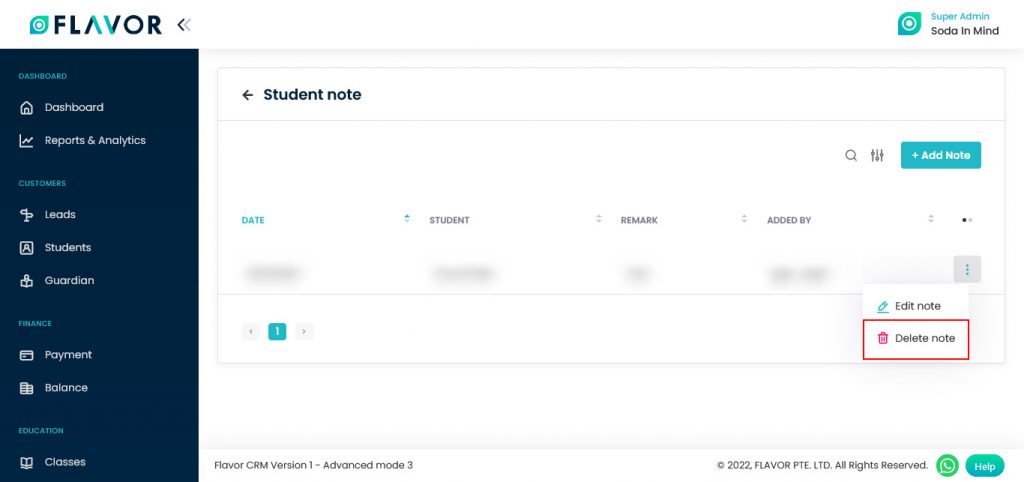
Delete Student Note
If you want to delete a particular student note, you have to click on the Action Button (vertical Dots) of the selected note. after clicking a small popup will appear on your screen. Click on Delete Note.
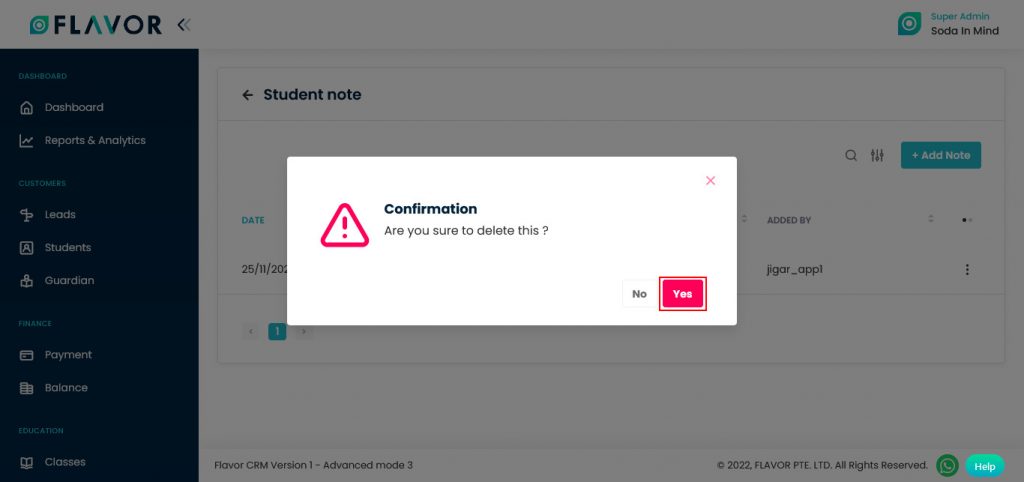
After clicking on the Delete Note link, a Confirmation pop-up box will appear on your screen. Click on the Yes button to delete the Student Note.
Student Replacement
Migrate a student from one class to another. Navigate to the Student Replacement link.
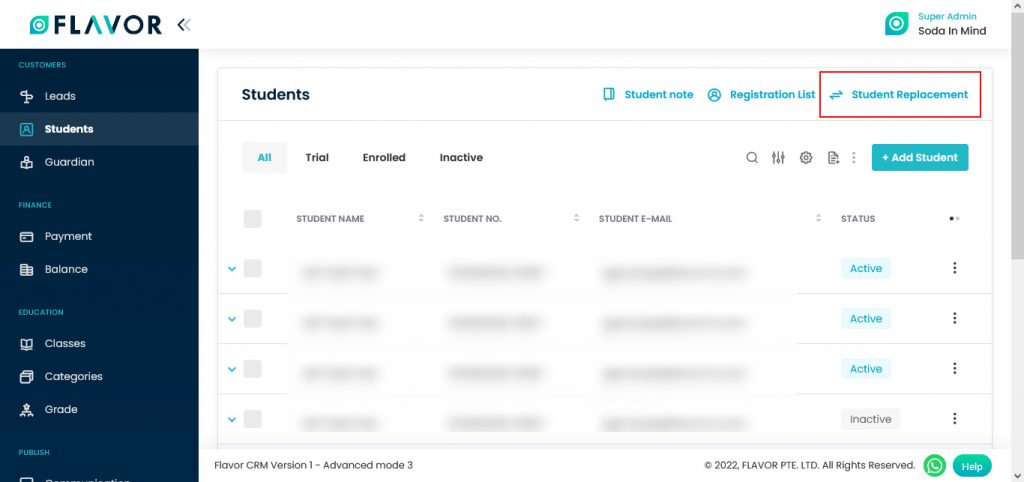
After clicking on the Student Replacement link, you will be redirected to the Student Replacement Page. Here, you can see the Transfer Class & Make up Class tabs. Search, Filter, Export option, Transfer Student button, etc.
Students Replacement Options
Transfer Class
Click on the Transfer Class tab. Here, you will see the list of all students who transferred their classes.
![]()
Search
By clicking on the Search Icon, you can search the particular Students quickly by entering Student Name, Original Class Name or Transfer Class Name in the search box.
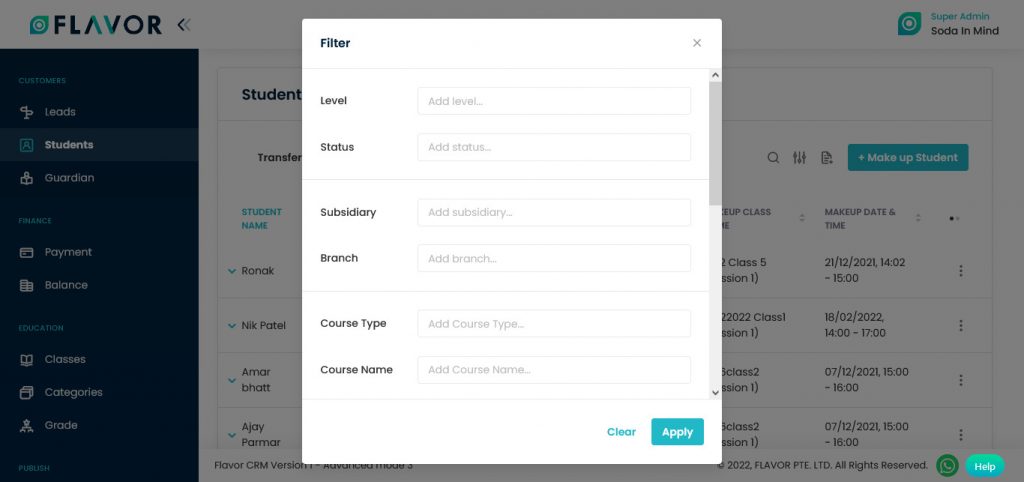
Filter
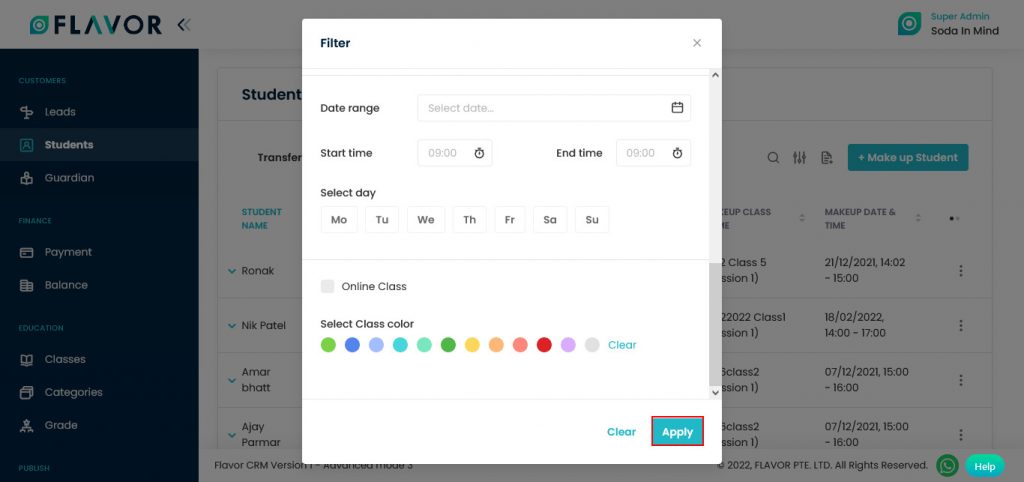
You can filter the student’s records based on specific parameters. Click on Filter Icon, after clicking, a popup form name “Filter” will appear on your screen. Fill the details according to your need.
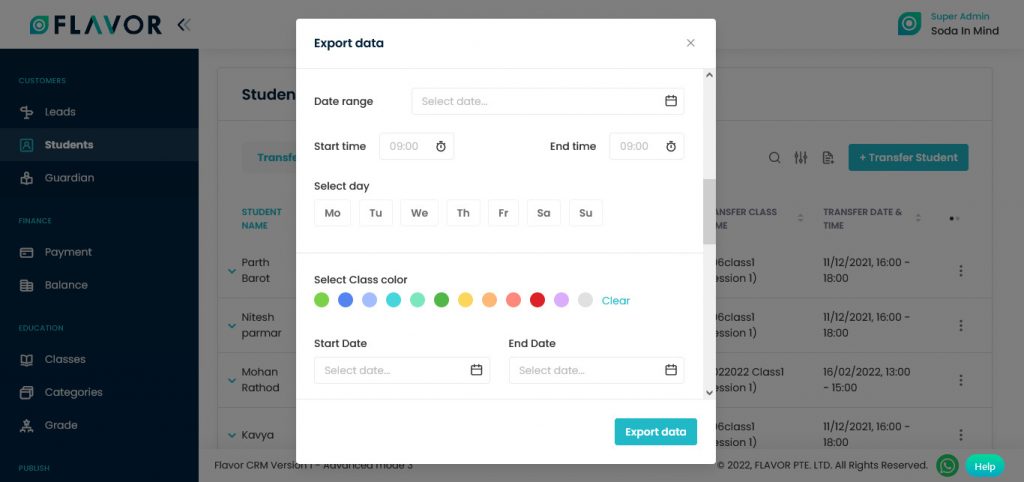
Select the Date Range from the form, choose Start Time & End Time, select the day, mark on Online Class, select class colour and then click on the Apply button.
Export
To export the data, you need to click on the Export icon. After clicking on the Export icon, a pop-up form will appear on your screen. From here you can download the records. Fill all the details of the form.
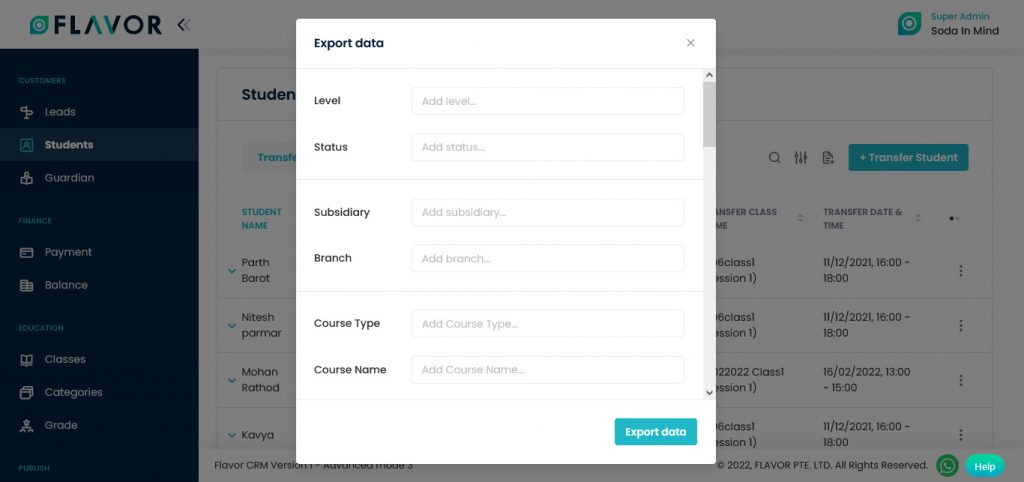
- Select the Date Range & Start Time & End Time of the course, select day, select class colour,
- Start Date and End Date: Select the time period in the start date and end date column for which time period’s data you need.
- Select Data to Export: Here, you can export the data of all rows or 15 rows by simply clicking on the dropdown.
- Select Column to Export: Select columns which you need your data to export. Like if you want all the details of students, then simply click on “ALL DATA” and you will get all desired row’s information of students in your exported file.
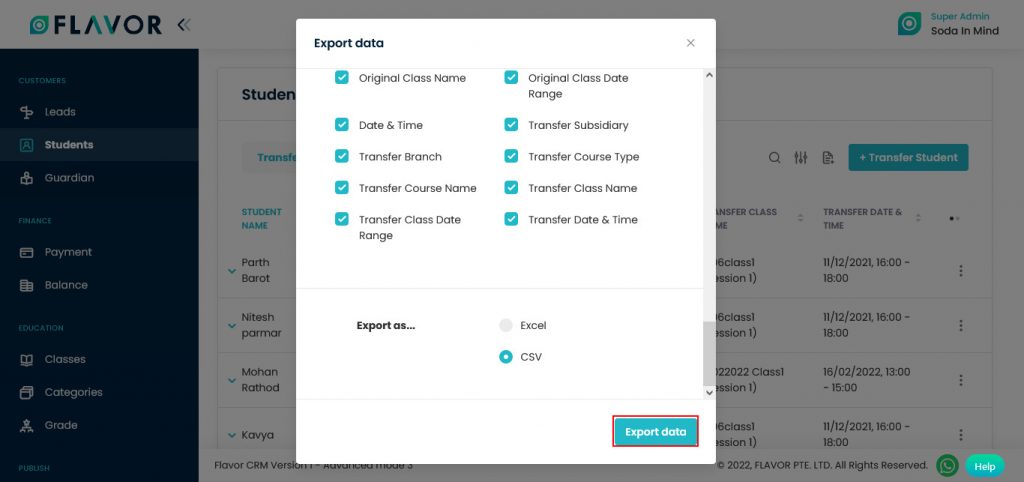
![]()
- Export as: Then select a format in which you want to download your data i.e (EXCEL or CSV).
- After selecting the relevant records/data, click on the Export data button to export the Registered Students Records in the selected file (Excel/CSV).
Transfer Student
After Clicking on the Transfer Student button you will be redirected to the transfer student’s form. Fill all the details of this form.
![]()
Select Class, select date of Session Form, fill all the details of Select transfer’s Class sections’ details and then click on the Transfer button.
![]()
Column Sorting
You can sort columns by clicking on the Elipse Icons, you will get the pop-up form name Select Data to View. Mark the columns you want to see and unmark the ones you don’t want to see on screen. After this procedure click on the Apply Filter button.
Cancel Transfer
To cancel the transfer of a class, click on the Action button (3 vertical dots), a small popup button will appear on your scree name Cancel Transfer. Click on that button to stop the transfer.
![]()
Makeup Class
Migrate students from one class to another & you can schedule classes or create new classes from here. Click on the Makeup Class tab. Here, you will see the list of all students who transferred their classes.

Search
By clicking on the Search Icon, you can search the particular Students quickly by entering Student Name, Original Class Name or Transfer Class Name in the search box.
Filter
Click on Filter Icon, after clicking, a popup form name “Filter” will appear on your screen. Fill the details according to your need.
Select the Date Range from the form, choose Start Time & End Time, select the day, mark on Online Class, select class colour and then click on the Apply button.
Export
To export the data, you need to click on the Export icon. After clicking on the Export icon, a pop-up form will appear on your screen. From here you can download the records. Fill all the details of the form.
![]()
Select the Date Range & Start Time & End Time of the course, select day, select class colour,
- Start Date and End Date: Select the time period in the start date and end date column for which time period’s data you need.
- Select Data to Export: Here, you can export the data of all rows or 15 rows by simply clicking on the dropdown.
- Select Column to Export: Select columns which you need your data to export. Like if you want all the details of students, then simply click on “ALL DATA” and you will get all desired row’s information of students in your exported file.
![]()
- Export as: Then select a format in which you want your data to be exported i.e (EXCEL or CSV).
- After selecting the relevant records/data, click on the Export data button to export the Registered Students Records in the selected file (Excel/CSV).
Create Makeup Class
After Clicking on the “+ Make up Student” button you will be redirected to the makeup class creating form. Fill all the details of this form.
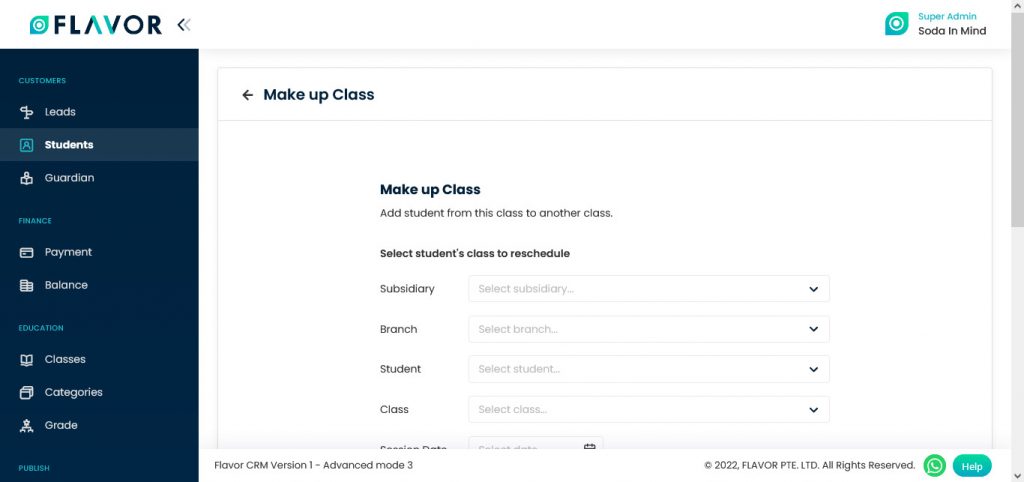
Select type of the class, Add From Existing Class or Create New. Fill the form, select the session according to your choice. Then click on the Save Class button.
Column Sorting
You can sort columns by clicking on the Ellipse Icons, you will get the pop-up form name Select Data to View. Mark the columns you want to see and unmark the ones you don’t want to see on screen. After this procedure click on the Apply Filter button.

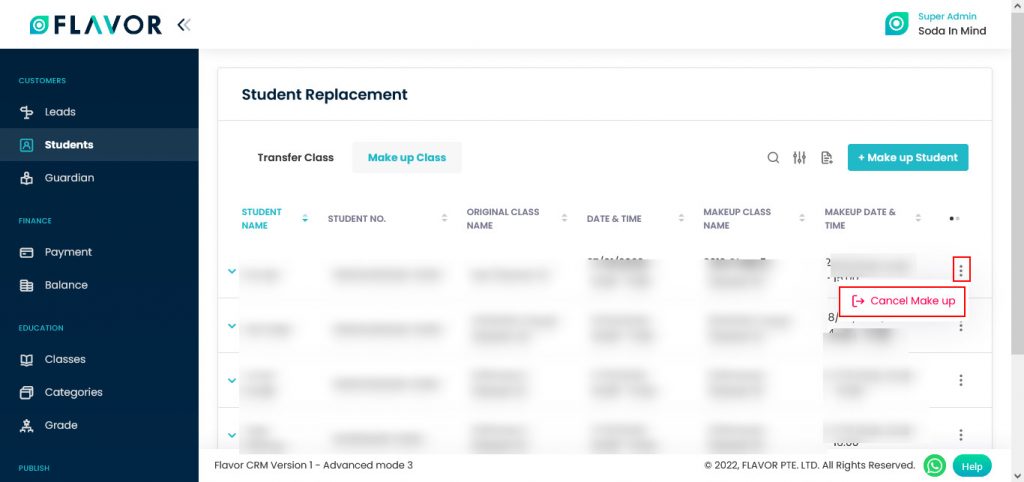
Cancel Make up
To cancel the make-up of a class, click on the Action button (3 vertical dots), a small popup button will appear on your screen name Cancel Make up. Click on that button to stop the makeup.
Student Profile
Click one of the student’s from the student list to go to a student profile page.
You will be redirected to the desired student’s profile. Here, you can check all the information of a student.
Student Profile Options
Student Profile
You can check any student’s profile after clicking on the desired row. A student’s profile will be open. You can see the details of that particular student.
Edit Student:
You can see the Edit Details button to the top right corner of the screen, click on that to edit a profile. Click on the Save button after entering details of what you want to change.

Navigate to the Next Section where you can see various tabs named Personal, Classes, Schedule, Invoice & Payment etc.
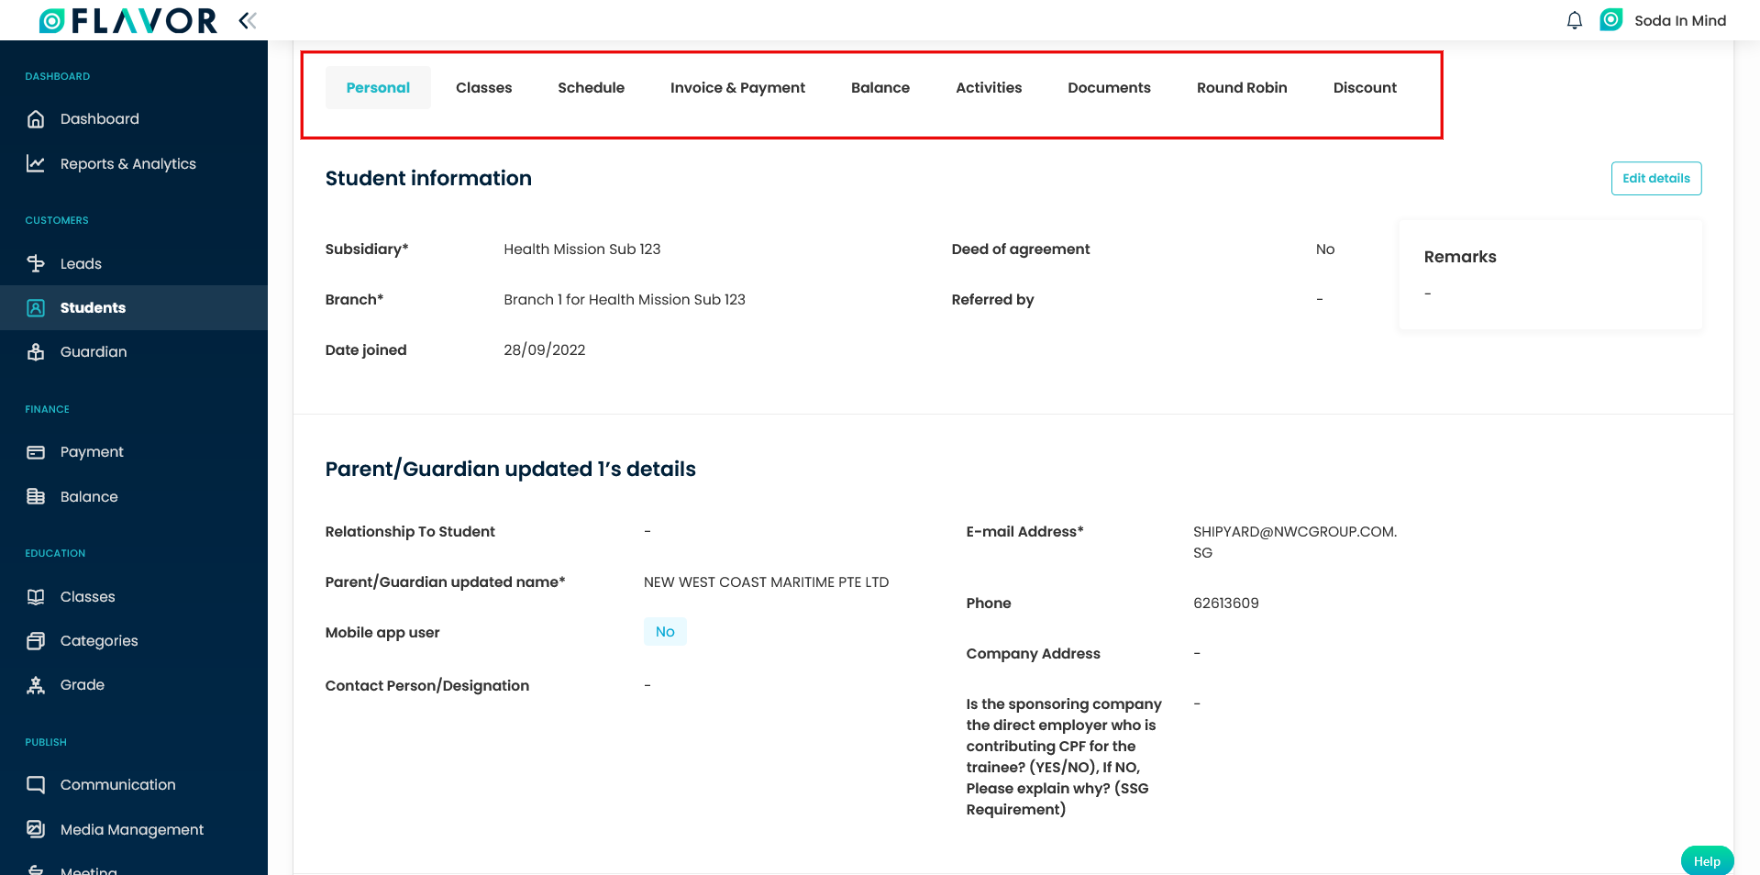
Personal Tab
Navigate to the Personal Tab, click on that tab, there you will see Student’s Information, Parent’s Details, School Details & Sibling Details. Click on the Edit button to edit the details.
You can also add multiple parents to click on Add More Parent button.
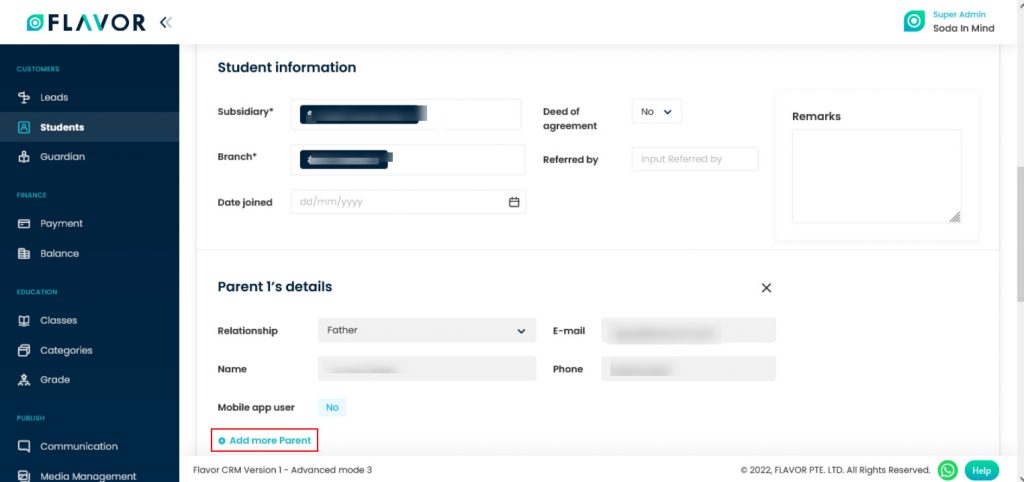
Here, you can edit School Details & can see Student Siblings. After editing details click on the Save button.
Classes
Navigate the Classes tab. Here, you can see the list of classes. Under Classes Tab you can find two tabs viz. Regular Class and Class Replacement.
Regular Class
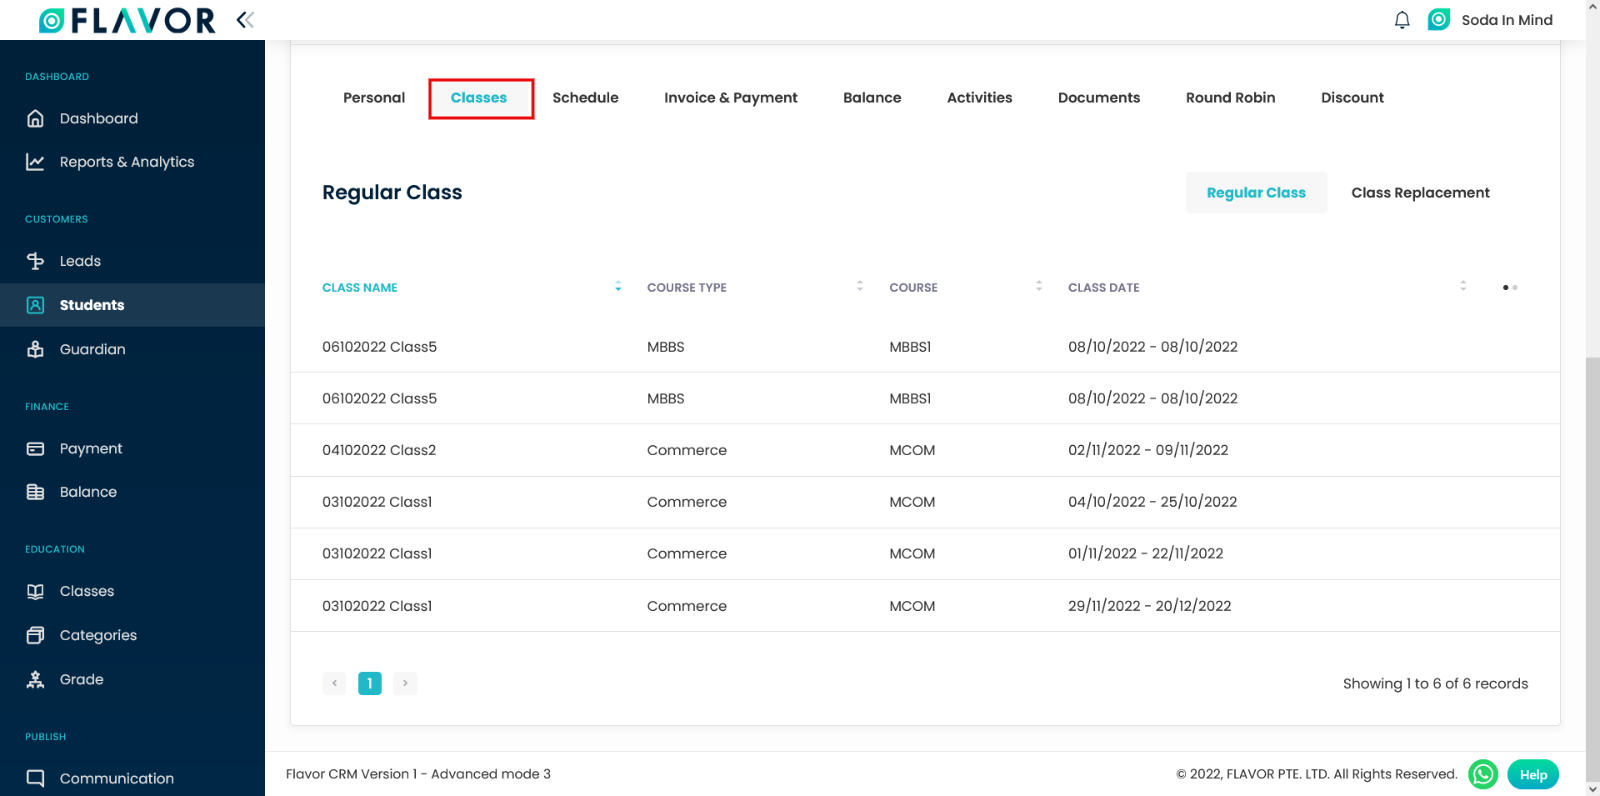
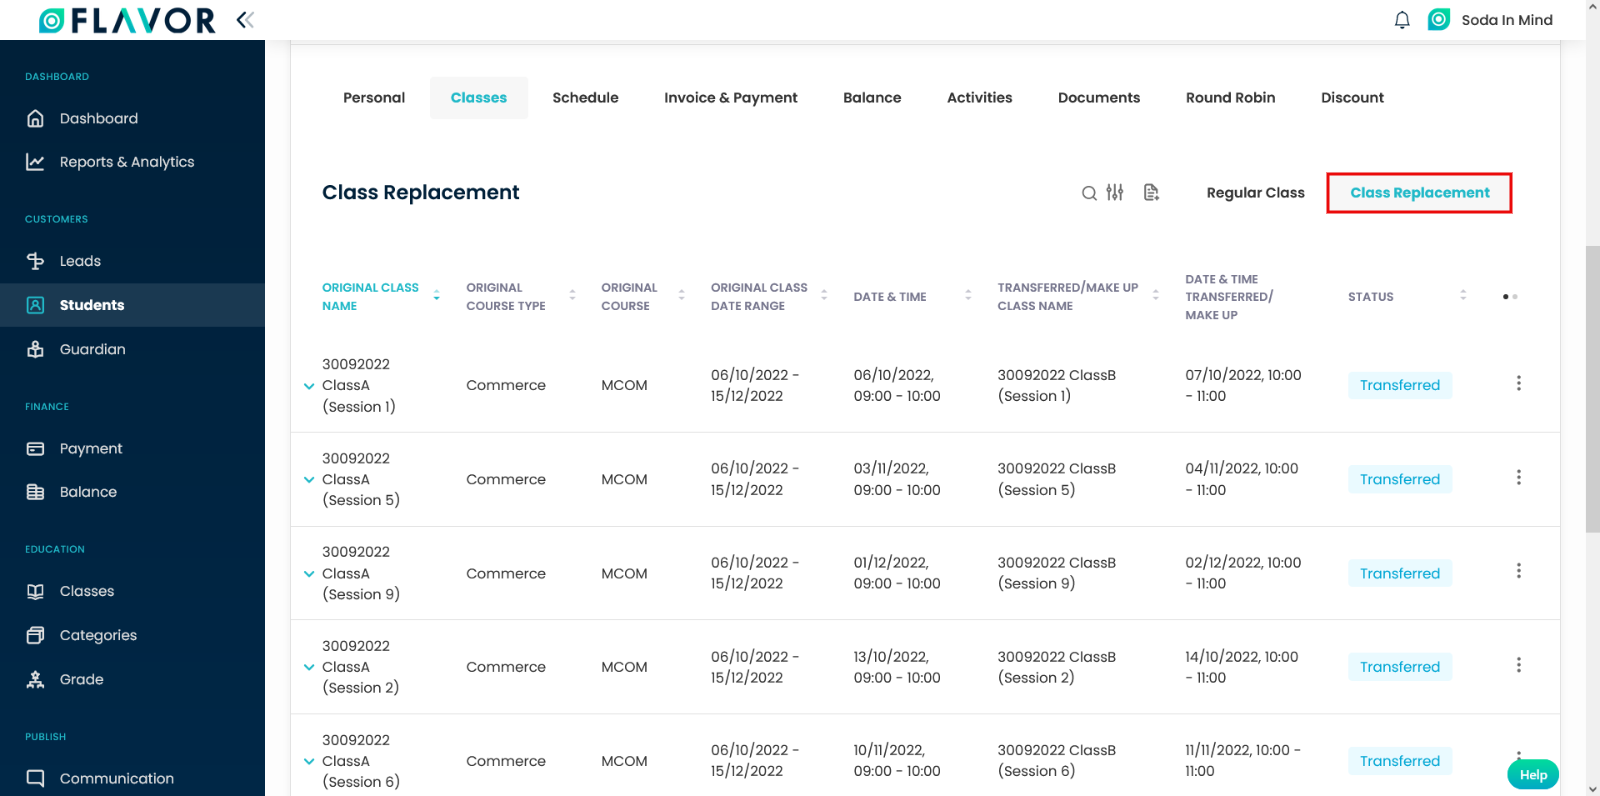
Class Replacement
Class Replacement tab will have list of transferred class details.
Search
By clicking on the Search Icon, you can search the specific class name in which the student transferred by entering the Original Class Name values in the search box.
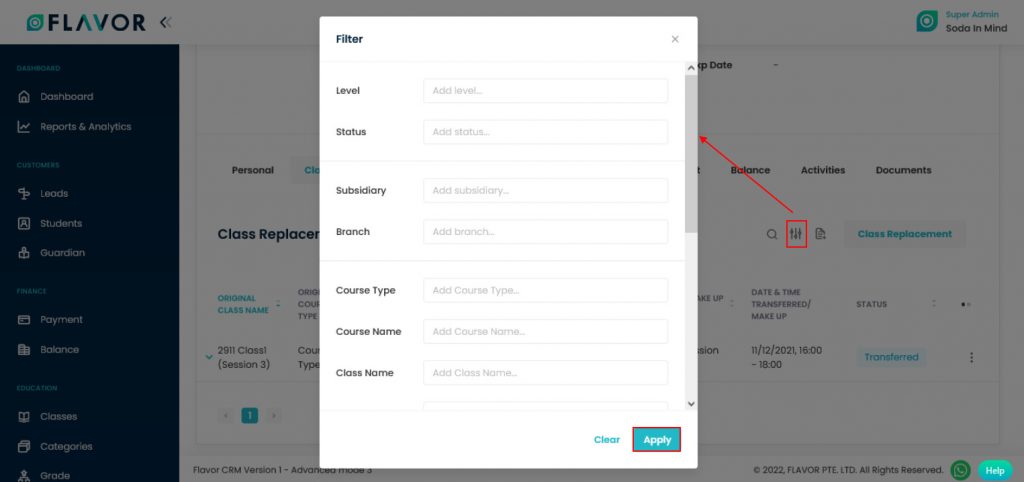
Filter
You can filter the student’s records based on specific parameters. Click on Filter Icon, after clicking, a popup form will appear on your screen. Select the data according to your need then click on Apply button to save or if you entered the wrong data you can click on the Cancel button.
Export
To export the data, you need to click on the Export icon. After clicking on the Export icon, a pop-up form will appear on your screen. From here you can download the records.
- Fill all the details of Level, Status, Subsidiary, Branch, etc & scroll down the form.
- Select the Date Range & Start Time & End Time of the course, select day, select class colour,
- Start Date and End Date: Select the time period in the start date and end date column for which time period’s data you need.
- Select data to export: Here, you can export the data of all rows or 15 rows by simply clicking on the dropdown.
- Select column to export: Select columns which you need your data to export. Like if you want all the details of students, then simply click on “ALL DATA” and you will get all desired row’s information of students in your exported file.
![]()
- Export as: Then select a format in which you want your data to be exported i.e (EXCEL or CSV).
- After selecting the relevant records/data, click on the Export data button to export the Registered Students Records in the selected file (Excel/CSV).
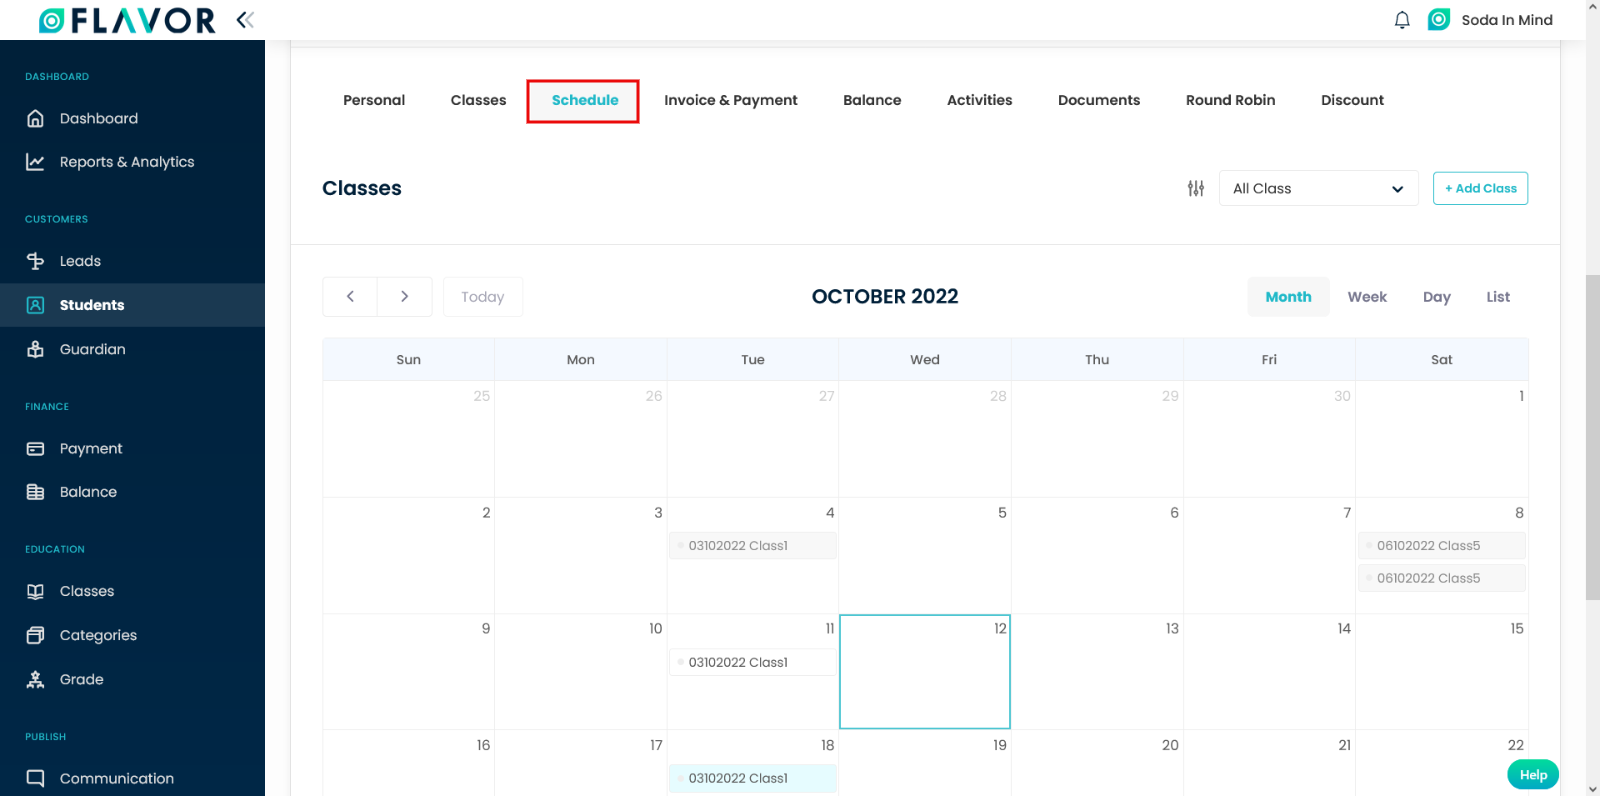
Schedule:
In the Schedule tab, you can see the scheduled class for the respective student in the calendar view. Here, you can see the Filter option, All class, you can also add a class by clicking on Add Class button. You can also check the scheduled classes by Month, Week, Day & List wise. You can also check how many classes are there in the month, Week & Day.
If you want to know the quick info about scheduled classes, click on the “Scheduled Class” from the calendar. To check the full details of the class click on the Go to Class Details button.
- Calendar Navigation Button: From this button, you can check the classes of previous, current & next months.
Filter
Click on the Filter Icon, after clicking, a Filter Pop-up form will appear on the screen. Enter the details into the form, scroll down the form. Then click on the Apply button to get the filtered records.
- Date Range: Click on Date Range, a calendar will be open. Select the date and click on Apply Button.
- Start Time: Enter the start time of the class.
- End Time: Enter the end time of the class.
- Select Day: Select the start day of the class.
- Mark on Online Class option.
- Select Class Color: Select the colour of the respective classes.
- Click on Apply button.
All Class Dropdown: Navigate to the All-Class Dropdown, after clicking on this a dropdown will be open, having all classes listed. Here you can select any class and check which class will be held in which month and on which date.
Add class
To add new schedule classes click on Add Class button.

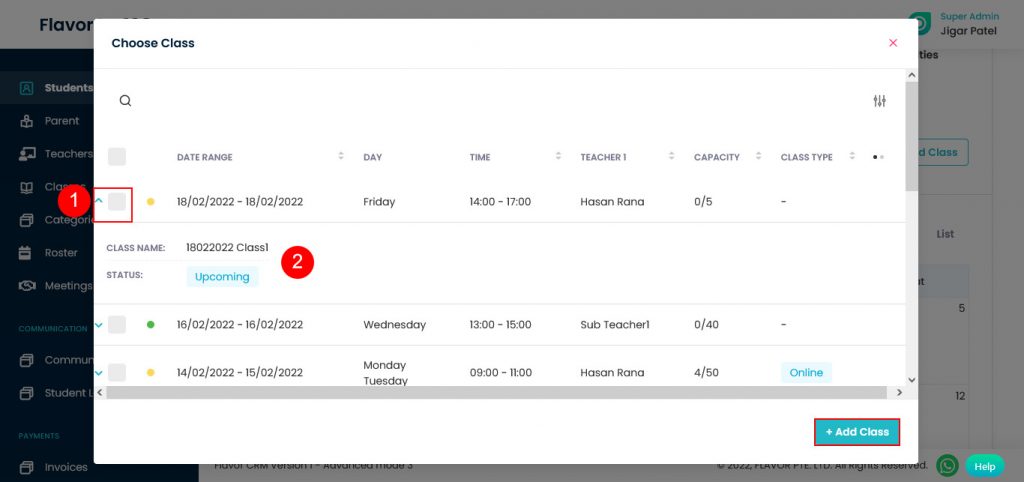
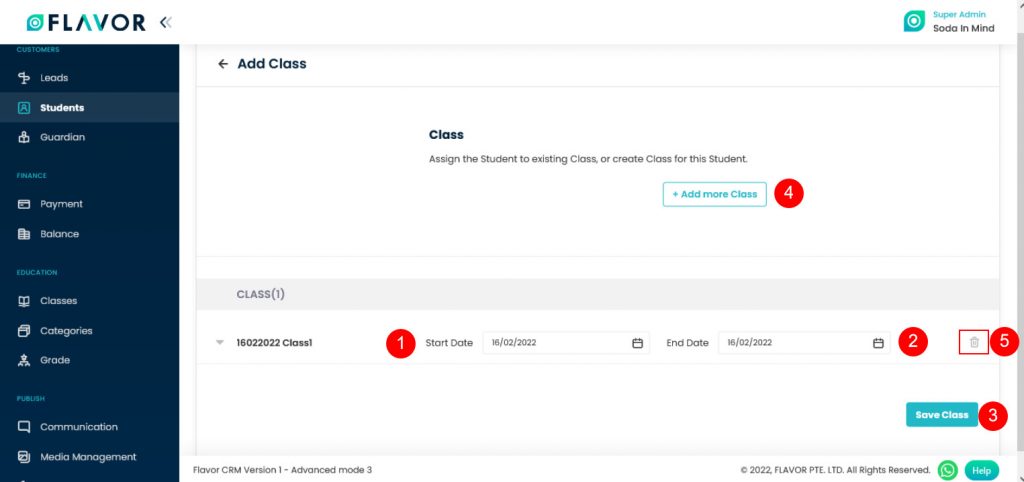
After clicking on Add Class a popup form name “Choose Class” will appear, from here you can schedule classes.
- Click on the down arrow to show information.
- A row expands and you will see the Class Name & its Status.
- All classes are created in this form. Choose a class to create by marking the column. Click on Add Class button to add a new class.
-
- Start Date: Choose the start date of the class.
- End Date: Choose the end date of the class.
- Click on the Save Class button to save this class.
- Add More Class: To add more classes click on “+ Add More Class”
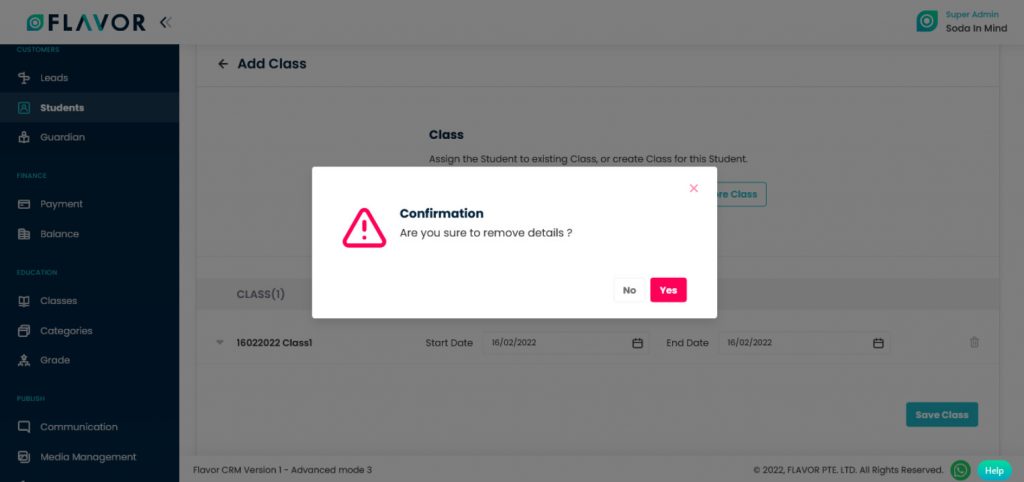
- If you want to delete this class, click on Delete Icon.

After clicking on the Delete icon, a confirmation popup form will appear on your screen. Click on the Yes button to delete this class.
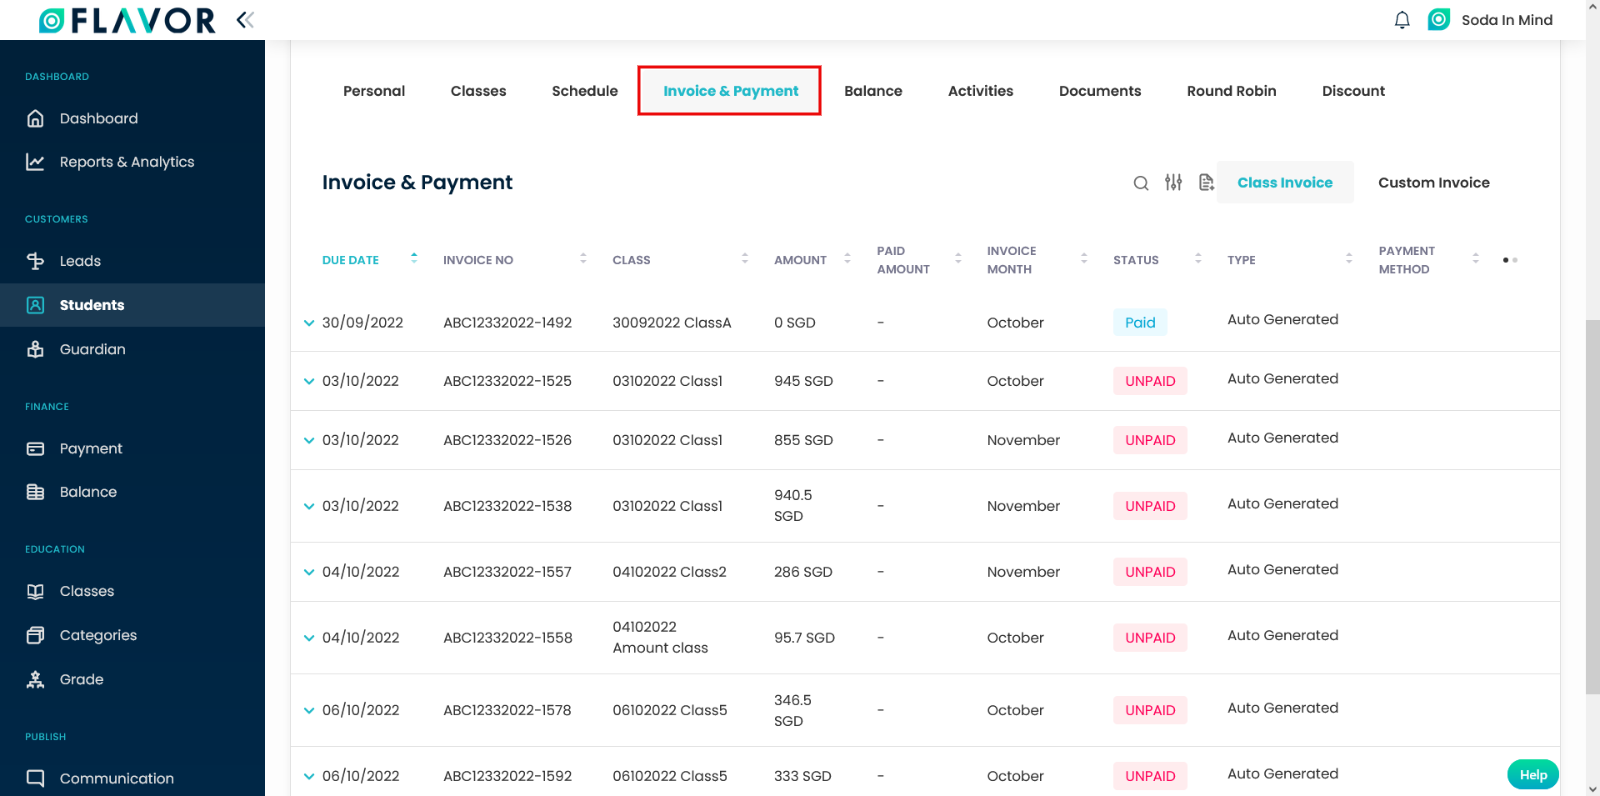
Invoice Payment
Navigate to Invoice & Payment tab, here you will get details of paid and unpaid invoices.
Under Invoice and payment Tab, you will find two tabs, viz. Class Invoice and Custom Invoice. Class Invoice will have all class invoice and Custom invoice will have all he custom invoice.
Search
By clicking on the Search Icon, you can search the specific student by entering Invoice No. & Class Name in the search box.
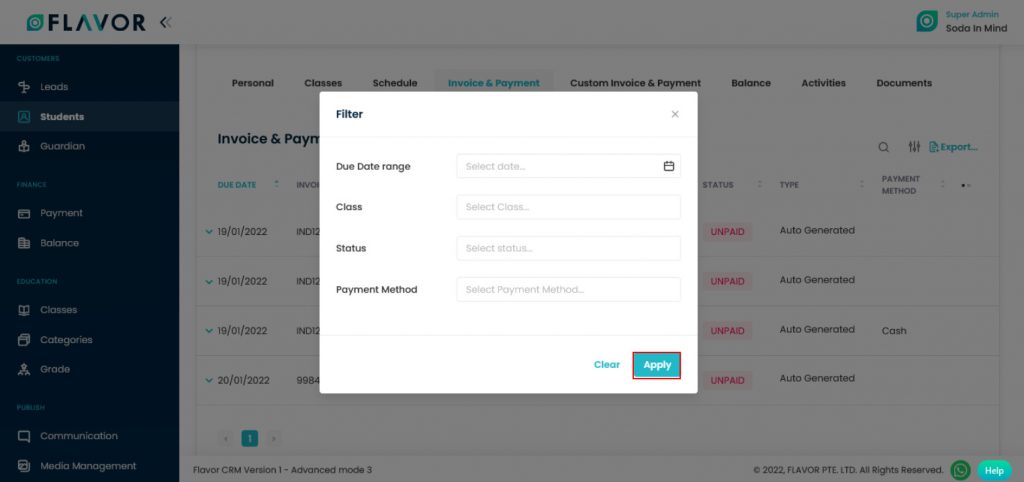
Filter
You can filter the student’s records based on specific parameters. Click on the Filter Icon, after clicking, a Filter Pop-up form will appear on the screen. Enter the Due Date Range, Class, Status, and Payment Method to the form, then click on the Apply button to get the filtered records.
Export
To export the Registered Student’s data, you need to click on the Export icon.
After clicking on the Export icon, a pop-up form will appear on your screen. From here you can download the records.
- Start Date and End Date: Select the time period in the start date and end date column for which time period’s data you need.
- Select data to export: Here, you can export the data of all rows or 15 rows by simply clicking on the dropdown.
- Select column to export: Select columns which you need your data to export. Like if you want all the details of students, then simply click on “ALL DATA” and you will get all desired row’s information of students in your exported file.
- Export as: Then select a format in which you want to download your data i.e (EXCEL or CSV).
- After selecting the relevant records/data, click on the Export data button to export the Registered Students Records in the selected file (Excel/CSV).
Column Sorting
You can sort columns by clicking on the Ellipse Icons, you will get the pop-up form named Select Data to View. Mark the columns you want to see and unmark the ones you don’t want to see on screen. After this procedure click on the Apply Filter link.
Balance
- Wallet: Here, you can check how much money is in a student’s wallet. how much is credited and debited. How does it gets added?
- Point: You can track the points of students. Points refer to the grades that students get in activities given by teachers or schools.
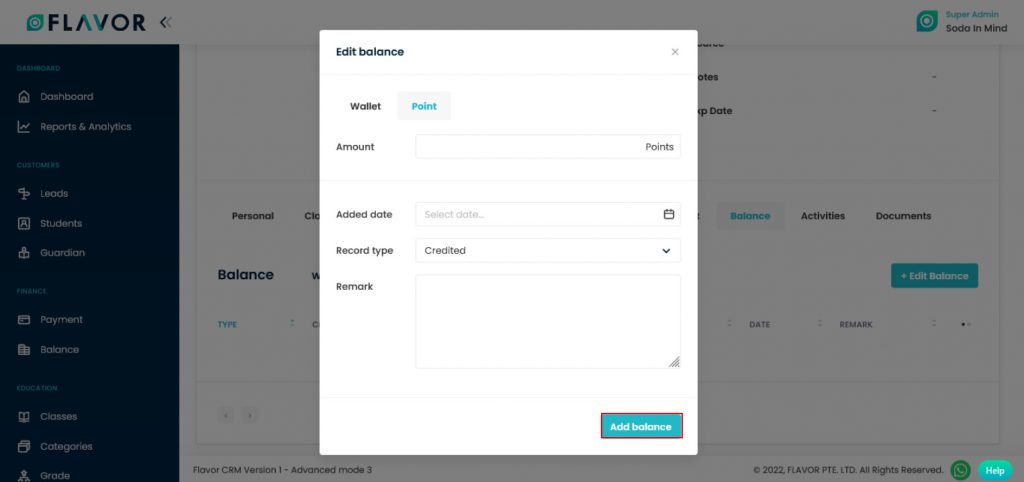
Edit Balance:
- To edit the student’s balance, click on the Edit Student button, a popup form will appear on the screen, here you can see two options Wallet & Points. If you want to edit Wallet, click on Wallet Button and fill the form and then click on Add Balance button.
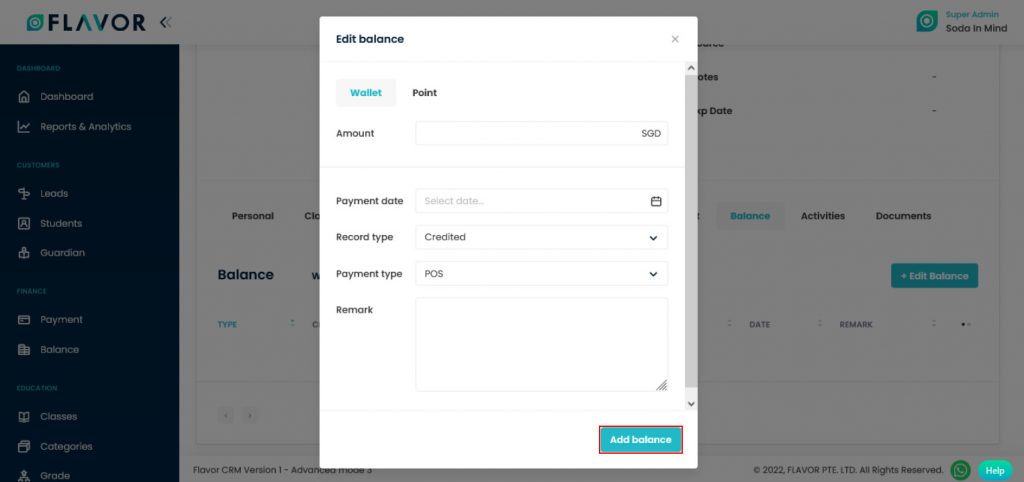
- To add points to the Student. Click on the Point button and fill the form and then click on Add Balance button.
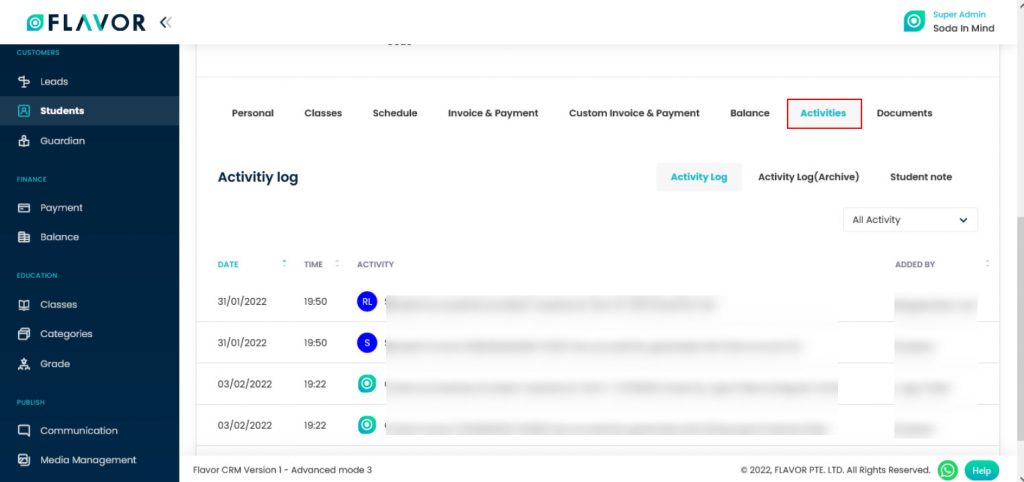
Activities
Here, you can see the list of activities done by a student from enrolled to inactive their class. Navigate to the Activities Tab. here, you will see Activity Log, Activity log(Archive), Student Note options & A dropdown of All Activity.
Activity Log
On which date a student has enrolled & when is the invoice generated and how he was added here.
All Activity Dropdown
Navigate to the All Activity Dropdown, after clicking on this a dropdown will be open, having All Activity, Enrollment & Invoice Option.
- All Activity: This option is showing all activities performed by a student.
- Enrollment: When is a student enrolled and for which class?
- Invoice: Here, you can see the list of invoices.
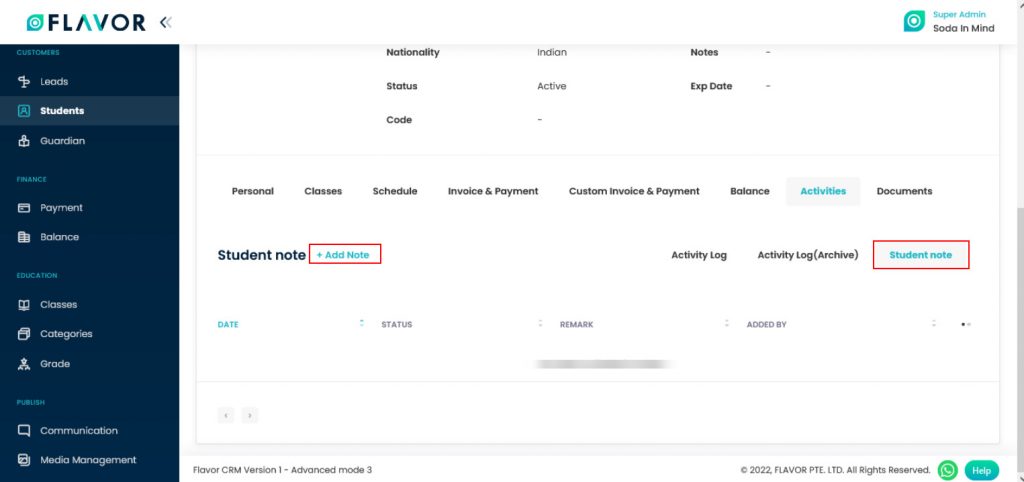
Student Note
Here, you can see the list of Student Notes & you can also create a new student by clicking on “+ Add Note” button.
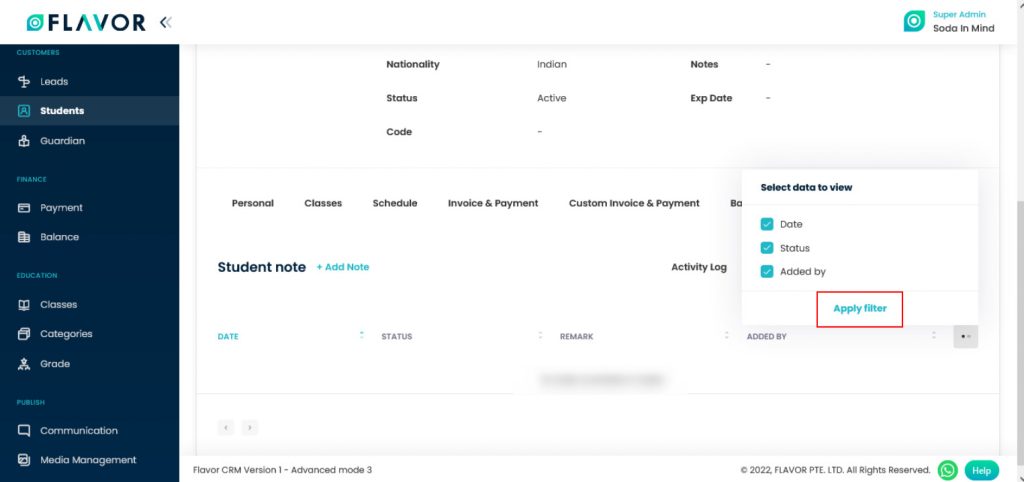
Column Sorting
You can sort columns by clicking on the Elipse Icons, you will get the pop-up form named Select Data to View. Mark the columns you want to see and unmark the ones you don’t want to see on screen. After this procedure click on the Apply Filter button.
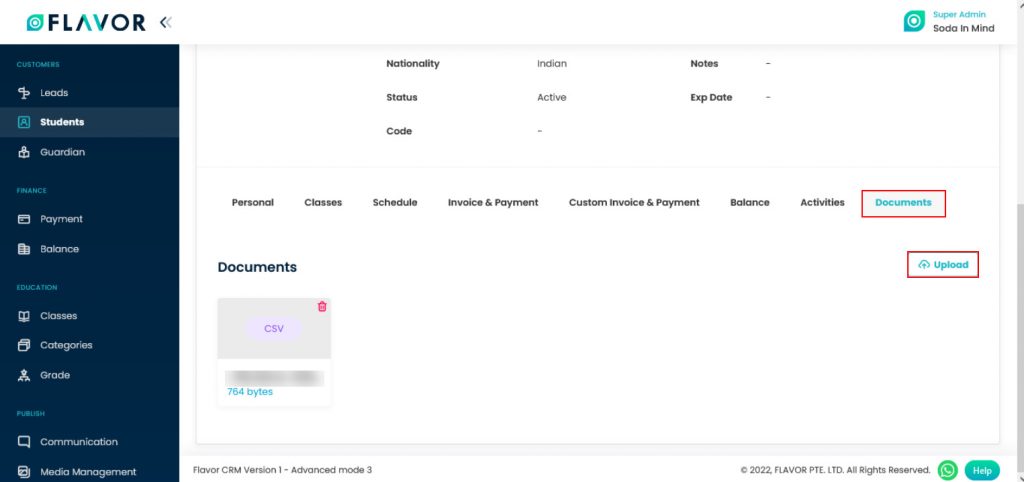
Document
Navigate to the Documents Tab. here, you can upload any files related to a student. File types ould be PDF, CSV, JPEG & DOC files.
Upload Document
Click on the Upload button to upload a file, a file selector window will be open. Click on the desired file to upload.
Need more help? Ask us a question
Please let us know more of your details and our team will reach out to you very shortly.