
Pre-requisite
HikVision is a Wi-Fi and/or LAN device For LAN, you need a LAN cable for the device to communicate. You need to ensure your machine and device are connected to the same network. Now, To get into the admin options of the device, press the screen for 3 seconds and then slide right/left.
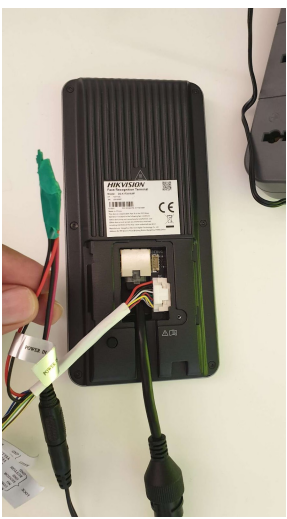
Hardware Device Setup
- Open the back of the device.
- Attach the power input cable of the wire cluster with the power adapter extension.
- Attach wire cluster to wiring terminal.
- Insert the LAN cable extension in the network interface.
- The final setup should look like this.
Device Activation
Power on the device and proceed with the instructions shown on the screen.
- Set a password for the device.
- Set Application Mode as others.
- Access to Hik-Connect -> off, then click next.
- Privacy -> Select All
- Add an administrator for the device. (Employee ID: 1, name: admin, click next)
- Try to add Employee ID by the name of the company. Example: If the company name is Flavor, you can assign the id as flavor1.
- Add face and fingerprint for admin.
Device Setup
- Long press on screen for 3 seconds and then slide left/right. Admin authentication will be required to proceed further.
- (FOR WI-FI) Go to Comm -> WI-FI connection -> click on the WI-FI -> get the IP address, paste it on the browser.
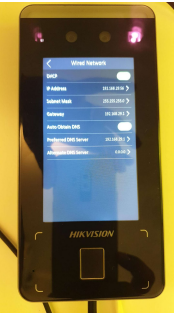
- (FOR LAN CABLE) Go to Comm -> Wired Network. – Enable DHCP (If the press-on switch does not work, try pressing on the IP address digits below). This should provide the new IP address to the device. – Enable Auto Obtain DN.
Device Communication Setup
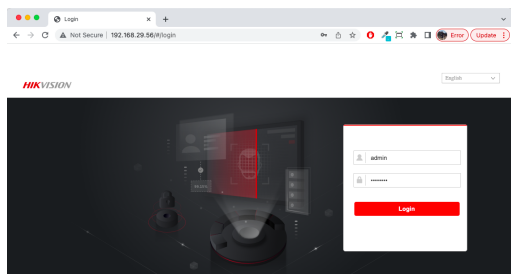
Make sure your machine and device are connected to the same network.
- On the browser, go to the IP address mentioned in the machine. Login with username as admin and password set for the machine during activation.
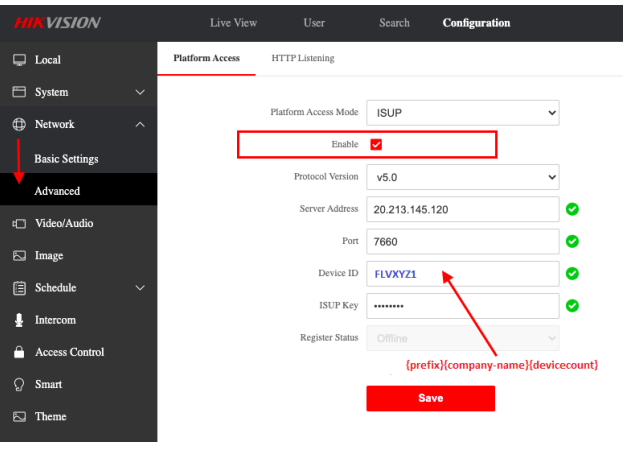
- Go to Network -> Advanced.
- Enable the checkbox → Protocol Version 5.
- Add production server address 20.213.145.120 → Port 7660
- Give device ID as the combination of the company name, and count of devices assigned to the company XYZ.
Example: FLVXYZDEVICE1, FLVXYZDEVICE2 NAME FORMAT is like {prefix}{company-name}{device count}.
Here for FLVXYZDEVICE1:
FLV is a prefix that needs to be kept the same, XYZ is the company name, and 1 is the count that will be increased by one on adding a new device. Try to keep the ISUP key (password) the same as the device during activation.
Note: Need to share the Device ID (here is FLVXYZ1) with the Network Administrator to activate the device over the Hikvision system software.
Flavor Portal Setting
Note: Before moving ahead, you must first contact Flavor System Admin to enable HikVision from the backend.
- Login into Flavor Web Portal with super admin credentials.
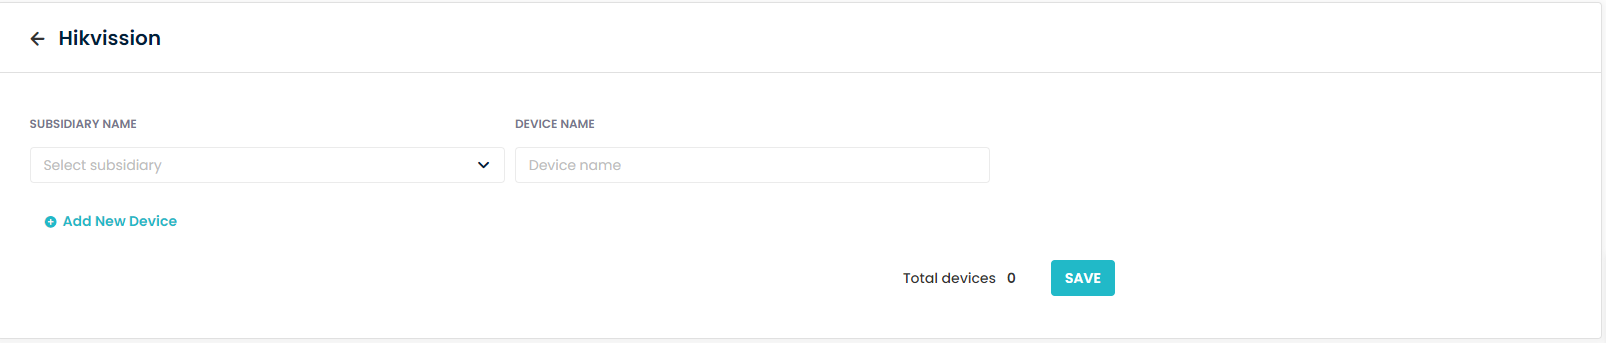
- Go to the Settings->System->Hikvision Integration(Set up Devices)
- You need to select the subsidiary and then enter the device name.
- Here device name will be the same as you have configured and will follow this format {prefix}{company-name}{device count} (e.g. FLVXYZDEVICE1)
- Now click on the SAVE button.
If there are multiple devices, you can add multiple devices by using the Add New Device button.
Note:
- You can select All for all the Subsidiaries and add the device name. So, the feature of face recognition will be available to all the Subsidiaries.
- Or, select an individual Subsidiary and add the device name. In this, only that particular Subsidiary’s student will have the feature of face recognition. For example, Student A is under Subsidiary 1 and Subsidiary 2. And the Device is connected to Subsidiary 1. So, student A‘s photo will be synced with that device for Subsidiary 1.
- When any student is added/updated, at that time the student’s photo will get synced with the device. Suppose a student is created with his/her photo and other details, and that student belongs to a Subsidiary that is connected with HikVision, then the student’s photo will get synced. Or, if you update a student’s photo, at that time too, that student’s photo will get synced.
Need more help? Ask us a question
Please let us know more of your details and our team will reach out to you very shortly.