
Introduction
An automated crediting and debiting system for students’ credits. This feature lets the client put a credit for a specific subject and when the student either attends or gets enrolled in that subject at that event only the credits are deducted from that subject s balance. Also, all credits have an expiry date so that students use the client’s service as soon as possible.
Ways to add Class Credit to Student
- Add credit points while creating the student.
- Add Credit points from the Student view under the Balance Tab.
- Purchase of Class Credit from presets through the Flavor Web portal.
Add credit points while creating the student
- From the student module, Click on Add Student button.
- While filling up the details, fill in Add Class credit under the Details section of the page.
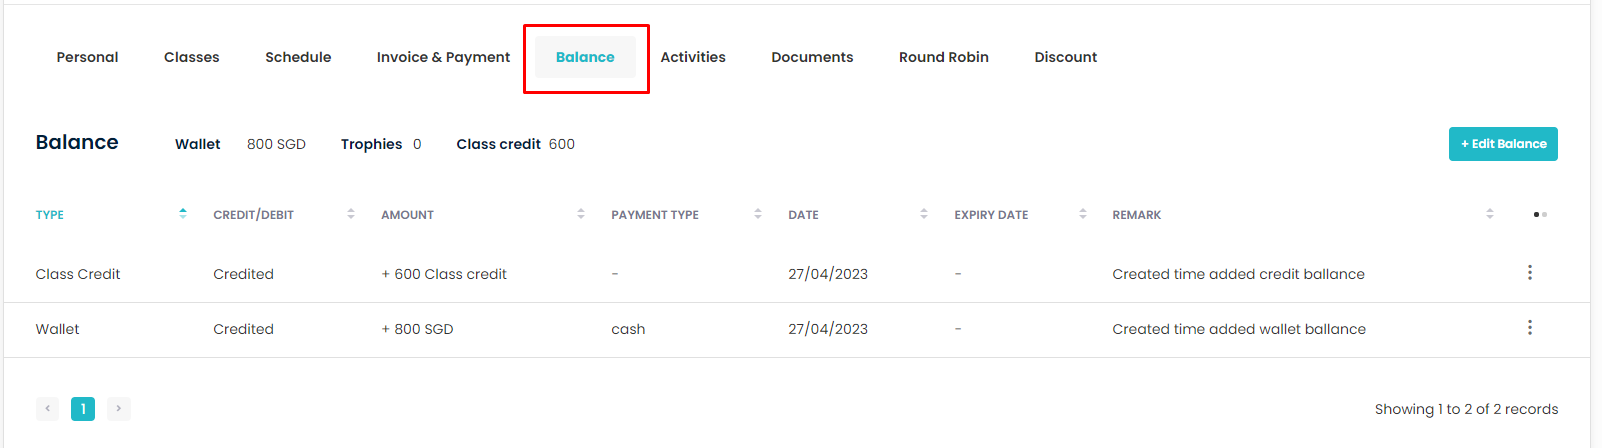
- After creating the student you can check for the Class Credit in the Student view under Balance Tab.
Add Credit points from the Student view under the Balance Tab.
Step 1
- Go to the Student view Page.
- Click on the Balance Tab.
- Click on the Edit Balance button.
- A popup named Edit Balance will appear.
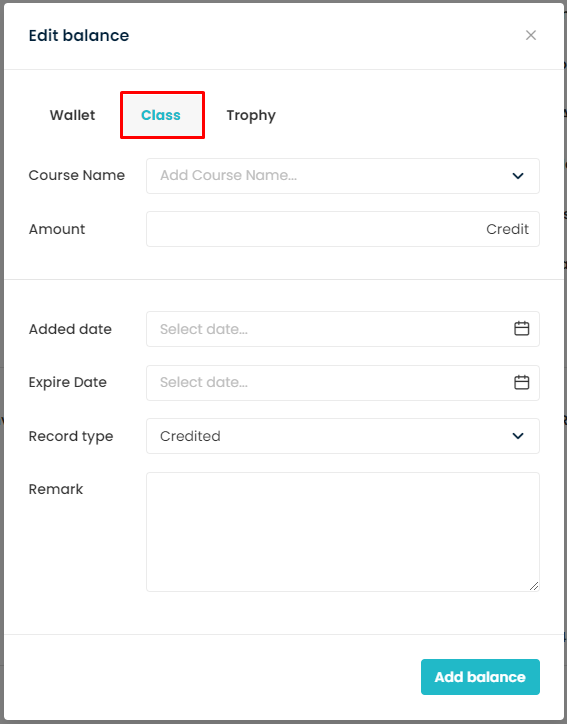
Step 2
- On that popup, go to the Class Tab.
- Fill in the details like Course Name(optional), Amount, Added Date, Expiry Date(optional), Record Type (Credited/Debited), and Remarks.
- Once done, it will get added to the grid under Balance Tab.
Note:
- Here, if the user fills in the Course Name, then Class Credit points will be applicable to only those Credit-based classes that are under that particular Course Name and if it remains blank, it will be applicable to all Credit-based classes.
- After the expiry date, Credit points cannot be used. Also, an email will get triggered based on the setting done under Balance Notification.
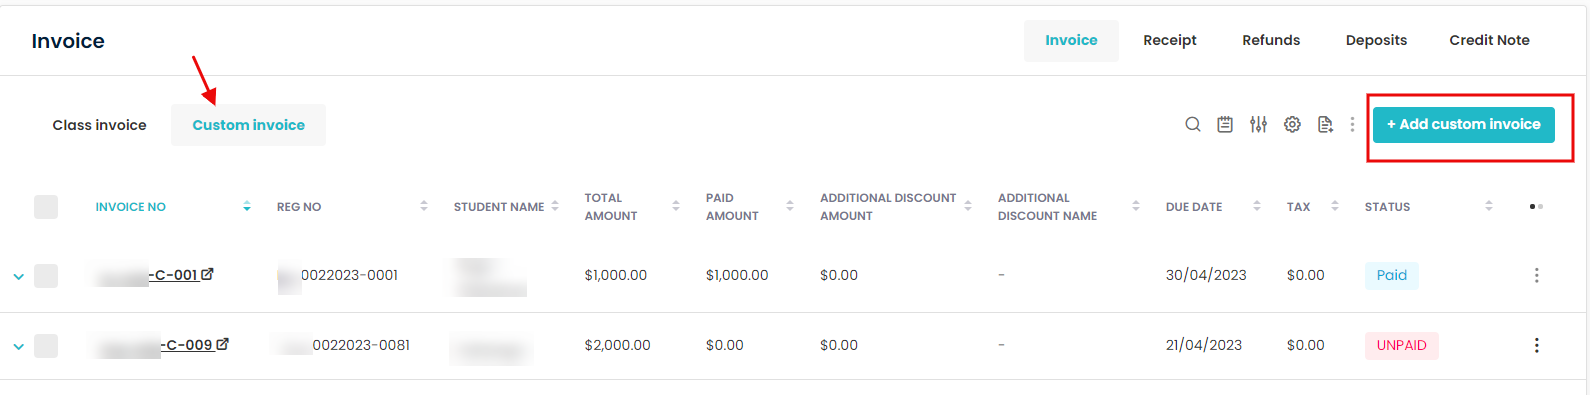
Purchase of Class Credit preset through Flavor Web Portal
- Go to the Payment module.
- Click on the Custom invoice tab.
- Click on Add Custom Invoice button.
- On the Add Custom Invoice page, fill in the details on the first page, and click on the Next button.
- On the Payment Details section, under the Type, select Credit.
- Then choose the item (Credit – added in the Invoice Preset).
- Fill rest of the details and click on Publish Invoice button.
- The Class Credit will get added to the Class Credit under the Balance Tab for the student against whom Custom Invoice is created.
Setting Based on which Class Credit will get Deducted.
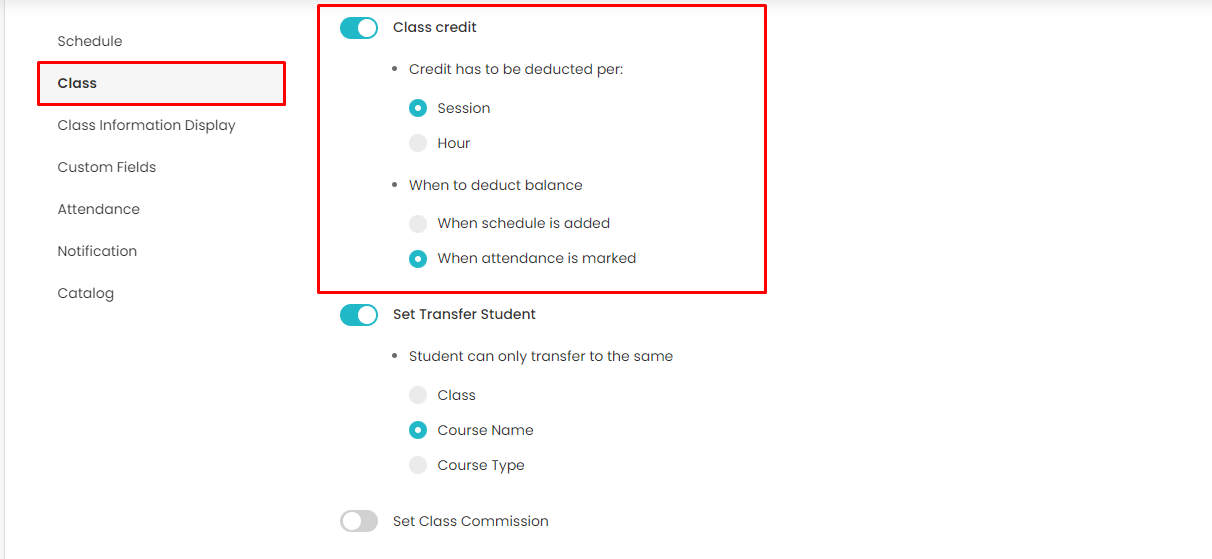
Class Credit points can be deducted either on Hour Based/ Session Based. Apart from this, it is also based on Schedule Added or Attendance marked. Now, .lets see how the user can do the settings.
- Go to the class settings.
- Scroll down to Class Credit under the Class section.
- Do the settings as per the need and click on the Save button.
Note:
- For attendance settings, if the attendance is marked as Present, then only Class Credit will get deducted.
- For Schedule Added settings, once the student gets enrolled in a class, at that event class credit will get deducted.
- A notification will be sent to the Student/Parent/Guardian regarding the deduction of the class credit.
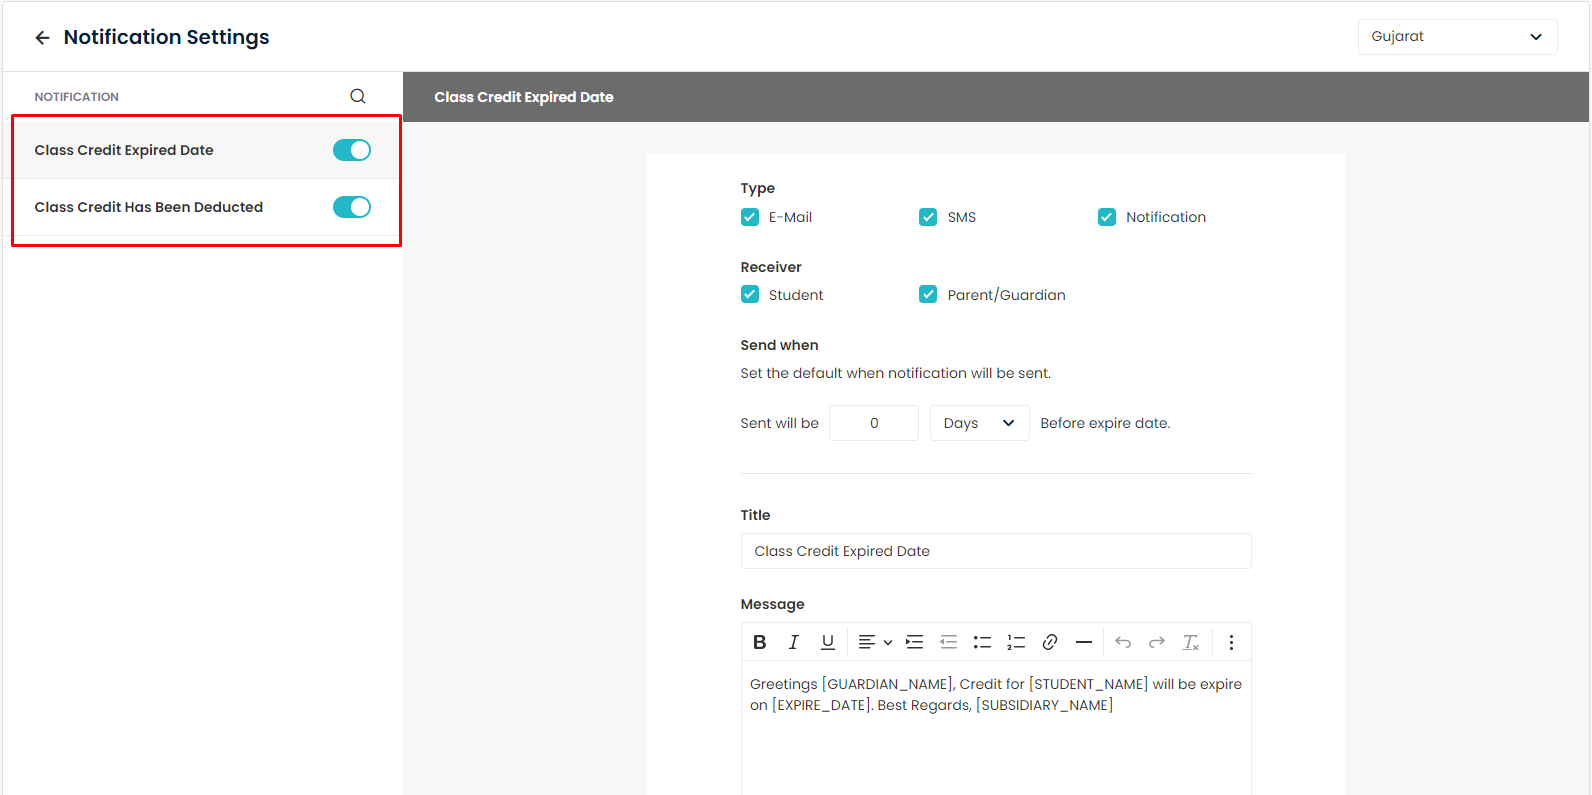
How to Set Notification Template for Class Credit Notifications?
- Go to the Settings.
- Click on the Notification Tab.
- Scroll down to Balance notifications.
- Click on the Set messages button.
- Enable both the Class Credit Expiry Date and Class Credit Has Been Deducted toggle switch.
- Set the template and click on the Save button.
Note: The Template is set for specific Subsidiaries. So, for multiple Subsidiaries, the template should be set at different times.
Need more help? Ask us a question
Please let us know more of your details and our team will reach out to you very shortly.