
Step 1: Enable HeyHi Integration
-
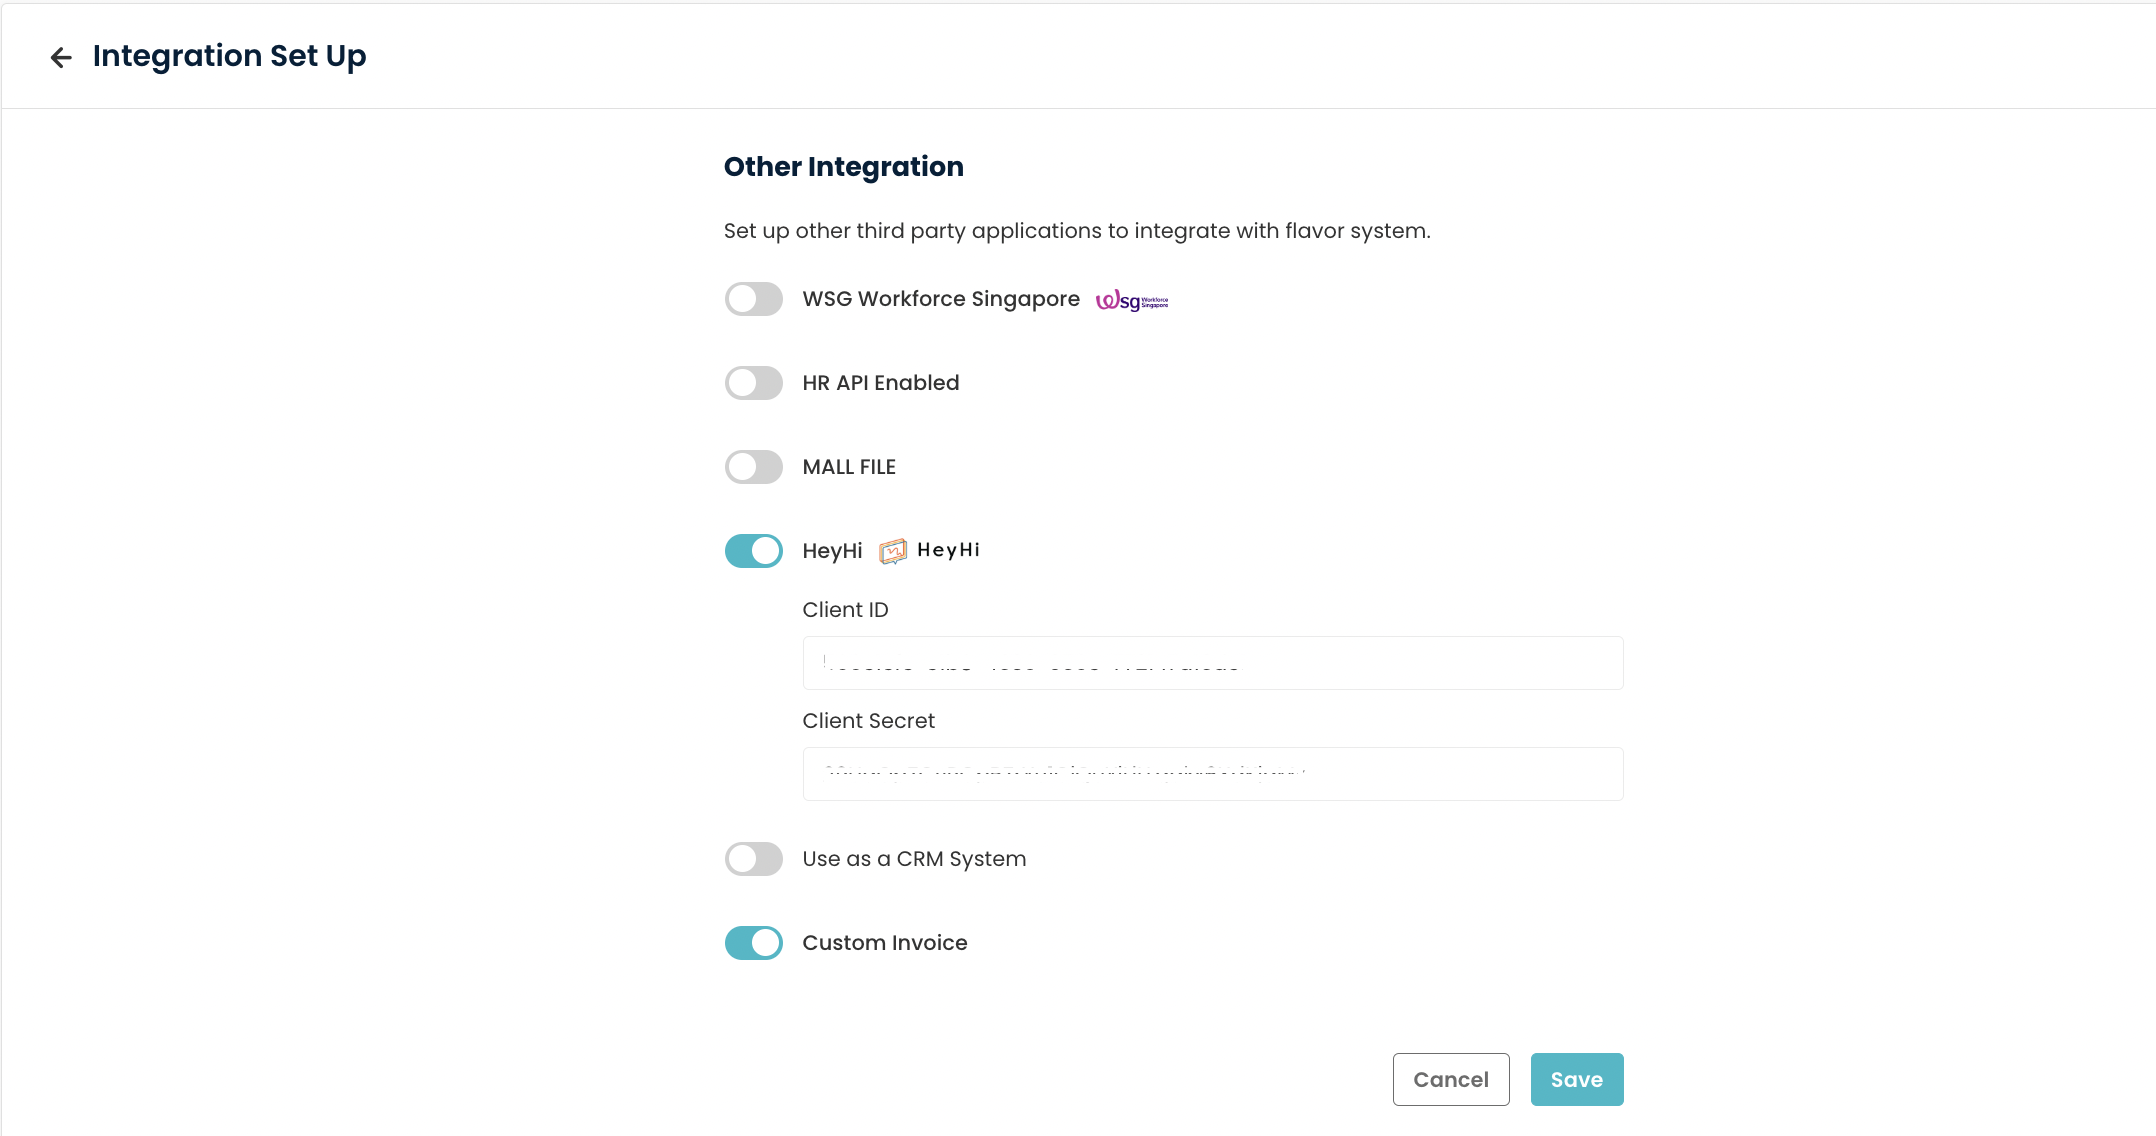
Navigate to the Flavor Settings Page:
-
Go to System > Other Integration.
-
-
Enable HeyHi:
-
Toggle the switch to enable HeyHi integration.
-
-
Enter Credentials:
-
Fill in the Client ID and Client Secret (contact HeyHi Support for these details).
-
-
Save Changes:
-
Click Save to apply the settings.
-
Step 2: Automatic Data Synchronization
Once HeyHi is integrated:
-
All newly created data (Students, Parents, Classes, and Teachers/Tutors) will automatically sync to HeyHi.
Step 3: Access HeyHi Login Details
To retrieve login details for HeyHi:
-
For Students:
-
Open the Student Profile.
-
Click on HeyHi Detail to view the login information.
-
-
For Parents and Teachers:
-
Open the respective Parent Profile or Teacher Profile.
-
Click on HeyHi Detail to access their login details.
-
Step 4: Sync Existing Data
For existing data (Students, Parents, Teachers) added before integration:
-
Open the respective profile (Student, Parent, or Teacher).
-
Click on Sync with HeyHi to update their information in HeyHi.
Step 5: Sync and Manage Existing Classes
This step covers syncing existing classes and updating their schedules.
5.1: Sync Existing Classes
-
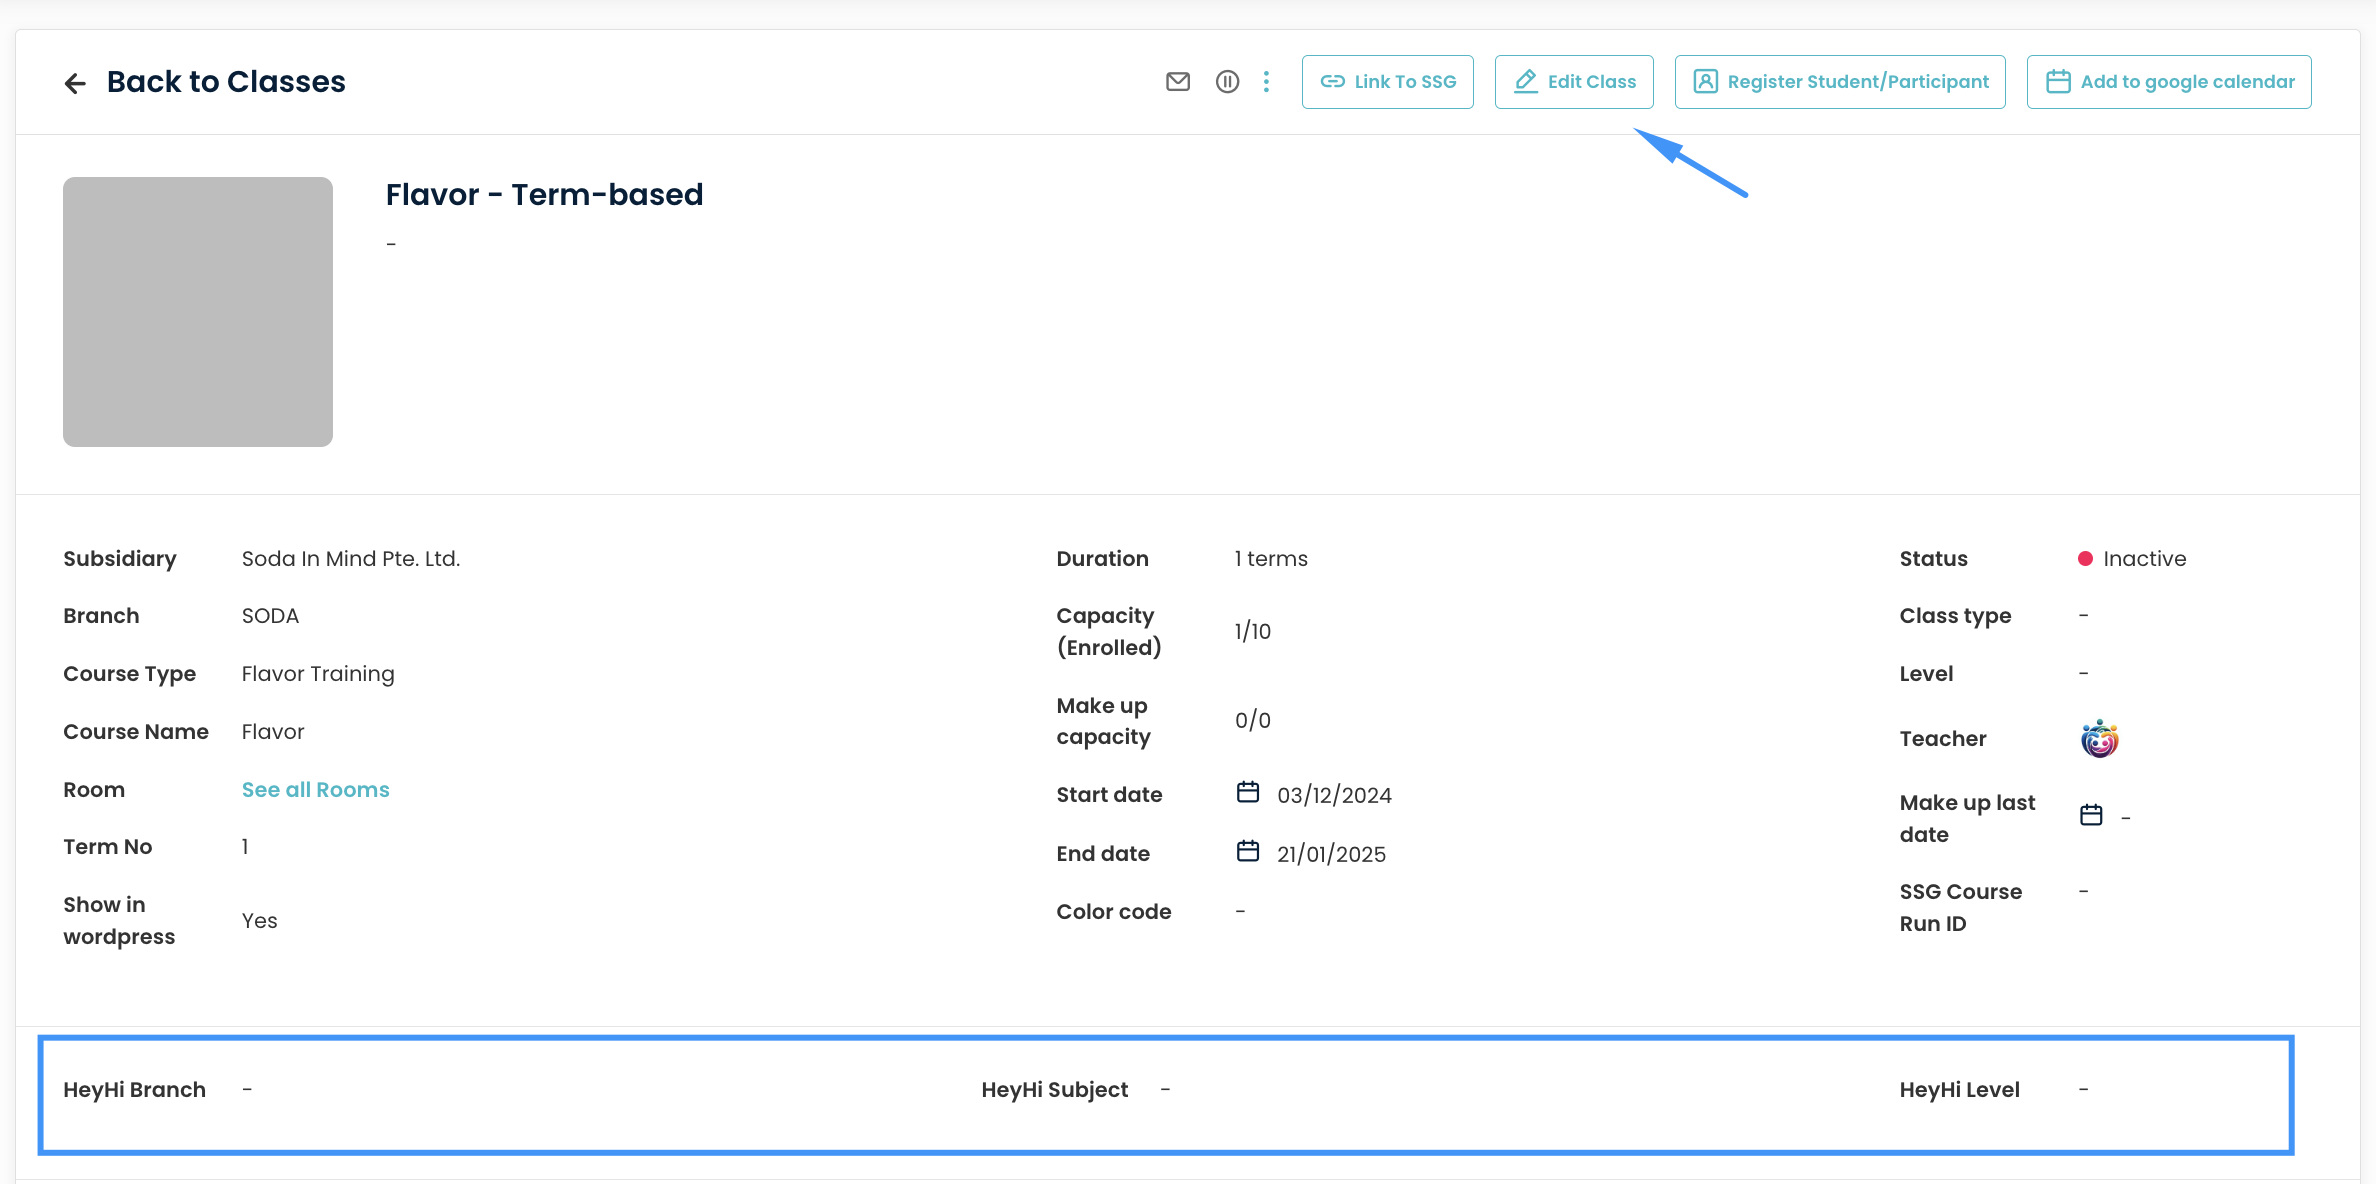
Open the Class Detail Page.
-
Edit the class and assign the correct information for:
-
HeyHi Branch
-
HeyHi Subject
-
HeyHi Level
-
-
Save the changes.
5.2: Update Class Schedules
-
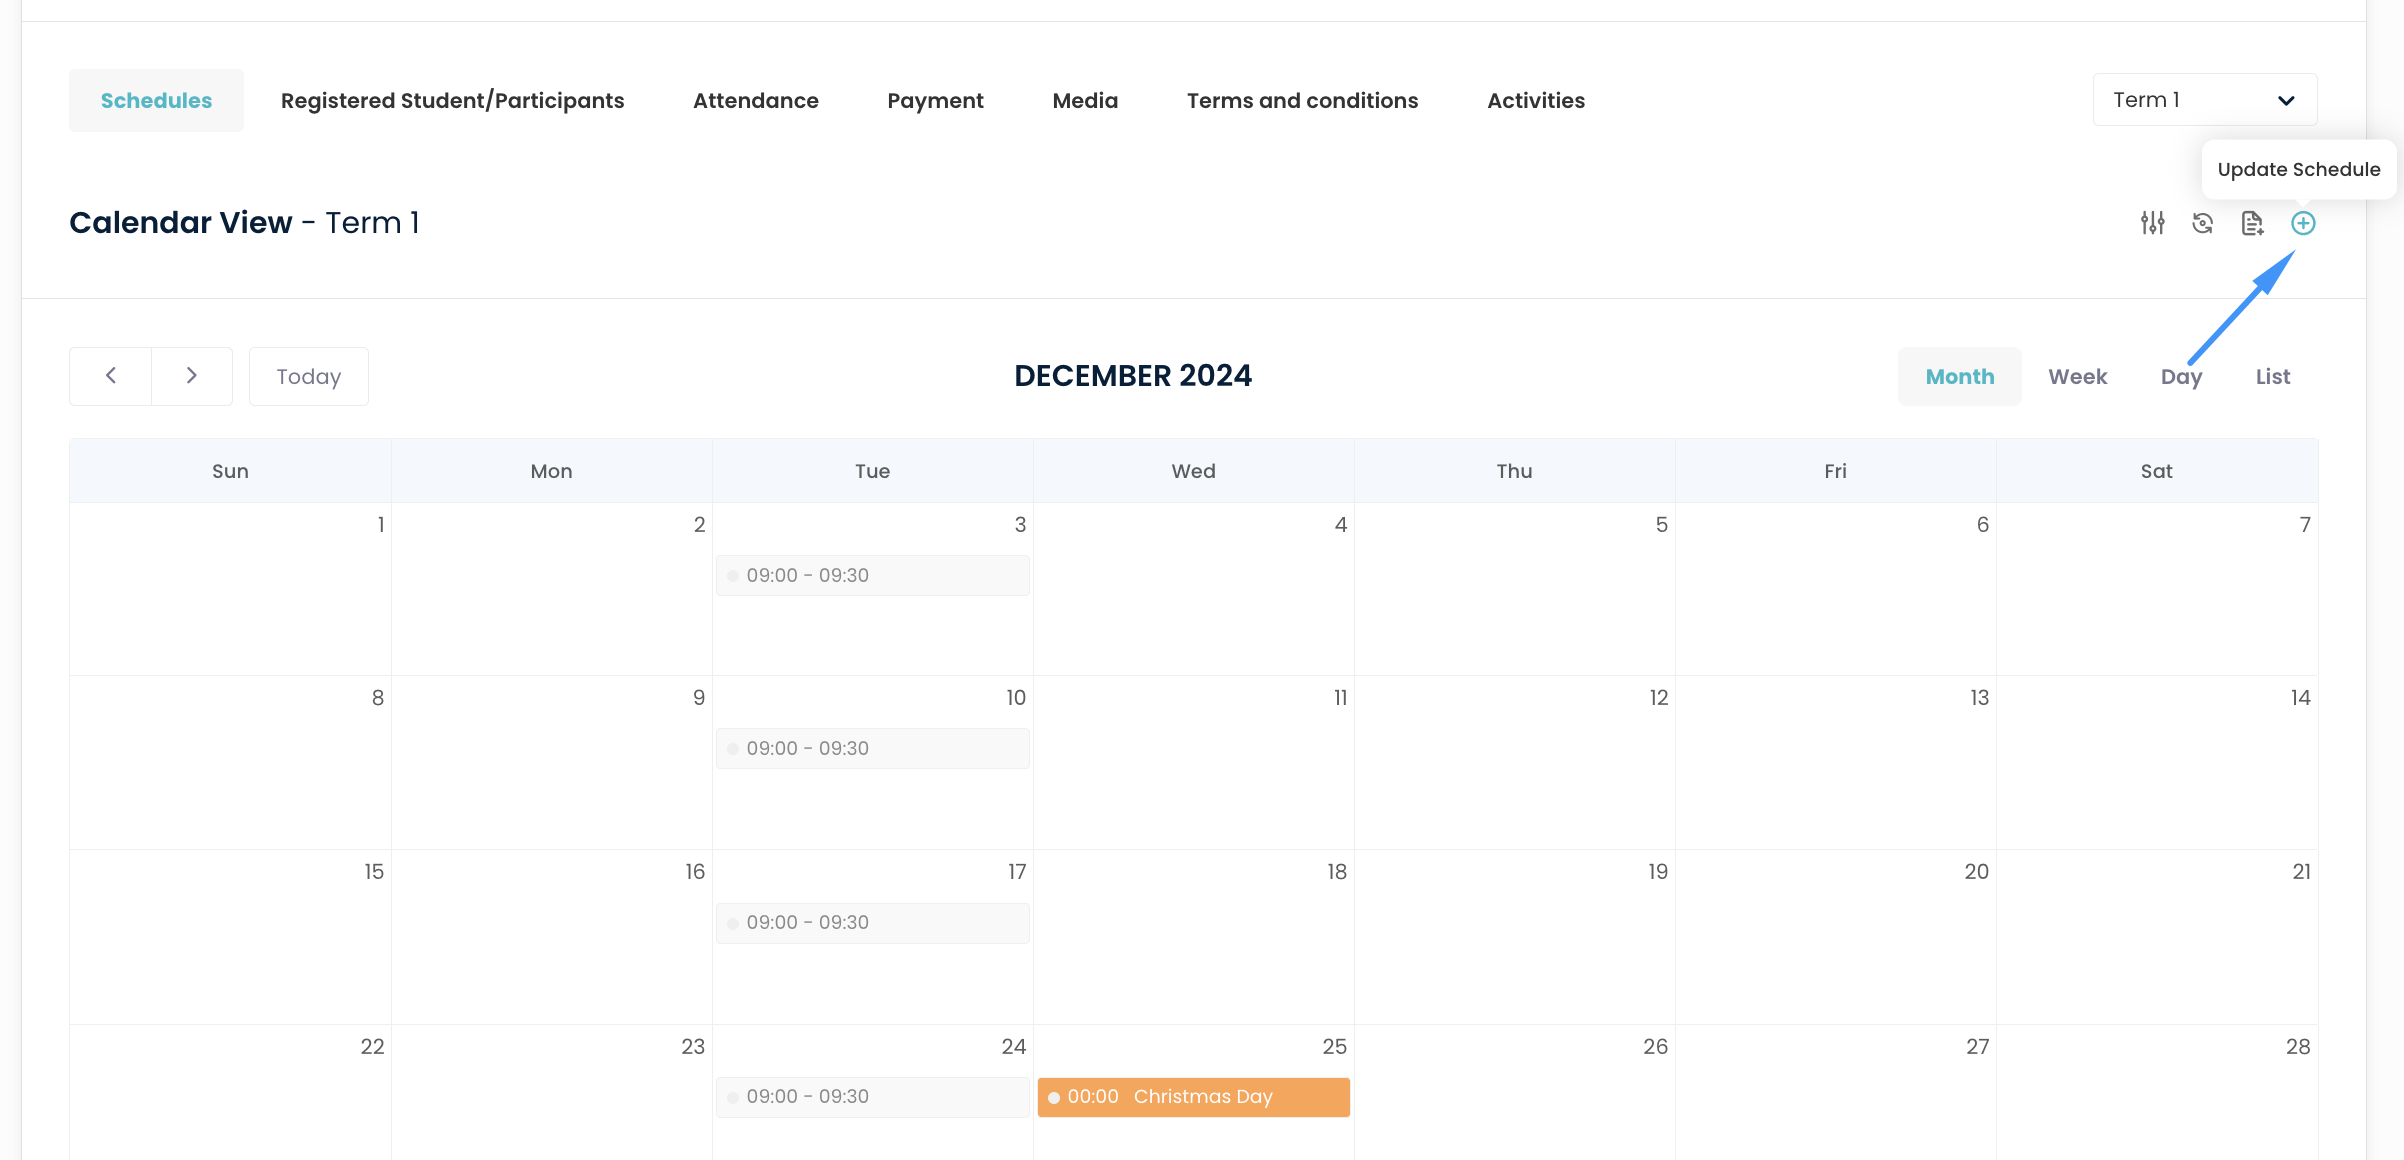
In the Class Detail Page, go to the Schedules Tab.
-
Click on Update Schedule to link the correct teacher to the class.
-
In the Update Schedule Page:
-
Click on Reschedule to refresh the teacher linking.
-
If there are students in the class:
-
Click Update Enrollment if you make changes to the session date, timing, room, or teacher.
-
Choose Without Update Enrollment if no changes are needed.
-
Note: Updating enrollment may affect unpaid student invoices if the class fee is set per session and the student is not registered for all sessions.
-
-
-
Click the Back Icon to return to the Class Detail Page.
5.3: Sync Students in a Class
-
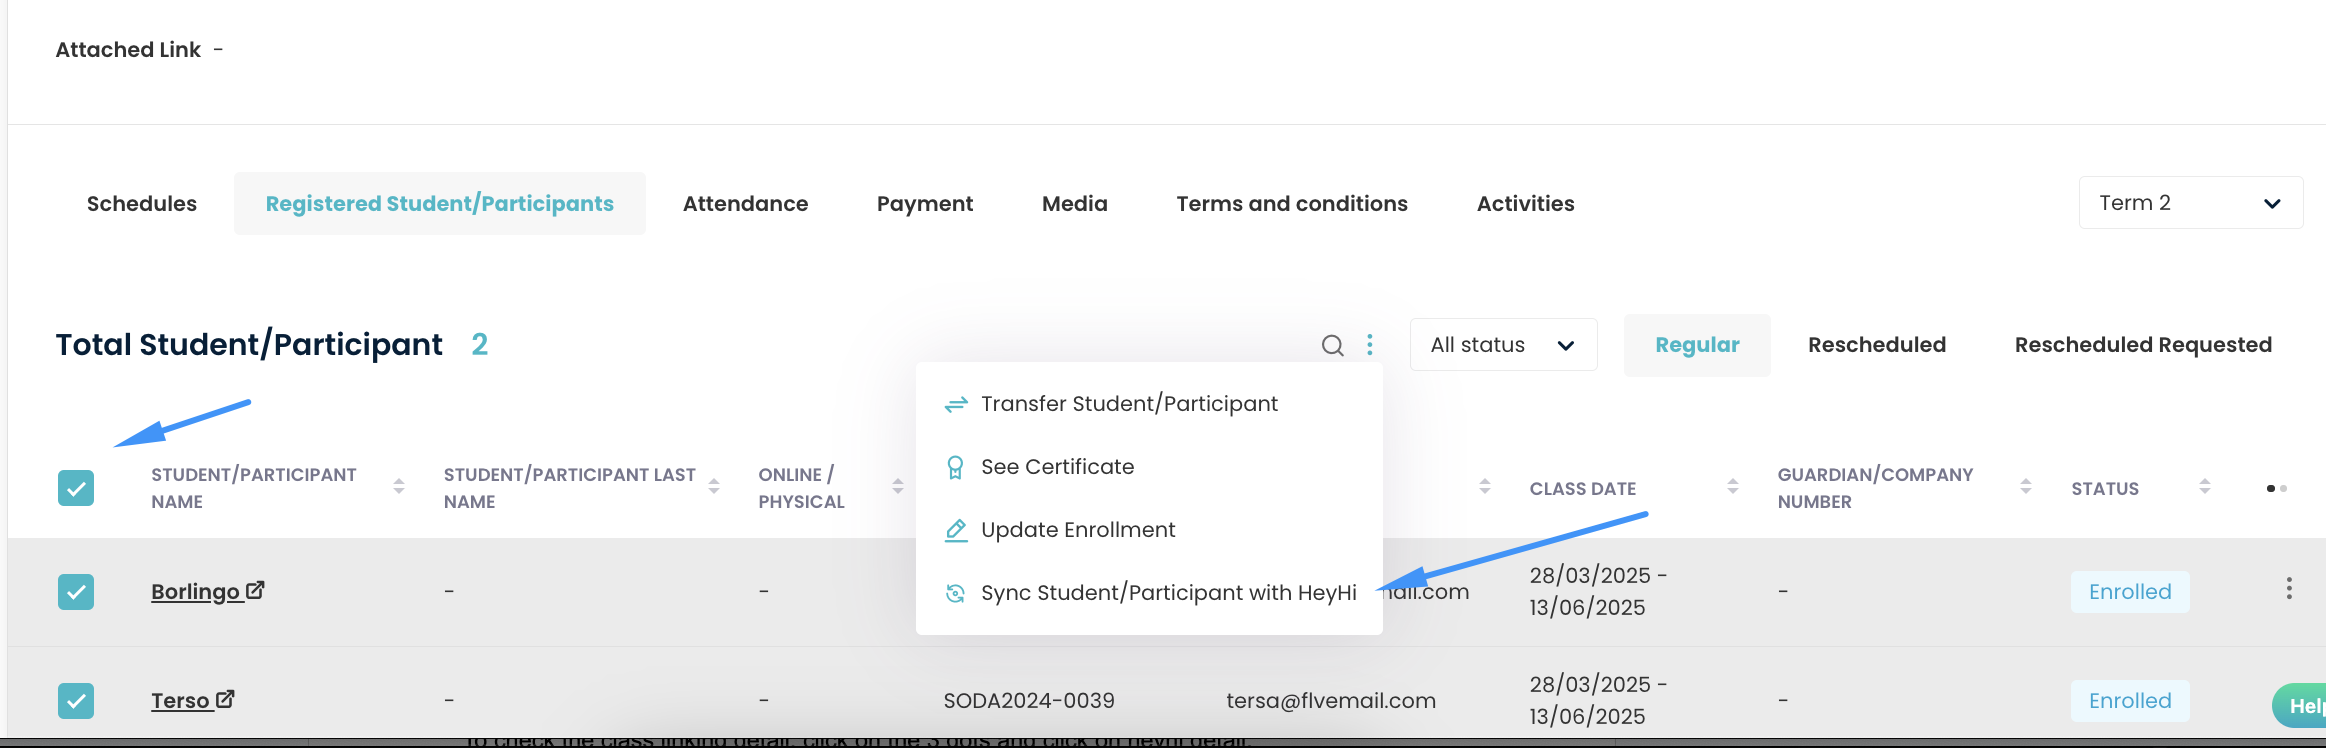
In the Class Detail Page, go to the Registered Student Tab.
-
Select the student, click the 3 Dots, and choose Sync Student with HeyHi.
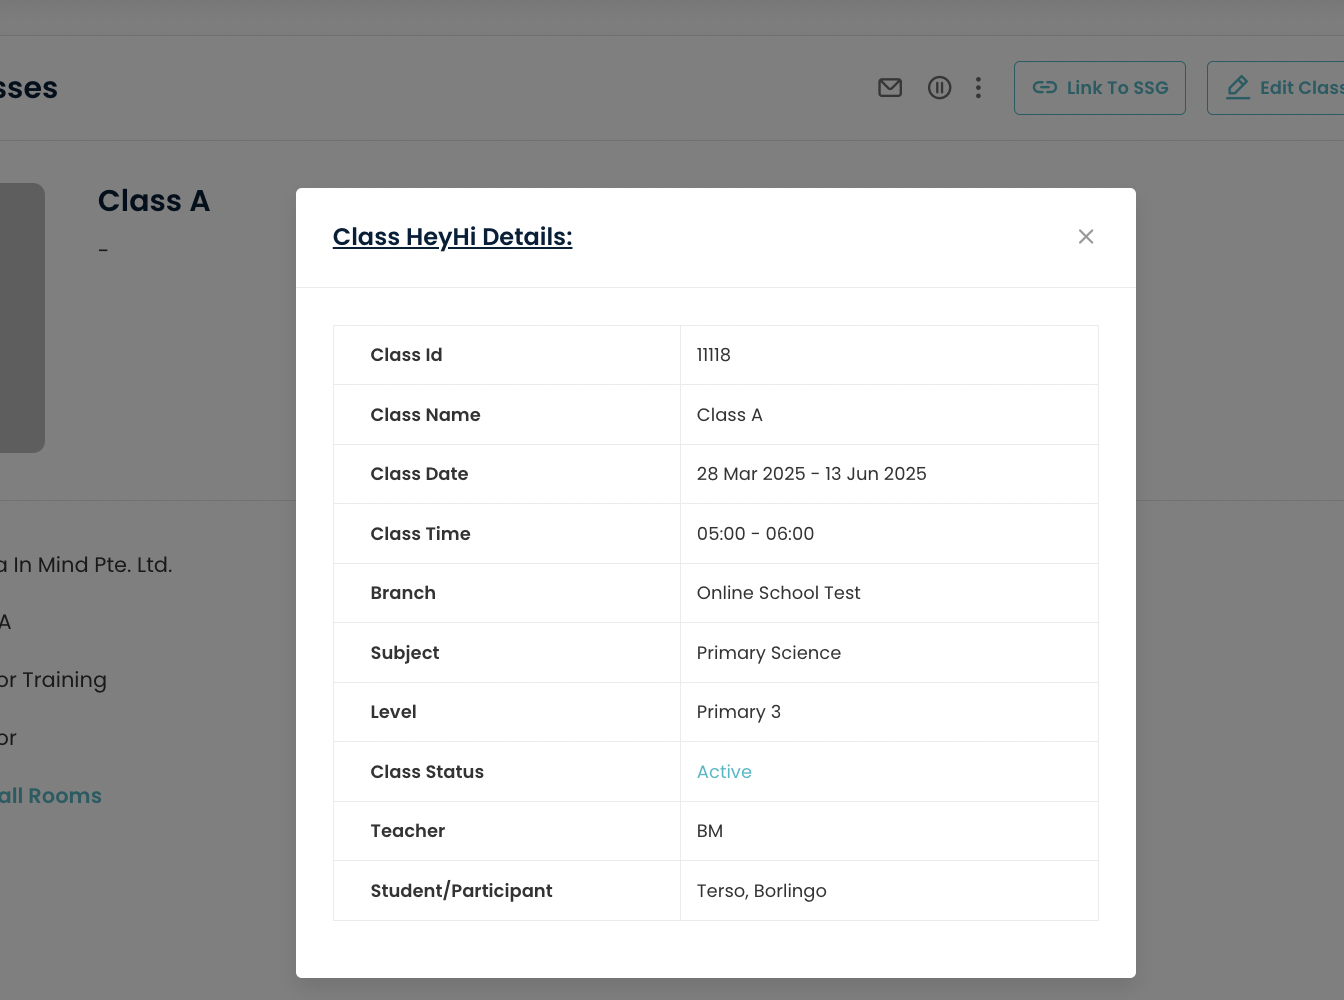
5.4: Check Class Linking Details
-
In the Class Detail Page, click the 3 Dots next to the class.
-
Select HeyHi Detail to view all information related to the class in a pop-up window.
Step 6: Sync Newly Created Classes
For newly created classes after integration:
-
The class will automatically sync to HeyHi once the data (Students, Parents, and Teachers) is synced.
Step 7: Manage Student Registrations
-
When a class is synced with HeyHi:
-
Registering a new student or withdrawing a student will automatically update the HeyHi Class.
-
Summary
By following these steps, you can seamlessly integrate HeyHi into your system and ensure that all data is synchronized accurately. If you encounter any issues, contact Flavor Support for assistance.
Note: Always double-check the information entered (e.g., Client ID, Client Secret, HeyHi Branch, Subject, and Level) to avoid synchronization errors.
Need more help? Ask us a question
Please let us know more of your details and our team will reach out to you very shortly.