
How to Merge Invoices?
To merge the invoices you have to enable Merge Invoices functionality from the Invoice Configuration.
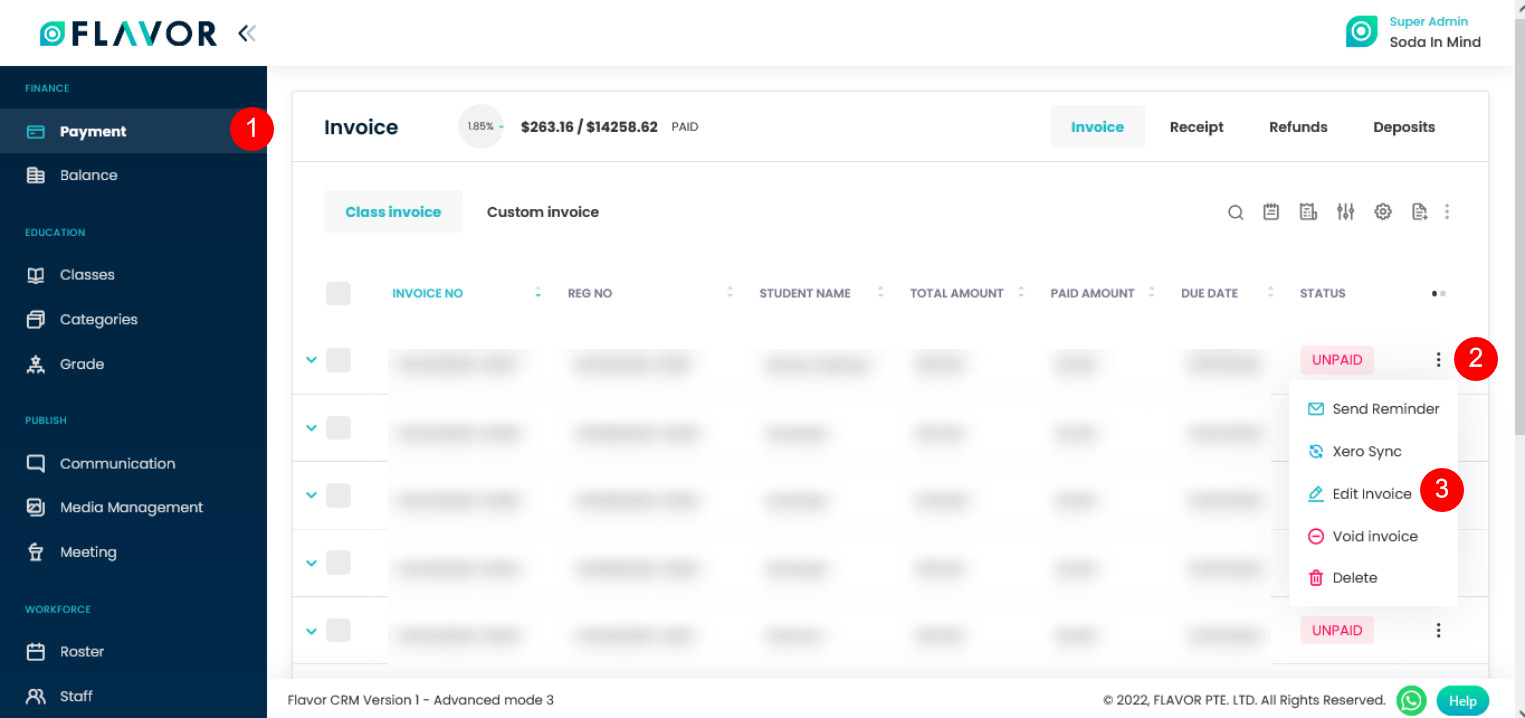
Step 1.1
- Go to the Payment Module from the left menu.
- Click on Action Button (3 vertical dots), After clicking, a small pop up form will be open.
- Click on the Edit Invoice option.
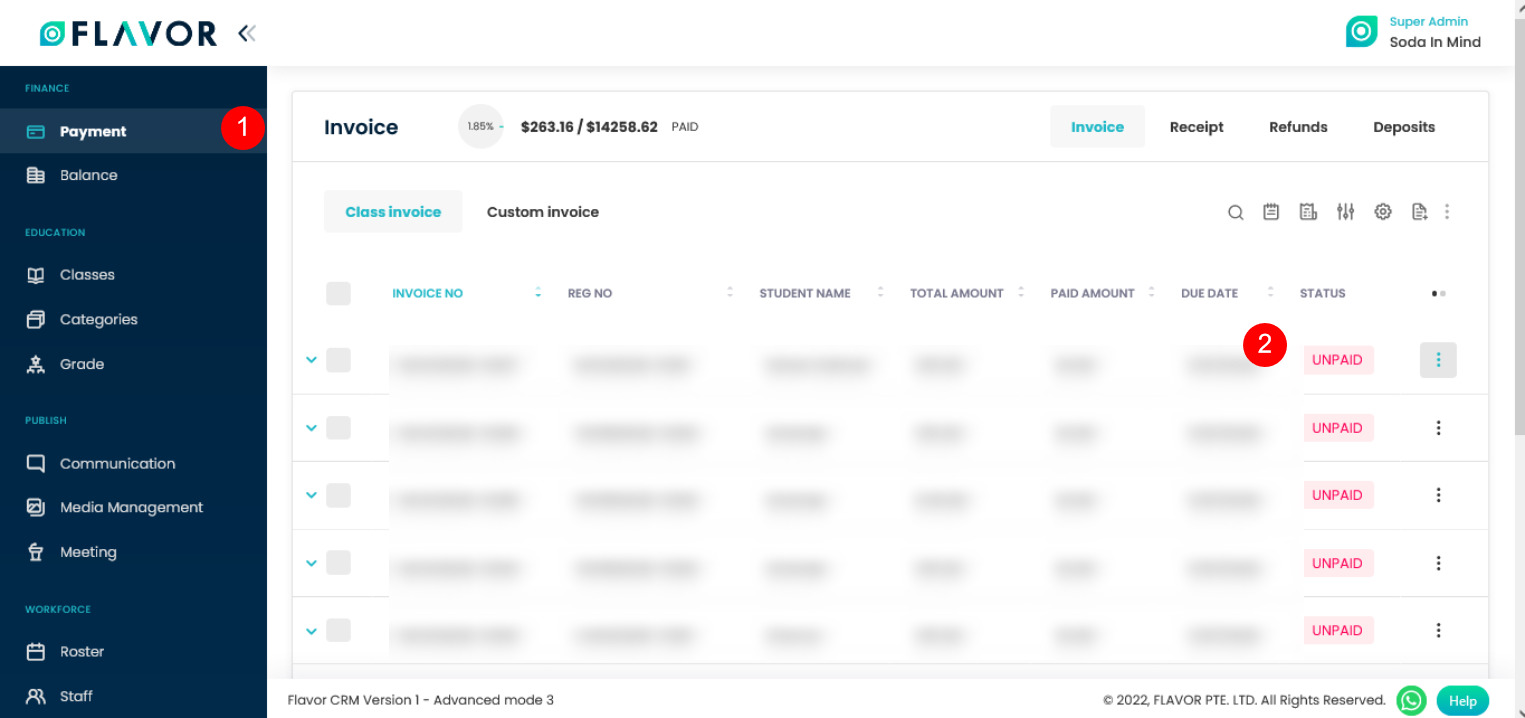
Step 1.2.1
- Go to the Payment Module from the left menu.
- You will see a list of invoices, click on desired invoice’s row to view Invoice details.
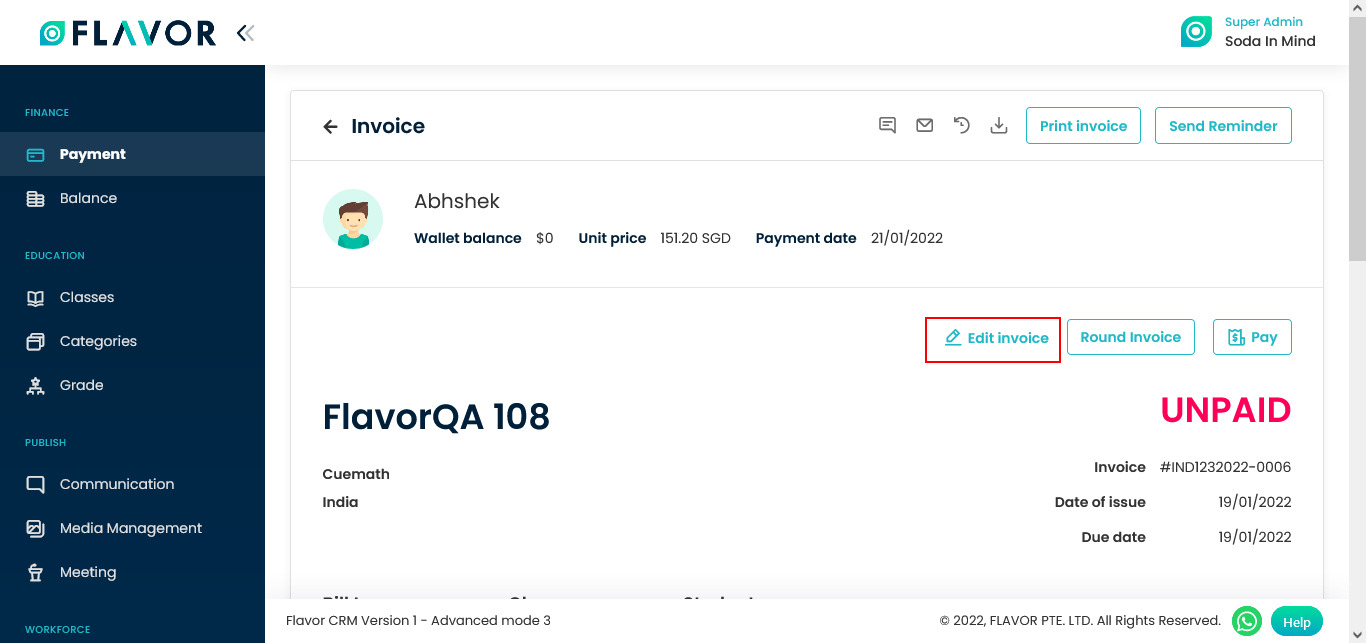
Step 1.2
After clicking on the desired invoice’s row, the invoice will be open. Click on the Edit Invoice button.
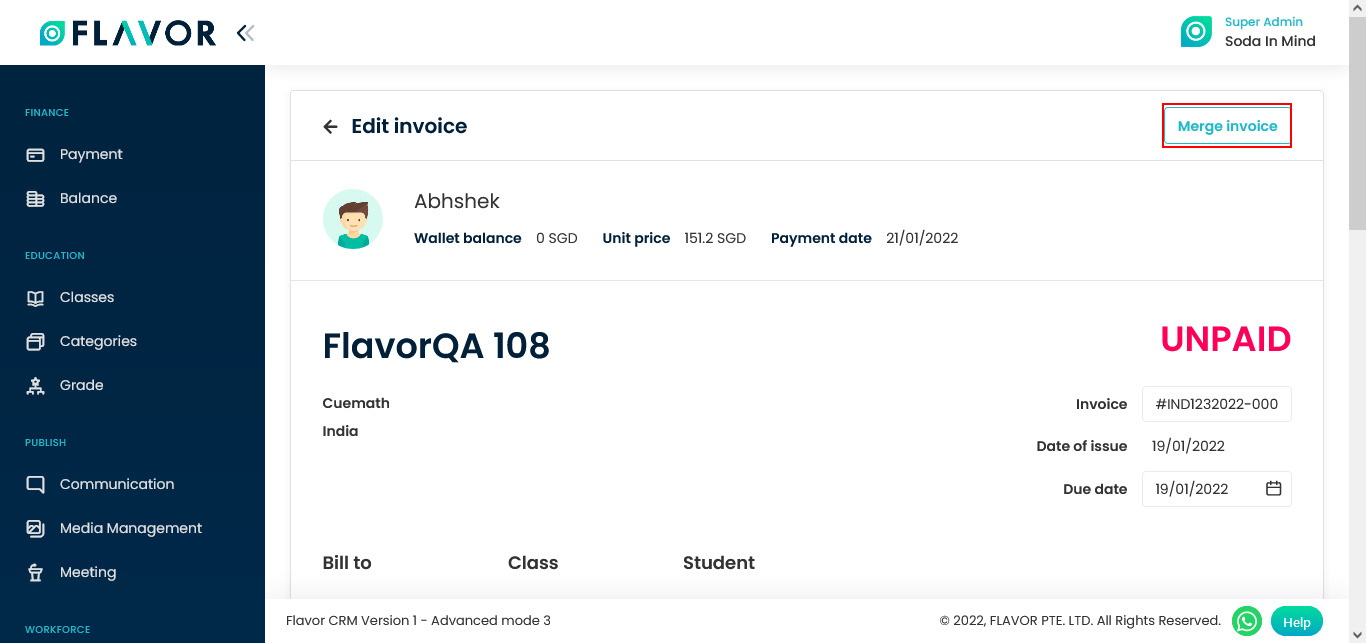
Step 2
After clicking on the Edit Invoice button, the invoice will open here, and on the top right corner, you will see the Merge Invoice button. Click on that button.
Step 3
After clicking on the Merge Invoice button a pop-up form will appear. Here, you see two options to merge invoices, Merge Invoice within Same Student & Merge Invoice within Siblings, choose the option according to your requirement.
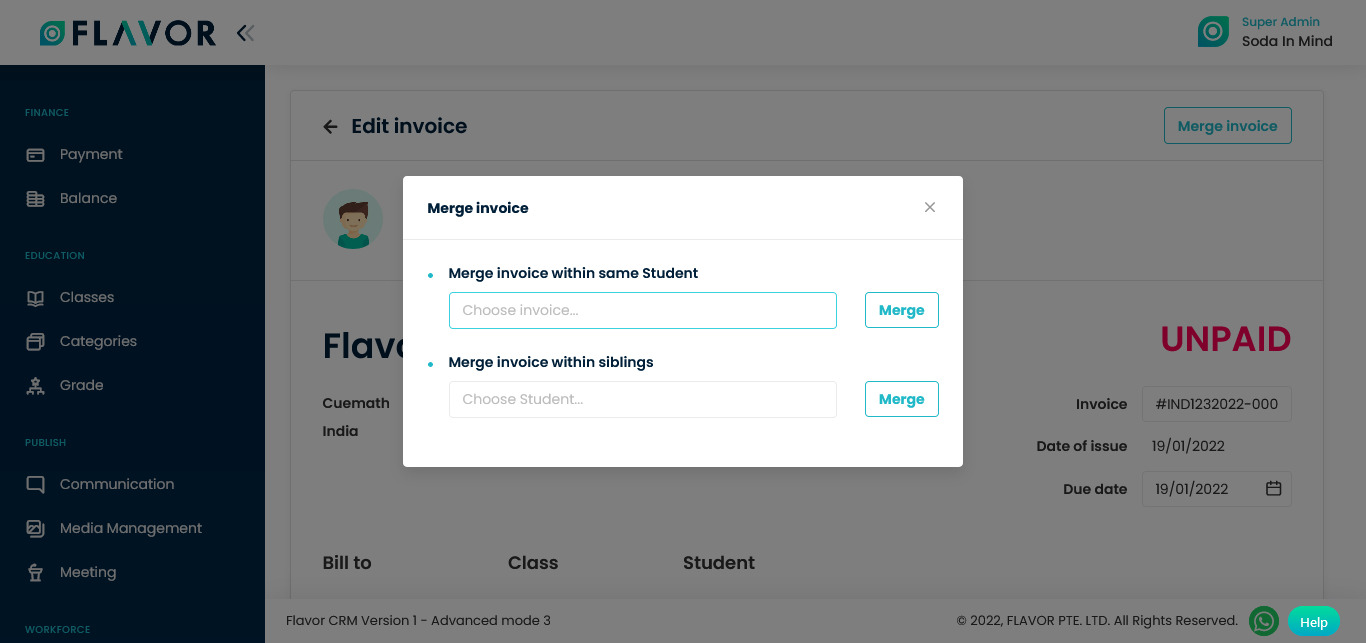
Step 4
- If you want to Merge Invoice within the Same Student, click on that option and a dropdown list will appear.
- Select the desired student and then click on the Merge button.
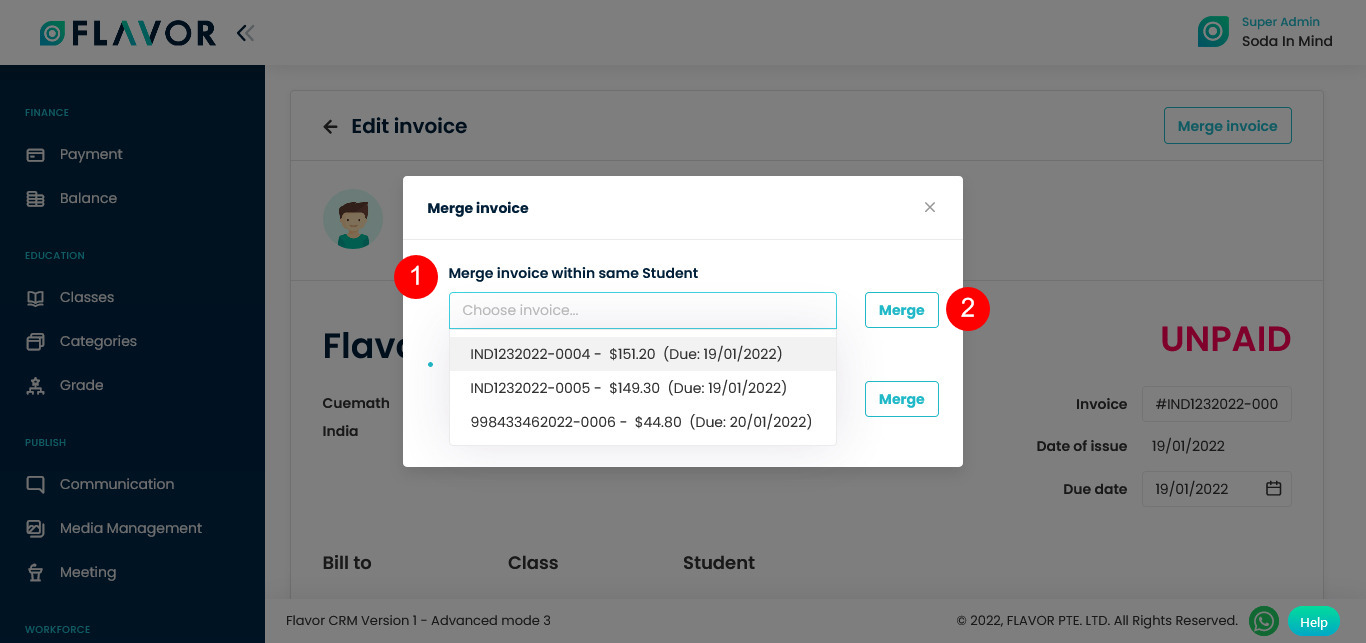
Step 5
- After selecting the desired student, you have to click on the Merge Button, then you will be asked for this Merge Invoice confirmation.
- Click on the Yes button & your invoice will be merged.
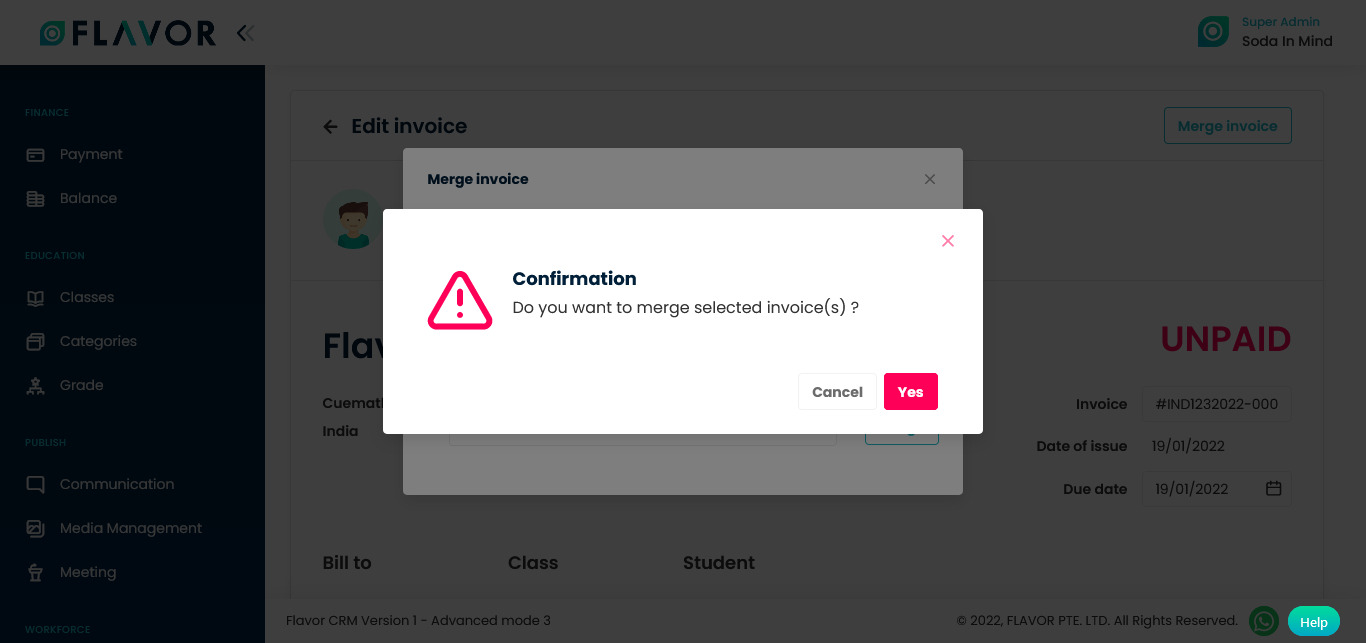
Step 6
- If you want to Merge Invoice within Siblings, click on that option and a dropdown list will appear.
- Select the desired student and then click on the Merge button.
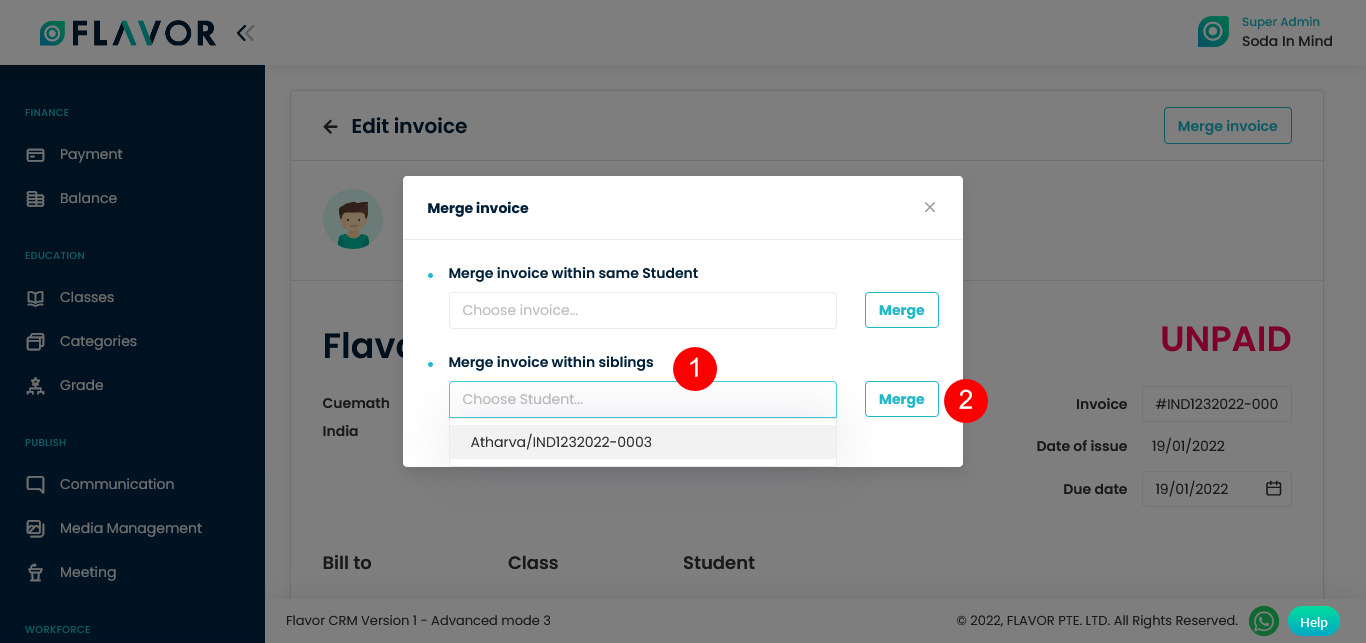
Step 7
- After selecting the desired student, you have to click on the Merge Button, then you will be asked for this Merge Invoice confirmation.
- Click on the Yes button & your invoice will be merged.

Need more help? Ask us a question
Please let us know more of your details and our team will reach out to you very shortly.