
Step 1
To create a Custom Invoice:
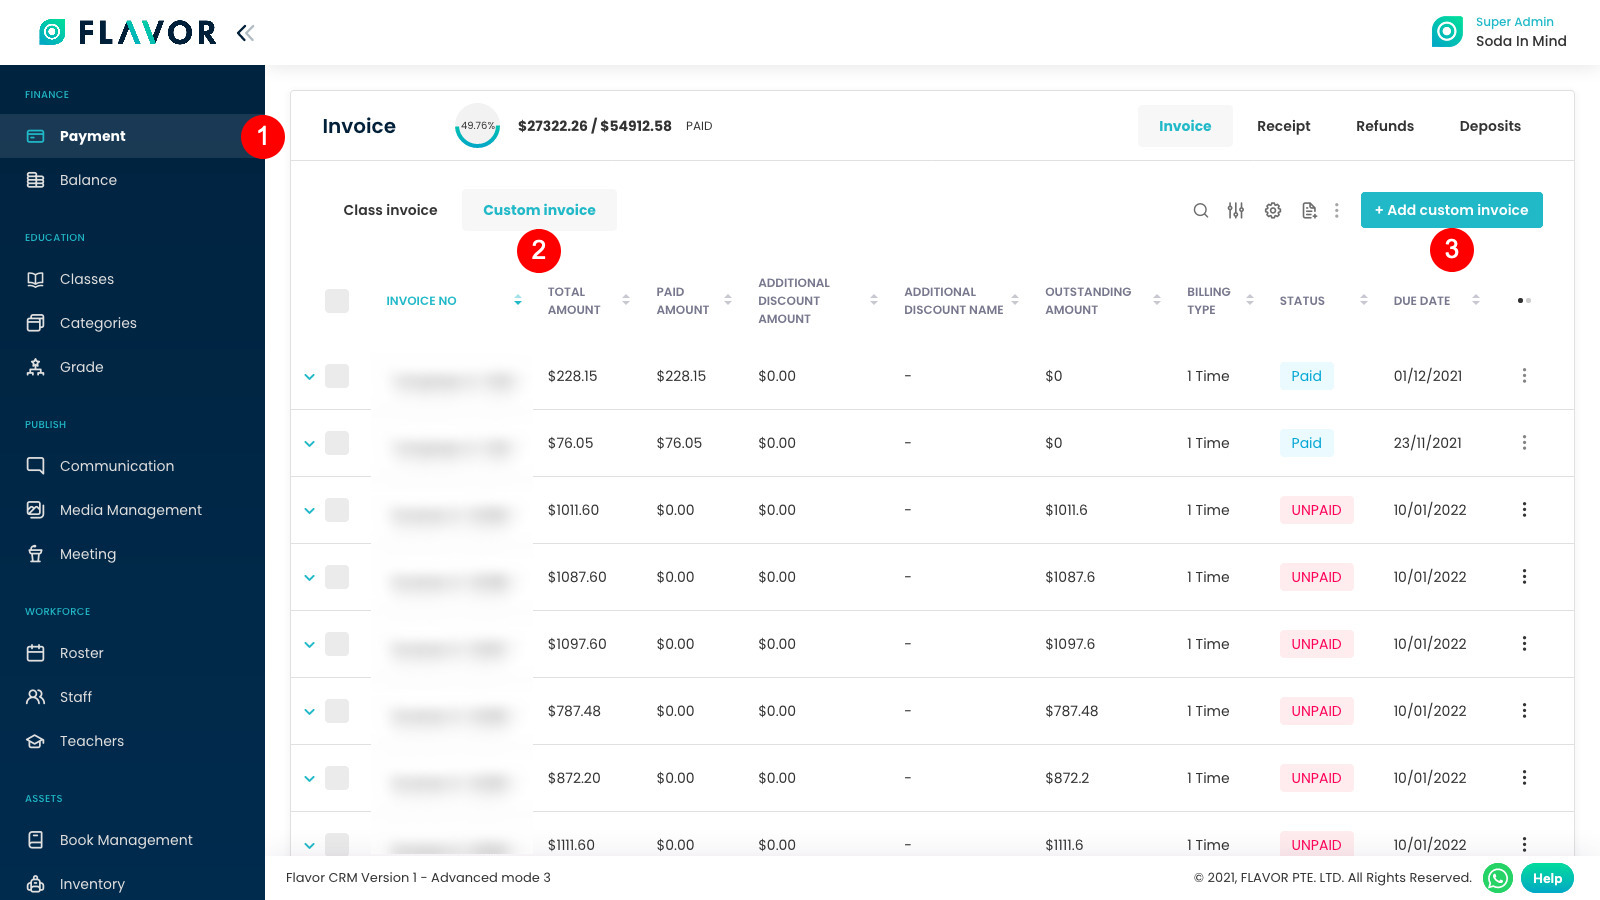
- Go to Payment from the left menu.
- And then, click on Custom Invoice. Through this you can use all the invoices that have been generated manually.
- Now, click on Add custom Invoice.
Step 2
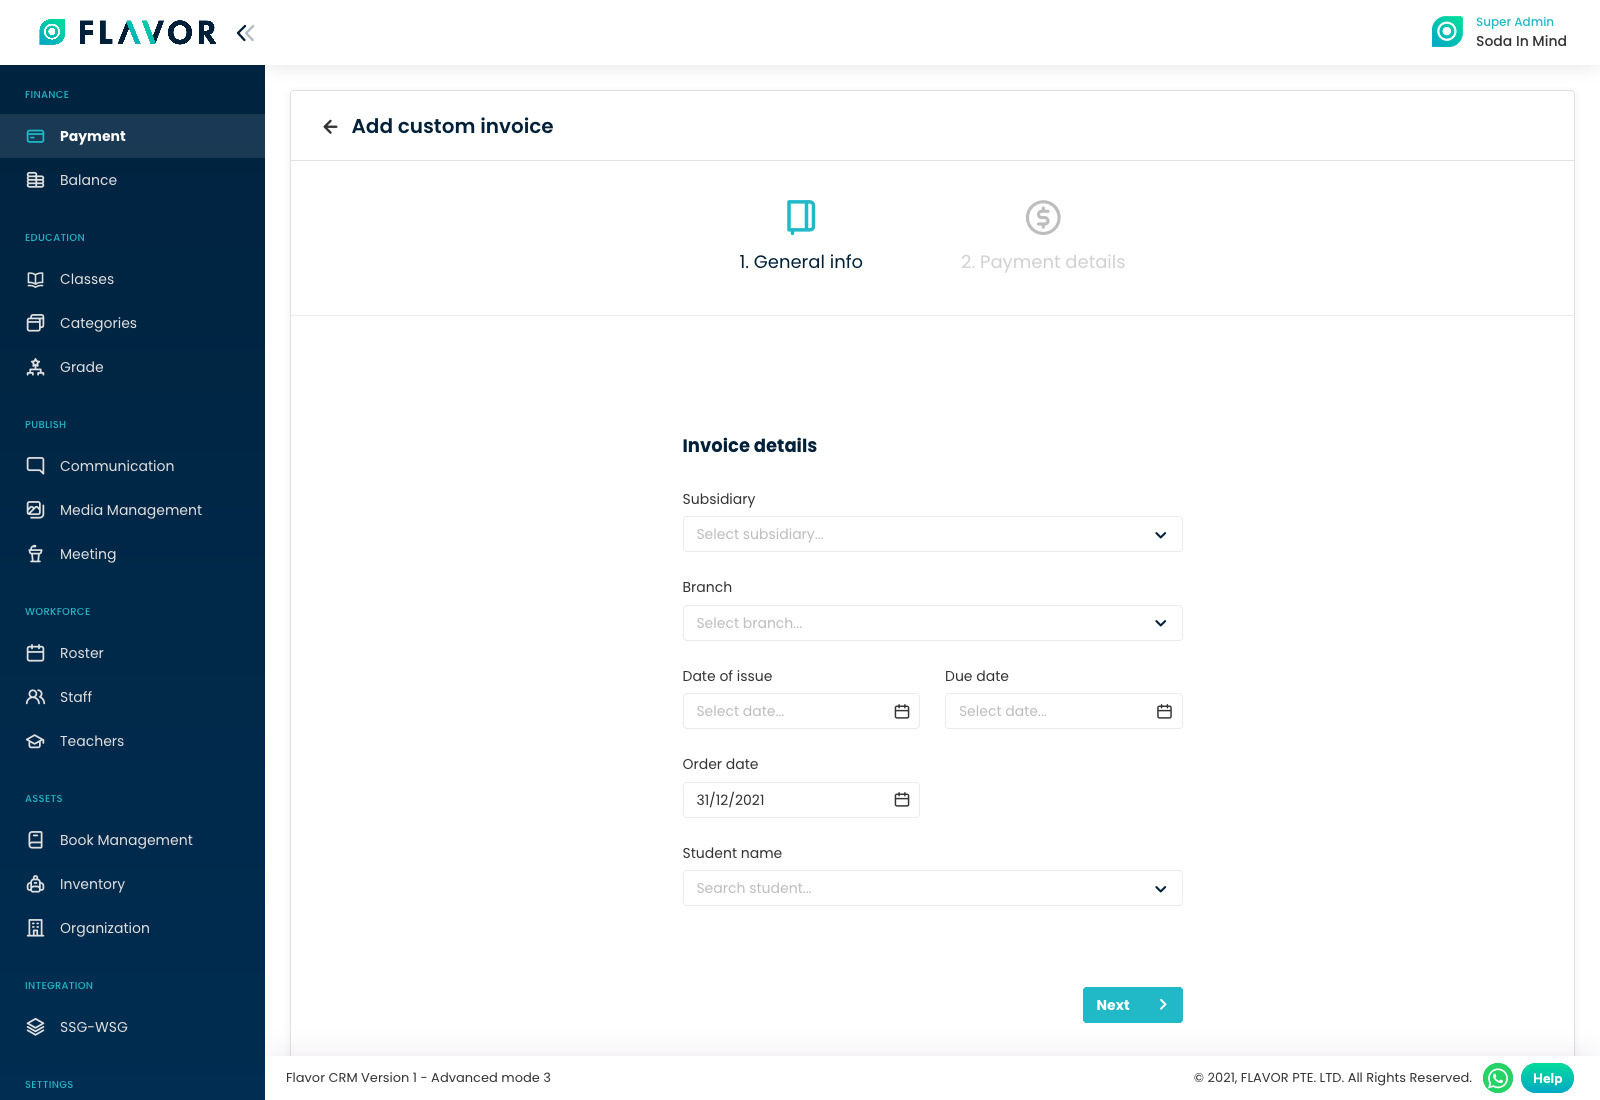
Here fill up all the General information described below: related to Subsidiary, Branch, Date of Issue, Due Date, Student name.
- Select the Subsidiary from the list.
- Select the Branch from the list.
- Date of Issue: Date on which Invoice is issued. Select the date from the Date Picker Tool.
- Due Date for the invoice to be paid on. Select the date from the Date Picker Tool.
- Order Date: Select the date from the Date Picker Tool.
- Select the Student Name from the list.
After that, click on Next. Once clicked on the Next button, the Payment details tab will open.
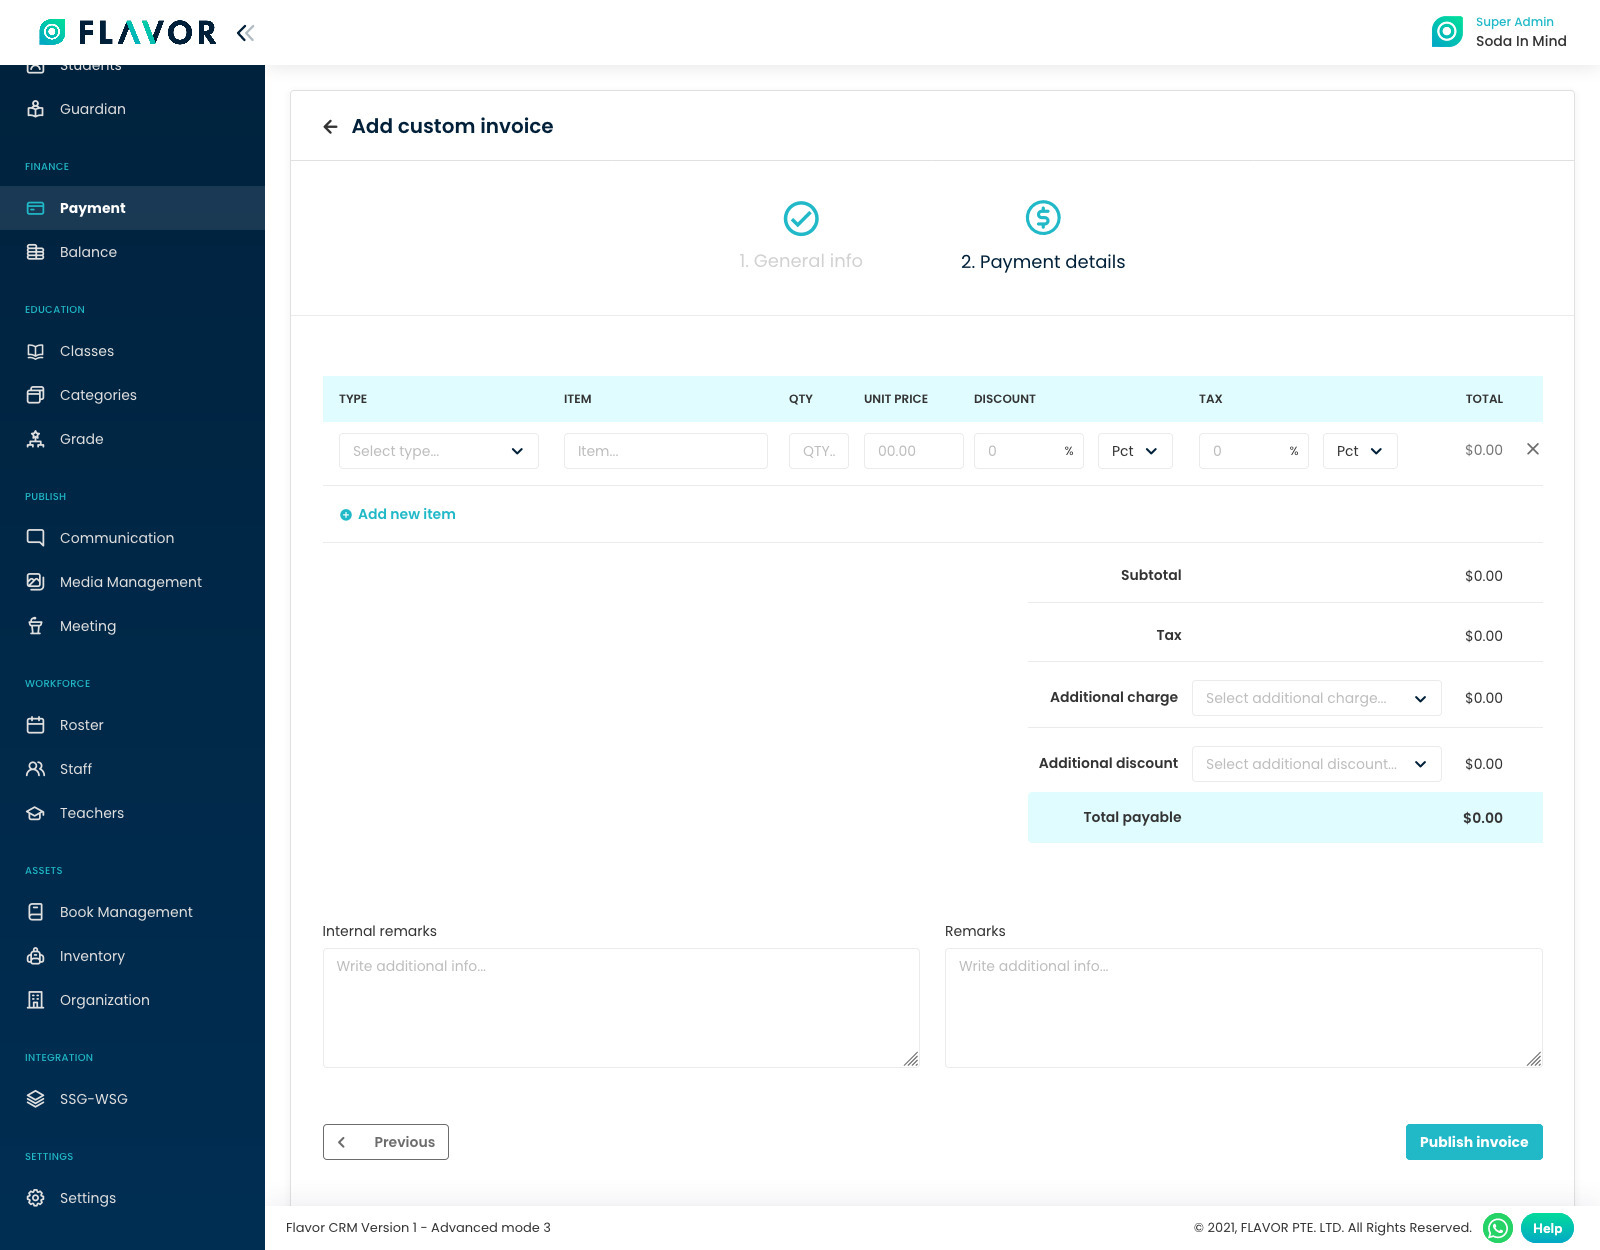
Step 3
Enter the Payment details in this section for your invoice.
- Type: Select the item type.
- Item: Enter the Class Name.
- QTY: Quantity/Sessions of Class.
- Unit Price: Unit price is Price per Session/Class.
- Discount: Enter the discount if you offer any type of discount. Select Pct if discount is offered in Percentage. Select Flat if the fixed discount is offered.
- Tax: Enter the tax amount if you charge any type of tax. Select Pct if tax is charged in Percentage. Select Flat if the fixed tax is charged.
- After Entering all the details, the Total box will show the amount needed to be paid.
- Subtotal and Total both are the same amount displayed.
- Tax amount will be displayed in $.
- Select Additional charges if you charge extras.
- Additional discount/Special discount.
- Internal Remarks: These remarks are displayed internally.
- Remarks: External Remarks displayed on Invoice.
After entering all the required fields, click on Publish invoice. You will get notification for successfully generated custom invoice.
If you want to make changes in General Info, click on Previous button.
Need more help? Ask us a question
Please let us know more of your details and our team will reach out to you very shortly.