
This article let you understand how to do settings for Custom Invoice.
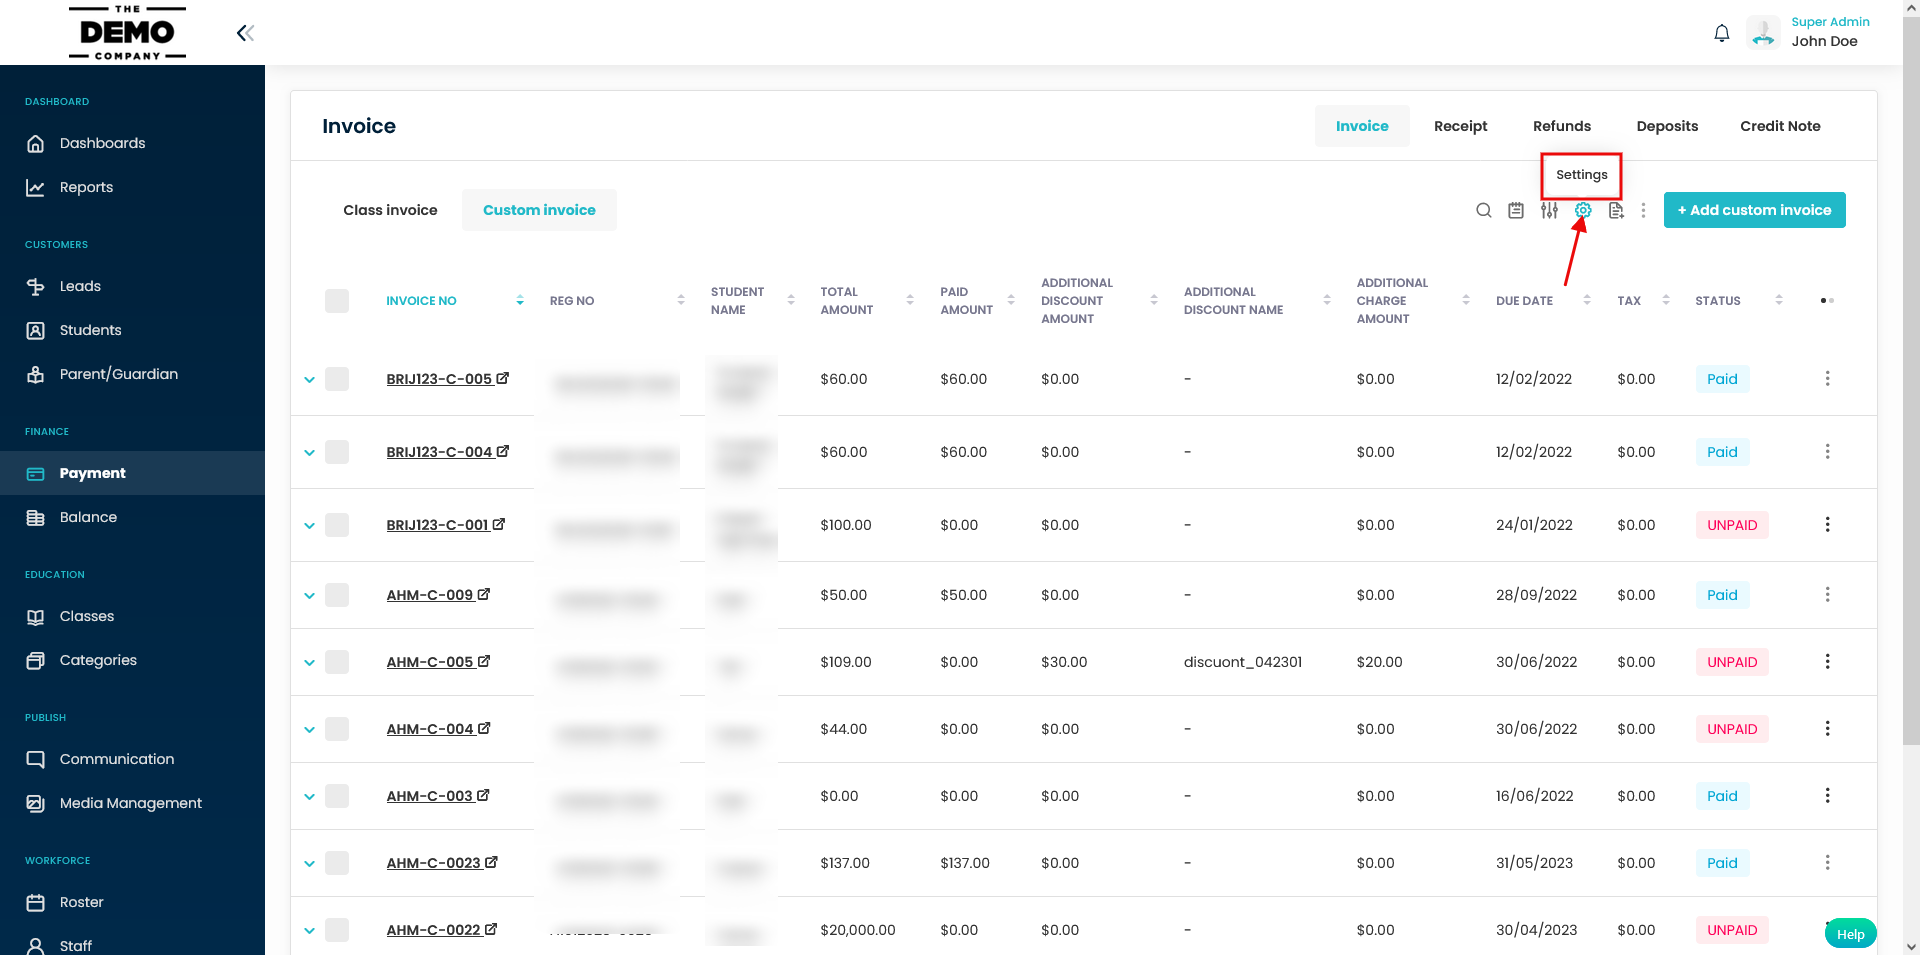
Step 1
- Go to Payments from the left side menu of the Flavor System.
- Click on Custom Invoice tab.
- Go to Settings.
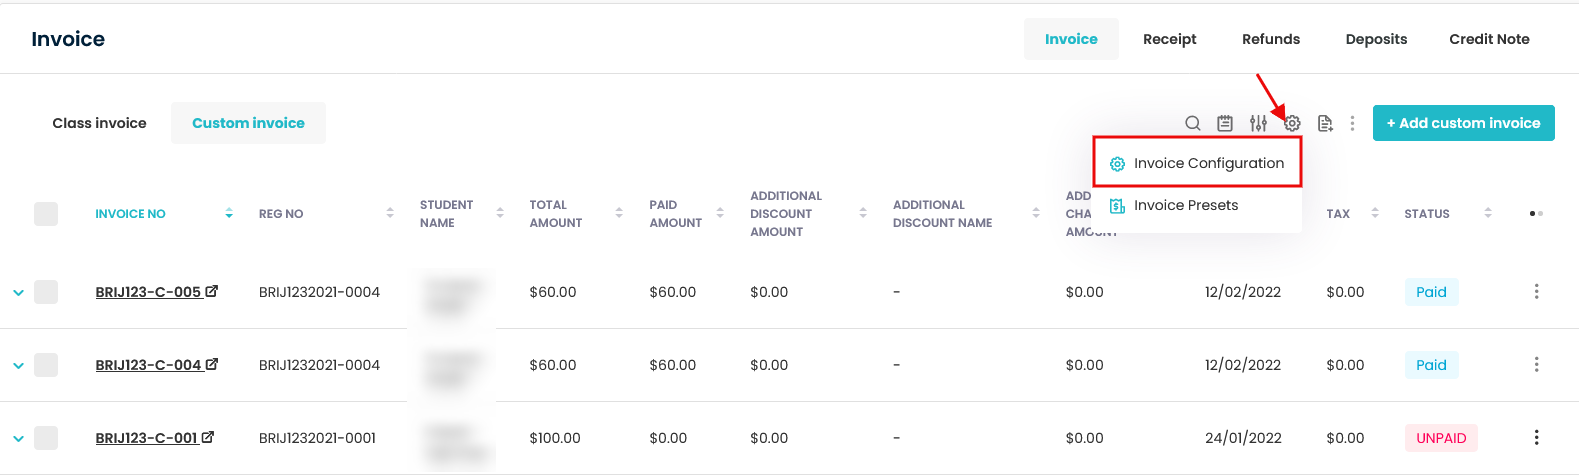
Step 2
- A small popup appears with two options viz. Invoice Configuration and Invoice Presets.
- Click on Invoice Configuration.
Step 3
- It will redirect you to the Custom Invoice Configuration page.
- Custom Invoice Configuration page has two tabs viz. Subsidiary Configuration and General Configuration.
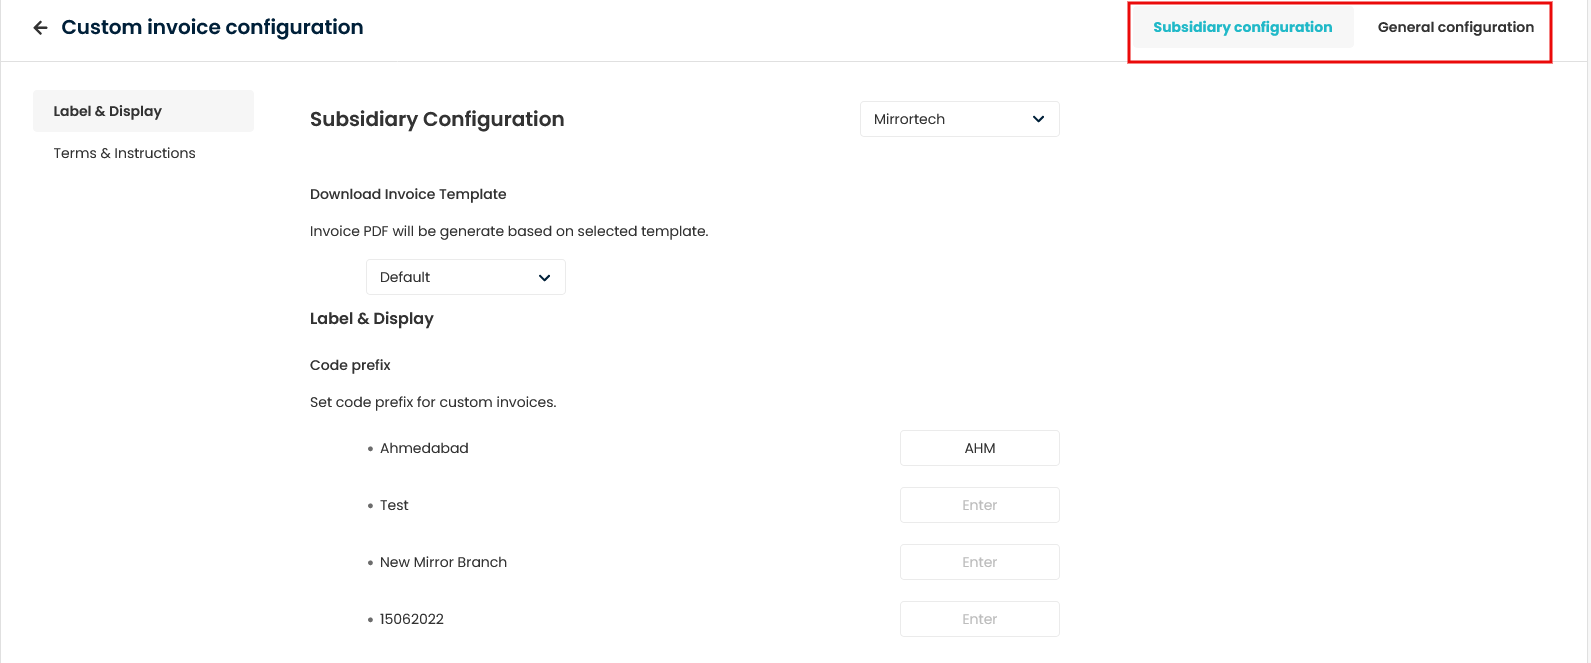
Subsidiary Configuration
Step 1
- Go to the Subsidiary Configuration Tab.
- You will find two sections label viz. Label & Display and Terms & Instructions.
- Before moving ahead, you need to select the Subsidiary for which setting is to be done.
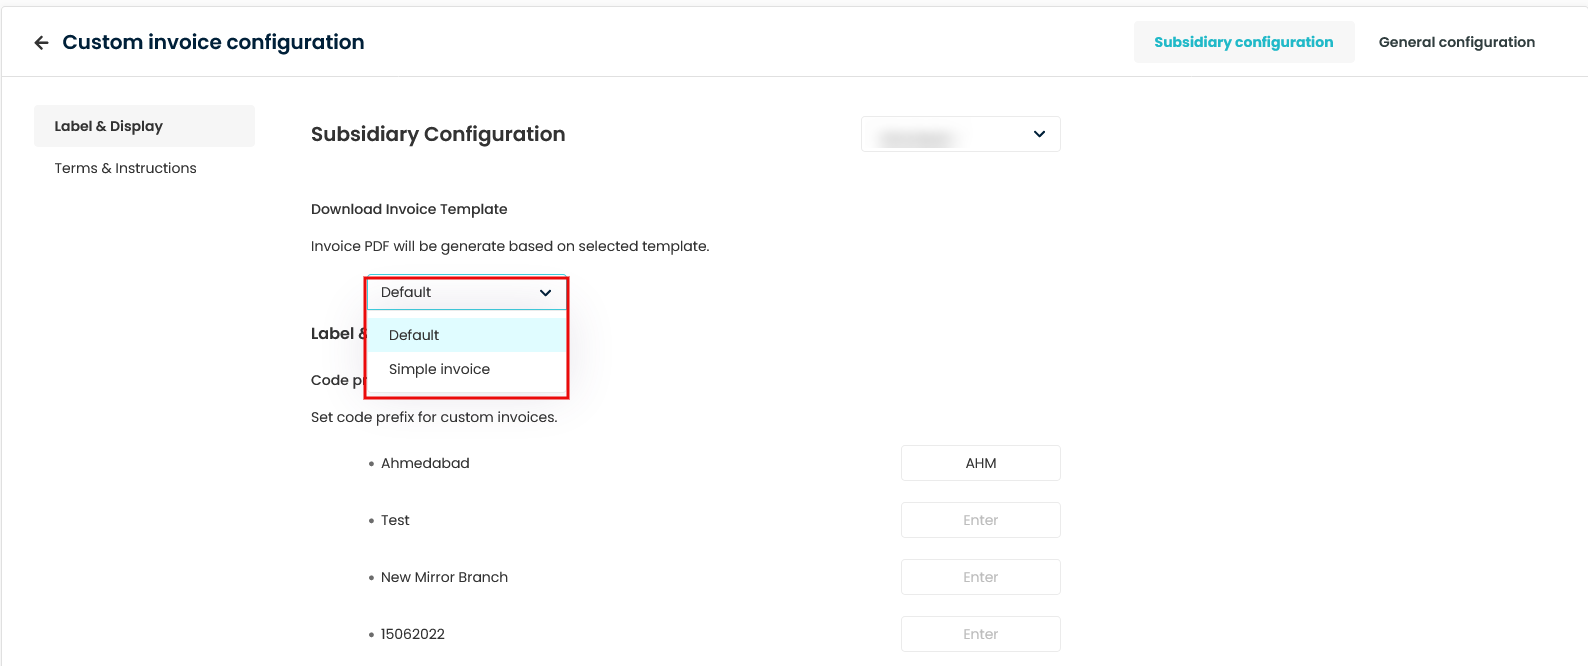
Step 2
- After selecting the Subsidiary from the drop-down, you need to select any one of the options i.e Default or Simple Invoice for Download Invoice Template.
- Invoice PDF will be generate based on the selected template.
Label & Display
- Scroll down to Label & Display.
- Code Prefix: Here, you can set code prefixes for all invoices for the different branches under that specific Subsidiary.
- Custom invoice settings: Here , you can set configuration to show inventory details on custom invoice.
- Other Display Settings: Here, you can set the configuration for label display options on invoices.

Terms & Conditions
- Scroll down to Terms & Conditions.
- Here, you can show or hide terms & instructions on custom invoices.
- Enable Terms & Conditions.
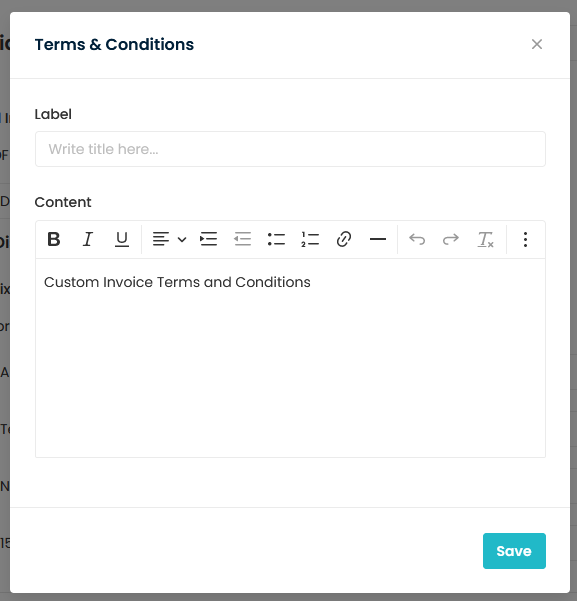
- Click on Edit Content.
- A popup named Terms & Conditions appear on the screen.
- Fill the Label and Content.
- Click on Save button.
Payment Instructions
- Navigate to Payment Instructions.
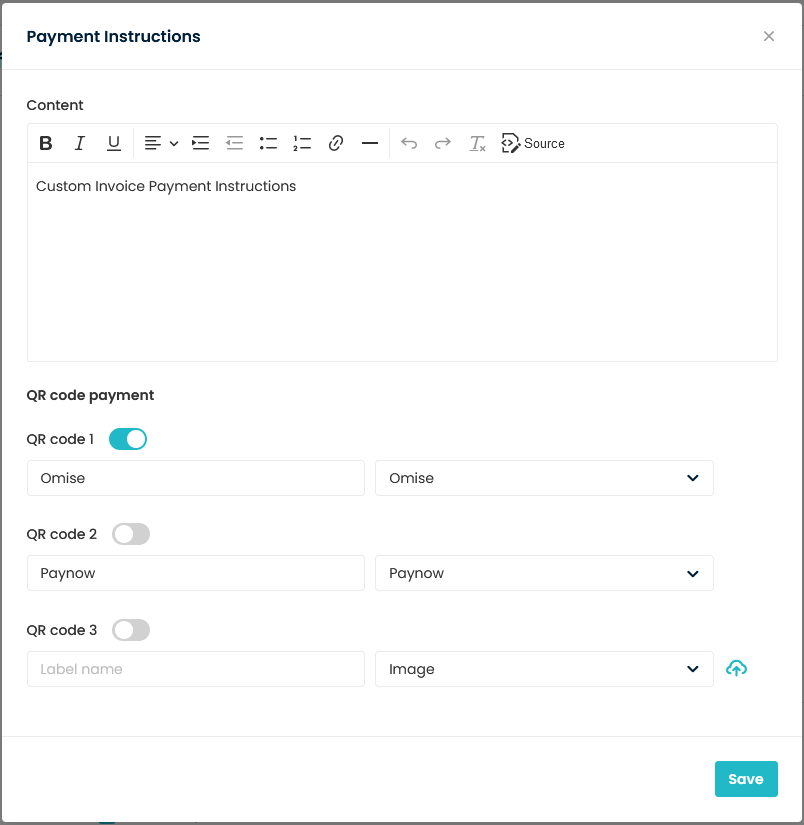
- To change the Payment Instructions click on the Edit Content button.
- A popup named Payment Instructions will be appear on the screen.
- In the Content section, you can write your content.
- QR Code Payment: QR code labels are off by default, make them on by switching.
- Image Drop-down: Select the payment method or from the drop-down.
- Click on the Save Settings button.
General Configuration
- Go to General Configuration Tab.
- You will find various sections like Label Settings, Tax, Bill To Information, Payment Method, and Currency Settings.
Label Settings
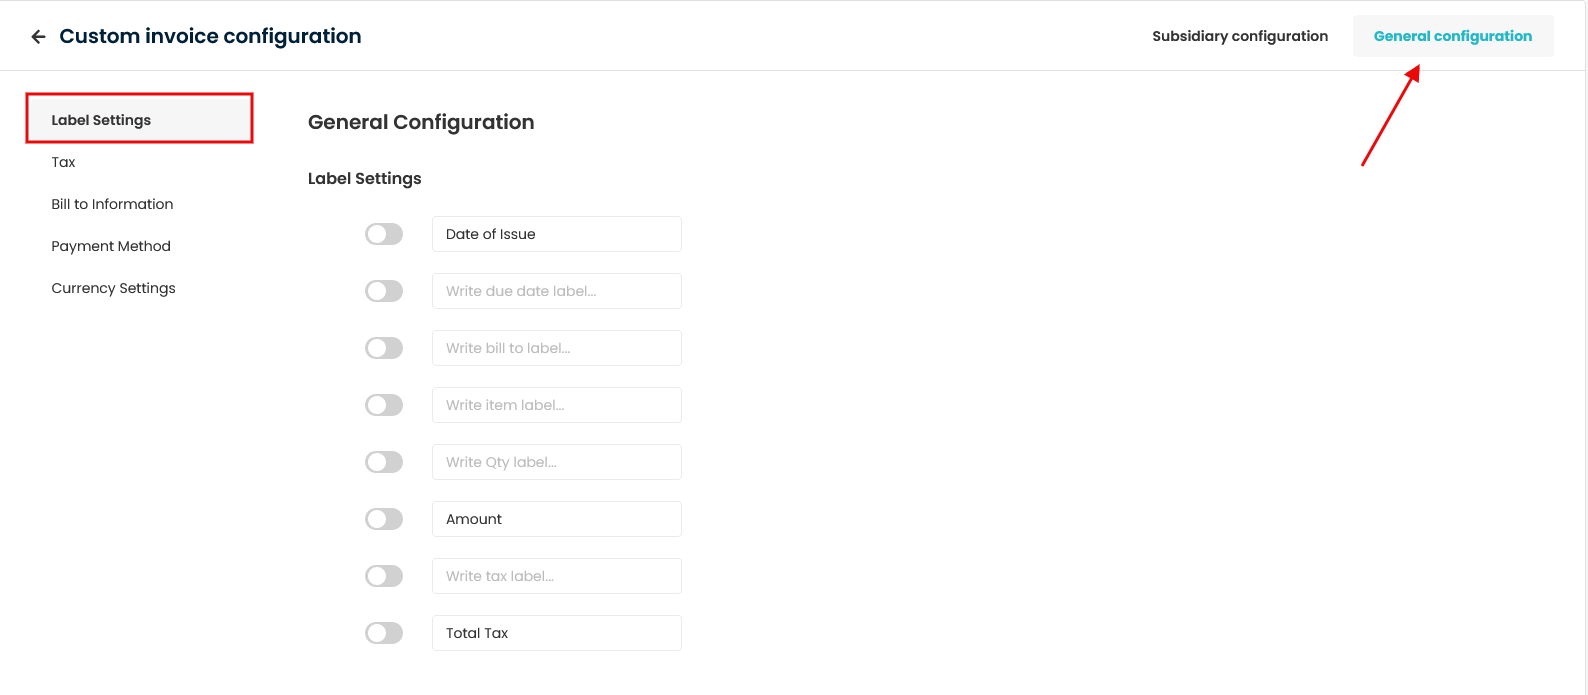
- Navigate to Label Settings.
- You can enable or disable the various fields. These fields will be shown in the Invoice and you can set the label from here.
Tax
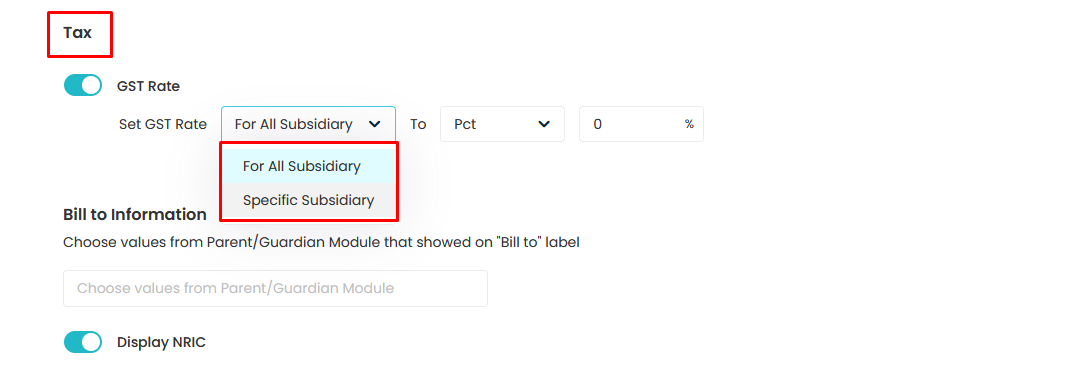
- Scroll down to Tax.
- Here, you can set GST Rate for different Subsidiaries separately and also for All.
- Enable GST Rate. Below you will find two options viz. For All Subsidiary and For Specific Subsidiary.
- Select For All Subsidiary, then select Pct/Flat and set the value accordingly.
- If For Specific Subsidiary is selected, then list of Subsidiary will be shown and you need to set GST individually for different Subsidiary.
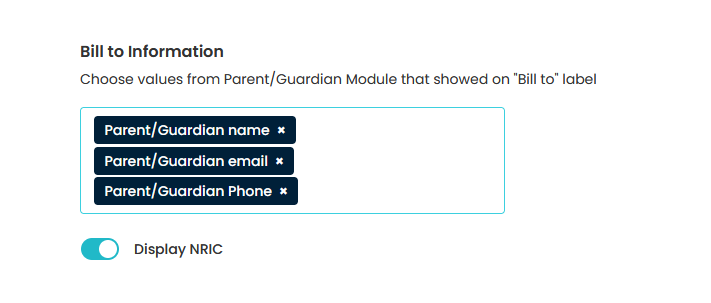
Bill To Information
- Scroll down to Bill To Information.
- Here, you can choose different fields from Parents/Guardian module, that is to be shown in the Custom invoice under Bill To label.
- Enable Display NRIC to display NRIC value on the Custom Invoice.
Payment Method
- Scroll down to Payment Method.
- Here, you can see the list of payment modes which can be enabled and disabled.
- These methods are found in the drop-down of payment method in the Pay Invoice popup form while paying from the invoice.
- Also, you can add additional payment mode by clicking on + Add payment mode.
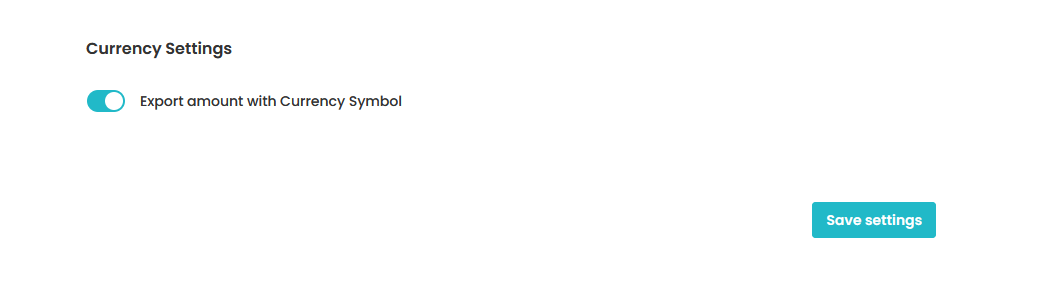
Currency Settings
- Scroll down to Currency Settings.
- Enable Export amount with Currency Symbol to export the invoice amount with the currency symbol. But is it is OFF, then in the export file, there will not be any currency symbol against any amount.
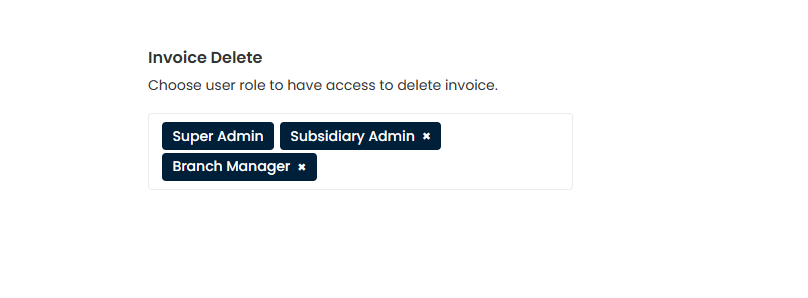
Invoice Delete
Here, you can select the different user roles to give them the access to delete the invoice. By default, it shows all the role i.e., Super Admin/ Subsidiary Admin/ Branch Manager. You can select/deselect as per the requirement.
Need more help? Ask us a question
Please let us know more of your details and our team will reach out to you very shortly.