
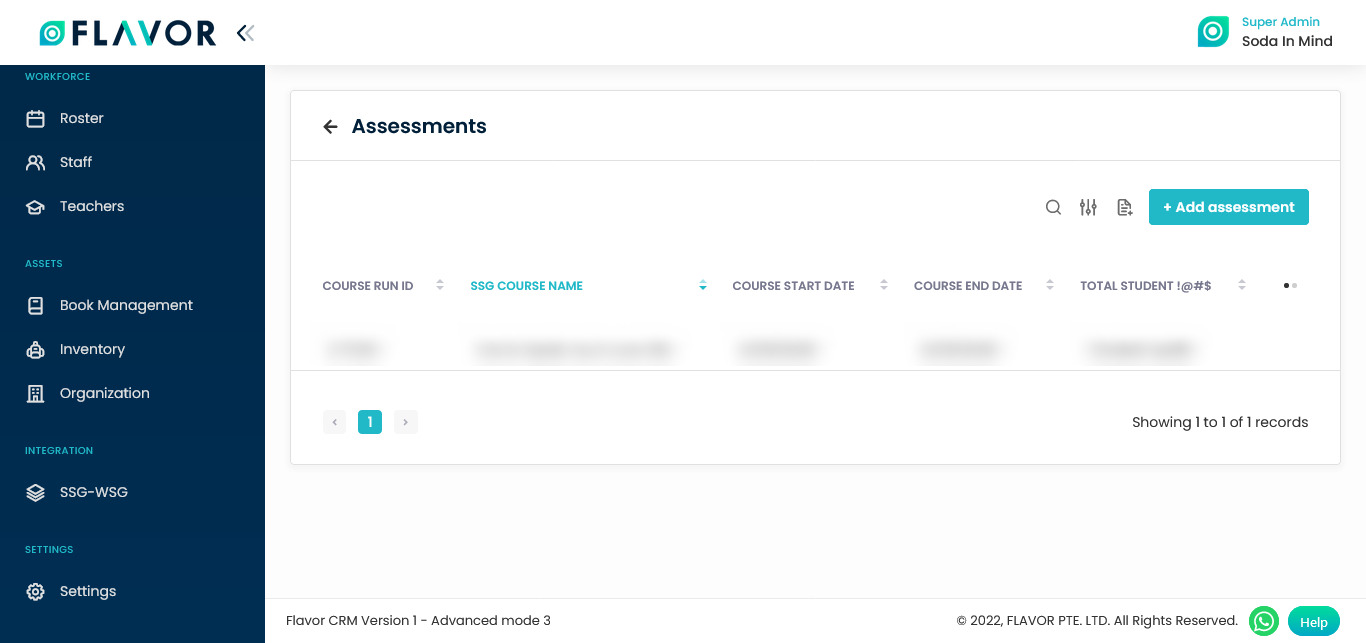
Assessments
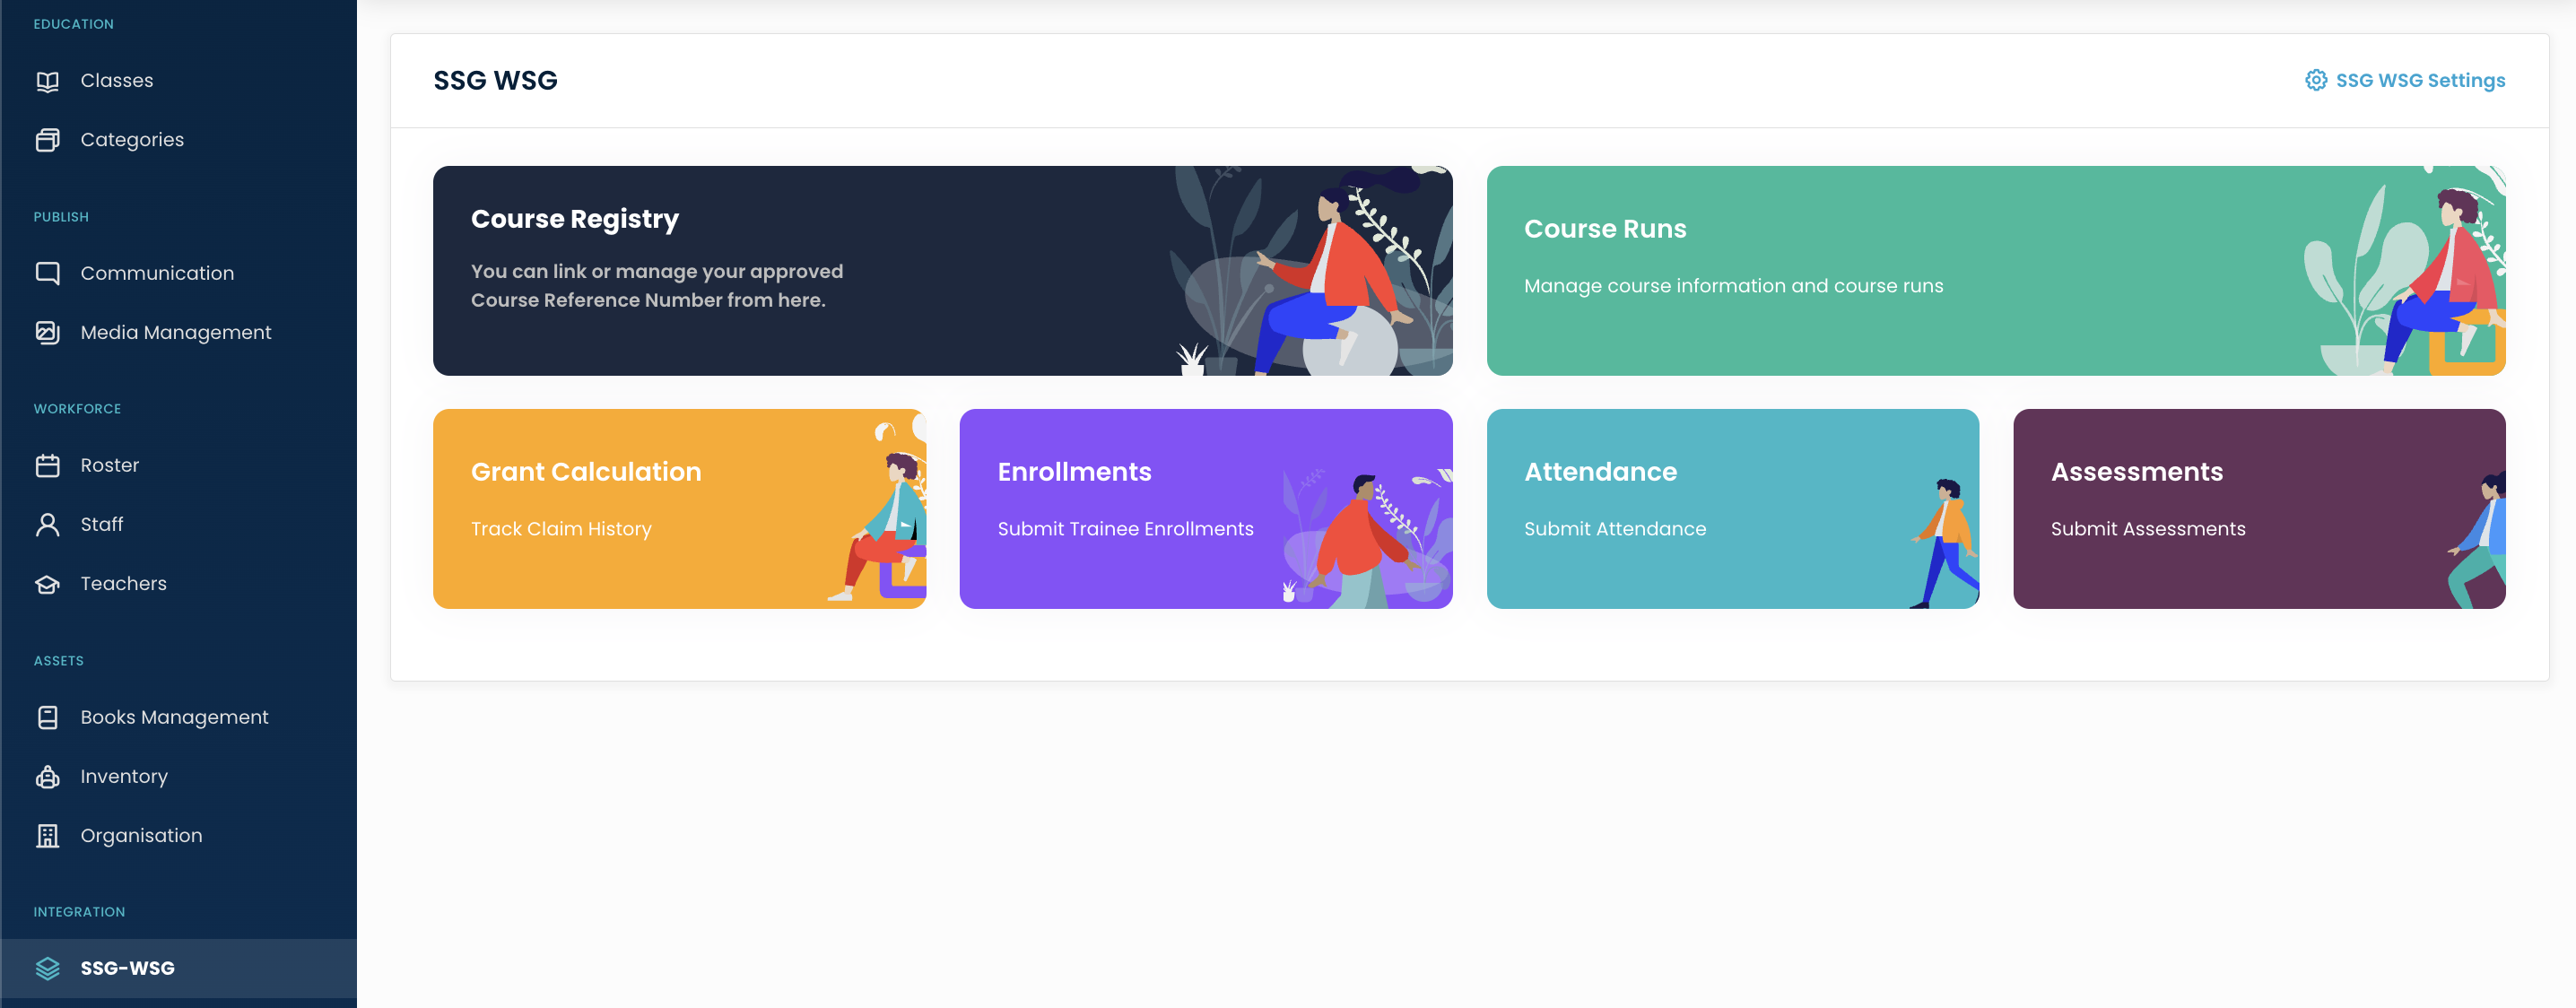
Search
By clicking on the Search Icon, you can search the specific assessment by entering the course run ID, SSG Course Name and Course Reference Number.
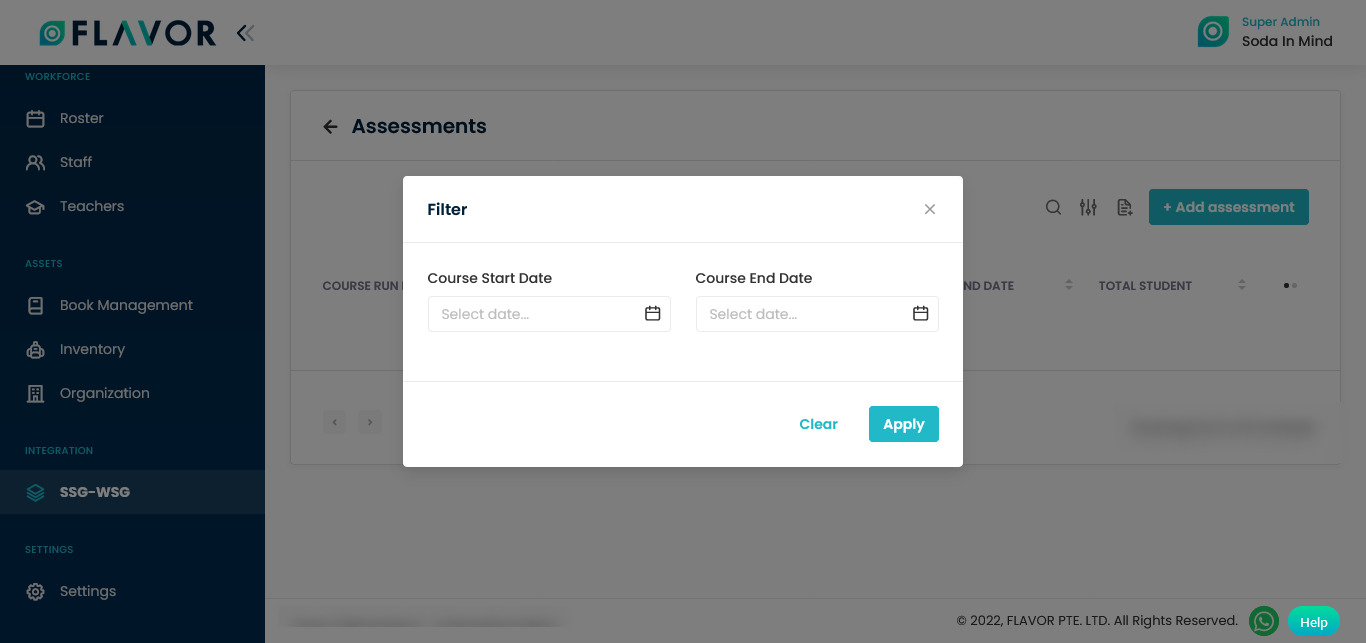
Filter
You can filter the assessment based on specific parameters. Click on Filter Icon, after clicking, a popup form will appear on your screen. Enter Subsidiary, Branch and Course Date Range. Click on the Apply button to save the parameters.
Import/Export
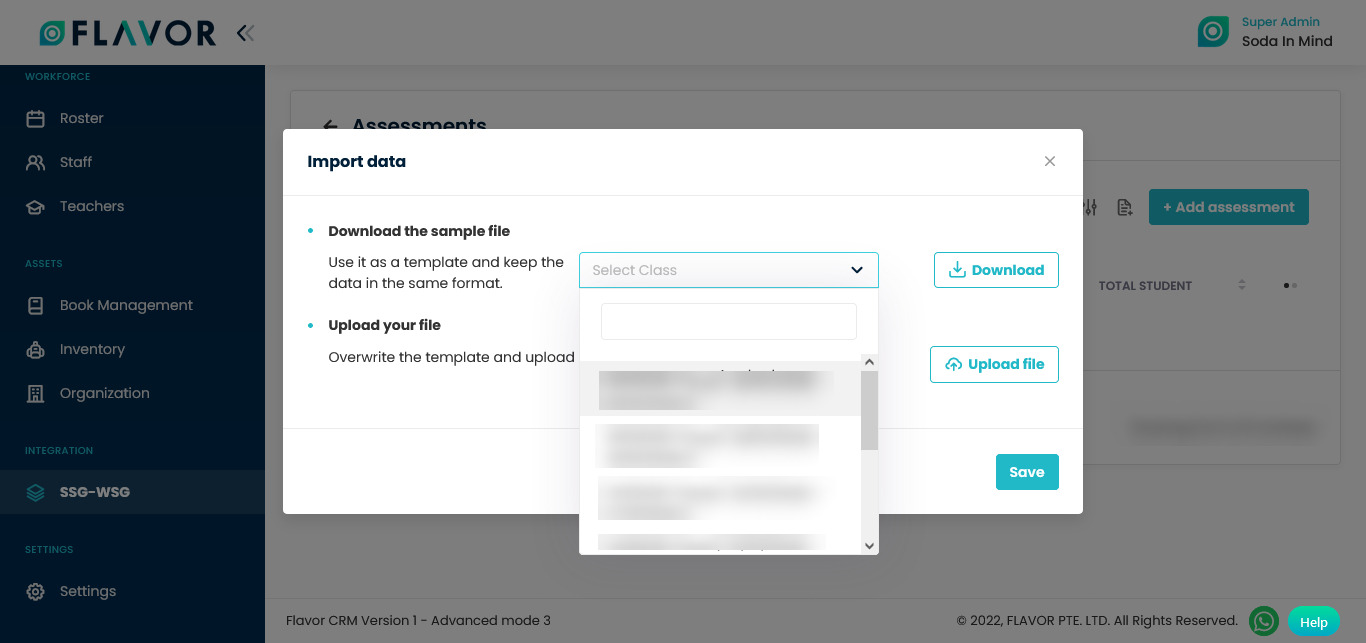
Import
- Click on the Import option.
- A pop named Import Data will be open.
- Download the Sample File: Select the class from the dropdown.
- If you want to download the sample file, click on the Download button. After clicking on the Download button a File Download window will be open on your screen, click on Save File and then click on the OK button.
- It depends on you which kind of file you want to upload CSV or XLSX.
- Upload Your File: Click on the Upload File button. A File Selector Window will be open, choose a .CSV or .XLSX file to upload.
- Click on the Open button to upload. The selected file will be uploaded. Click on the Save button.
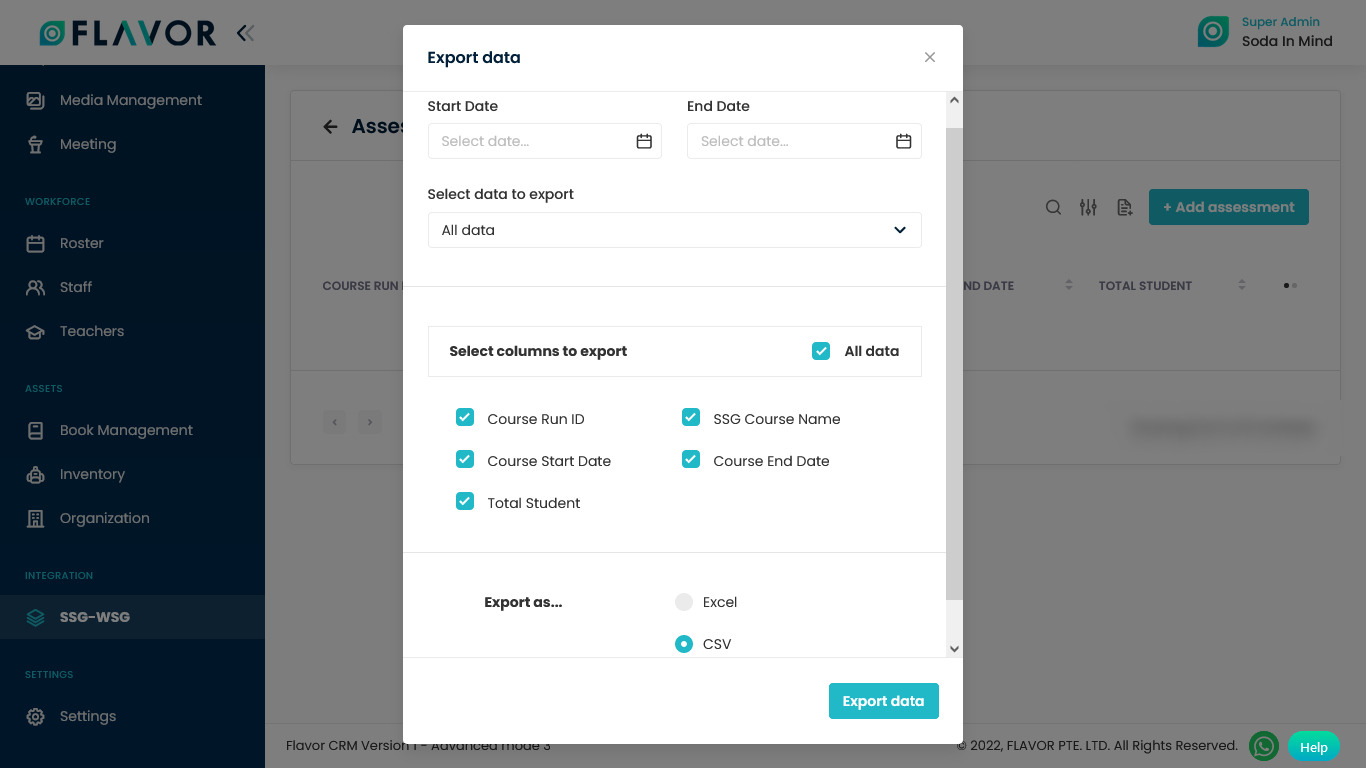
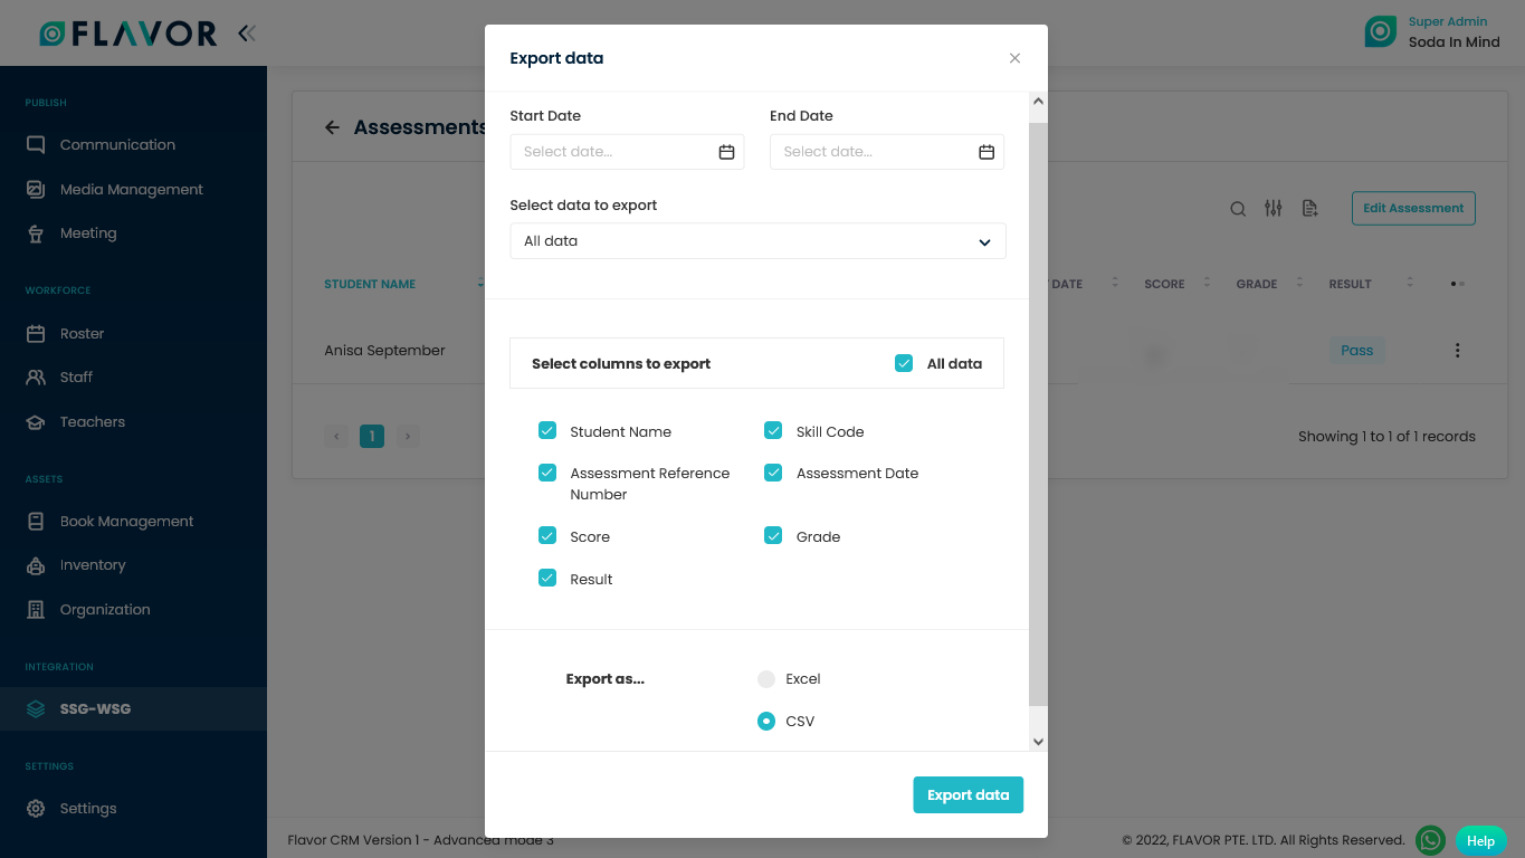
Export
- To export all data, you have to click on the Export Icon.
- After clicking on the Export icon, a pop-up form named Export Data will appear on your screen.
- Start Date and End Date: Select the time period in the start date and end date column for which time period’s data you need.
- Select Data to Export: Here, you can export the data of all rows or 15 rows by simply clicking on the dropdown.
- Select Column to Export: Select columns to which you need your data to export. Like if you want all the data of the assessment, then simply click on “ALL DATA” and you will get the data of the assessment module in your exported file.
- Export as: Then select a format in which you want to export your data i.e (EXCEL or CSV).
- After selecting the relevant records/data, click on the Export Data button to export all the data in the selected file (Excel/CSV).
Add Assessment
- To add an assessment, click on the + Add Assessment button.
- A popup named Choose Course will be open.
- Here, you can see the list of all created courses.
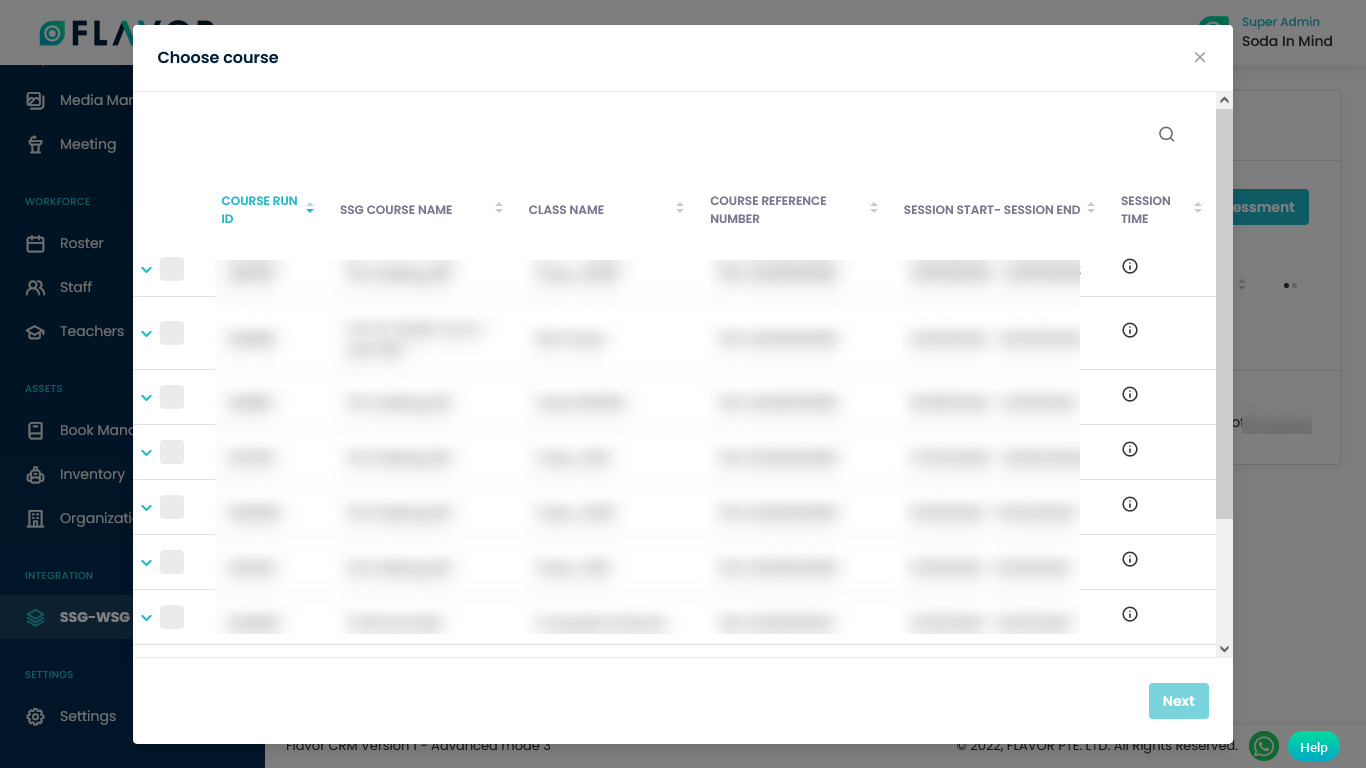
- Select any course from the list then click on the Next button.
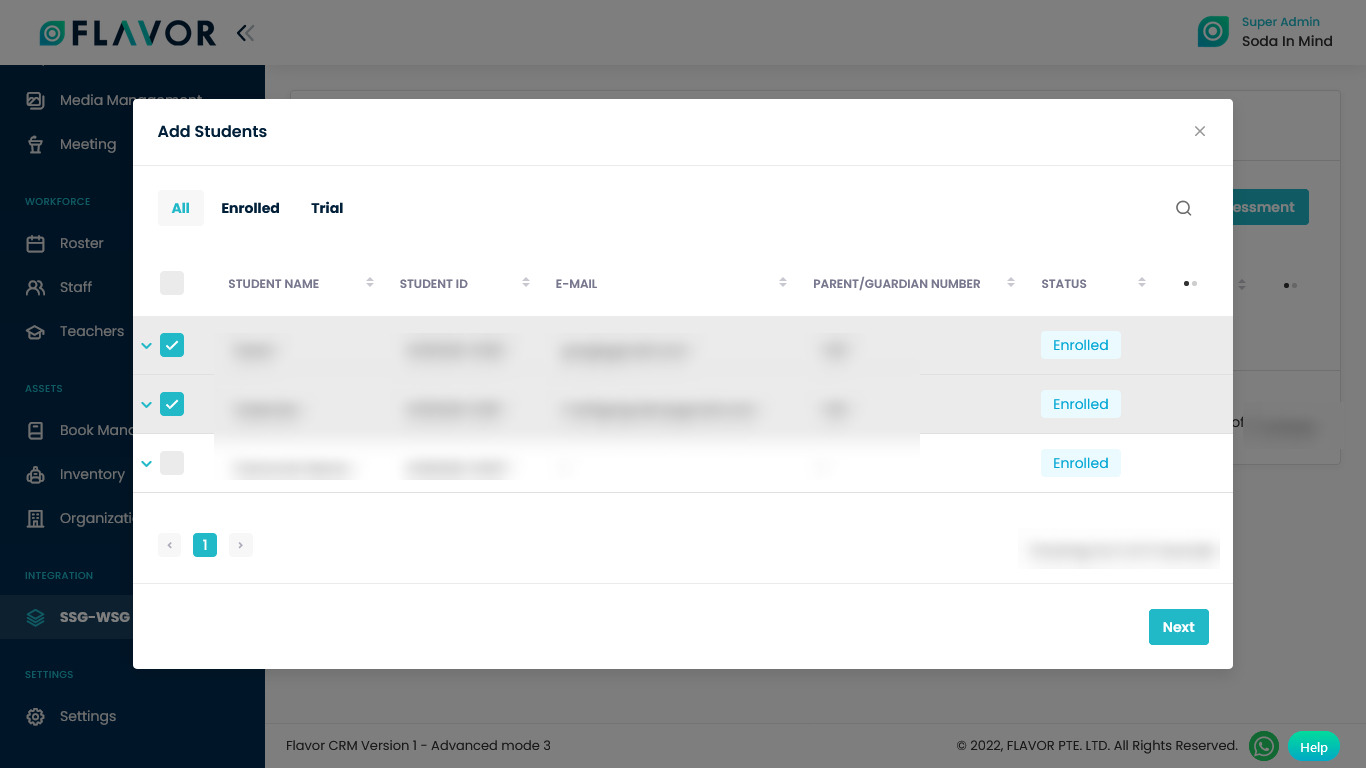
- After clicking on the Next button, a new popup named Add Students will be open.
- Select students from the list.
- Click on the Next button.
- You will be redirected to the Class Assessment page.
- Here, you can see Students Name in the left column and Assessment Details in the right column.
- Assessment Details: Fill in the details of the assessment.
- Result: Select the result from the dropdown. A student could be a Pass, Fail or Exempt.
- Score: Enter the score here.
- Grade: Select grade from the dropdown.
- Assessment Date: Select the assessment date from the date picker.
- Skill Code: Mandatory field. This code is set during enrollment.
- After filling in the details click on the Confirm button.

Assessment Profile
Click on any record to check the details. After clinking you will be redirected to the Assessment Details page.
Search
By clicking on the Search Icon, you can search the specific assessment details by entering the student name, skill code or assessment reference number.
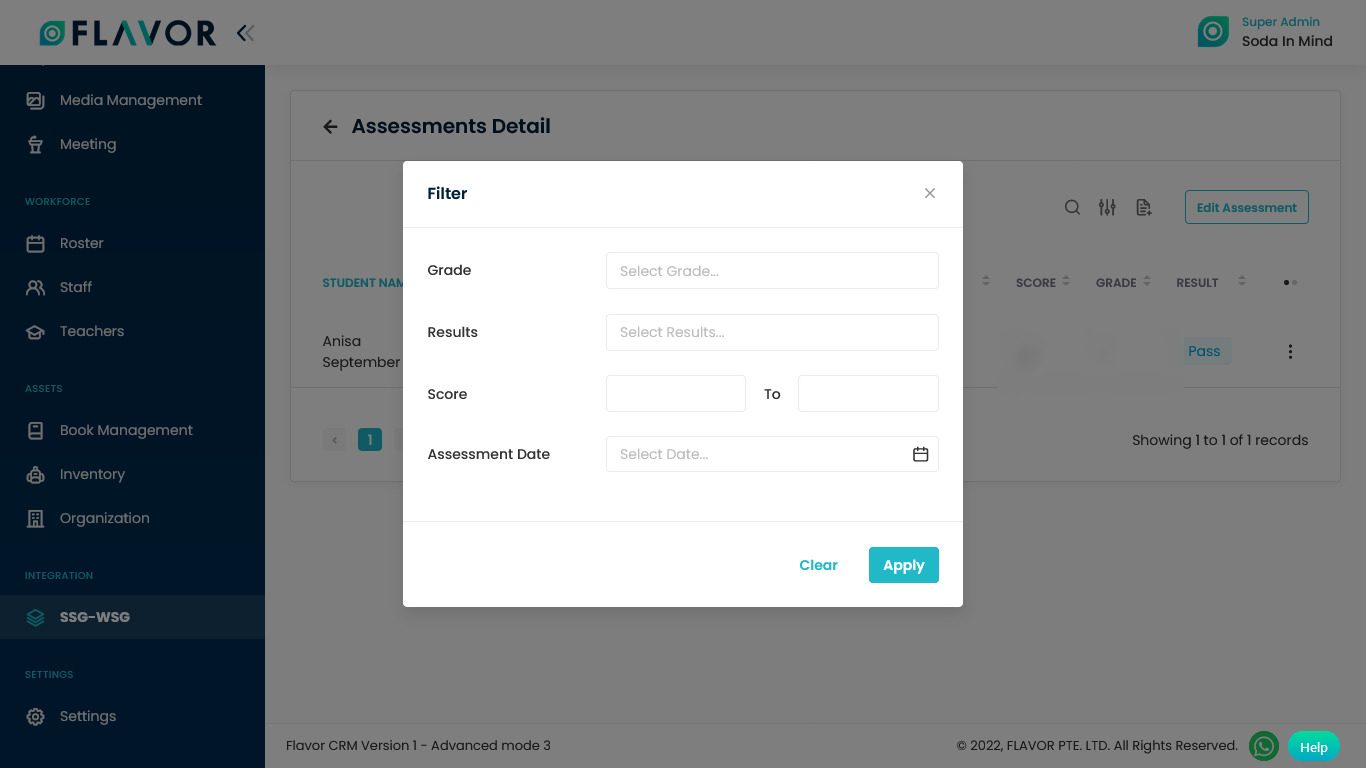
Filter
You can filter the details based on specific parameters. Click on Filter Icon, after clicking, a popup named Filter will appear on your screen. Enter the grade, result, score and assessment date then click on Apply button to save parameters.
Export
- To export all data, you need to click on the Export Icon.
- After clicking on the Export icon, a pop-up named Export Data will appear on your screen.
- Start Date and End Date: Select the time period in the start date and end date column for which time period’s data you need.
- Select Data to Export: Here, you can export the data of all rows or 15 rows by simply clicking on the dropdown.
- Select Column to Export: Select columns to which you need your data to export. Like if you want all the data, then simply click on “ALL DATA” and you will get the data of the entire inventory in your exported file.
- Export as: Then select a format in which you want to export your data i.e (EXCEL or CSV).
- After selecting the relevant records, click on the Export Data button to export all the data in the selected file (Excel/CSV).
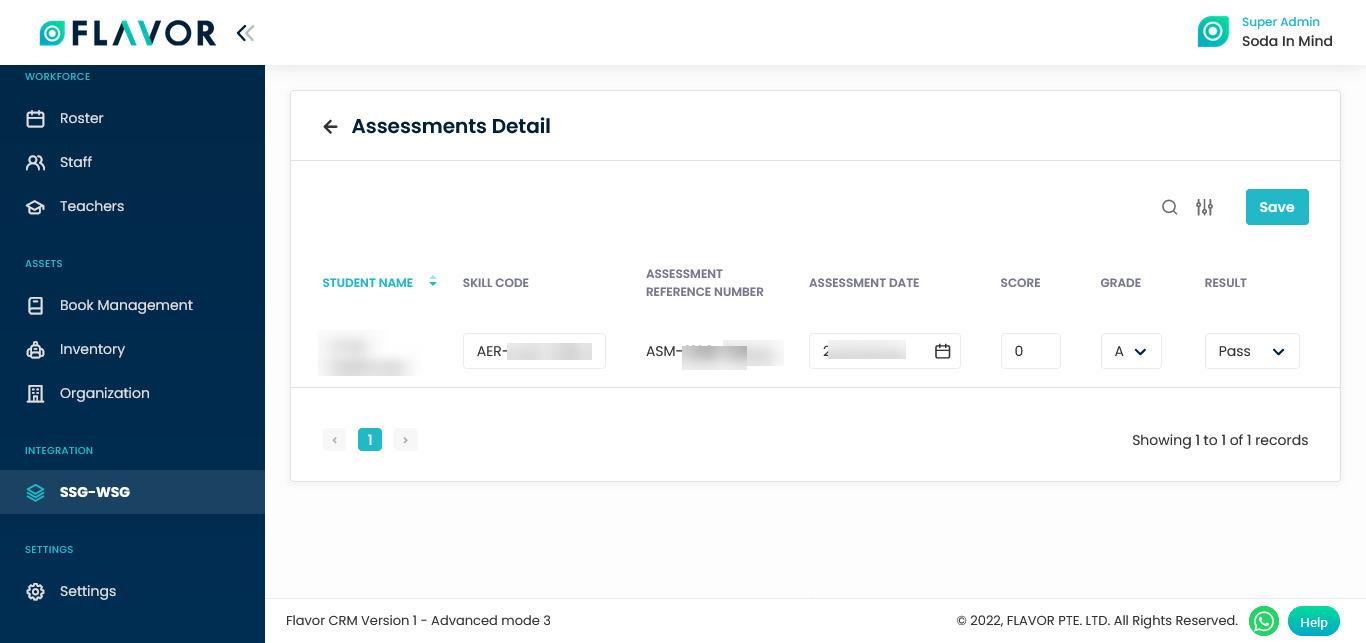
Edit Assessment
- To edit the assessment click on the Edit Assessment page.
- You will be redirected to the Assessment Detail page.
- Edit the details and then click on the Save button.
- Here, you can search and filter the assessment by clicking on the search icon and filter icon.
Edit Assessment Records
Column Sorting
All details will be shown in Tabular Format. You can sort the data by clicking on Column Sorting Arrows in Table Header.
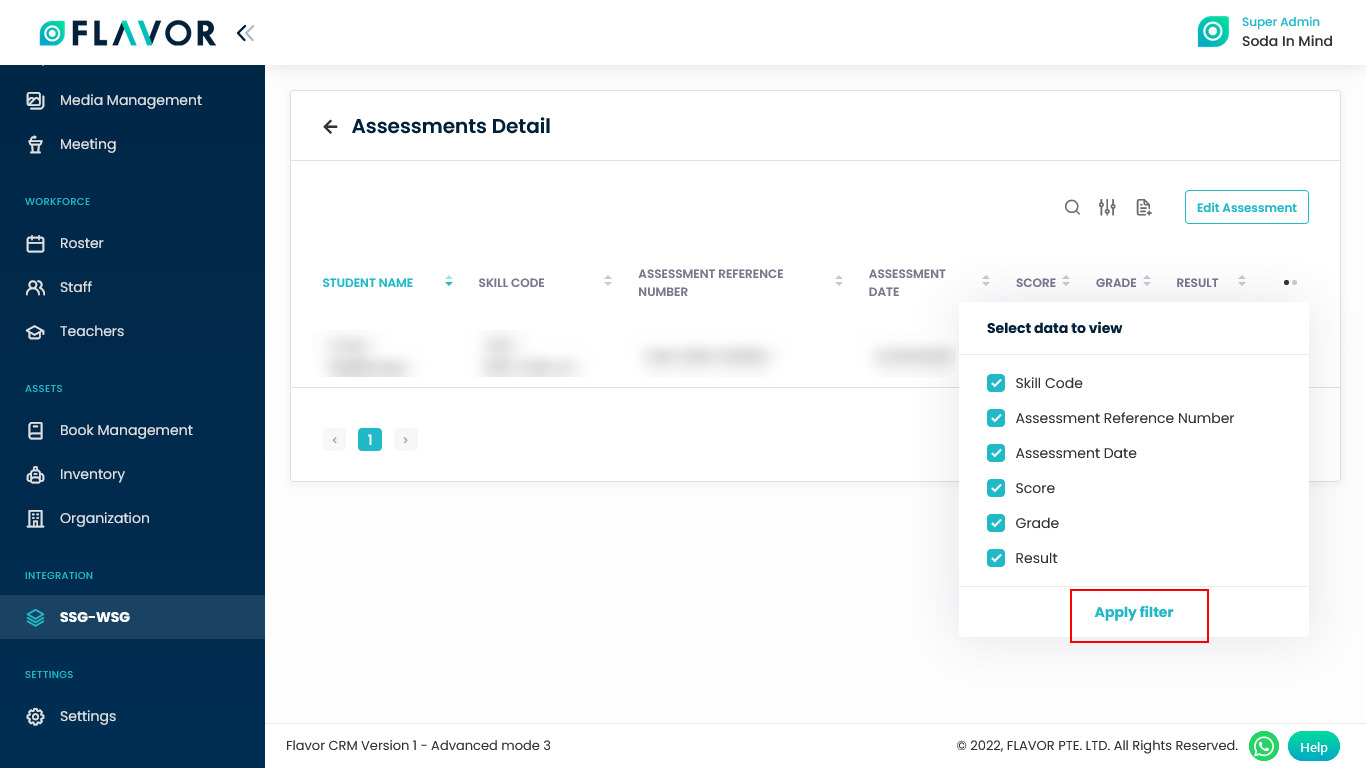
Column Visibility
You can sort columns by clicking on the Ellipsis Icon, you will get the pop-up form named Select Data to View. Mark the columns you want to see and unmark the ones you don’t want to see in the table. After this procedure click on the Apply Filter button.
Action Button
Click on Action Button (Vertical Ellipsis), and a small popup box with Void Assessment will appear.
Need more help? Ask us a question
Please let us know more of your details and our team will reach out to you very shortly.