
You can check the SSG WSG by clicking on the SSG-WSG from the main navigation panel of the Flavor EduPortal. The “SSG-WSG” menu is provided under the SSG-WSG section in the navigation panel.
By clicking on the SSG-WSG, from the left menu you will be redirected to the SSG-WSG page where you will see the listing of all SSG-WSG in the grid view. From here, you can see Course Registery, Course Run, Grant Calculation, Enrollment, Attendance, Assessments & SSG WSG Settings.
SSG WSG Settings
Navigate to the SSG Settings, click on the link and you will be redirected to the Integration Setup Page. Here, you can see SSG Workforce Singapore option is off by default. Make it on by switching.
After enabling this option you can see 2 Environment Options. UAT & Production. We will go with the production option.
Production
We will go with the Production option. The client will register on the SSG Portal and from there he will get the UEN Number, Training Partner Code and Compose ID, from which the Flavor Portal r will generate the Client Key and Client Certificate.
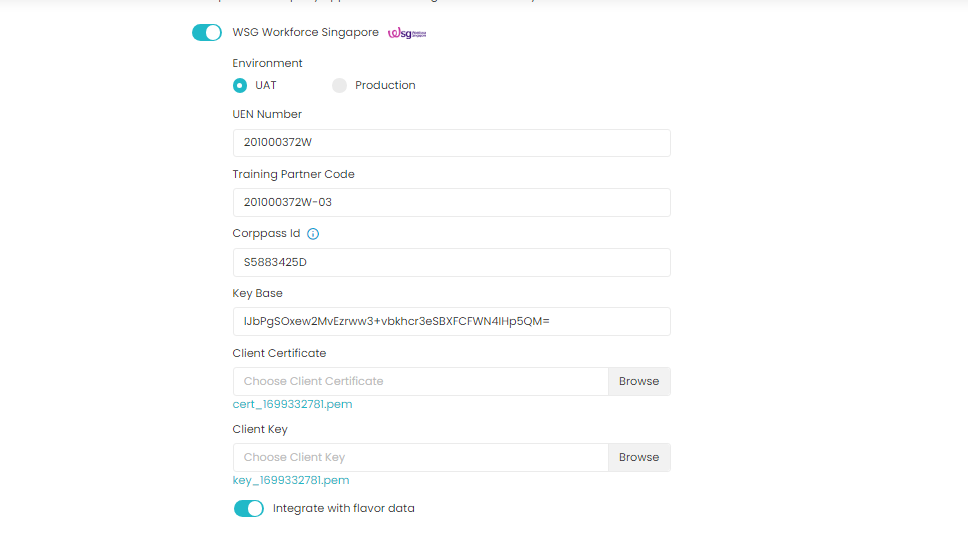
Integrated with Flavor Data: This option is off by default, you can make it on by switching. If this option is off then the courses of the Flavor system will not see in the Course Run.
Link Flavor Class Name: To link the class with Flavor click on the Link Flavor Class Name button.
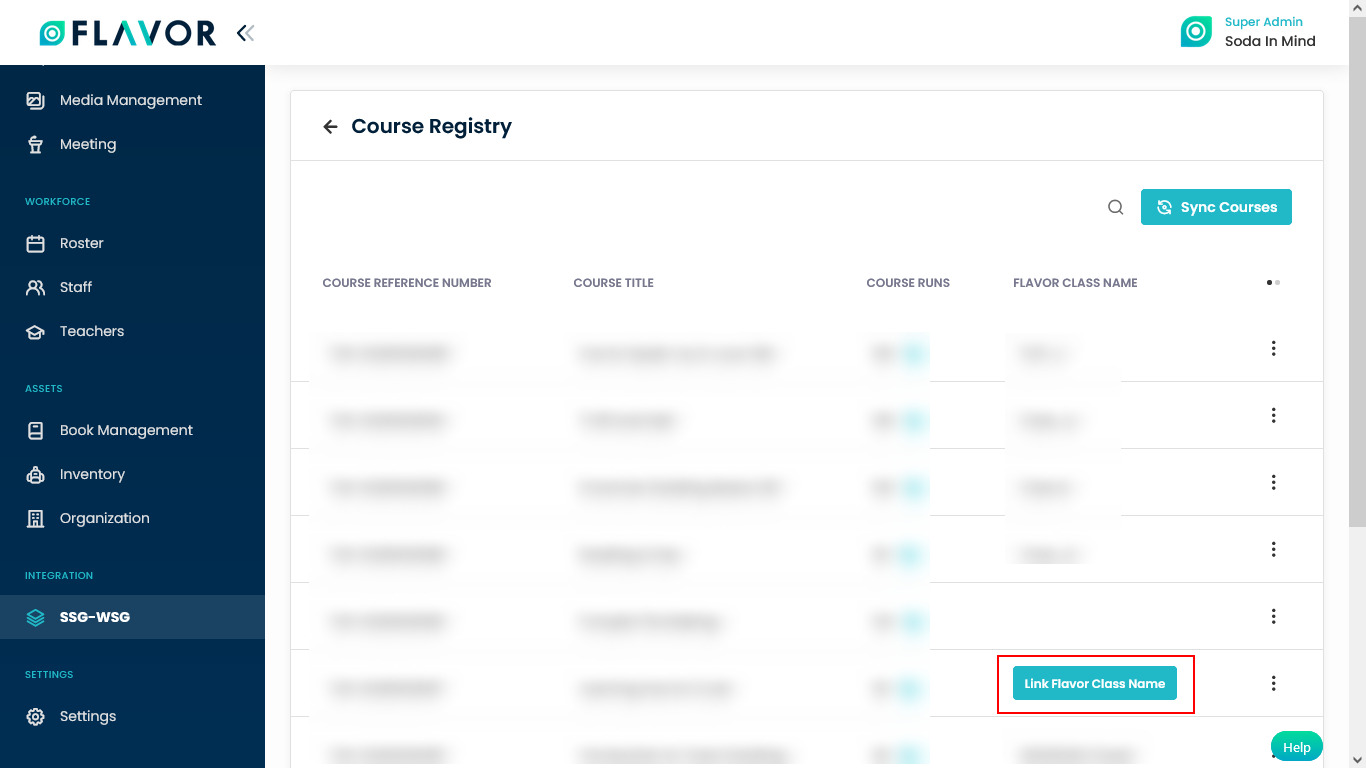
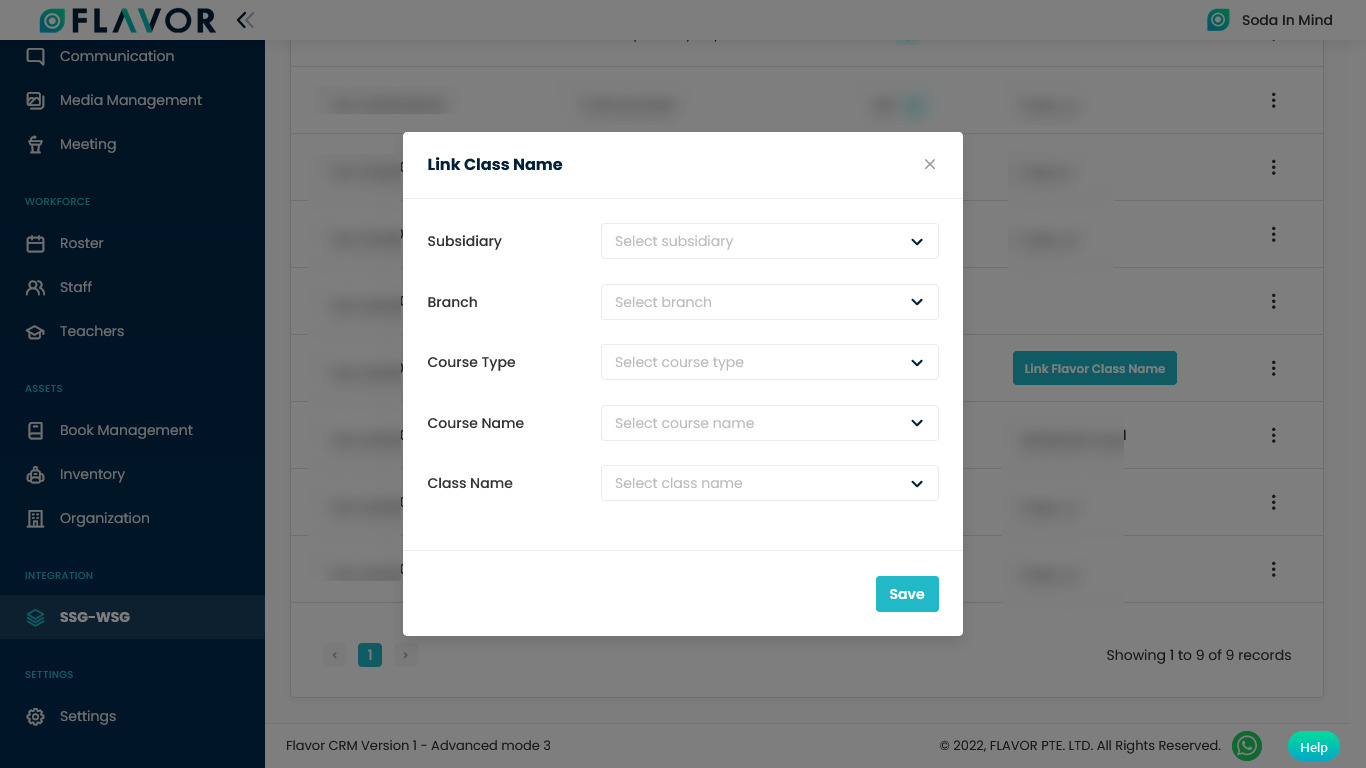
- After clicking a popup named Link Class Name will be open.
- Subsidiary: Select subsidiary from the dropdown.
- Branch: Select the branch from the dropdown.
- Course Type: Select the course type from the dropdown.
- Course Name: Select the course type from the dropdown.
- Class Name: Select the course type from the dropdown.
Course Registry
Courses that the clients have registered on the Government SSG WSG’s site will show in the Course Registry.
Course Registry Options
Search
By clicking on the Search Icon, you can search the specific course by entering the course reference number and course title.
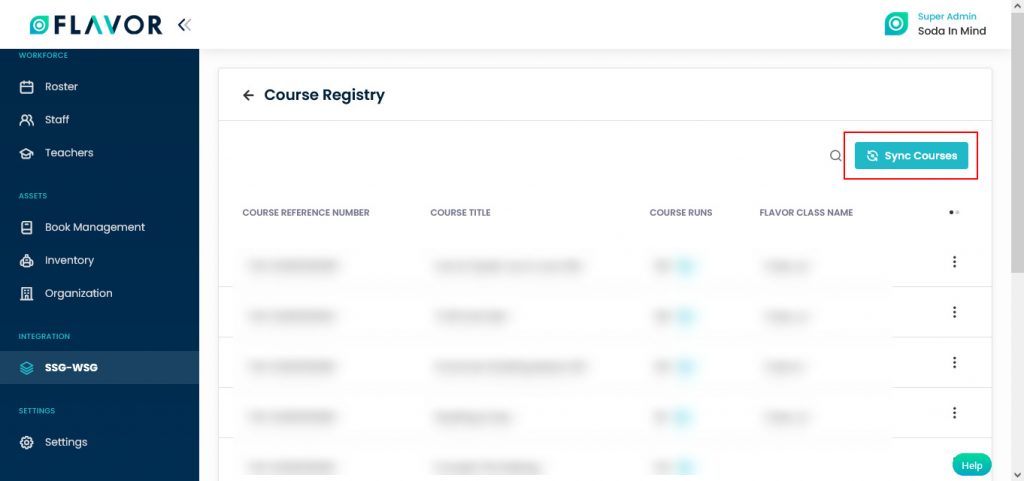
Sync Courses
- After registering the courses on the SSG WSG Site, you have to sync all these courses in Flavor CRM by clicking on the Sync Courses button.
- After syncing number of courses will be seen in the Course Registry.
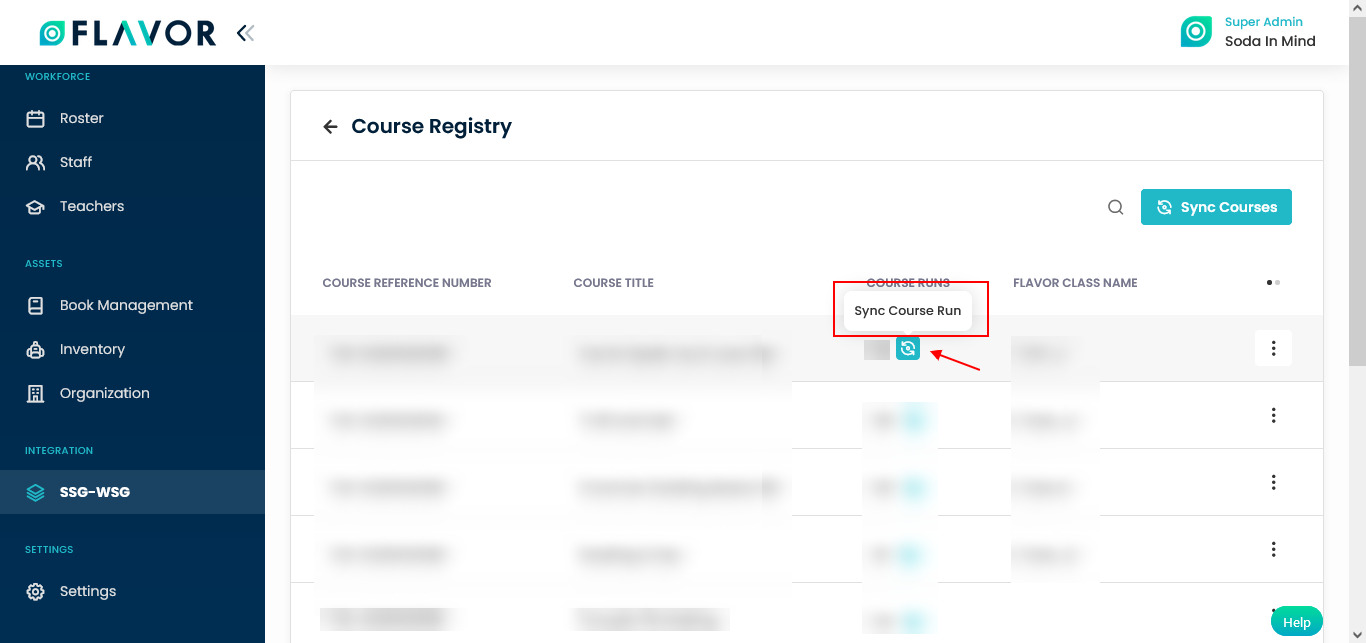
Sync Course Run: First, you have to sync courses and after that sync the sub courses by clicking on the Sync Course Run icon.
Course Registry Records
Column Sorting
All courses will be shown in Tabular Format. You can sort the data by clicking on Column Sorting Arrows in the Table’s Header.
Column Visibility
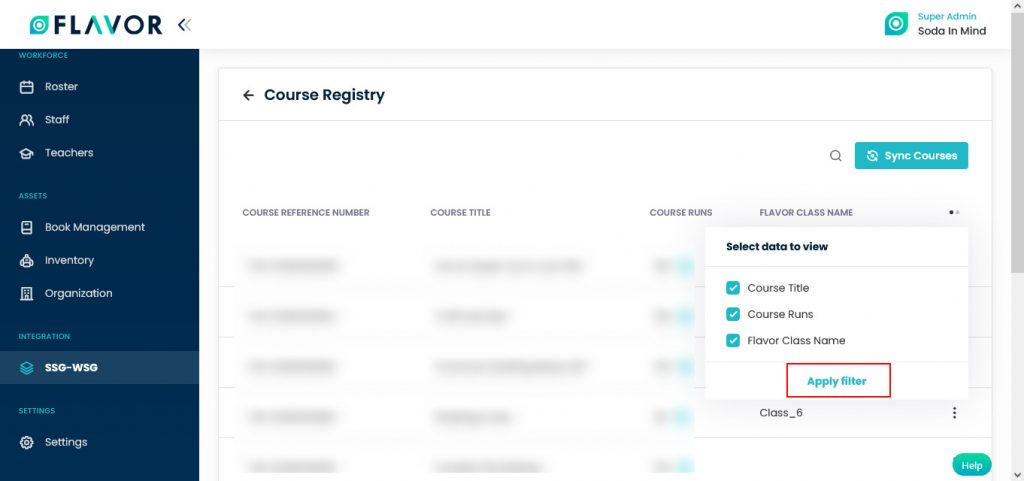
You can sort columns by clicking on the Ellipsis Icon, you will get the pop-up form named Select Data to View. Mark the columns you want to see and unmark the ones you don’t want to see in the table. After this procedure click on the Apply Filter button.
Action Button
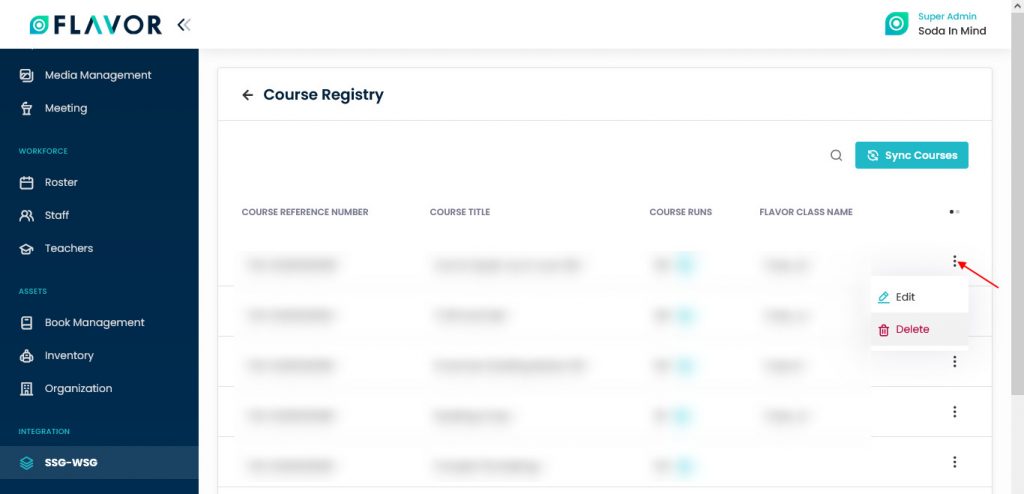
Click on Action Button (Vertical Ellipsis), and a popup box will appear on your screen with the Edit option.
Edit Option
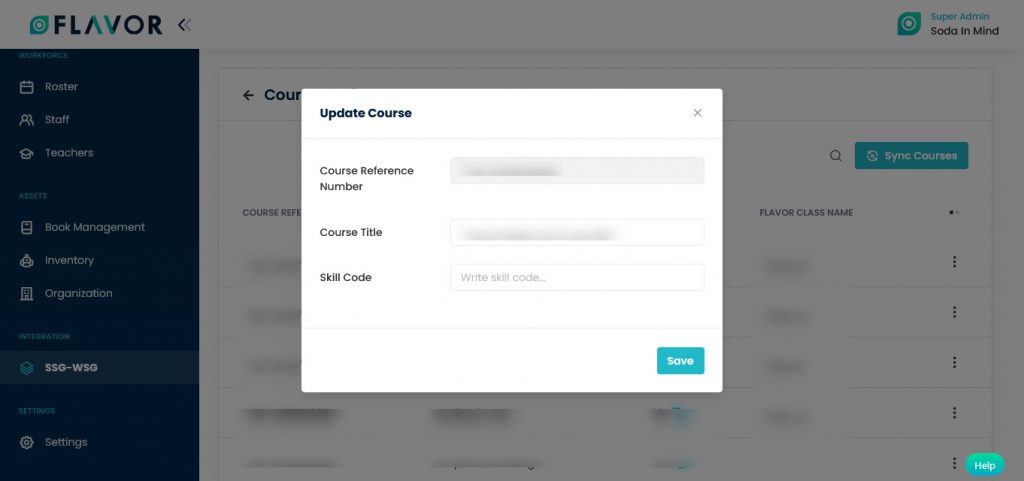
- Click on the Edit option.
- A popup named Update Course will be open.
- Update the details.
- Click on the Save button.
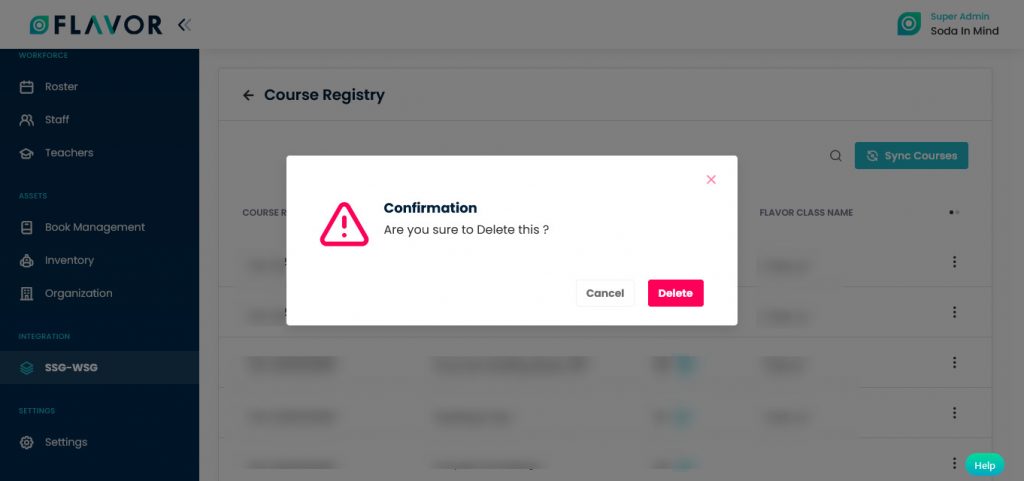
Delete Option
- To delete the course click on the Delete option.
- A confirmation popup will be open.
- Click on the Delete button to delete the course.
Course Runs
Search
By clicking on the Search Icon, you can search the specific course run by entering the course run ID, SSG Course Name and Course Reference Number.
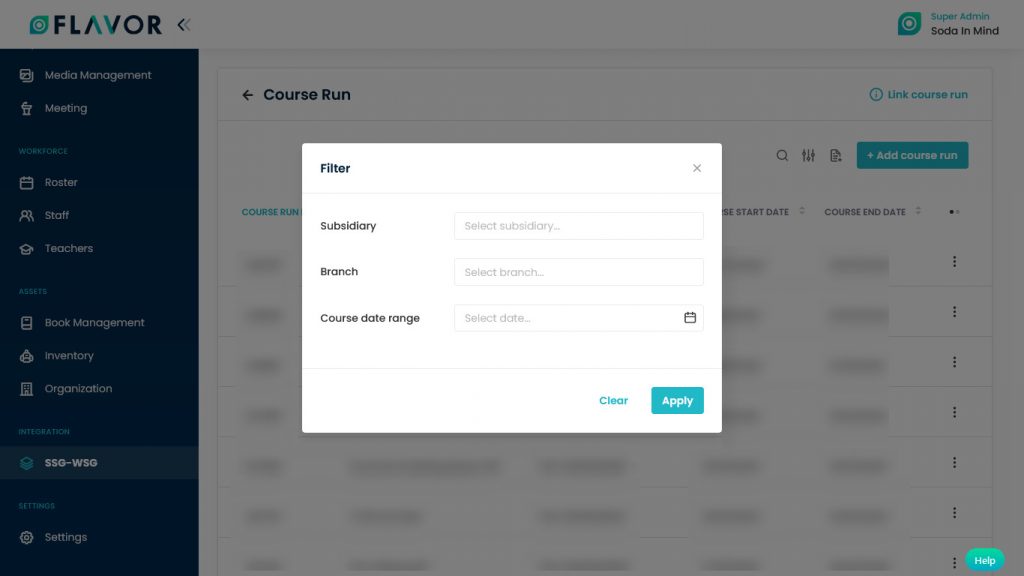
Filter
You can filter the course run based on specific parameters. Click on Filter Icon, after clicking, a popup form will appear on your screen. Enter Subsidiary, Branch and Course Date Range. Click on the Apply button to save the parameters.
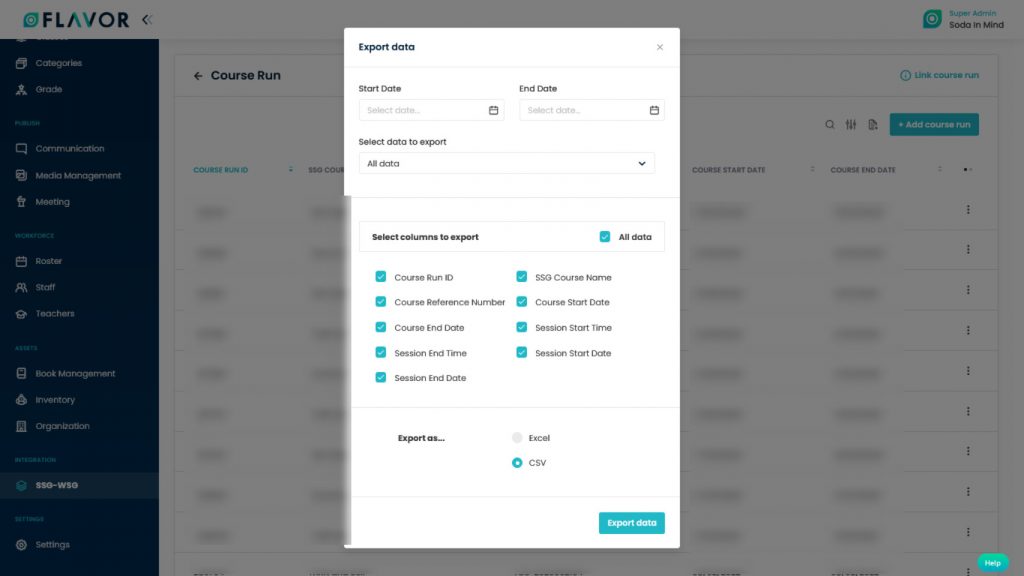
Export
- To export all data, you have to click on the Export Icon.
- After clicking on the Export icon, a pop-up form named Export Data will appear on your screen.
- Start Date and End Date: Select the time period in the start date and end date column for which time period’s data you need.
- Select Data to Export: Here, you can export the data of all rows or 15 rows by simply clicking on the dropdown.
- Select Column to Export: Select columns to which you need your data to export. Like if you want all the data of the course run, then simply click on “ALL DATA” and you will get the data of the course run submodule in your exported file.
- Export as: Then select a format in which you want to export your data i.e (EXCEL or CSV).
- After selecting the relevant records/data, click on the Export Data button to export all the data in the selected file (Excel/CSV).
Add Course Run
- To add a course run click on the + Add Course Run button.
- A popup named Choose Class will be open.
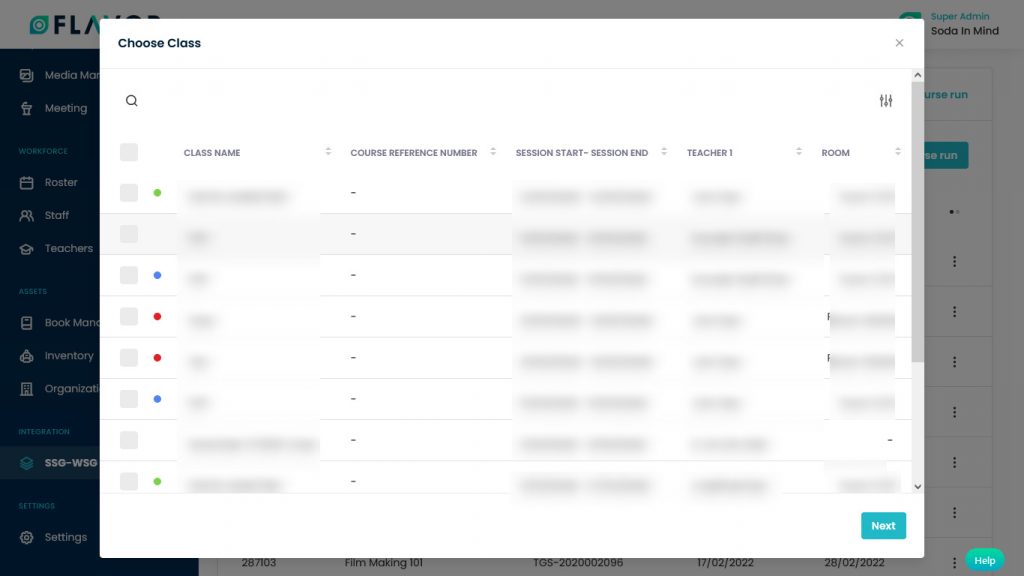
- Here, you can see the Search and Filter option. You can search and filter classes according to your need.
- Select classes from the list.
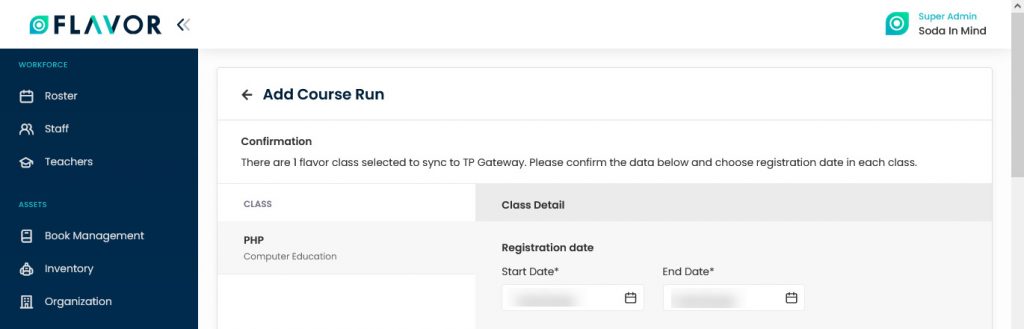
- Click on the Next button, you will be redirected to the Add Course Run page.
- Here, you can see the fill-up form for Add Run Course.
- Here, you can see in the Confirmation section, the number of classes that you have selected.
- Class: In the class column you will see the selected classes.
Class Details
- Registration Date: Here, you can select the start and end date of class registration.
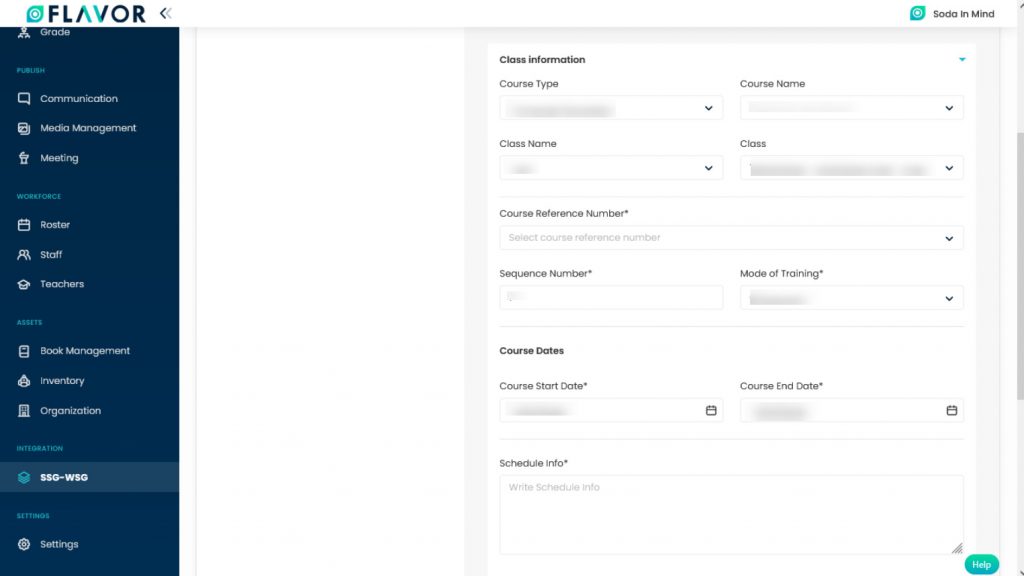
Class Information
- Class information: Navigate to the Class Information section. Click on the accordion, it will be open.
- Course Type: Select the type of course from the dropdown.
- Course Name: Select the name of the course from the dropdown.
- Class Name: Selec the class name from the dropdown.
- Class: Here, you can select the class time and date from the dropdown.
- Course Reference Number: Select the course reference number from the dropdown.
- Sequence Number: the sequence number will be auto-populated based on the selection of the Course Reference Number.
- Mode of Training: Select the mode of training from the dropdown.
- Course Dates: Select the start and end date of the course from the date picker.
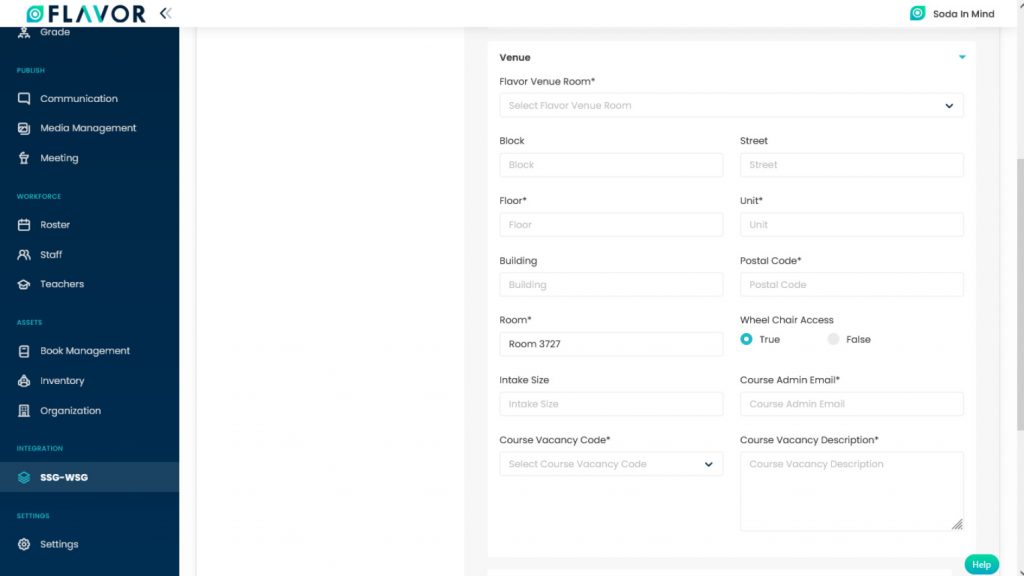
Venue
Here, you can tell the student where the class will be held.
- Flavor Venue Room: Select the room from the dropdown.
- Block: Enter the block name.
- Street: Enter the street.
- Floor: Enter the floor
- Unit: Enter the unit.
- Building: Enter the building number or name.
- Postal Code: This field is mandatory. enter the postal code.
- Room: Enter the Room Number
Session
- Navigate to the Session tab. Click on it. Here, you can see Session details.
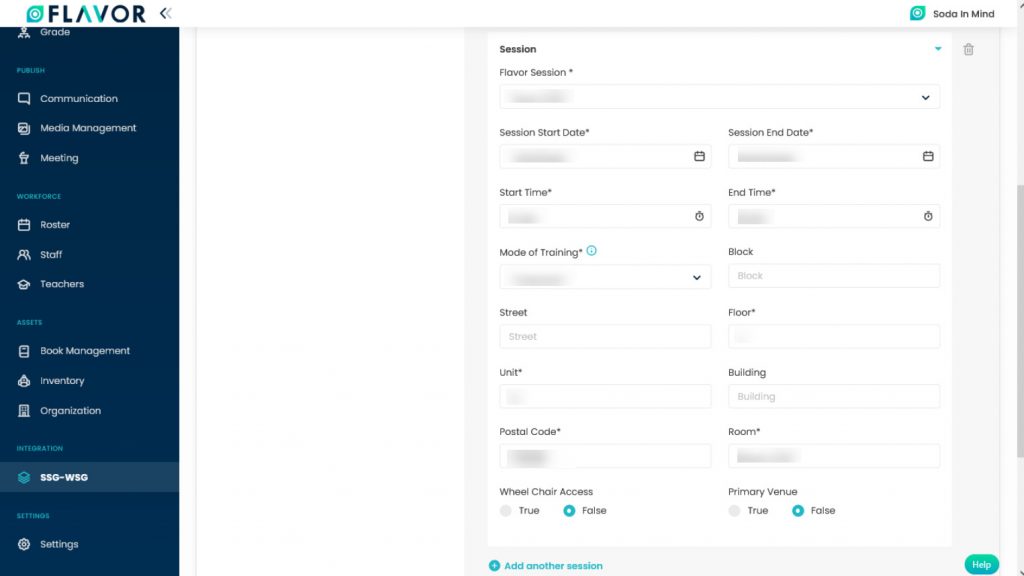
- If you want to add more sessions click on the + Add Another Session button.

- A new tab of Session will be open.
- If you want to delete the session then click on the Delete icon.
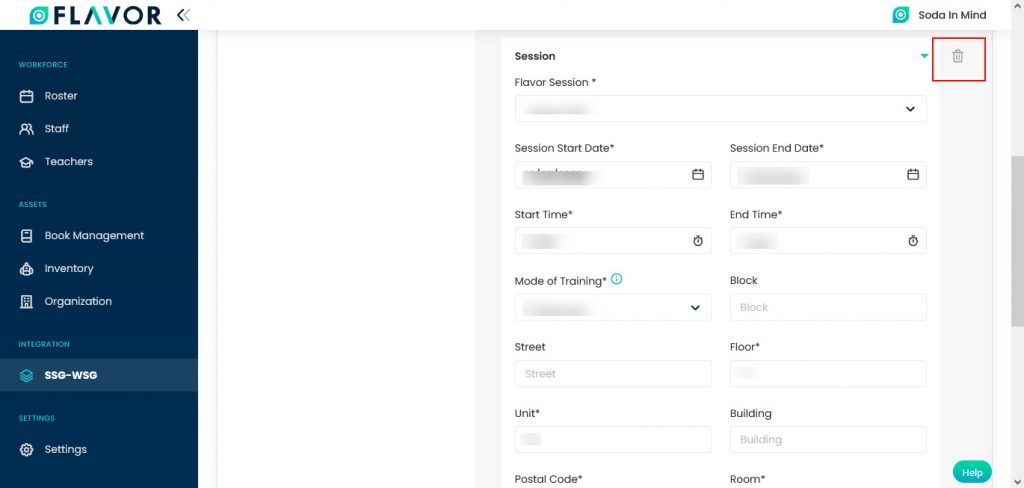
- A confirmation box will appear on your screen.
- Click on the Delete button to delete the session.
Teacher
- Navigate to the Teacher tab. Here, you can see the Teacher’s details.
- If you want to add more teachers to a class then click on the + Add Another Teacher button.

- A new tab for teachers will be added.
- If you want to delete the teacher then click on the Delete icon.
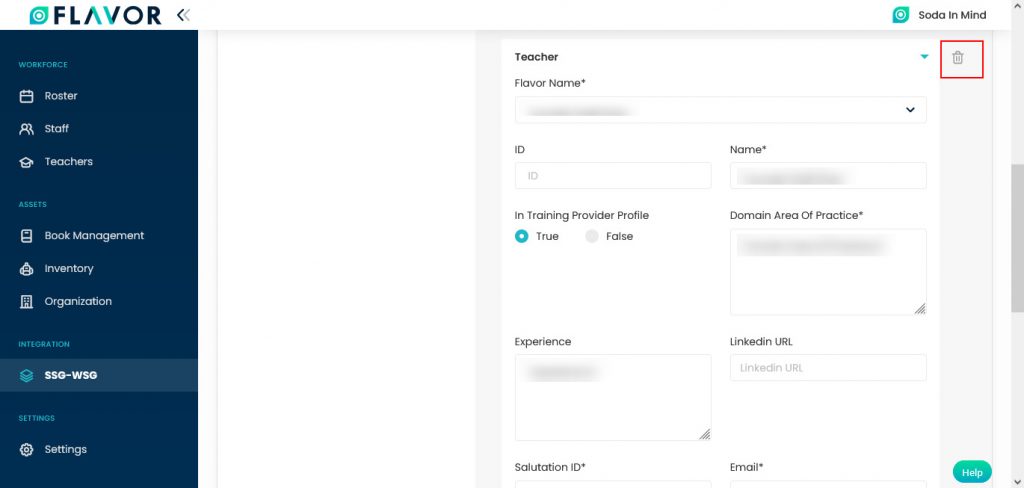
- A confirmation box will appear on your screen.
- Click on the Delete button to delete the teacher.
- Click on the Confirm button to add the Course Run.
Course Run Records
Column Sorting
All course run will be shown in Tabular Format. You can sort the data by clicking on Column Sorting Arrows in the Table’s Header.
Column Visibility
You can sort columns by clicking on the Ellipsis Icon, you will get the pop-up form named Select Data to View. Mark the columns you want to see and unmark the ones you don’t want to see in the table. After this procedure click on the Apply Filter button.

Action Buttons
Click on Action Button (Vertical Ellipsis), and a small popup box will appear on your screen with Update Course Run, Delete Course Session and Delete Course Run options.
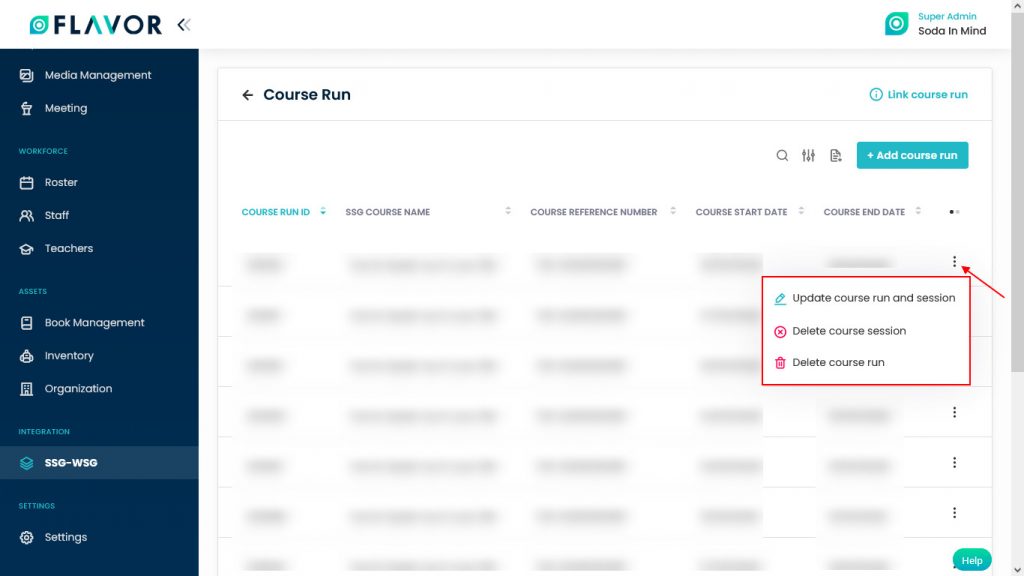
Update Course Run and Session
- To update the course and session click on the Update Course Run and Session option.
- You will be redirected to the Edit Course Run And Session page.
- Update the details.
- Click on the Save button to save the updated details.
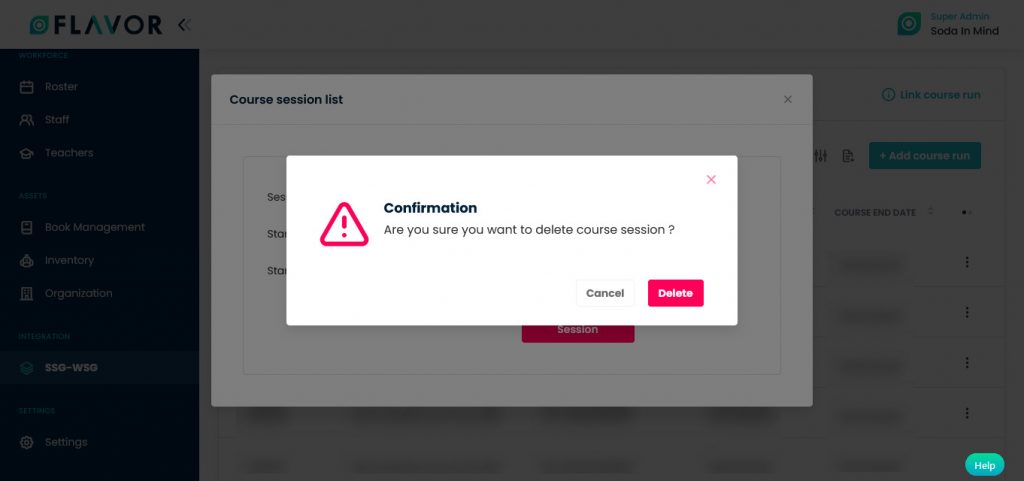
Delete Course Session
- If you want to delete the session click on the Delete Course Session option.
- A popup named Course Session List will be open.
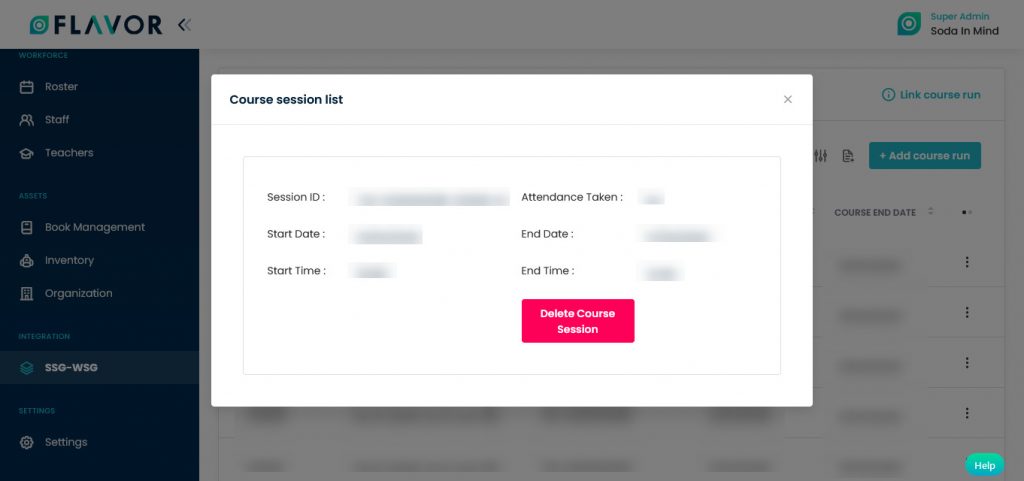
- If you want to delete the session, click on the Delete Course Session button.
- A confirmation popup will be open.
- Click on the Delete button to delete the session.
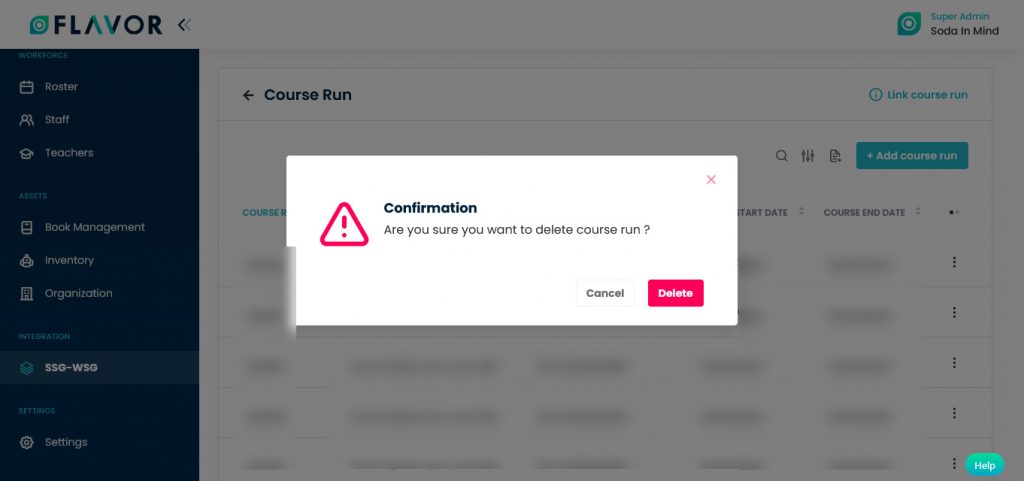
Delete Course Run
- If you want to delete the entire course click on the Delete Course Run option.
- A confirmation popup will be open.
- Click on the Delete button to delete the course.
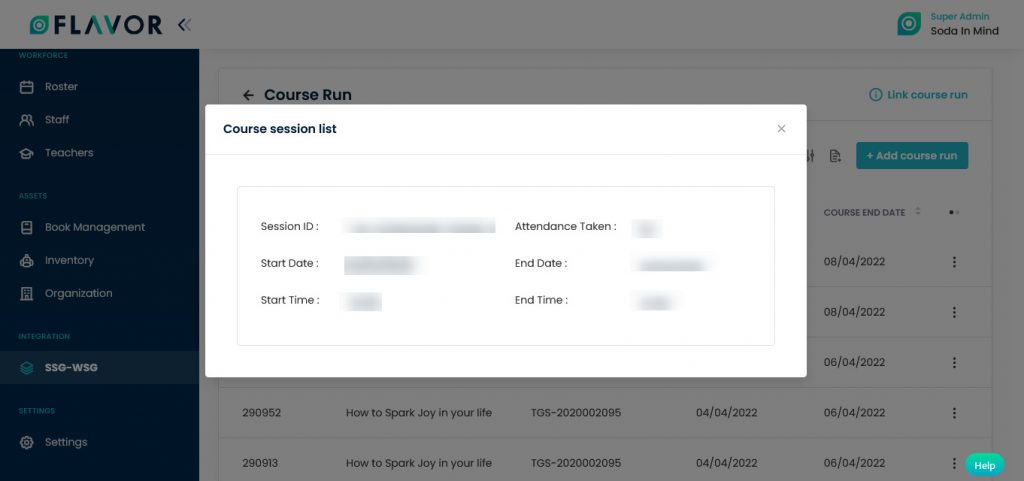
Course Run Details
- To check the details of any course run then click on any record, a popup named Course Session List will be open.
- From here, you can check the details of the course session.
Link Course Run
You can search and link your existing Course Run using Course Run ID and Course Reference Number.
- To link course run click on this option, and a popup named Link Run Course will be open.
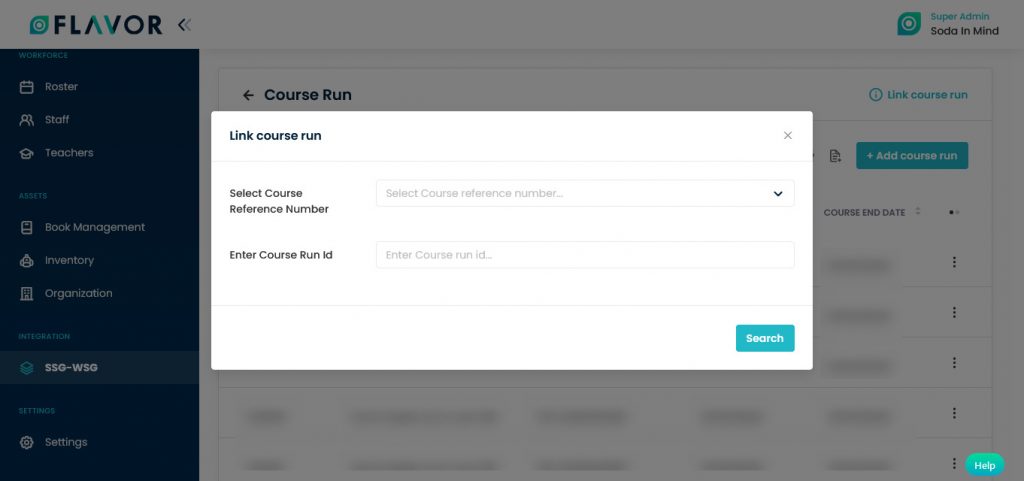
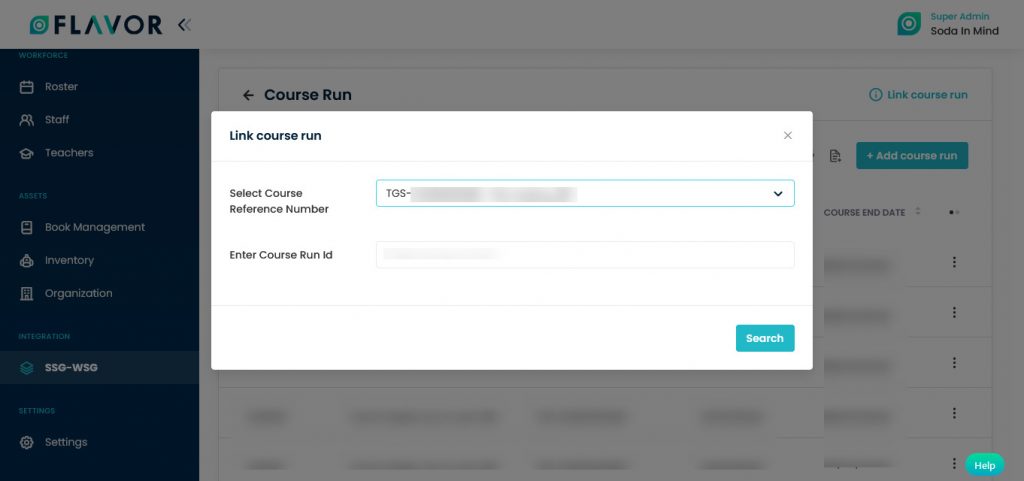
- Select Course Reference Number: Select the course reference number from the dropdown.
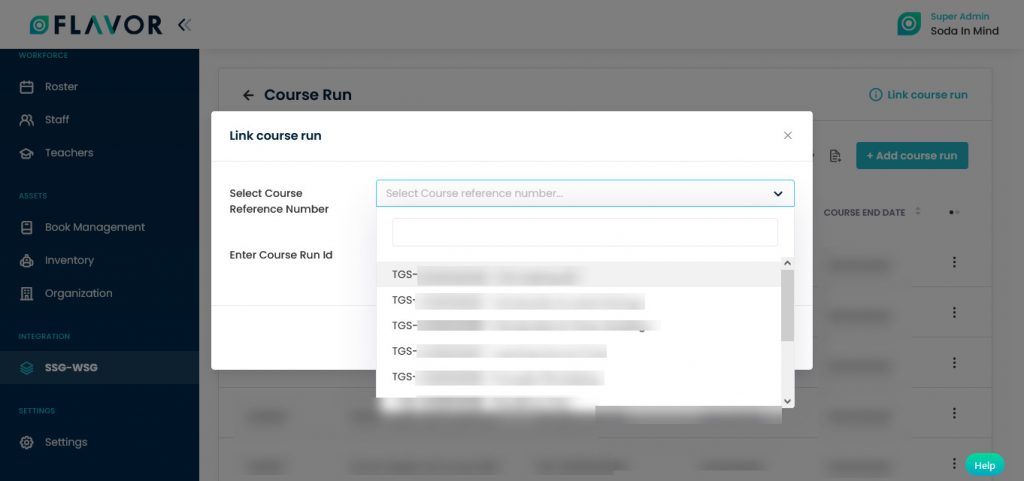
- Enter the Course Run ID.
- Click on the Search button.
- A popup named Link Course Run will be open.
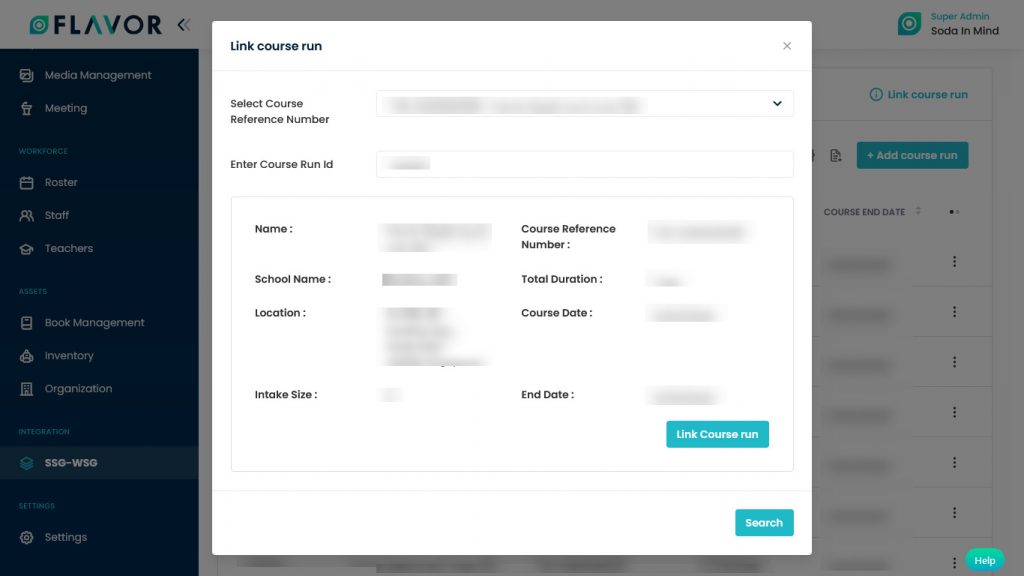
- Here, you can get the details about the course.
- Click on the Link Course Run button.
- If the course is already linked you will get the Course Run has Already been Linked or if the course run is not linked then you can get the message The course has been linked.
Enrollments
Navigate to the Enrollment section. After clicking you will be redirected to the Enrollments page.
Search
By clicking on the Search Icon, you can search the specific courses run by entering the course run ID, SSG Course Name and Course Reference Number.
Filter
You can filter the Enrollment based on specific parameters. Click on Filter Icon, after clicking, a popup form will appear on your screen. Enter the start date and end date of the course. Click on the Apply button to save the parameters.

Import/Export
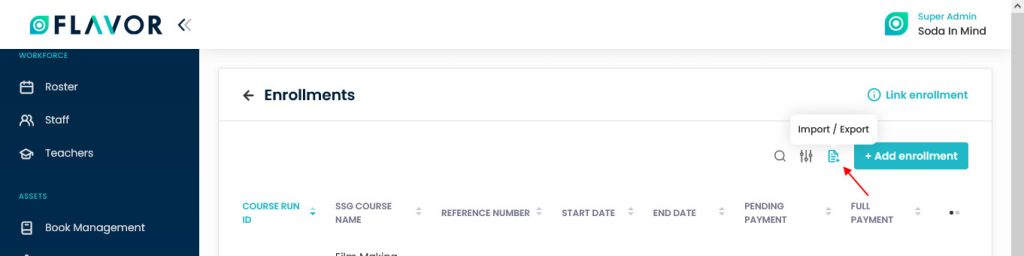
Import
- Click on the Import option.
- A pop named Import data will be open.
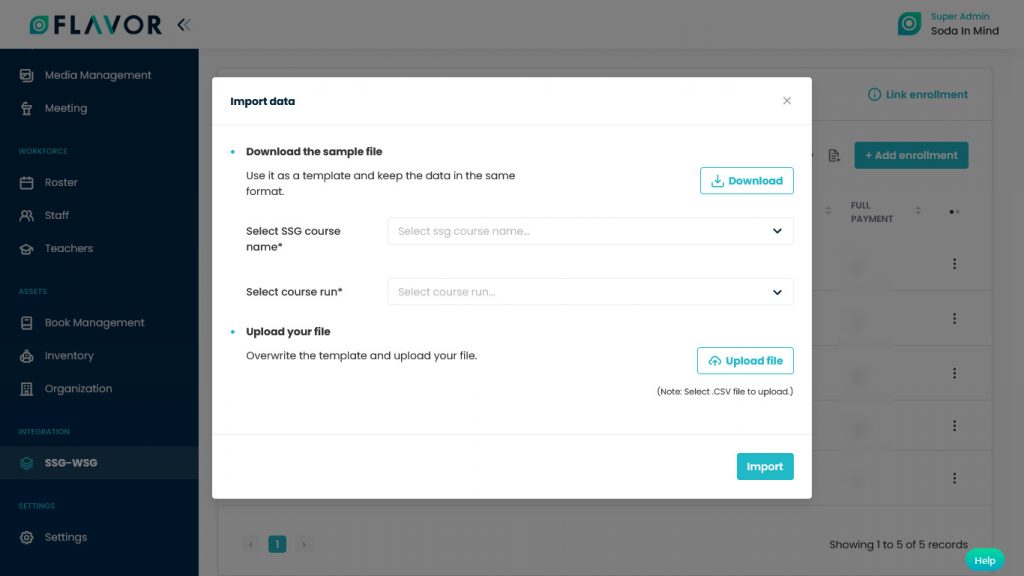
- Download the Sample File: If you want to download the sample file, click on the Download button. After clicking on the Download button a File Download Window will be open on your screen, click on Save File and then click on the OK button. It depends on you which kind of file you want to upload CSV or XLSX.
- This file contains the format based on which you can create .CSV file to import data.
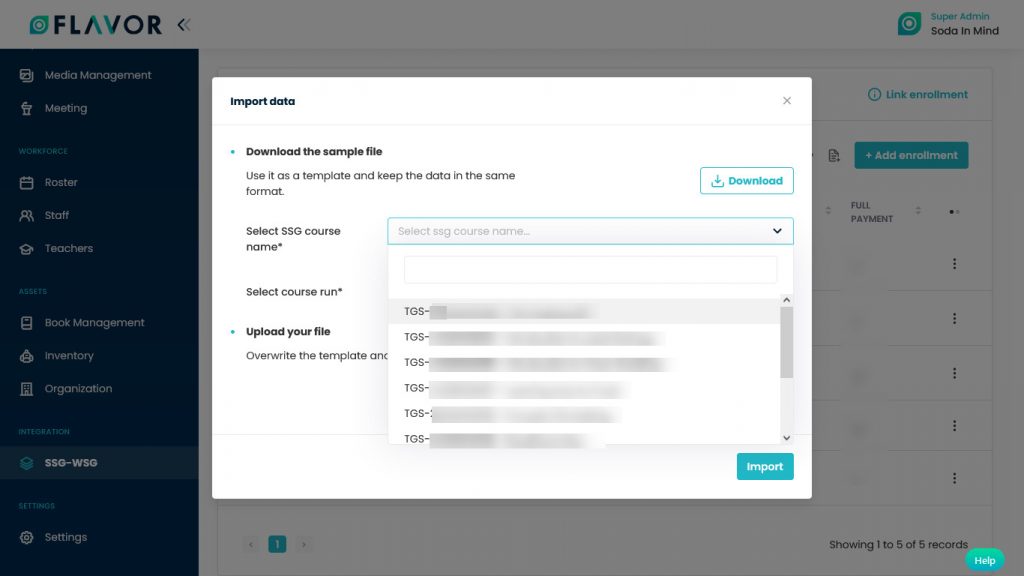
- Select SSG Course Name: Select the SSG course name from the dropdown.
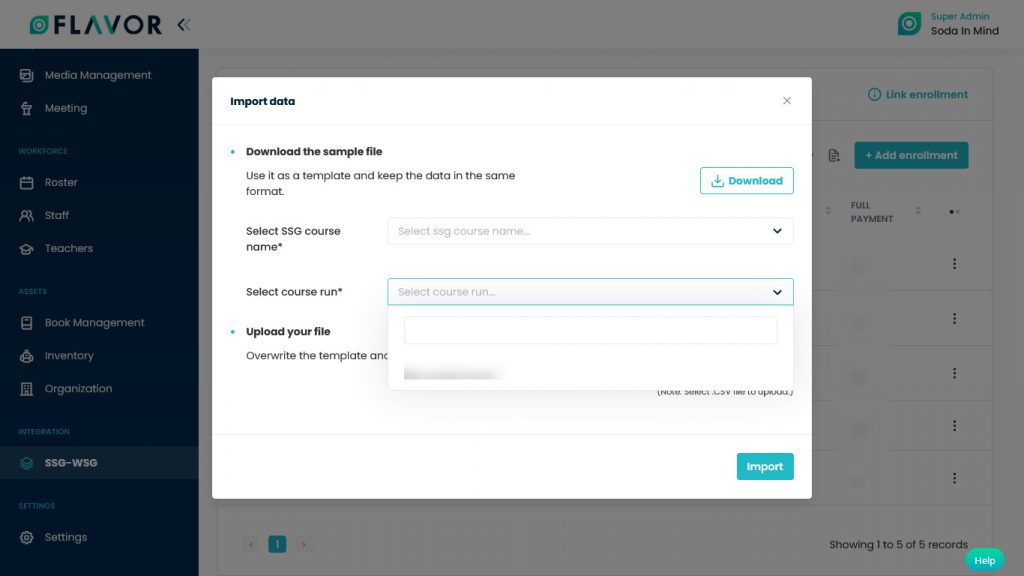
- Select Course Run: Select the course run from the drop-down.
- Upload Your File: Click on the Upload File button. A File Selector Window will be open, choose a .CSV or .XLSX file to upload.
- Click on the Open button to upload. The selected file will be uploaded. Click on the Import button.
Export
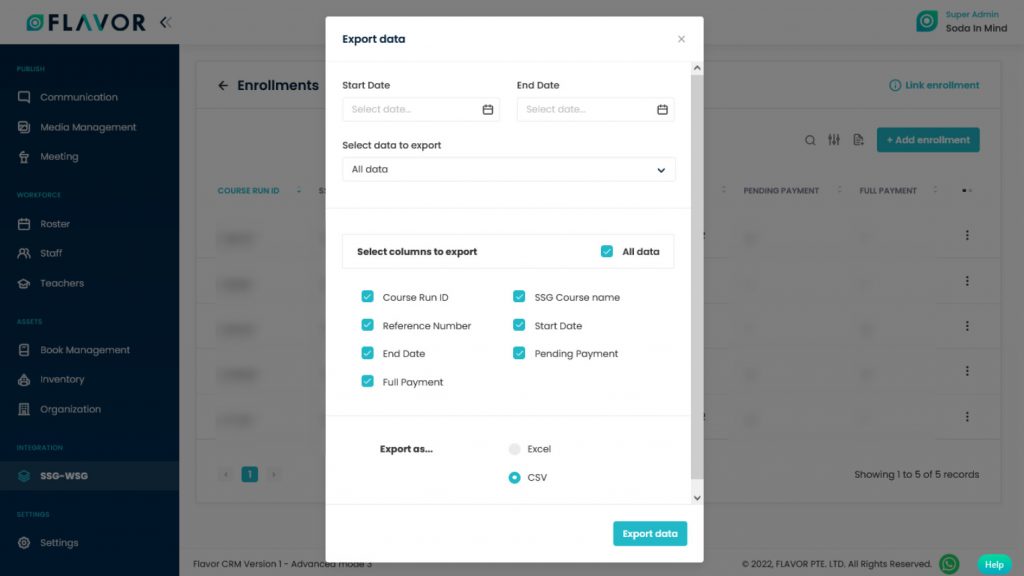
- To export all data, you have to click on the Export Icon.
- After clicking on the Export icon, a pop-up form named Export Data will appear on your screen.
- Start Date and End Date: Select the time period in the start date and end date column for which time period’s data you need.
- Select Data to Export: Here, you can export the data of all rows or 15 rows by simply clicking on the dropdown.
- Select Column to Export: Select columns to which you need your data to export. Like if you want all the data of the entire data, then simply click on “ALL DATA” and you will get the data of the enrollment submodule in your exported file.
- Export as: Then select a format in which you want to export your data i.e (EXCEL or CSV).
- After selecting the relevant records/data, click on the Export Data button to export all the data in the selected file (Excel/CSV).
Add Enrollment
- To add enrollment click on the + Add Enrollment button.

- A popup named Choose Course will be open.
- The entire list of Course Run will be shown in this popup.
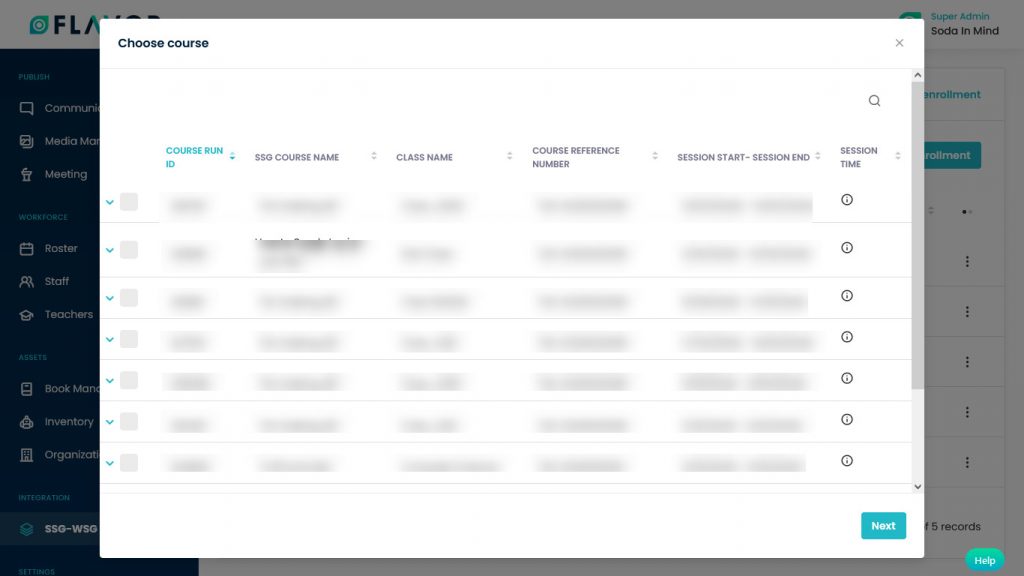
- If there are sessions in any course run you can check by hovering the mouse on Session time.
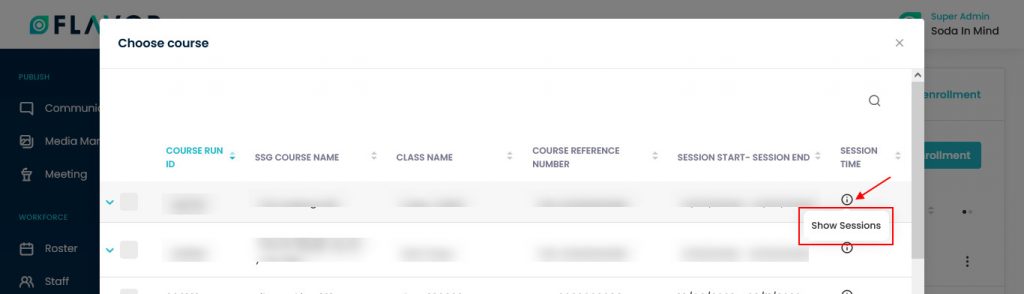
- Click on that icon, after clicking a popup named Course Session List will be open.
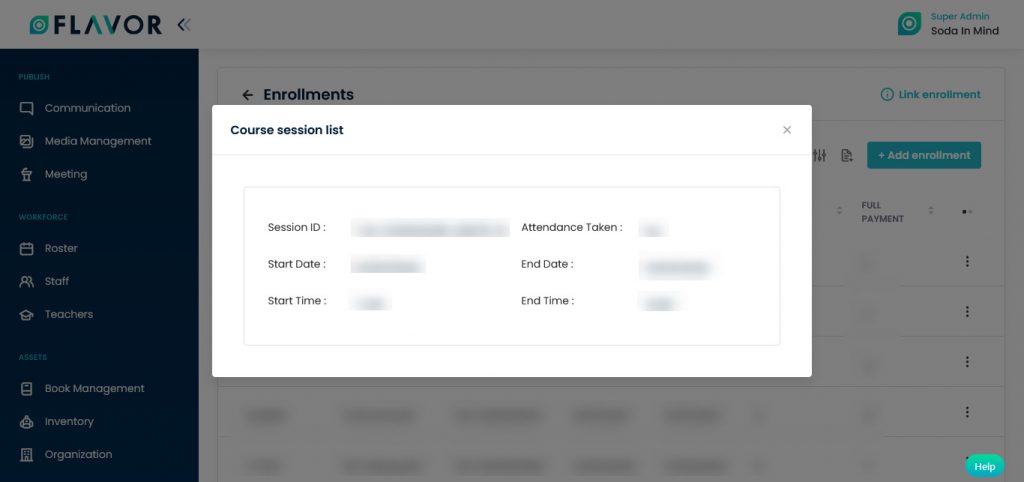
- Here, you can see the number of sessions, Session Id, start and end date of the session.
- Select a course from the Choose Course popup.
Note: After selecting any course rest of the courses will be blurred. You can select one course at a time. - Click on the Next button.
- A new popup named Add Students will be open.
- A list of registered students for this course will be seen in Add students popup.
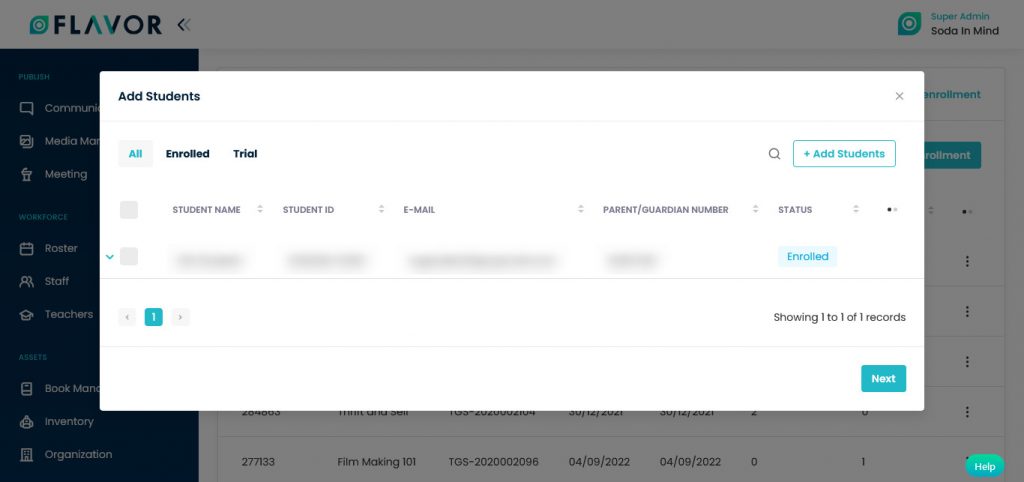
Note: You can only see those students list who have NRIC Numbers in their form.
- Select students from the list then click on the Next button.
- You will be redirected to the Class Enrollment page.
- You can see the list of students in the Student Column and in the Student Details column, you have to fill up the details.
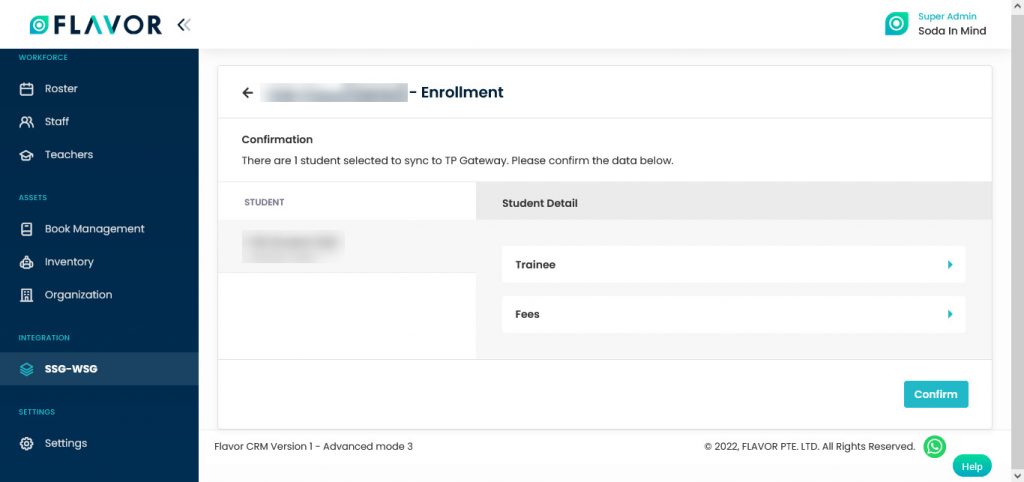 Note: If you want to add students then click on the Add Students button. You will be redirected to the Add Student page.
Trainee
- Trainee Type: Select the type of trainee from the drop-down, it could be NRIC, FIN or others.
- Trainee ID: When you select the Trainee Type, Trainee ID will be populated automatically.
- Trainee Birth Date: Enter the birth date of the trainee.
- Enter the trainee’s name, country code, area code, phone number and email address.
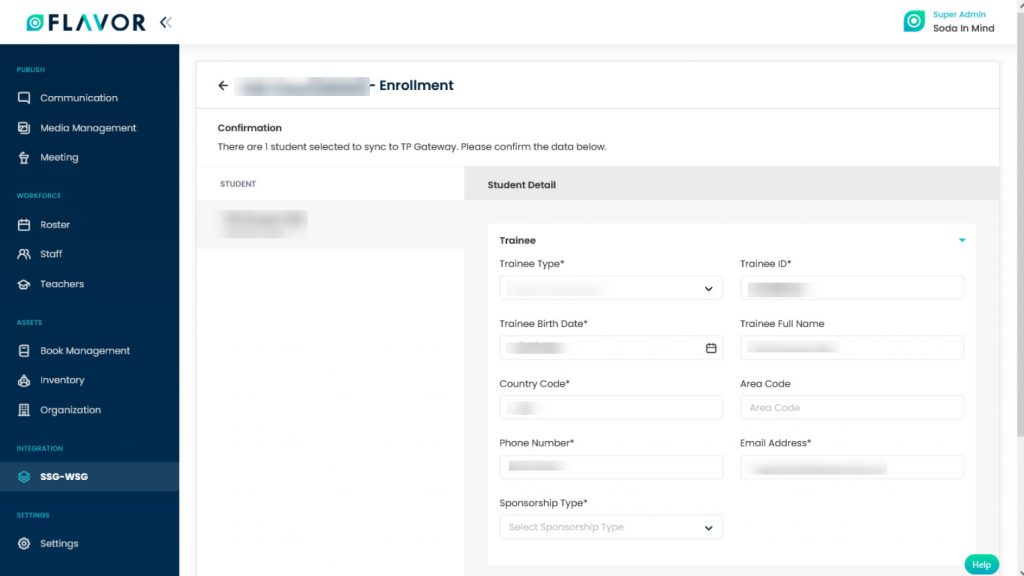
- Sponsorship Type: mandatory filed, select the type from the dropdown.
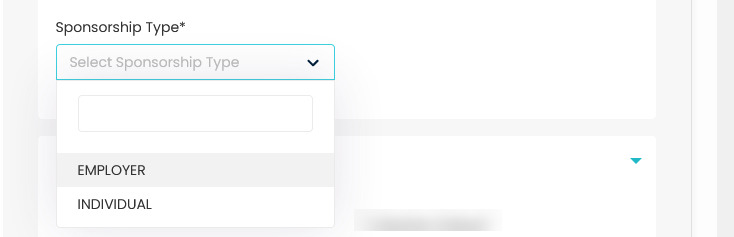
- Individual:
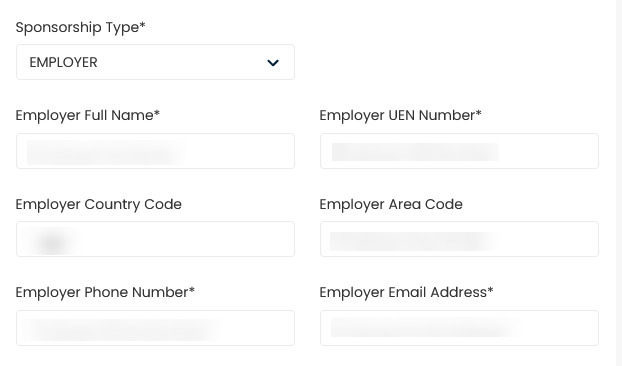
- Employer: If you select Employer from the dropdown, details related to the employee will have to be filed.
Fees
- Discount Amount: Enter the discount amount.
- Collection Status: Select the payment status from the dropdown.
- Enrollment Date: Select the date of enrollment from the date picker.
- Total payment: Enter the total payment.
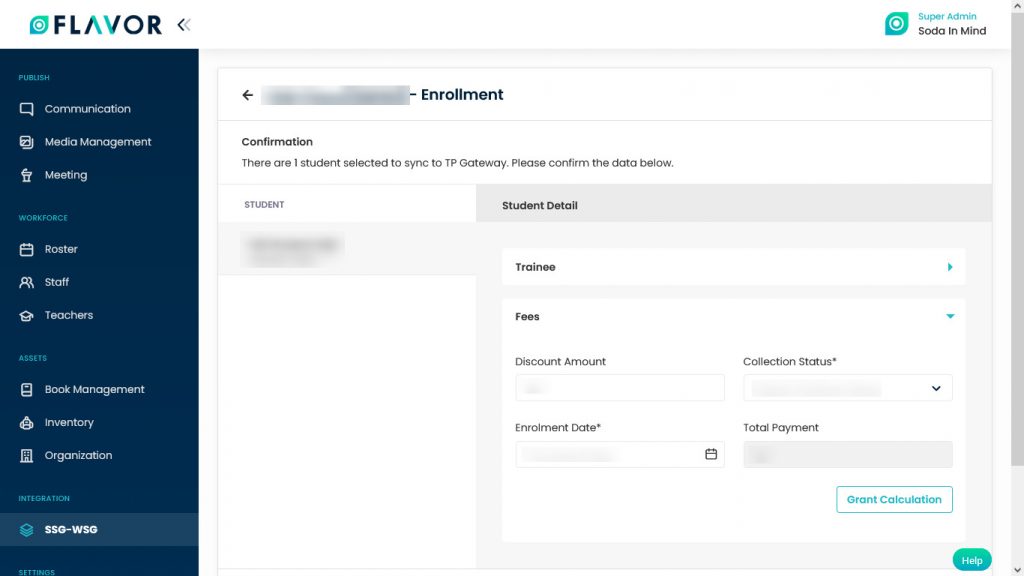
Grant Calculation
- Click on the Grand Calculation button.
- You will get the details of the total payment and how much grant will you get and what will be the nett fee.
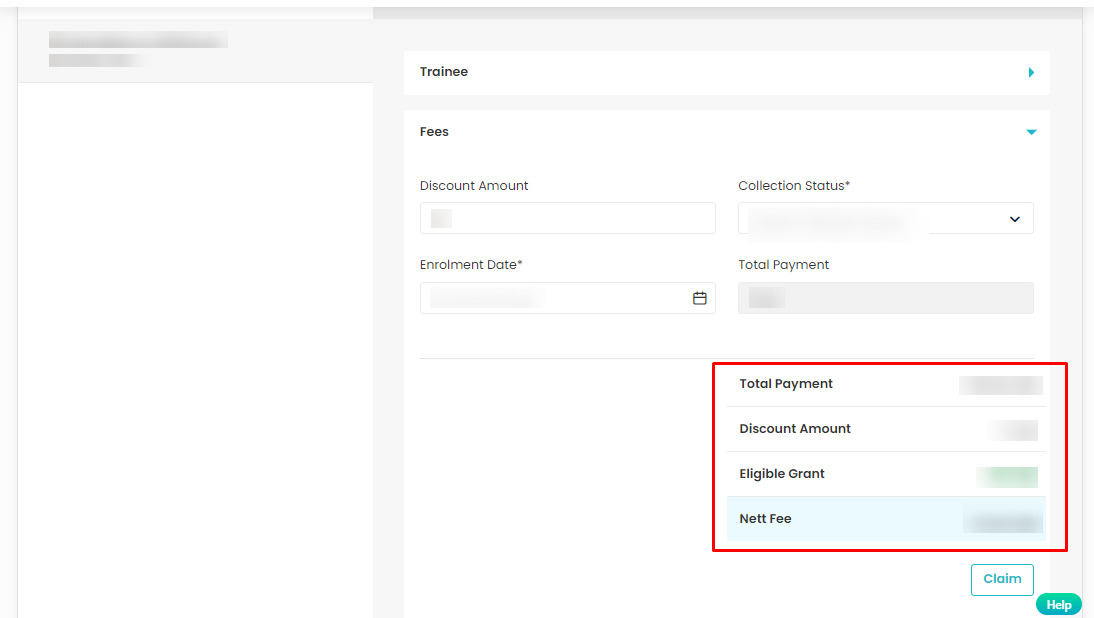
- Click on the Claim button, a confirmation popup named Claim Grant will appear on your screen.
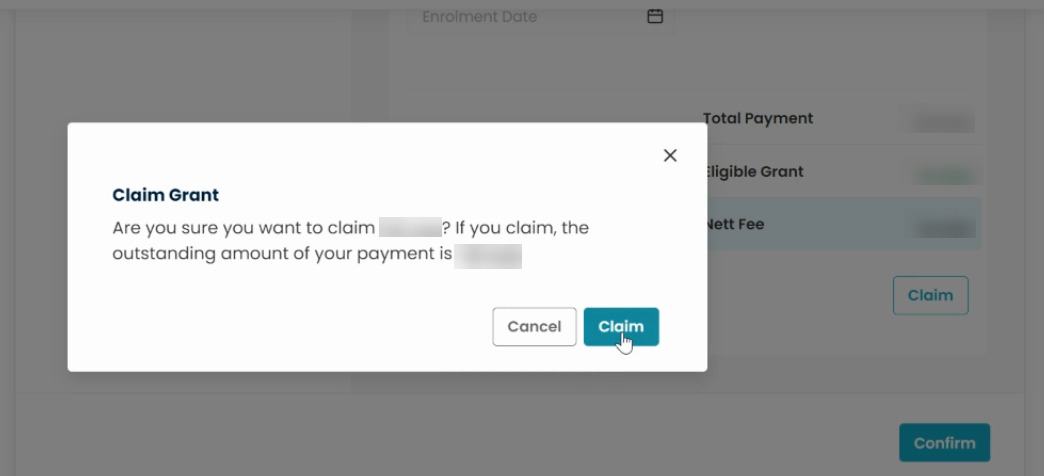
- Click on the Claim button, you will get the confirmation message Claim Instruction mail is send successfully. The mail will be sent to the parents.
Process After the Claim
- A parent needs to check his email to pay the fee. In his mailbox, he can see the Proceed Claim button.
- Click on that button, after clicking a parent will be redirected to the SSG WSG site.
- A parent will be redirected to the login page
- Log in to the site.
- He’ll be redirected to the Payment page.
- Enter the amount in the Payment details field.
- Mark on the terms and conditions.
- Click on the Submit button.
- After submitting a parent will get the Claim Created Successfully message.
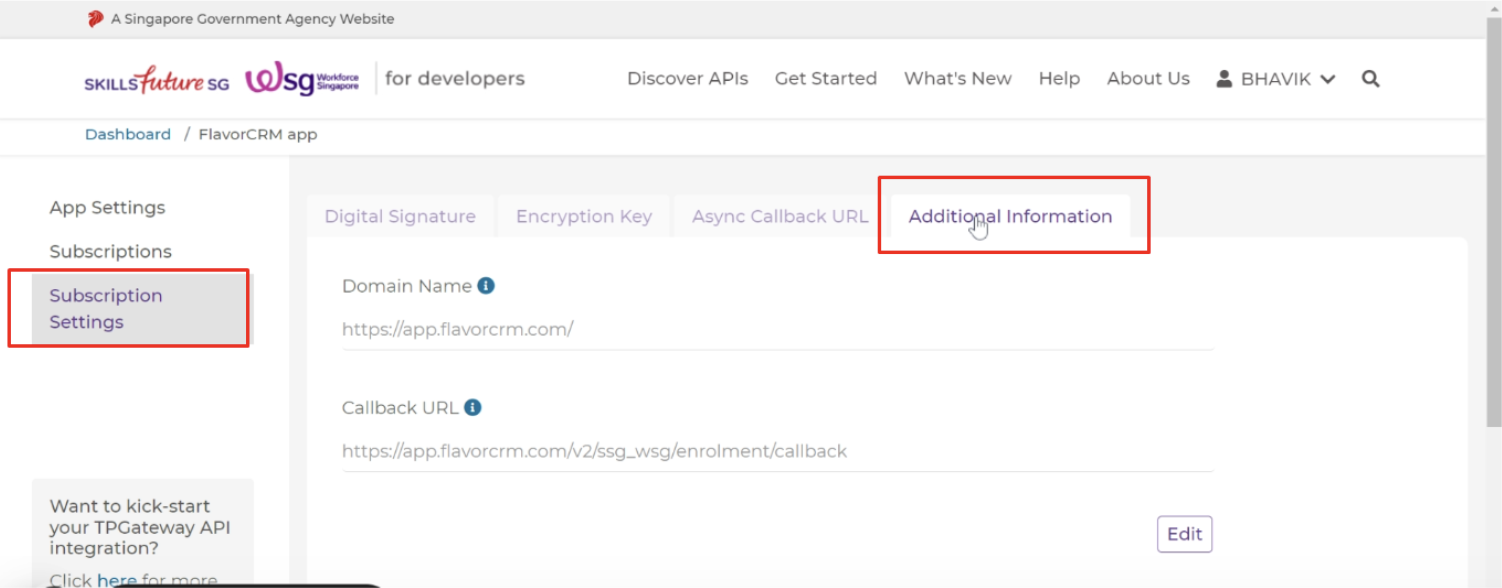
Note
Set Domain Name and Callback URL For Claim request:
Go to subscription setting > Additional Url set Domain Name and Callback URL.
Domain Name : https://app.flavorcrm.com/
Callback URL : https://app.flavorcrm.com/v2/ssg_wsg/enrolment/callback
Please watch video for detail reference:
https://www.loom.com/share/d491e1819234466c87dceb7d35b3c4eb?sid=35ab6cd6-bc51-478f-bd5f-02effdfd96ff
Enrollment Records
Column Sorting
All enrollments will be shown in Tabular Format. You can sort the data by clicking on Column Sorting Arrows in the Table’s Header.
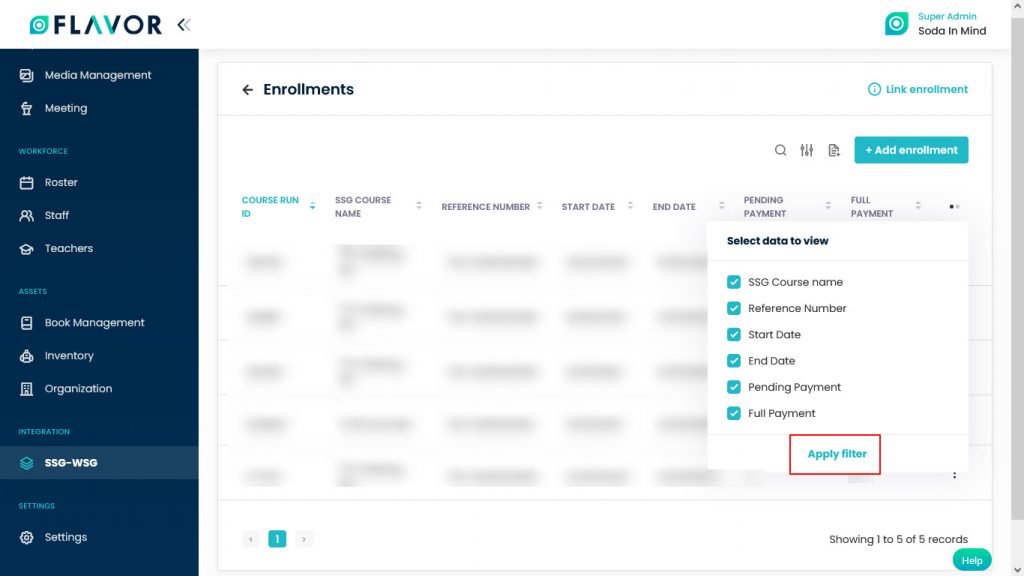
Column Visibility
You can sort columns by clicking on the Ellipsis icon, you will get the pop-up form named Select Data to View. Mark the columns you want to see and unmark the ones you don’t want to see in the table. After this procedure click on the Apply Filter button.
Action Button
Click on Action Button (Vertical Ellipsis), and a small popup box will appear on your screen with the Vie Enrollment option.
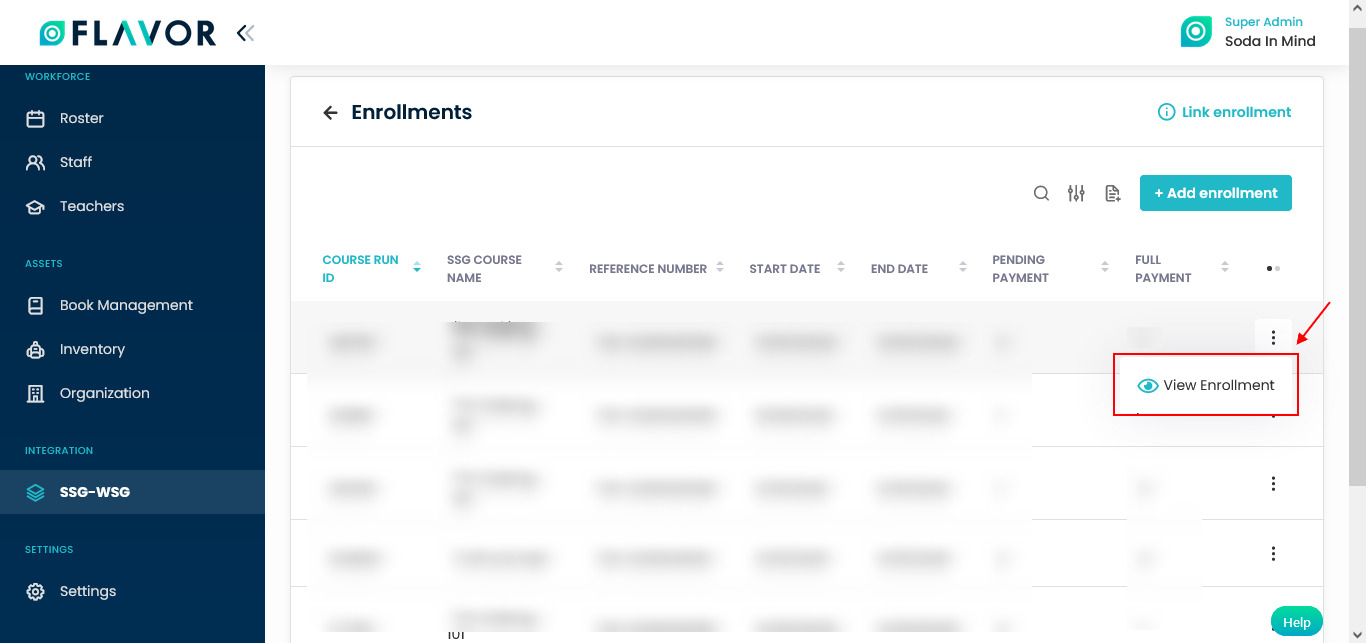
View Enrollment
- Click on the vie enrollment option.
- A popup named View Enrollment will be open.
- Here, you can get the details of the Course run ID, Enrollment ID, etc.
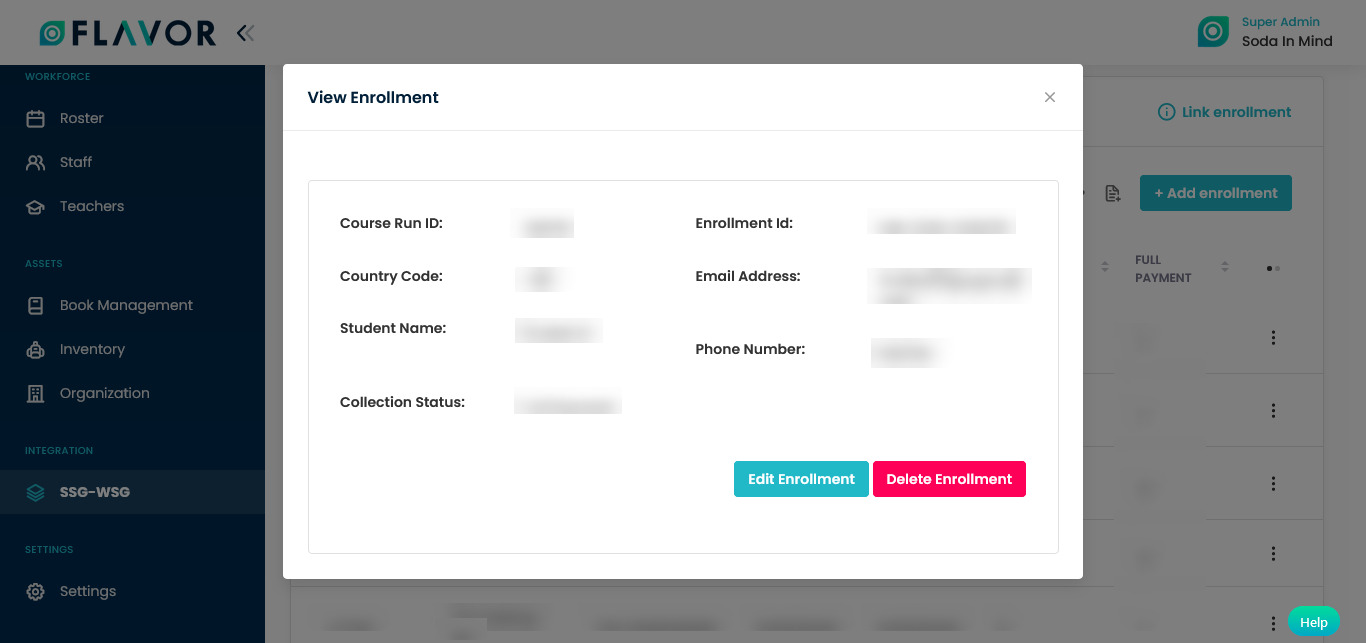
- In this popup, you can see two buttons.
- Edit Enrollment: To edit the enrollment click on the Edit Enrollment button, and you will be redirected to the Edit Enrollment page.
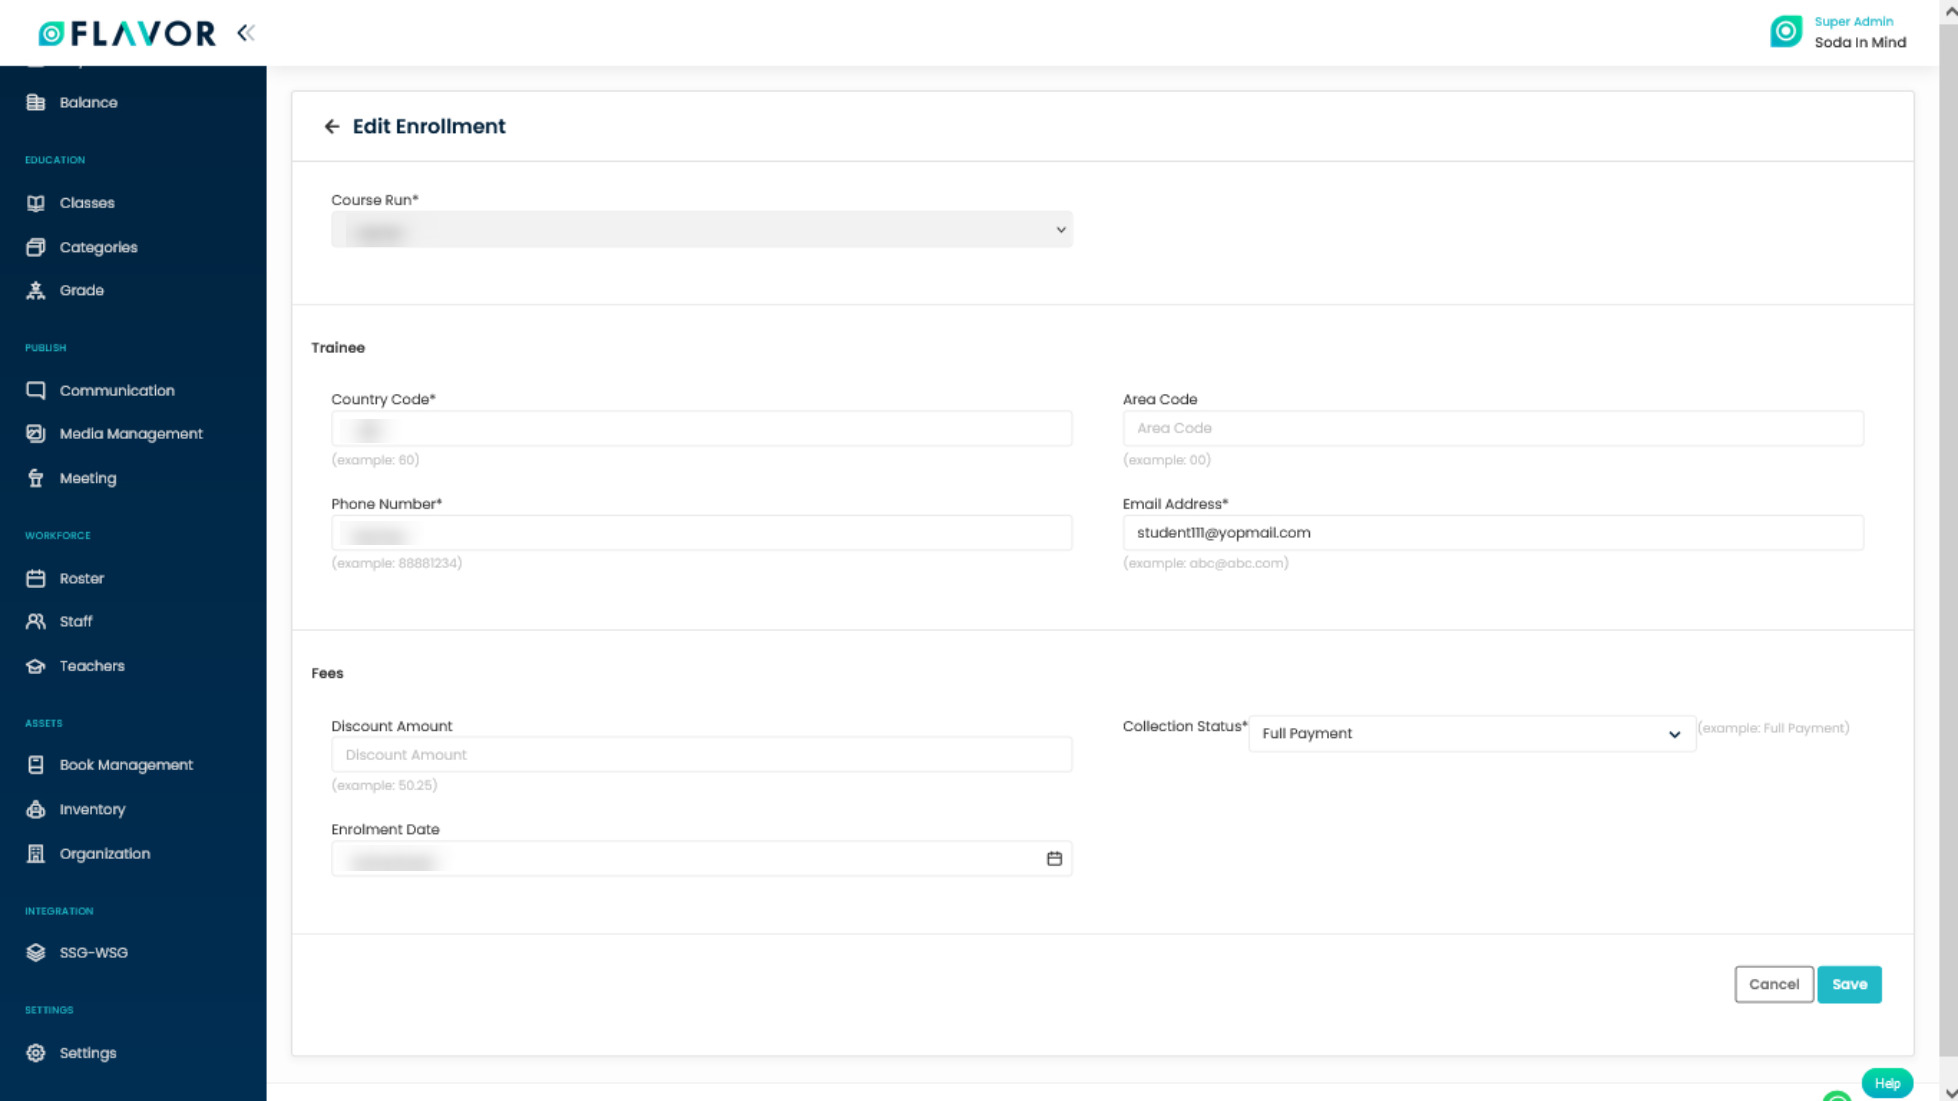
- Update the information and then click on the Save button.
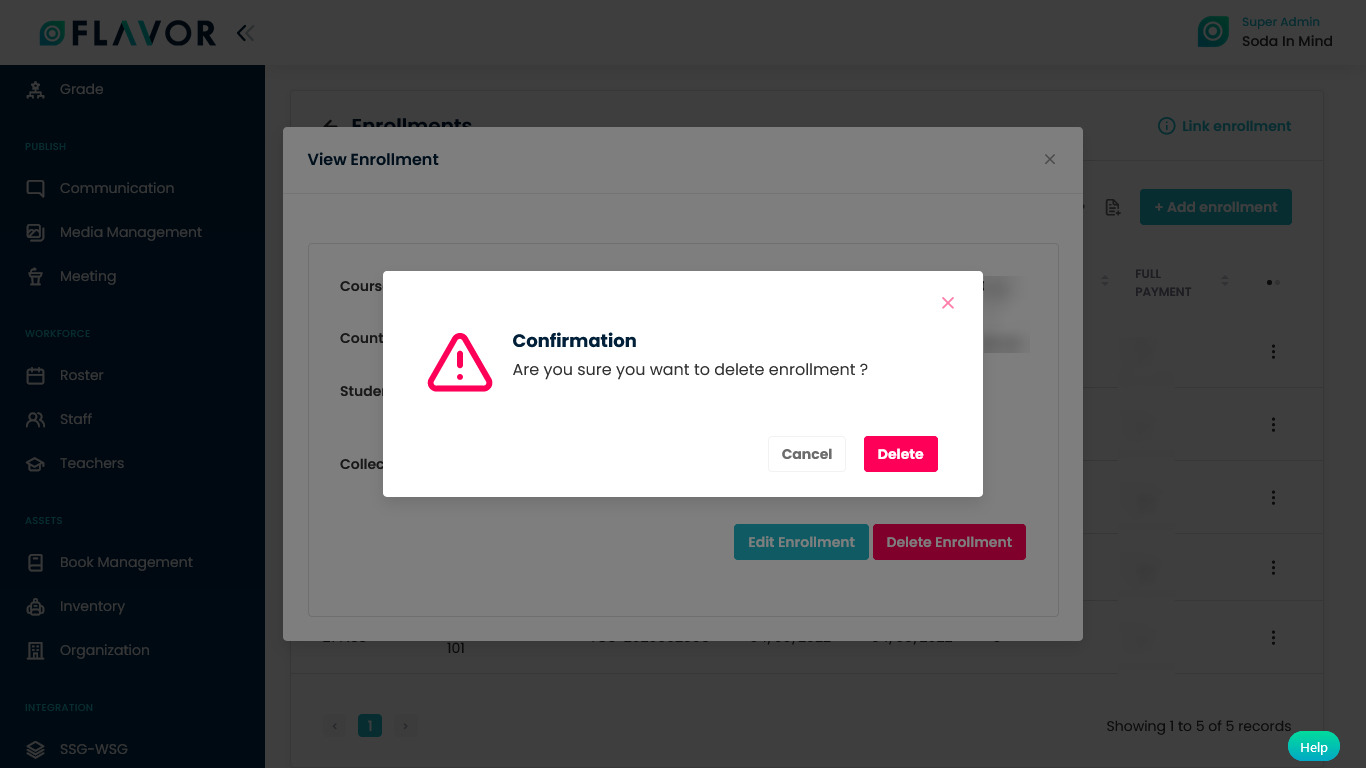
- Delete Enrollment: To delete the enrollment click on the Delete Enrollment button.
- A confirmation popup will be open. Click on the Delete button.
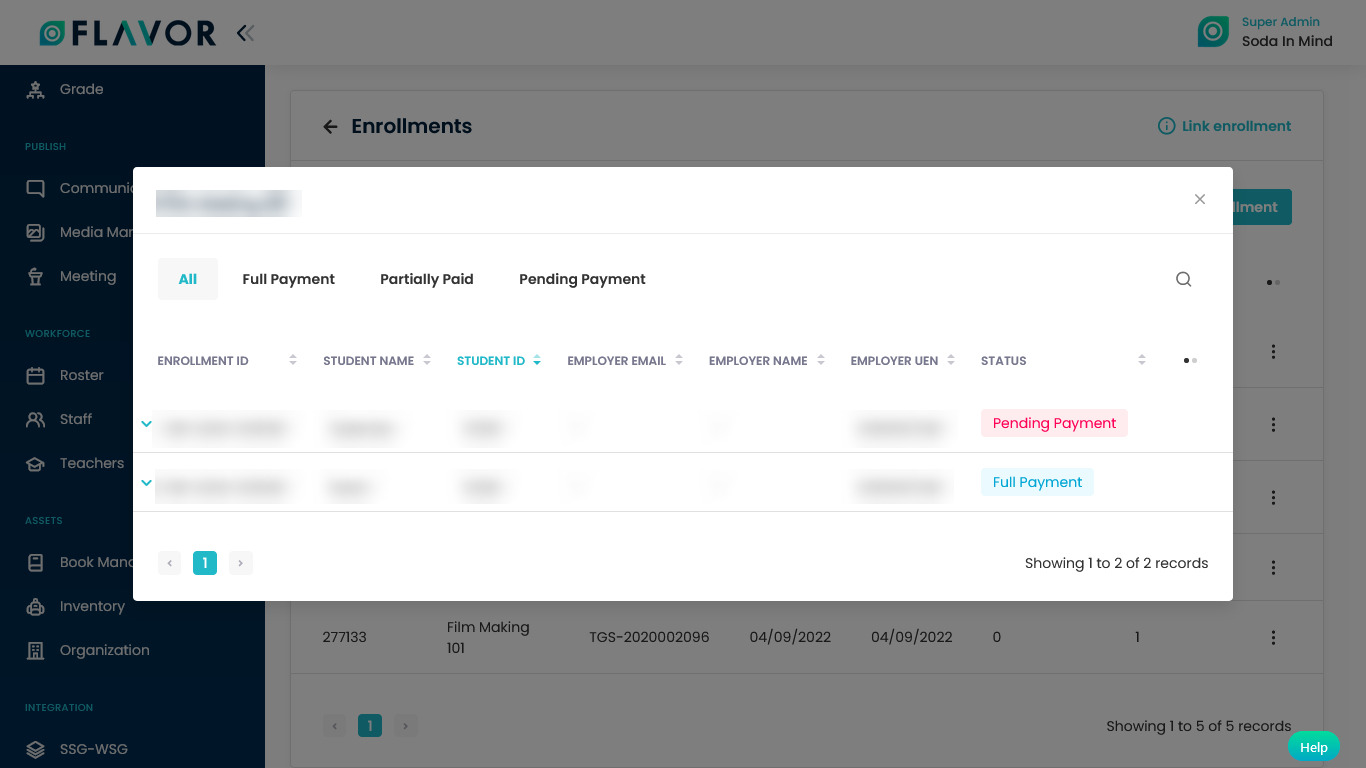
Enrollment Detail
- Click on any enrollment record.
- A popup will be open.
- Here, you can get the details of enrollment, with the payment status.
- You can also see the Full Payment, Partially Payment, and Pending Payment tabs.
- You can check the status of payment from these tabs.
Link Enrollment
You can search and link your existing Course Run using Course Run ID and Course Reference Number.
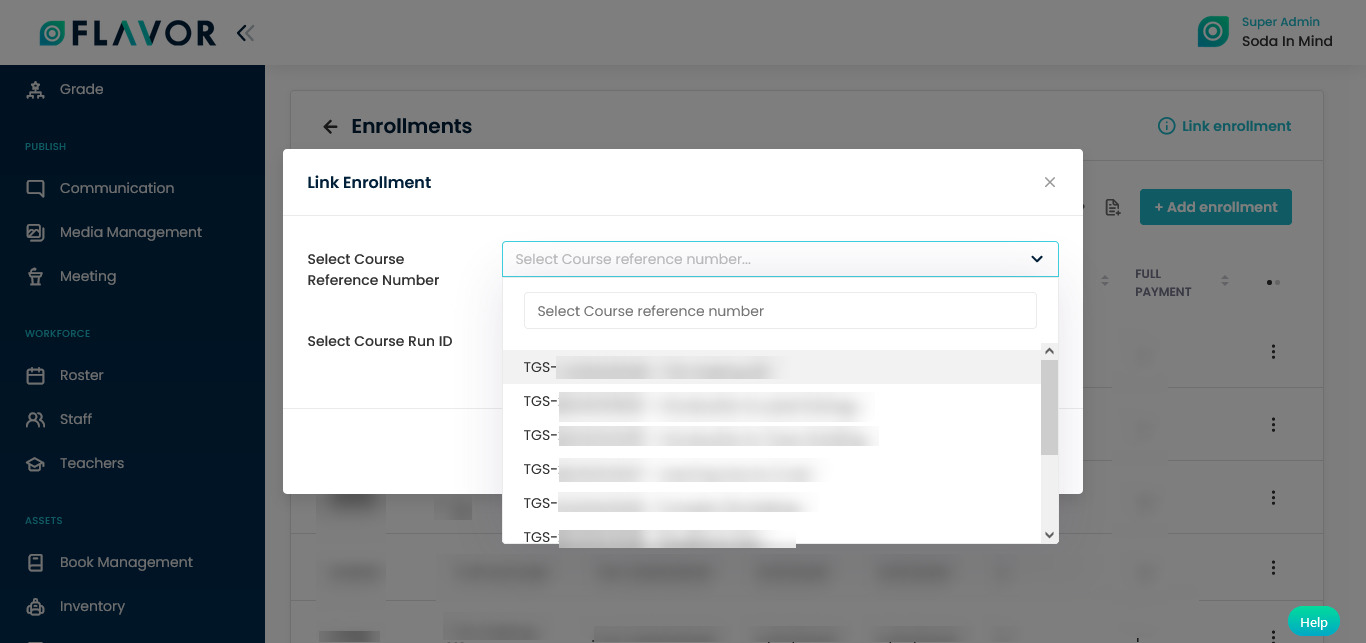
- Navigate to the Link Enrollment option.
- A popup named Link Enrollment will be open.
- Select Course Reference Number: Select the course reference number from the dropdown.
- Select Course Run ID: Select the course run ID from the dropdown.
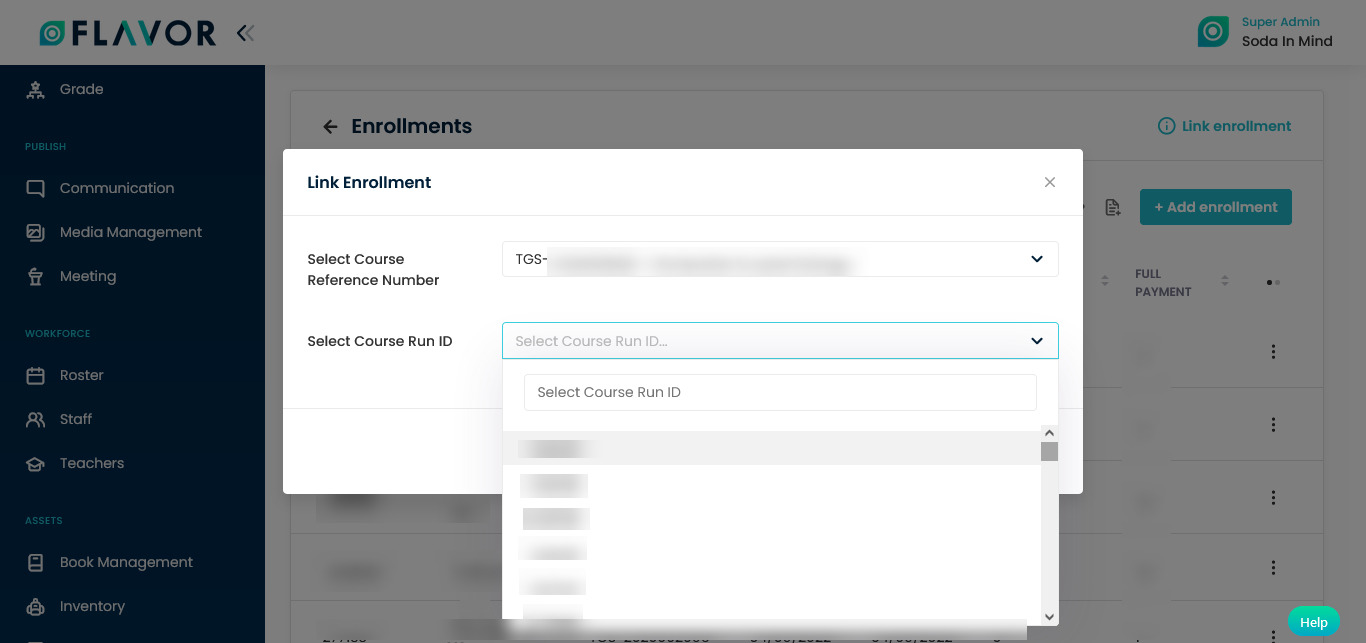
- Click on the Search button.
- A popup named Link Course Run will be open.
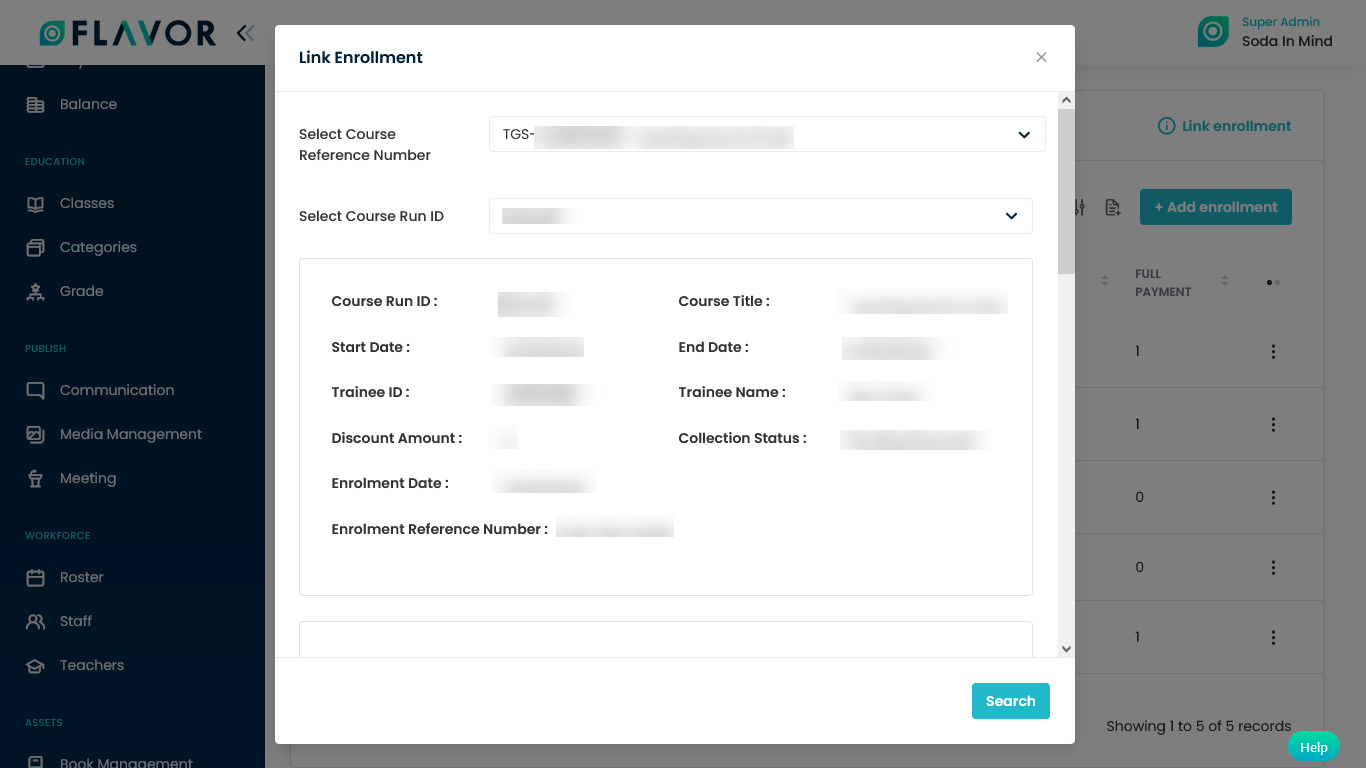
- Here, you can get the details about the course.
- Click on the Link Course Run button.
- If the course is already linked you will get the Course Run has Already been Linked or if the course run is not linked then you can get the message The course has been linked.
Attendance
After enrolment, the student entry is reflected in the Attendance Model.
Search
By clicking on the Search Icon, you can search the attendance by entering the course run ID, SSG Course Name and Course Reference Number.
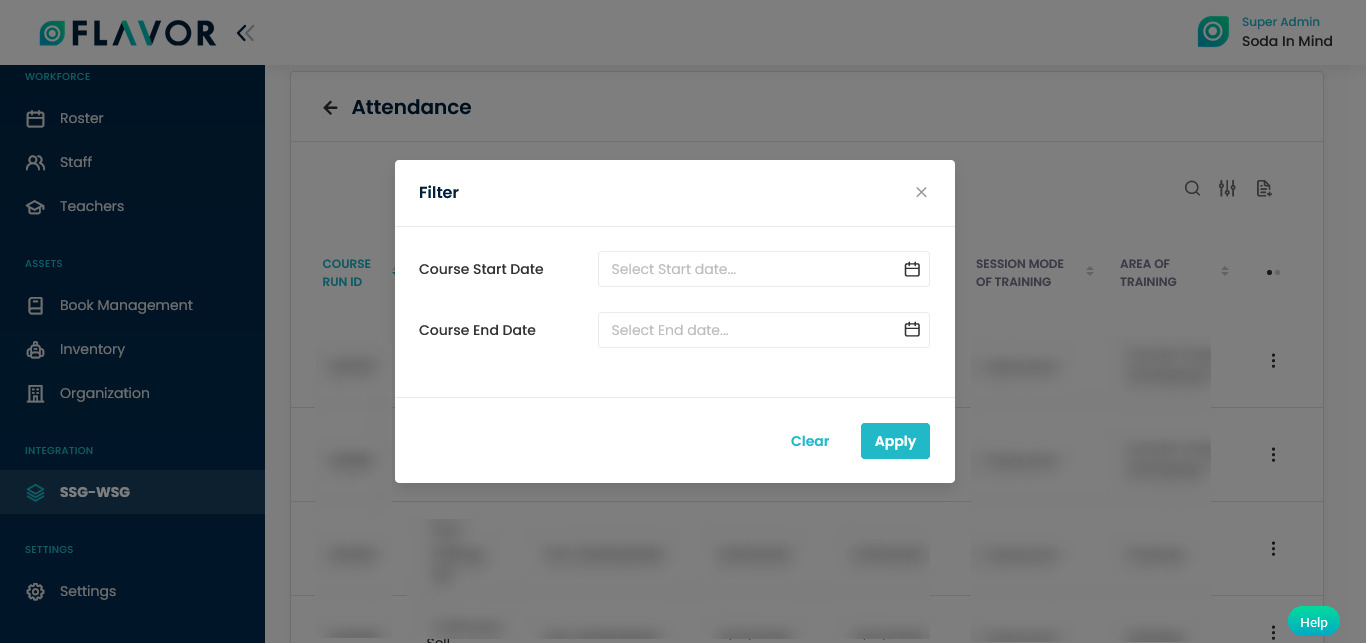
Filter
You can filter the attendance based on specific parameters. Click on Filter Icon, after clicking, a popup form will appear on your screen. Enter the start date and end date of the course. Click on the Apply button to save the parameters.
Export
- To export all data, you have to click on the Export Icon.
- After clicking on the Export icon, a pop-up form named Export Data will appear on your screen.
- Start Date and End Date: Select the time period in the start date and end date column for which time period’s data you need.
- Select Data to Export: Here, you can export the data of all rows or 15 rows by simply clicking on the dropdown.
- Select Column to Export: Select columns to which you need your data to export. Like if you want all the data of the attendance submodule, then simply click on “ALL DATA” and you will get the data of the attendance in your exported file.
- Export as: Then select a format in which you want to export your data i.e (EXCEL or CSV).
- After selecting the relevant records/data, click on the Export Data button to export all the data in the selected file (Excel/CSV).
Attendance Records
Column Sorting
Attendance records will be shown in Tabular Format. You can sort the data by clicking on column sorting arrows in Table Header.
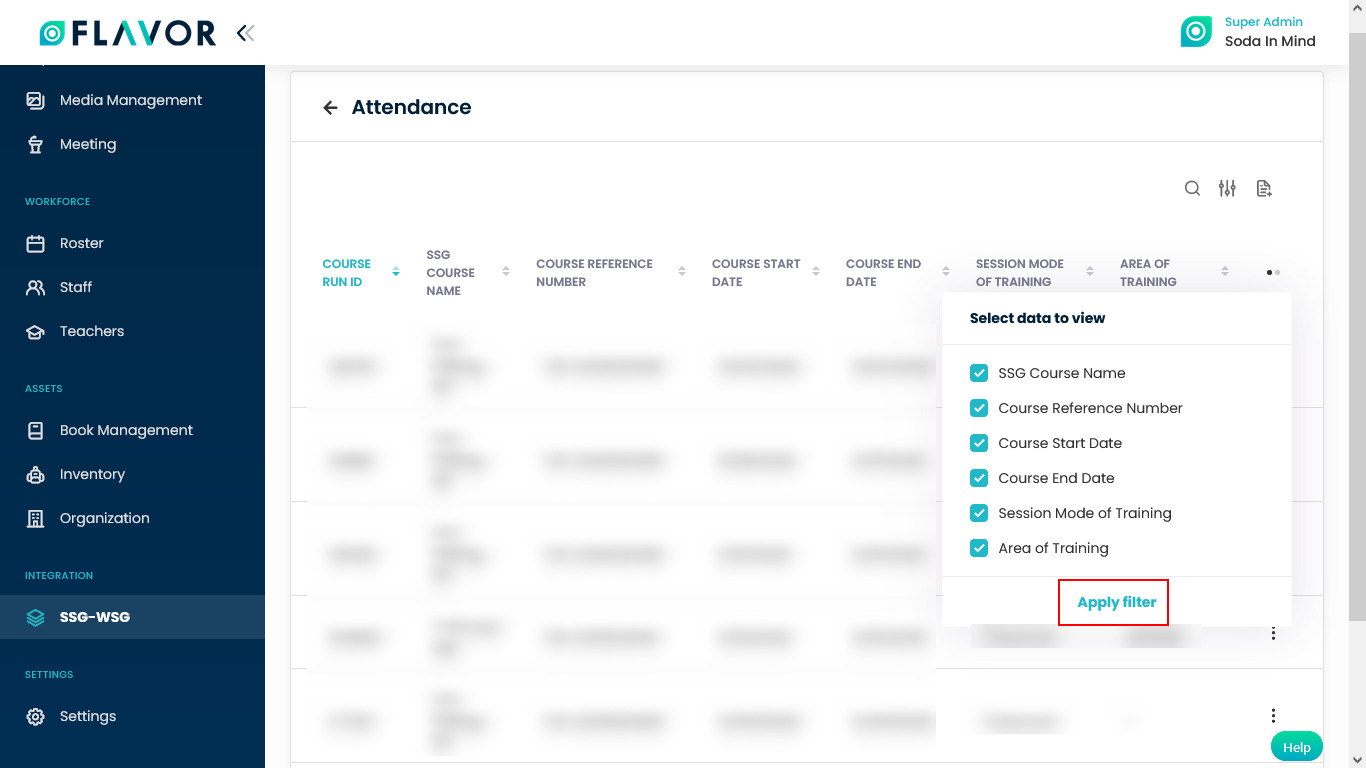
Column Visibility
You can sort columns by clicking on the Ellipsis icon, you will get the pop-up form named Select Data to View. Mark the columns you want to see and unmark the ones you don’t want to see in the table. After this procedure click on the Apply Filter button.
Action Buttons
Click on Action Button (Vertical Ellipsis), and a popup box will appear on your screen with the import option.

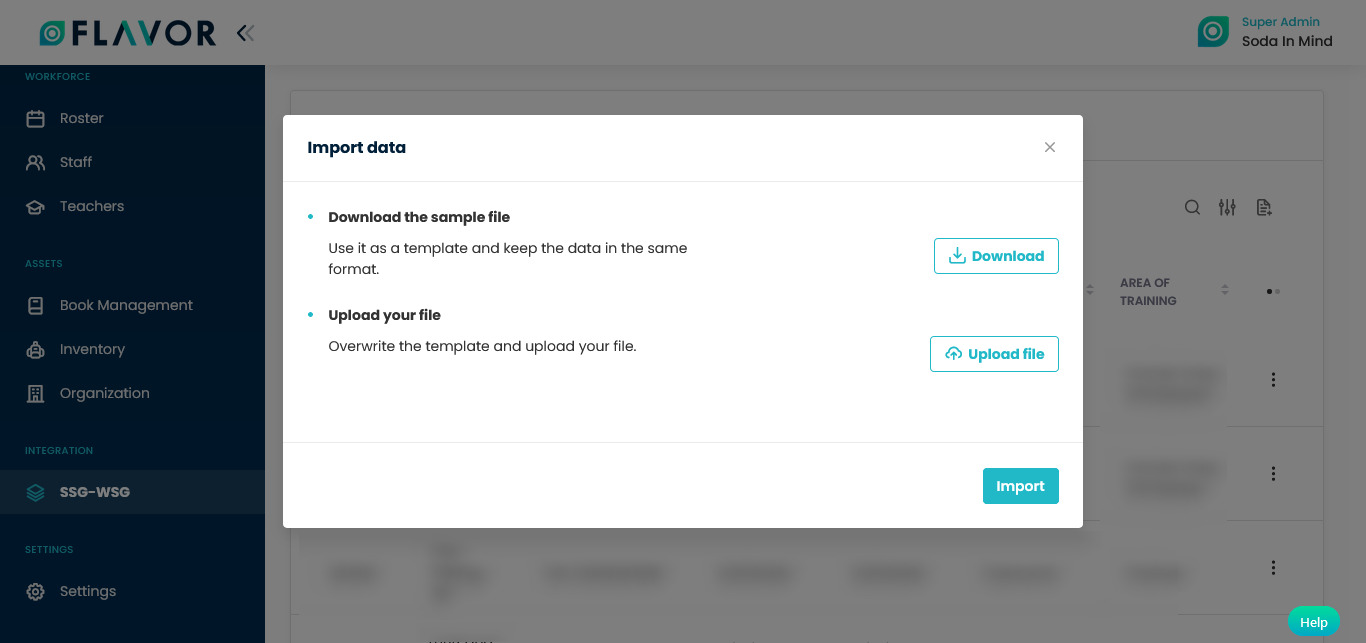
Import
- Click on the Import option.
- A pop named Import Data will be open.
- Download the Sample File: If you want to download the sample file, click on the Download button. After clicking on the Download button a File Download window will be open on your screen, click on Save File and then click on the OK button. It depends on you which kind of file you want to upload CSV or XLSX.
- This file contains the format based on which you can create .CSV file to import data.
- Upload Your File: Click on the Upload File button. A File Selector Window will be open, choose a .CSV or .XLSX file to upload.
- Click on the Open button to upload. The selected file will be uploaded. Click on the Import button.
Attendance Record
- You check the attendance of any Course by clicking on any record.
- After clicking a popup named Course Session List ill be open.
- Session List: In the session list column you can see the list of all sessions.
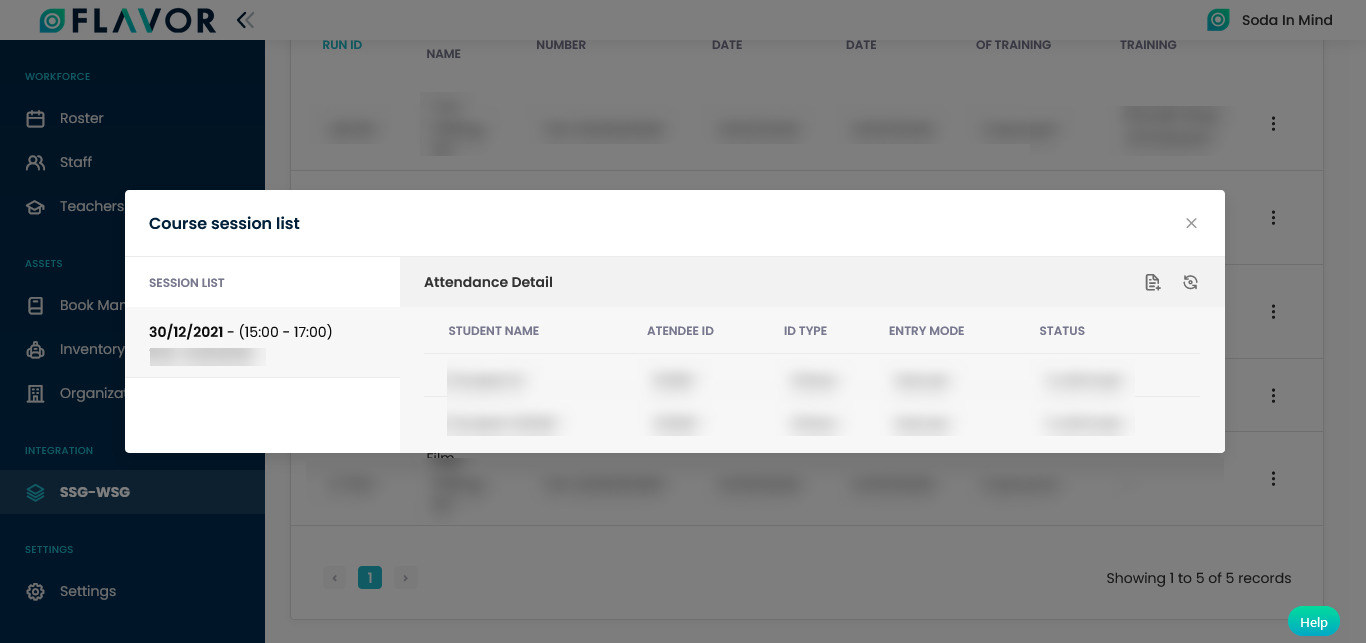
- Attendance Details: Click on any session attendance details of the particular session will be open.
- Import: You can import data by clicking on the Import icon.
- Sync: To sync the attendance click on the Sync icon.
- A popup of that particular class with the list of students will be open.
- From here, you can mark the attendance of students.
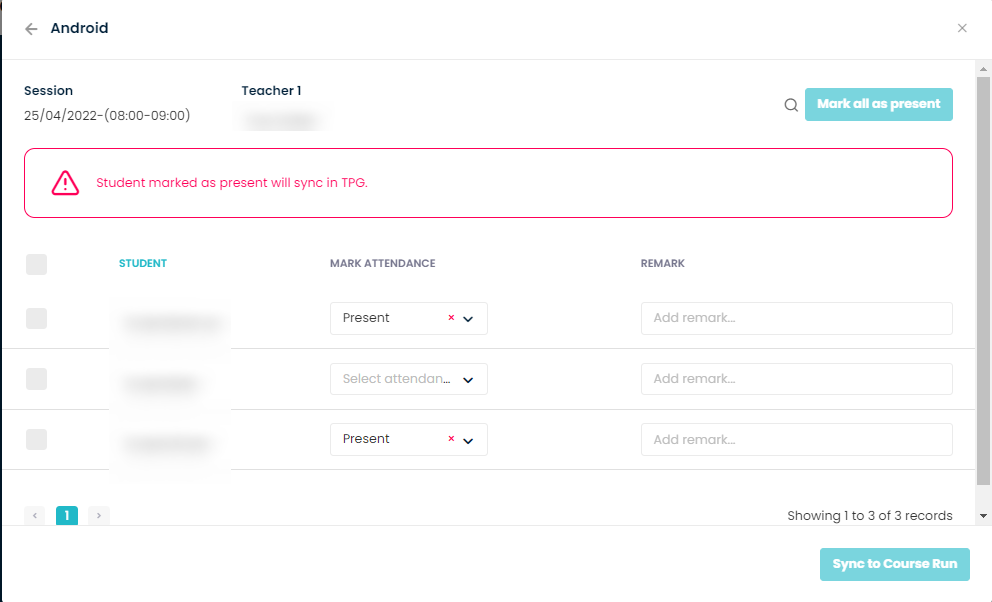
- Then click on the Sync to Course Run button.
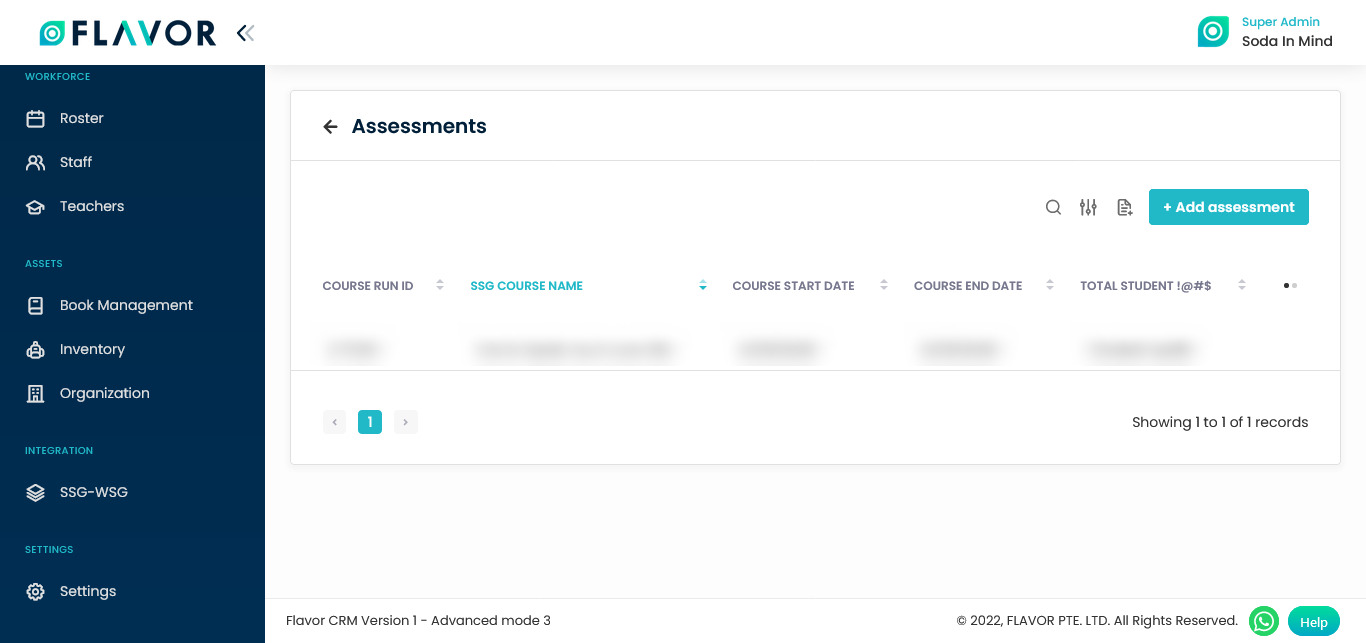
Assessments
Search
By clicking on the Search Icon, you can search the specific assessment by entering the course run ID, SSG Course Name and Course Reference Number.
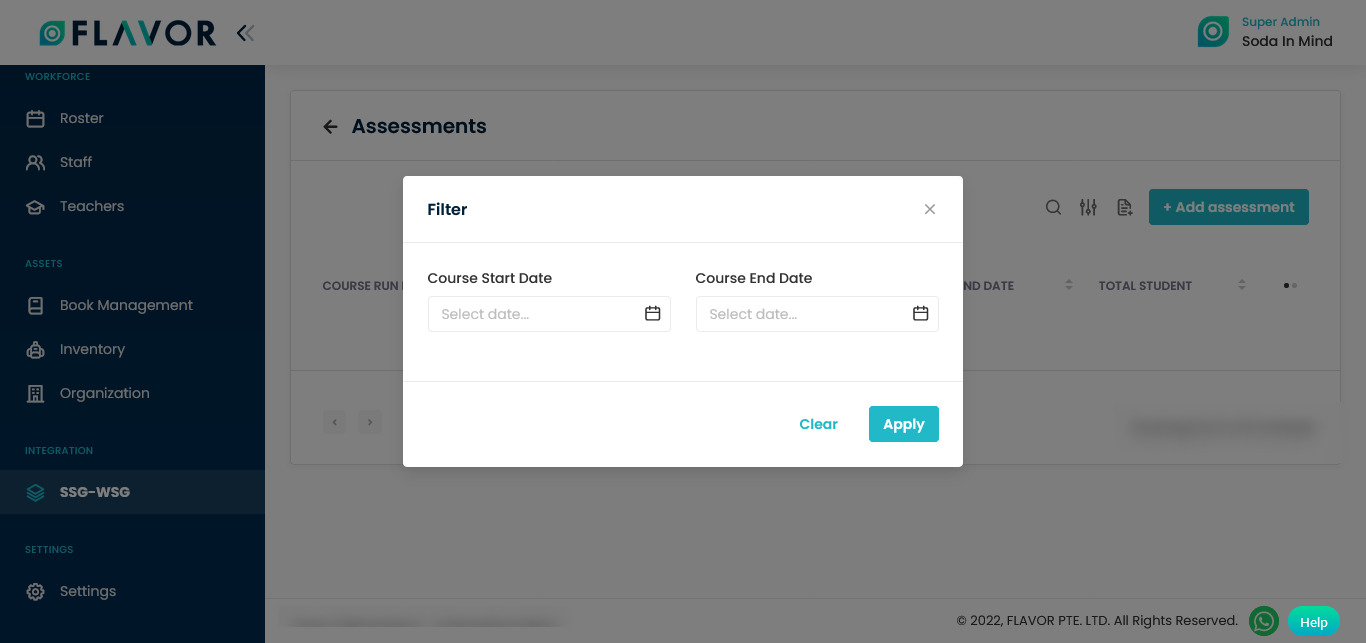
Filter
You can filter the assessment based on specific parameters. Click on Filter Icon, after clicking, a popup form will appear on your screen. Enter Subsidiary, Branch and Course Date Range. Click on the Apply button to save the parameters.
Import/Export
Import
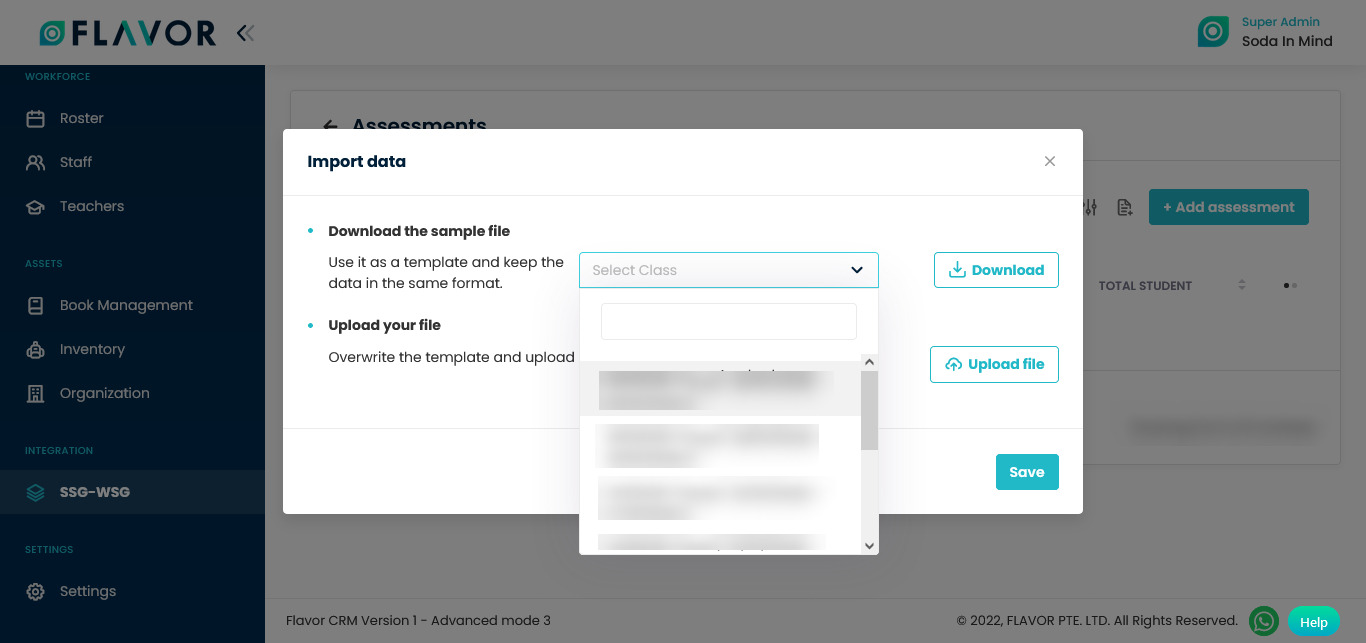
- Click on the Import option.
- A pop named Import Data will be open.
- Download the Sample File: Select the class from the dropdown.
- If you want to download the sample file, click on the Download button. After clicking on the Download button a File Download window will be open on your screen, click on Save File and then click on the OK button.
- It depends on you which kind of file you want to upload CSV or XLSX.
- Upload Your File: Click on the Upload File button. A File Selector Window will be open, choose a .CSV or .XLSX file to upload.
- Click on the Open button to upload. The selected file will be uploaded. Click on the Save button.
Export
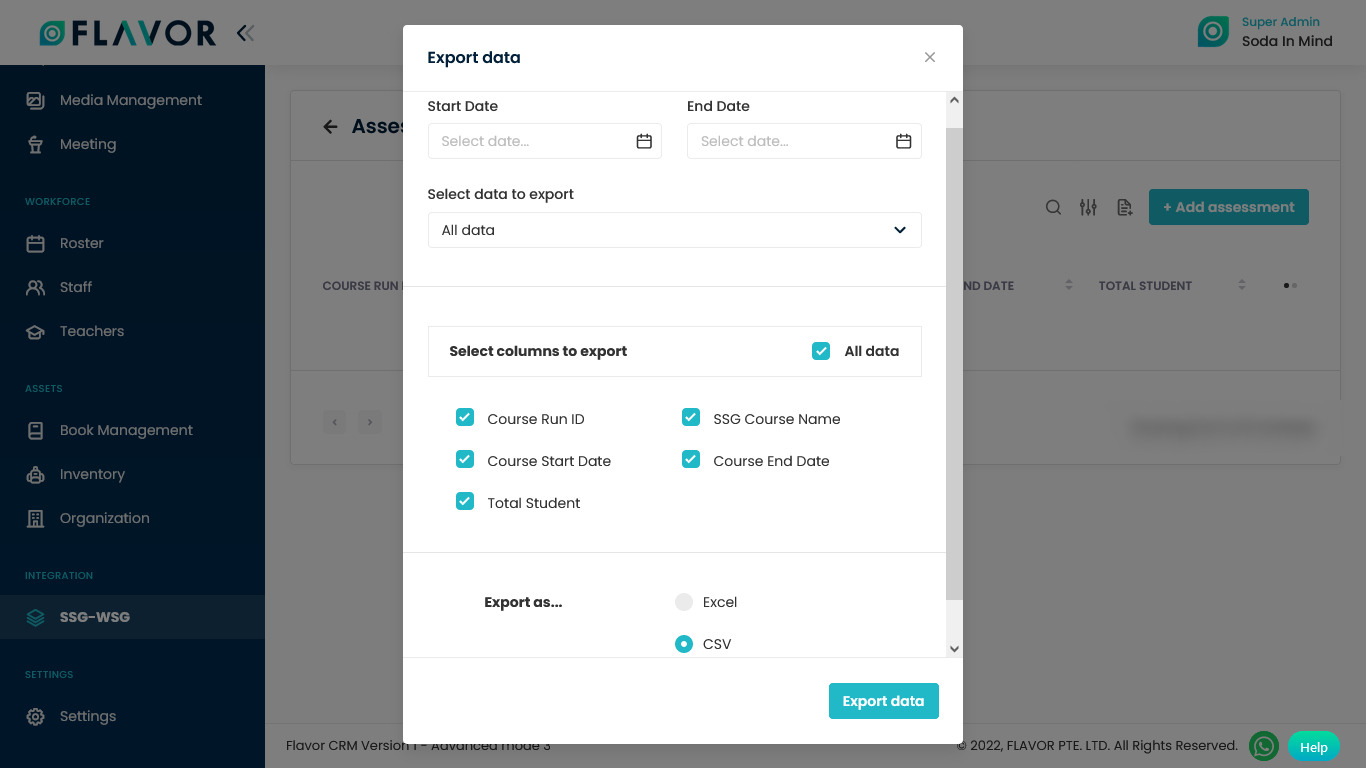
- To export all data, you have to click on the Export Icon.
- After clicking on the Export icon, a pop-up form named Export Data will appear on your screen.
- Start Date and End Date: Select the time period in the start date and end date column for which time period’s data you need.
- Select Data to Export: Here, you can export the data of all rows or 15 rows by simply clicking on the dropdown.
- Select Column to Export: Select columns to which you need your data to export. Like if you want all the data of the assessment, then simply click on “ALL DATA” and you will get the data of the assessment module in your exported file.
- Export as: Then select a format in which you want to export your data i.e (EXCEL or CSV).
- After selecting the relevant records/data, click on the Export Data button to export all the data in the selected file (Excel/CSV).
Add Assessment
- To add an assessment, click on the + Add Assessment button.
- A popup named Choose Course will be open.
- Here, you can see the list of all created courses.
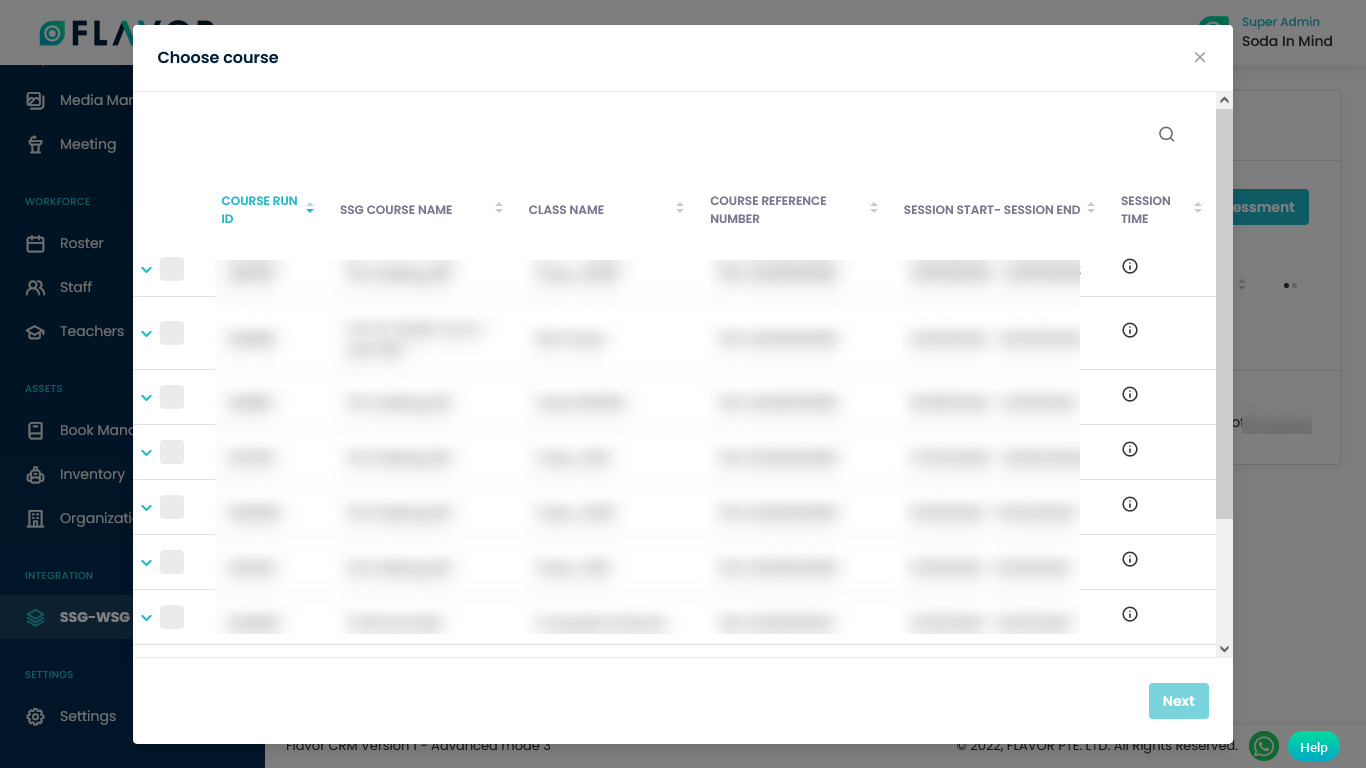
- Select any course from the list then click on the Next button.
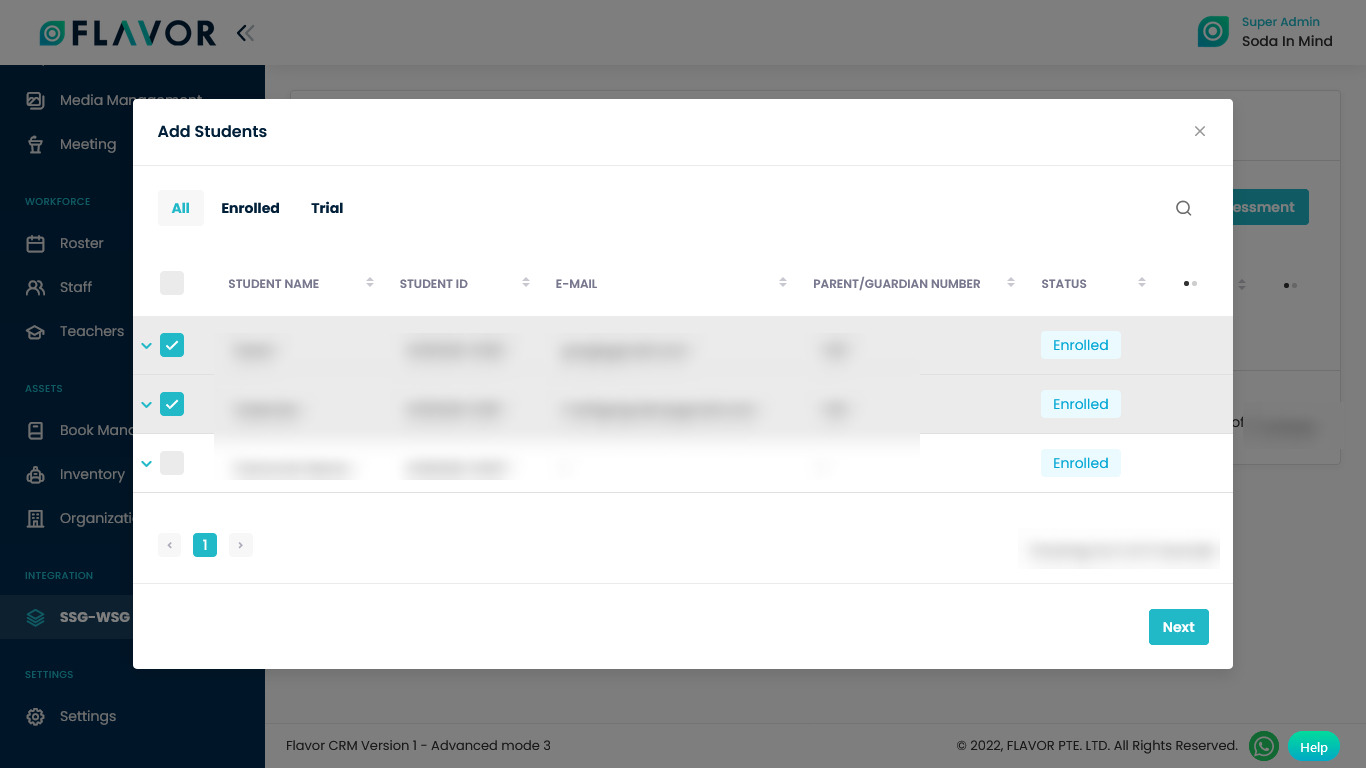
- After clicking on the Next button, a new popup named Add Students will be open.
- Select students from the list.
- Click on the Next button.
- You will be redirected to the Class Assessment page.
- Here, you can see Students Name in the left column and Assessment Details in the right column.
- Assessment Details: Fill in the details of the assessment.
- Result: Select the result from the dropdown. A student could be a Pass, Fail or Exempt.
- Score: Enter the score here.
- Grade: Select grade from the dropdown.
- Assessment Date: Select the assessment date from the date picker.
- Skill Code: Mandatory field. This code is set during enrollment.
- After filling in the details click on the Confirm button.

Assessment Profile
Click on any record to check the details. After clinking you will be redirected to the Assessment Details page.
Search
By clicking on the Search Icon, you can search the specific assessment details by entering the student name, skill code or assessment reference number.
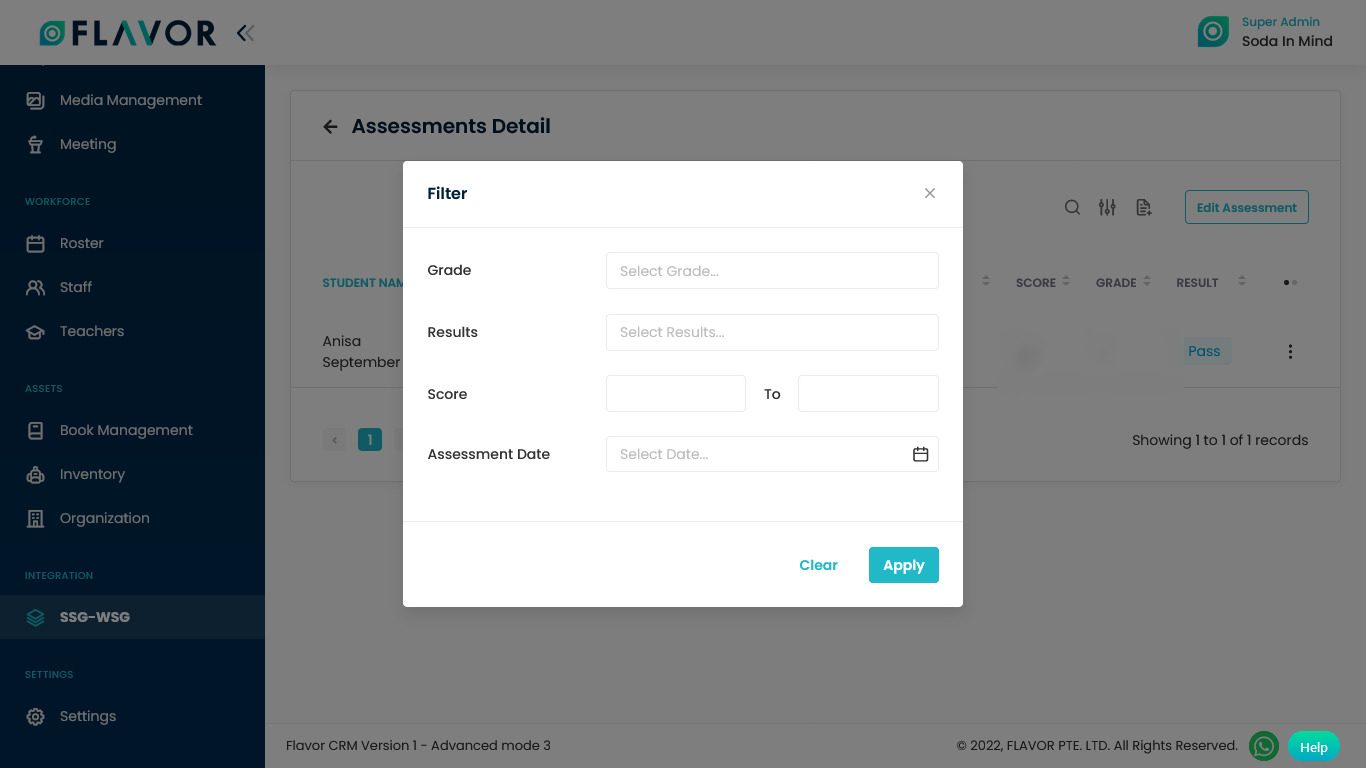
Filter
You can filter the details based on specific parameters. Click on Filter Icon, after clicking, a popup named Filter will appear on your screen. Enter the grade, result, score and assessment date then click on Apply button to save parameters.
Export
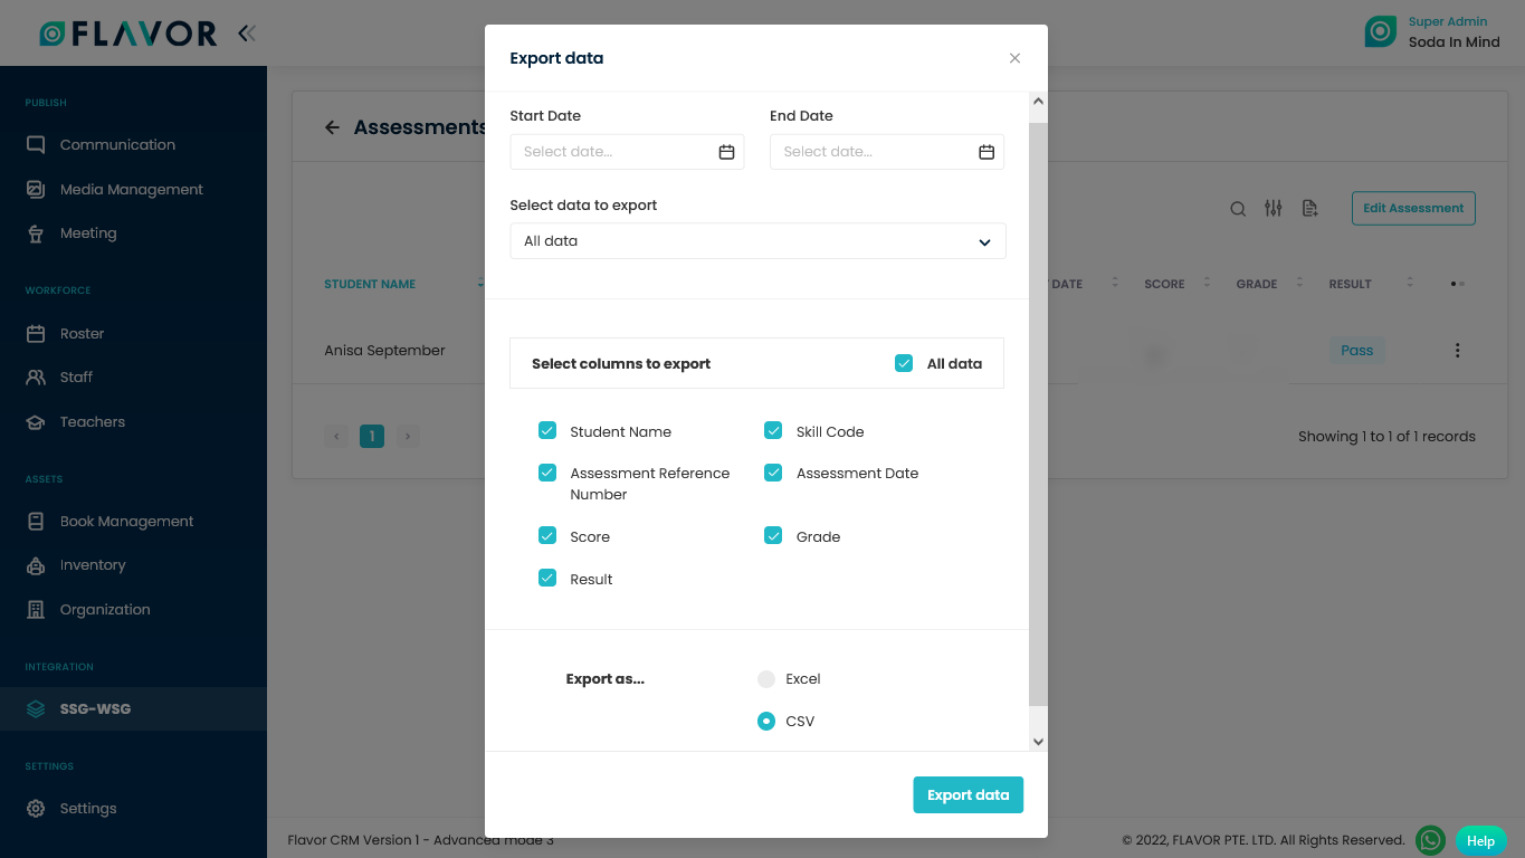
- To export all data, you need to click on the Export Icon.
- After clicking on the Export icon, a pop-up named Export Data will appear on your screen.
- Start Date and End Date: Select the time period in the start date and end date column for which time period’s data you need.
- Select Data to Export: Here, you can export the data of all rows or 15 rows by simply clicking on the dropdown.
- Select Column to Export: Select columns to which you need your data to export. Like if you want all the data, then simply click on “ALL DATA” and you will get the data of the entire inventory in your exported file.
- Export as: Then select a format in which you want to export your data i.e (EXCEL or CSV).
- After selecting the relevant records, click on the Export Data button to export all the data in the selected file (Excel/CSV).
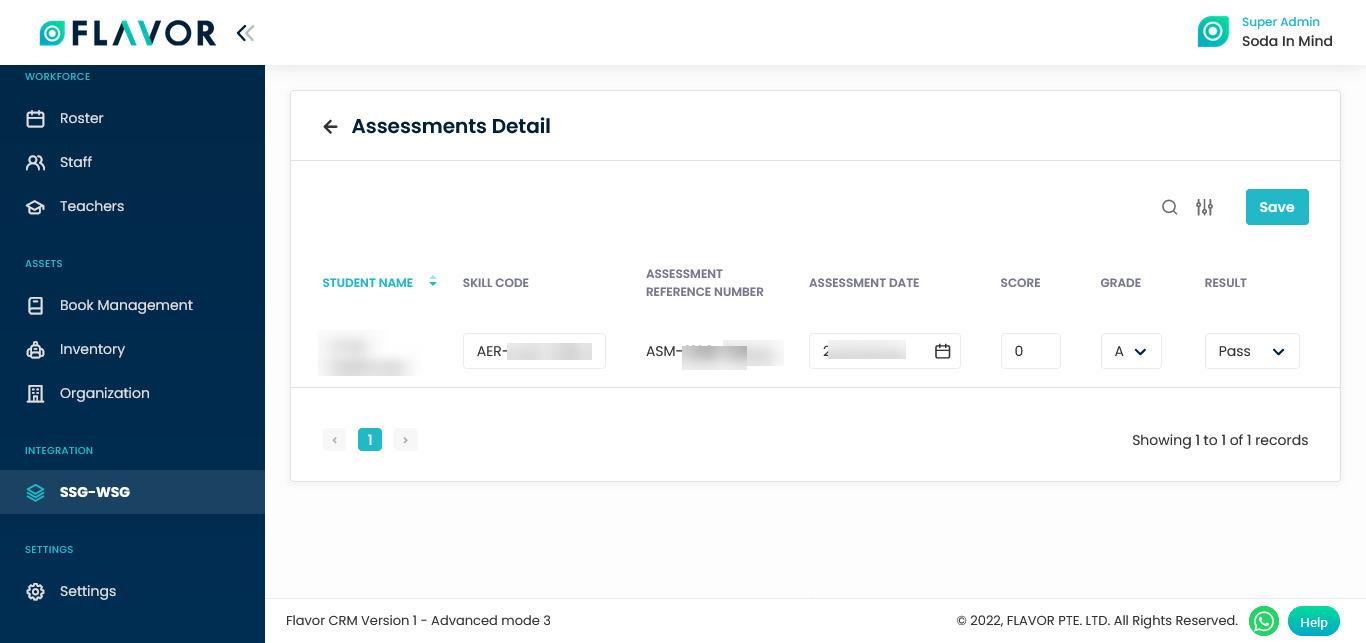
Edit Assessment
- To edit the assessment click on the Edit Assessment page.
- You will be redirected to the Assessment Detail page.
- Edit the details and then click on the Save button.
- Here, you can search and filter the assessment by clicking on the search icon and filter icon.
Edit Assessment Records
Column Sorting
All details will be shown in Tabular Format. You can sort the data by clicking on Column Sorting Arrows in Table Header.
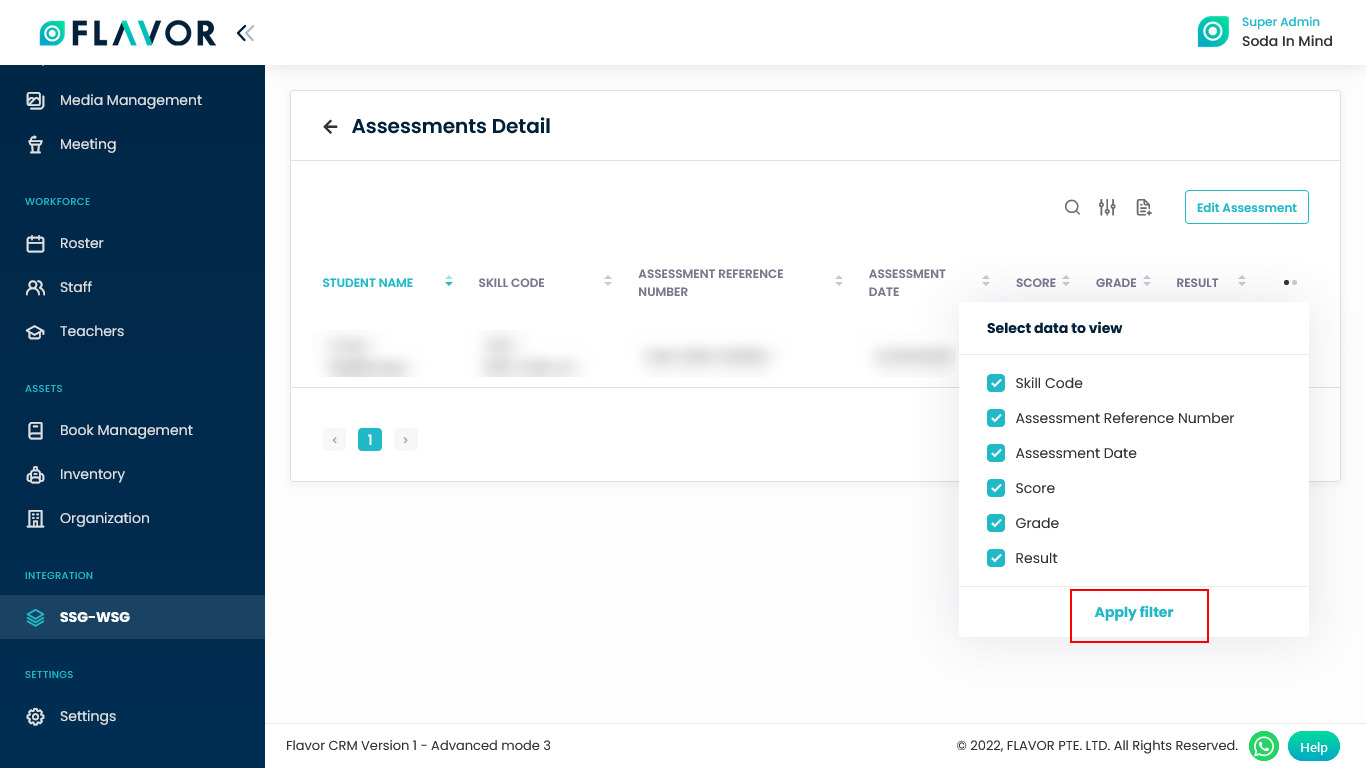
Column Visibility
You can sort columns by clicking on the Ellipsis Icon, you will get the pop-up form named Select Data to View. Mark the columns you want to see and unmark the ones you don’t want to see in the table. After this procedure click on the Apply Filter button.
Action Button
Click on Action Button (Vertical Ellipsis), and a small popup box with Void Assessment will appear.
Void Assessment
Grant Calculation
From here you can track the Claim History.
Grant Calculation Options
Search
By clicking on the Search Icon, you can search the specific calculation by entering the student name, student NRIC, student no, class name, course run ID, and course reference number.
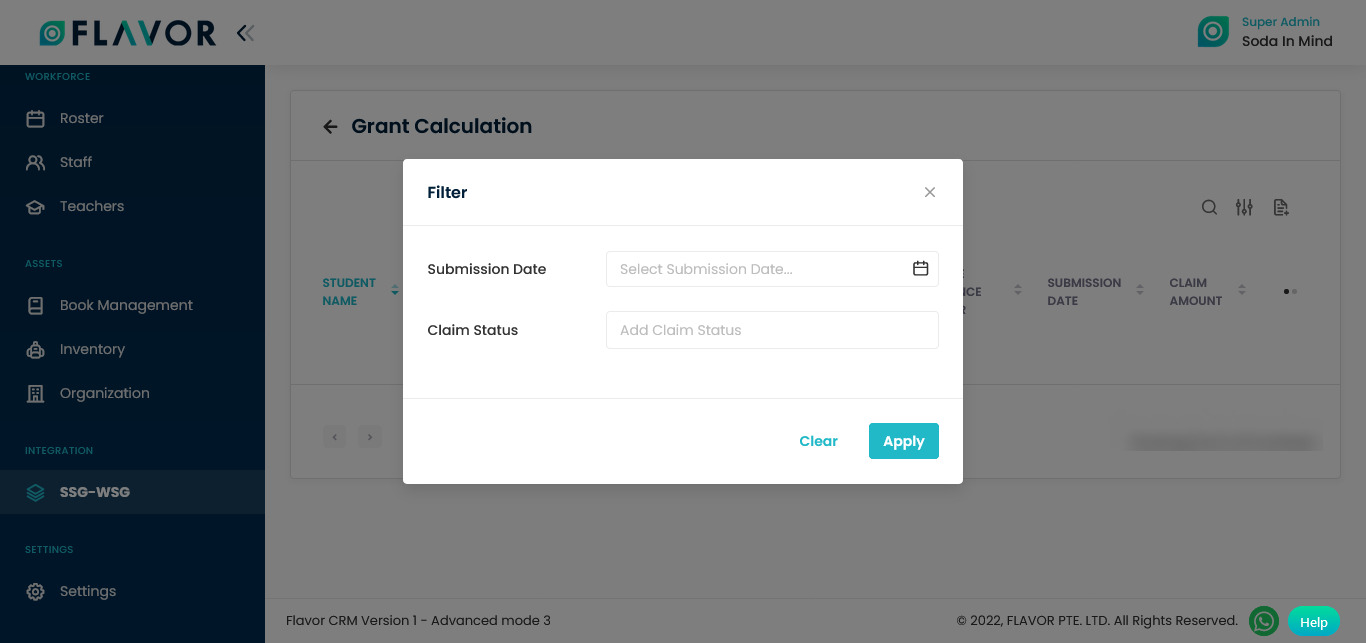
Filter
You can filter the calculations based on specific parameters. Click on Filter Icon, after clicking, a popup form will appear on your screen. Select the submission date from the date picker then click on the Apply button and enter the Claim Status. Click on the Apply button to save the parameters.
Export
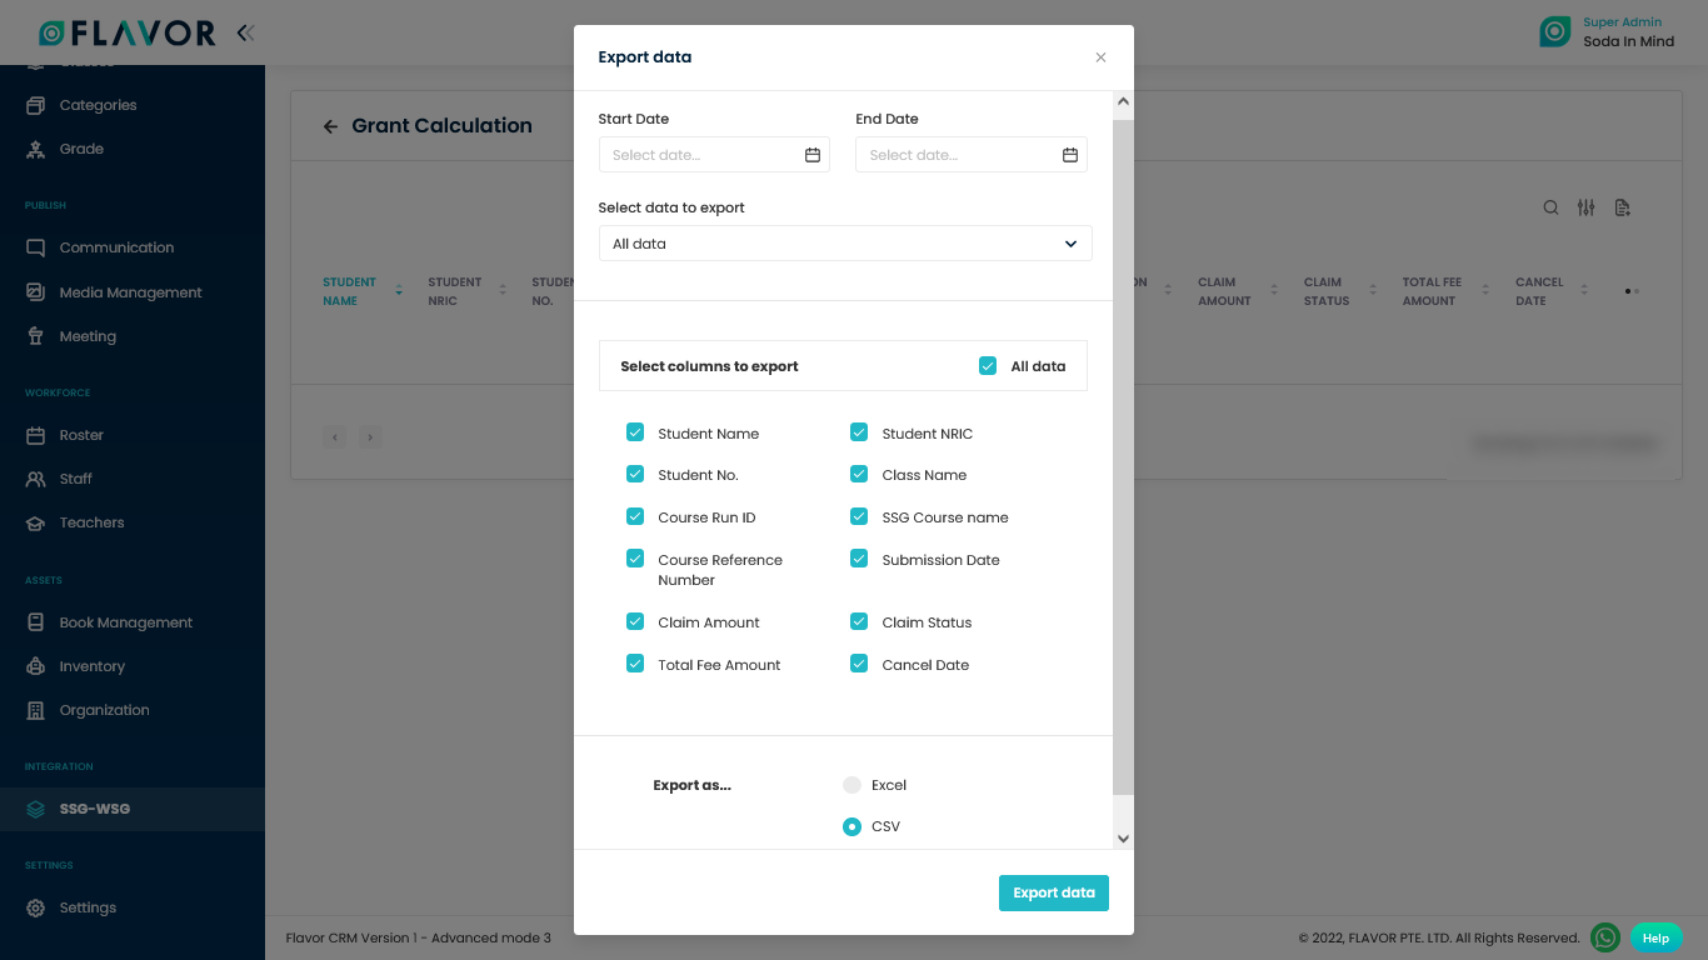
- To export all data, you have to click on the Export Icon.
- After clicking on the Export icon, a pop-up form named Export Data will appear on your screen.
- Start Date and End Date: Select the time period in the start date and end date column for which time period’s data you need.
- Select Data to Export: Here, you can export the data of all rows or 15 rows by simply clicking on the dropdown.
- Select Column to Export: Select columns to which you need your data to export. Like if you want all the data of all calculations, then simply click on “ALL DATA” and you will get the data of the grant calculation submodule in your exported file.
- Export as: Then select a format in which you want to export your data i.e (EXCEL or CSV).
- After selecting the relevant records/data, click on the Export Data button to export all the data in the selected file (Excel/CSV).
Grant Calculation Records
Column Sorting
All calculations will be shown in Tabular Format. You can sort the data by clicking on Column Sorting Arrows in the Table’s Header.
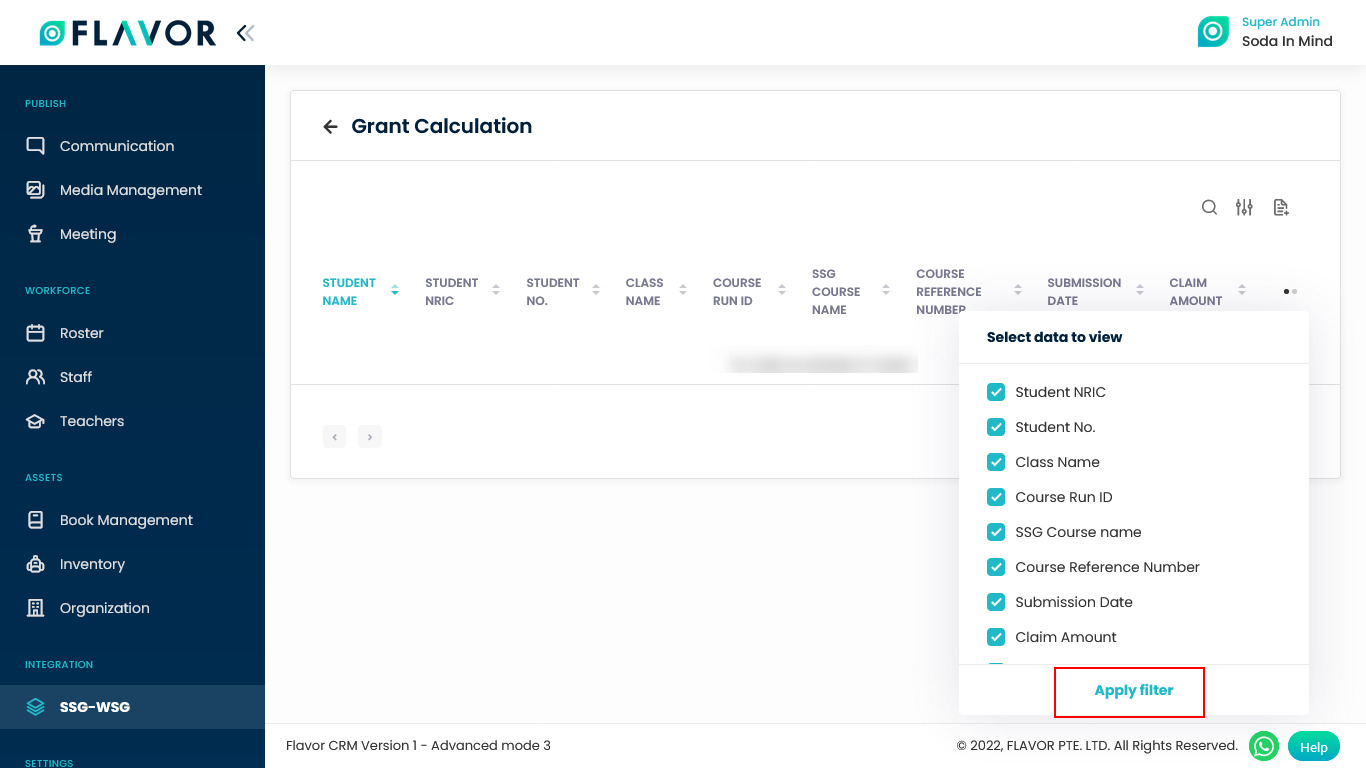
Column Visibility
You can sort columns by clicking on the Ellipsis Icon, you will get the pop-up form named Select Data to View. Mark the columns you want to see and unmark the ones you don’t want to see in the table. After this procedure click on the Apply Filter button.
Action Button
Click on Action Button (Vertical Ellipsis), and a popup box will appear on your screen with the Cancel option.
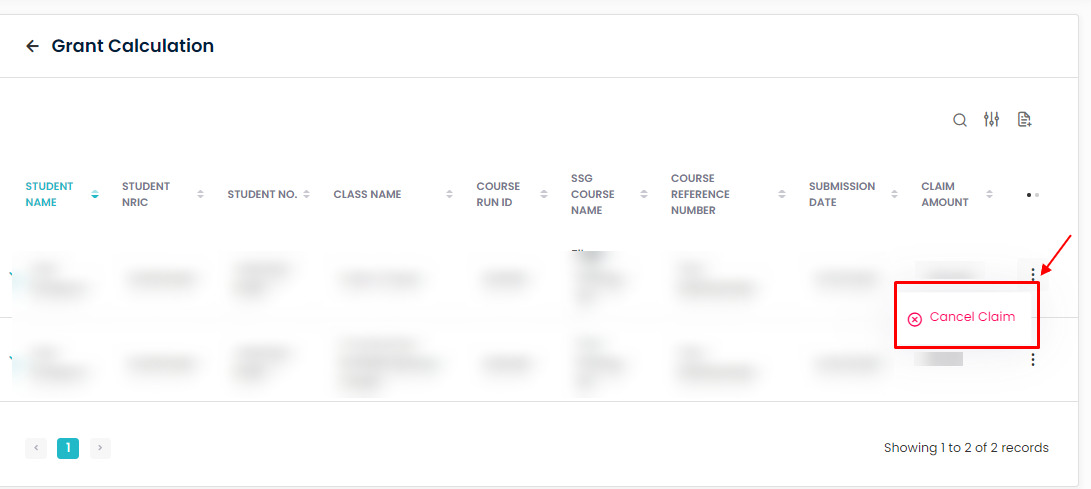
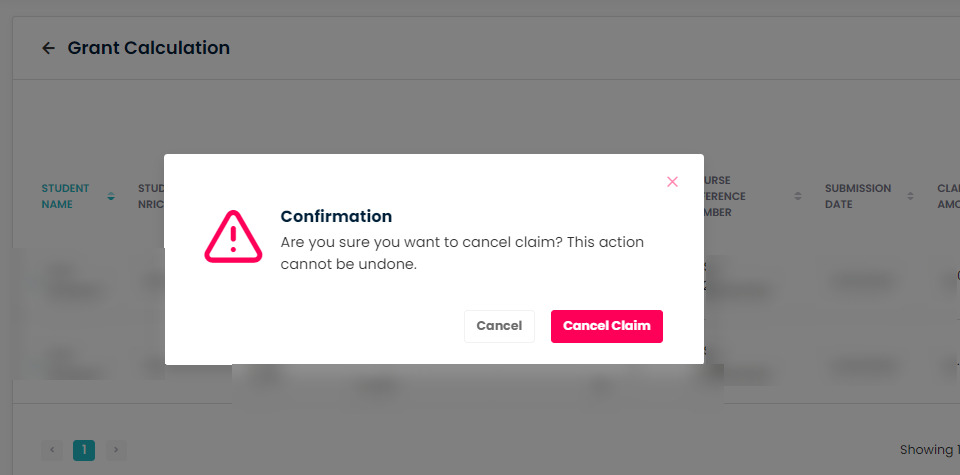
Cancel Option
- To cancel the claim click on the Cancel option.
- A confirmation popup will be open.
- To cancel the claim click on the Cancel Claim button.
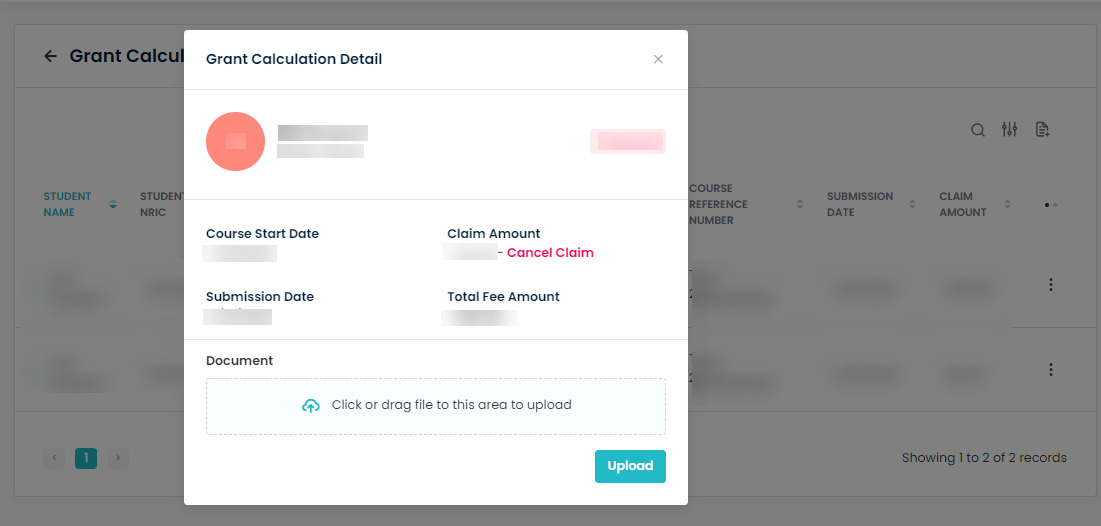
Grant Calculation Details
- To check the detail of any claim click on any record.
- A popup named Grant Calculation Details will be open.
- Here, you can see the status of the claim, course start date, submission date, and total fee amount.
- Claim Amount: Here, you can see the claim amount and a Cancel Claim option. You can also cancel the claim from here.
- Document: Here, you can upload the related documents, then click on the Upload button.
Need more help? Ask us a question
Please let us know more of your details and our team will reach out to you very shortly.