
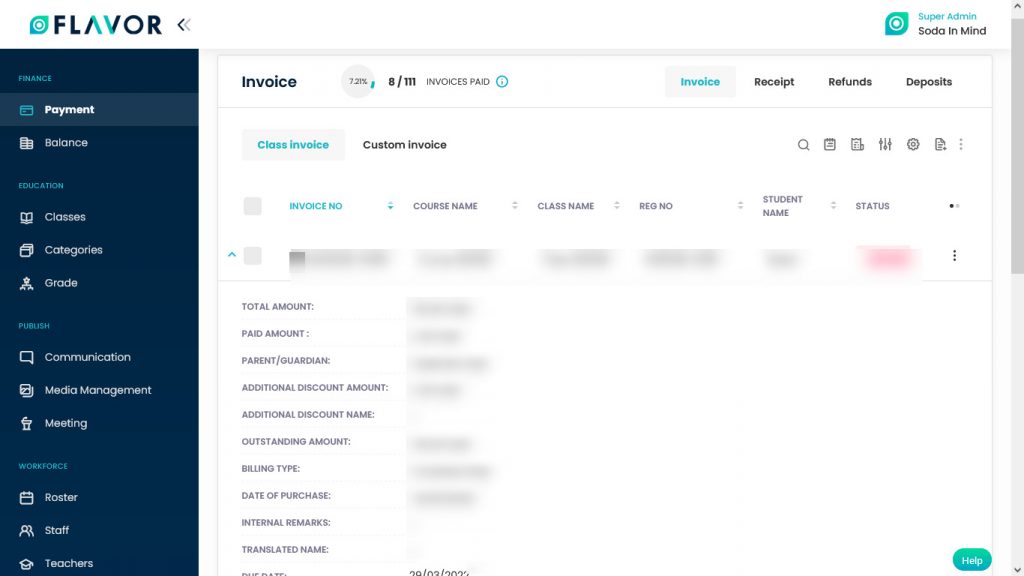
You can check Payments by clicking on the Payment Module from the main navigation panel of the Flavor Edu Portal. The “Payment Module” is provided under the “Finance” section in the navigation panel.
By clicking on the Payment, from the left menu you will be redirected to the Invoice Page. Here, you can see four tabs at the rights corner of the Payment Module. Invoice, Receipt, Refunds & Deposit Tabs.
Invoice Tab
When you are redirected to the Payment module, you can see the Invoice tab is already selected and this tab is consists of two tabs. Class Invoice & Custom Invoice.
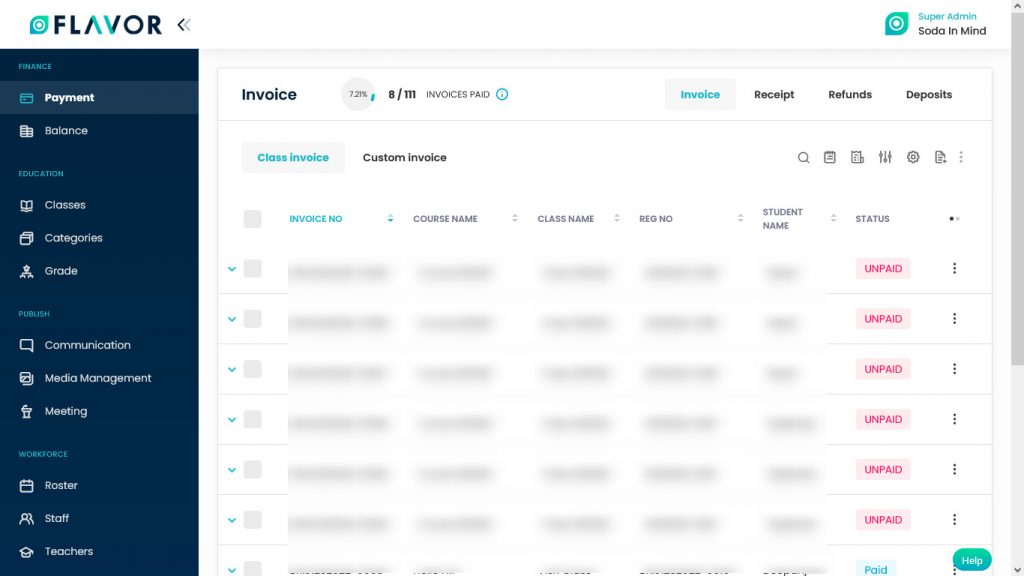
Class Invoice
The first tab is Class Invoice in the Invoice tab. Here, you can see the list of all invoices which are generated while creating a class.
Class Invoice Options
Search
By clicking on the Search Icon, you can search the specific invoice by entering the invoice number, student name or company name.
Note: Do not use the Chinese characters in the search function.
Log
The invoice log records all invoices and payments along with the details of the students, classes, etc.
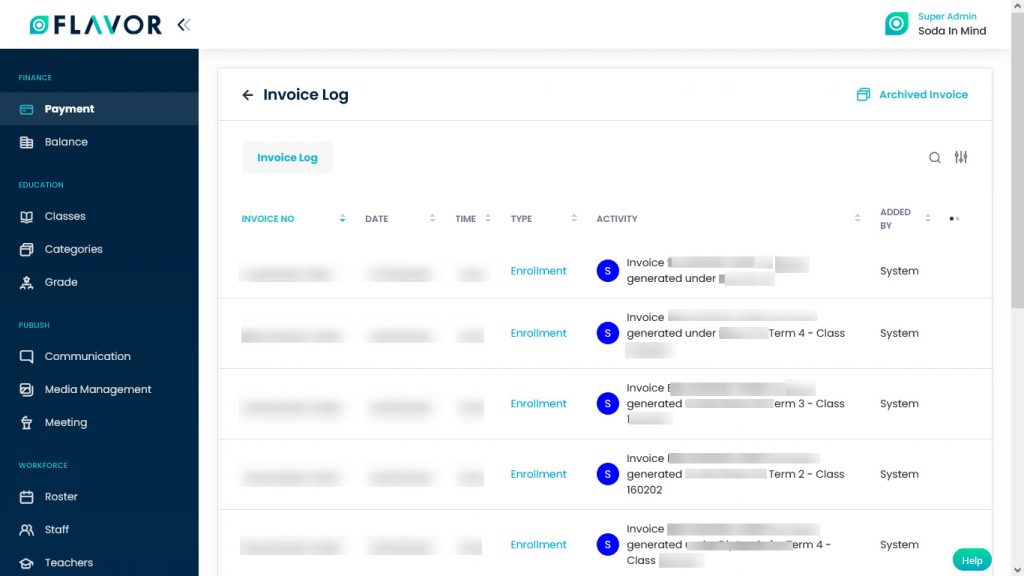
Search
By clicking on the Search Icon, you can search the specific invoice log by entering the invoice number or type.
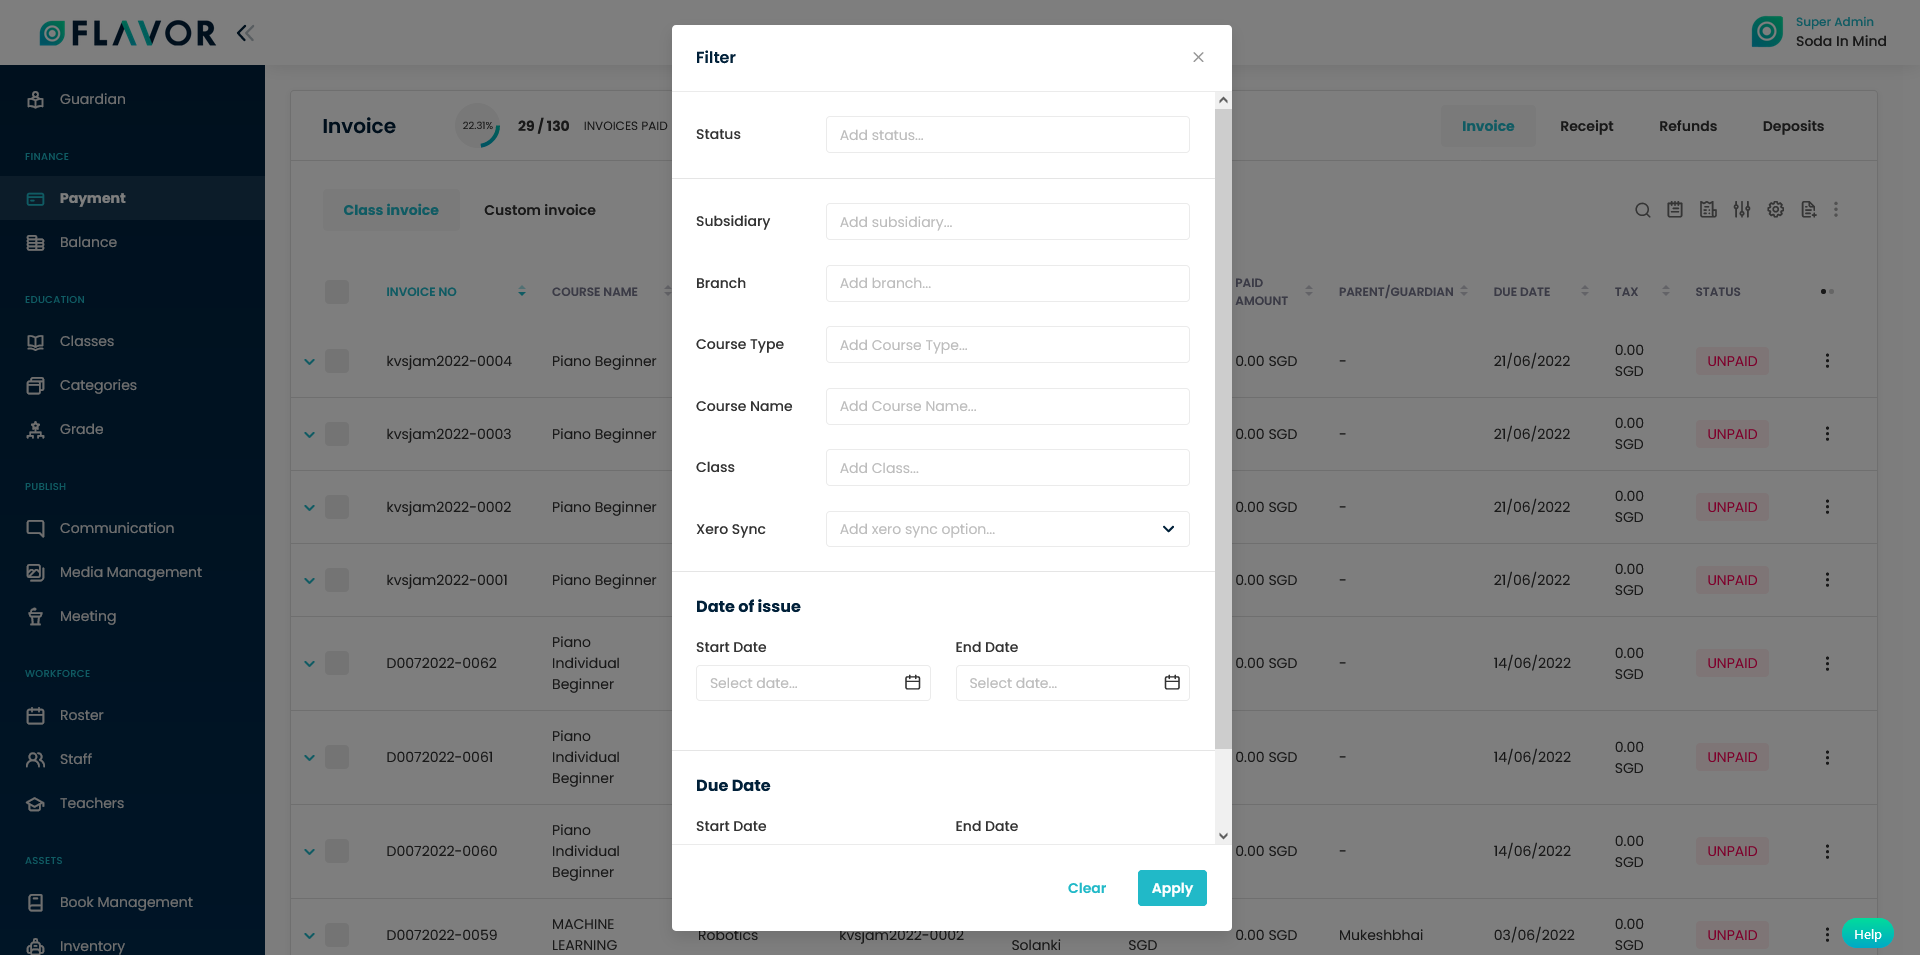
Filter
You can filter the invoices based on specific parameters. Click on Filter Icon, after clicking, a popup form named “Filter” will appear on your screen. Enter Course Type, Subsidiary & Branch, Course Name, Class, etc. Also select the one of the Xero Sync options. Click on Apply button to save parameters.
Invoice Reminder
Note: In invoice reminder, you can send the invoice to the Unpaid and partially Paid students or their parents.
- Click on the Invoice Reminder icon, you will be redirected to the Invoice Reminder page.
- Here, you can see two tabs Unpaid Tab & Partially Paid tab.

Unpaid Tab & Partially Tab
Search
By clicking on the Search Icon, you can search the specific invoice by entering the invoice number, student name or parent/guardian name.
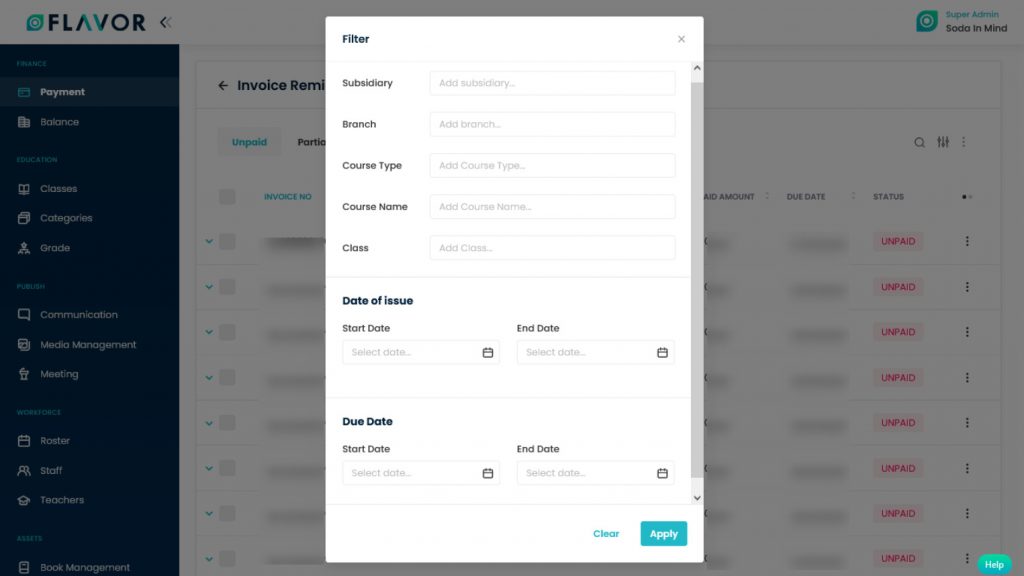
Filter
You can filter the invoices based on specific parameters. Click on Filter Icon, after clicking, a popup form named “Filter” will appear on your screen. Enter Course Type, Subsidiary & Branch, Course Name, Class, etc. Click on Apply button to save parameters.
Bulk Action Button
- The Bulk Action Button is disabled by default. When you mark on the check box, which appears at the starting of each row, this action button will be enabled.
- You can select/deselect rows by marking the checkbox.
- After selecting any record go to the action button, click on the button a small popup will appear with Send Reminder option.
Send Reminder
- Click on the Send Reminder option.
- A popup named Send Reminder will be open.
- Subject: Enter the subject of the reminder.
- Message: Write your message here. Variables are used in the message box.
- Send Credit Card Payment Link: To send the payment link in the reminder enable this option by marking it.
- Click on the Send button.
Invoice Reminder Records
Column Sorting
All invoice reminders will be shown in Tabular Format. You can sort the data by clicking on Column Sorting Arrows in the Table’s Header.
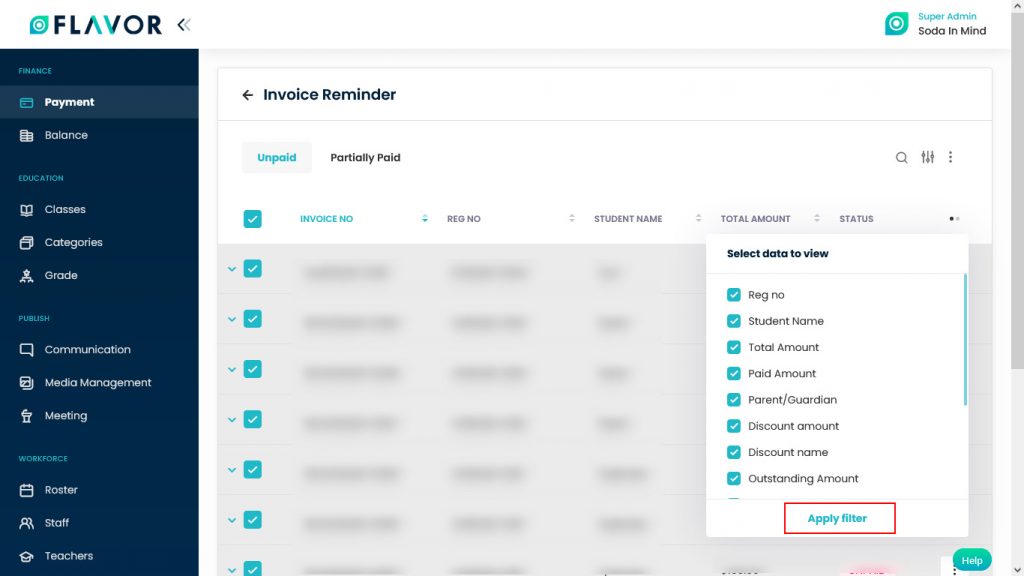
Column Visibility
You can sort columns by clicking on the Ellipsis Icon, you will get the pop-up form named Select Data to View. Mark the columns you want to see and unmark the ones you don’t want to see in the table. After this procedure click on the Apply Filter button.
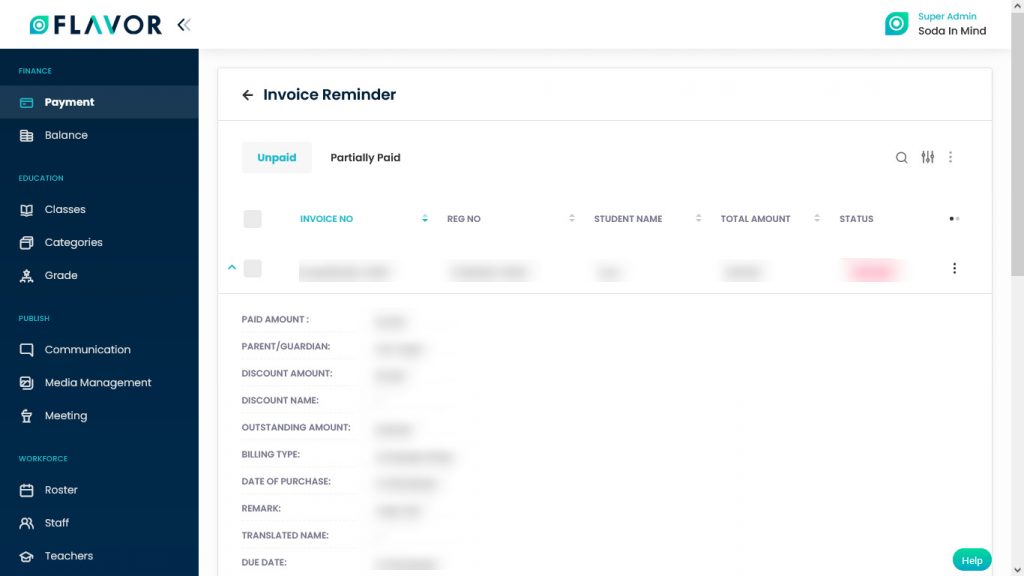
Expand Records
At the starting of all records, there is an Expand Button (Down Arrow), after clicking on this button a record will be expanded. From here will get the information of any invoice. You can collapse the record by clicking on the same button.
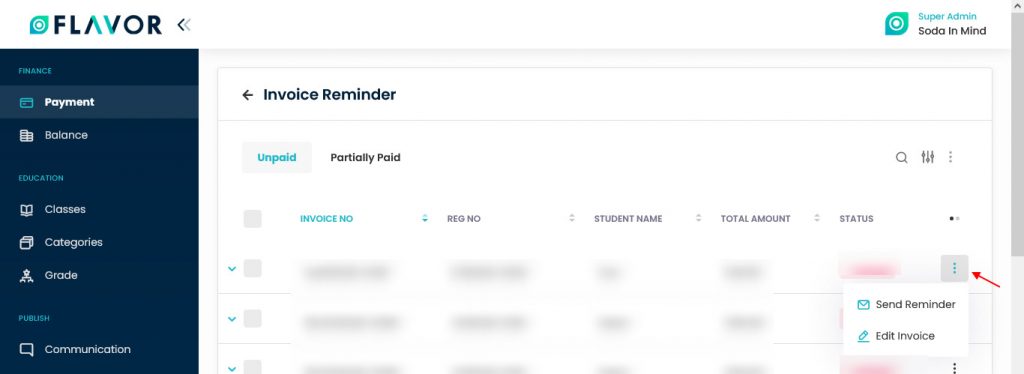
Action Button
Click on Action Button (Vertical Ellipsis), a popup box will appear on your screen with Send Reminder & Edit Invoice options.
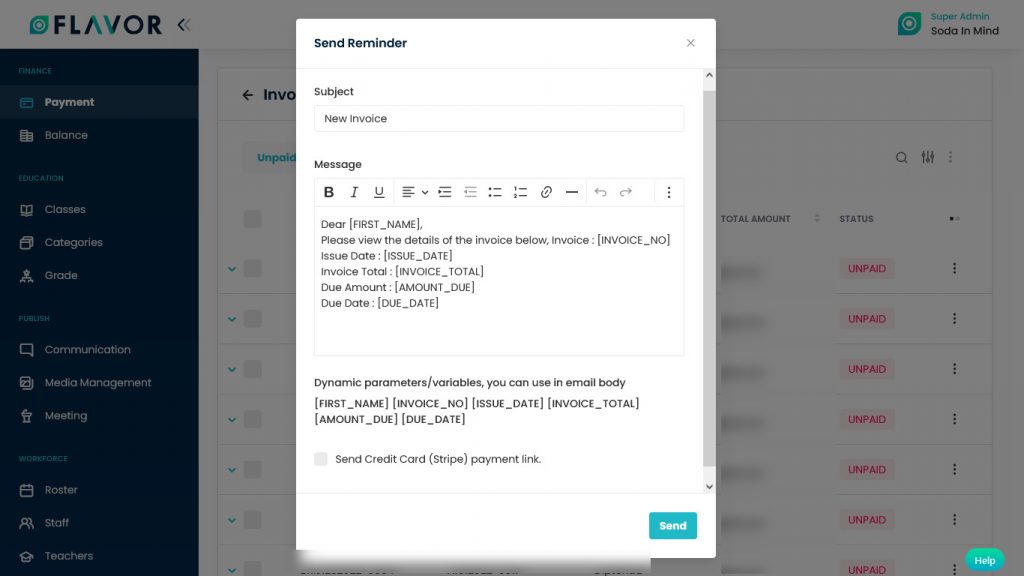
Send Reminder
- Click on the Send Reminder option.
- A popup named Send Reminder will be open.
- Subject: Enter the subject of the reminder.
- Message: Write your message here. Variables are used in the message box.
- Send Credit Card Payment Link: To send the payment link in the reminder enable this option by marking it.
- Click on the Send button.
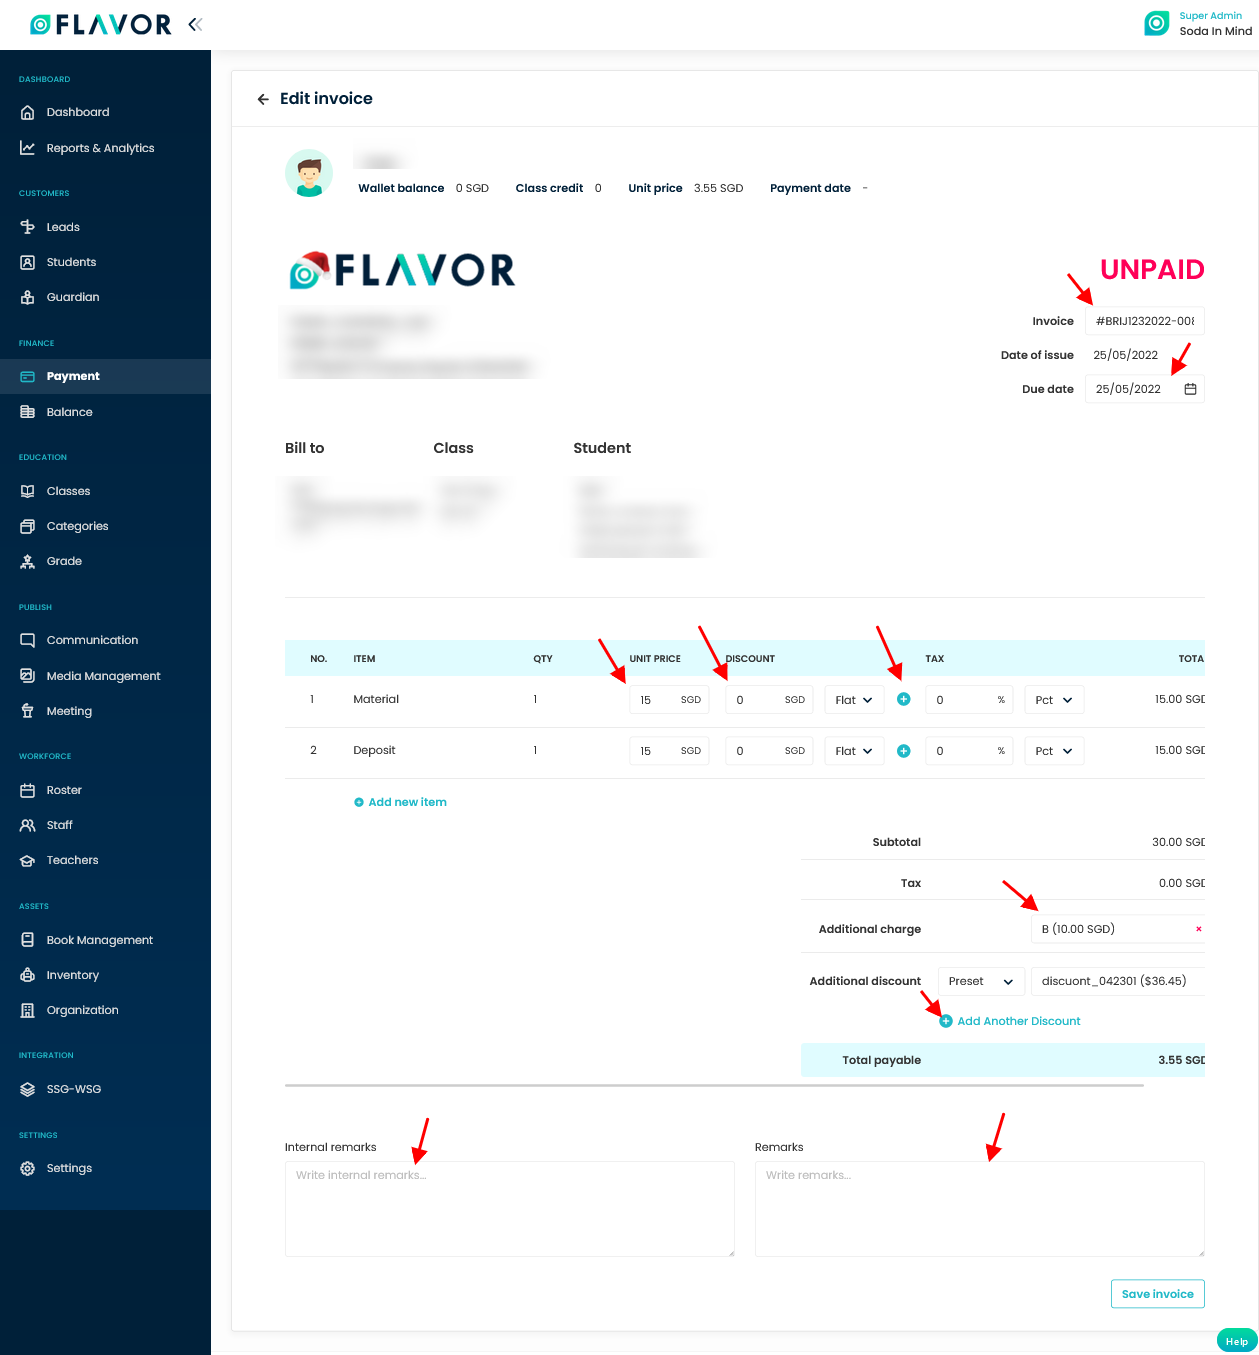
Edit Invoice
Class Invoice and Custom invoice are editable which are Unpaid or Partially paid. To edit an invoice, click on the Edit Invoice option. You will be redirected to the Edit Invoice page of that invoice that you want to edit. You can edit the Unit price, inline discount, Tax, Additional charge and Another discount as required. Also you can Add new item, inline discount and Another discount. Apart from that you can add Internal Remarks and Remarks. The invoice number and Due date are also editable. Click on the Save Invoice button.
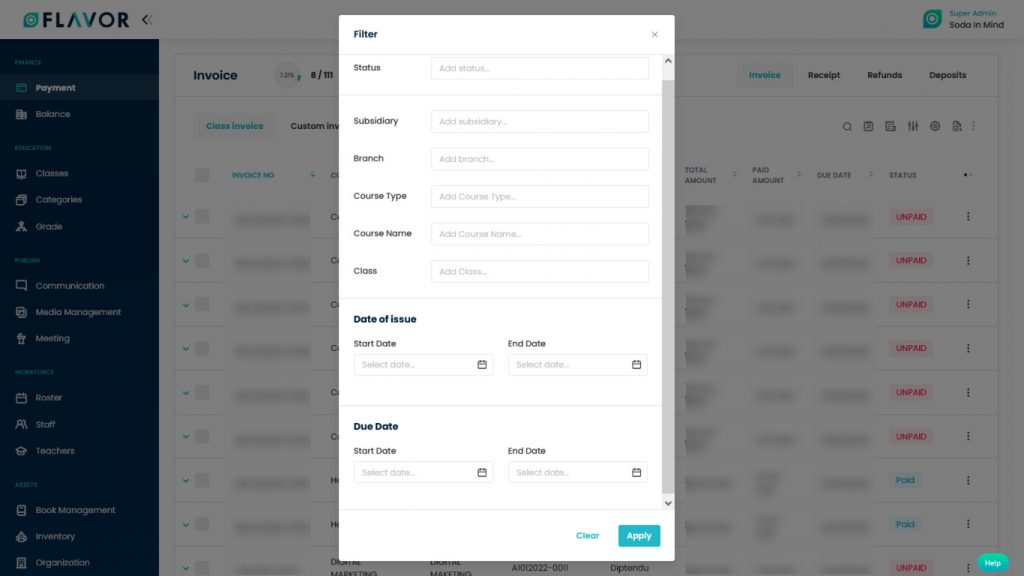
Filter
You can filter the invoices based on specific parameters. Click on Filter Icon, after clicking, a popup form named “Filter” will appear on your screen. Enter Status, Subsidiary & Branch, Course Name, Class, etc. Click on Apply button to save parameters.
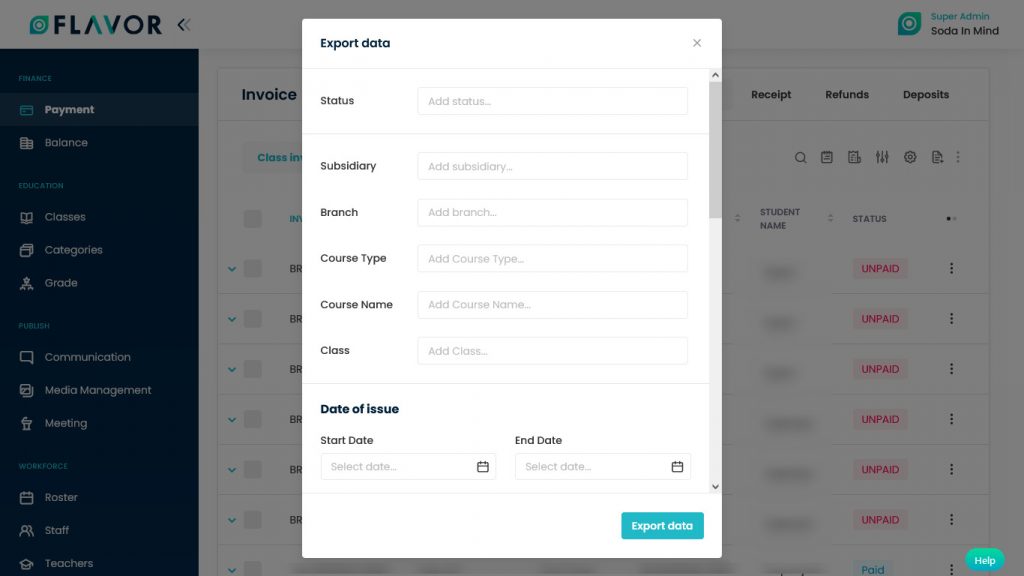
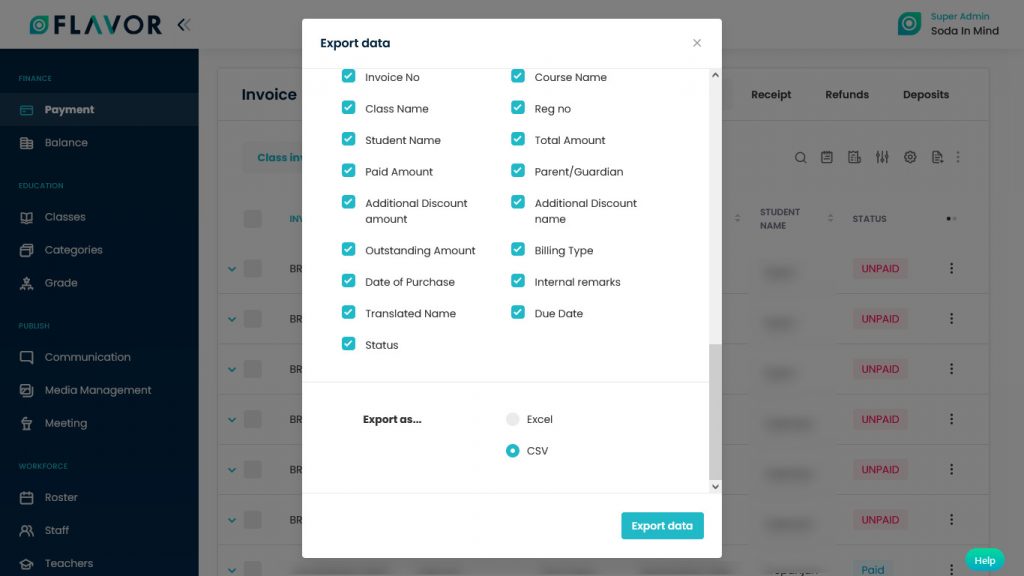
Export
- To export all data, you need to click on the Export Icon.
- After clicking on the Export icon, a pop-up form will appear on your screen.
- Enter the status, subsidiary, branch, course type etc. Enter the date of issue, due date.
- Due Date: Enter the due date.
- Select Data to Export: Here, you can export the data of all rows or 15 rows by simply clicking on the dropdown.
- Select Column to Export: Select columns to which you need your data to export. Like if you want all the data of all invoices, then simply click on “ALL DATA” and you will get the data of invoices in your exported file.
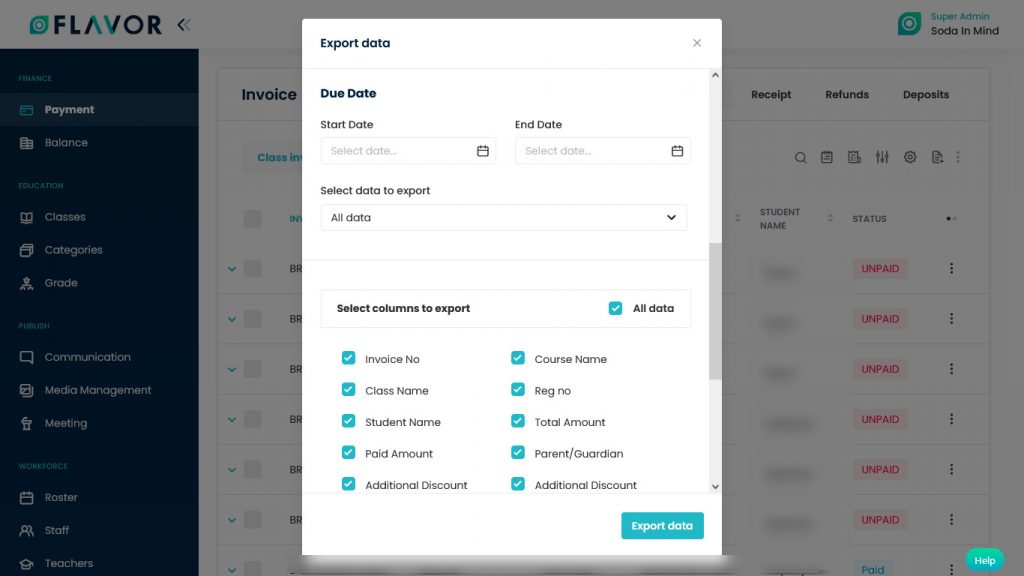
- Export as: Then select a format in which you want to export your data i.e (EXCEL or CSV).
After selecting the relevant records/data, click on the Export Data button to export all the data in the selected file (Excel/CSV).
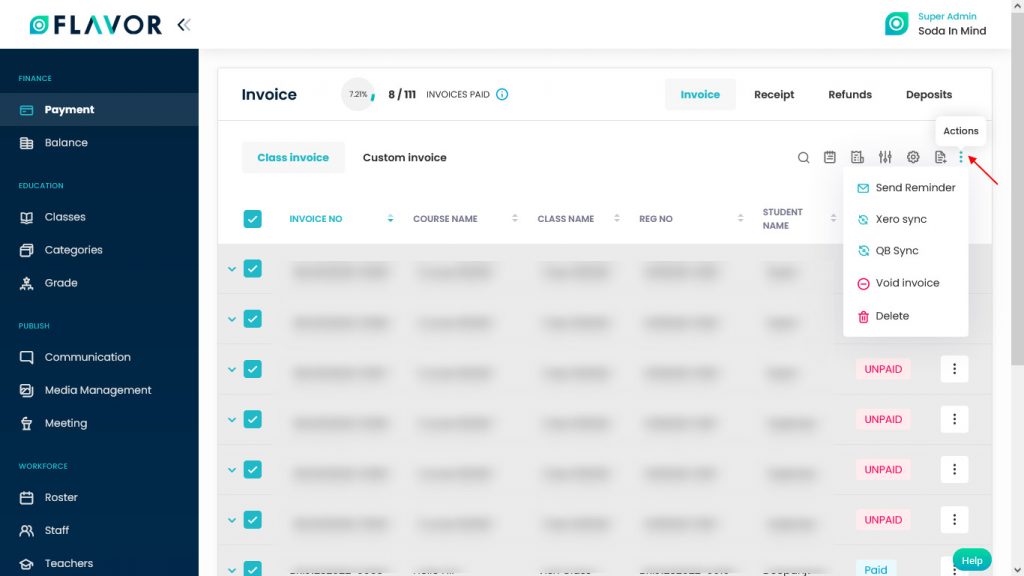
Bulk Action Button
- The Bulk Action Button is disabled by default. When you mark on the check box, which appears at the starting of each row, this action button will be enabled.
- You can select/deselect rows by marking the checkbox.
- After selecting any record go to the action button, click on the button a small popup will appear. Here, you can see Send Reminder, Xero Sync, Void Invoice, Delete options.
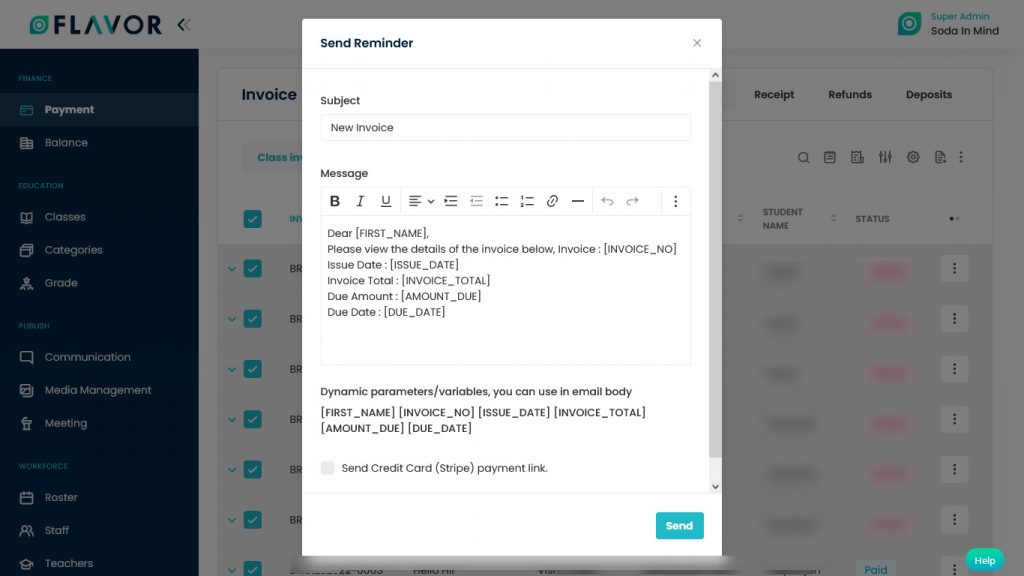
Send Reminder
- To send reminders to all or selected students click on the Send Reminder option.
- A popup named Send Reminder will be open.
- Subject: Enter the subject of the reminder.
- Message: Write your message here.
- Dynamics Variables: Here, you can see the dynamic variable which will be used in the Email body. Variables like First Name, Invoice No. Due Date, etc.
- Send omise payment link: To add the payment link in the reminder enable this option by marking it.
- Click on the Send button.
Void Invoice
Void Invoice: This option will cancel students’ invoices but their invoices will be kept in the database. Students can’t make any payments.
- To void all selected invoices click on the Void Invoice option.
- A confirmation popup will appear on the screen.
- To delete all selected invoices click on the Delete button.

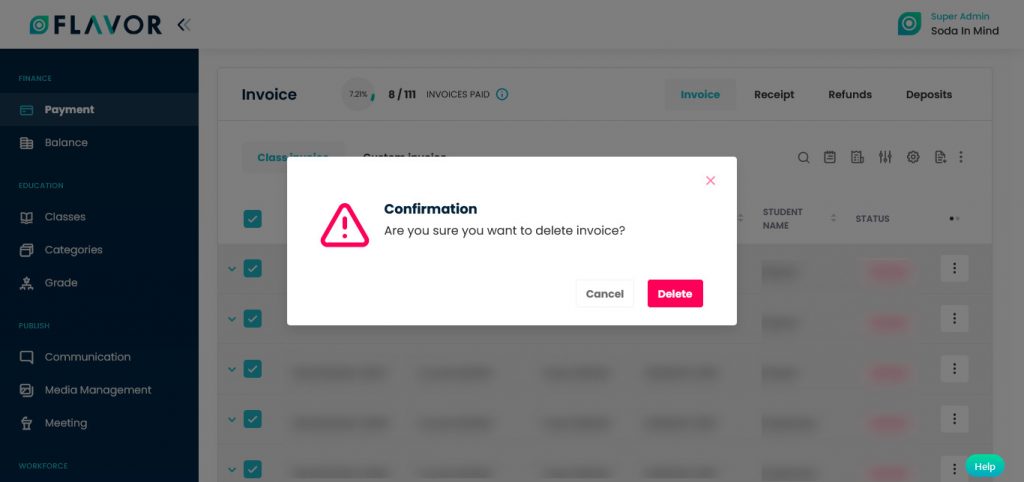
Delete
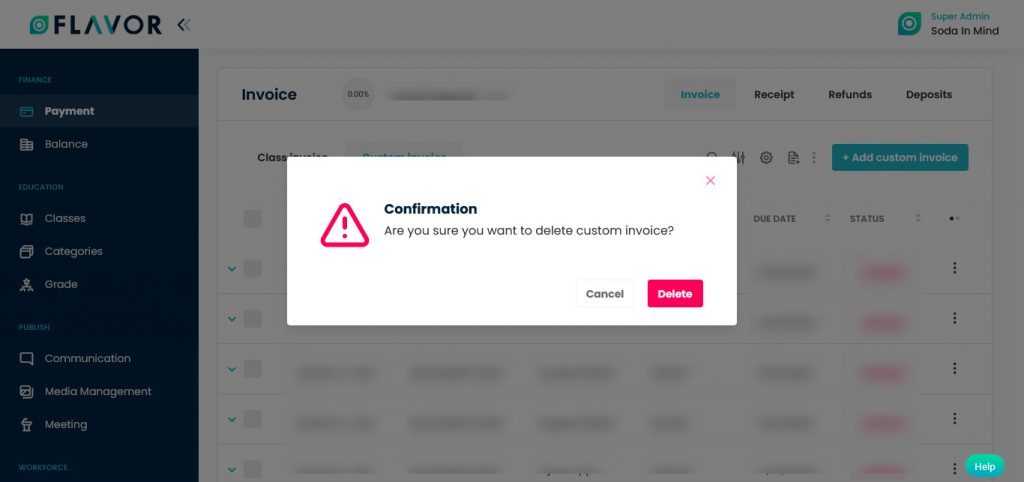
- To delete all invoices click on the Delete option.
- A confirmation popup will be open.
- Click on the Delete button to delete all selected invoices.
Class Invoice Records
Column Sorting
All class invoices will be shown in Tabular Format. You can sort the data by clicking on Column Sorting Arrows in the Table’s Header.
Column Visibility
You can sort columns by clicking on the Ellipsis Icon, you will get the pop-up form named Select Data to View. Mark the columns you want to see and unmark the ones you don’t want to see in the table. After this procedure click on the Apply Filter button.

Expand Records
At the starting of all records, there is an Expand Button (Down Arrow), after clicking on this button a record will be expanded. From here will get the information of any invoice. You can collapse the record by clicking on the same button.
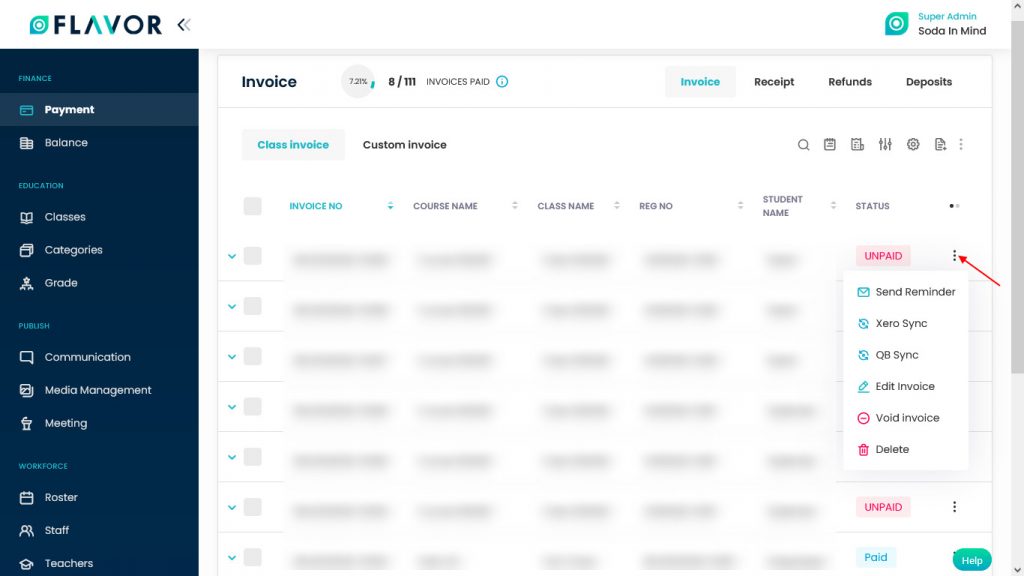
Action Button
Click on Action Button (Vertical Ellipsis), a popup box will appear on your screen with Send Reminder, Xero Sync, Edit Invoice, Void Invoice, Delete options.
Send Reminder
- To send a reminder to the student or his parent click on the Send Reminder option.
- A popup named Send Reminder will be open.
- Subject: Enter the subject of the reminder.
- Message: Write your message here.
- Dynamics Variables: Here, you can see the dynamic variable which will be used in the Email body. Variables like First Name, Invoice No. Due Date, etc.
- Send omise payment link: To add the payment link in the reminder enable this option by marking it.
- Click on the Send button.
To edit an invoice, click on the Edit Invoice option. You will be redirected to the Edit Invoice page of that invoice that you want to edit. Edit the details and click on the Save Invoice button.
Void Invoice
Void Invoice: This option will cancel students’ invoices but their invoices will be kept in the database. Students can’t make any payments.
- To void the invoice click on the Void Invoice option.
- A confirmation popup will appear on the screen.
- To delete the invoice click on the Delete button.
Delete
- To delete the invoice click on the Delete option.
- A confirmation popup will be open.
- Click on the Delete button.
Extra Actions
When you hover the cursor on any invoice record, you will see SMS, Email, Payment Link, Communication log Icons & Status of payment.
![]()
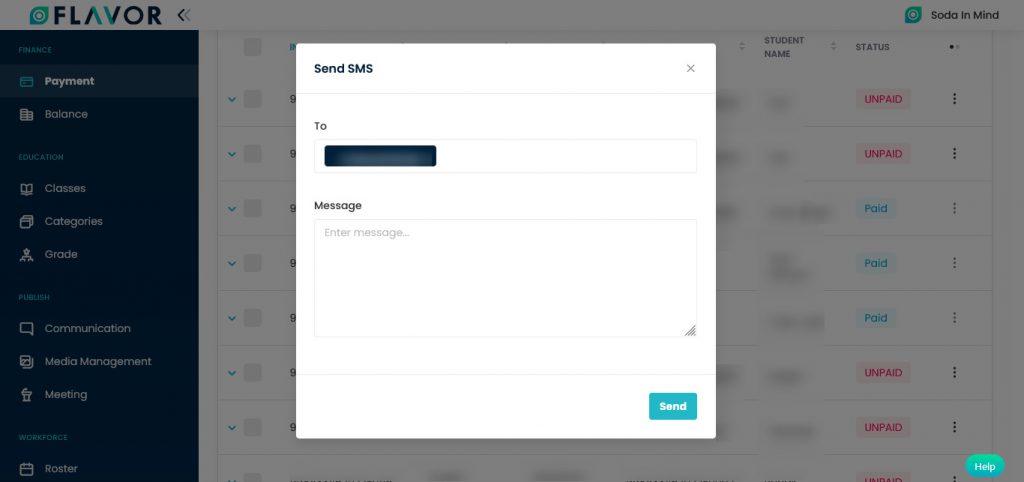
SMS
- To send the SMS to the student or his parent click on the SMS icon.
- A popup named Send SMS will be open.
- The registered contact number will automatically show in the To field.
- Write your desired message in the Message Box.
- Then click on the Send button
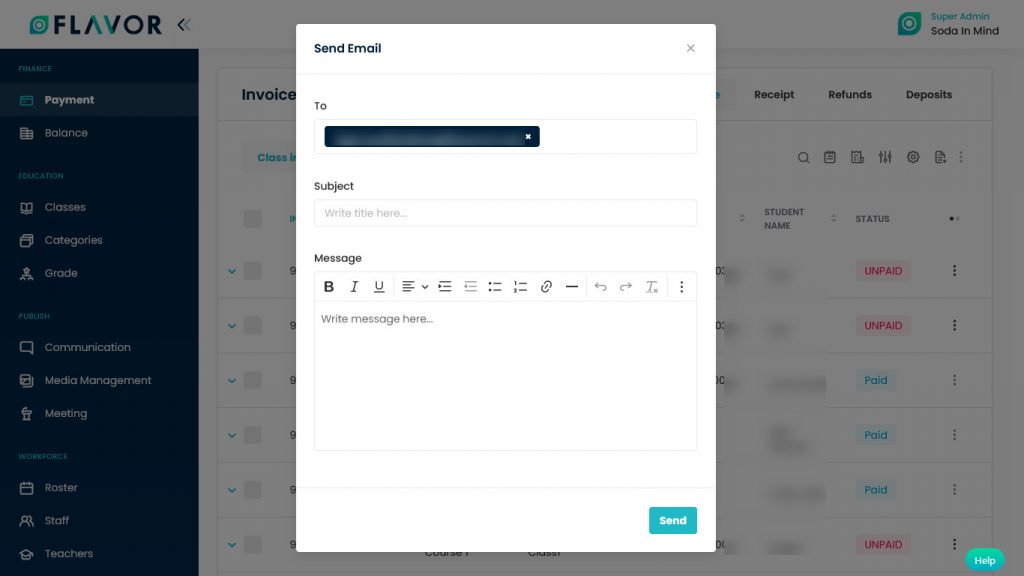
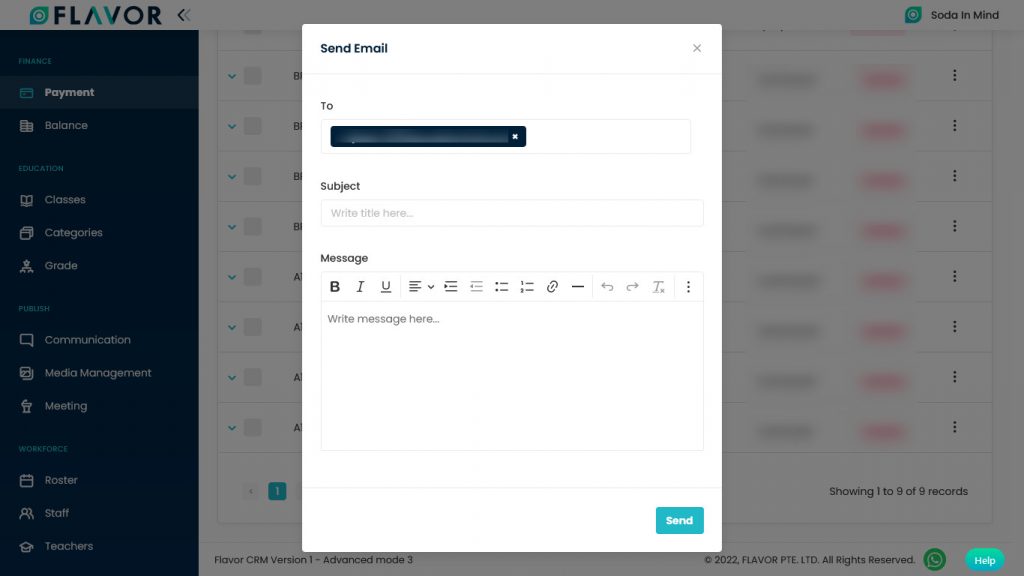
- To send an Email to the student or his parent click on the Email icon.
- A popup named Send Email will be open.
- Registered email id will automatically be shown in the To field.
- Write subject in the Subject field.
- Write your message in the Message box.
- Then click on the Send button.
Payment Link
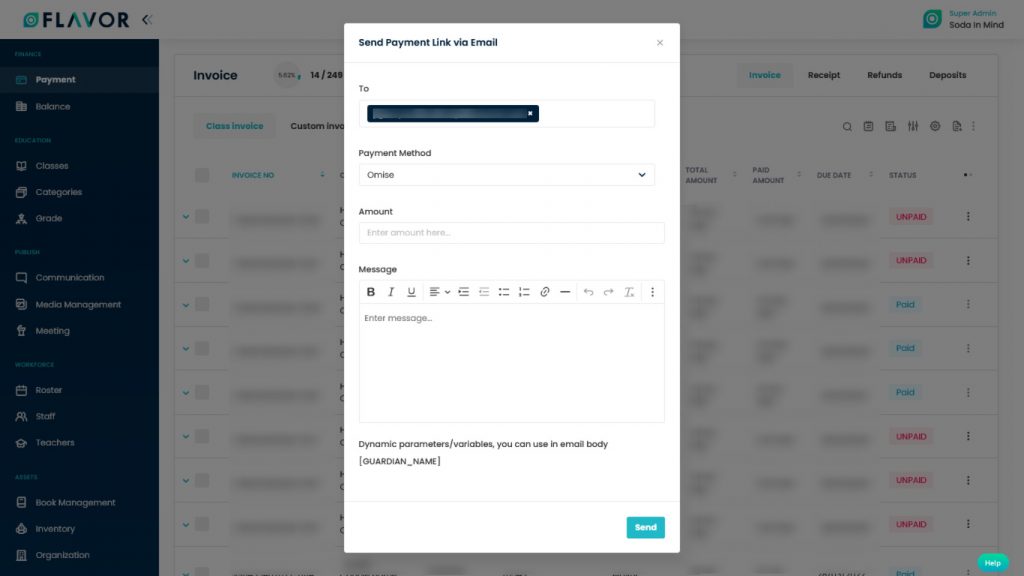
- To send the Payment link via email to the parent click on the Payment Link icon.
- A popup named Send Payment Link via Email will be open.
- Registered email id will automatically be shown in the To field.
- Payment Method: Select the payment mode from the dropdown.
- Enter the amount in the Amount field.
- Write your message in the Message box.
- Dynamic variables will be used in the mail.
- Then click on the Send button.
Status of Payment
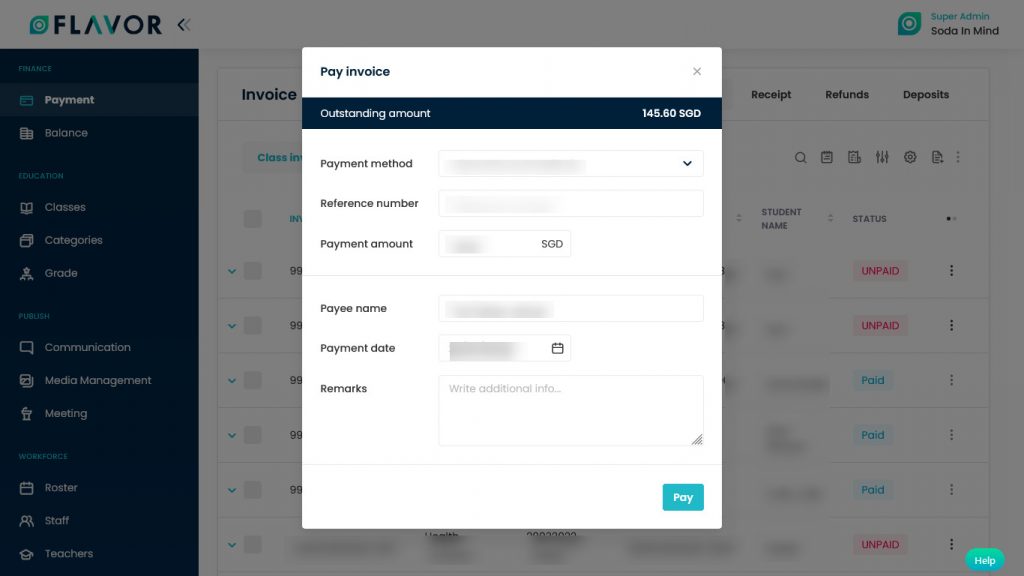
- If the status of the payment is an unpaid or partial payment. Then click on the unpaid option.
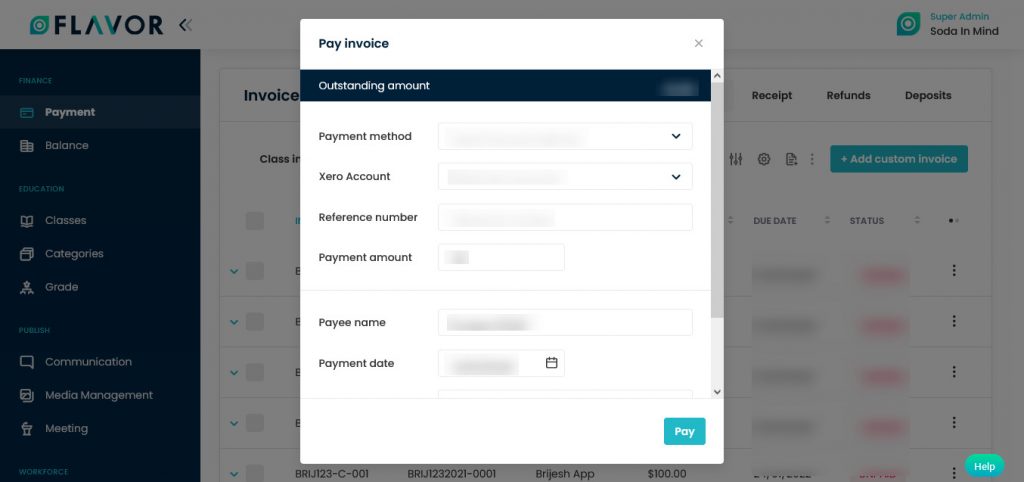
- A popup named Pay Invoice will be open.
- Here, you can see the outstanding amount.
- Select the Payment Method from the dropdown.
- Xero account from the dropdown.
- Enter the Reference Number.
- Enter the Payment Amount.
- The Payee name will be automatically added to this field.
- Select the payment date.
- Add additional information in the Remarks.
- Click on the Pay button.
Class Invoice Details
Invoice Details
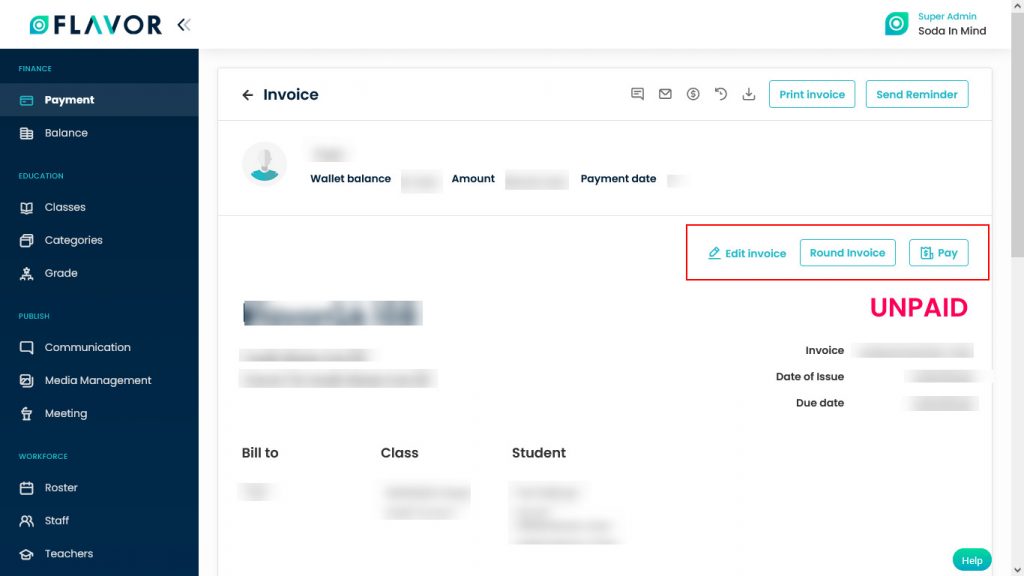
- To check the detail of any class invoice click on any invoice record. After clicking you will be redirected to the Invoice View page.
- In the top right corner of the Invoice View page, you can see SMS, Email, Payment Link, Communication Log, Download icon and Print Invoice button.
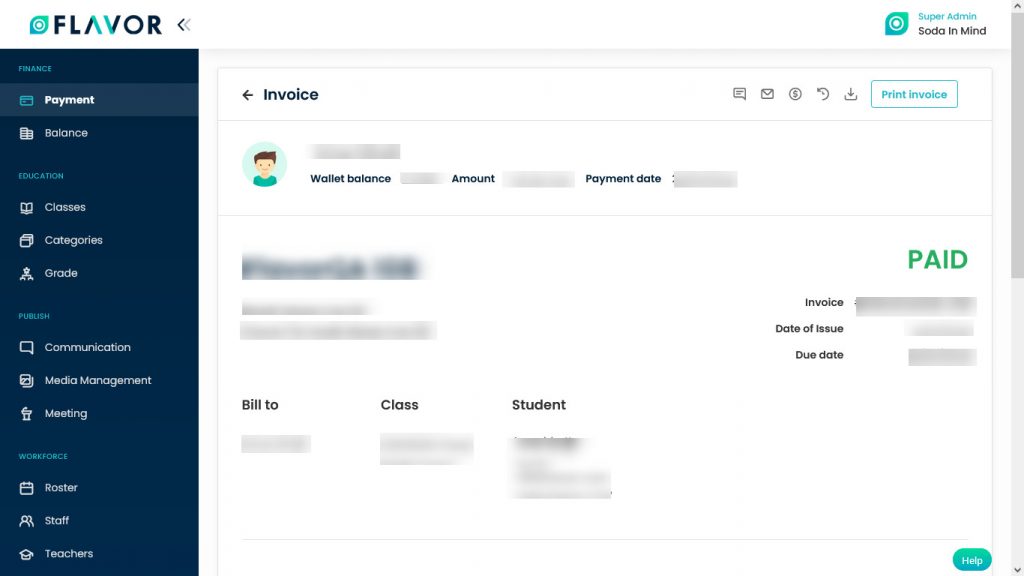
Print invoice Button:
- To print the invoice click on the Print Invoice button.
- After clicking a print window will be open.
- Click on the Print button, your Invoice will be downloaded in PDF format.
Send Reminder Button:
- If the bill is unpaid or partially paid then you can see the Send Reminder button in Invoice Details.
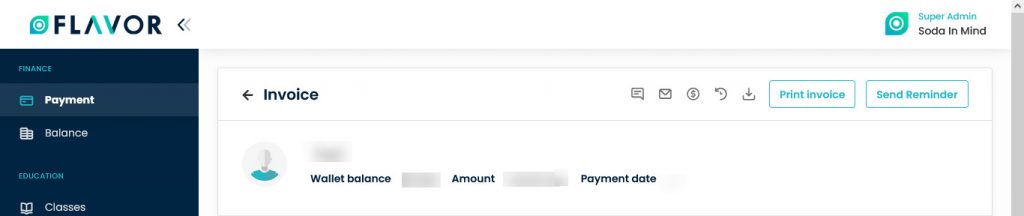
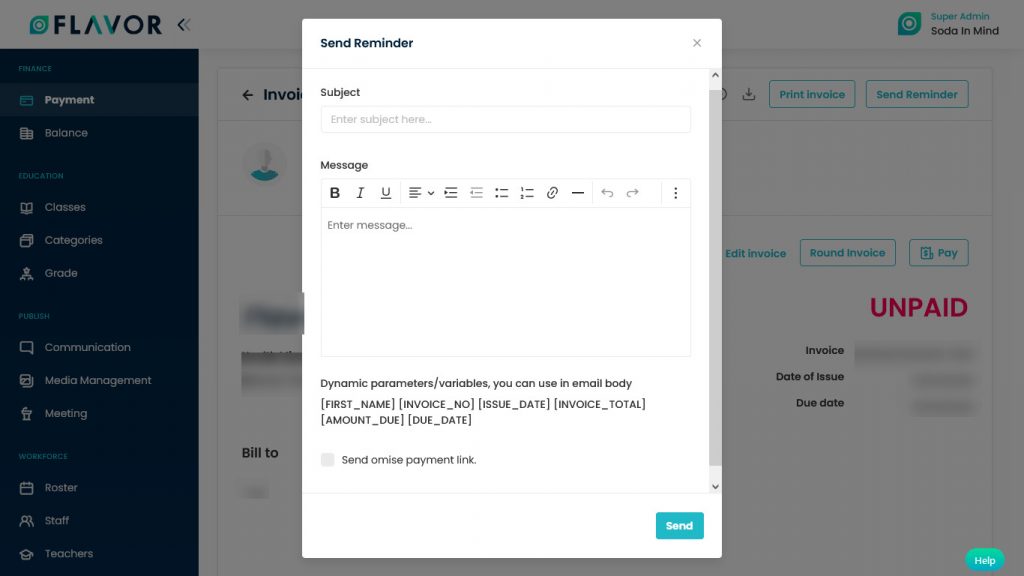
- To send a reminder to the student or his parents click on the Send reminder button.
- A popup named Send Reminder will be open.
- Subject: Enter the subject in the subject field.
- Message: Write your message in the message box.
- Variables will be used in the email body.
- Send omise payment link: To add the payment link in the reminder enable this option by marking it.
- Click on the Send button.
Note: If the bill is unpaid or partially paid then you can see the Edit Profile link, Round Invoice Button & Pay Buton.
Edit Invoice
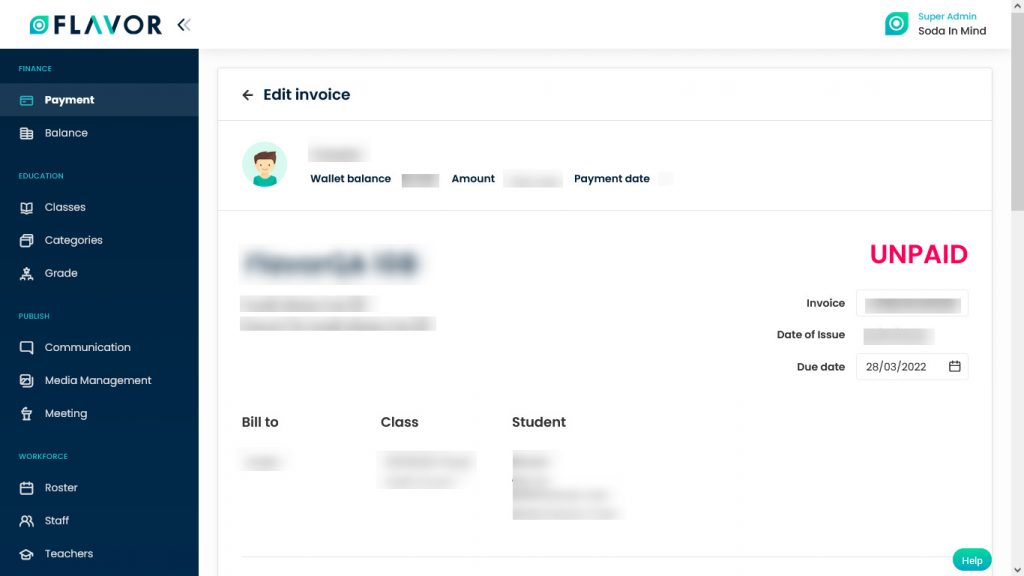
- To edit an invoice, click on the Edit Invoice option. You will be redirected to the Edit Invoice page of that invoice that you want to edit.
- Here, you can see the details of the Invoice. How much balance is left in the Wallet, Payment date, Subsidiary, branch, etc,
- From here, you can change the Invoice number and due date.
Merge Invoice
- In the top right corner of the Edit Invoice page, you can see the Merge Invoice button.
- If you want to Merge siblings click on the Merge Invoice button.
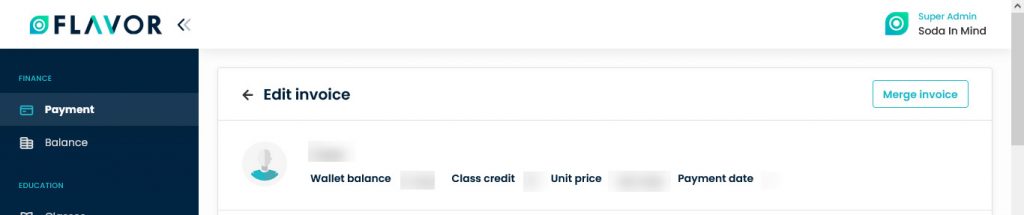
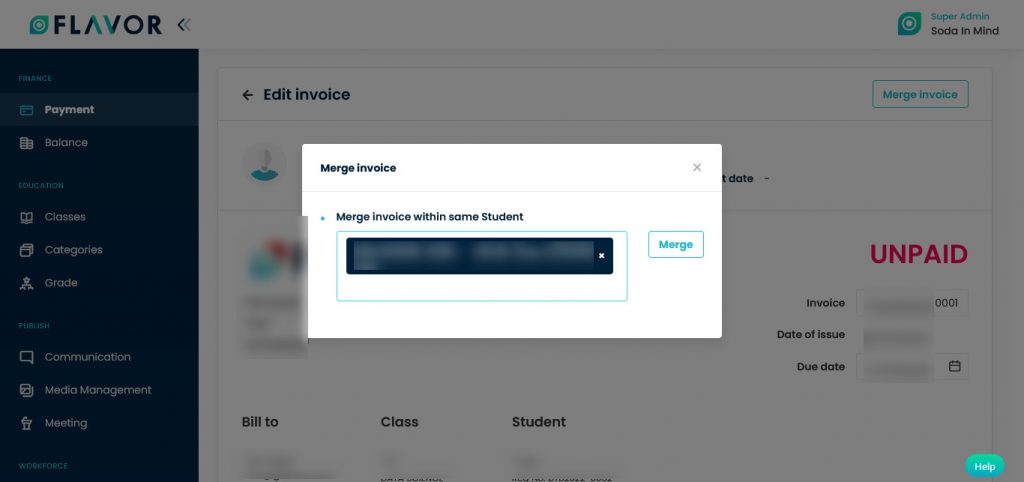
- A popup named Merge Invoice will be open.
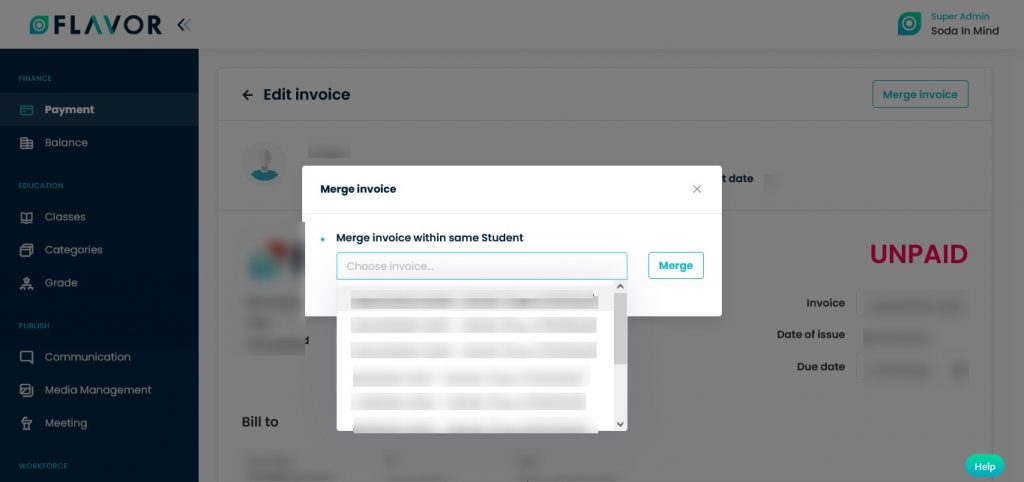
- Select sibling from the drop-down and then click on the Merge button.
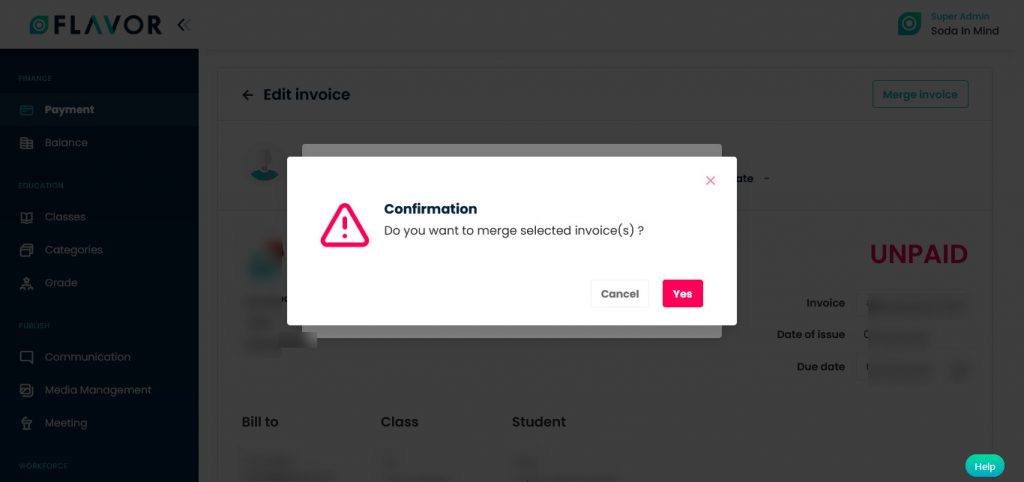
- A confirmation popup will open.
- Click on the Yes to merge the sibling.
Invoice Items
- Navigate to the Invoice items.
- Here, you can see the items, their quantity, price, discount & tax.
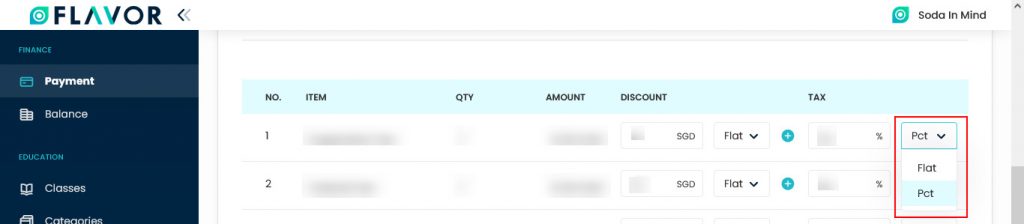
- Discounts: You can select a Flat discount or Percentage discount from the dropdown.
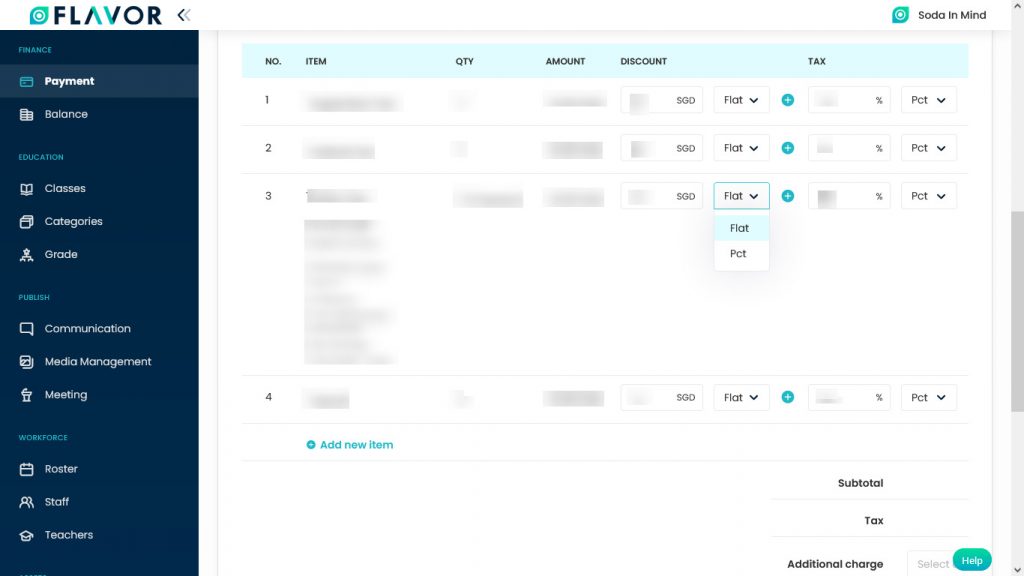
- At the right of the dropdown, you can see the Plus + icon. If you want to add more discount fields then click on Plus + icon, a row will be added to the discount column.

- If you want to delete this additional row then click on the Minus – icon to remove the row.

- A confirmation popup will appear, click on the Delete button to remove the discount.
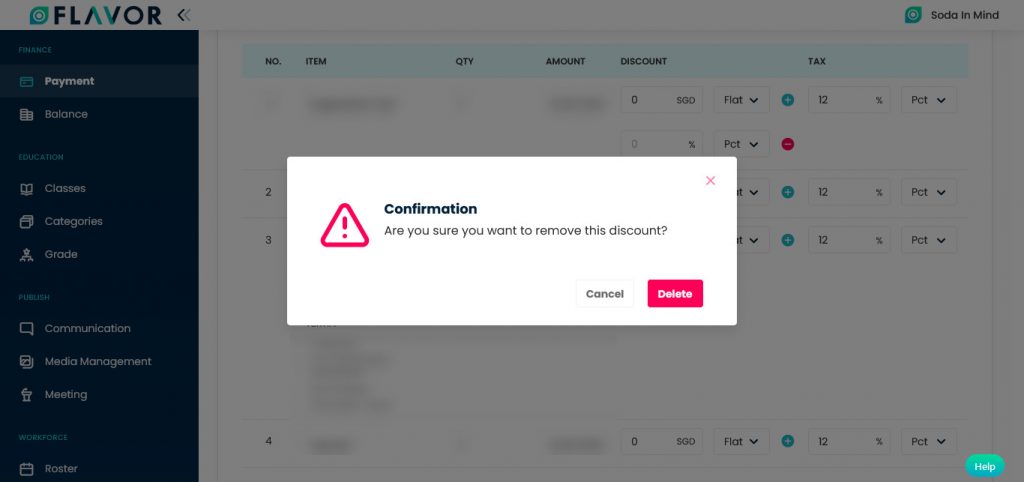
- Tax: Select Flat or Percentage tax from the dropdown.
Add New Item
- To add a new item click on the + Add New Item button.
- A new row will be added.
- you have to enter the Item name, select the code from the drop-down. Quantity, price, discount, tax.

Sub Total
- Navigate to the Sub Total section.
- Here, you can see the total of the items and tax.
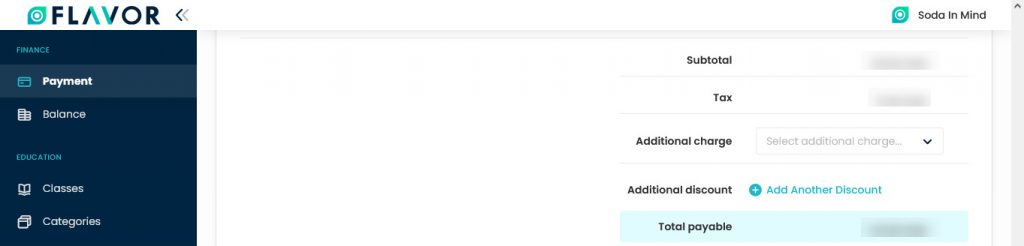
- Additional Charges: If there are additional charges select them from the dropdown.
- Additional Discount: If there is any additional discount then click on the + Add Another Discount button.
- A row will be added. You can select the additional discount type from the dropdown.

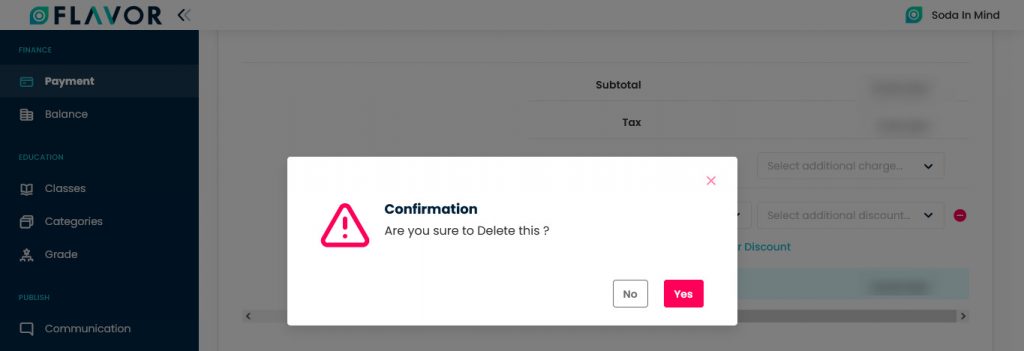
- If you want to remove the Additional Discount field click on the Minus – icon.
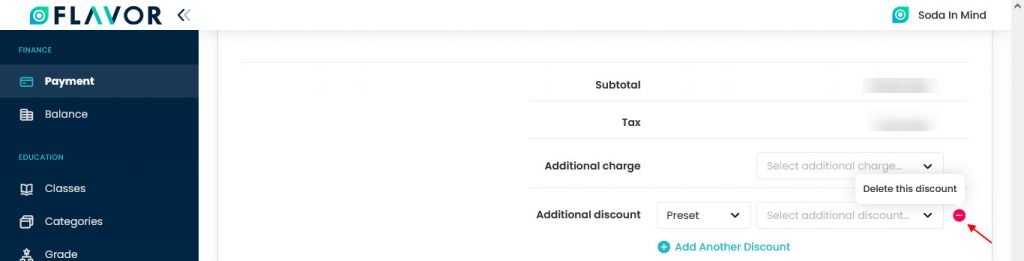
- A confirmation popup will appear.
- Click on the Delete button.
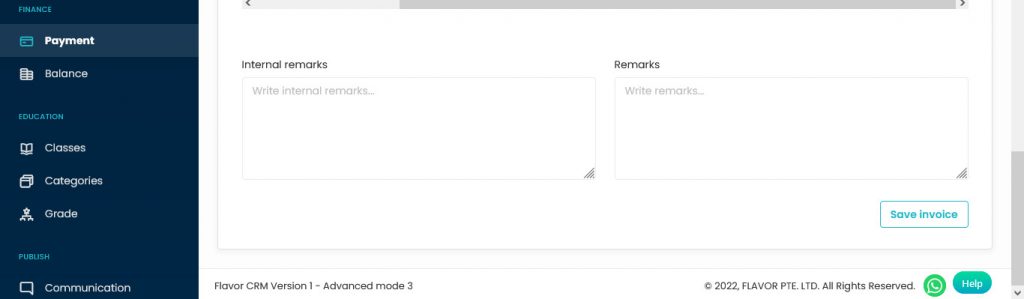
Internal Remarks & Remarks
- In both remarks sections, you can write a note.
- Click on the Save Invoice button. to save the updated details.
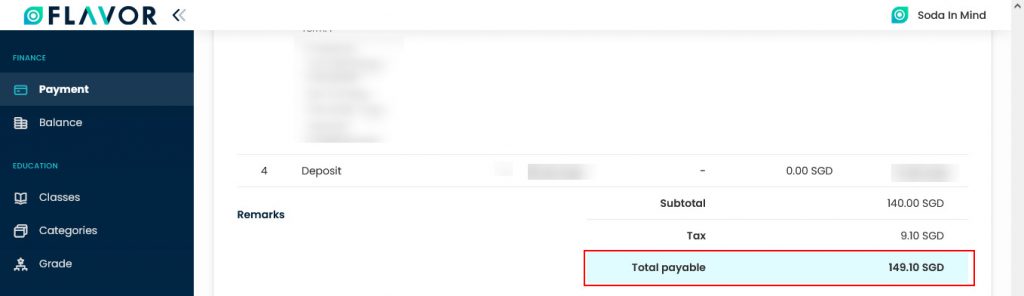
Round Invoice
- Navigate to the Round invoice button.
- If your total amount is 149.11 and you want to make it a round figure.
- Then you have to click on the Round Invoice button.

- After clicking it will be shown the nearest value. Your total amount will be 149.10
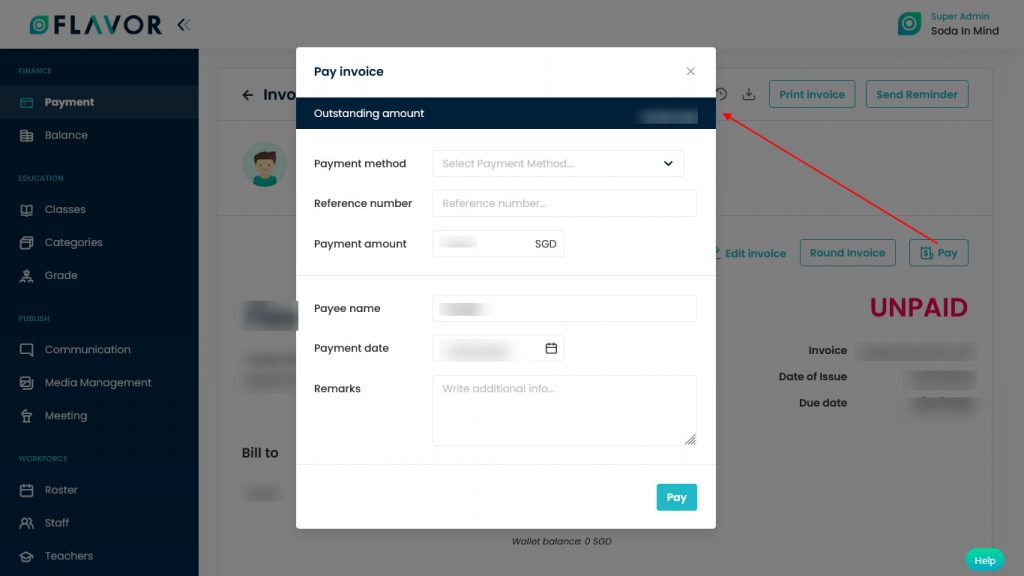
Pay
- To pay the invoice click on the Pay button.
- A popup named Pay Invoice will be open.
- Here, you can see the outstanding amount.
- Select the Payment Method from the dropdown.
- Enter the Reference Number.
- Enter the Payment Amount.
- The Payee name will be automatically added to this field.
- Select the payment date.
- Add additional information in the Remarks.
- Click on the Pay button.
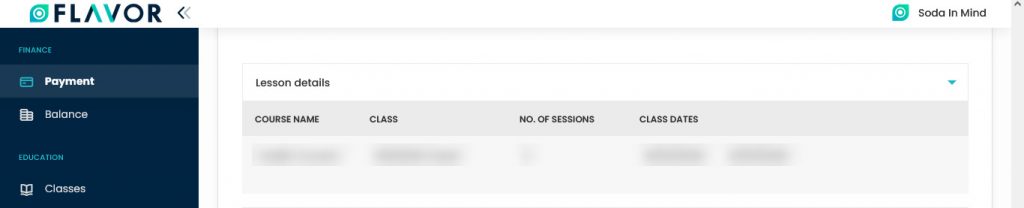
Lesson Details
Navigate to Lesson Details, Here you can get the course, session and class details of a particular Student.
Invoice Information
Navigate to the Invoice Information. From here, you will get Payment Instructions & Terms and Conditions.
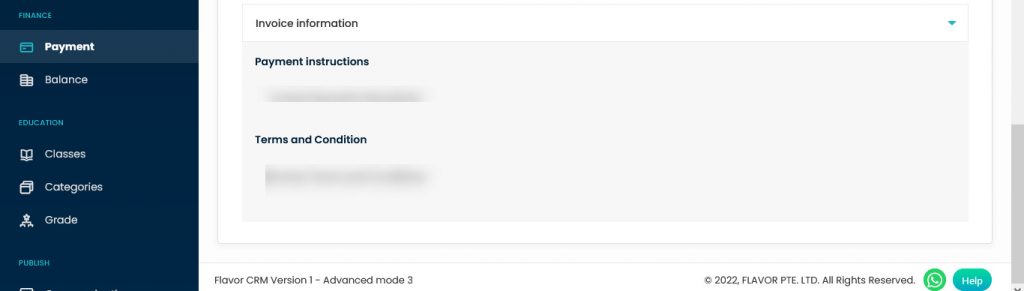
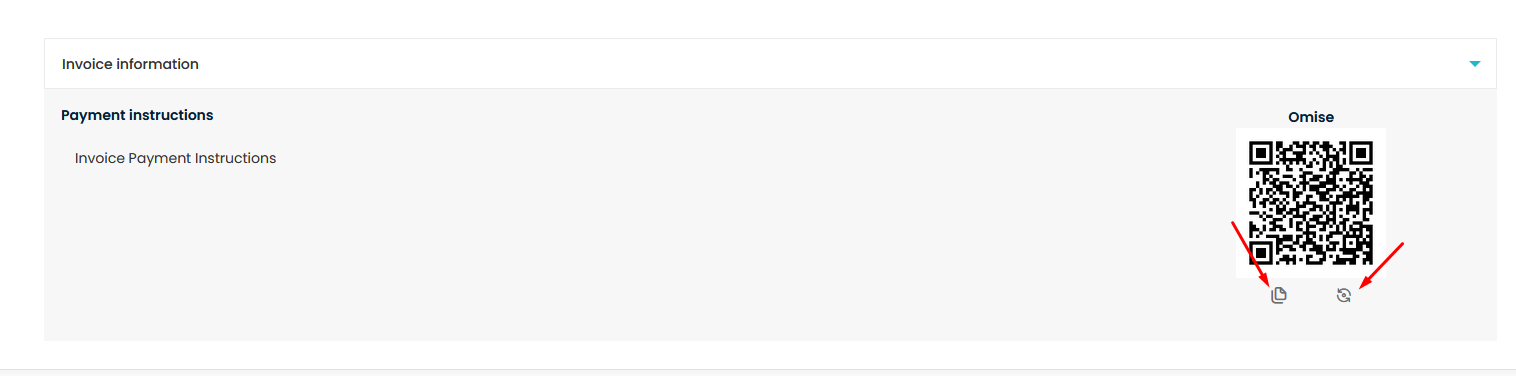
Payment Instructions:
If you enable the switch for Payment instructions from Payment settings, then in invoice view Payment instruction will be shown. Under the Payment instruction in the invoice view, on the right hand side, you can see the QR code along with payment link and regenerate button at the bottom. By clicking on the link, a new tab will open along with payment details. Clicking on regenerate button, it will regenerate a new QR code.
If you click on QR code, then it will open in a new tab with a larger size.
Custom Invoice
The second tab is Custom Invoice. Here, you can see the list of manually generated invoices.
Custom Invoices options
Search
By clicking on the Search Icon, you can search the specific invoice by entering the invoice number, student name or registration number.
Filter
You can filter custom invoices based on specific parameters. Click on Filter Icon, after clicking, a popup form named Filter will appear on your screen. Enter Status, Subsidiary & Branch, etc. Also, select one of the Xero Sync options. Click on Apply button to save parameters.

Import/Export
Navigate to the Import/Export icon. You can Import/Export data and Import Paynow data.
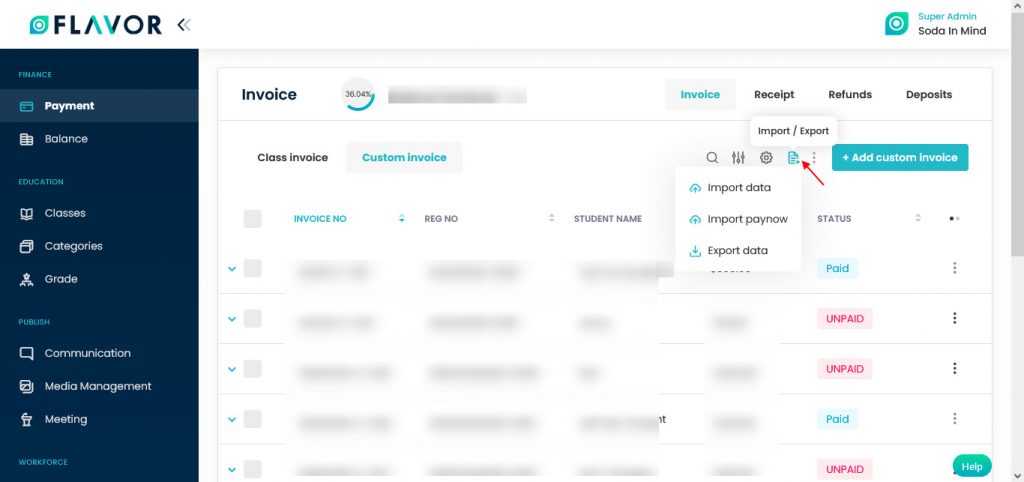
Import Data
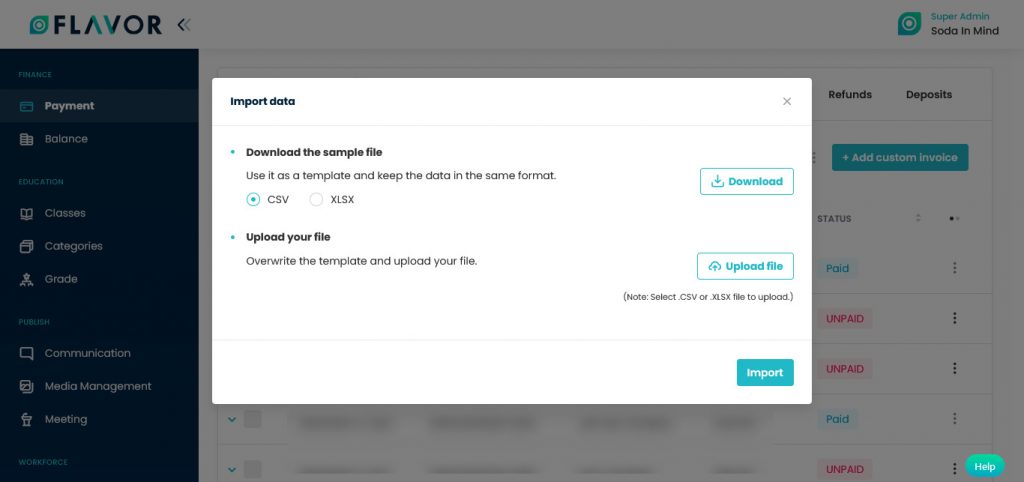
- To import the data click on the Import Data option, after clicking a popup named “Import Data” will appear on your screen.
- Download the Sample File: If you want to download the sample file, click on the Download button. After clicking on the Download button a File Download window will be open on your screen, click on Save File and then click on the OK button. It depends on you which kind of file you want to upload CSV or XLSX.
- This file contains the format based on which you can create .CSV file to import data.
- Upload Your File: Click on the Upload File button. A File Selector Window will be open, choose a .CSV or .XLSX file to upload.
- Click on the Open button to upload. The selected file will be uploaded. Click on the Import button.
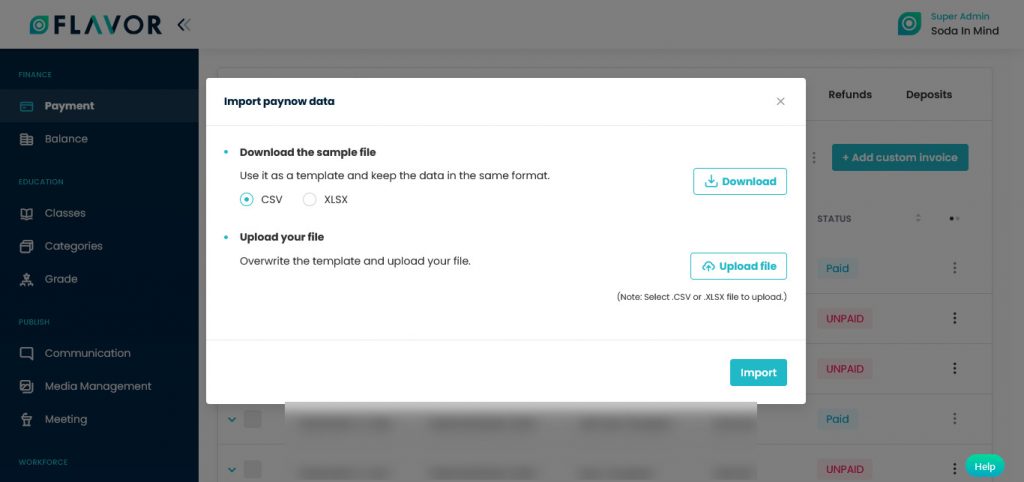
Import Paynow
- To import the data click on the Import Paynow option, after clicking a popup named Import Paynow Data will appear on your screen.
- Download the Sample File: If you want to download the sample file, click on the Download button. After clicking on the Download button a File Download window will be open on your screen, click on Save File and then click on the OK button. It depends on you which kind of file you want to upload CSV or XLSX.
- This file contains the format based on which you can create .CSV file to import data.
- Upload Your File: Click on the Upload File button. A File Selector Window will be open, choose a .CSV or .XLSX file to upload.
- Click on the Open button to upload. The selected file will be uploaded. Click on the Import button.
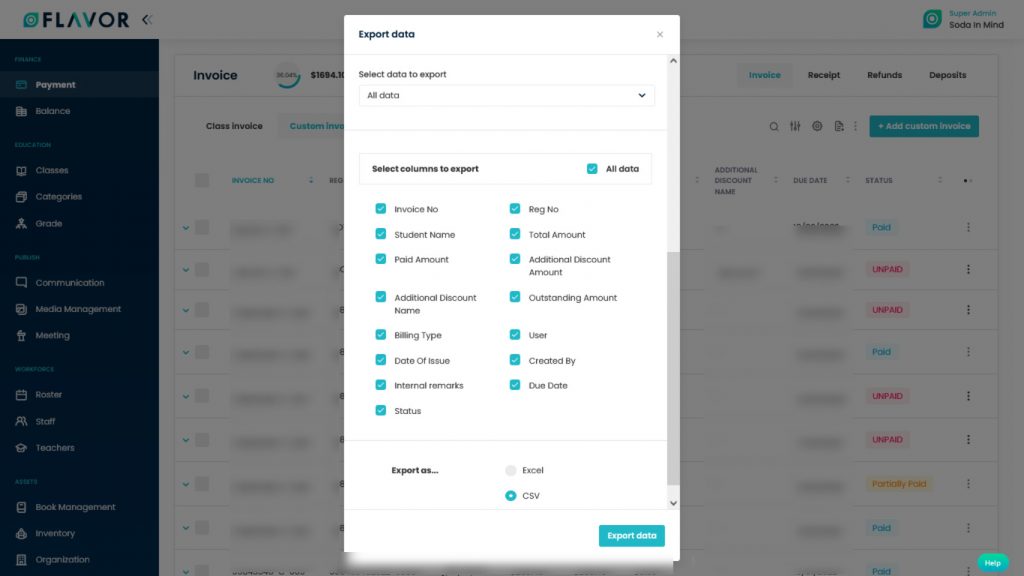
Export Data
- To export all data, you need to click on the Export Icon.
- After clicking on the Export icon, a pop-up form will appear on your screen.
- Enter the status, subsidiary, branch. Enter the date of issue, due date.
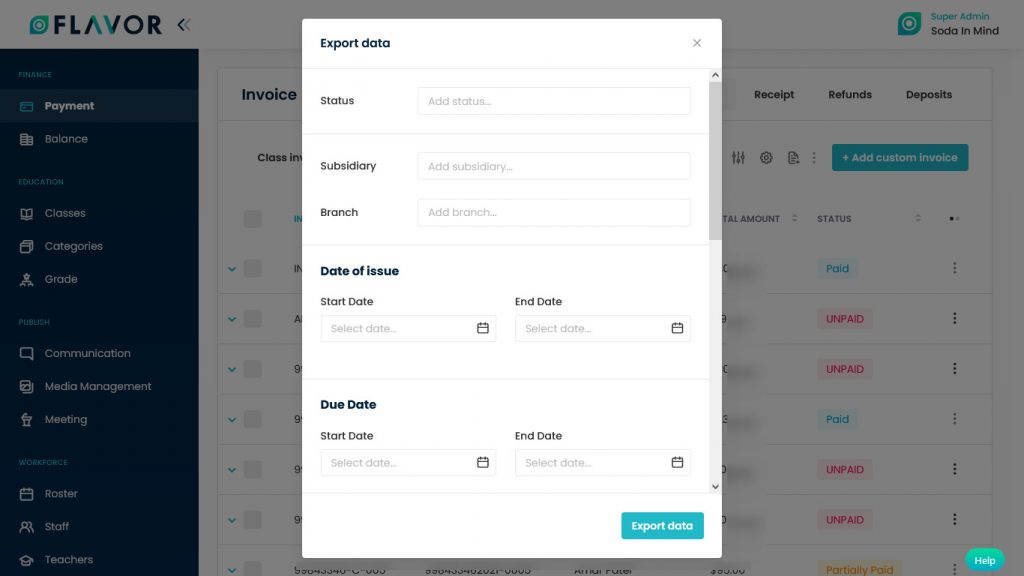
- Select Data to Export: Here, you can export the data of all rows or 15 rows by simply clicking on the dropdown.
- Select Column to Export: Select columns to which you need your data to export. Like if you want all the data of all custom invoices, then simply click on “ALL DATA” and you will get the data of invoices in your exported file.
- Export as: Then select a format in which you want to export your data i.e (EXCEL or CSV).
- After selecting the relevant records/data, click on the Export Data button to export all the data in the selected file (Excel/CSV).
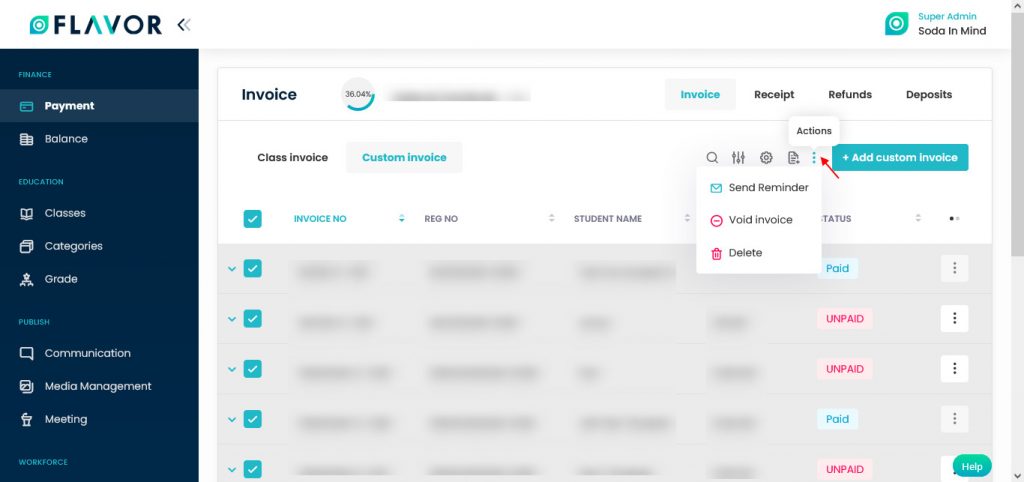
Bulk Action Button
- The Bulk Action Button is disabled by default. When you mark on the check box, which appears at the starting of each row, this action button will be enabled.
- You can select/deselect rows by marking the checkbox.
- After selecting any record go to the action button, click on the button a small popup will appear. Here, you can see Send Reminder, Xero Sync, Void Invoice, Delete options.
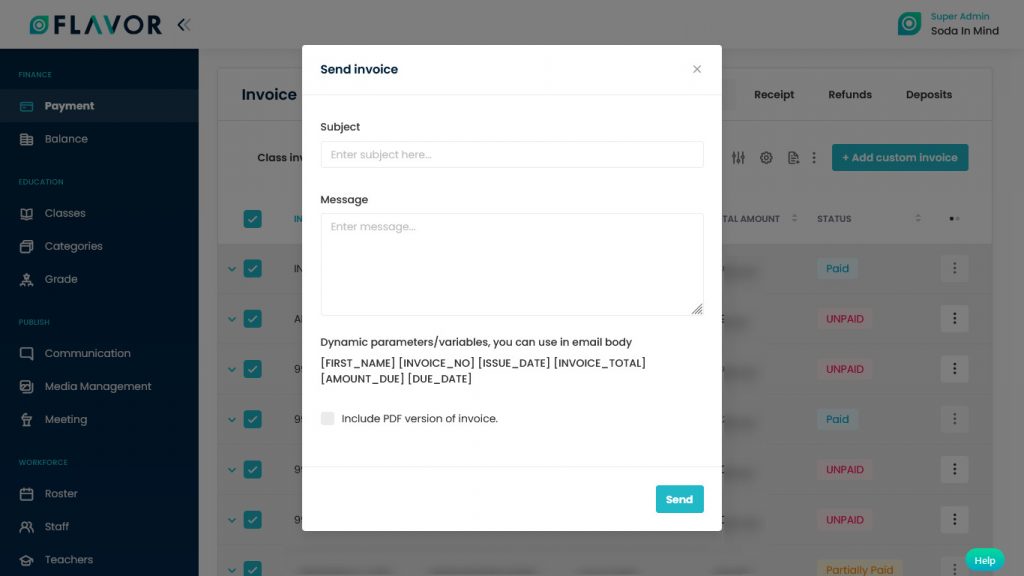
Send Reminder
- To send reminders to all or selected students click on the Send Reminder option.
- A popup named Send Reminder will be open.
- Subject: Enter the subject of the reminder.
- Message: Write your message here.
- Dynamics Variables: Here, you can see the dynamic variable which will be used in the Email body. Variables like First Name, Invoice No. Due Date, etc.
- Include PDF version of Invoice: Enable this option by marking the check box to include a PDF version of the invoice in the email.
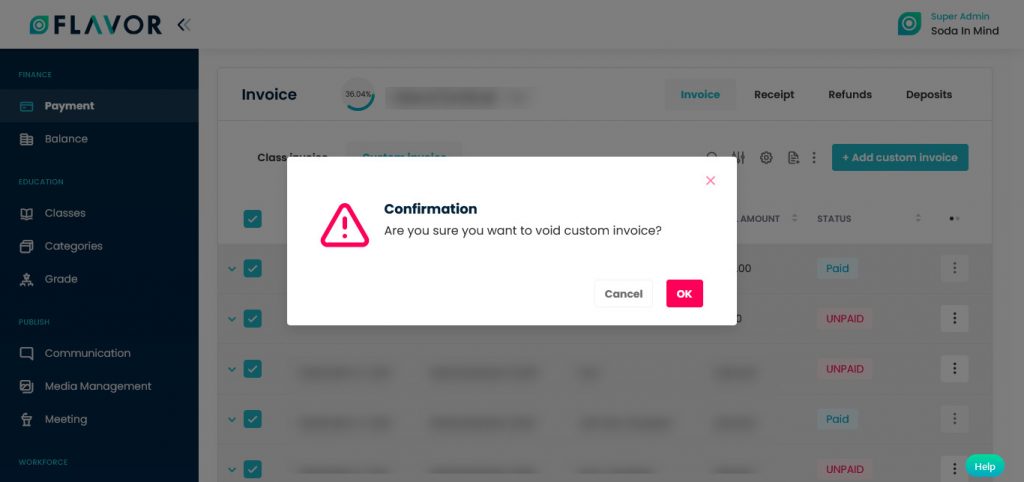
Void Invoice
Void Invoice: This option will cancel students’ invoices but their invoices will be kept in the database. Students can’t make any payments.
- To void all selected invoices click on the Void Invoice option.
- A confirmation popup will appear on the screen.
- To delete all selected invoices click on the OK button.
Delete
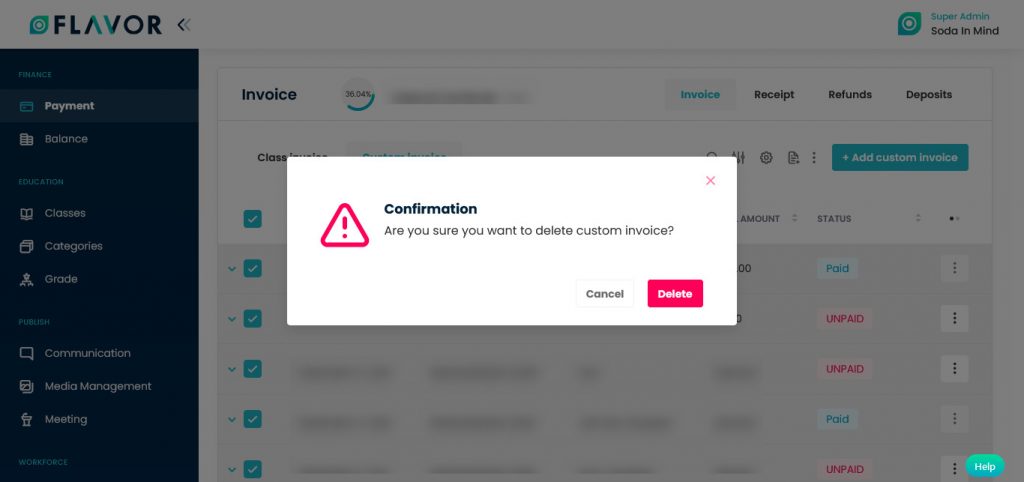
- To delete all invoices click on the Delete option.
- A confirmation popup will be open.
- Click on the Delete button to delete all selected invoices.
Add Custom Invoice
To add a custom invoice click on the + Add Custom Invoice button. You will be redirected to the add custom invoice page. Here, you can see 2 sections.
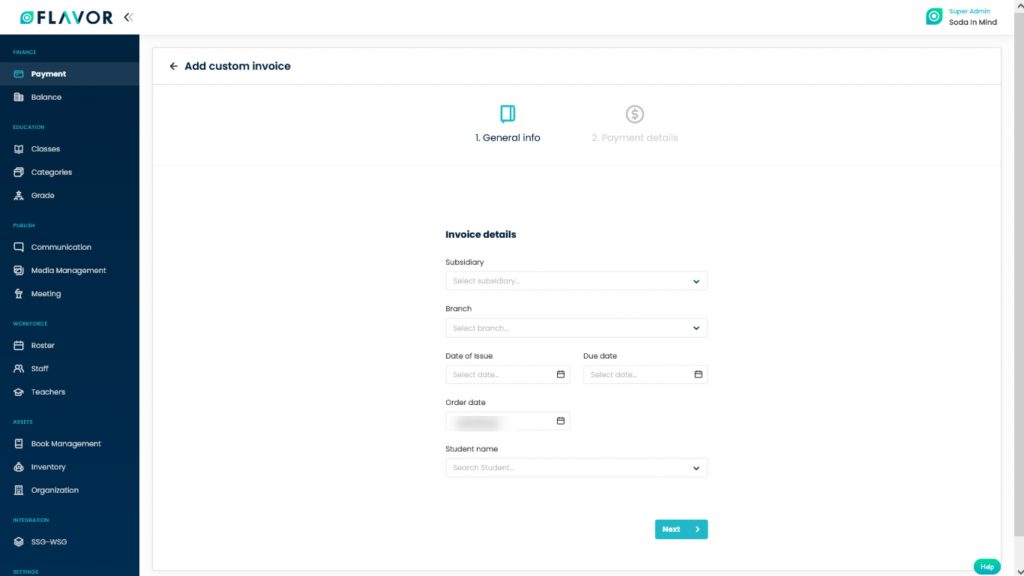
General Info
General Info, the first tab opens after the user clicked the button.
Note: Before fill the general info is finished, the rest of the tabs will be disabled.
- Subsidiary: Select the Subsidiary for which you are creating the class.
- Branch: It’s a Dropdown filled under chosen’s subsidiary. These fields are assigned to the Admin only.
- Date of issue: Enter the date.
- Due date: Enter the due date.
- Order date:
- Student Name: Select students from the dropdown. In the dropdown, you can see the list of students of a particular branch.
- Click on the Next button to go to the next tab.
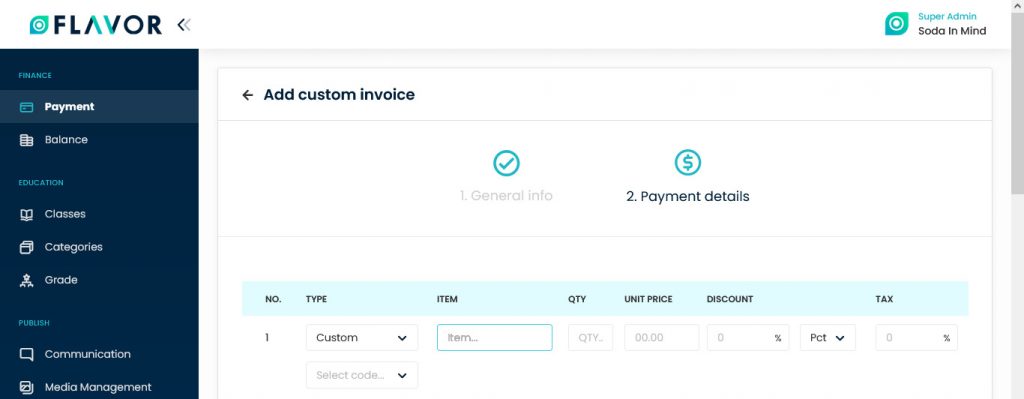
Payment Details
After clicking on the Next button you will be redirected to the Payment Details section.
Invoice Items
- Here, you can see the Invoice item section.

- Type: Type dropdown which consists of inventory, custom and credit. Select any type.

Custom
- Custom: Select Custom from the dropdown.
- Item: Admin can fill this one with free text. Need to fill out quantity and amount fields manually.
-
Inventory: Select Inventory from the dropdown.
-
Item: After selecting inventory from the type, the item will show you the dropdown. It consists of all inventory items which have already been added to the inventory. Quantity and amount fields are automatically filled by their price.

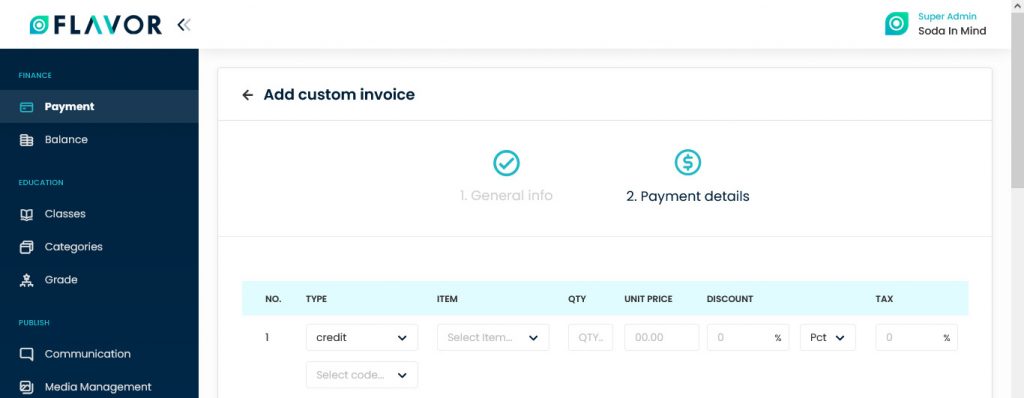
- Credit: Select Credit from the dropdown, it is for wallet and class credit.
- Item: It will consist of all class credit or wallet presets.
- Discount: Choose the type of discount from the dropdown. The discount will be either a flat discount or a percentage discount.
- Tax: Tax is already set.
- Total Tax:
- Remove this Payment: To remove this entry click on the Cross X icon which is situated at the end of the row, the row will be deleted.
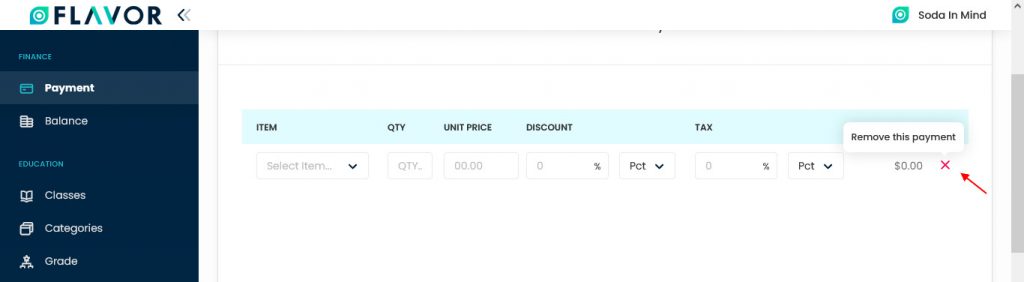
- Add New Item: To add a new item row or more items rows click on the + Add New Item button. A new Item row will be added.

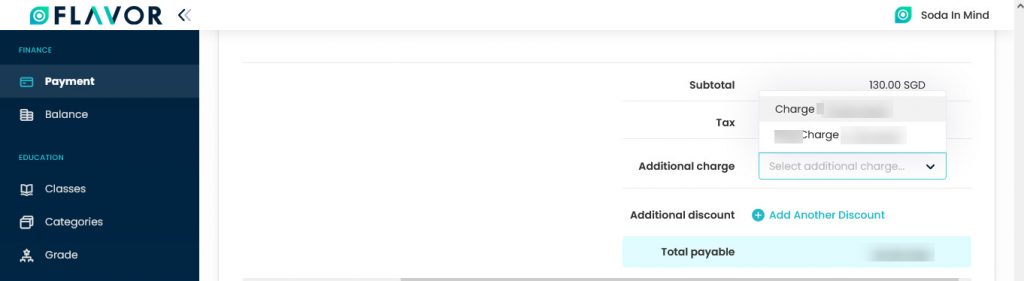
Subtotal
- Navigate to the Subtotal section. In the subtotal field, you can see the total price for items.
- Tax: Here, you can see the total taxes.
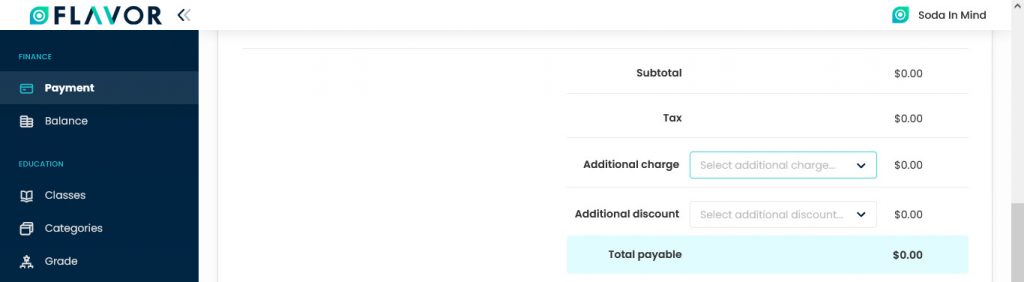
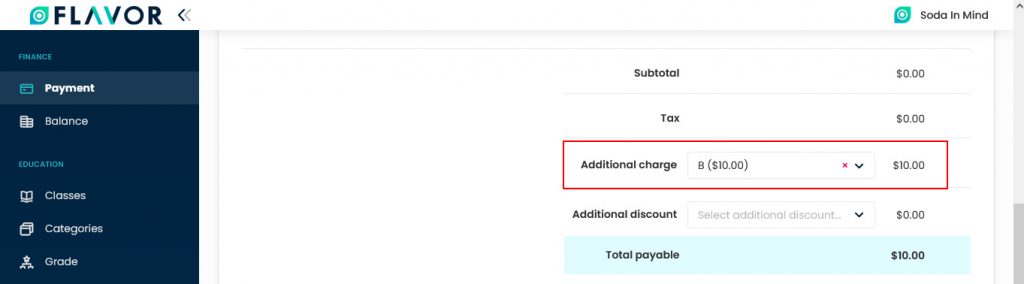
- Additional Charge: If there is any charge in invoice presets, then it will show in this field. You have to select the type of charge from the dropdown. You can also remove this charge by clicking on the Red Cross X icon.
- Additional Discount: If there is any discount in invoice presets, then it will show in this field. You have to select the type of charge from the dropdown. You can also remove this discount by clicking on the Red Cross X icon.

- Total Payable: Here, you can see the total payment which needs to be paid.
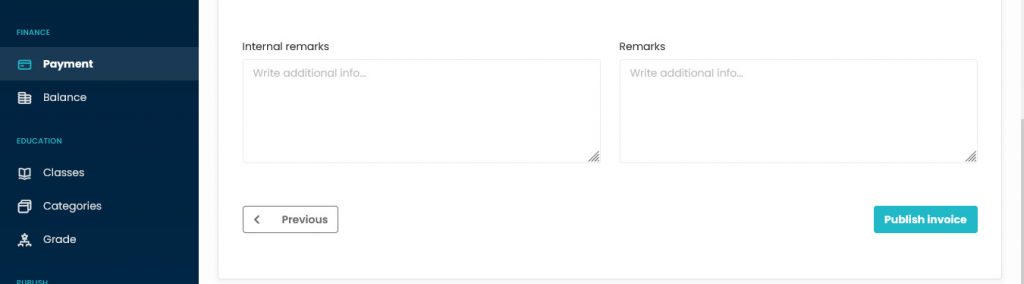
Remarks
- Internal Remarks: Here, you can write additional information. it will not appear when an invoice is sent to students, or when the invoice is downloaded or printed.
- Remarks: Here, you can write additional information. It will appear when the invoice is sent to the student, or when the invoice is downloaded or printed.
- To publish the invoice click on the Publish Invoice button.
- Previous Button: Click on the Previous button to go back to the previous tab.
Custom invoice Records
Column Sorting
All custom invoices will be shown in Tabular Format. You can sort the data by clicking on Column Sorting Arrows in the Table’s Header.
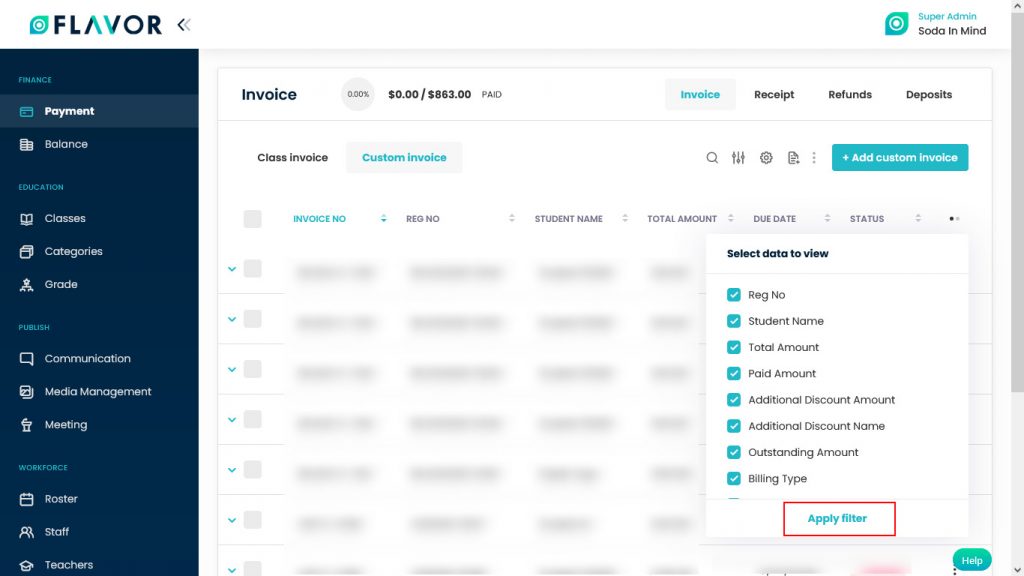
Column Visibility
You can sort columns by clicking on the Ellipsis Icon, you will get the pop-up form named Select Data to View. Mark the columns you want to see and unmark the ones you don’t want to see in the table. After this procedure click on the Apply Filter button.
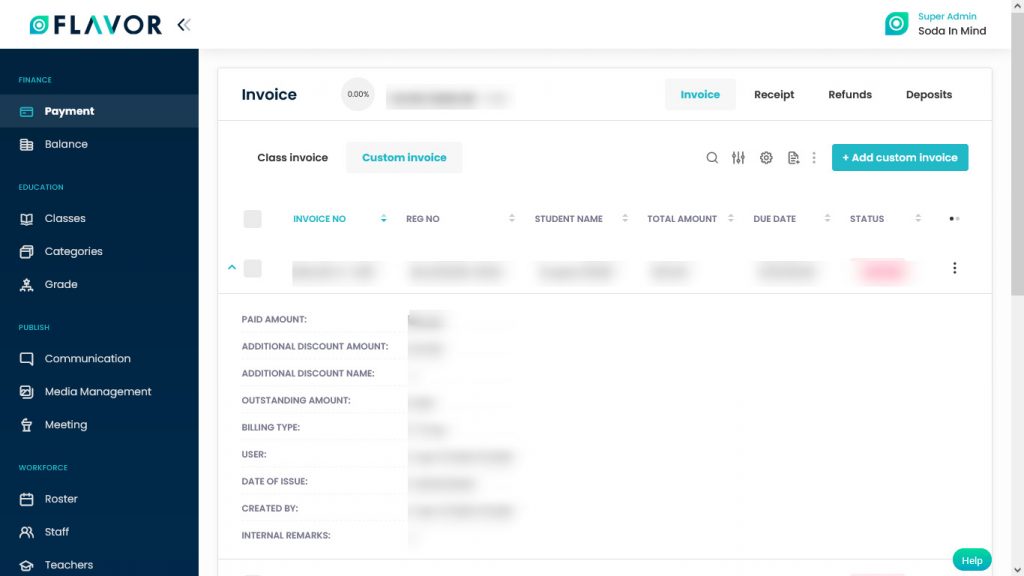
Expand Records
At the starting of all records, there is an Expand Button (Down Arrow), after clicking on this button a record will be expanded. From here will get the information of any invoice. You can collapse the record by clicking on the same button.
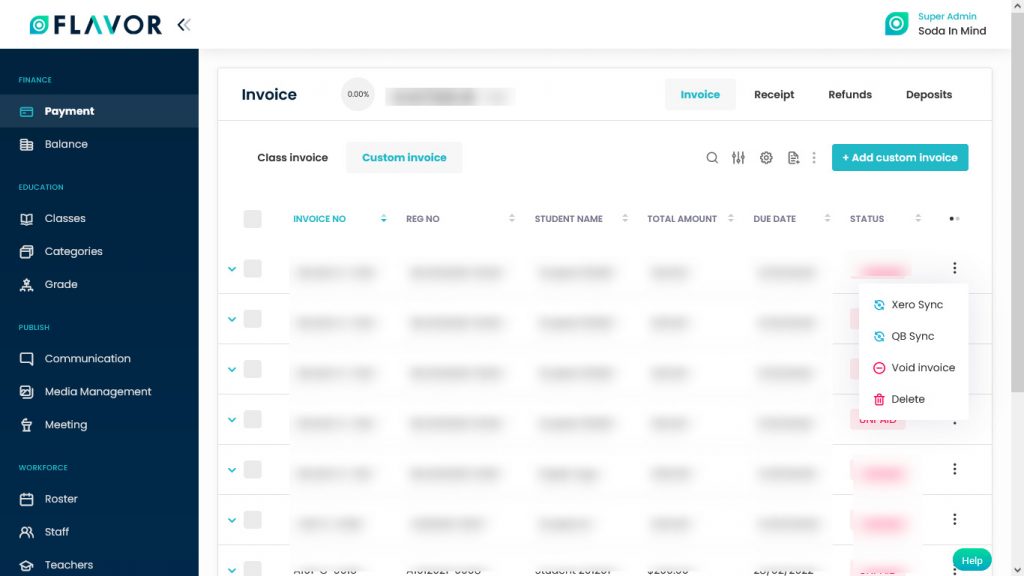
Action Button
Click on Action Button (Vertical Ellipsis), a popup box will appear on your screen with Send Reminder, Xero Sync, Edit Invoice, Void Invoice, Delete options.
Void Invoice
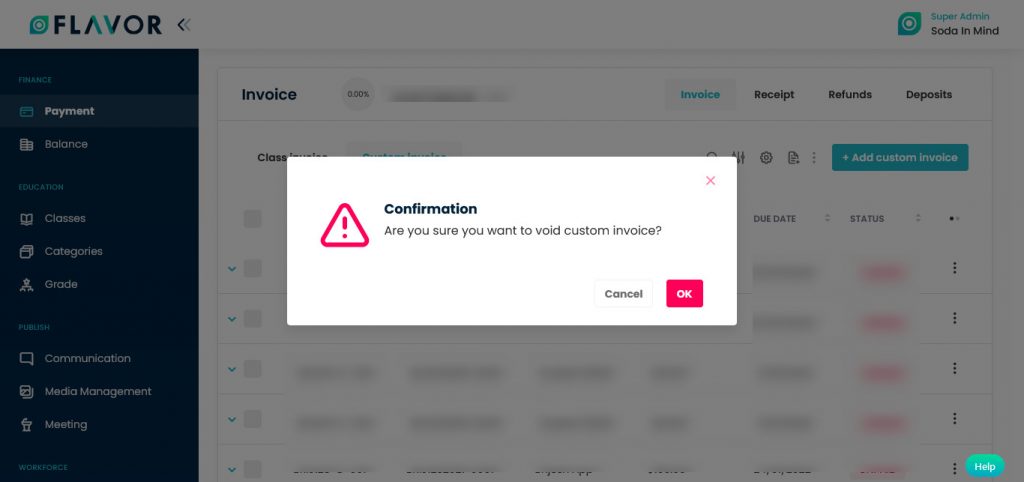
Void Invoice: This option will cancel students’ invoices but their invoices will be kept in the database. Students can’t make any payments.
- To void the invoice click on the Void Invoice option.
- A confirmation popup will appear on the screen.
- To delete the invoice click on the OK button.
Delete
- To delete the invoice click on the Delete option.
- A confirmation popup will be open.
- Click on the Delete button.
Extra Actions
When you hover the cursor on any invoice record, you will see SMS, Email, Payment Link, Communication log Icons & Status of payment.
SMS
- To send the SMS to the student or his parent click on the SMS icon.
- A popup named Send SMS will be open.
- The registered contact number will be automatically shown in the To field.
- Write your desired message in the Message Box.
- Then click on the Send button.
- To send an Email to the student or his parent click on the Email icon.
- A popup named Send Email will be open.
- Registered email id will automatically be shown in the To field.
- Write subject in the Subject field.
- Write your message in the Message box.
- Then click on the Send button.
Payment Link
- To send the Payment link via email to the parent click on the Payment Link icon.
- A popup named Send Payment Link via Email will be open.
- Registered email id will automatically be shown in the To field.
- Payment Method: Select the payment mode from the dropdown.
- Enter the amount in the Amount field.
- Write your message in the Message box.
- Dynamic variables will be used in the mail.
- Then click on the Send button.
Status of Payment
- If the status of the payment is unpaid or partial paid. Then click on the unpaid or partial paid option.
- A popup named Pay Invoice will be open.
- Here, you can see the outstanding amount.
- Select the Payment Method from the dropdown.
- Select Xero account from the dropdown.
- Enter the Reference Number.
- Enter the Payment Amount.
- The Payee name will be automatically added to this field.
- Select the payment date.
- Add additional information in the Remarks.
- Click on the Pay button.
Custom Invoice Details
Receipt Tab
Receipt: A receipt is a document acknowledging that a person has received the money in a payment following a sale or other transfer of goods or provision of a service. All receipts must have the date of purchase on them
The receipt tab consists of three tabs. Class Receipt Tab, Custom Receipt Tab, Custom Receipt Imported Tab.

Class Receipt, Custom Receipt & Custom Receipt Imported Tabs Options
Search
Search is working the same for all tabs. By clicking on the Search Icon, you can search the specific receipt by entering the receipt number, invoice number or student name.
Filter
You can filter receipts based on specific parameters. Click on Filter Icon, after clicking, a popup form named “Filter” will appear on your screen. Enter Status, Subsidiary & Branch, Course Name, Class, etc. Also select one of the Xero Sync options. Click on Apply button to save parameters.
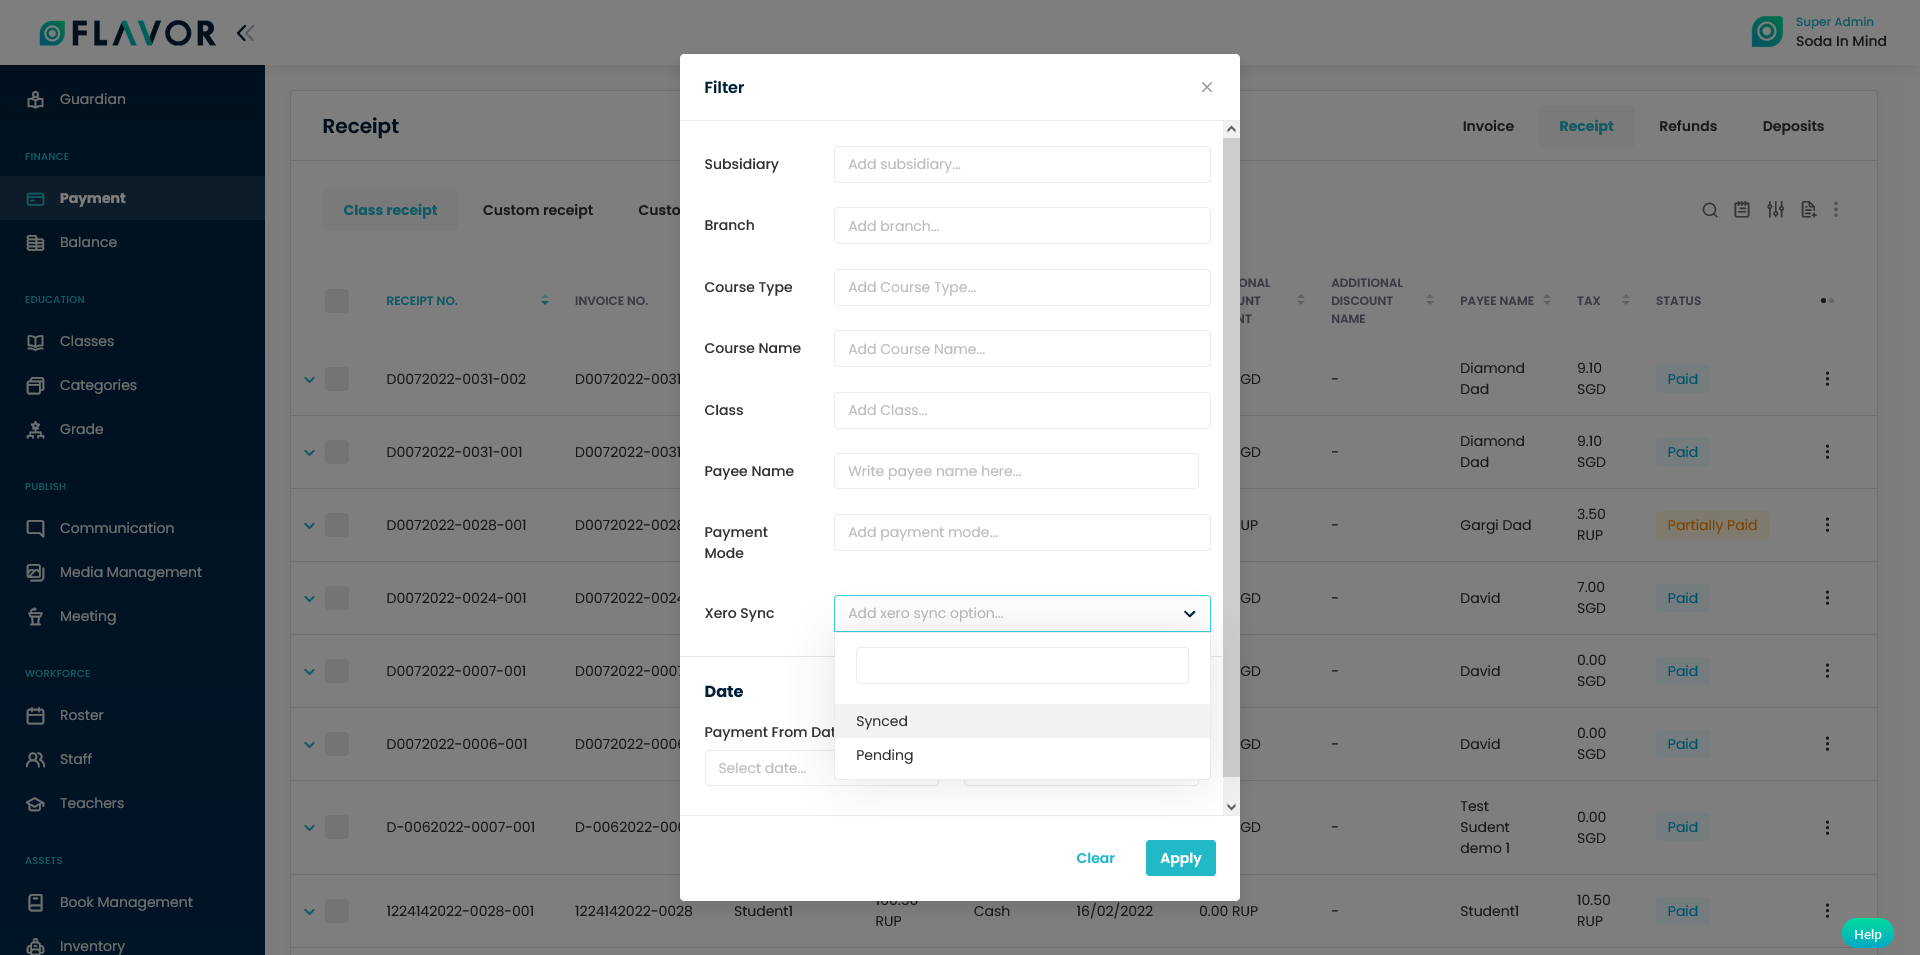
Note: The Filter is only working in the Class & Custom Receipt tabs.
Export
- To export all data, you need to click on the Export Icon.
- After clicking on the Export icon, a pop-up form named Export Data will appear on your screen.
- Enter the status, subsidiary, branch, course type, payment mode, etc.
- Payment Date: Enter the Payment From Date & Payment To Date.
- Select Data to Export: Here, you can export the data of all rows or 15 rows by simply clicking on the dropdown.
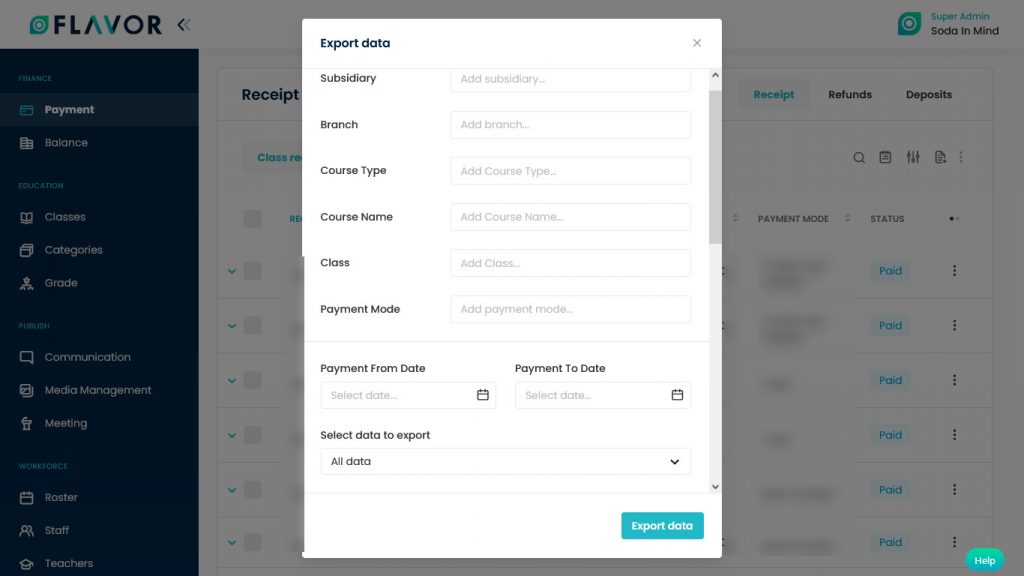
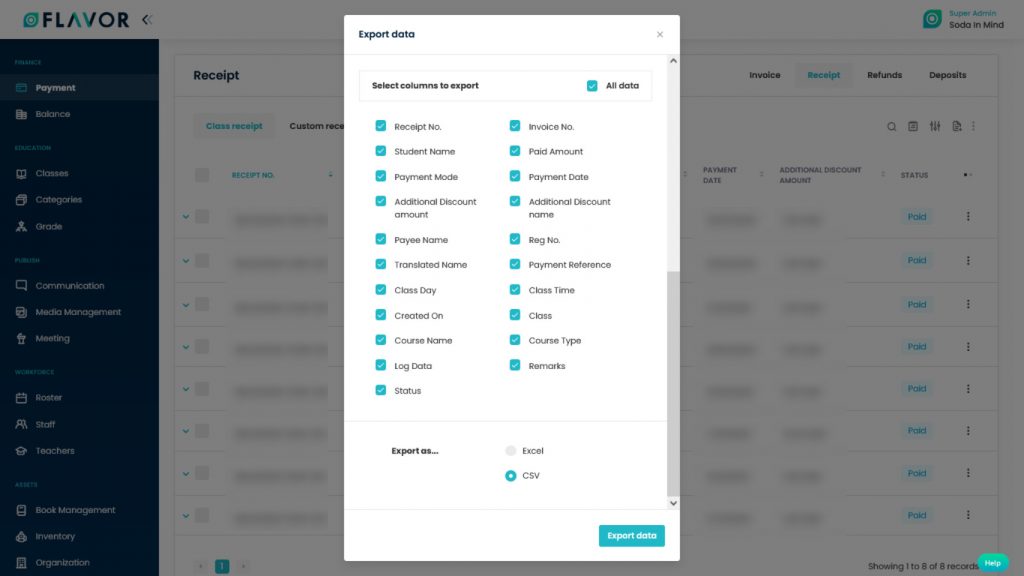
- Select Column to Export: Select columns to which you need your data to export. Like if you want all the data of all receipts, then simply click on “ALL DATA” and you will get the data of receipts in your exported file.
- Export as: Then select a format in which you want to export your data i.e (EXCEL or CSV).
- After selecting the relevant records/data, click on the Export Data button to export all the data in the selected file (Excel/CSV).
Note: Export Data is working the same for all tabs.
Bulk Action Button
- The Bulk Action Button is disabled by default. When you mark on the check box, which appears at the starting of each row, this action button will be enabled.
- You can select/deselect rows by marking the checkbox.
- After selecting any record go to the action button, click on the button a small popup will appear with various options.
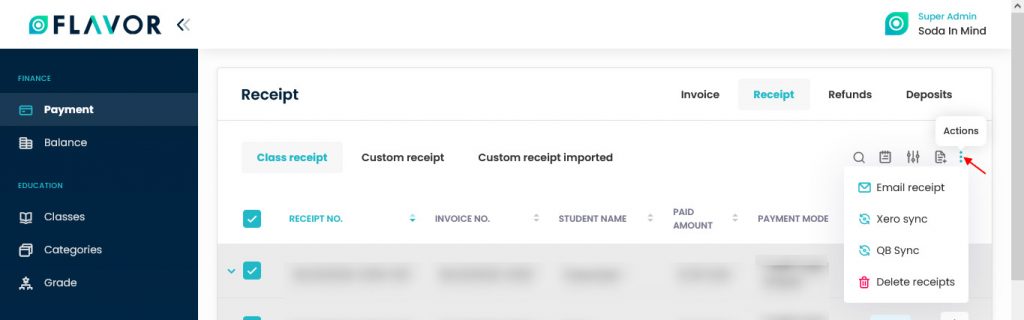
Email Receipt
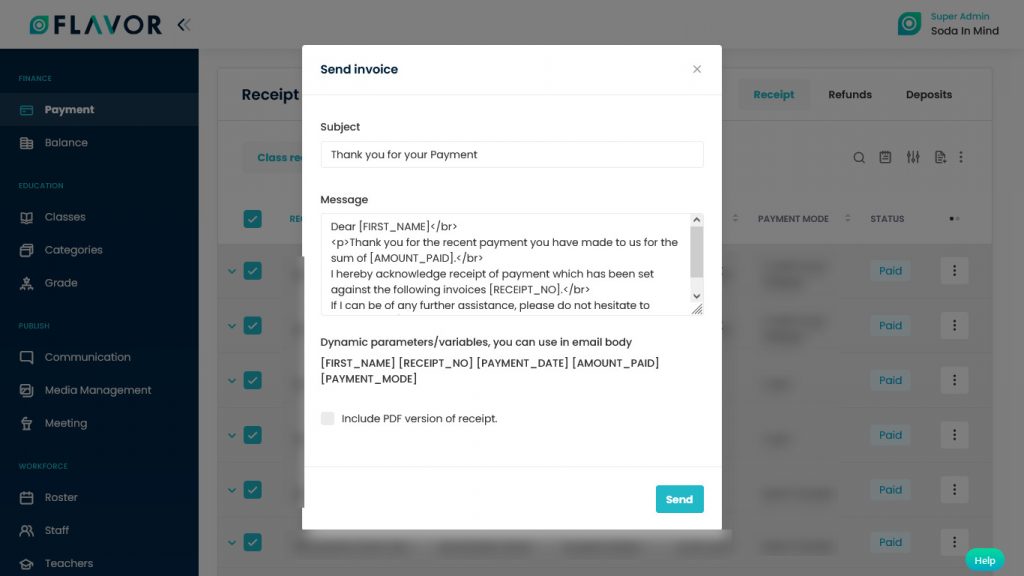
- To send an email receipt click on the Email Receipt option.
- A popup named Send Invoice will be open.
- Subject: The subject of an email will automatically be shown in the Subject field.
- Message: The message with First Name, Amount Paid & Receipt Number variables will be used in the mail with a message.
- Include PDF version of Invoice: Enable this option by marking the check box to include a PDF version of the invoice in the email.
Note: This Email Receipt option of the Bulk Action button is only applicable in the Class Receipt tab.
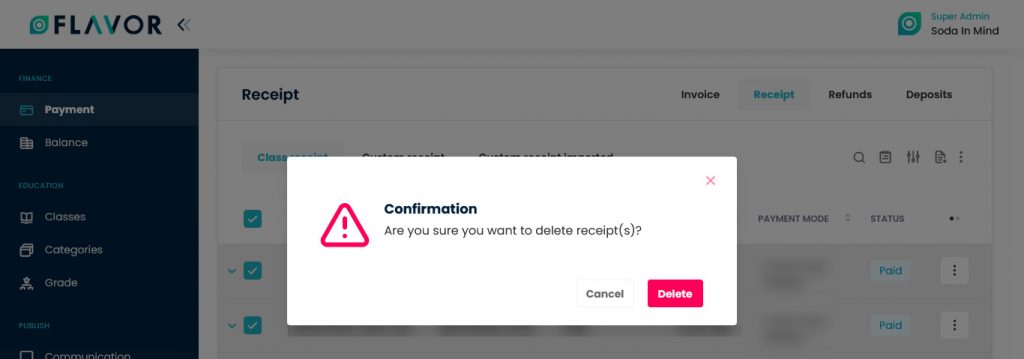
Delete Receipts
- To delete all receipts click on the Delete Receipts option.
- A confirmation popup will be open.
- Click on the Delete button to delete all selected receipts.
Note: This Delete Receipts & Delete Imported Receipts option of the Bulk Action button is applicable for all Receipt tabs.
Class Receipt, Custom Receipt & Custom Receipt Imported Tabs Records
Column Sorting
All receipts will be shown in Tabular Format. You can sort the data by clicking on Column Sorting Arrows in the Table’s Header.
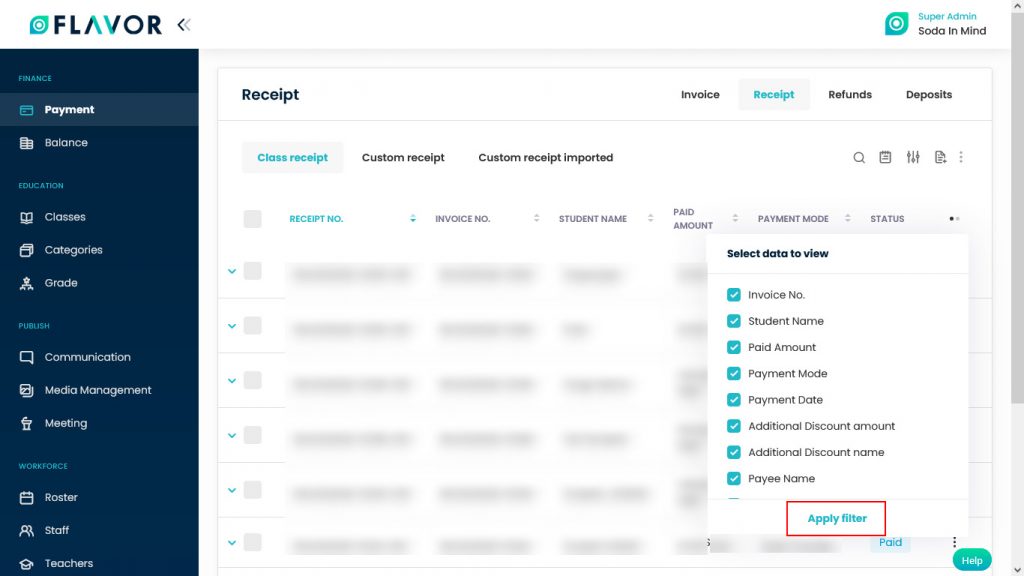
Column Visibility
You can sort columns by clicking on the Ellipsis Icon, you will get the pop-up form named Select Data to View. Mark the columns you want to see and unmark the ones you don’t want to see in the table. After this procedure click on the Apply Filter button.
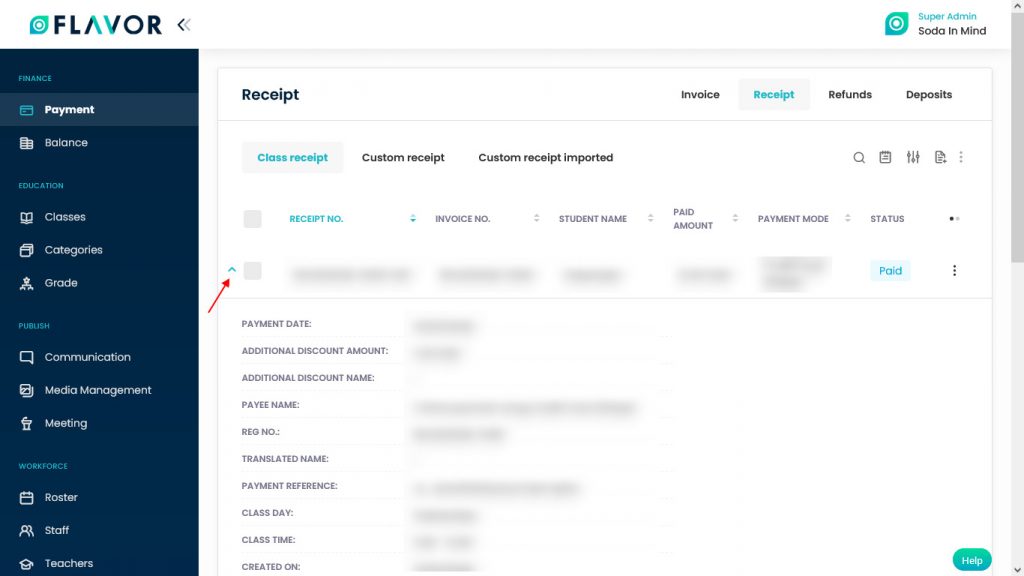
Expand Records
At the starting of all records, there is an Expand Button (Down Arrow), after clicking on this button a record will be expanded. From here will get the information of any invoice. You can collapse the record by clicking on the same button.
Action Button
Click on Action Button (Vertical Ellipsis), a popup box will appear on your screen with Edit Receipts, Xero Sync, QB Sync, Delete Receipt.
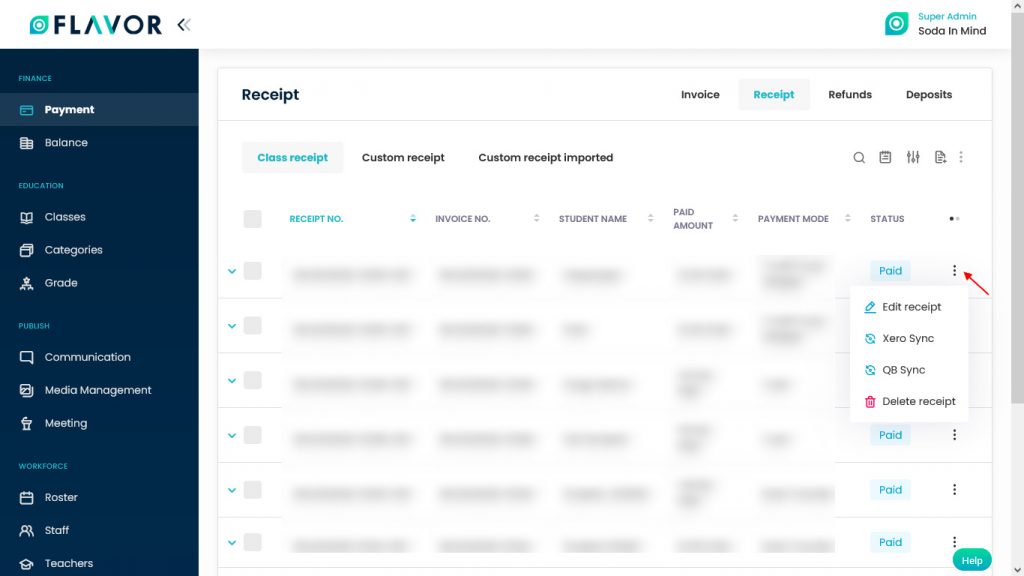
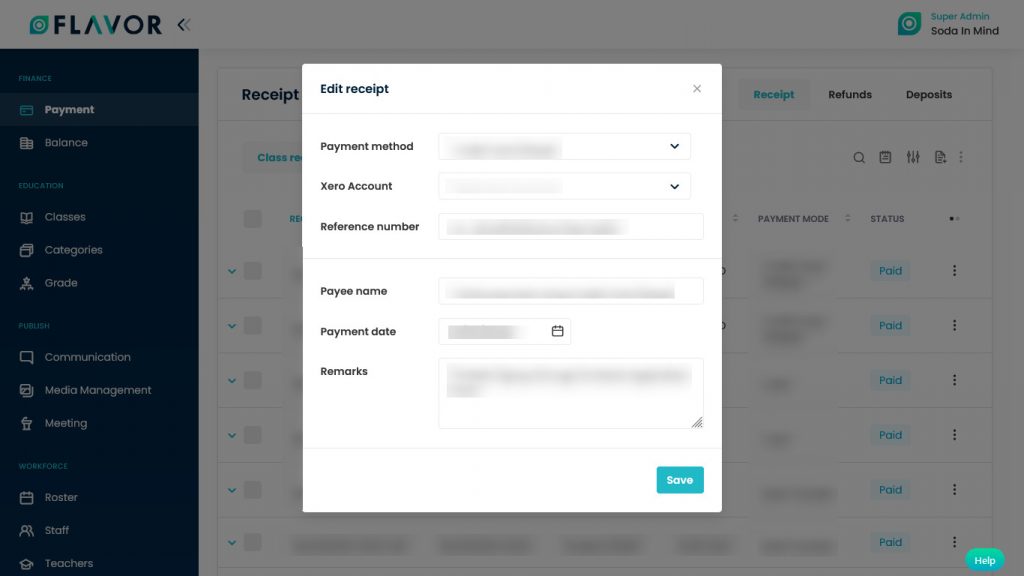
Edit Receipt
- To edit the particular receipt click on the Edit Receipt option.
- A popup named Edit Receipt will be open for Class Receipt & Custom Receipt and a popup named Edit Custom Receipt Imported will be open for Custom Receipt Imported.
- Payment Method: If you want to change the payment method then select it from the dropdown.
- Xero Account: Select the Xero account from the dropdown.
- Payment Reference Number: Enter the payment reference number.
- Payee Name: Enter the payee name.
- Payment Date: Enter the date of payment.
- Remarks: Add additional information if you want.
- Click on the Save button.
Note: This Edit Receipt option of the Action Button is applicable for all Class Receipts, Custom Receipts & Custom Imported Receipts.
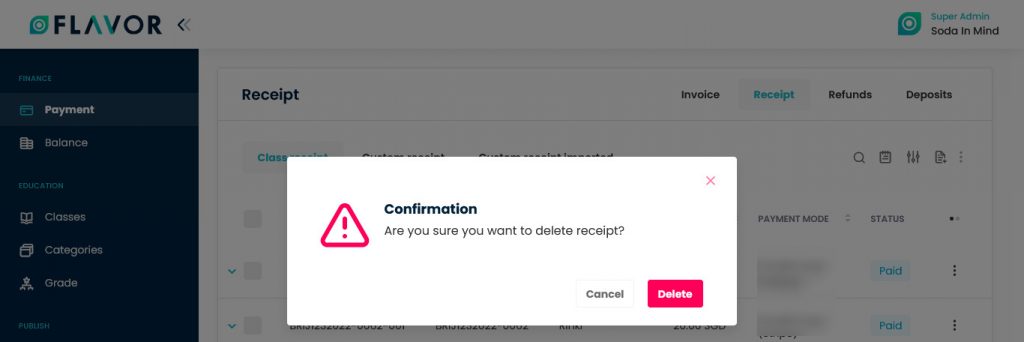
Delete Receipt
- To delete the receipt click on the Delete Receipt option.
- A confirmation popup will be open.
- Click on the Delete button.
Note: This Delete Receipt option of the Action Button is applicable for all Class Receipt & Custom Receipt.
Extra Actions
When you hover the cursor on any receipt record, you will see Email and Communication log Icons & Status of payment.
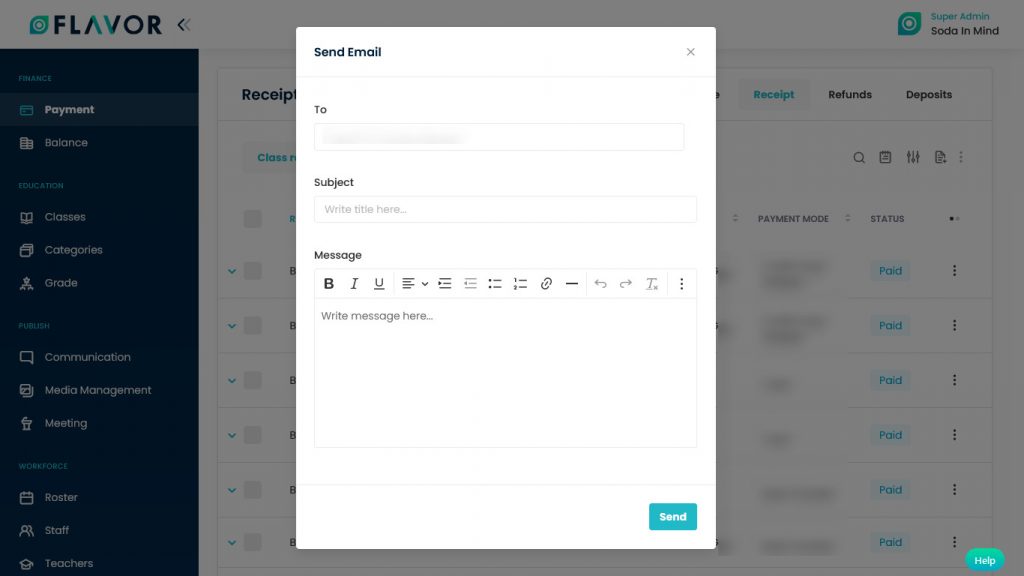
![]()
- To send an Email to the student or his parent click on the Email icon.
- A popup named Send Email will be open.
- Registered email id will automatically be shown in the To field.
- Write subject in the Subject field.
- Write your message in the Message box.
- Then click on the Send button.
Note: These Extra Actions are only applicable for Class Receipt & Custom Recept.
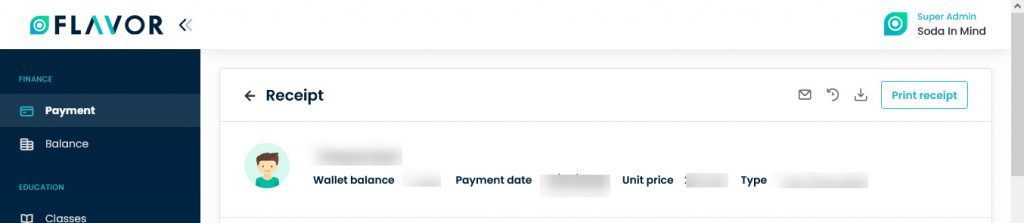
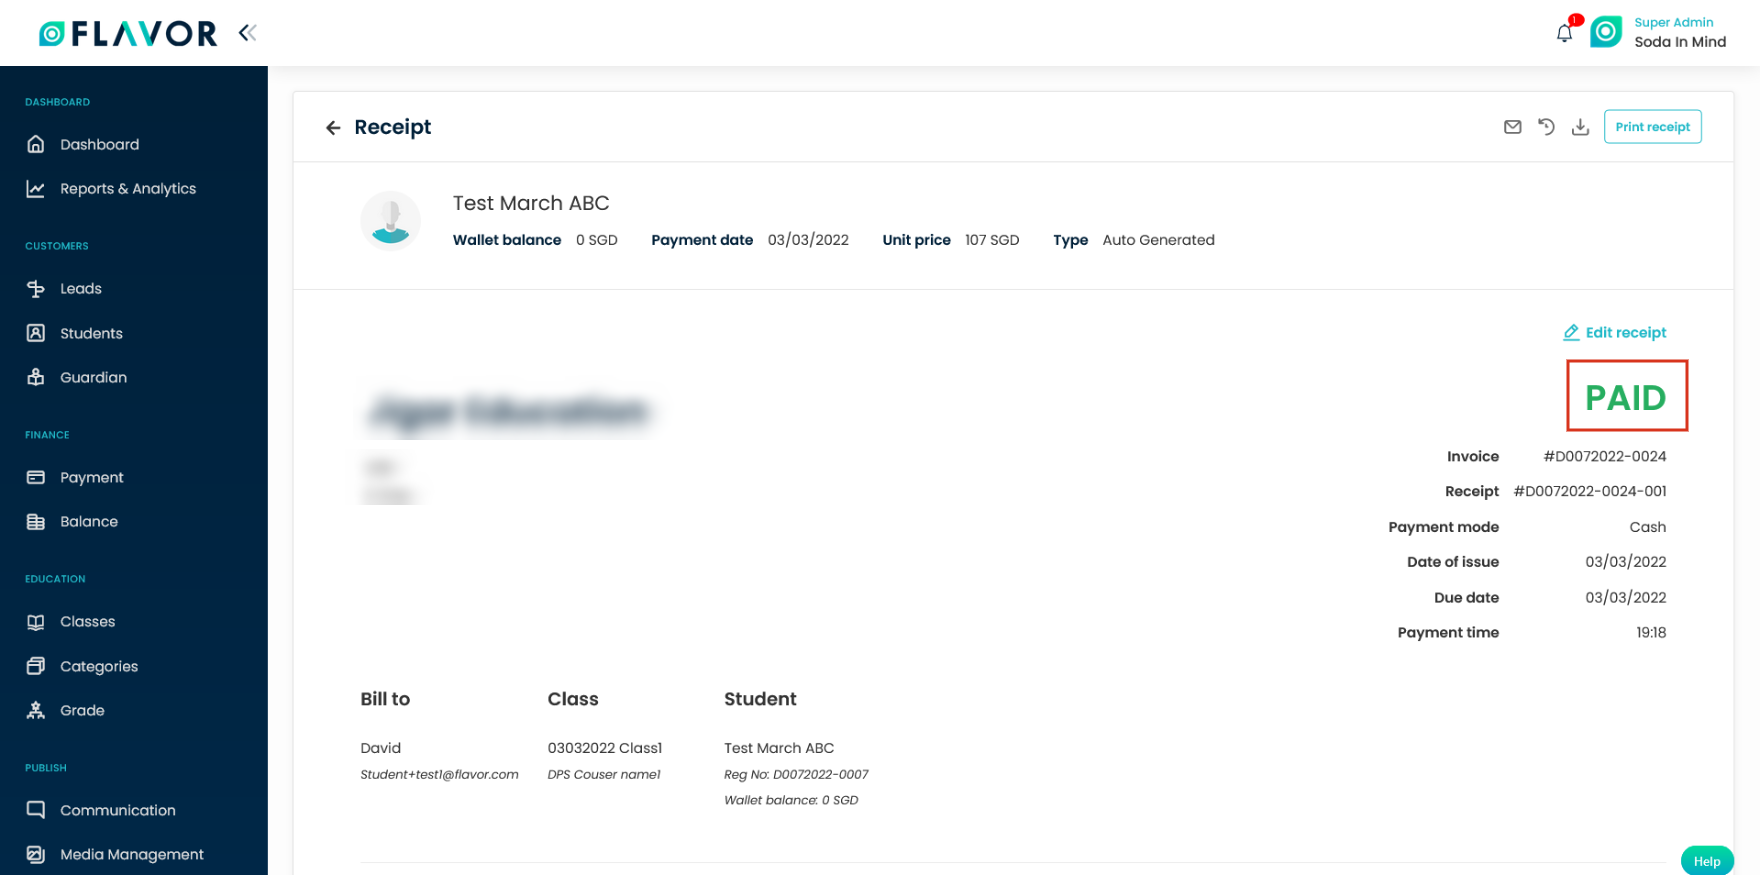
Receipt Details
Class Receipt, Custom Receipt & Custom Receipt Imported Profile Details
To check the detail of any receipt click on any receipt record. After clicking you will be redirected to the Receipt View page.
- In the top right corner of the Receipt View page, you can see Email, Communication Log and Download icons.
![]()
- By clicking on the Email Icon you can send an email to the recipient.
- A popup named Send Email will be open.
- Registered email id will automatically be shown in the To field.
- Subject: Write subject in the Subject field.
- Message: Write your message in the Message box.
- Then click on the Send button.
- Include PDF version of Invoice: Enable this option by marking the check box to include a PDF version of the invoice in the email.
![]()
Download Receipt
- To download the receipt click on the Download Receipt Icon.
- A File Download window will be open on your screen.
- Click on Save File.
- Your file will be saved in PDF format.
Print Receipt
- To print the receipt click on the Print Receipt button.
- After clicking a print window will be open.
- Click on the Print button, your receipt will be printed.
Student Info Section
Navigate to the Student’s Name. Here, you can see a student’s profile picture, Name, Wallet Balance, Payment Date, Unit Price & Type of receipt.
Edit Receipt
- Click on the Edit Receipt link.
- A popup named Edit Receipt will be open.
- A popup named Edit Receipt will be open for Class Receipt & Custom Edit Receipt popup will be open for Custom Receipt and a popup named Edit Custom Receipt Imported will be open for Custom Receipt Imported.
- Payment Method: If you want to change the payment method then select it from the dropdown.
- Xero Account: Select the Xero account from the dropdown.
- Payment Reference Number: Enter the payment reference number.
- Payee Name: Enter the payee name.
- Payment Date: Enter the date of payment.
- Remarks: Add additional information if you want.
- Click on the Save button.

Status of Receipt
- After the Edit Receipt link, you can see the status of the receipt which tells whether it is paid or unpaid.
- In this section, you can see, Class, Student, Invoice and Receipt number, Payment mode, date of issue, due date and Payment time.
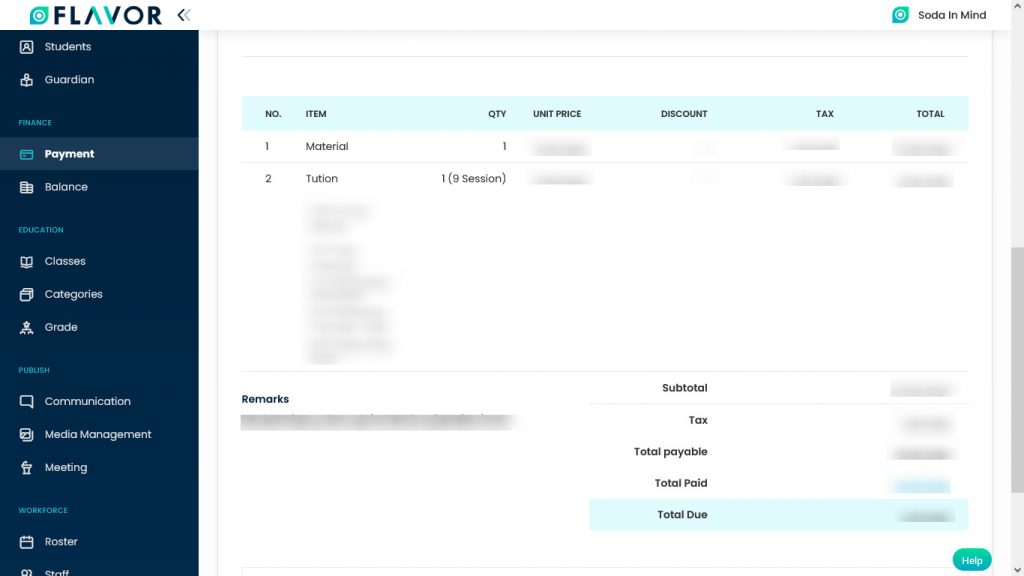
Receipt Items
- Navigate to the Receipt items.
- Here, you can see the items, their quantity, price, discount & tax.
- Subtotal of all items.
Lesson Details
- Navigate to the Lesson Details Accordion.
- Click on the accordion, it will be expanded.
- From here, you can check the courses the student has applied for, the number of sessions and the date on which the classes are conducted.

Refunds Tab
The Refunds Tab consists of two tabs. Class Refunds Tab and Custom Refunds Tab.
Class Refunds Tab & Custom Refunds Tab Options
Search
Search is working the same for all tabs. By clicking on the Search Icon, you can search the specific receipt by entering the receipt number, invoice number or student name.
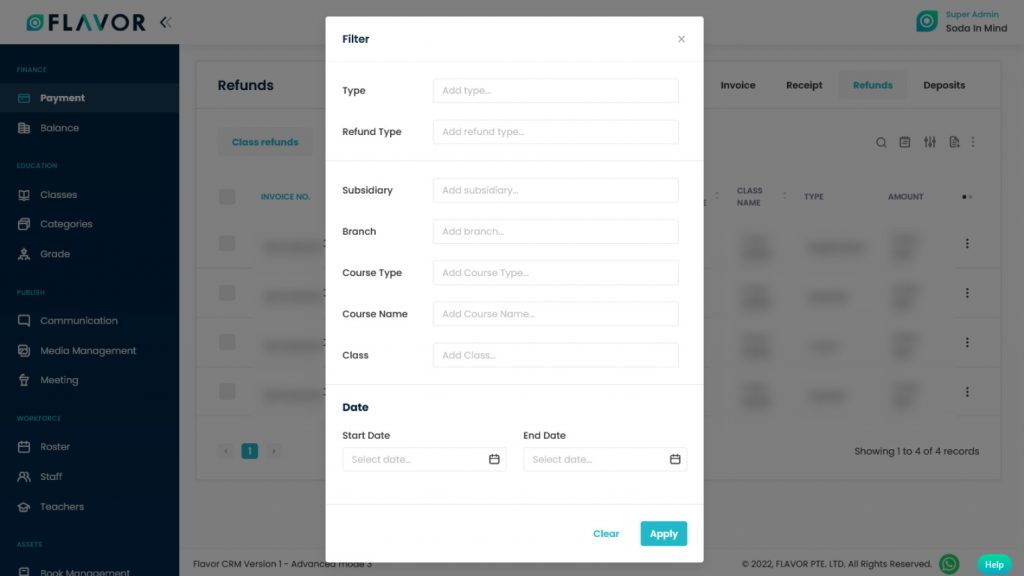
Filter
You can filter refunds based on specific parameters. Click on Filter Icon, after clicking, a popup form named “Filter” will appear on your screen. Enter Status, Subsidiary & Branch, Course Name, Class, etc. Click on Apply button to save parameters.
Note: The Filter is only working in the Class & Custom Refunds tabs.
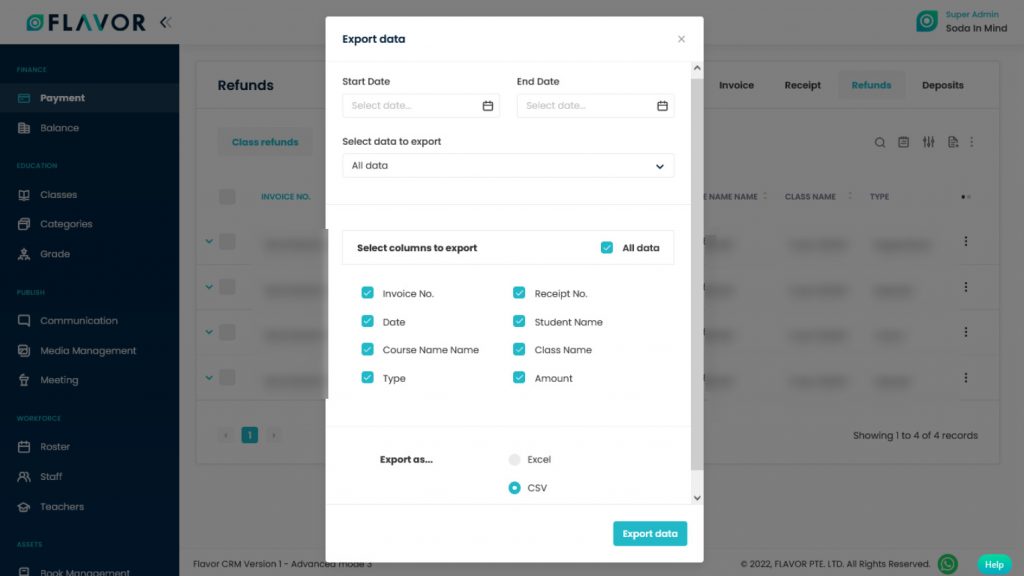
Export Data
- To export all data, you need to click on the Export Icon.
- After clicking on the Export icon, a pop-up form named Export Data will appear on your screen.
- Select Data to Export: Here, you can export the data of all rows or 15 rows by simply clicking on the dropdown.
- Select Column to Export: Select columns to which you need your data to export. Like if you want all the data of all refunds, then simply click on “ALL DATA” and you will get the data of refunds in your exported file.
- Export as: Then select a format in which you want to export your data i.e (EXCEL or CSV).
After selecting the relevant records/data, click on the Export Data button to export all the data in the selected file (Excel/CSV).
Note: Export Data is working the same for all tabs.
Bulk Action Button
- The Bulk Action Button is disabled by default. When you mark on the check box, which appears at the starting of each row, this action button will be enabled.
- You can select/deselect rows by marking the checkbox.
- After selecting any record go to the action button, click on the button a small popup will appear with cancel refund option.
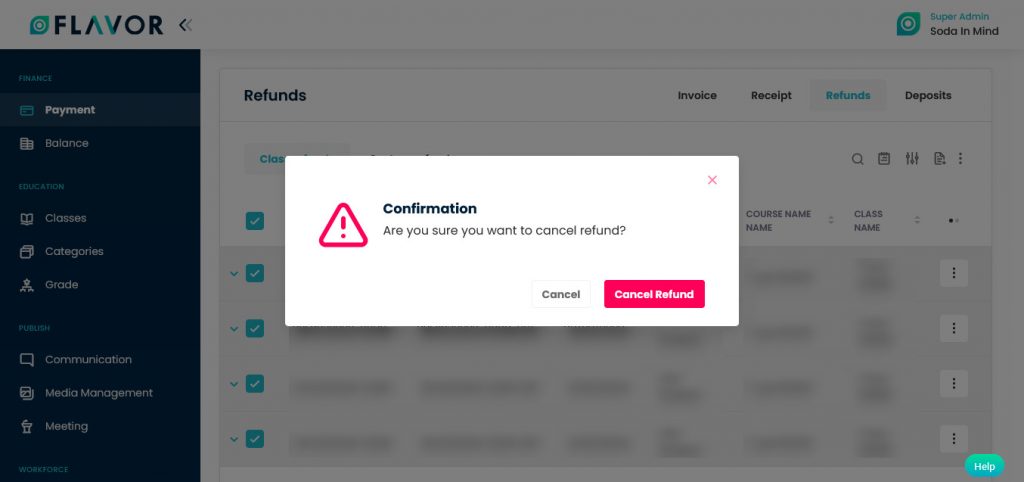
Cancel Refund
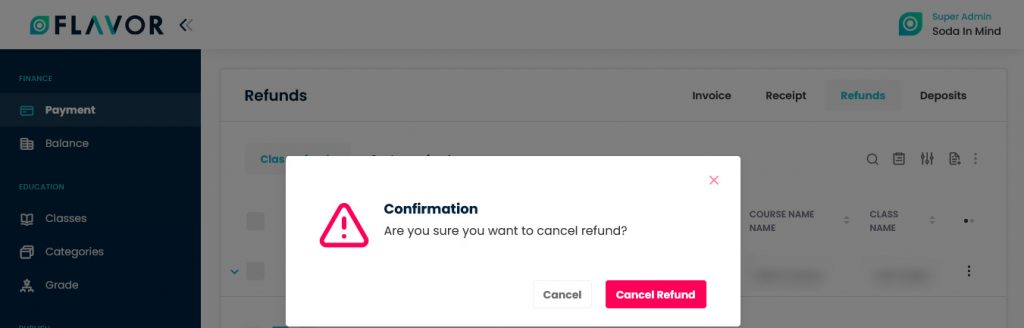
- To cancel all refunds click on the Cancel Refund option.
- A confirmation popup will be open.
- Click on the Cancel Refund button.
Note: This Cancel Refund option of the Bulk Action button is applicable for all Refunds tabs.
Refunds Tab Records
Column Sorting
All receipts will be shown in Tabular Format. You can sort the data by clicking on Column Sorting Arrows in the Table’s Header.
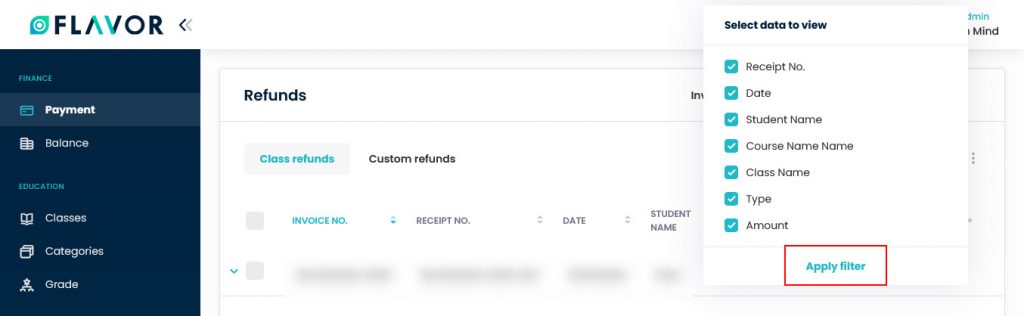
Column Visibility
You can sort columns by clicking on the Ellipsis Icon, you will get the pop-up form named Select Data to View. Mark the columns you want to see and unmark the ones you don’t want to see in the table. After this procedure click on the Apply Filter button.
Expand Records
At the starting of all records, there is an Expand Button (Down Arrow), after clicking on this button a record will be expanded. From here will get the information of any invoice. You can collapse the record by clicking on the same button.

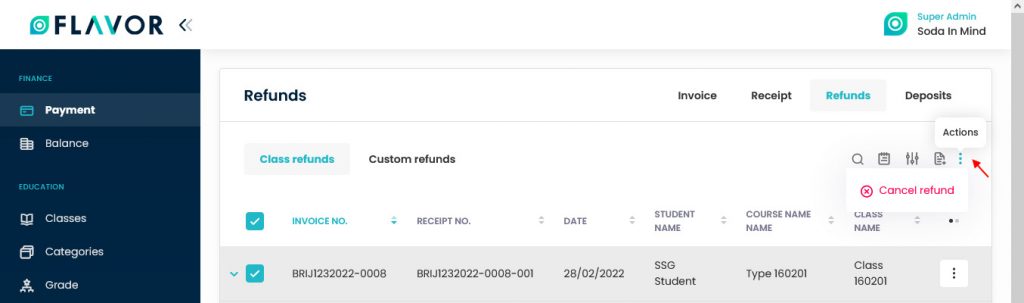
Action Button
Click on Action Button (Vertical Ellipsis), a popup box will appear on your screen with various options.
Cancel Refund
- To cancel the refund click on the Cancel Refund option.
- A confirmation popup will be open.
- Click on the Cancel Refund button to cancel the receipt.
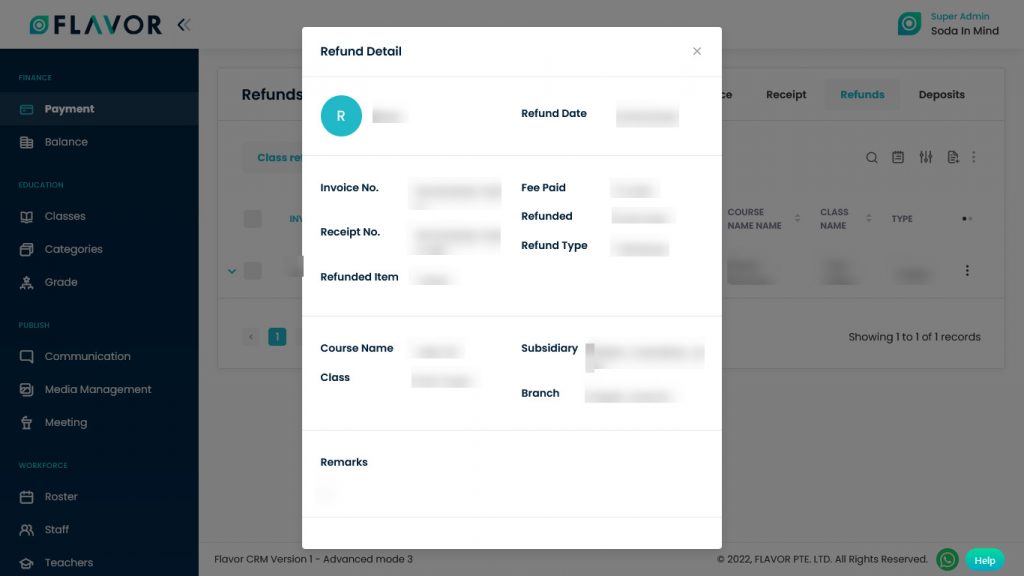
Class & Custom Refunds Detail
- To check the detail of any refund click on any refund record.
- After clicking a popup named Refund Details will be open.
- Here, you can see the details of the refund. Refund date, invoice no. receipt no. the fee paid, refunded & refunded item details.
- Course name, subsidiary, branch & class details.
Deposits Tab
Search
Search By clicking on the Search Icon, you can search the specific invoice by entering the student name or student no.
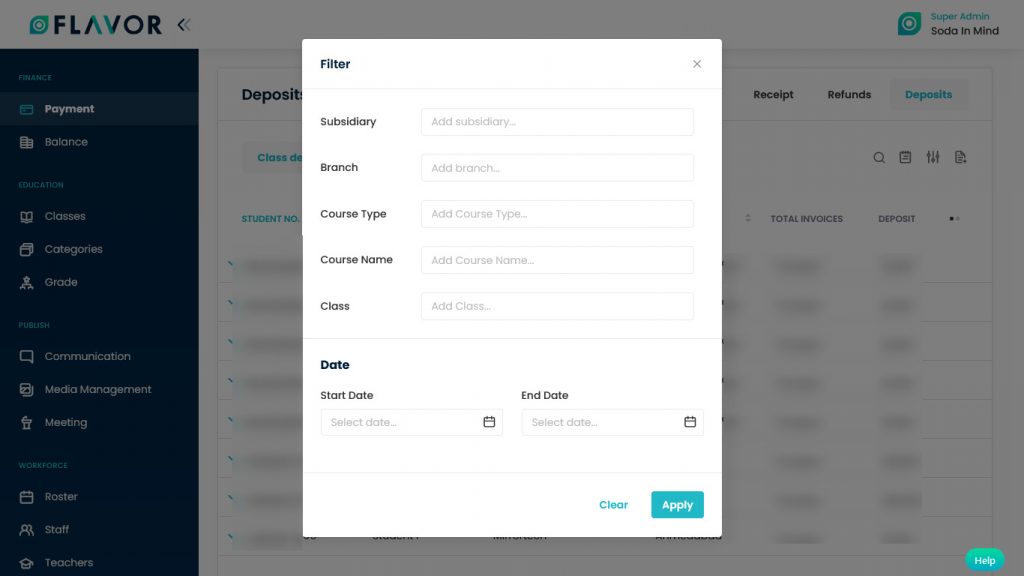
Filter
You can filter the deposits based on specific parameters. Click on Filter Icon, after clicking, a popup form named “Filter” will appear on your screen. Enter Status, Subsidiary & Branch, Course Name, Class, etc. Click on Apply button to save parameters.
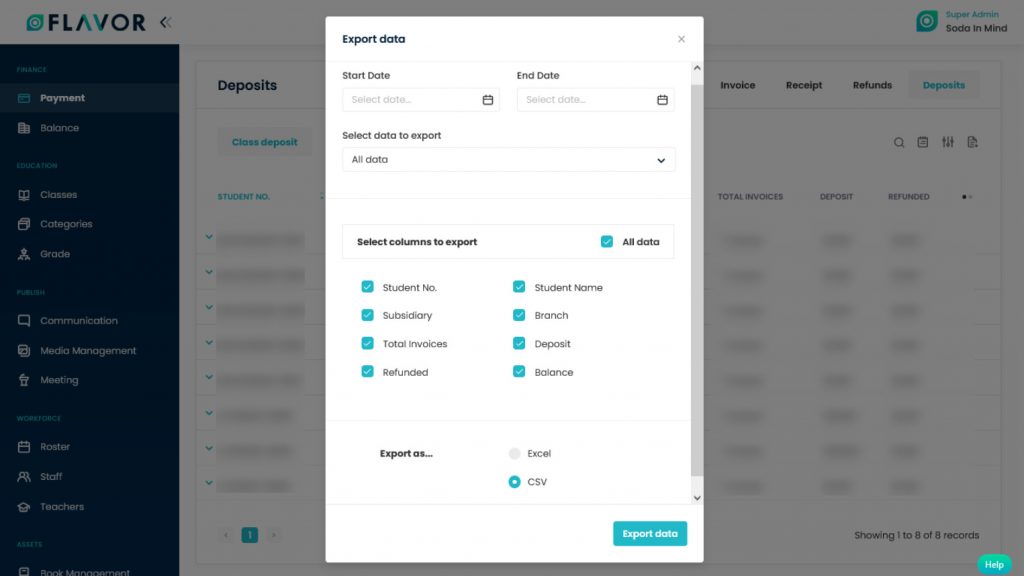
Export
- To export all data, you need to click on the Export Icon.
- After clicking on the Export icon, a pop-up form will appear on your screen.
- Start Date and End Date: Select the time period in the start date and end date column for which time period’s data you need.
- Select Data to Export: Here, you can export the data of all rows or 15 rows by simply clicking on the dropdown.
- Select Column to Export: Select columns to which you need your data to export. Like if you want all the data of all deposits, then simply click on “ALL DATA” and you will get the data of deposits in your exported file.
- Export as: Then select a format in which you want to export your data i.e (EXCEL or CSV).
After selecting the relevant records/data, click on the Export Data button to export all the data in the selected file (Excel/CSV).
Deposits Records
Column Sorting
All Class Deposits will be shown in Tabular Format. You can sort the data by clicking on Column Sorting Arrows in the Table’s Header.
Column Visibility
You can sort columns by clicking on the Ellipsis Icon, you will get the pop-up form named Select Data to View. Mark the columns you want to see and unmark the ones you don’t want to see in the table. After this procedure click on the Apply Filter button.

Expand Records
At the starting of all records, there is an Expand Button (Down Arrow), after clicking on this button a record will be expanded. From here will get the information of any deposit. You can collapse the record by clicking on the same button.
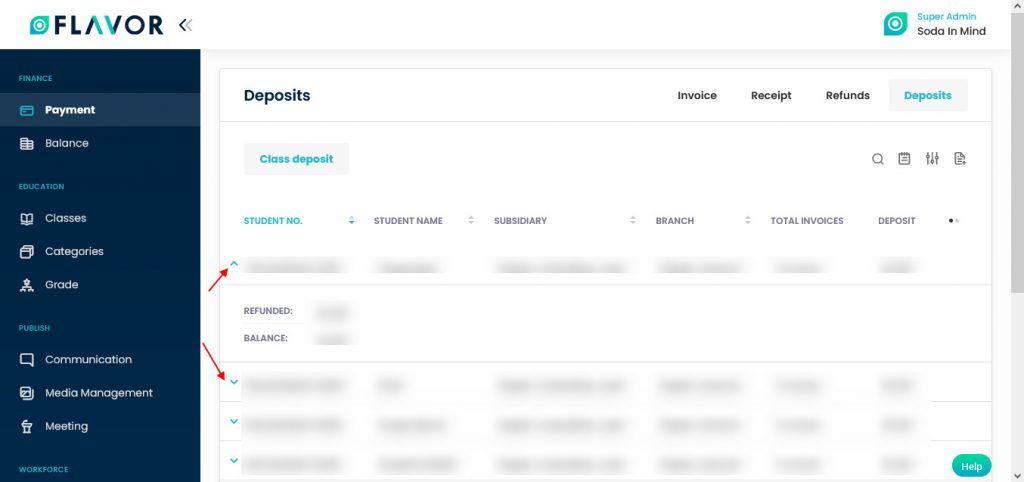
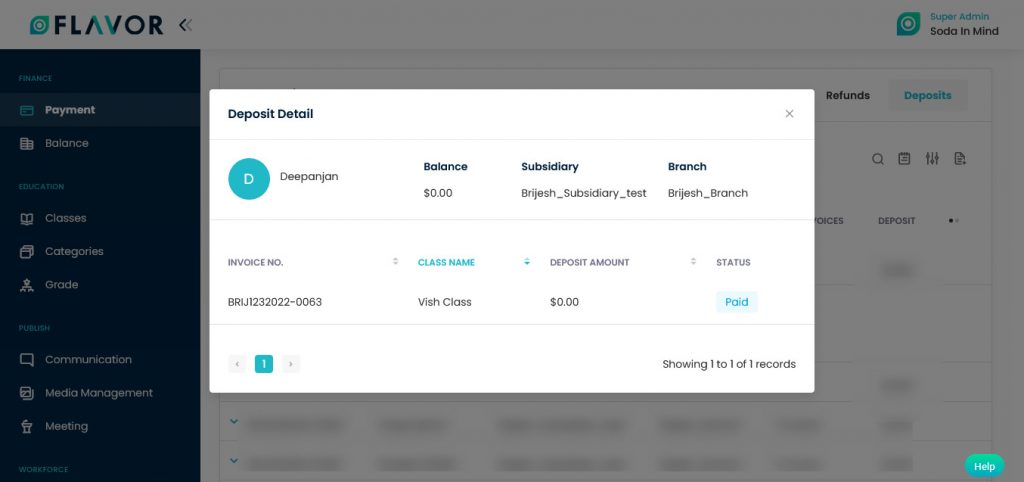
Deposits Details
- To check the detail of any deposit click on any deposit record. After clicking a popup named Deposit Details will be open.
- From here, you can get the details of the deposit and its status.
Settings
- By clicking on the Settings Icon, you can see two options. Invoice Configuration & invoice Presets.
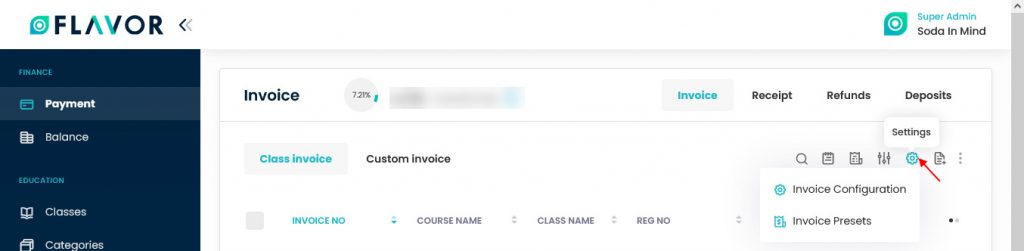
- By clicking on the Invoice configuration, you will be redirected to Invoice Configuration Page.
- Here, you can see two tabs, Subsidiary Configuration & General Configuration.

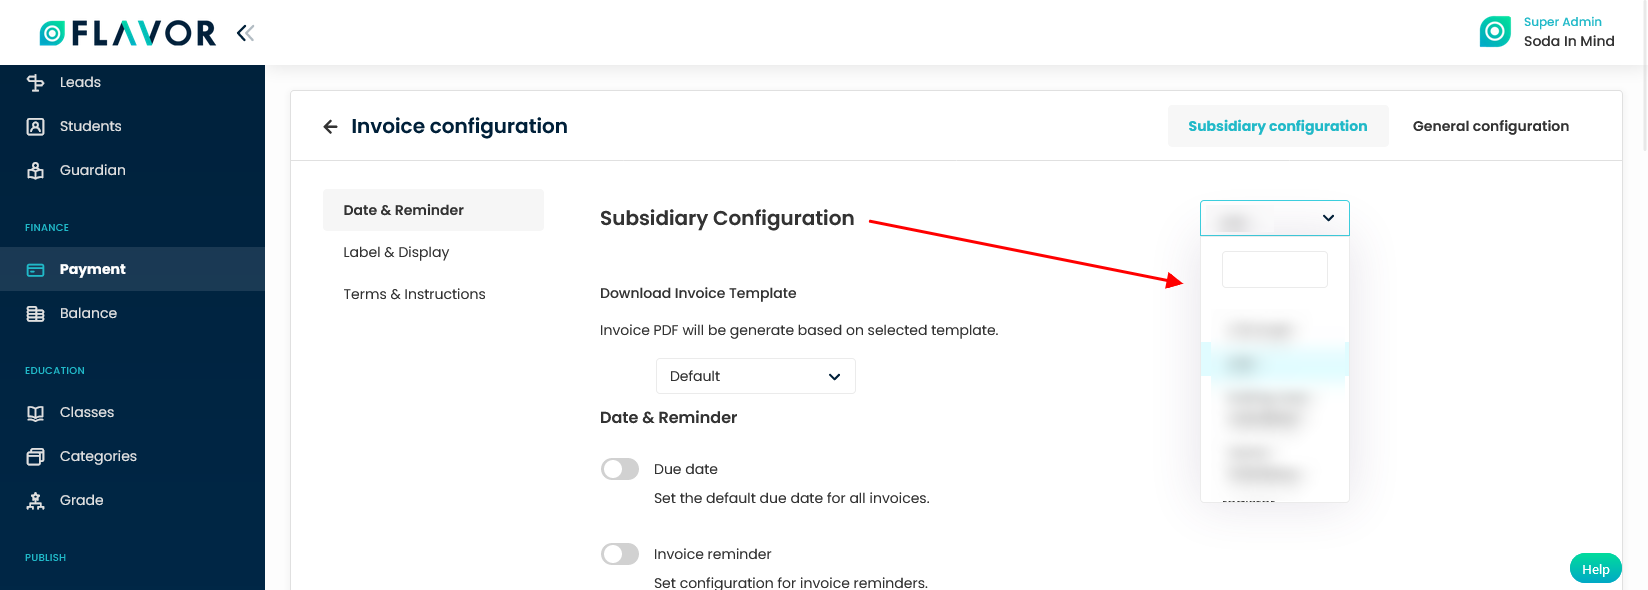
Subsidiary Configuration
In the Subsidiary Configuration tab, you will see Date & Reminder, Label & Display and Terms & Instructions options.
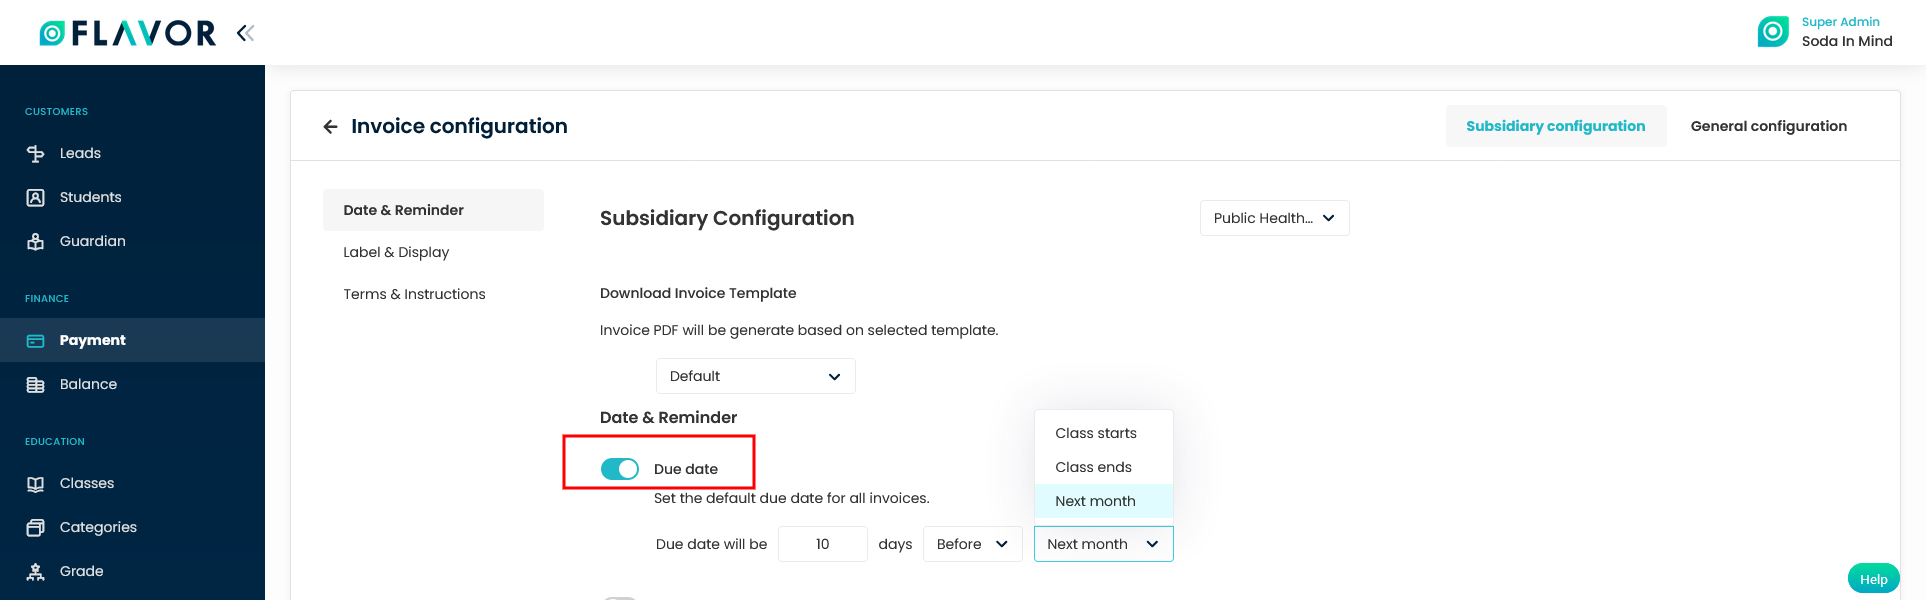
Date & Reminder
- First, you need to select the subsidiary from the dropdown.
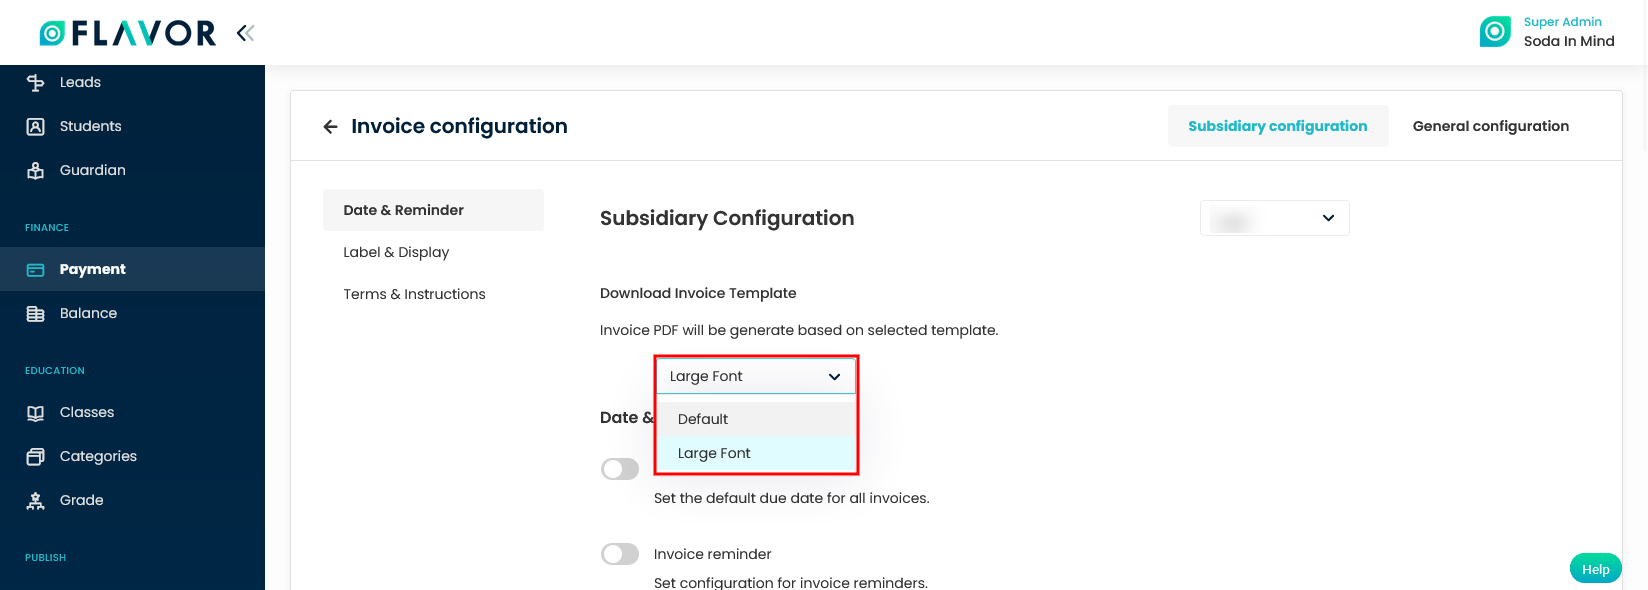
- Download Invoice Template: You can generate the invoice based on the template selected. You can find two options viz. Default and Large Font. The only different is the Large Font template will have larger font. The effect will be visible when you email or download the invoice.
- Navigate to the Date & Reminder Settings.
- Due Date: Due date is off by default, make it on by switching. Here, you have to set the default due date for all invoices. After switching, Invoice Due Date configuration row will be open. Here, enter the Due date in the Days column, choose whether you want to send the reminder after class starts or before class ends or after/before next month.
- Invoice Reminder: Invoice reminder is off by default, make it on by switching. Here, you can set in how many days a reminder will be sent before the due date.

- Monthly Invoice Reminder: It is off by default, make it on by switching. here, you can set the configuration for invoice reminders.

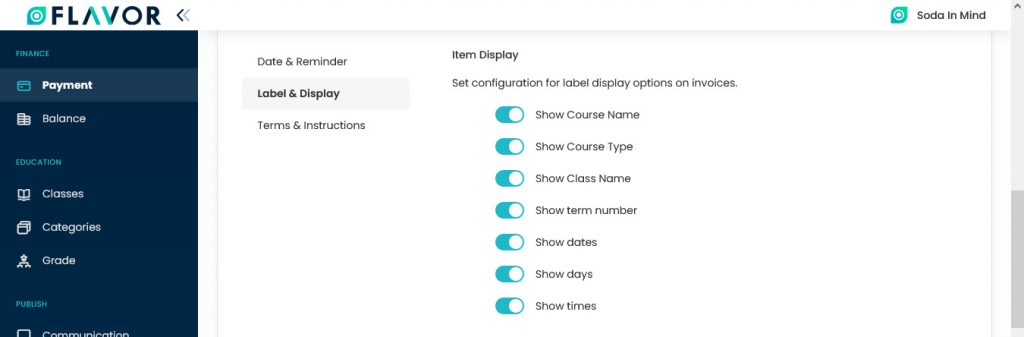
Label & Display
- Navigate to the Label & Display.
- Code Prefix: Here, you can set code prefixes for all invoices.

- Item Display: Navigate to Item Display. From here, you can set the configuration for label display options on invoices. You can enable or disable this field by switching.
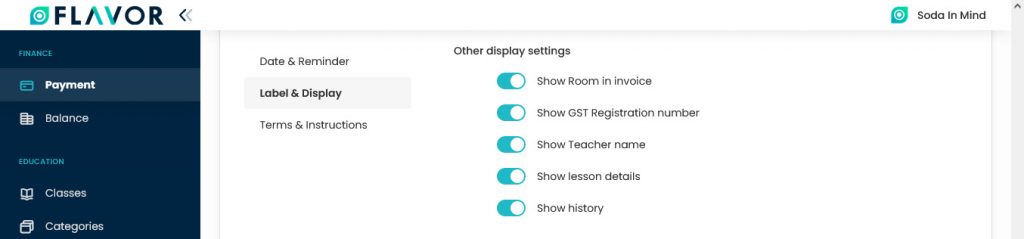
- Other Display Settings: Navigate to the Other Display Settings. From here, you can set the configuration for label display options on invoices. You can enable or disable this field by switching.
Terms & Instructions
- Navigate to the Terms & Instructions.
- From here, you can show or hide terms & instructions on auto-generated invoices.

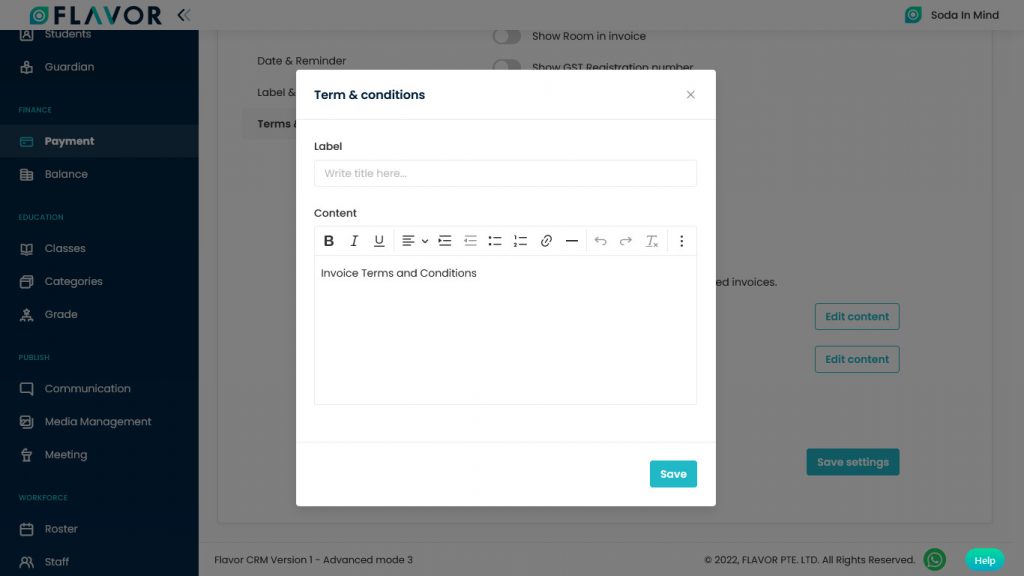
Terms & Conditions:
- If you want to change the terms & conditions click on the Edit Content button.
- A popup named Term & Condition will be open.
- Enter the label & in the Content section, you can write your content and then click on the Save button.
Payment Instructions:
- If you want to change the Payment Instructions click on the Edit Content button.
- A popup named Payment Instructions will be open.
- In the Content section, you can write your content.
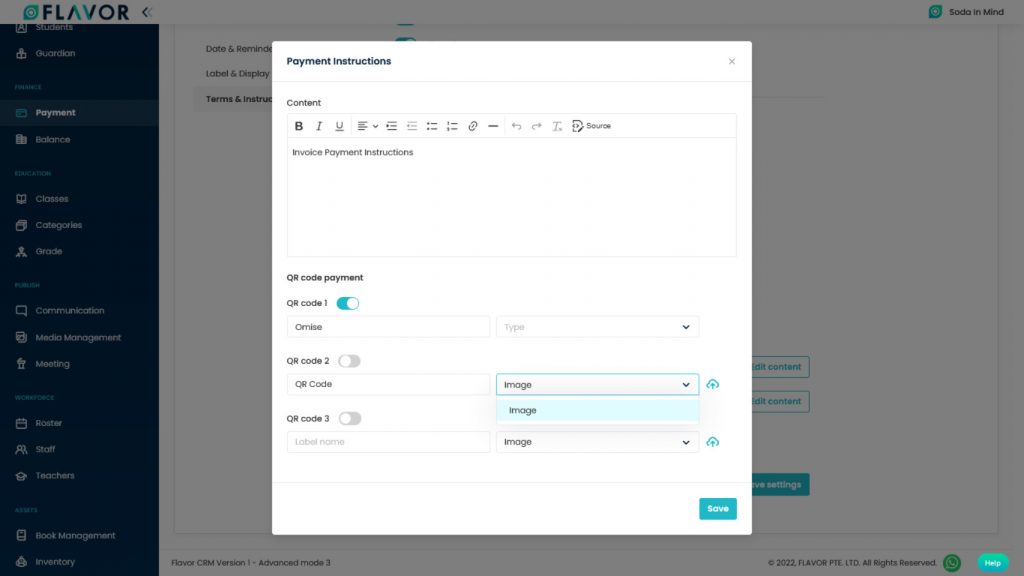
- QR Code Payment: QR code labels are off by default, make them on by switching.
- Image Dropdown: Select the payment method or from the dropdown then click on the Save button.
After changing all settings click on the Save Settings button.
General Configuration Tab
Navigate to the General Configuration tab. Here, you can see the various options.
Label Settings
Navigate to Label Settings. You can enable or disable these fields by switching. These fields will be shown in the Invoice and you can set the label from here.

Tax
- This option is off by default, make it on by switching.
- Set GST Rate: You can set the GST rate from the dropdown. If you want to same GST for all subsidiaries then select For All Subsidiary and if you want to apply GST on specific subsidiaries then select Specific Subsidiary from the dropdown.
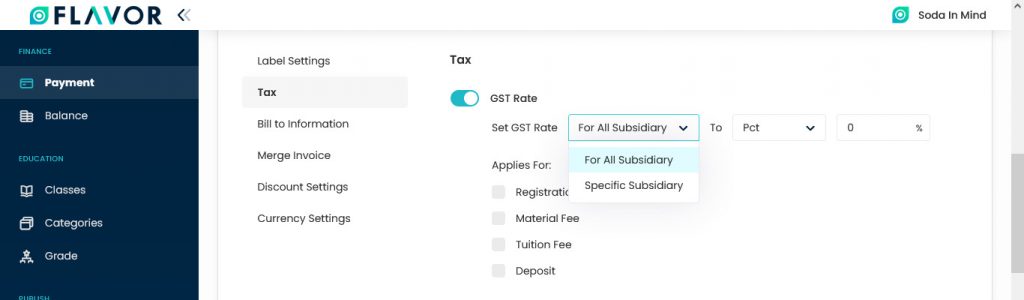
For All Subsidiary
- When you select For All Subsidiary from the drop-down, a list of various options will be open. Mark the ones on which you want to apply GST. GST will be applied to Registration Fee, Material Fee, Tuition Fee, Deposit.
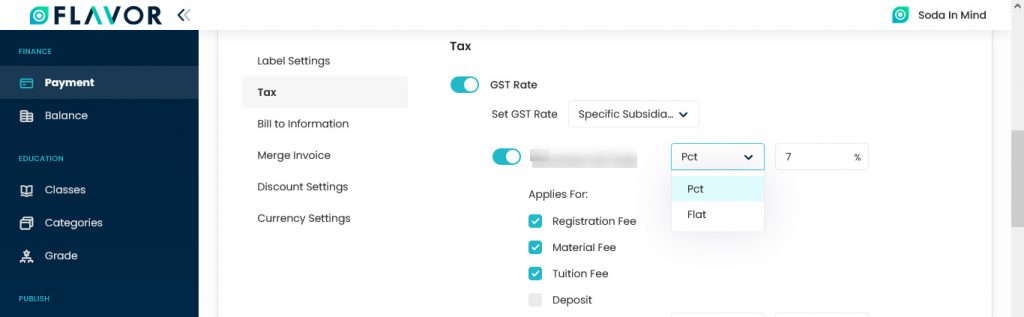
- Select GST Type: From here, you can select a specific GST percentage or a flat amount which will be applied to all subsidiaries.
- If you select Flat Rate, the next column where the rate is set will show the dollar symbol.
Specific Subsidiary
- When you select Specific Subsidiary, the list of all subsidiaries will be open.
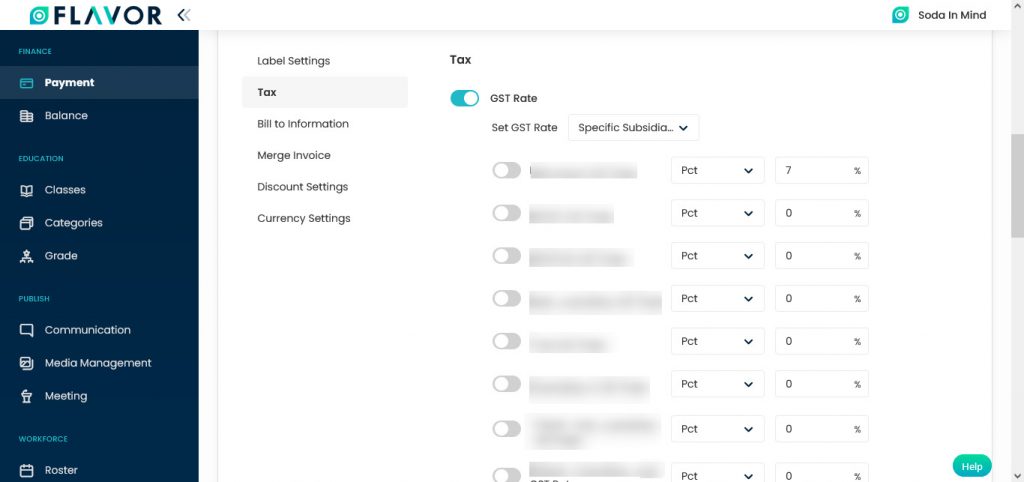
- All are off by default, You can turn on any of these by switching.
- After making them on a new row will be open.
- Here, you can see a list, mark the ones on which you want to apply GST. GST will be applied to Registration Fee, Material Fee, Tuition Fee, Deposit.
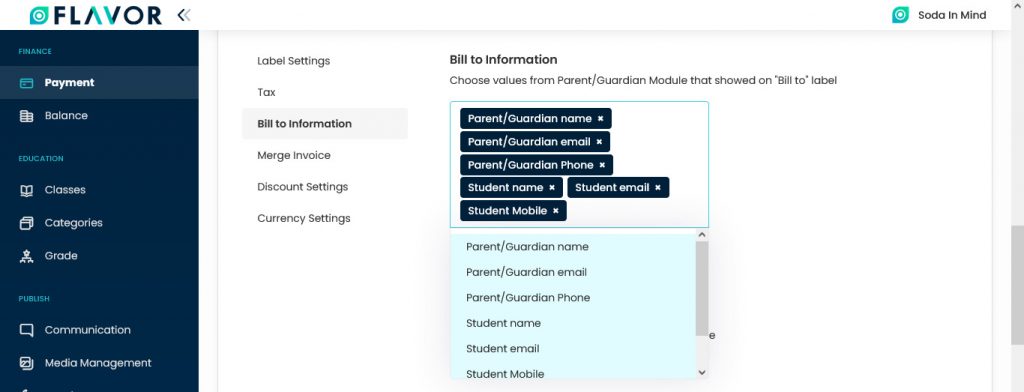
Bill to Information
Navigate to the Bill to information section, In the Bill Information section, you can choose to whom this bill will be sent and on which platform.
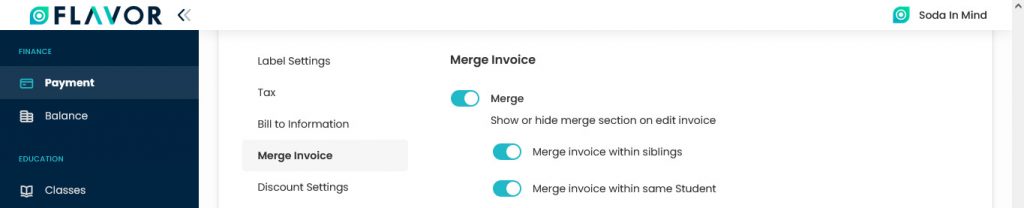
Merge Invoice
- This option is off by default, make it on by switching. This option is used to merge invoices of siblings.
- After making it on, you can see two options.
- Merge invoice within siblings: To merge the invoices of siblings make this option on by switching.
- Merge invoice within same Student: If a student is taking two classes and I want the invoices of both the classes to be merged together. For that, you have to enable this option.
Discount Settings
- This option is off by default, make it on by switching it. Enable this option to apply multiple discounts.
- Multiple discounts will be applied to Classes or on Sessions. Select Class or session from the dropdown.
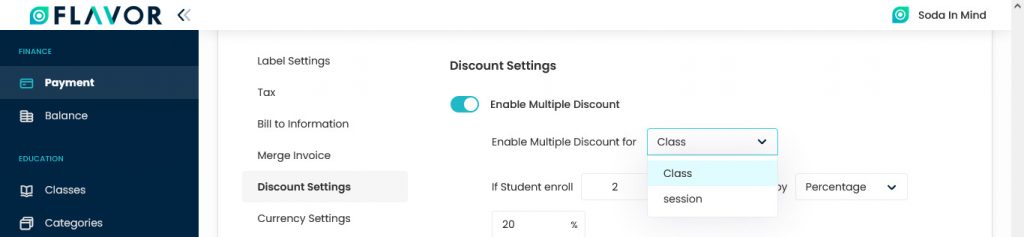
- You can give a discount in Percentage or can give a flat discount. Select it from the dropdown.
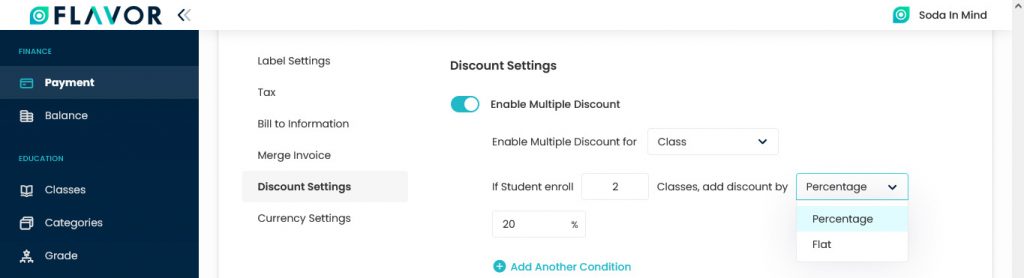
- If a student is enrolled in two classes and you want to give him a discount you can select it from here.

- To add another condition click on the + Add Another Condition button. A new row will be open.
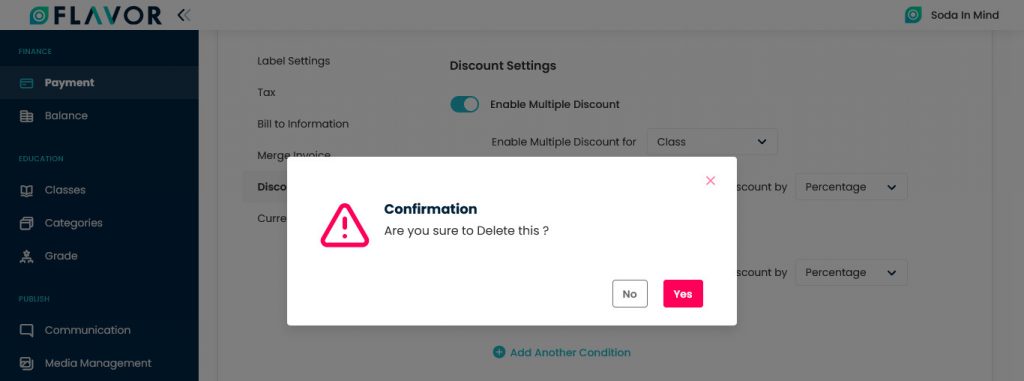
- If you want to delete the condition then click on the Minus – icon.
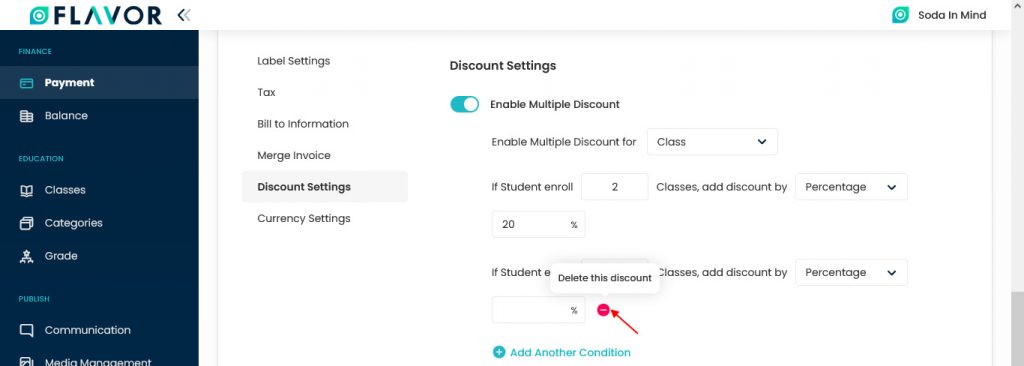
- After clicking a confirmation popup will be Open.
- Click on the Yes button.
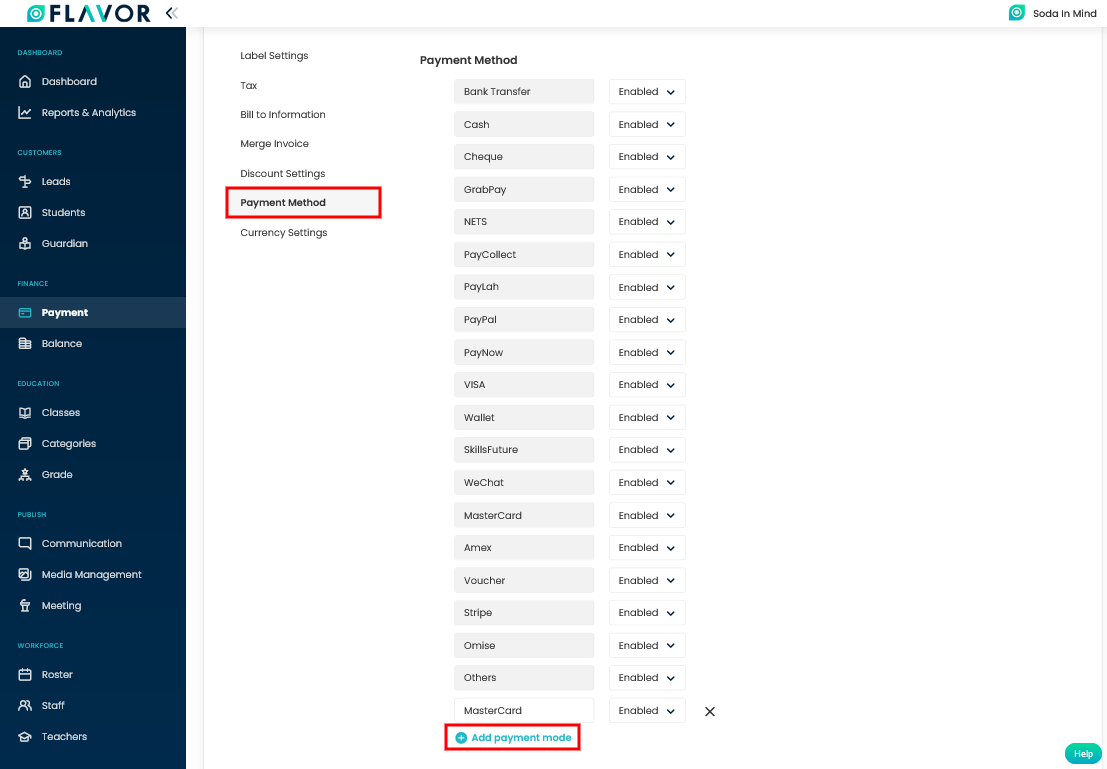
Payment Method
Here, you can see the list of payment modes which can be enabled and disabled. These methods are found in the dropdown of payment method in the Pay Invoice popup form while paying from the invoice. Also, you can add additional payment mode by clicking on + Add payment mode.
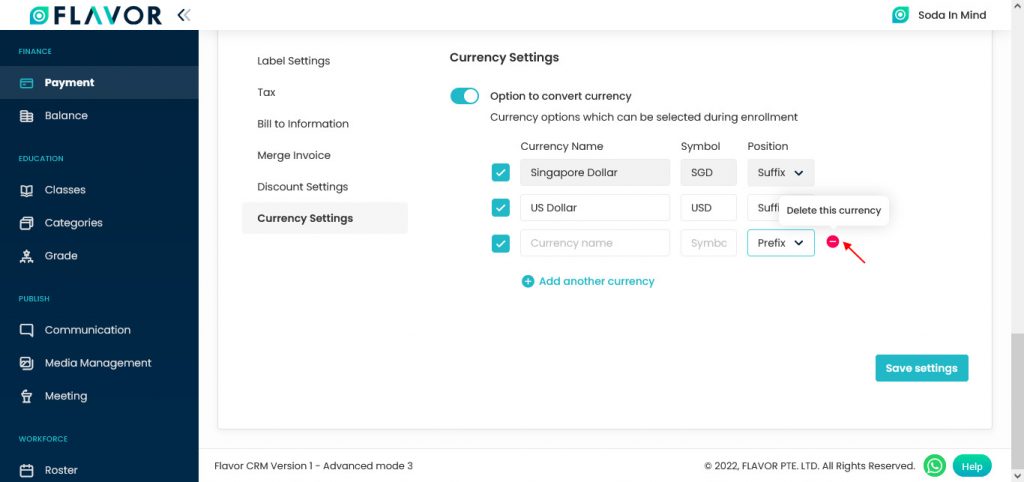
Currency Settings
- Navigate to the Currency Settings.
- This option is off by default, make it on by switching it.
- The currency option can be selected during enrollment.
- Mandatory Option: First Currency field is mandatory, you can’t unmark this field.
- Here, you can see checkboxes before each field. You can enable/disable the fields by marking the checkbox of fields.

- Add Another Currency: To add another currency click on the + Add Another Currency button. A new row will appear.
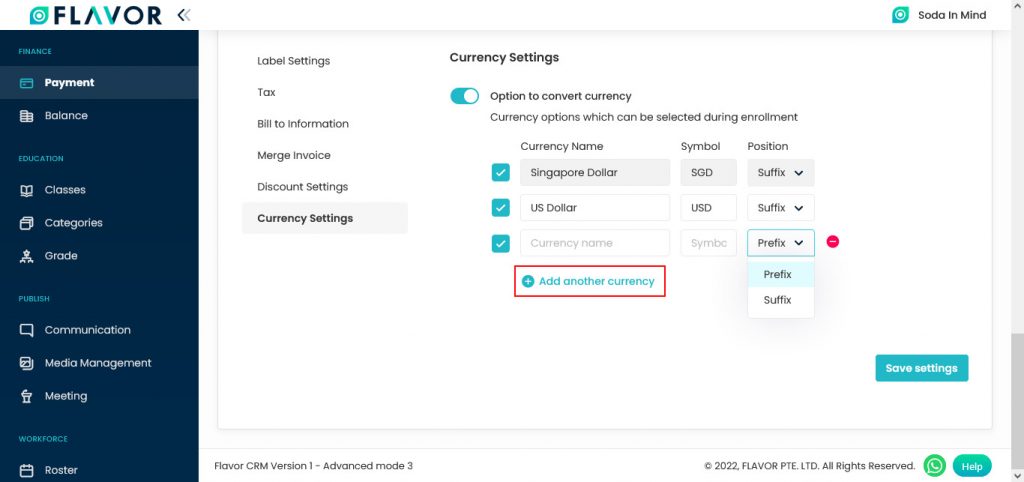
- Here, enter the currency name, symbol and select Prefix & Suffix from the dropdown.
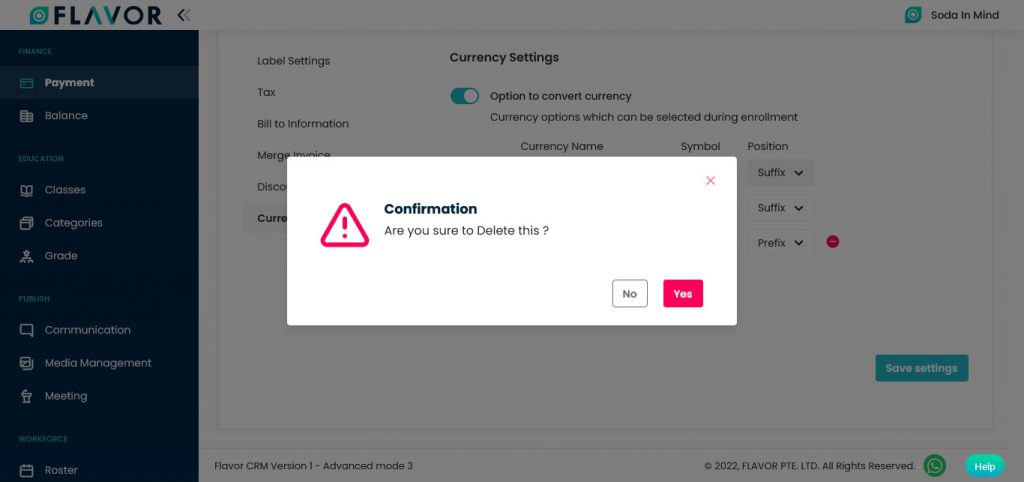
- If you want to remove any row then click on the Minus – icon.
- A confirmation popup will be open.
- Click on the Yes button to delete.
- After changing all the settings click on the Save Settings button.
Invoice presets
Invoice Presets: Invoice preset helps you by adding a predefined item to choose from when making the custom invoice.
Navigate to the Settings icon, click on that a small popup will be open. Select Invoice Presets.
After clicking you will be redirected to the Invoice presets page. Here, you can see five tabs. Type, Item, Discount, Charge and Credit tab.

Type Tab
Search
By clicking on the Search Icon, you can search the specific type of invoice by entering the type name, subsidiary name and branch name.
Bulk Action Button
- The Bulk Action Button is disabled by default. When you mark on the check box, which appears at the starting of each row, this action button will be enabled.
- You can select/deselect rows by marking the checkbox.
- After selecting any record go to the action button, click on the button a small popup will appear. Here, you can see the Delete option.
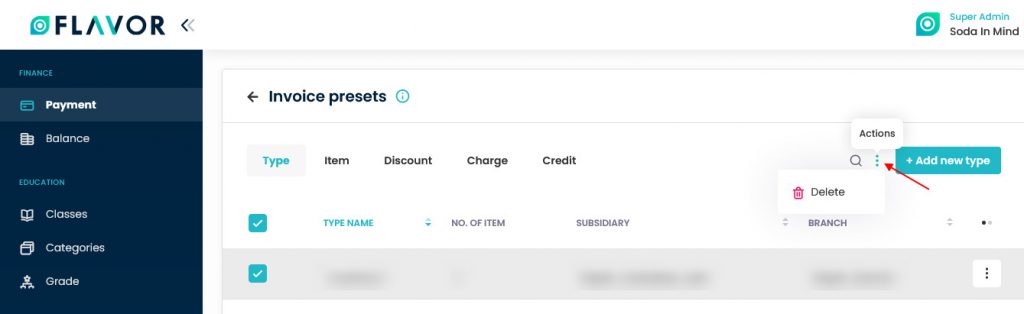
Delete
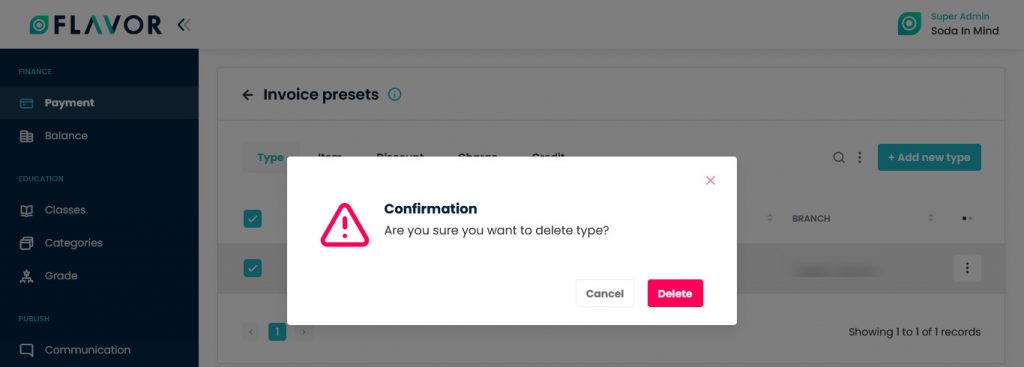
- To delete all Types click on the Delete option.
- A confirmation popup will be open.
- Click on the Delete button to delete.
Add New Type
To add a new Type click on the + Add New Type button. You will be redirected to the Add Type page.
Type
- Type Name: Enter the Name of the type.
- Subsidiary: Select subsidiary from the dropdown.
- Branch: Select the branch from the dropdown.

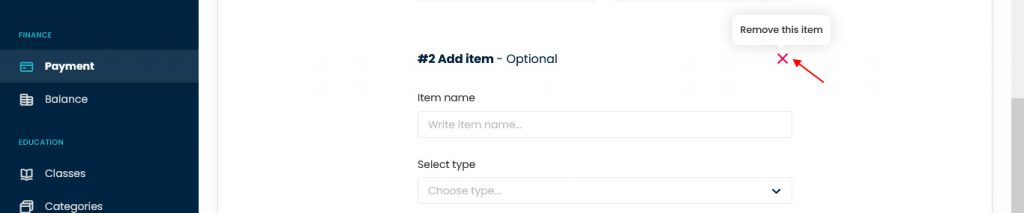
Add Another Item
- To add another item click on the + Add Another Item button.

- Item Name: Enter the item name.
- Item Sale Price: Enter the sale price of the item.
- Discount: This is optional & you can enter how much discount you want to give.
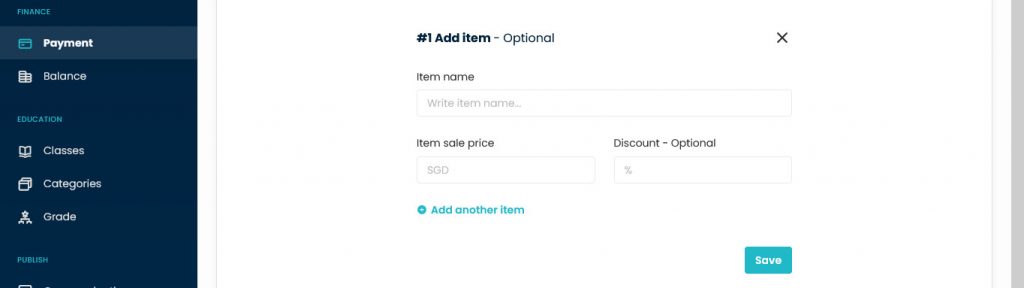
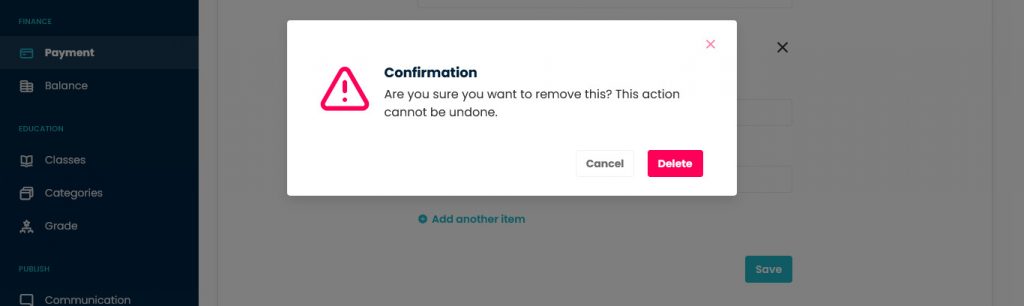
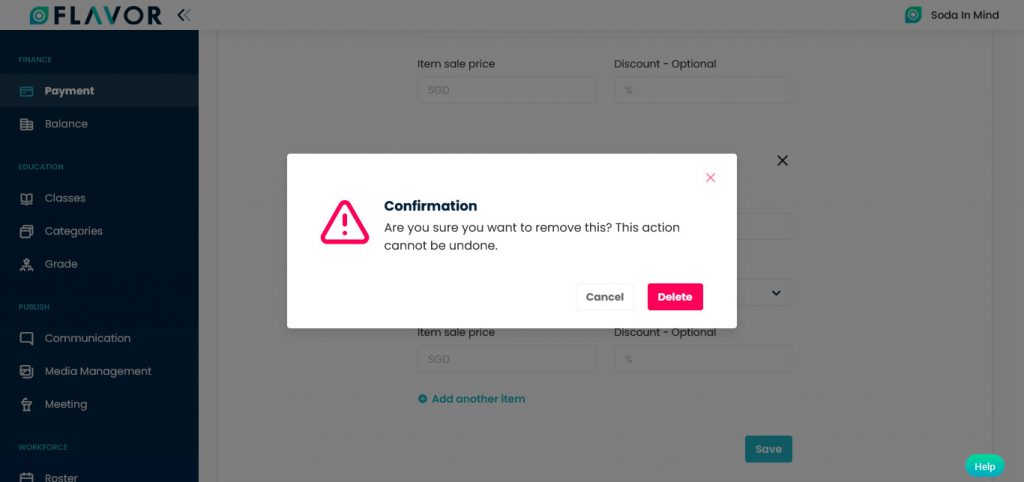
- To remove the Item click on the Cross X icon.

- A confirmation popup will be open.
- Click on the Delete button to delete the item.
- Click on the Save button to save the Type.
Type Records
Column Sorting
All Types will be shown in Tabular Format. You can sort the data by clicking on Column Sorting Arrows in the Table’s Header.
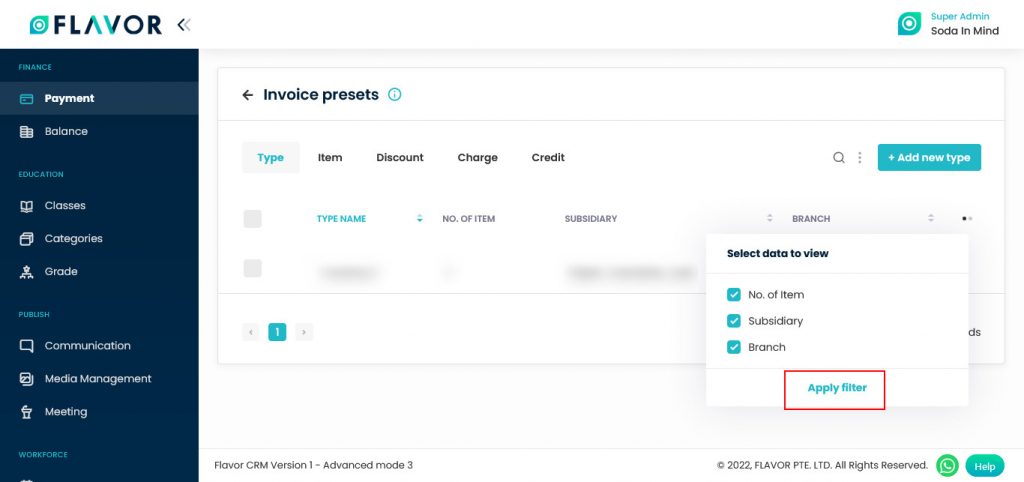
Column Visibility
You can sort columns by clicking on the Ellipsis Icon, you will get the pop-up form named Select Data to View. Mark the columns you want to see and unmark the ones you don’t want to see in the table. After this procedure click on the Apply Filter button.
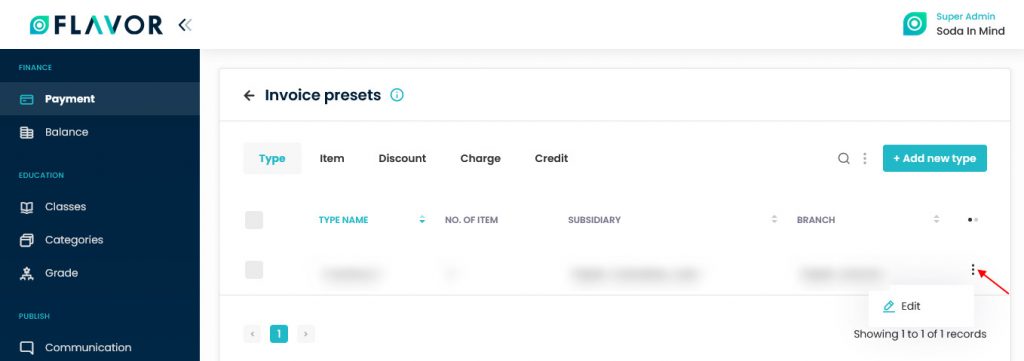
Action Button
Click on Action Button (Vertical Ellipsis), a popup box will appear on your screen with the Edit option.
Edit Option
- Click on the Edit option.
- You will be redirected to the Edit Type page.
- Update the details.
- Click on the Save button.
Item Tab
All tabs data will be affected to custom invoice and add item invoice in the class invoice. Item is a list under the chosen type.

Search
By clicking on the Search Icon, you can search the specific item by entering the item name, discount, price, subsidiary name and branch name.
Bulk Action Button
- The Bulk Action Button is disabled by default. When you mark on the check box, which appears at the starting of each row, this action button will be enabled.
- You can select/deselect rows by marking the checkbox.
- After selecting any record go to the action button, click on the button a small popup will appear. Here, you can see the Delete option.
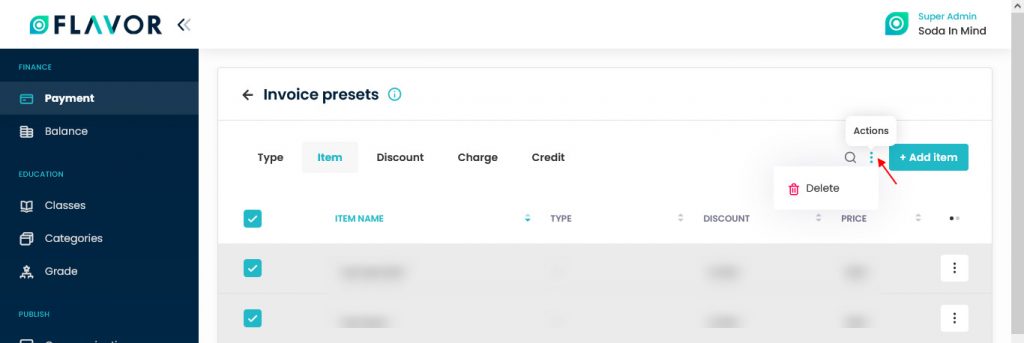
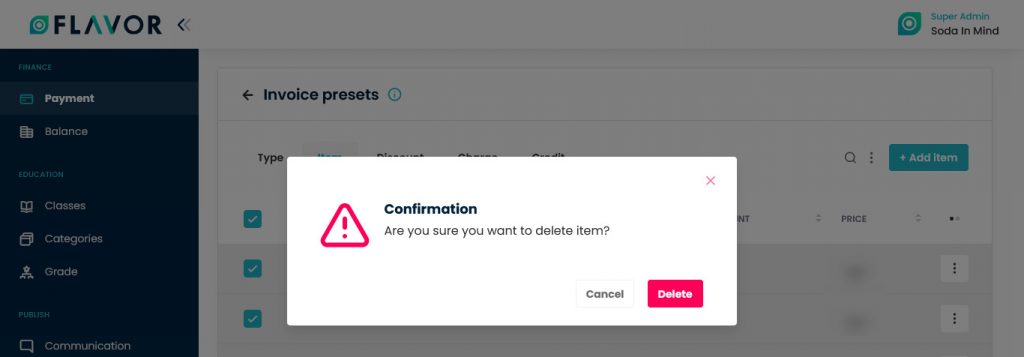
Delete
- To delete all Items click on the Delete option.
- A confirmation popup will be open.
- Click on the Delete button to delete.
Add Item
To add a new Item click on the + Add Item Type button. You will be redirected to the Add Type page.
Item
- Item Name: Enter the item name.
- Select Type: Select the type of Inventory.
- Item Sale Price: Enter the sale price of the item.
- Discount: This is optional & you can enter how much discount you want to give.

- To add another item click on the + Add Another Item button.
- To remove the Item click on the Cross X icon.
- A confirmation popup will be open.
- Click on the Delete button to delete the item.
- Click on the Save button to save the Type.
Item Records
Column Sorting
All Items will be shown in Tabular Format. You can sort the data by clicking on Column Sorting Arrows in the Table’s Header.
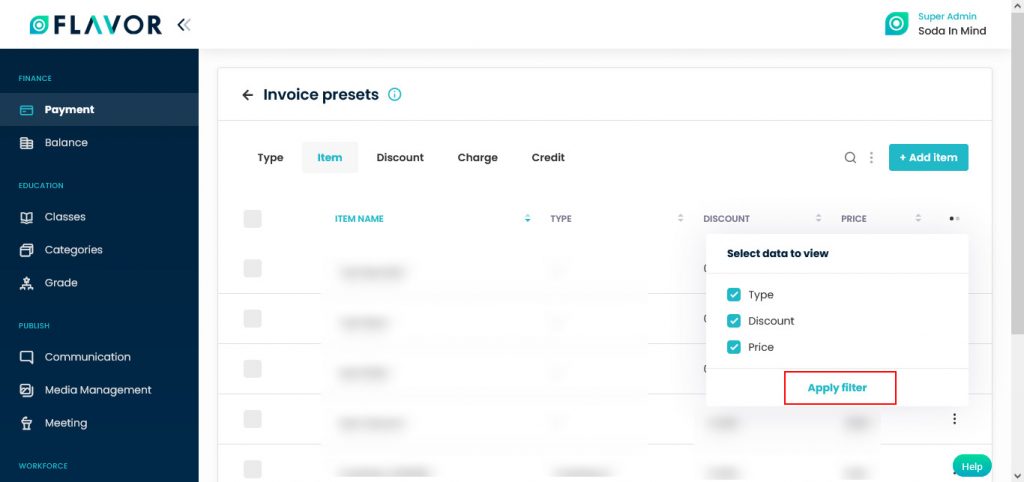
Column Visibility
You can sort columns by clicking on the Ellipsis Icon, you will get the pop-up form named Select Data to View. Mark the columns you want to see and unmark the ones you don’t want to see in the table. After this procedure click on the Apply Filter button.
Action Button
Click on Action Button (Vertical Ellipsis), a popup box will appear on your screen with the Edit & Delete options.
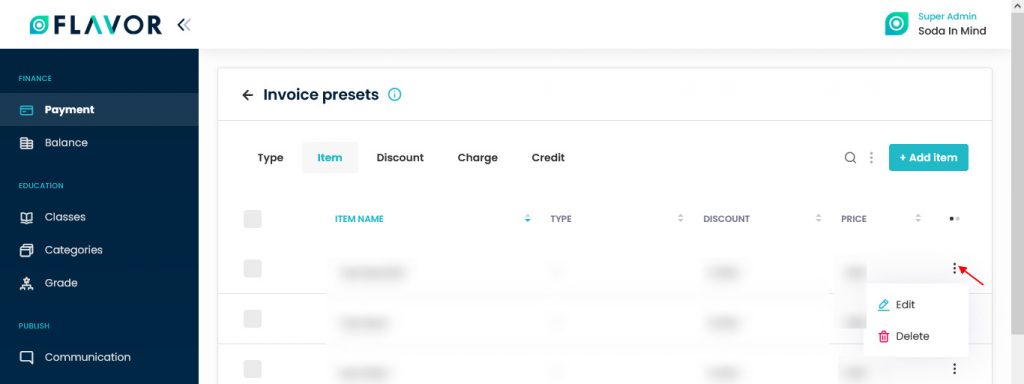
Edit Option
- Click on the Edit option.
- You will be redirected to the Edit Item page.
- Update the details.
- Click on the Save button.
Delete Option
- To delete an Item click on the Delete option.
- A confirmation popup will be open.
- Click on the Delete button to delete.
Discount Tab
Search
By clicking on the Search Icon, you can search the specific discount by entering the discount name, discount type and amount.
Bulk Action Button
- The Bulk Action Button is disabled by default. When you mark on the check box, which appears at the starting of each row, this action button will be enabled.
- You can select/deselect rows by marking the checkbox.
- After selecting any record go to the action button, click on the button a small popup will appear. Here, you can see the Delete option.
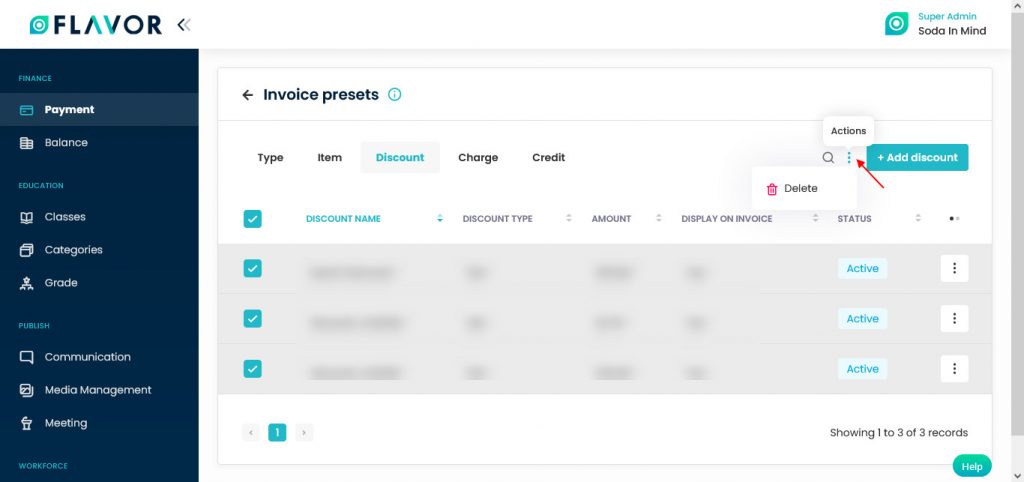
Delete
- To delete all Discounts click on the Delete option.
- A confirmation popup will be open.
- Click on the Delete button to delete.

Add Discount
To add a new Discount click on the + Add Discount Type button. You will be redirected to the Add Discount page.
Add Discount
- Discount Name: Enter the discount name.
- Select Discount Type: Select the type of discount from the dropdown. It could be Flat or in Percentage.
- Amount: Enter the amount.
- Display in Invoice: To display the discount in the invoice make this option enable. This option is off by default.
- Status: Select the status of the discount from the dropdown. It could be Active or Inactive.
- Click on the Save button.

Item Records
Column Sorting
All Discounts will be shown in Tabular Format. You can sort the data by clicking on Column Sorting Arrows in the Table’s Header.
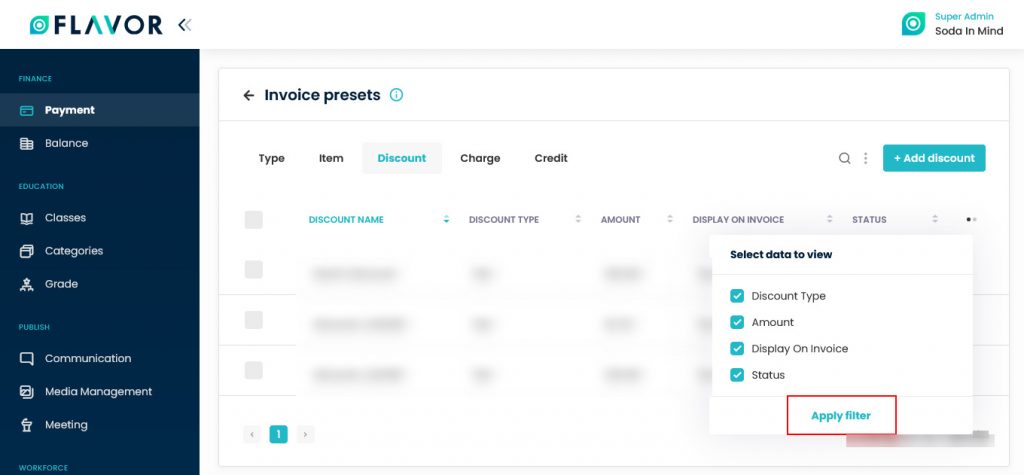
Column Visibility
You can sort columns by clicking on the Ellipsis Icon, you will get the pop-up form named Select Data to View. Mark the columns you want to see and unmark the ones you don’t want to see in the table. After this procedure click on the Apply Filter button.
Action Button
Click on Action Button (Vertical Ellipsis), a popup box will appear on your screen with the Edit & Delete options.
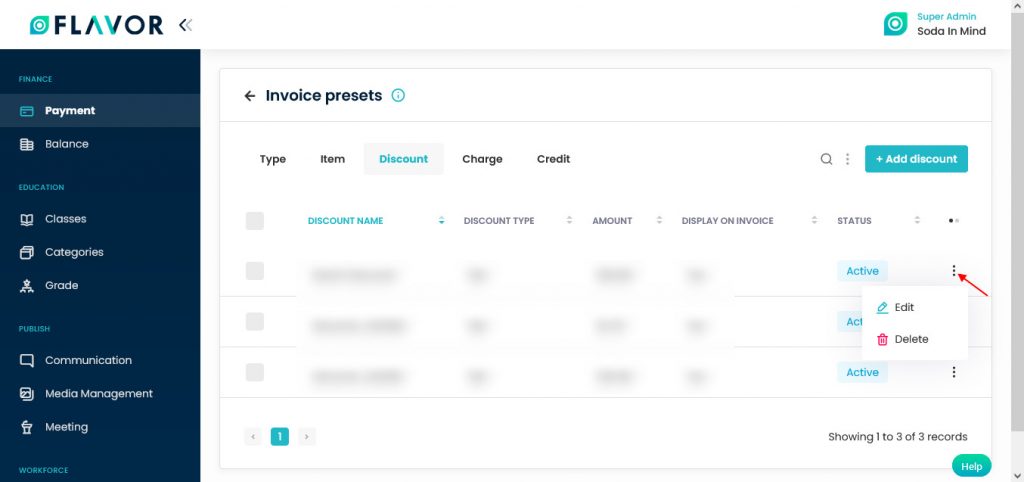
Edit Option
- Click on the Edit option.
- A popup named Edit Discount will be open.
- Update the details.
- Click on the Save button.
Delete Option
- To delete a discount click on the Delete option.
- A confirmation popup will be open.
- Click on the Delete button to delete.
Charge Tab
Search
By clicking on the Search Icon, you can search the specific charge by entering the charge name, charge type and charge.
Bulk Action Button
- The Bulk Action Button is disabled by default. When you mark on the check box, which appears at the starting of each row, this action button will be enabled.
- You can select/deselect rows by marking the checkbox.
- After selecting any record go to the action button, click on the button a small popup will appear. Here, you can see the Delete option.
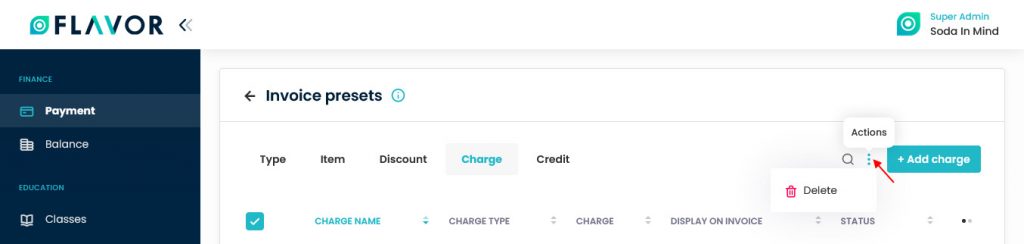
Delete
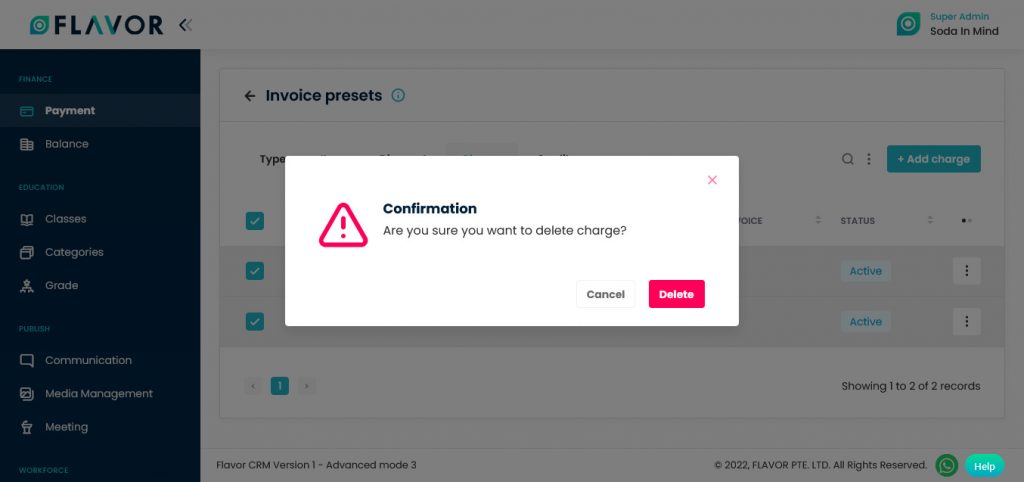
- To delete all charges click on the Delete option.
- A confirmation popup will be open.
- Click on the Delete button to delete.
Add Charge
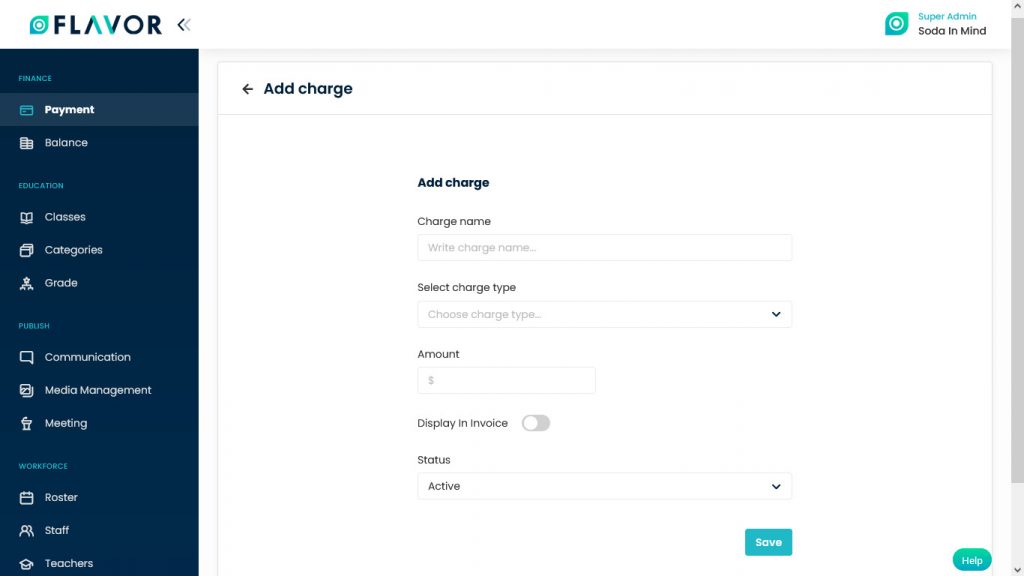
To add a new Charge click on the + Add Charge Type button. You will be redirected to the Add Charge page.
Add Charge
- Charge Name: Enter the charge name.
- Select Charge Type: Select the type of charge from the dropdown. It could be Flat or in Percentage.
- Amount: Enter the amount.
- Display in Invoice: To display the discount in the invoice make this option enable. This option is off by default.
- Status: Select the status of the discount from the dropdown. It could be Active or Inactive.
- Click on the Save button.
Charge Records
Column Sorting
All charges will be shown in Tabular Format. You can sort the data by clicking on Column Sorting Arrows in the Table’s Header.
Column Visibility
You can sort columns by clicking on the Ellipsis Icon, you will get the pop-up form named Select Data to View. Mark the columns you want to see and unmark the ones you don’t want to see in the table. After this procedure click on the Apply Filter button.
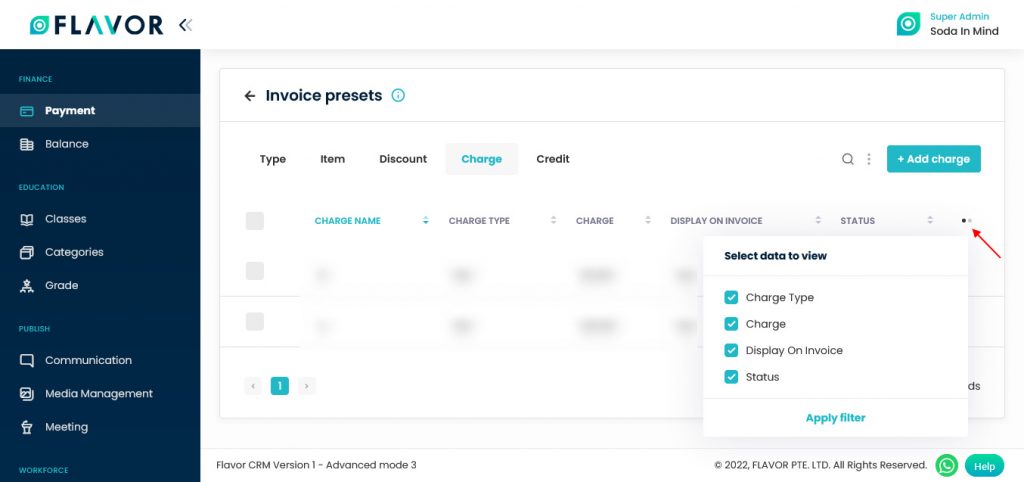
Action Button
Click on Action Button (Vertical Ellipsis), a popup box will appear on your screen with the Edit option.

Edit Option
- Click on the Edit option.
- You will be redirected to the Edit Charge page.
- Update the details.
- Click on the Save button.
Credit Tab
Search
By clicking on the Search Icon, you can search the specific credit by entering the credit name, amount, price, subsidiary name or branch name.
Bulk Action Button
- The Bulk Action Button is disabled by default. When you mark on the check box, which appears at the starting of each row, this action button will be enabled.
- You can select/deselect rows by marking the checkbox.
- After selecting any record go to the action button, click on the button a small popup will appear. Here, you can see the Delete option.

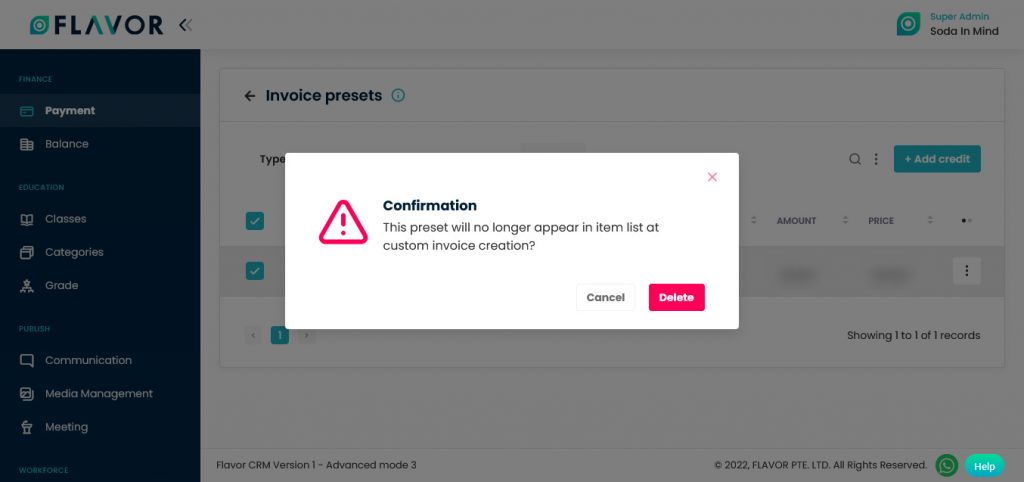
Delete
- To delete all charges click on the Delete option.
- A confirmation popup will be open.
- Click on the Delete button to delete.
Add Credit
To add a new Credit click on the + Add Credit Type button. You will be redirected to the Add Credit page.
Add Credit
- Credit Name: Enter the charge name.
- Subsidiary: Select subsidiary from the dropdown.
- Branch: Select the branch from the dropdown.
- Select Credit Type: Select the type of credit from the dropdown. It could be a wallet or class credit.
- Wallet Amount: Enter the wallet amount.
- Price: Enter the price.
- Click on the Save button.

Charge Records
Column Sorting
All credits will be shown in Tabular Format. You can sort the data by clicking on Column Sorting Arrows in the Table’s Header.
Column Visibility
You can sort columns by clicking on the Ellipsis Icon, you will get the pop-up form named Select Data to View. Mark the columns you want to see and unmark the ones you don’t want to see in the table. After this procedure click on the Apply Filter button.

Action Button
Click on Action Button (Vertical Ellipsis), a popup box will appear on your screen with the Edit & Delete options.

Edit Option
- Click on the Edit option.
- You will be redirected to the Edit Credit page.
- Update the details.
- Click on the Save button.
Delete Option
- To delete credit click on the Delete option.
- A confirmation popup will be open.
- Click on the Delete button to delete.

Need more help? Ask us a question
Please let us know more of your details and our team will reach out to you very shortly.