
User Guide
/
Flavor Scholar App
/
How does Reschedule request work in Flavor:Book and Manage Classes & Flavor Professional app?
Introduction
In this article, you will find how the reschedule request are being made by the students or parent/guardian in Flavor: Book & Manage classes and the teachers Accepts/Rejects in Flavor Professional. Also the settings for templates for notifications to be sent to the Branch Manager, Teacher, Students, and the parents.
Before login to the Flavor: Book & Manage classes App to make a reschedule request, you need to activate the reschedule manual form.
- Go to the Settings from the left side menu of the Flavor System.
- Under the General Tab, scroll down to Mobile Configuration.
- Click on Set up Mobile Configuration.
- On the Mobile Configuration page, scroll down to Reschedule Settings and Enable Reschedule Form.
- Finally, Click on SAVE.
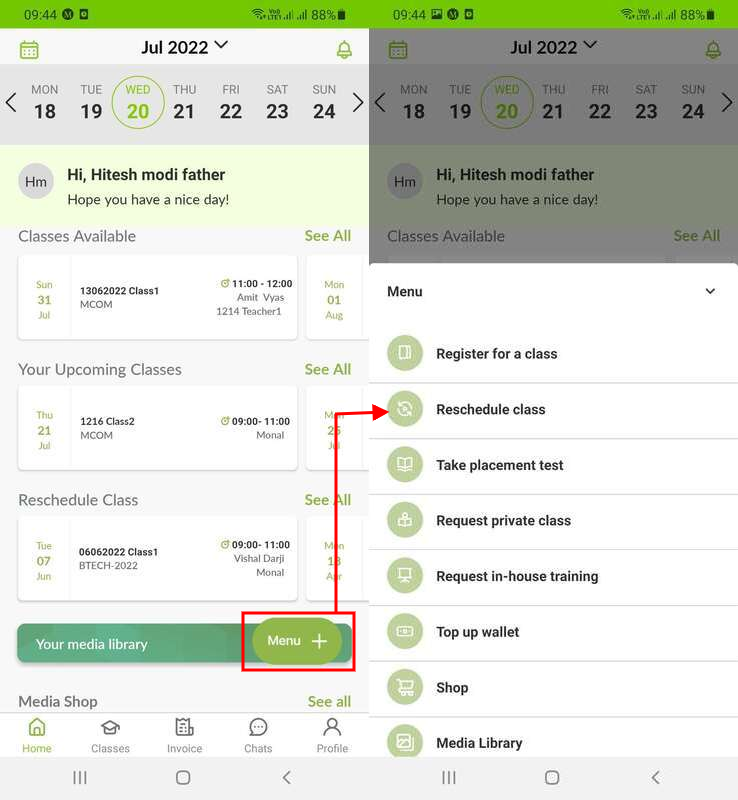
Step 1
- Login to the Flavor: Book & Manage classes App with the credentials.
- It will navigate you to the home screen of the Flavor: Book & Manage classes App.
- Click on the Menu + icon.
- Click on Reschedule class link.
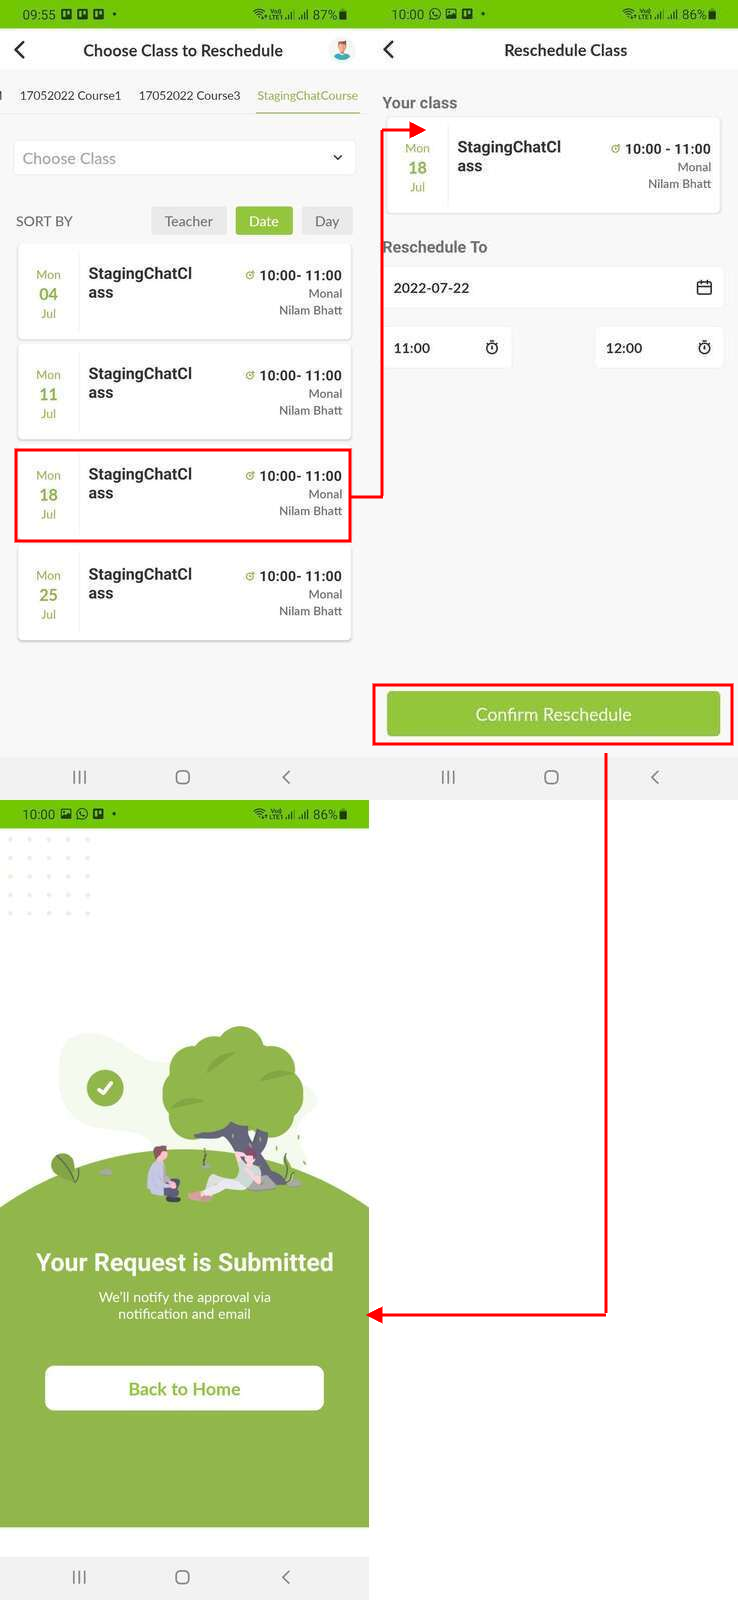
Step 2
- It will navigate you to the Choose Class to Reschedule screen.
- Choose the class and click on it.
- Choose the preferred Date and Time.
- Click on Confirm Reschedule button.
- A confirmation message will appear on the screen.
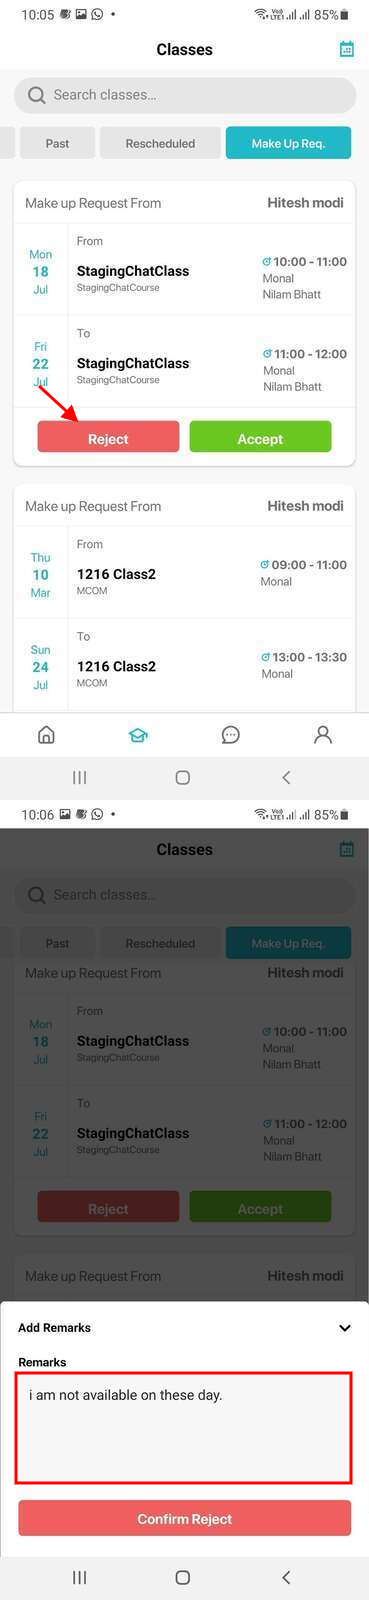
How does the teacher Accepts/Rejects the Reschedule requests in Flavor Professional?
Step 1
- The respective teacher needs to login to the Flavor Professional App.
- Click on the Classes icon and then go to Make Up Req. Tab.
- Here all Reschedule Request will be shown.
- Teachers can accept and reject based on their availability.
- If Teacher Rejects then Remarks/Reasons will be asked so that it can be added to the email/app notification that will be sent to the student.
- If Teacher Accepts then notification to be sent to admin and student. The admin must create schedule and add the student to the schedule.
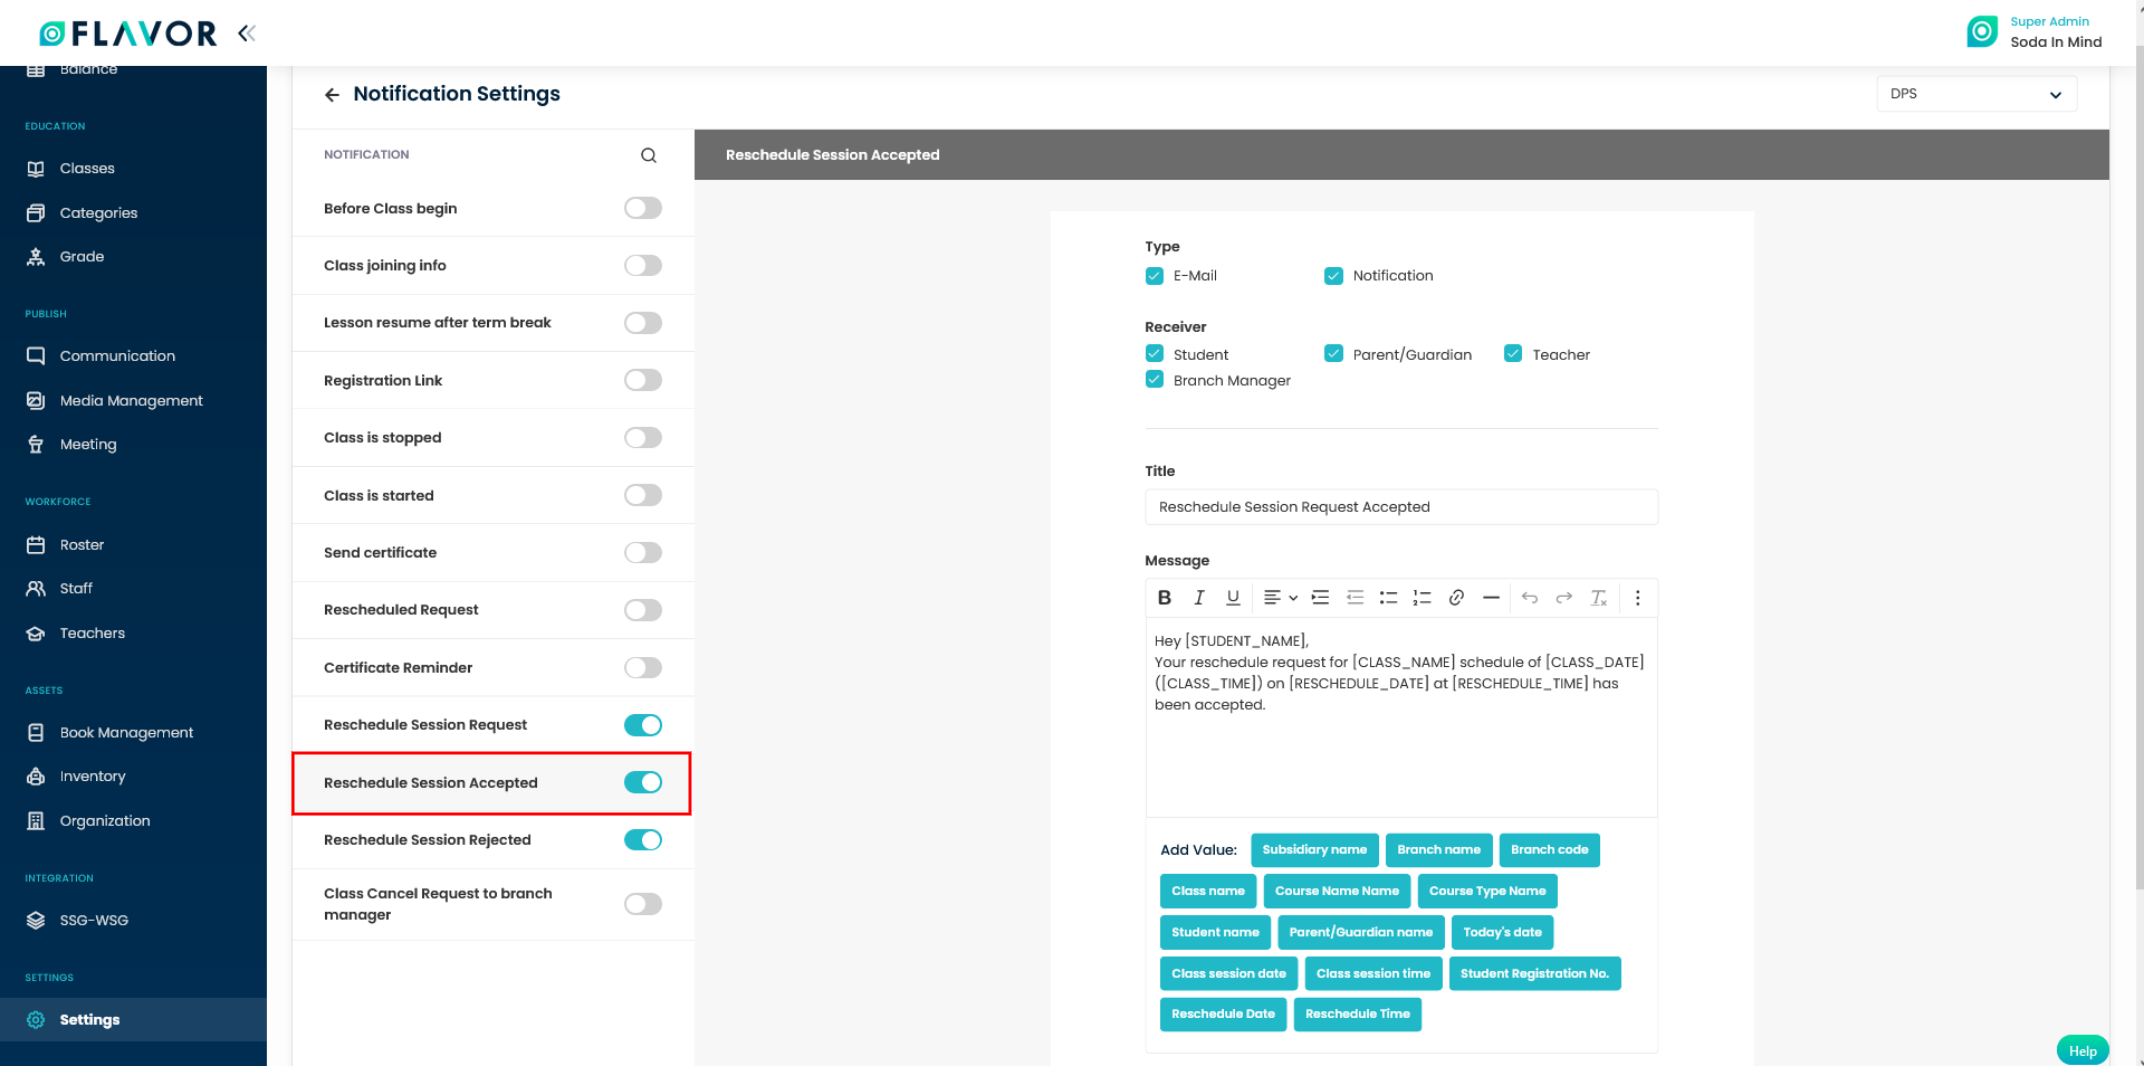
How to set a template for the Reschedule Accepted Notification?
Step 1
- On the Notification Settings page, scroll down and click and enable the Reschedule Session Accepted switch.
- Select the Type and Receiver.
- Set the Title and compose the Message Template using Add value.
- Click on the Save Notification button.
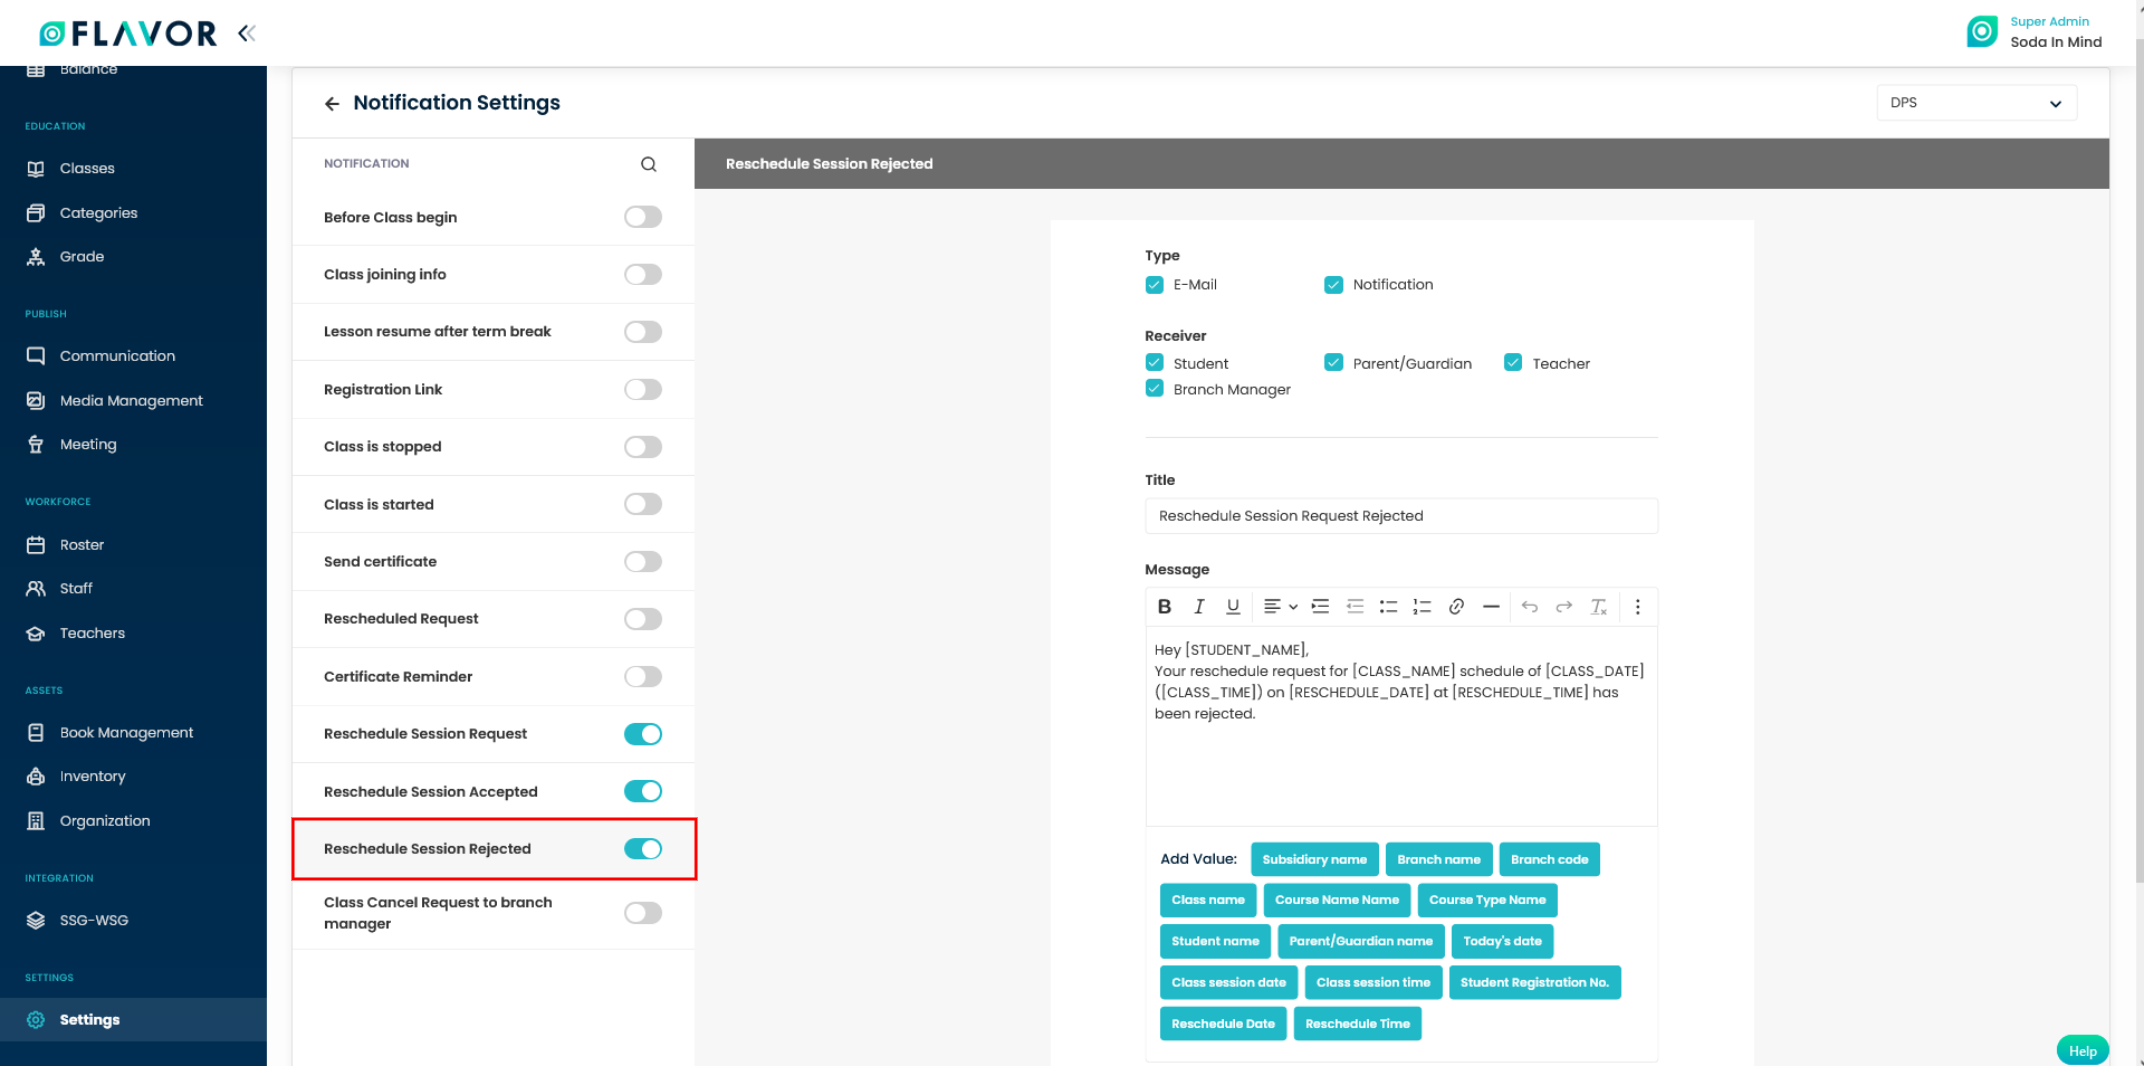
How to set a template for Reschedule Rejected Notification?
Step 1
- On the Notification Settings page, scroll down and click and enable the Reschedule Session Rejected switch.
- Select the Type and Receiver.
- Set the Title and compose the Message Template using Add value.
- Click on the Save Notification button.
Need more help? Ask us a question
Please let us know more of your details and our team will reach out to you very shortly.