
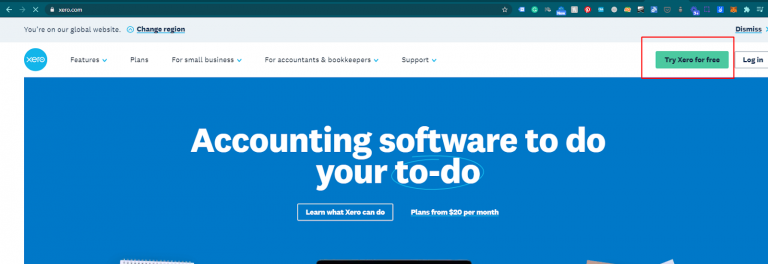
Step 1
Sign over Xero.com
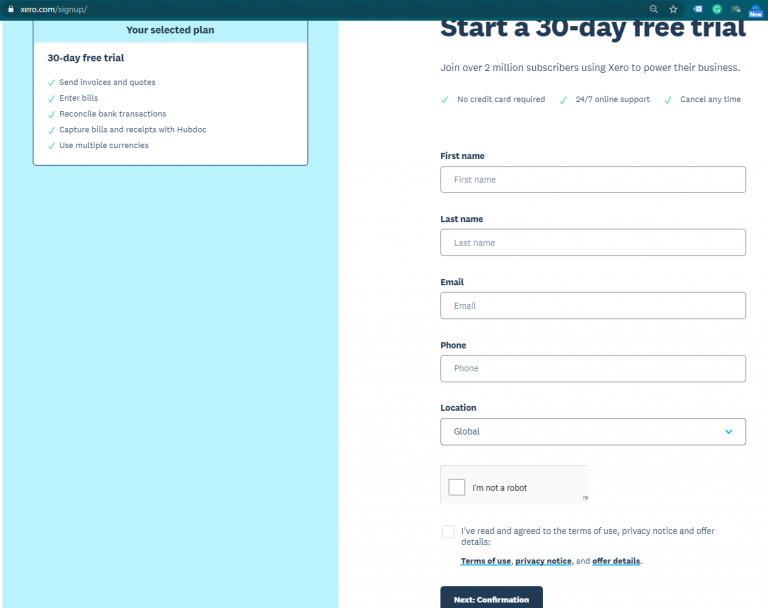
Step 2
Fill up the required information to sign up
Step 3
Now when you login, you must add an organization.

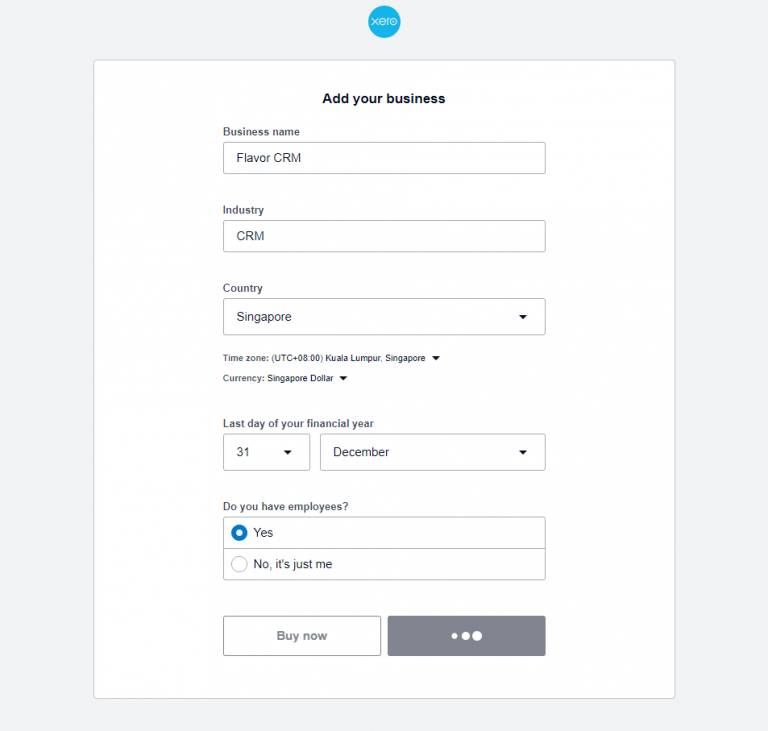
Step 4
Place the asked information within Xero to add your business
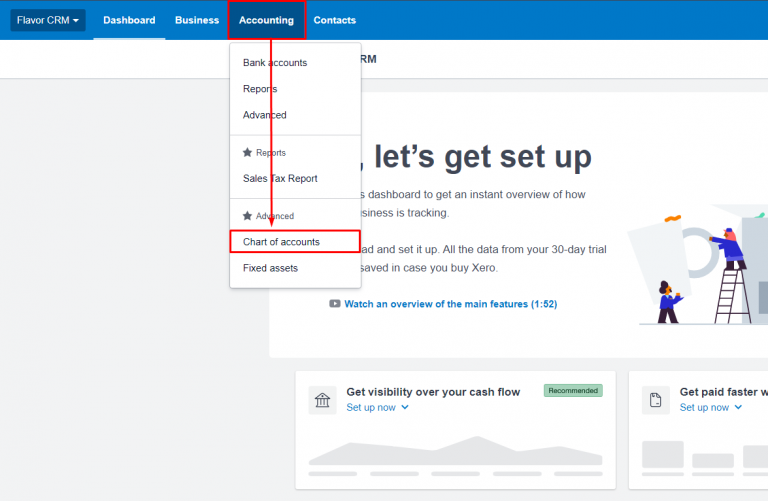
Step 5
Now you enter that business page and goto ACCOUNTING > CHART OF ACCOUNTS
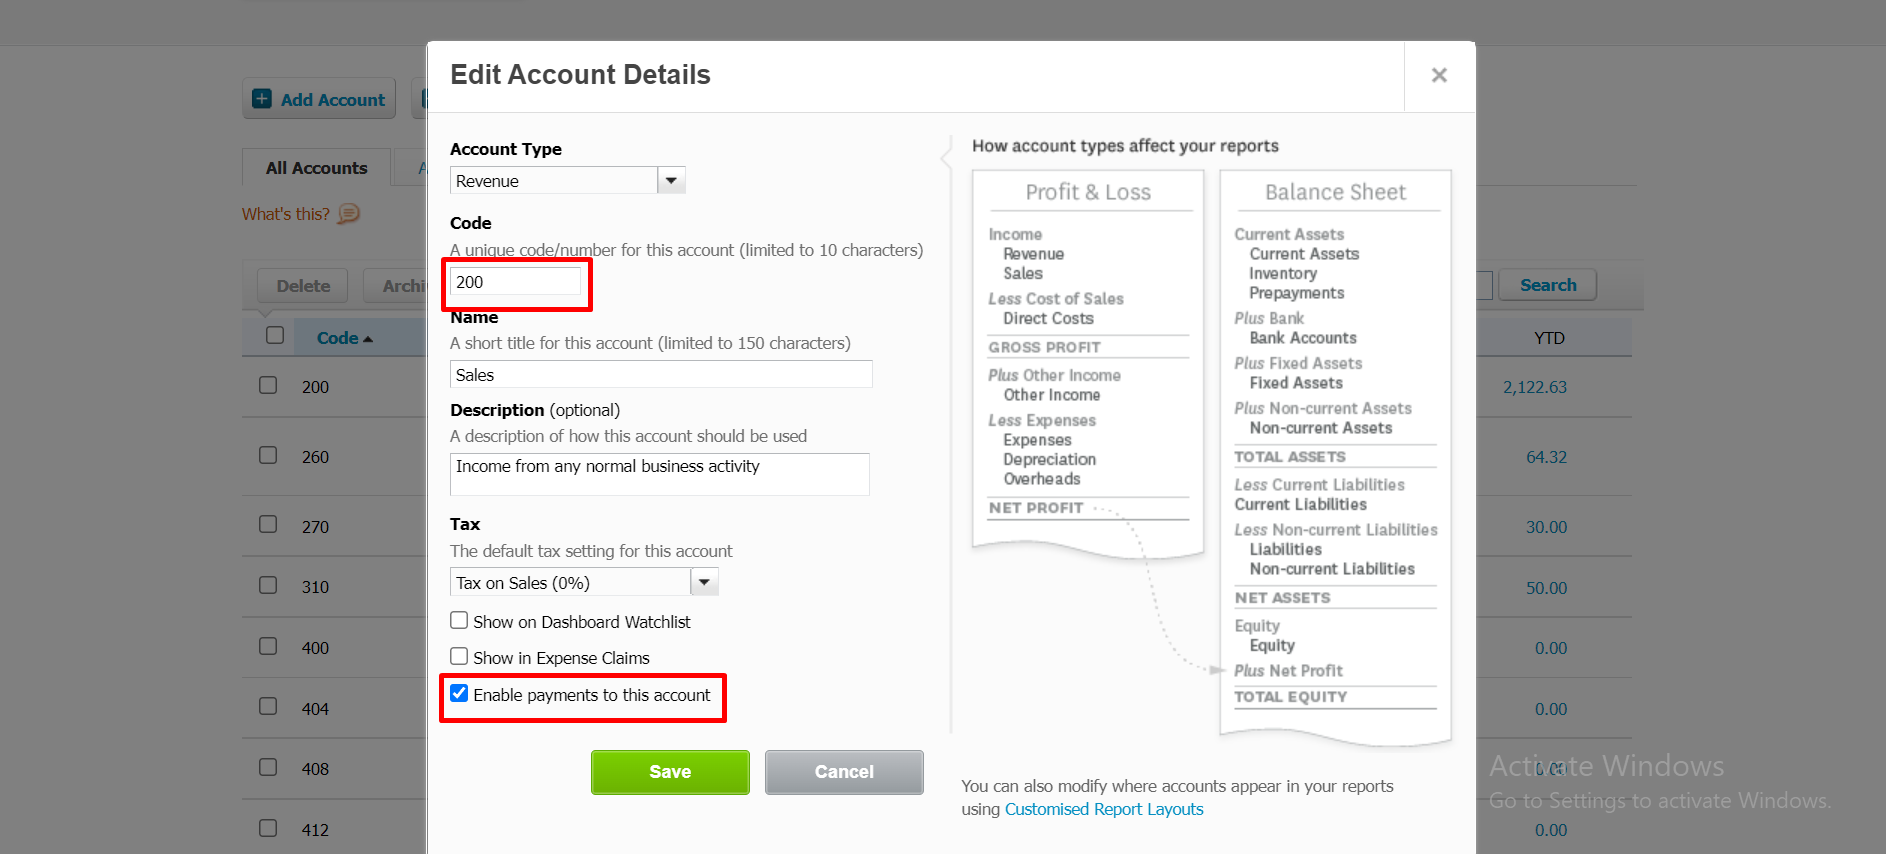
Step 6
Chart of accounts is the place where you create accounts for Accounting Values the flavor sends. FLAVOR sends Sales data, Deferred Income, Deposits and accordingly must have the CHART OF ACCOUNTS created in Xero SYSTEM and keep in mind the codes.
Also, check the enable payments to this account option.
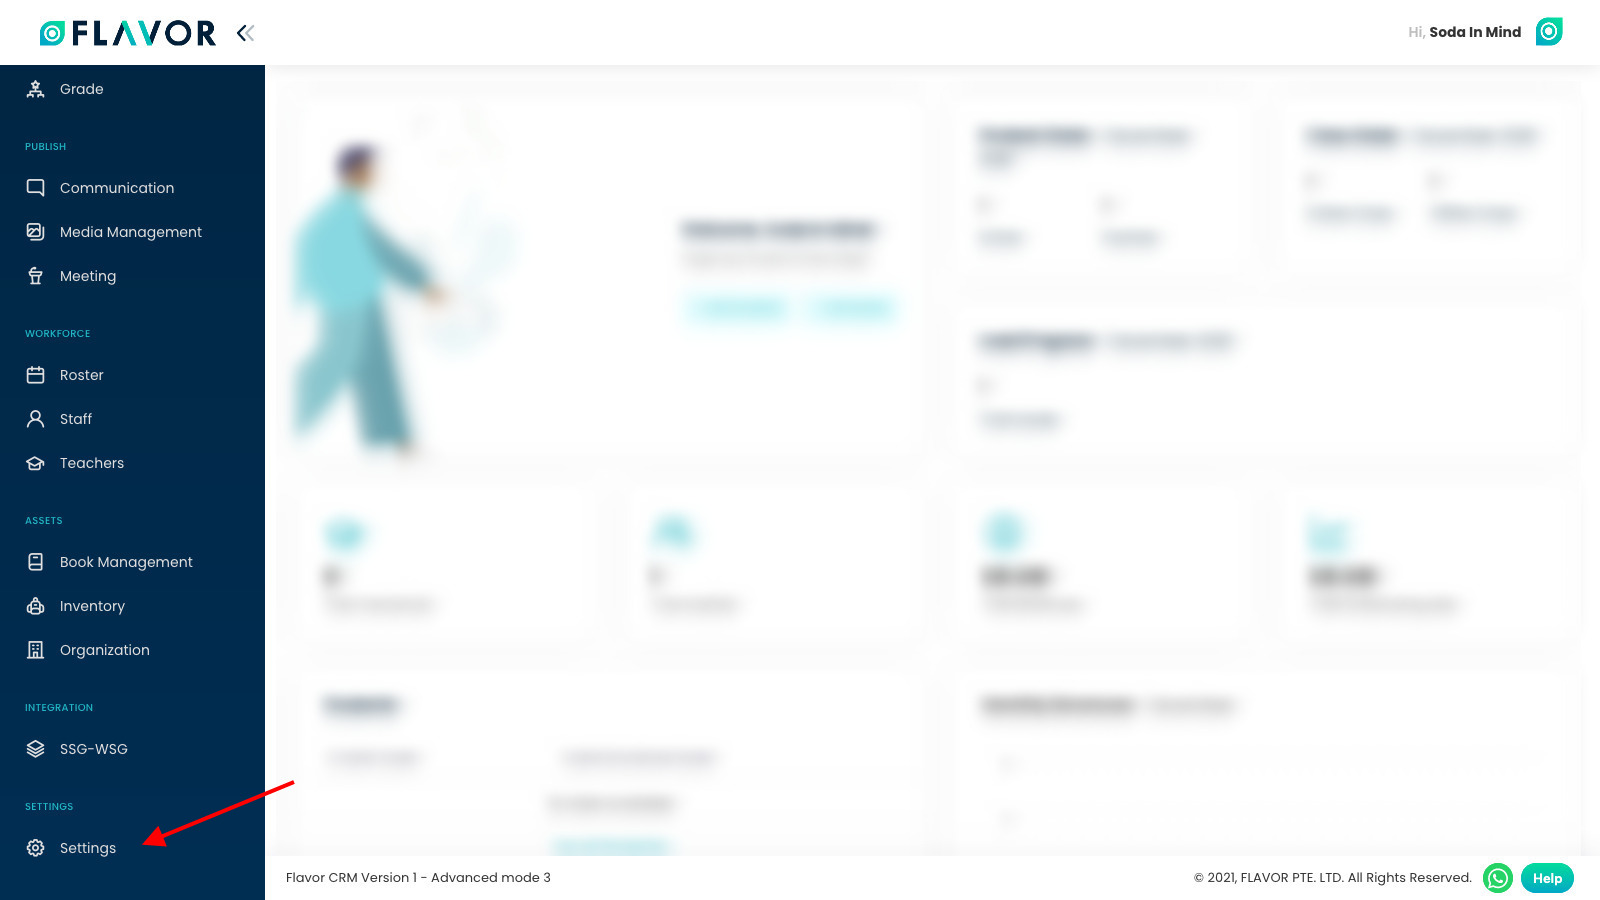
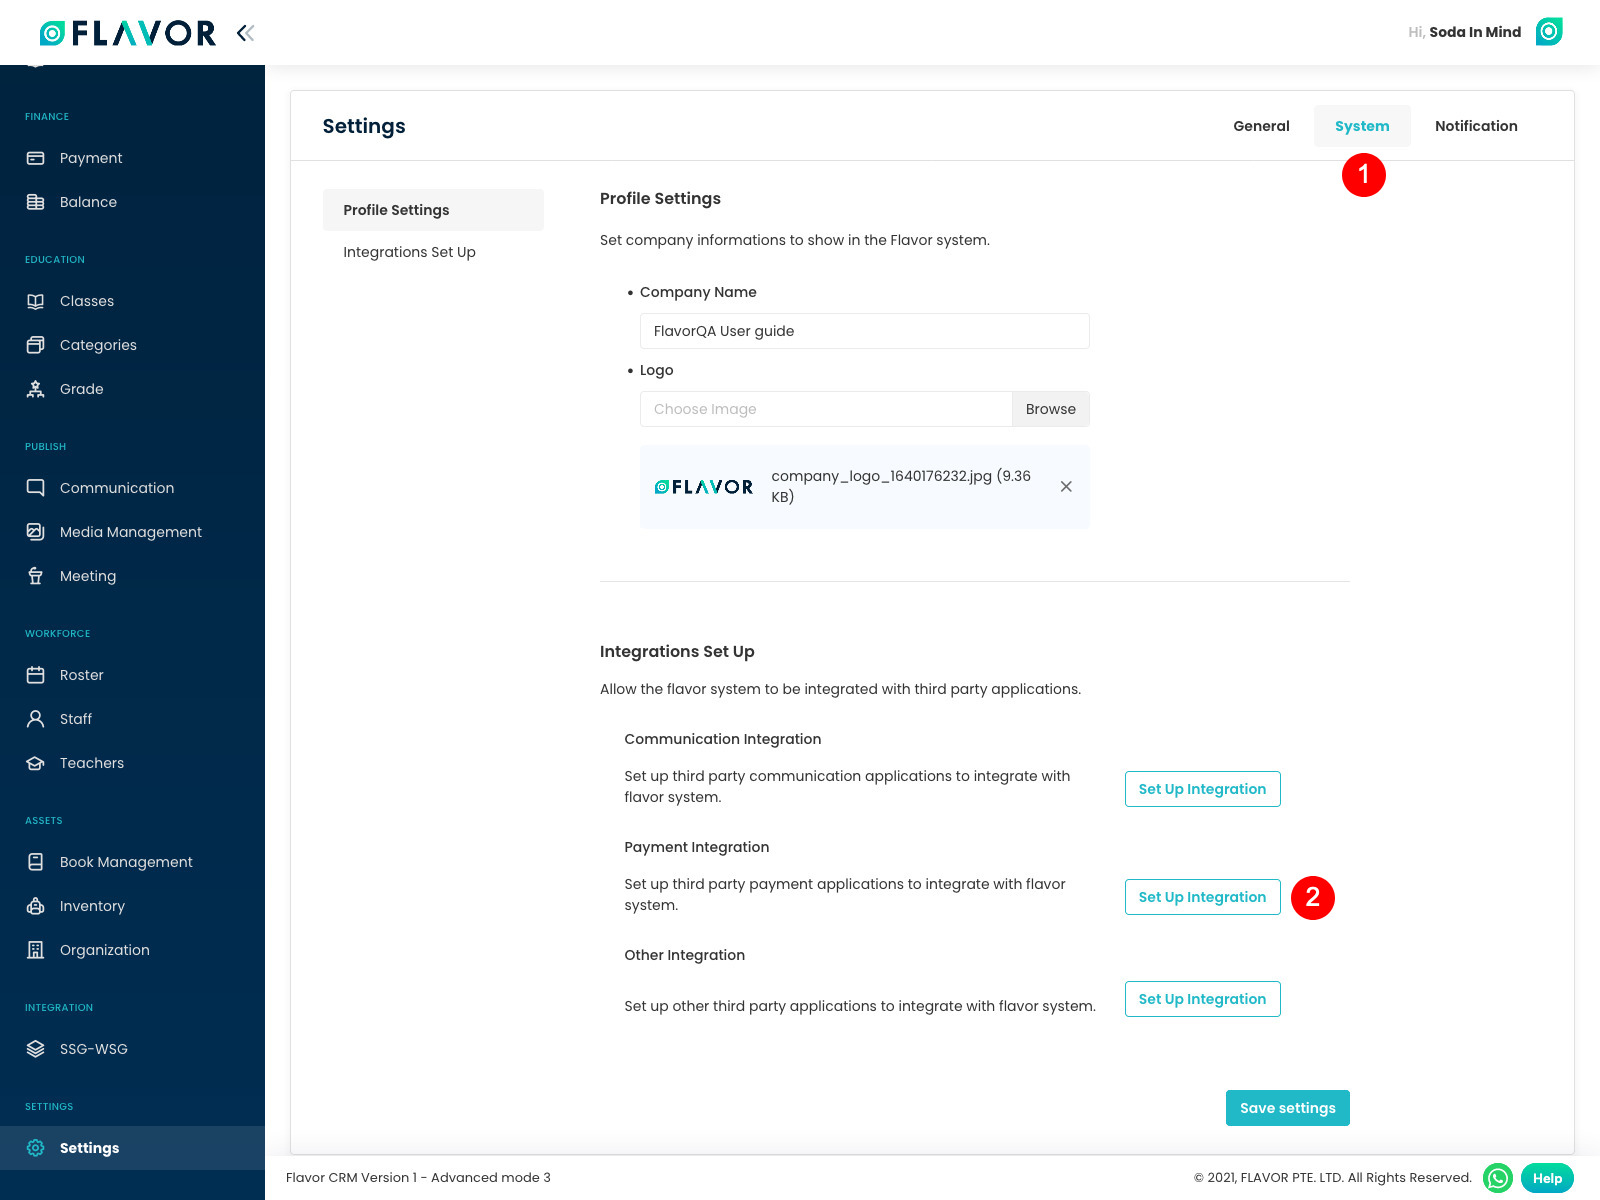
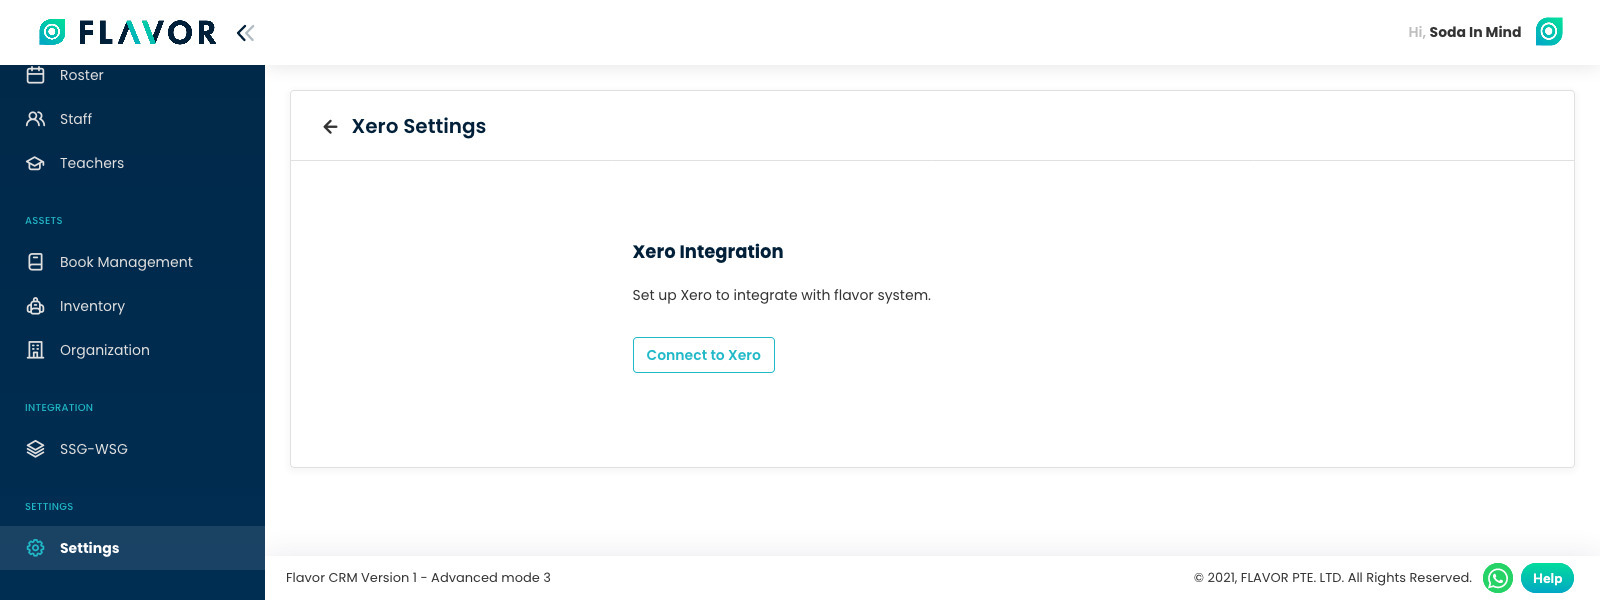
Step 8
Here, click on System and then click on Set Up Integration button in Payment Integration section.
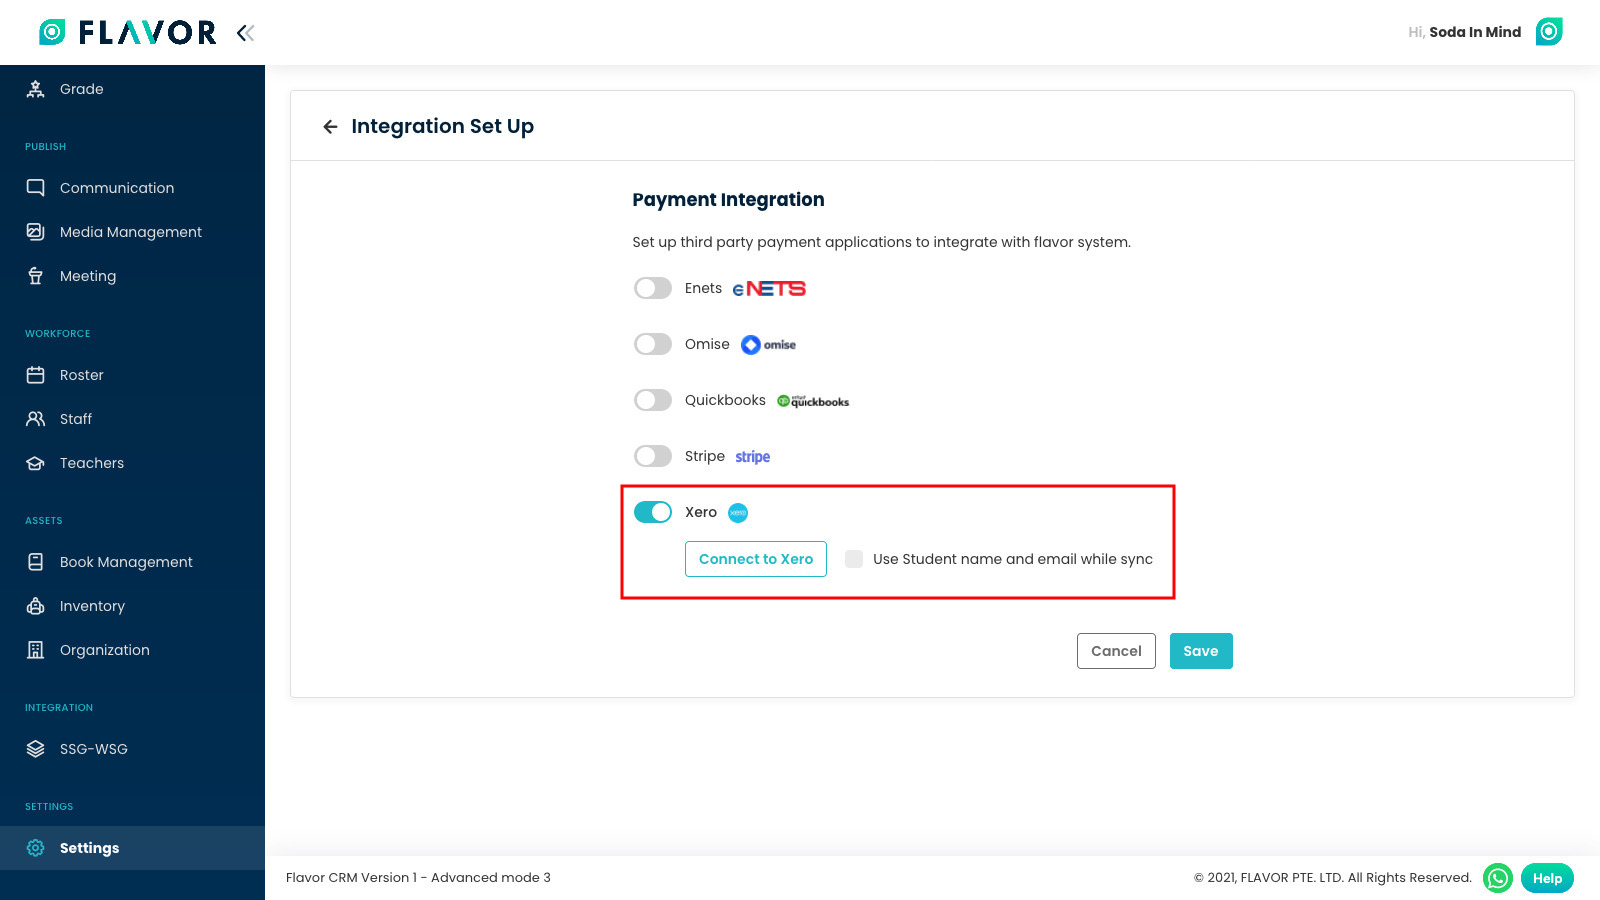
Step 9
In this window, scroll down to Xero section and enable this section if needed. After that, click on Connect to Xero button.
Step 10
In this window, again click on Connect to Xero button.
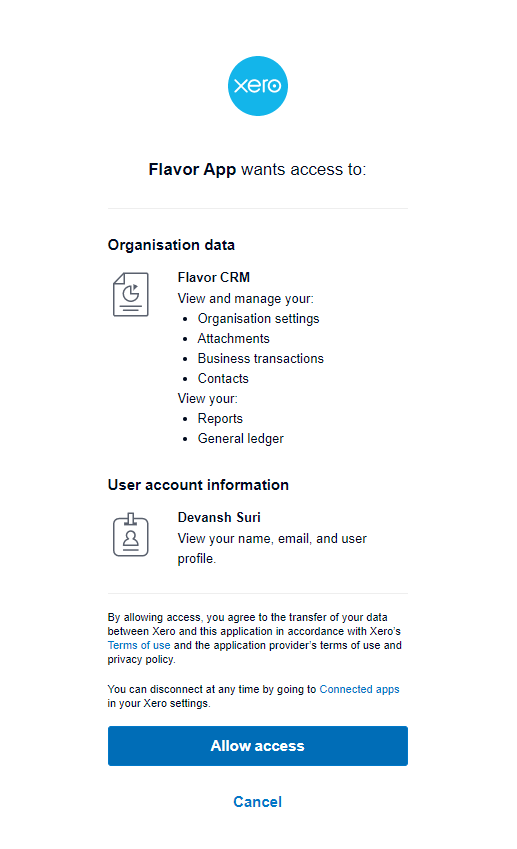
Step 11
You will redirected login to Xero page and then asked to give access to Xero.
Step 12
Now you will see the subsidiaries dropdown you have updated in FLAVOR CRM will show up and to connect the subsidiary with Xero you will have to select the subsidiary from dropdown.

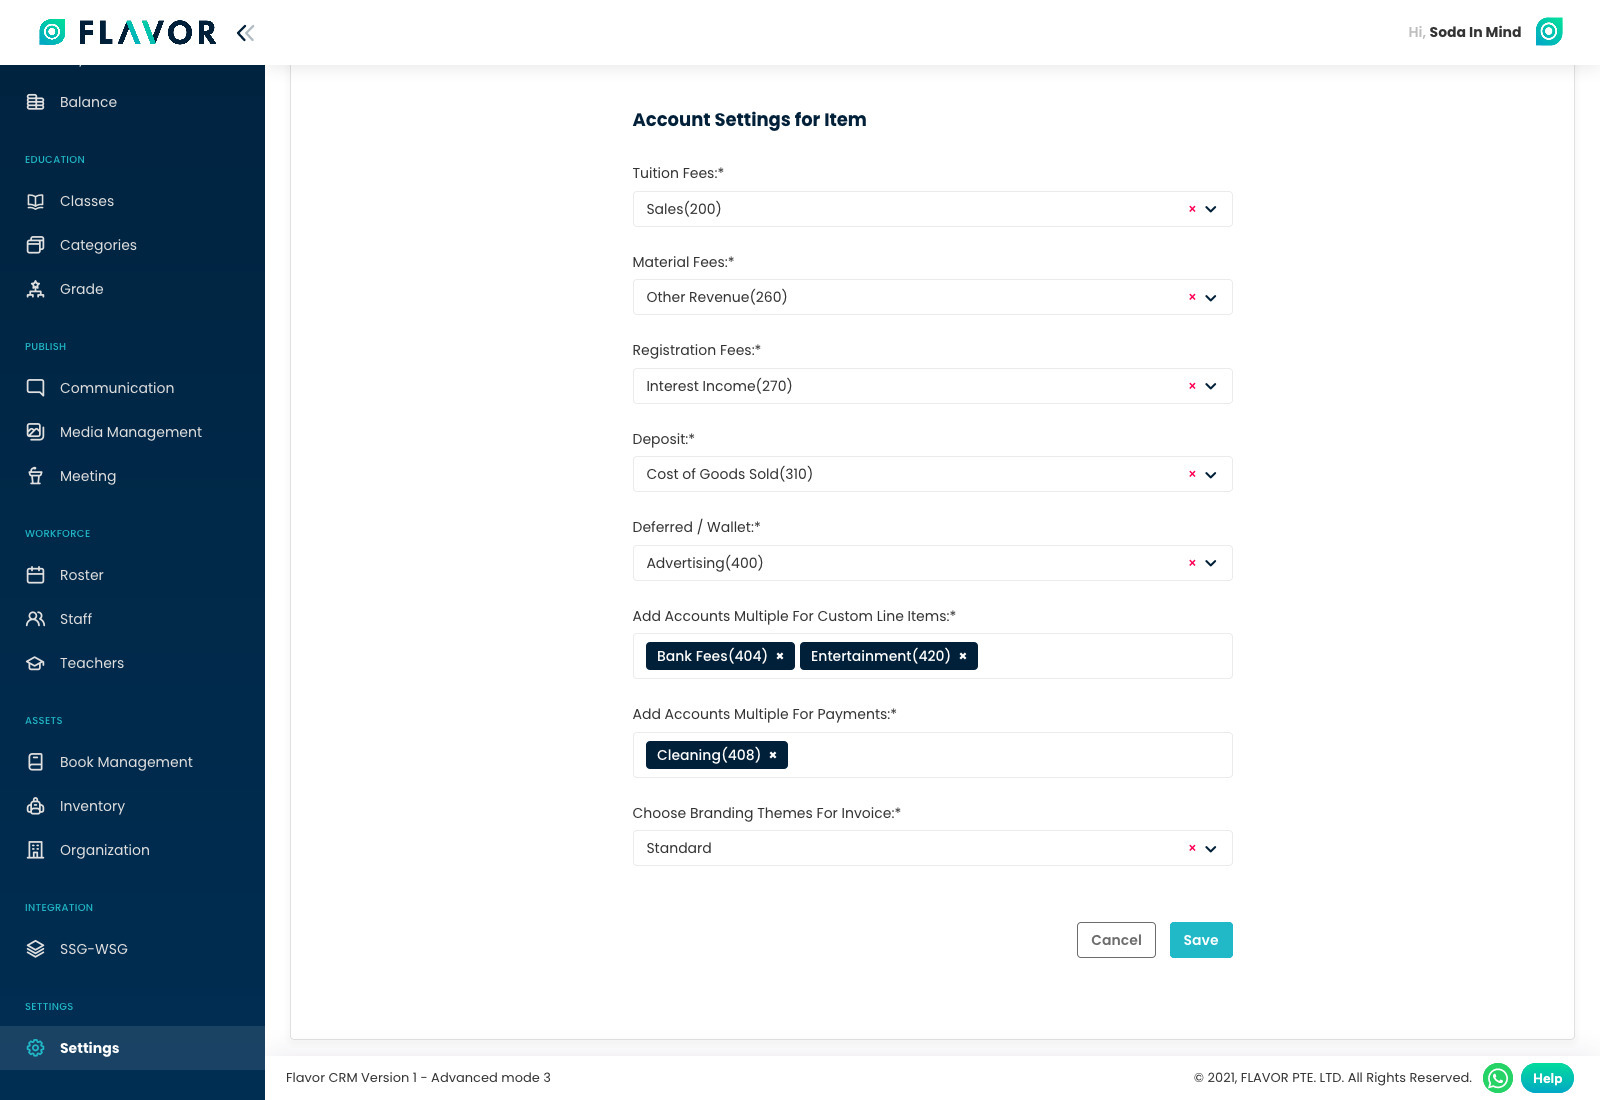
Step 13
After selecting a subsidiary, a form comes within which you are shown what fees Flavor System accepts and you can add here to what CHART OF ACCOUNTS the fee data must go to. Here you must get in touch with your Accountant to make sure they are configured properly and then click on Save button.
Step 14
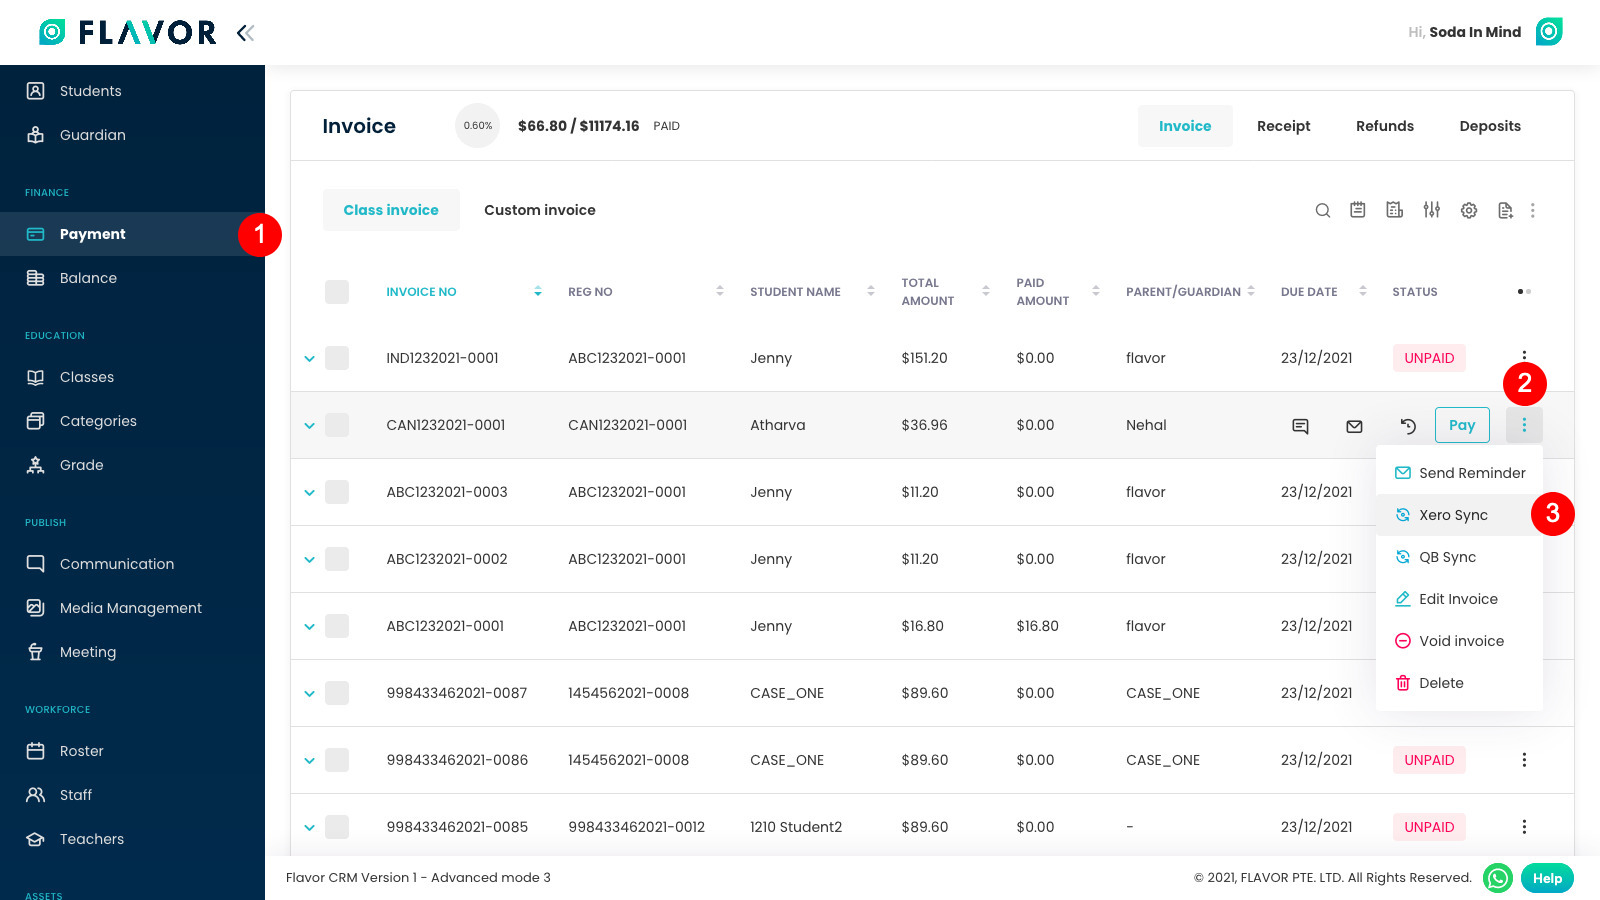
Now, when you go to Invoices module make sure that you login via the organization account to which data must be passed.
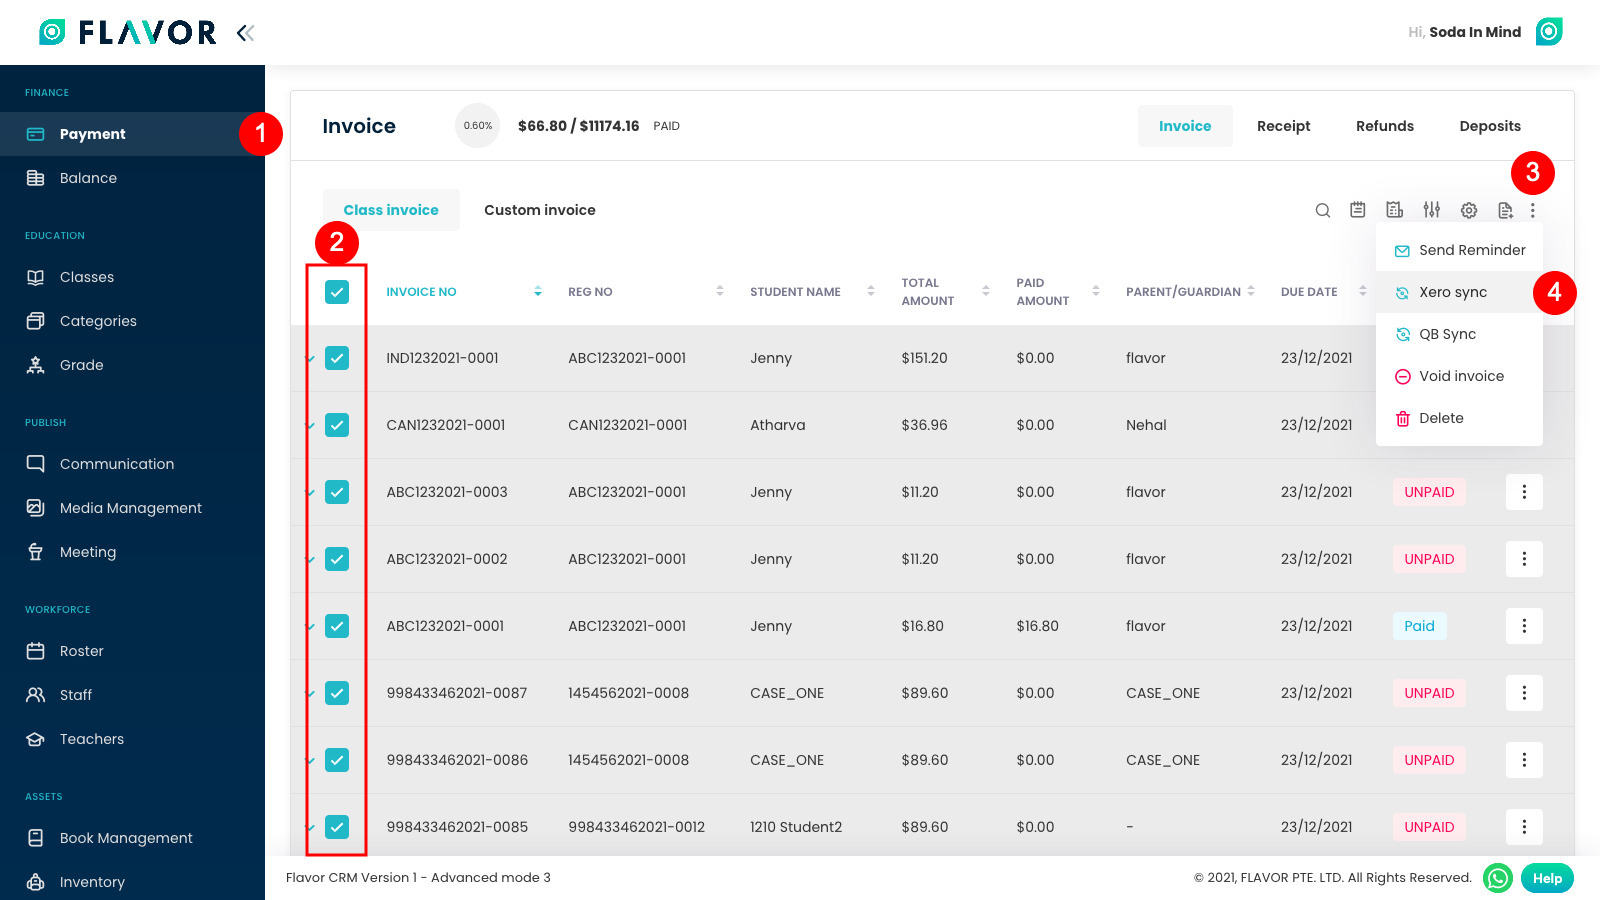
- For Invoices, click on Payment on the left menu.
- Then click on actions (3 vertical dots) of a invoice row.
- In this dropdown, click on Xero Sync.
Step 15
For bulk sync:
- Go to Invoices by clicking on Payment on the left menu.
- Select the Invoices.
- Select Bulk actions (3 vertical dots) and
- Click on Xero sync.
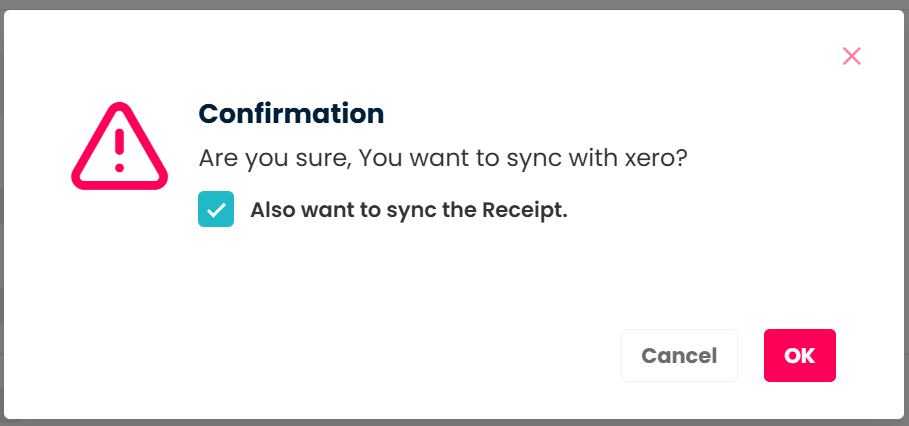
Step 16
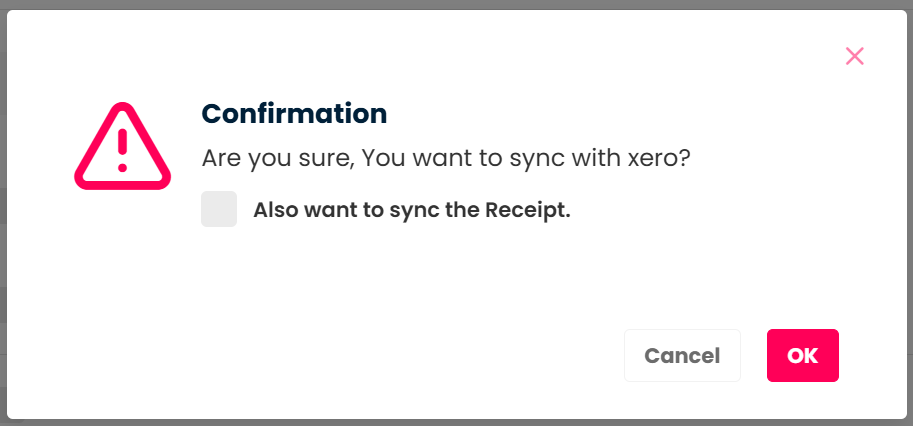
When Xero sync is clicked, you’ll see a confirmation popup. Check the box if you also want to sync the receipt. Click OK to proceed or Cancel to stop.
To sync with Xero without including the receipt, simply leave the checkbox unchecked and click OK to proceed or Cancel to stop.
Step 17
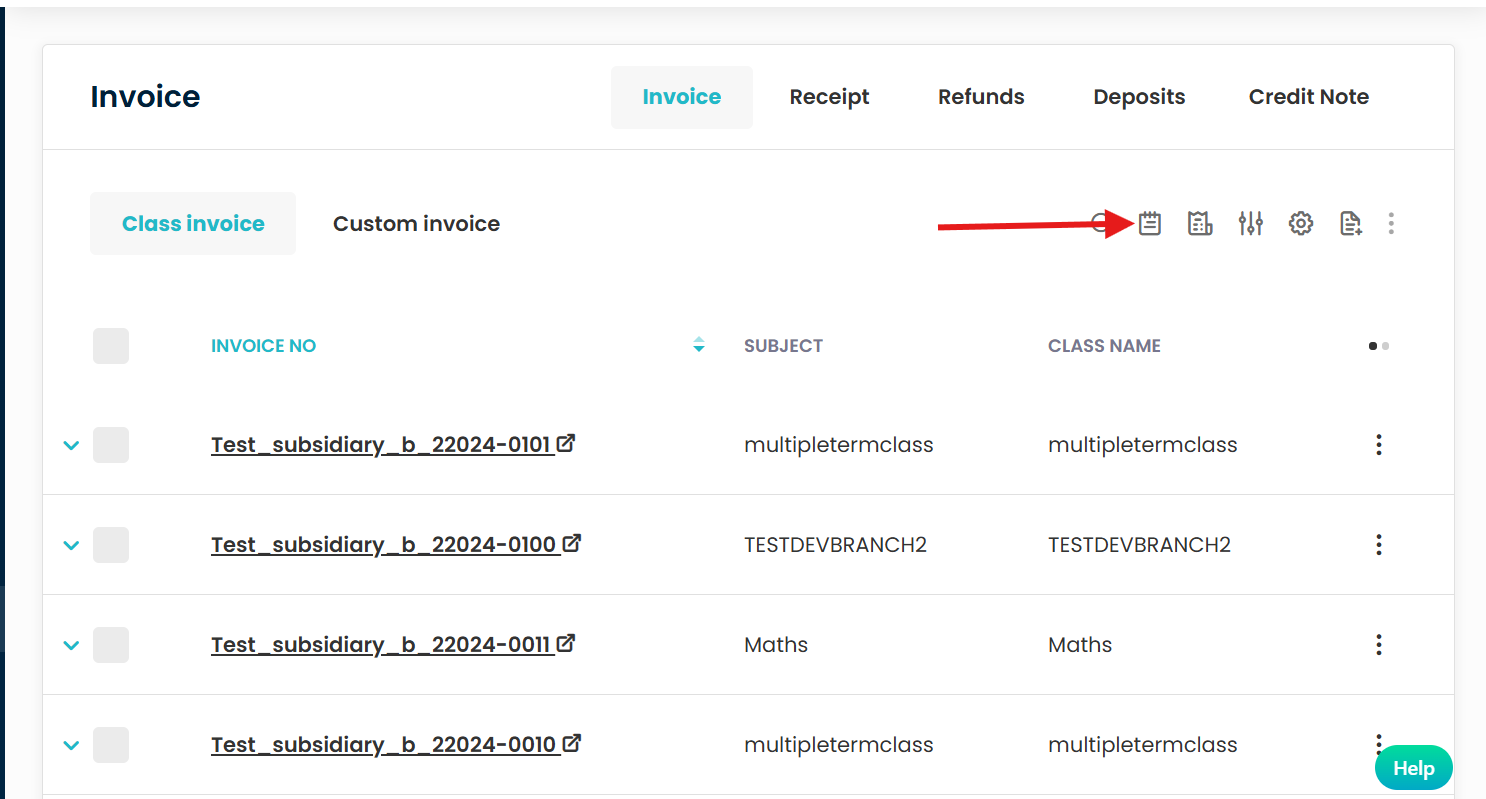
To check to the Invoice Log in Flavor CRM, click the icon located at the top right corner of the table, as indicated by the red arrow in the image below. This icon allows users to view detailed logs related to invoice operations, including synchronization records and status updates.
This view specifically tracks the integration logs related to Xero, helping users monitor invoice synchronization activities.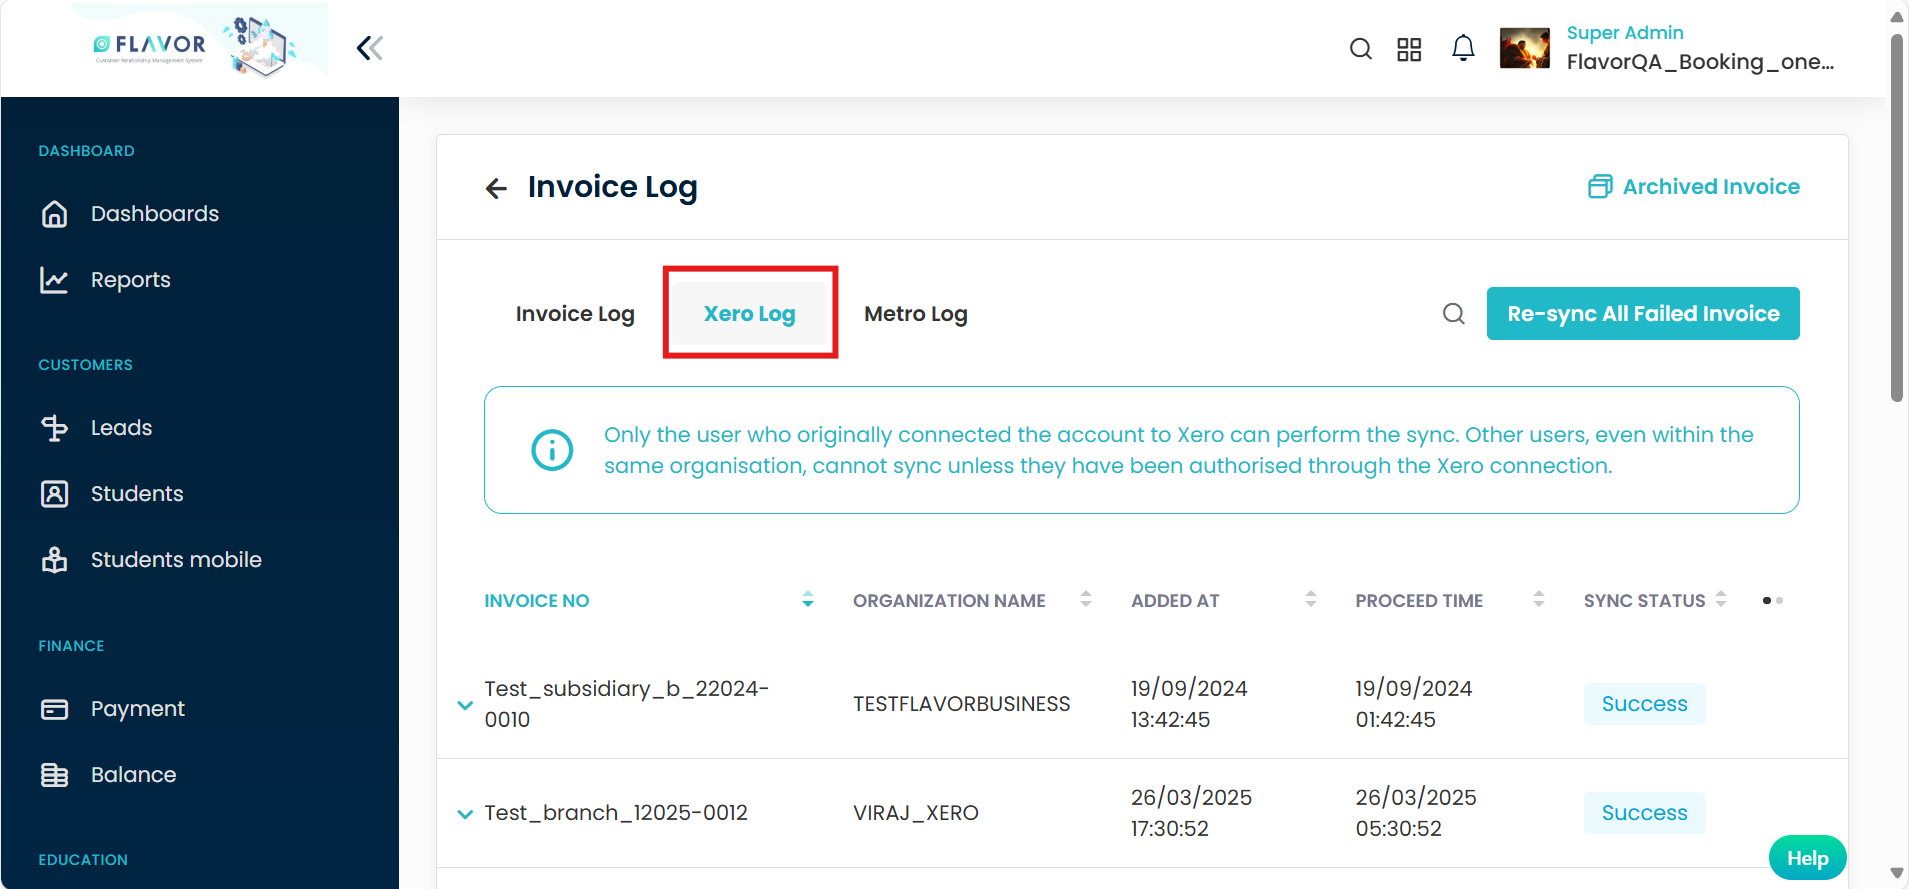
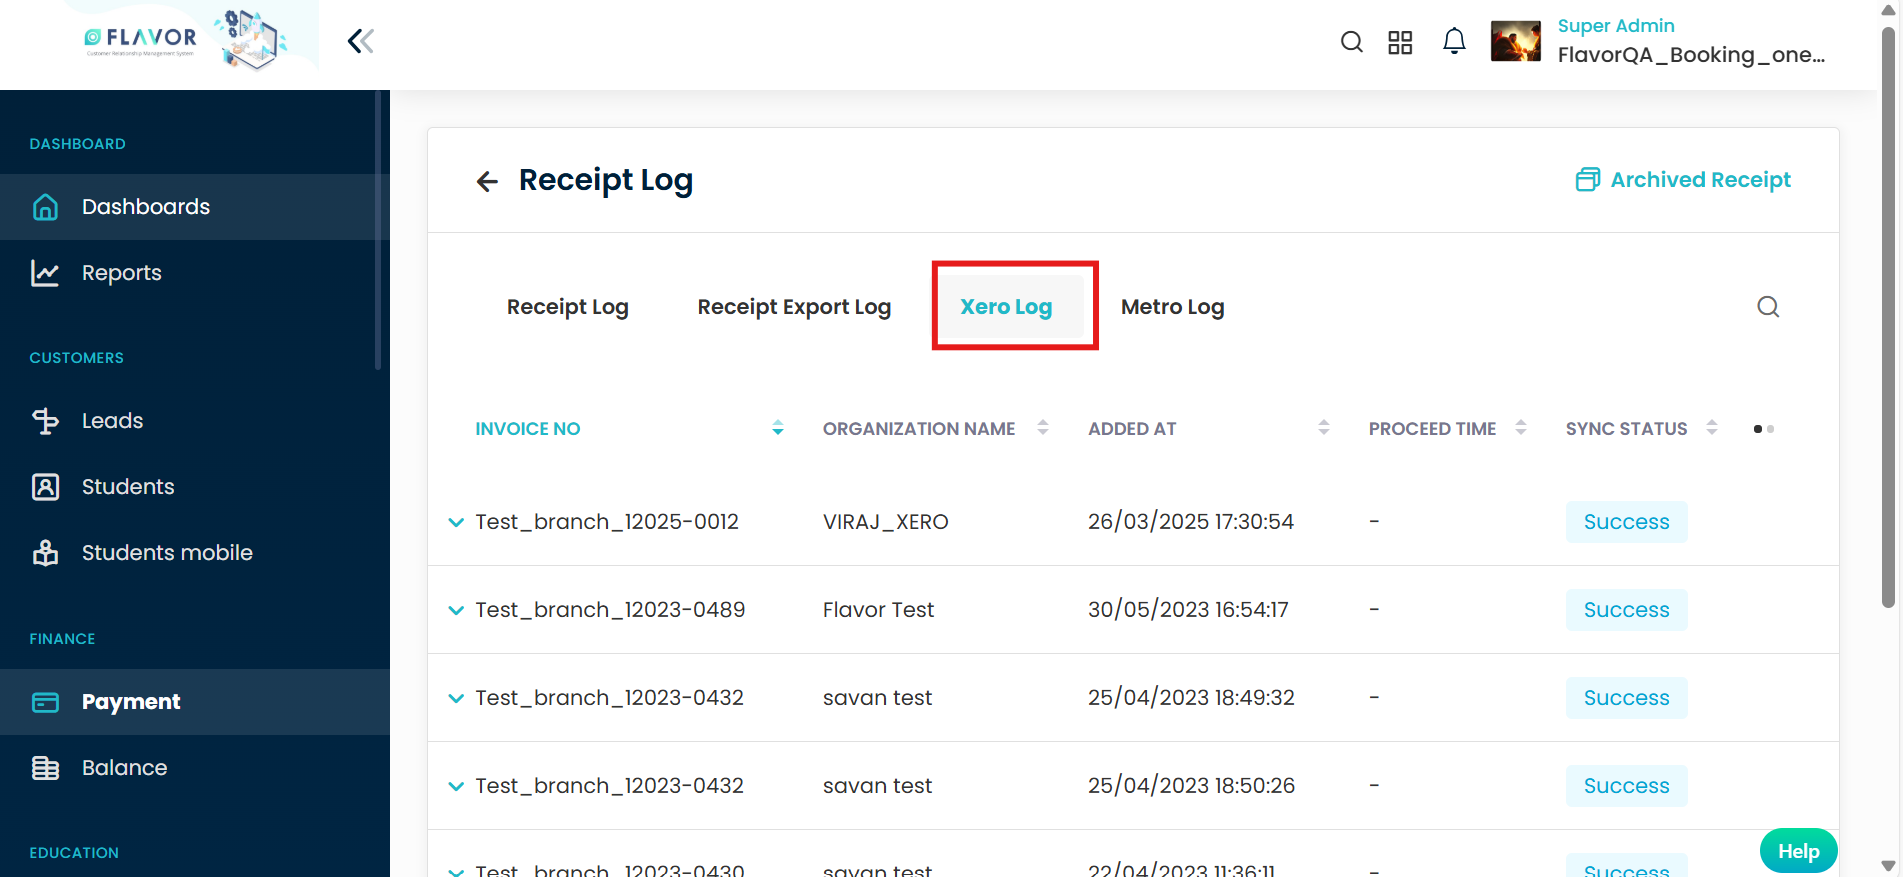
This view allows users to track synchronization activity specifically for receipts integrated with Xero.
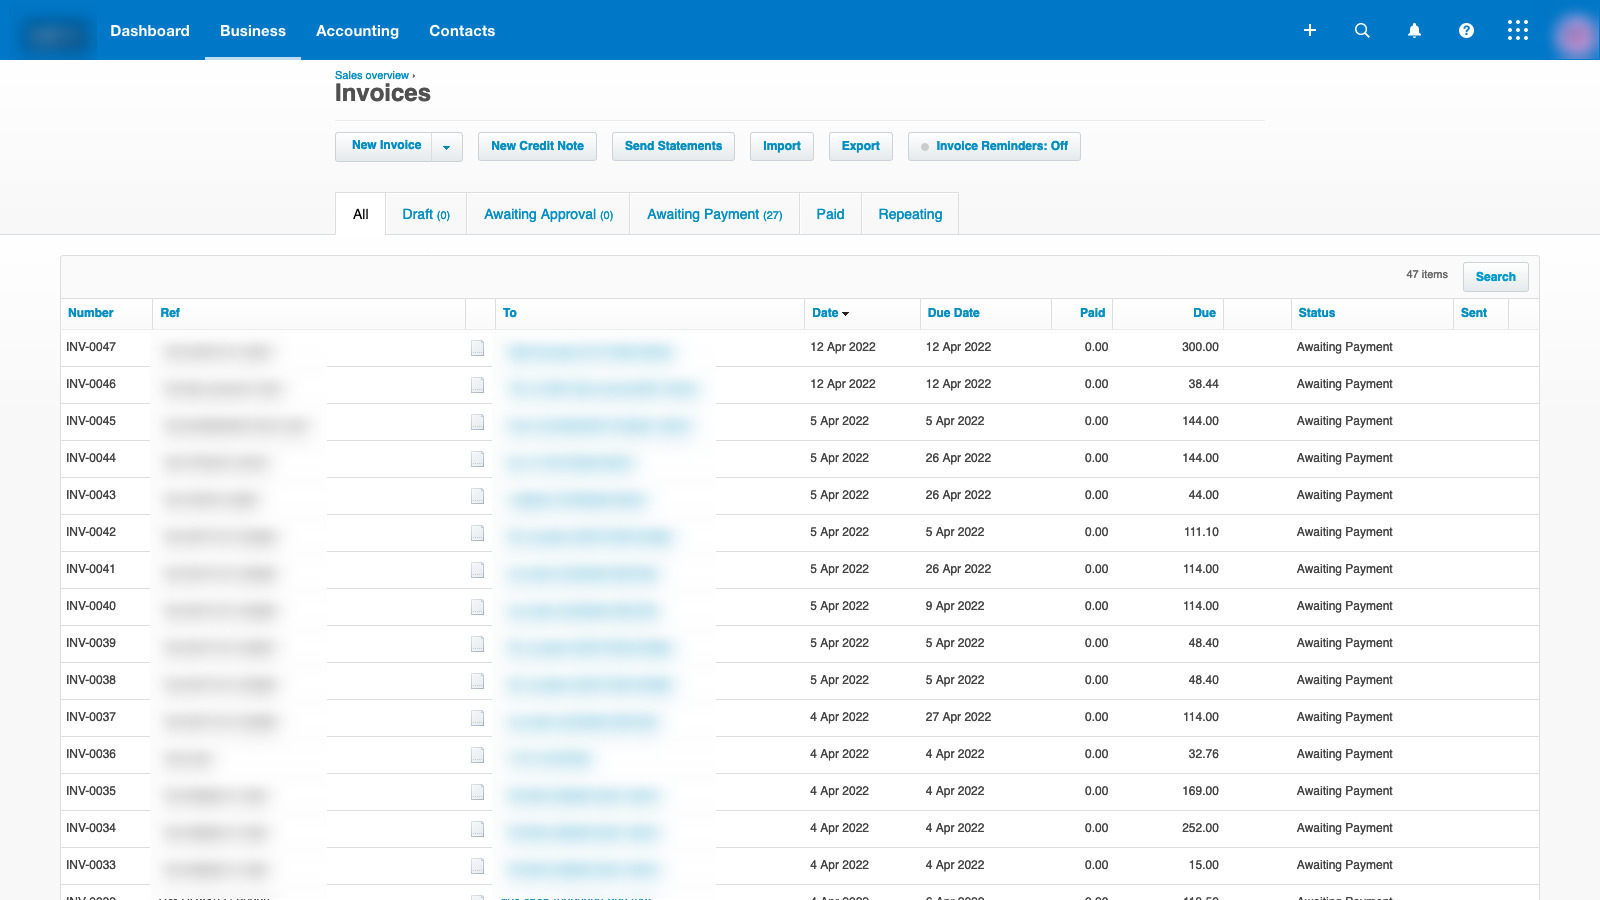
In the Xero account, the invoices will get synced and be shown in the listing.
Note :
Only the user who originally connected the account to Xero can perform the sync. Other users, even within the same organization, cannot sync unless they have been authorized through the Xero connection.
Need more help? Ask us a question
Please let us know more of your details and our team will reach out to you very shortly.