
Introduction
In this article, you will learn how to do settings to generate Mall Report. Also, the process of generating Mall Report.
How to do the settings for generating Mall Report?
- Go to Settings from the left-side menu of the Flavor System.
- Click on System Tab.
- Scroll down to Other integration and click on the Setup Integration button.
- It will navigate you to the Integration Set Up page.
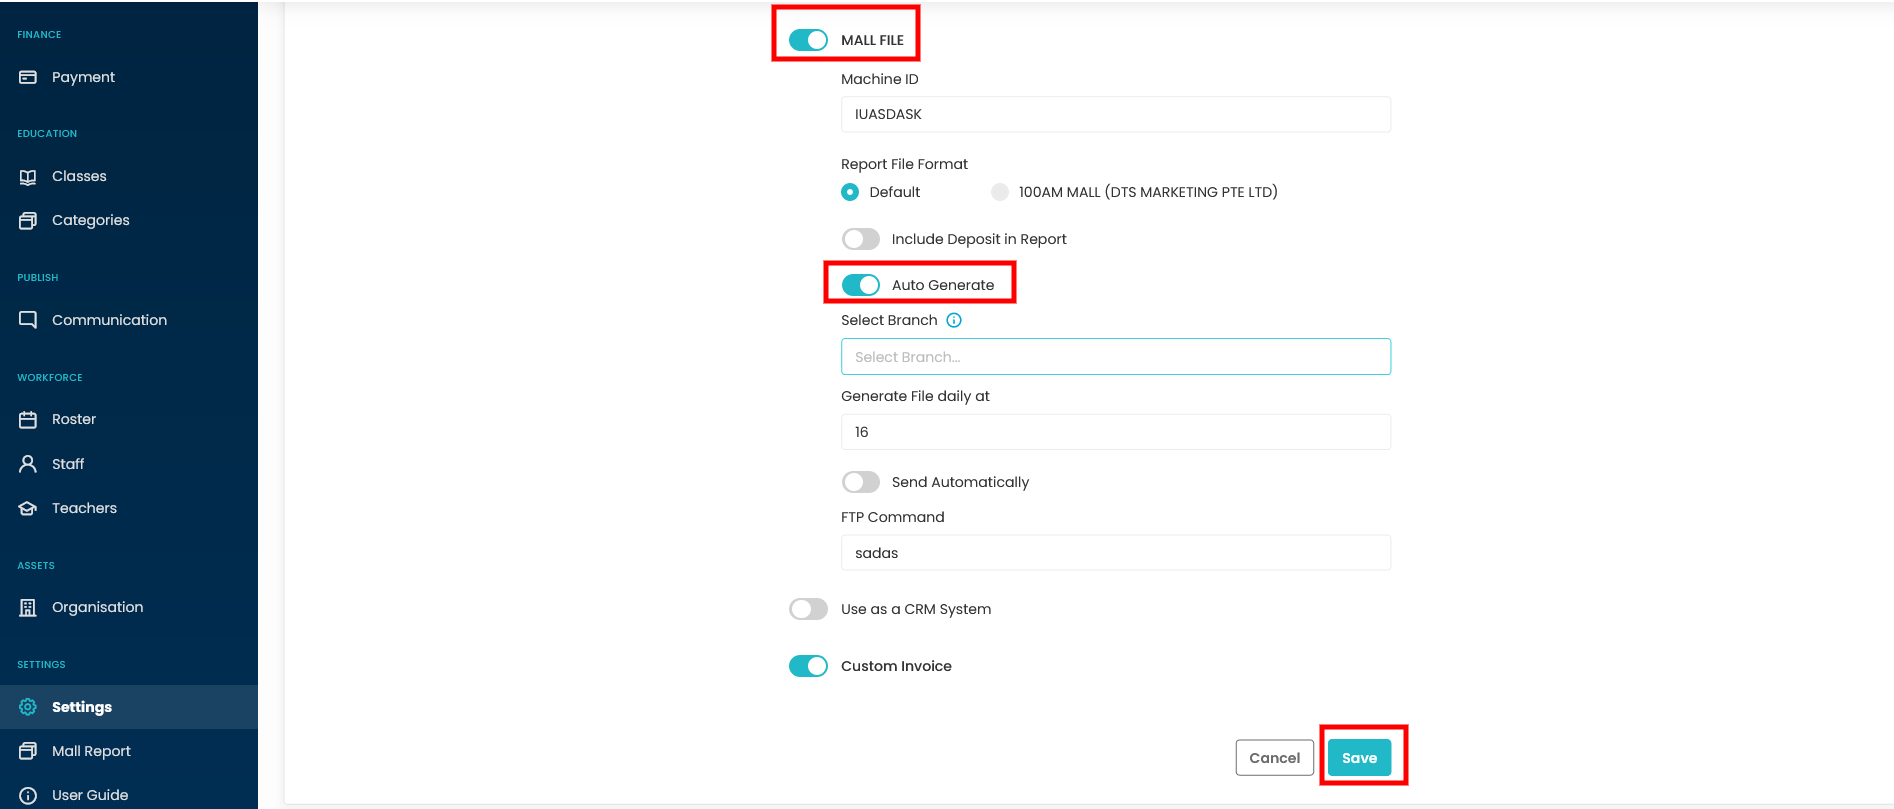
- Scroll down and enable the MALL FILE switch.
- Enter the Machine ID.
- Now you have two Report File Format viz. Default and 100AM MALL (DTS MARKETING PTE LTD) . You can choose any one as per the requirement.
- To Include Deposit in Report kindly turn it on from the setting.
- If you want to generate the Mall File automatically, enable the Auto Generate switch.
- If auto generate setting is enabled you can also generate the report Branch wise through Select Branch. If no Branch is selected then all the branch receipt will be synced for mall report. You can also select more than 1 branch at a time.
- Enter the Generate File daily time and the FTP command.
- Click on Save if all the details are filled.

How to generate Mall Report?
Step 1
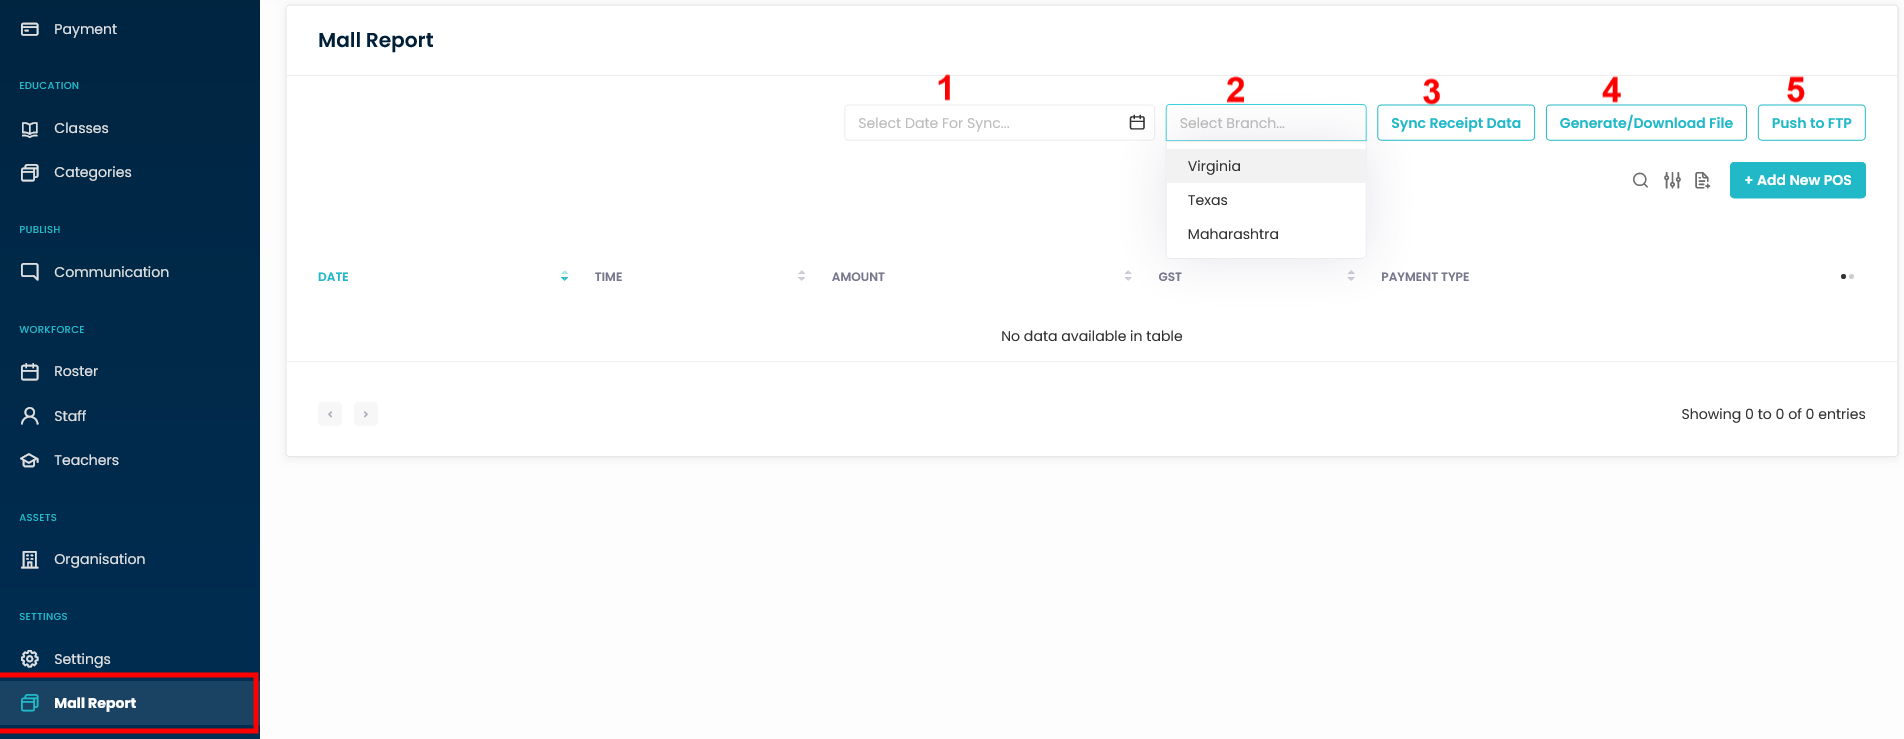
- Go to the Mall Report from the left side menu of the Flavor System.
- It will navigate you to the Mall Report Page.
Step 2
- Select Date for Sync i.e. payment date marked as 1 and click on Sync Receipt Data marked as 3.
- Based on Setting if branch is selected it will sync the data of that particular branch only or can also Select branch at the time of generating Mall report marked as 2.
- It will Sync all the receipts on the Flavor System for that specific payment date and be shown in the table below.
- If you want to Generate/Download the file, then click on Generate/Download file button marked as 4.
- Click the Push to FTP button marked as 5 to save the file to the server.
Step 4
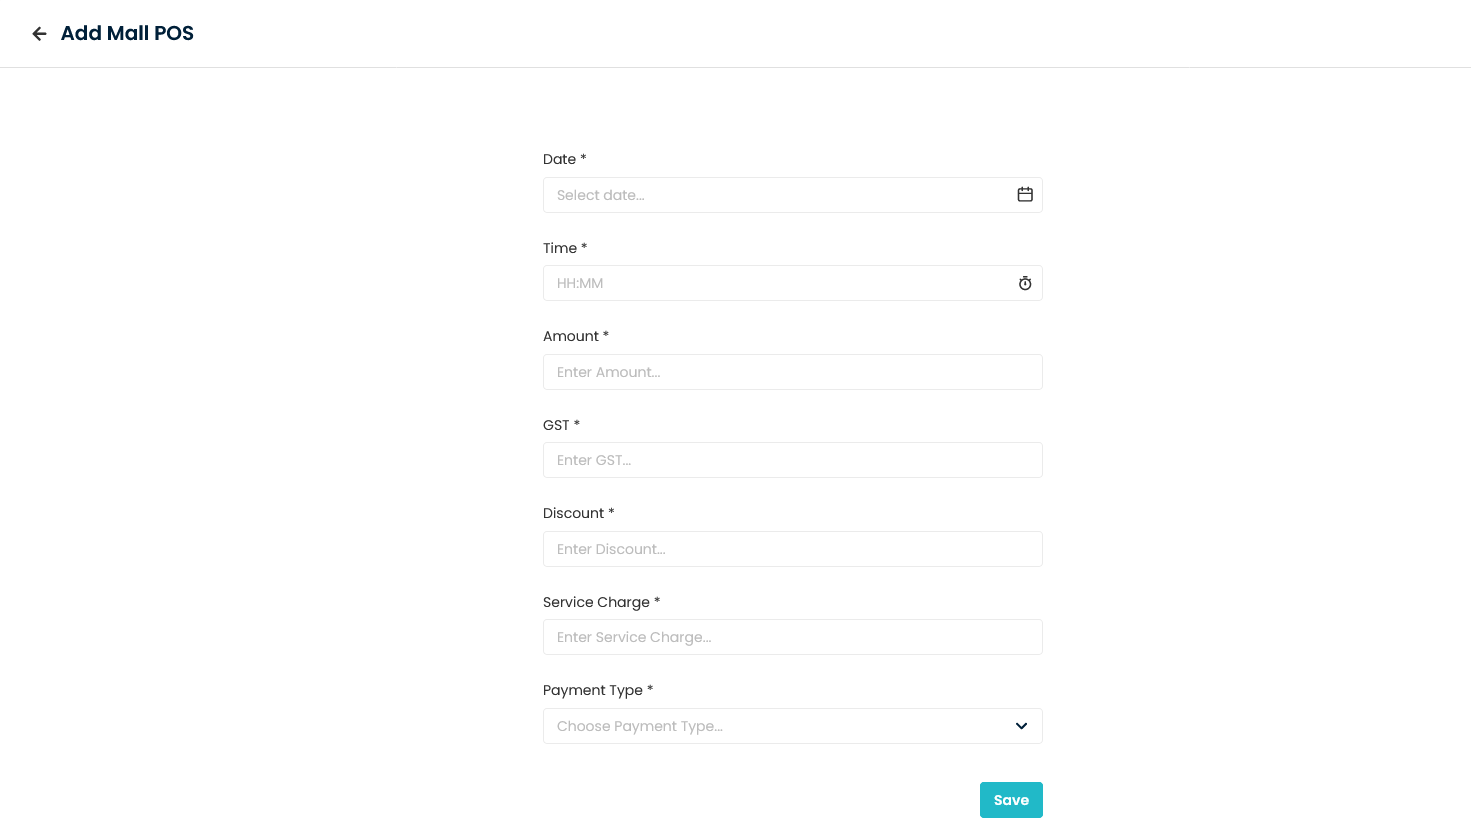
- To add data manually, click on Add New POS button.
- It will navigate you to the Add Mall POS page.
- Enter the details and click on the Add button.
- To generate/download the file, click on Generate/ Download button.
- Click on the FTP push button to save data to the server.
Step 5
Table Records
- You can Edit and Delete the table records by clicking on the edit and delete option against the inline action Icon button.
- The records can be searched, filtered and exported by clicking on the respective icon buttons.
- Click on the Column visibility(double dot) icon button to customize the data view.

Download Default format:
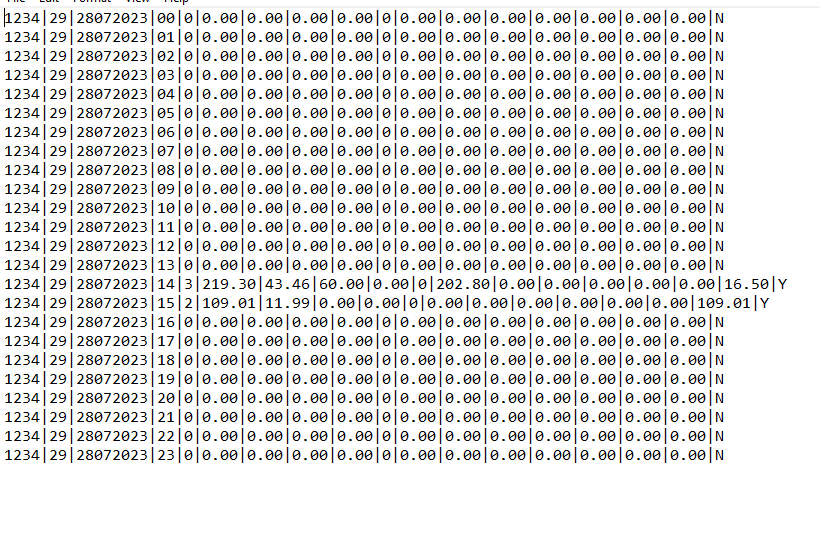
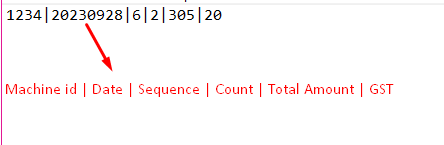
100AM MALL (DTS MARKETING PTE LTD) format:
Need more help? Ask us a question
Please let us know more of your details and our team will reach out to you very shortly.