
Introduction
The Booking System is a new feature which was introduced at the branch level to make the students book the class. It has a different view style i.e. the classes are visible in catalog form. In the listing, the upcoming and ongoing classes are only visible. This article will take you through the useful features of the booking system.
Note: To use this feature, first you need to raise a support ticket to get it activated.
Step 1
- Login to the Flavor System.
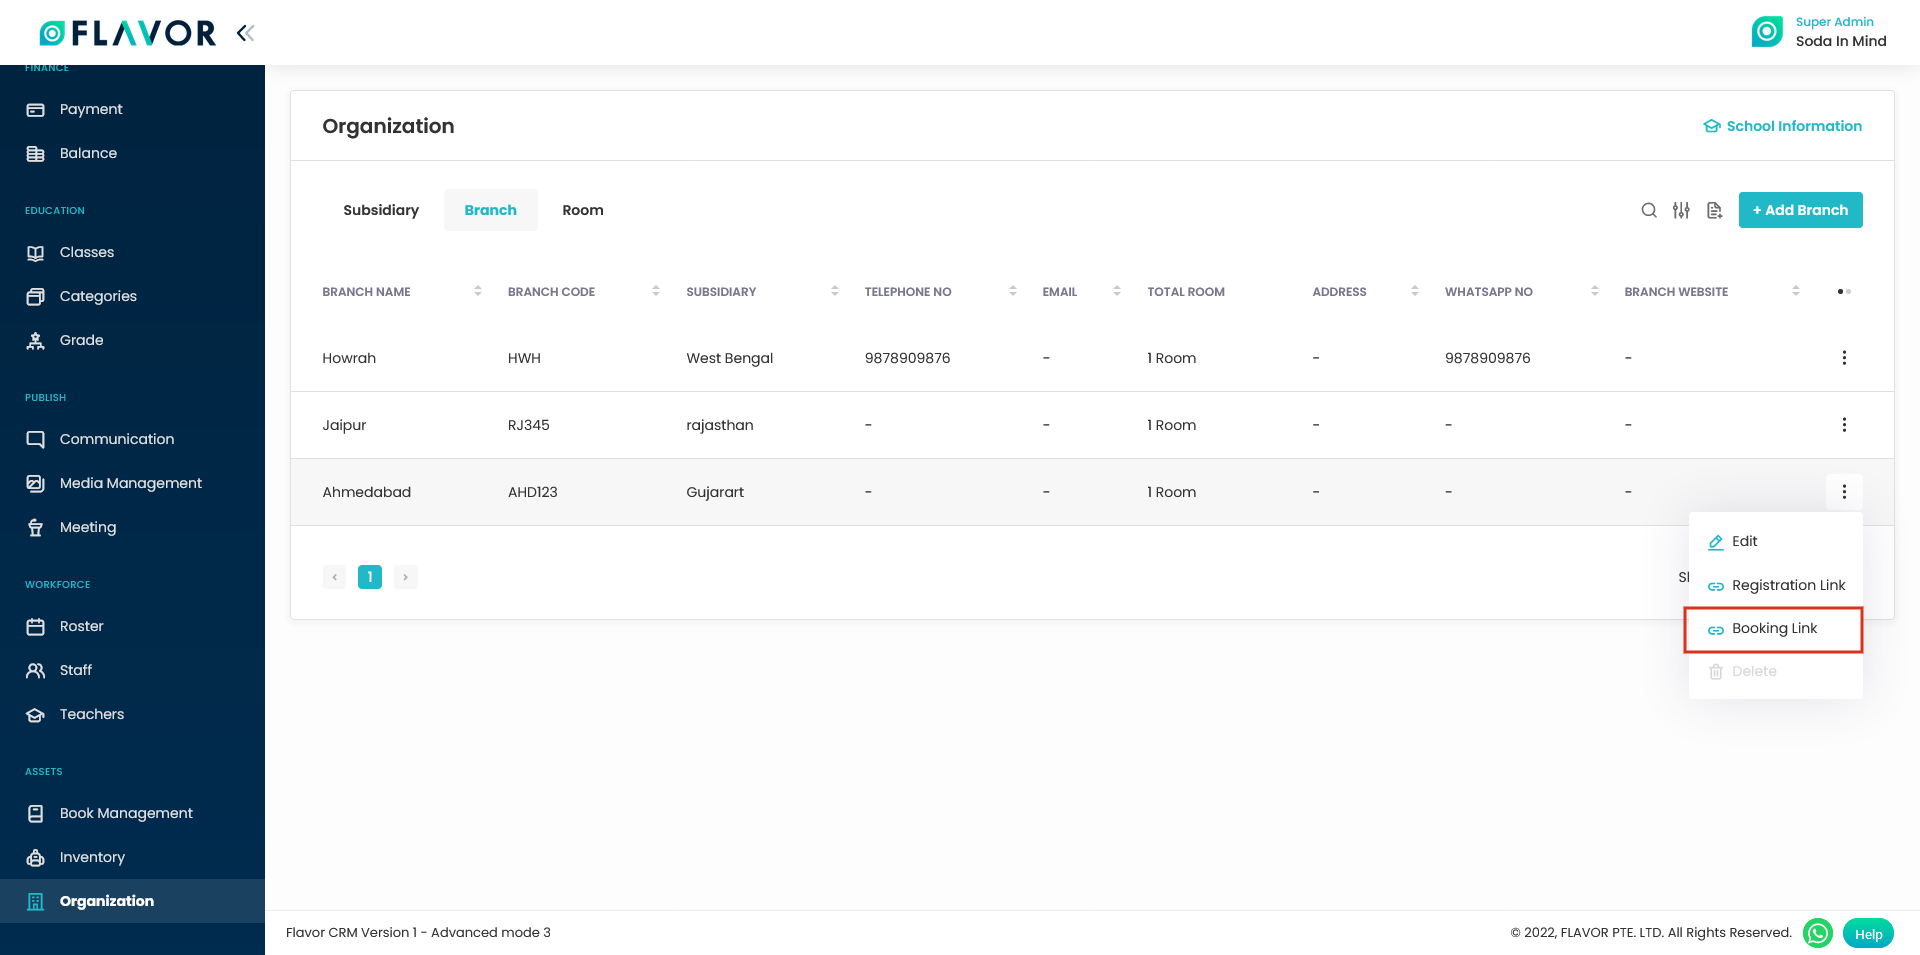
- Go to the Organization from the left-side menu of the Flavor System.
- Click on the Branch tab.
- This shows the Branch listing page.
- Click on the Action button against one particular branch for which you want to view the class catalog.
- A small popup will appear with some options.
- Click on the Booking Link (Branch).
- This will navigate you to the Class catalog page.
Step 2
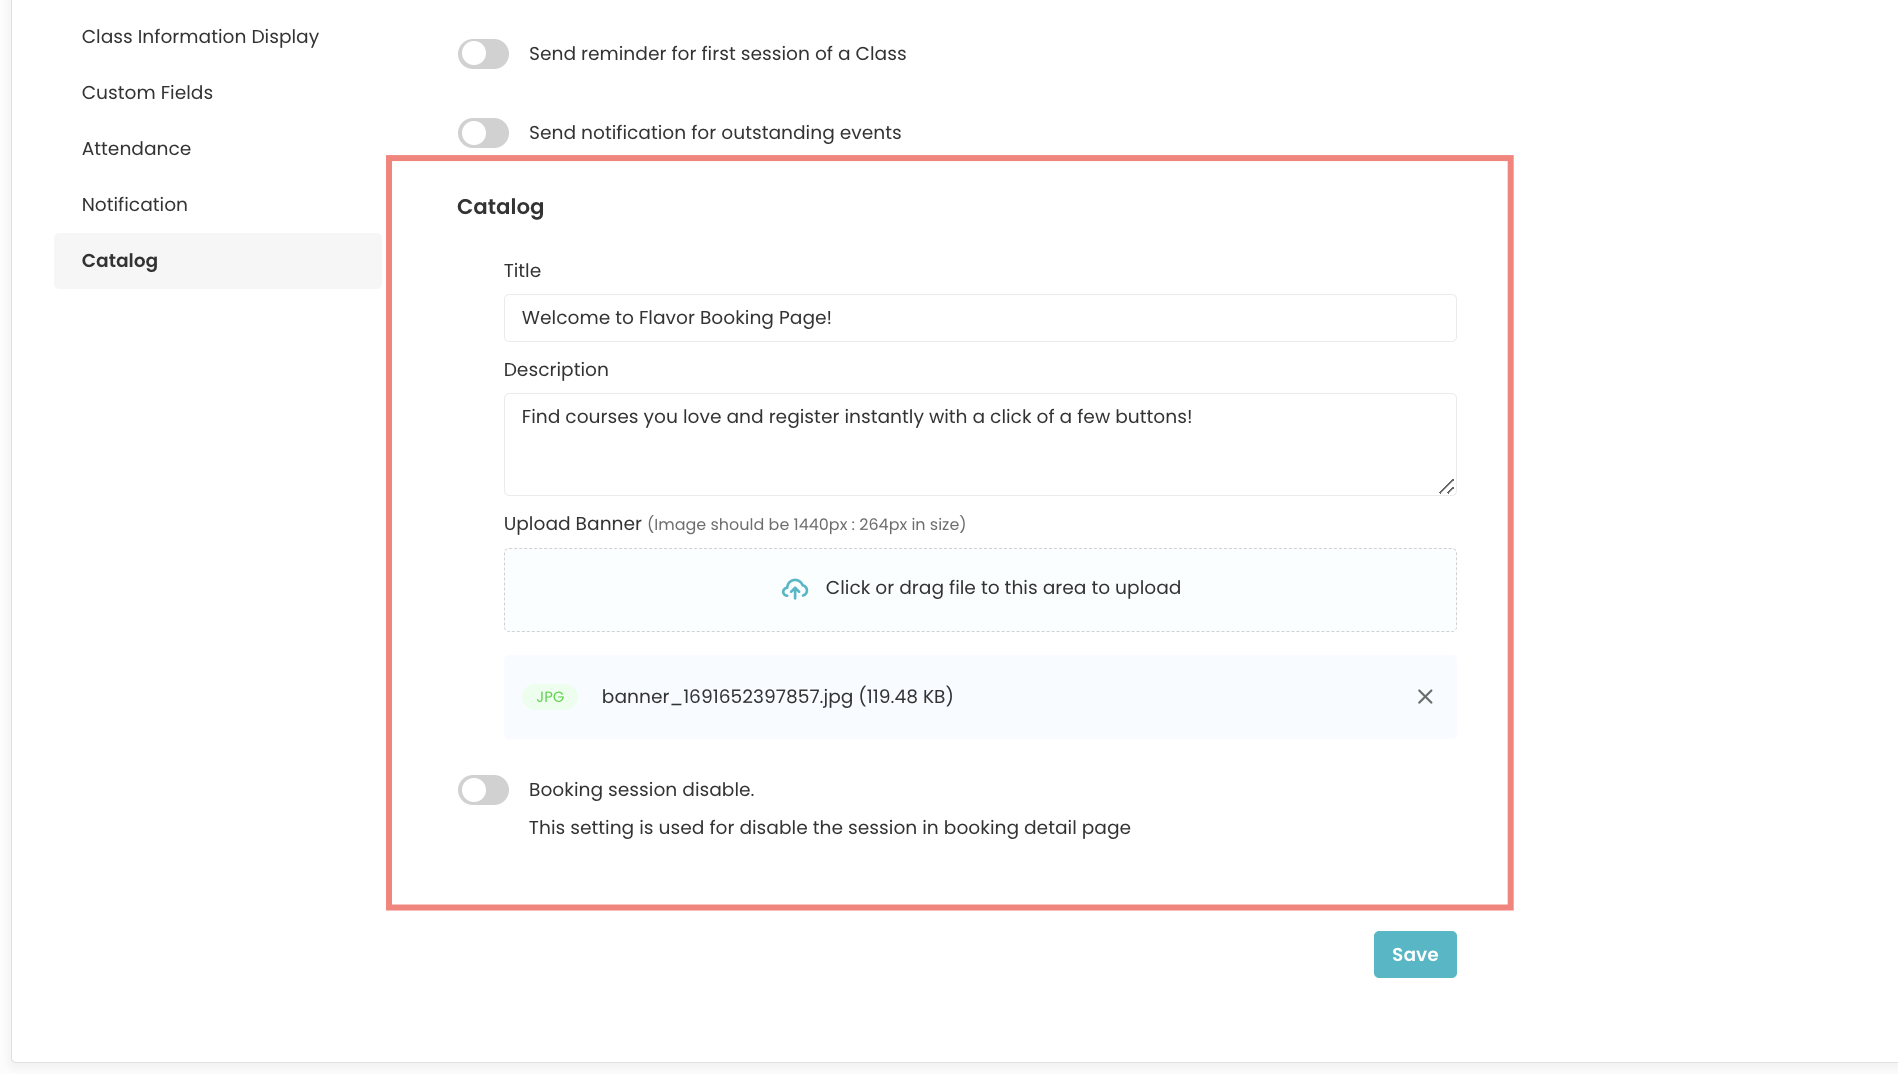
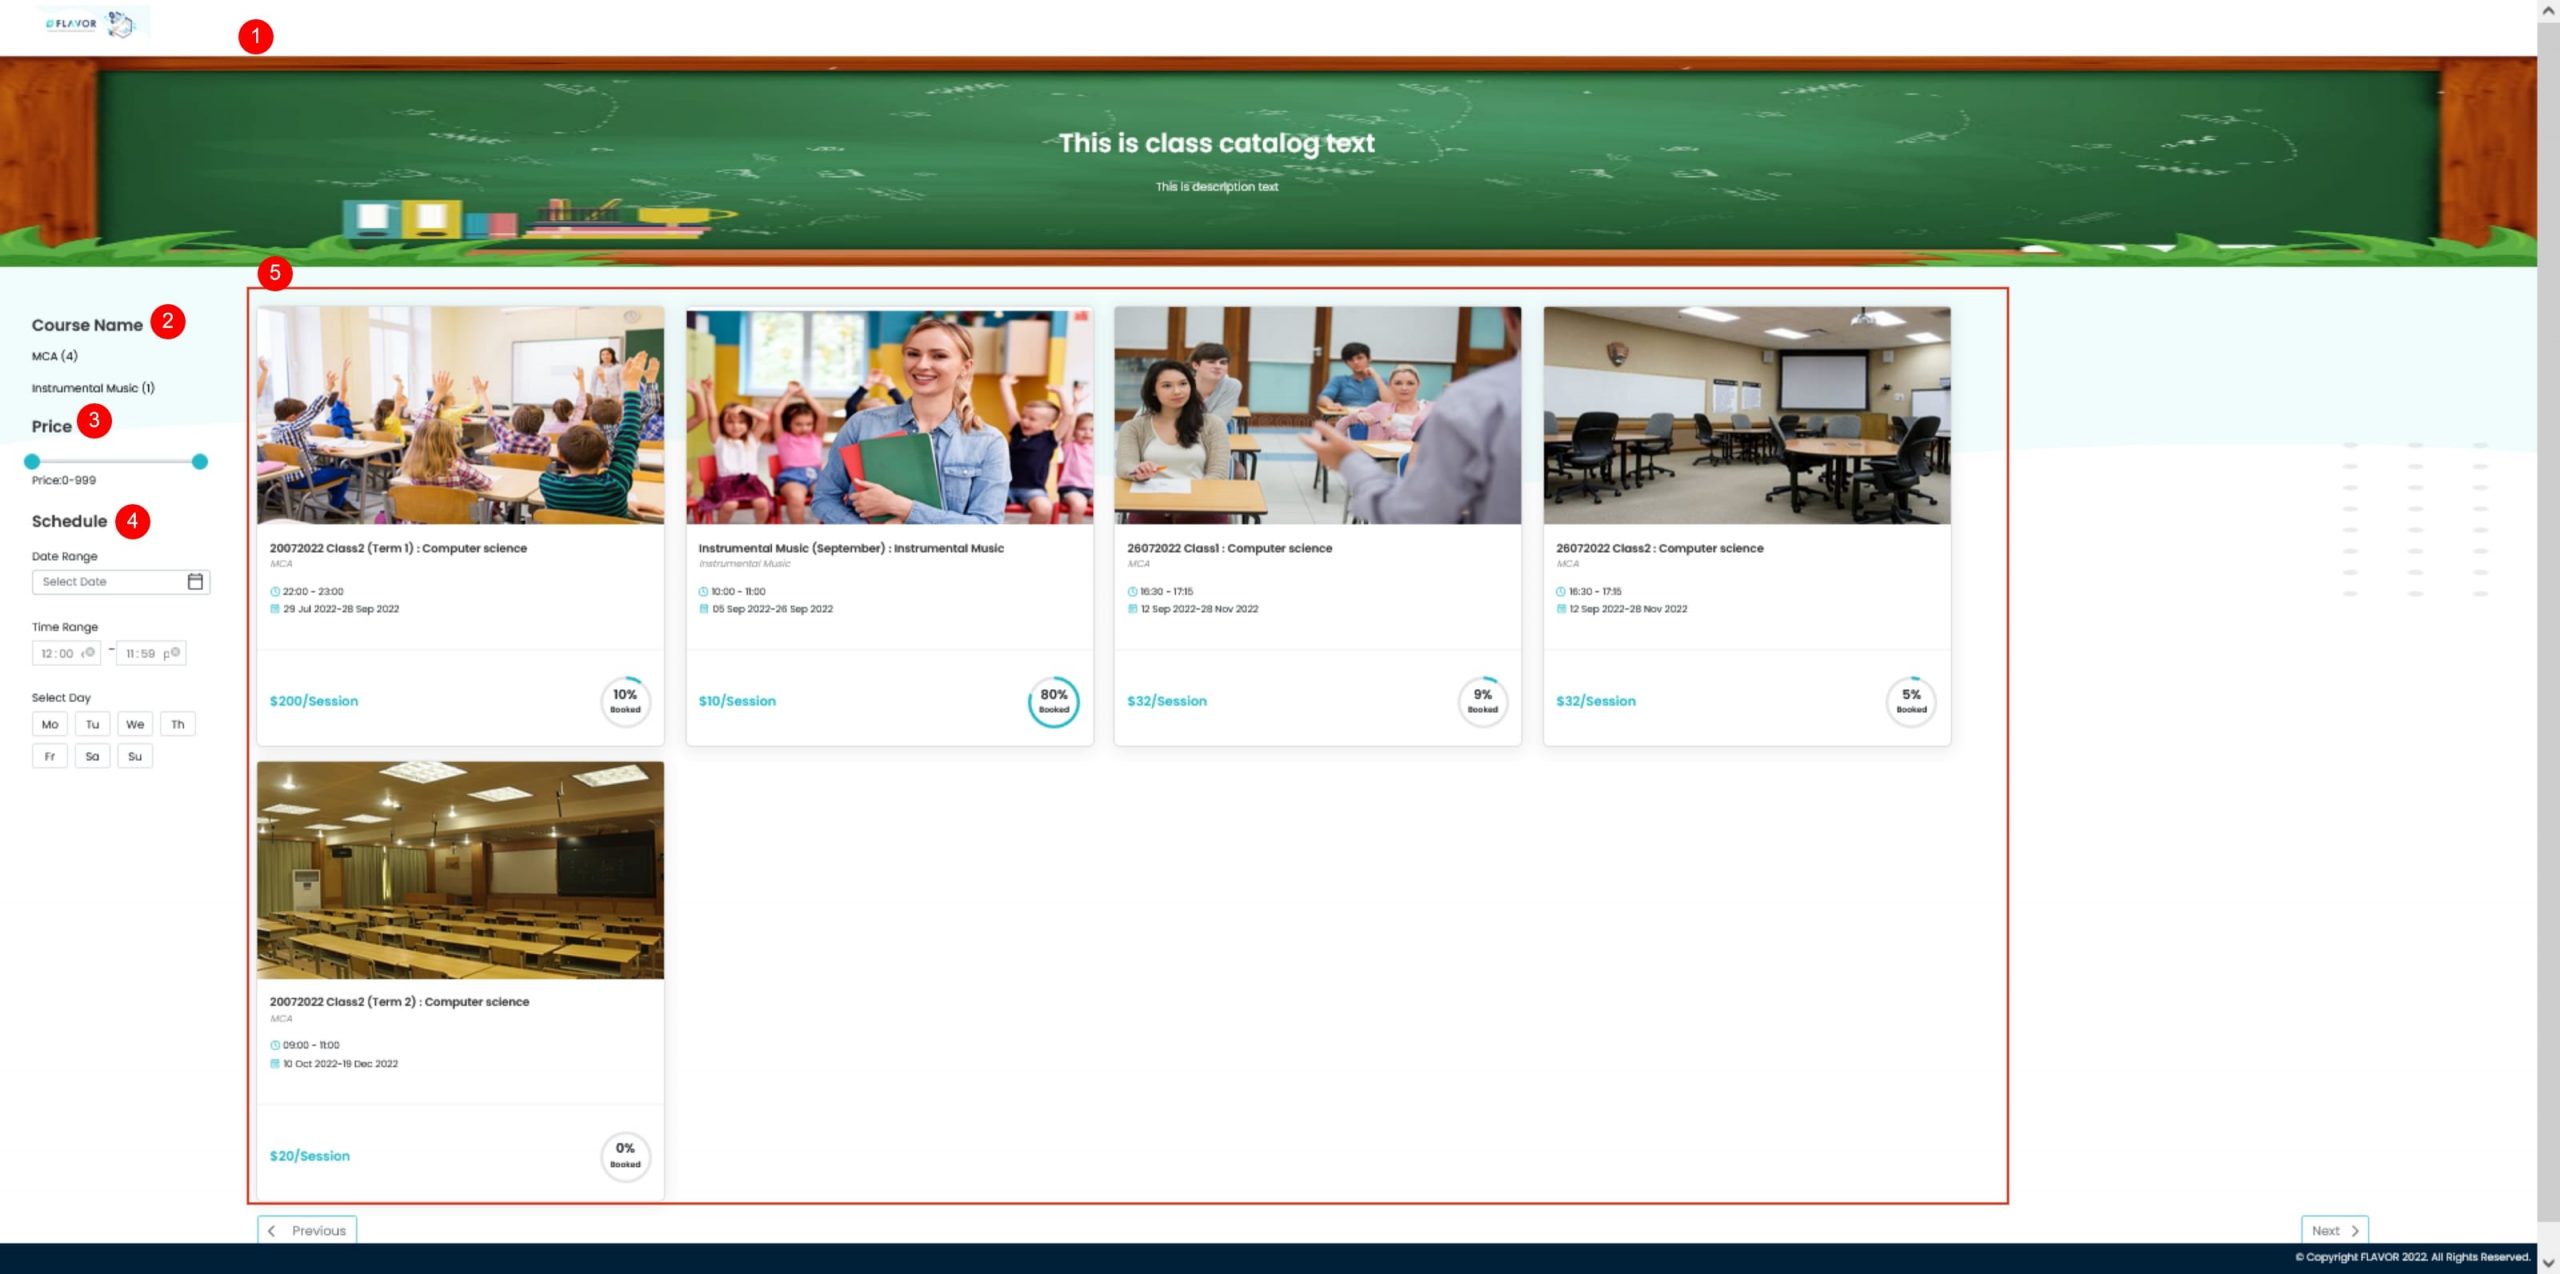
- Catalog banner: This part is the banner of the Catalog. You can customize this from the Class Settings. From the Class Settings, you can upload the banner image and write the text as you need.
- Booking Session Disable: Toggle this on to disable individual session selection while registering.
- Course Name: Here you can see the list of Course Names and the number of Classes under that course name.
- Price: This part shows you the class price range. There is a slider by which you can change the price range and filter.
- Schedule: There are different options by which you can filter the Classes.
- Date Range: You can select the date range and filter.
- Time Range: You can set the time range and filter.
- Select Day: You can Select the day/days and can filter.
- This part shows you the different upcoming and ongoing classes.
Step 3
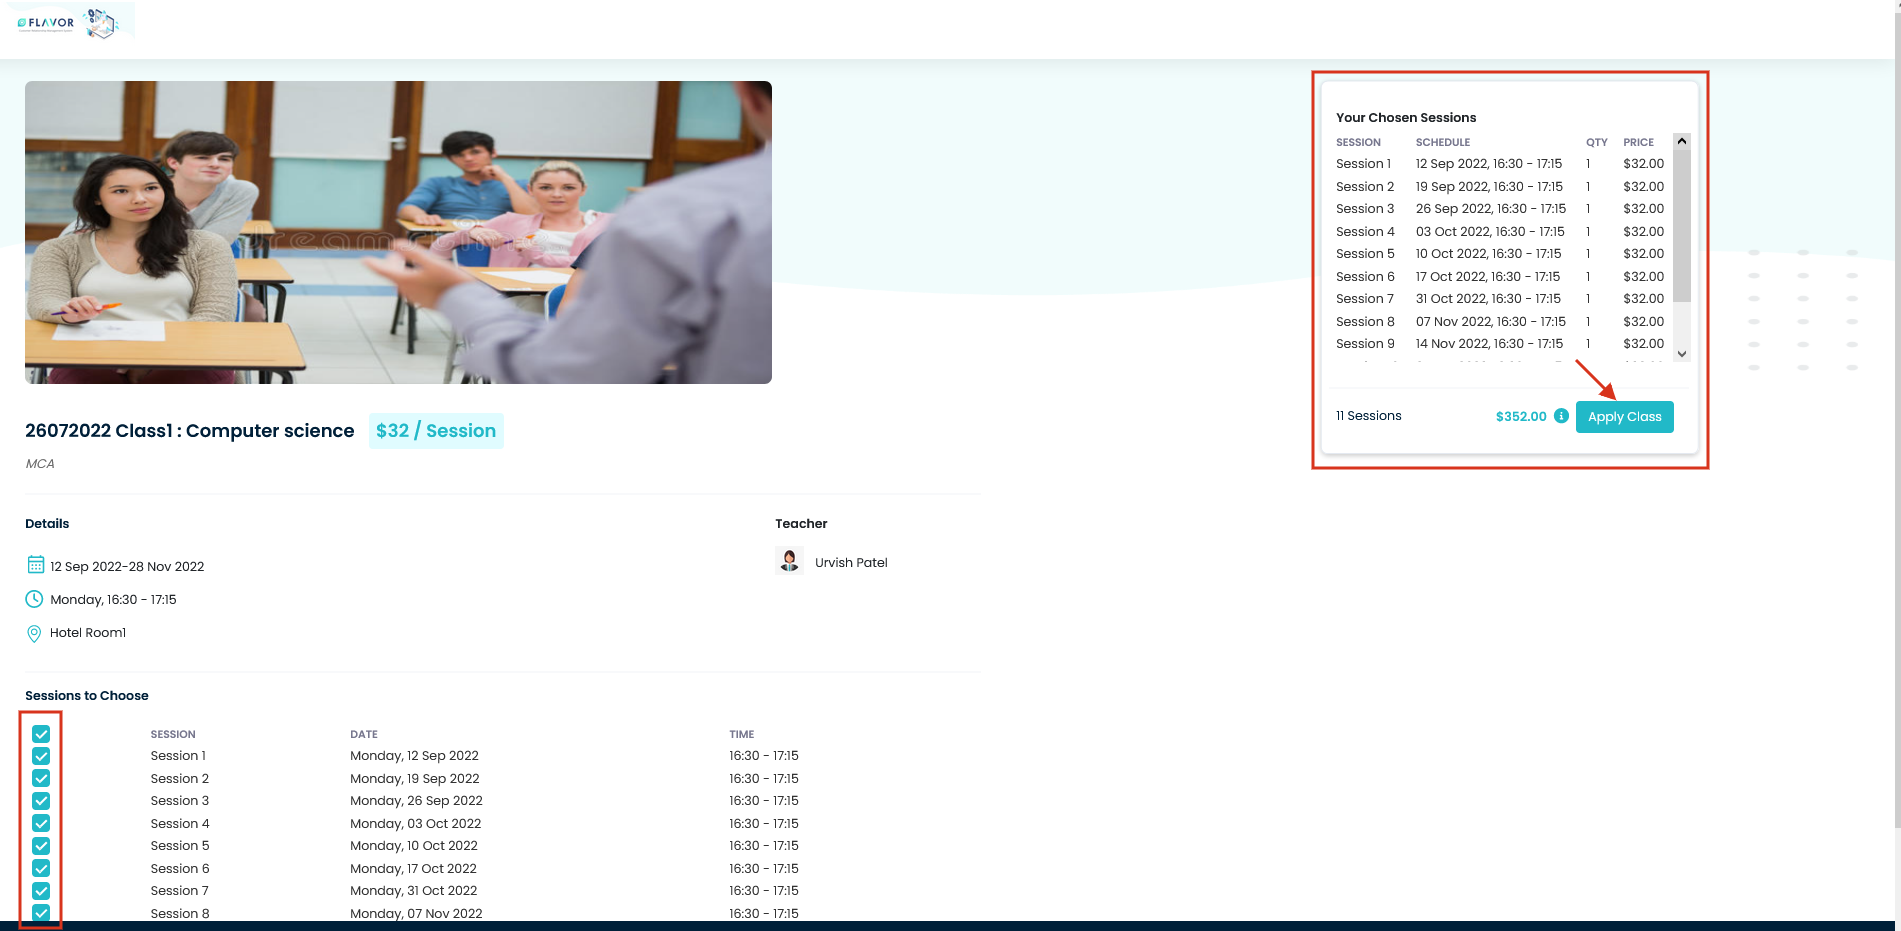
- Click on any class you want to register for.
- It will navigate you to the class detail page.
- Here, you can select the session and all the selected sessions appear along with the Total fees in the box on the right-hand side.
- Click on the Apply Class button.
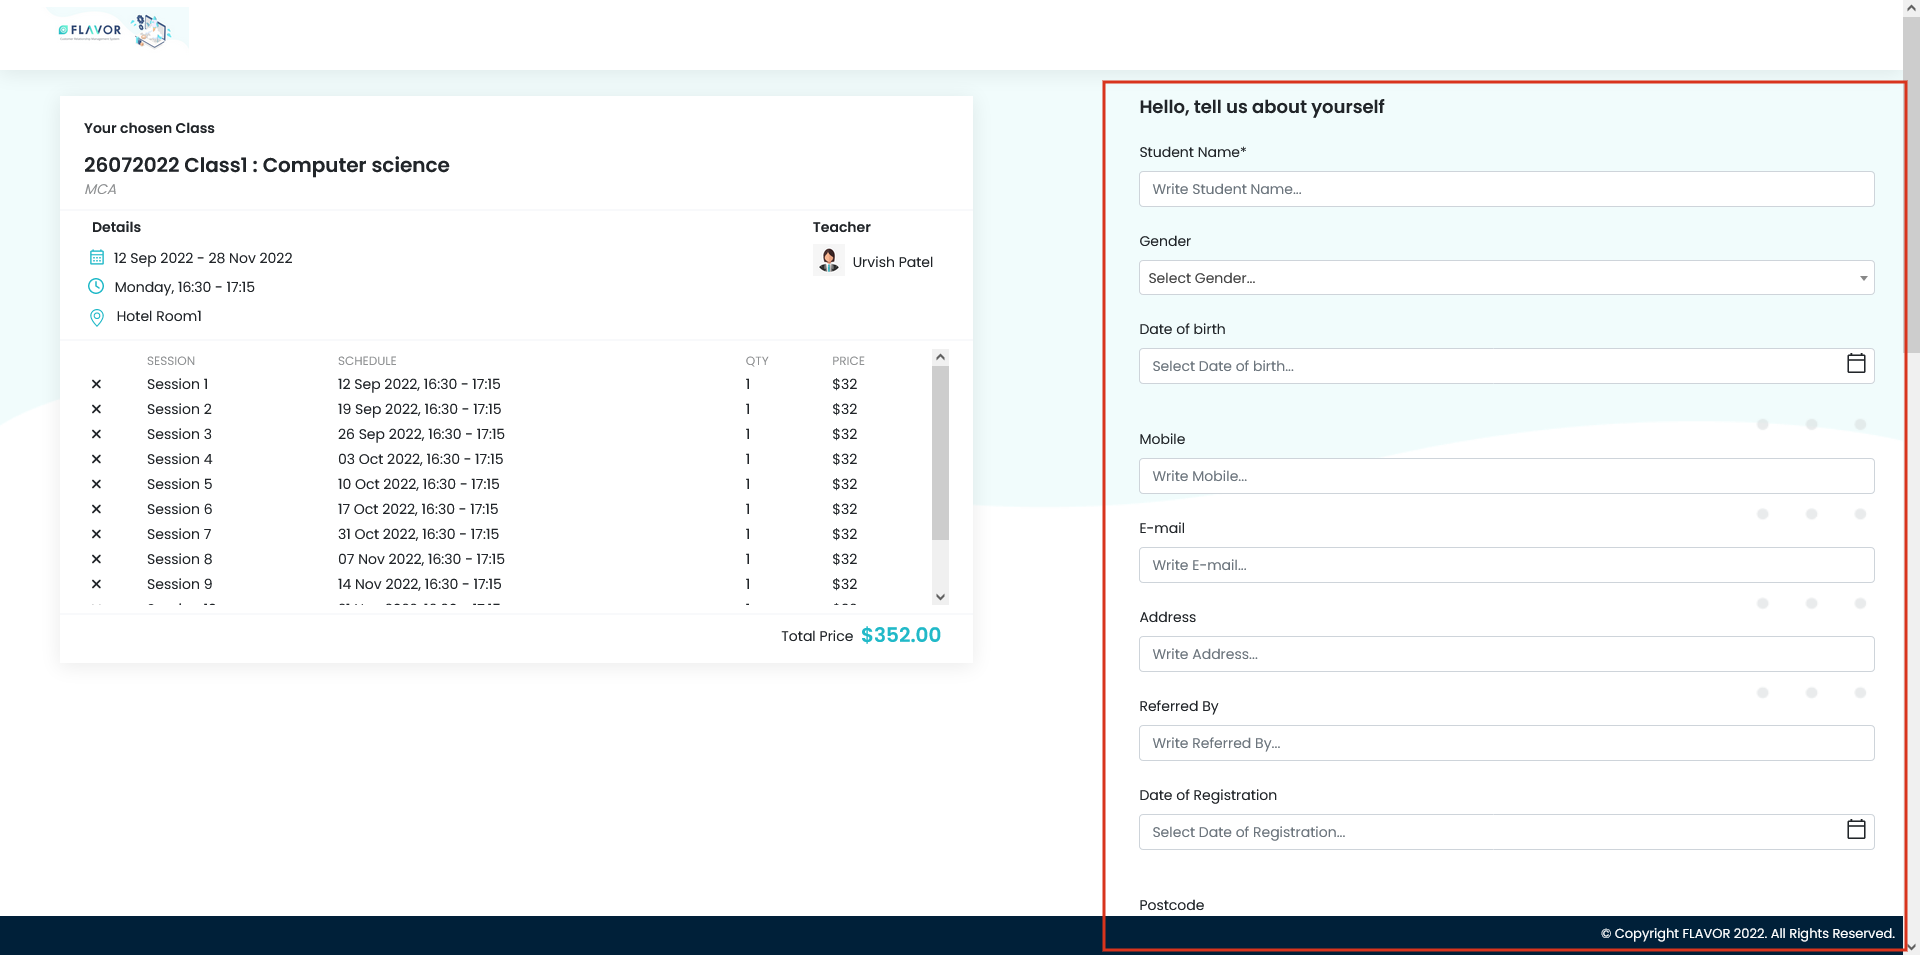
Step 4
- This will take you to the Registration Page.
- Fill up all the details on the registration page and click on the Confirm button.
Note: To know How to Customize the Registration form, Click
Step 5
- Once the form is filled up, you will get a notification on the screen.
- Apart from this, the newly registered student and their parent will receive an email as per the setting done in Student notification.
- Also, an invoice will be generated and it will be displayed under the payment module, class detail on the payment section, and student module on each profile view.

Need more help? Ask us a question
Please let us know more of your details and our team will reach out to you very shortly.