
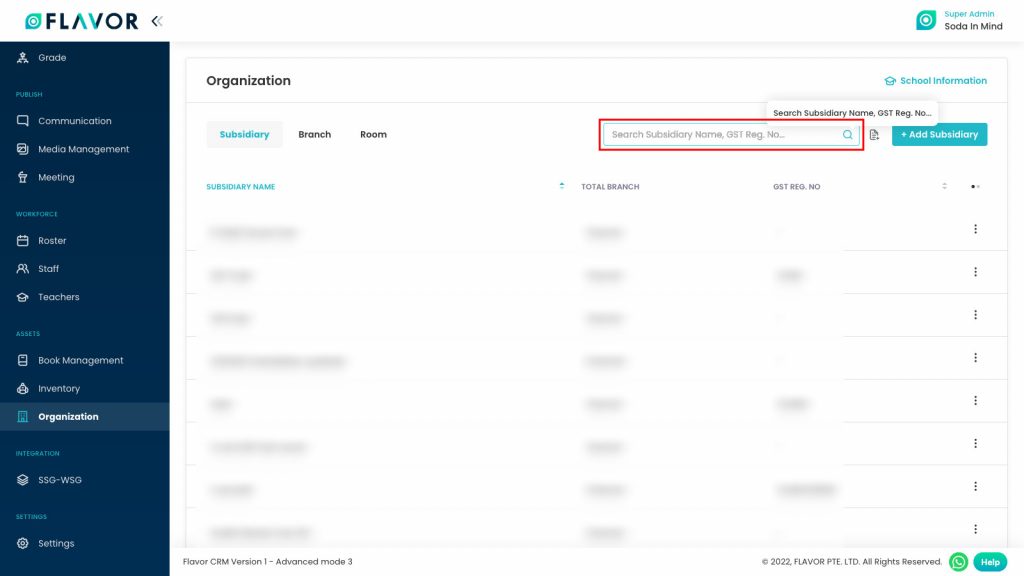
You can check the Organization by clicking on the Organization Module from the main navigation panel of the Flavor EduPortal. The “Organization” menu is provided under the “Assets” section in the navigation panel.
By clicking on the “Organization”, from the left menu you will be redirected to the Organization page where you will see the listing in the grid view.
Subsidiary
A subsidiary is usually referred to as the parent company or the holding company.

Subsidiary Options
Search
By clicking on the Search Icon, you can search the specific subsidiary by entering the subsidiary name, GST reg. No.
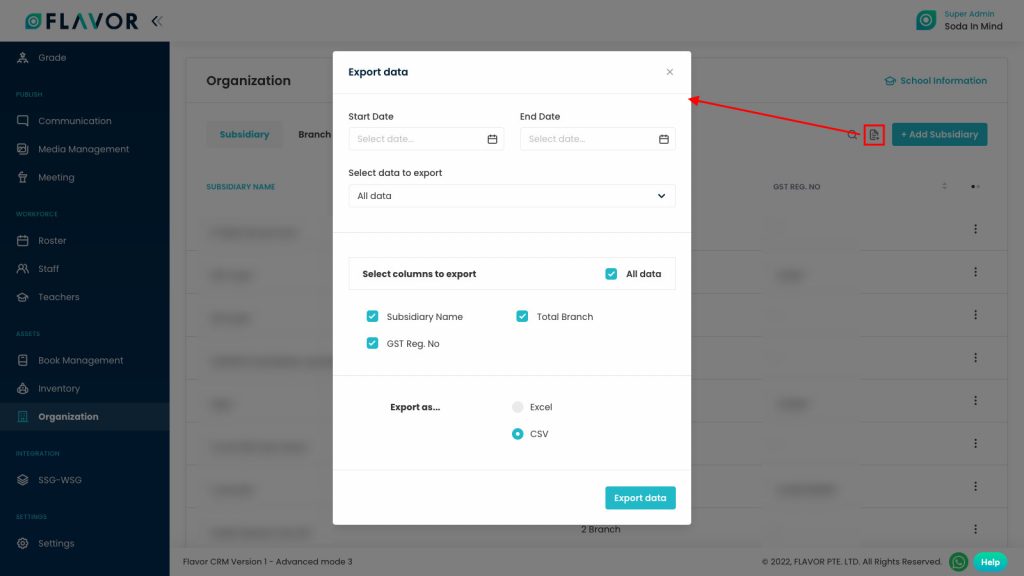
Export
- To export all subsidiary data, you need to click on the Export Icon.
- After clicking on the Export icon, a pop-up form will appear on your screen. Having these options:
- Start Date and End Date: Select the time period in the start date and end date column for which time period’s data you need.
- Select Data to Export: Here, you can export the data of all rows or 15 rows by simply clicking on the dropdown.
- Select Column to Export: Select columns which you need your data to export. Like if you want all the details of all subsidiaries, then simply click on “ALL DATA” and you will get all desired row’s information of the subsidiary in your exported file.
- Export as: Then select a format in which you want to export your data i.e (EXCEL or CSV).
- After selecting the relevant records/data, click on the Export Data button to export all data in the selected file (Excel/CSV).
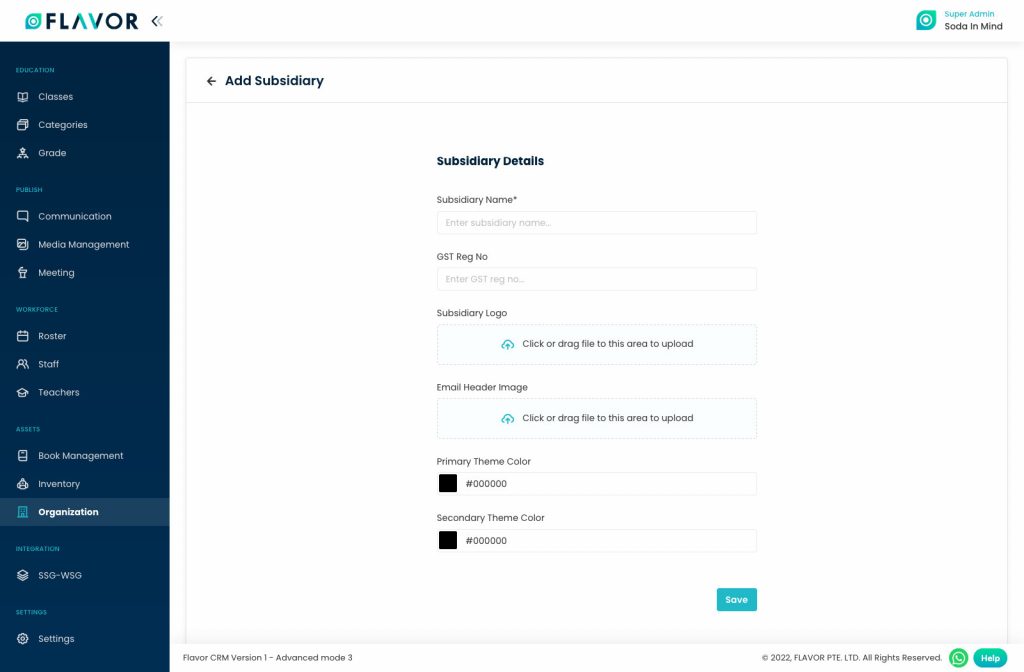
Add Subsidiary
To add the subsidiary click on the + Add Subsidiary button, you will be redirected to the Add Subsidiary page.
- Subsidiary Name: Here, you have to enter the name of the company.
- GST Reg No: Enter the GST registration No.
- Subsidiary Logo: Upload the logo of the company.
- Email Header: Upload email header image.
- Primary & Secondary Theme Color: Choose your own colour theme.
- Click on the Save button to save the details.
Subsidiary Records
Column Sorting
All sources will be shown in Tabular Format. You can sort the data by clicking on Column Sorting Arrows in Table’s Header.
Column Visibility
You can sort columns by clicking on the Ellipsis icon, you will get the pop-up form named Select Data to View. Mark the columns you want to see and unmark the ones you don’t want to see in the table. After this procedure click on the Apply Filter button.

Action Button
Click on Action Button (Vertical Ellipsis), a popup box will appear on your screen with the Edit option & Delete option (Delete Option is disabled).
Edit Button
- Click on the Edit button.
- After clicking on the edit button, you will be redirected to the Edit Subsidiary page.
- Update the details & click on the Save button.

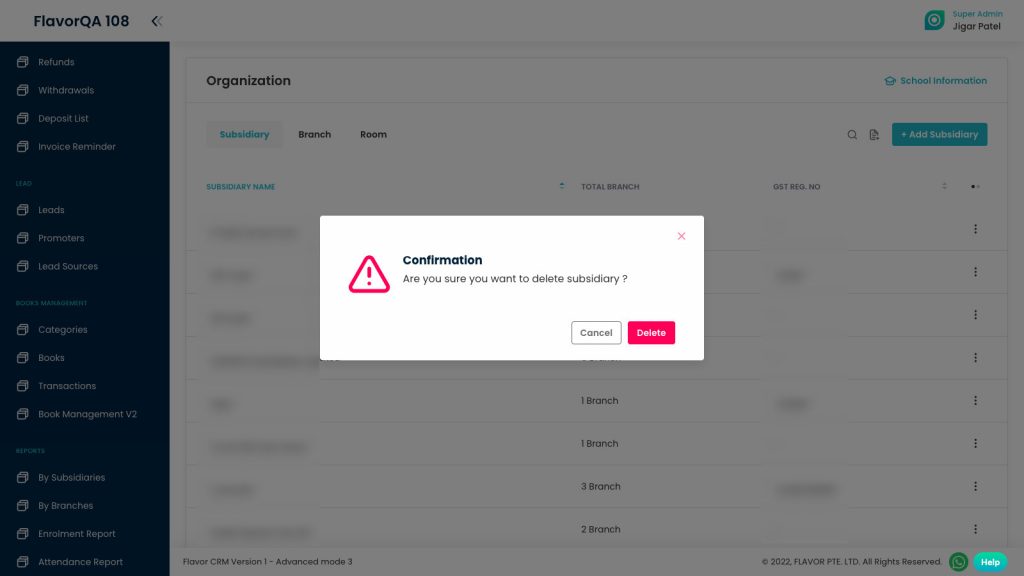
Delete Button
- Click on the Delete button.
- A confirmation popup will appear on your screen.
- Click on the Yes button to delete the record.
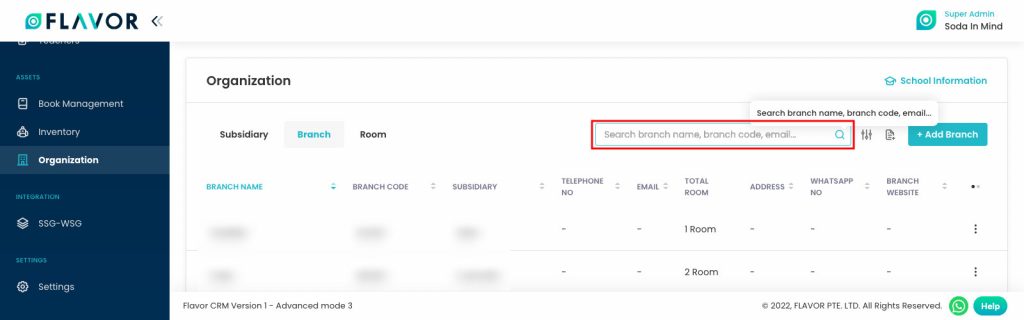
Branch
What branches are under in a company are defined in the Branch tab.
Search
By clicking on the Search Icon, you can search the specific branch records by entering the branch name, branch code & email.
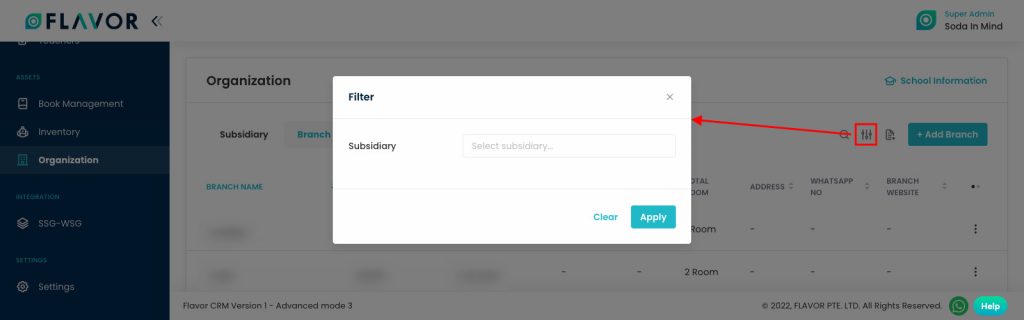
Filter
You can filter the branches based on specific parameters. Click on Filter Icon, after clicking, a popup form will appear on your screen. Select the data according to your need then click on Apply button to save parameters.
Export
- To export all branch data, you need to click on the Export Icon.
- After clicking on the Export icon, a pop-up form will appear on your screen.
- Start Date and End Date: Select the time period in the start date and end date column for which time period’s data you need.
- Select Data to Export: Here, you can export the data of all rows or 15 rows by simply clicking on the dropdown.
- Select Column to Export: Select columns which you need your data to export. Like if you want all the details of all branches, then simply click on “ALL DATA” and you will get all desired row’s information of the branch in your exported file.
- Export as: Then select a format in which you want to export your data i.e (EXCEL or CSV).
- After selecting the relevant records/data, click on the Export Data button to export all the data in the selected file (Excel/CSV).

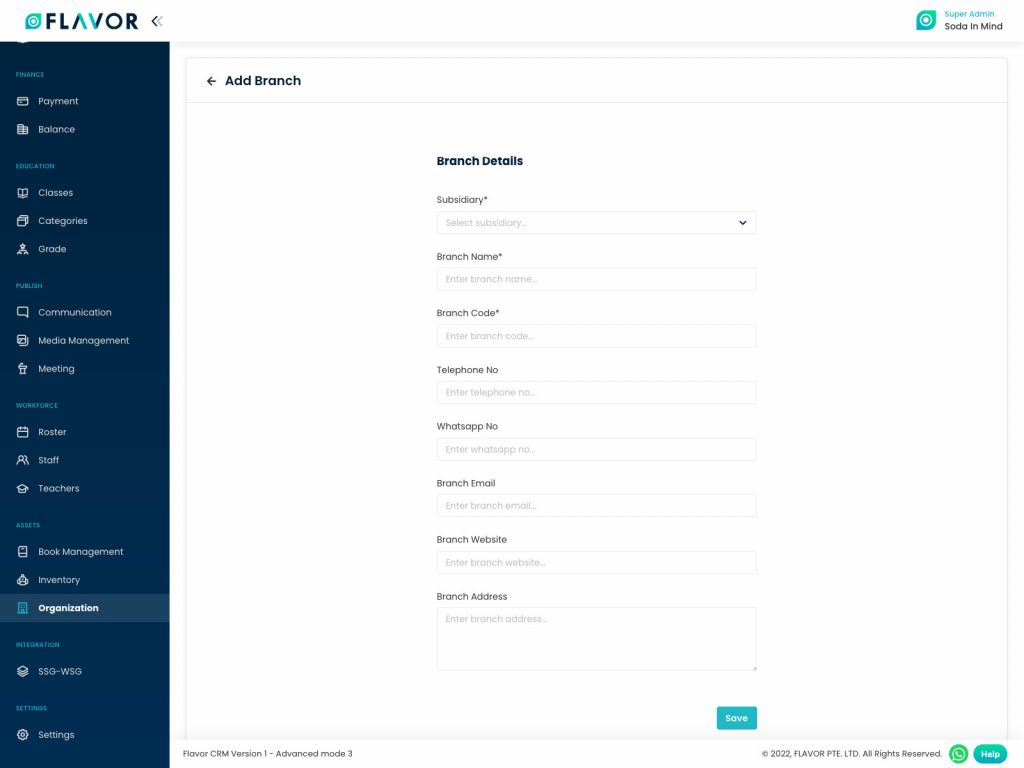
Add Branch
To add Branch, click on the + Add Branch button. You will be redirected to the add branch page. Fill in the details of the branch here.
- Subsidiary: Select the subsidiary from the dropdown.
- Branch Name: Fill in the branch name.
- Branch Code: The branch code is important, all invoices that were generated in the same branch will have the same Branch Code.
- A subsidiary, Branch Name Branch Code these fields are mandatory.
- Add telephone no., Whatsapp No, Branch Email, Branch Website & Branch Address.
- Click on the Save button to save the details.
Branch Records
Column Sorting
All sources will be shown in Tabular Format. You can sort the data by clicking on Column Sorting Arrows in Table’s Header.
Column Visibility
You can sort columns by clicking on the Ellipsis icon, you will get the pop-up form named Select Data to View. Mark the columns you want to see and unmark the ones you don’t want to see in the table. After this procedure click on the Apply Filter button.
Action Button
Click on Action Button (Vertical Ellipsis), a popup box will appear on your screen with the Edit option & Registration Link.
Edit Button
- Click on the Edit button.
- After clicking on the edit button, you will be redirected to the Edit Branch page.
- Update the details & click on the Save button.
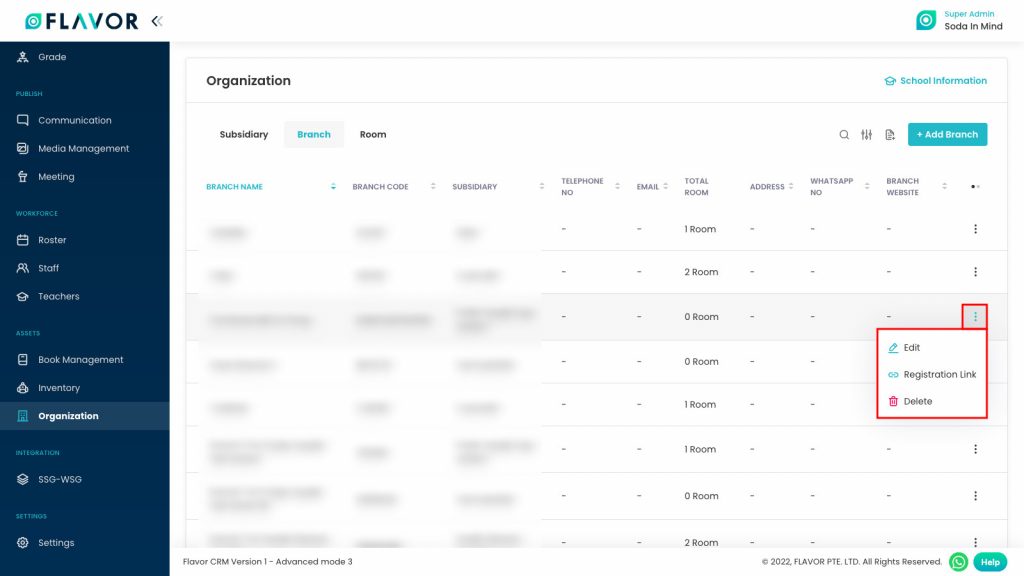
Registration Link
Click on the Registration Link, you will be redirected to the registration form. Fill out the form.
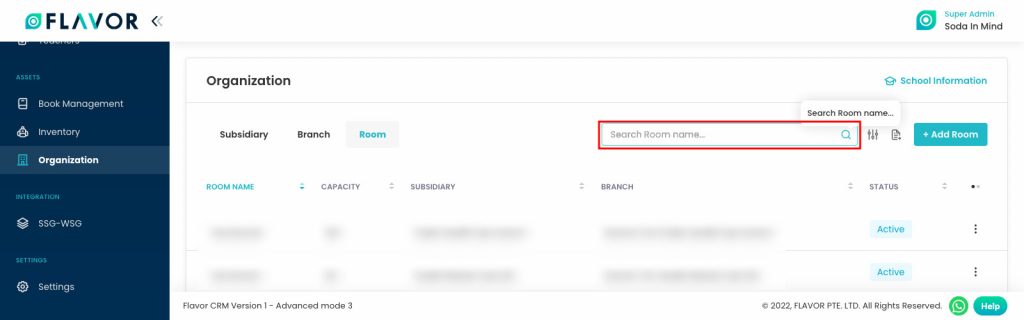
Room
Search
By clicking on the Search Icon, you can search the room by entering the room name.
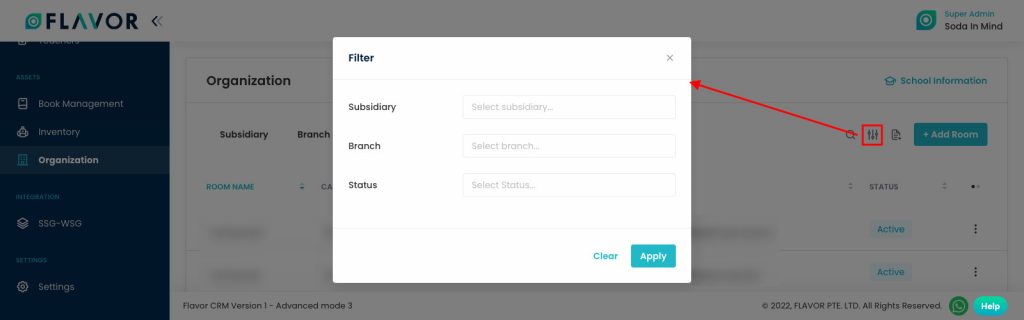
Filter
You can filter the room based on specific parameters. Click on Filter Icon, after clicking, a popup form will appear on your screen. Select the data according to your need then click on Apply button to save parameters.
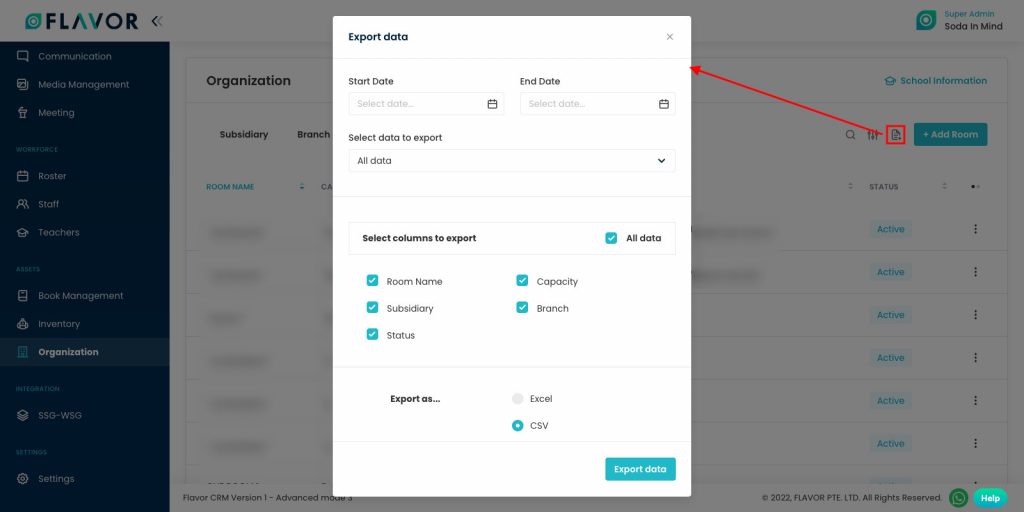
Export
- To export all Room data, you need to click on the Export Icon.
- After clicking on the Export icon, a pop-up form will appear on your screen.
- Start Date and End Date: Select the time period in the start date and end date column for which time period’s data you need.
- Select Data to Export: Here, you can export the data of all rows or 15 rows by simply clicking on the dropdown.
- Select Column to Export: Select columns which you need your data to export. Like if you want all the details of rooms, then simply click on “ALL DATA” and you will get all desired rows’ information of the room in your exported file.
- Export as: Then select a format in which you want to export your data i.e (EXCEL or CSV).
- After selecting the relevant records/data, click on the Export Data button to export all the data in the selected file (Excel/CSV).
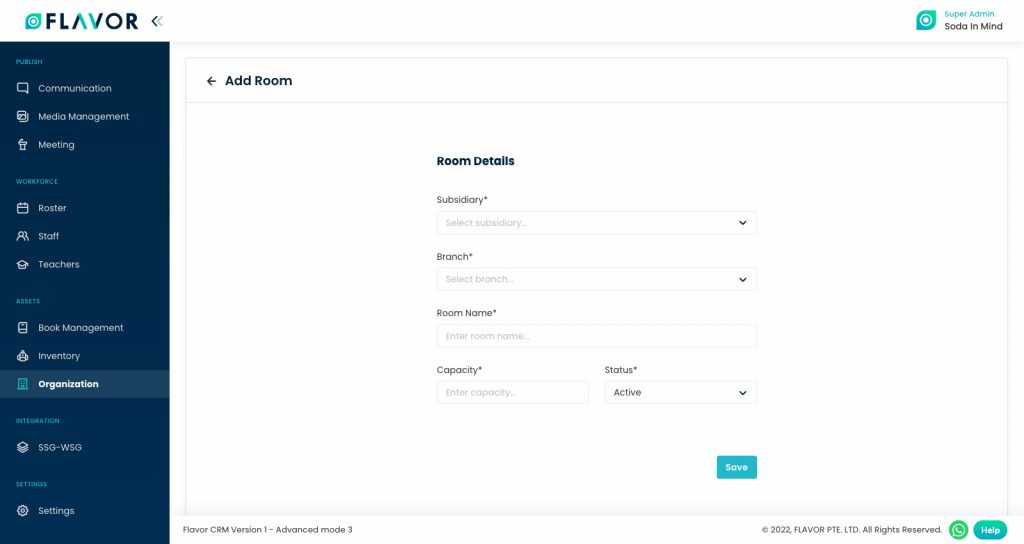
Add Room
To add Room, click on the + Add Room button. You will be redirected to the add room page. Fill in the details of the room here.
- Subsidiary: Select the subsidiary from the dropdown.
- Branch Name: Fill in the branch name.
- Room Name: Room name referred to the Class.
- Fill in the capacity of the class, and add the status of a class from the drop-down.
- Click on the Save button to save the room.
Room Records
Column Sorting
All rooms will be shown in Tabular Format. You can sort the data by clicking on Column Sorting Arrows in Table’s Header.
Column Visibility
You can sort columns by clicking on the Ellipsis icon, you will get the pop-up form named Select Data to View. Mark the columns you want to see and unmark the ones you don’t want to see in the table. After this procedure click on the Apply Filter button.
Action Button
Click on Action Button (Vertical Ellipsis), a popup box will appear on your screen with the Edit option & Delete option.
Edit Option
- Click on the Edit button.
- After clicking on the edit button, you will be redirected to the Edit Room page.
- Update the details & click on the Save button.

Delete Option
- Click on the Delete option. A confirmation popup will appear on the screen.
- Click on the Yes button to delete the room.

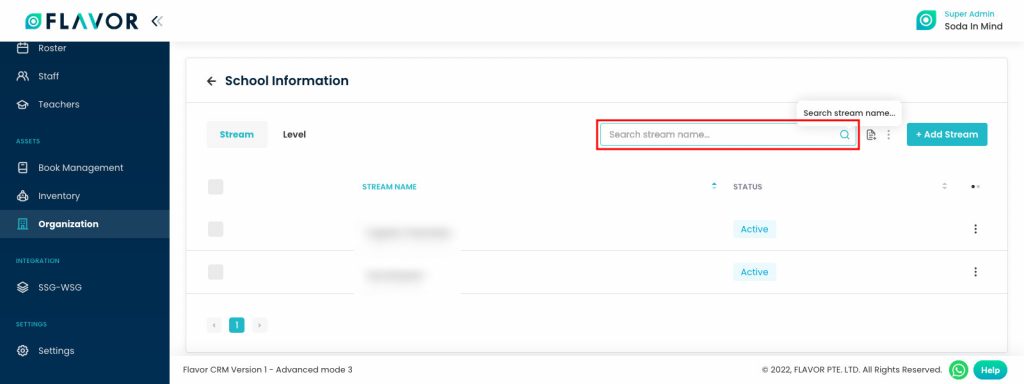
School Information
In the upper right corner of the Organisation Module, you can see the School Information. Click on that button, you will be redirected to the School Information page, here you can see two tabs Stream & Level.
Stream
- Stream is referred to as a branch or sub-branch of a field of study.
- Examples: Maths Stream, Science Stream, Social Stream, Engineering Stream, Medicine Stream, Arts Stream, Commerce Stream.
Search
By clicking on the Search Icon, you can search the room by entering the room name.
Export
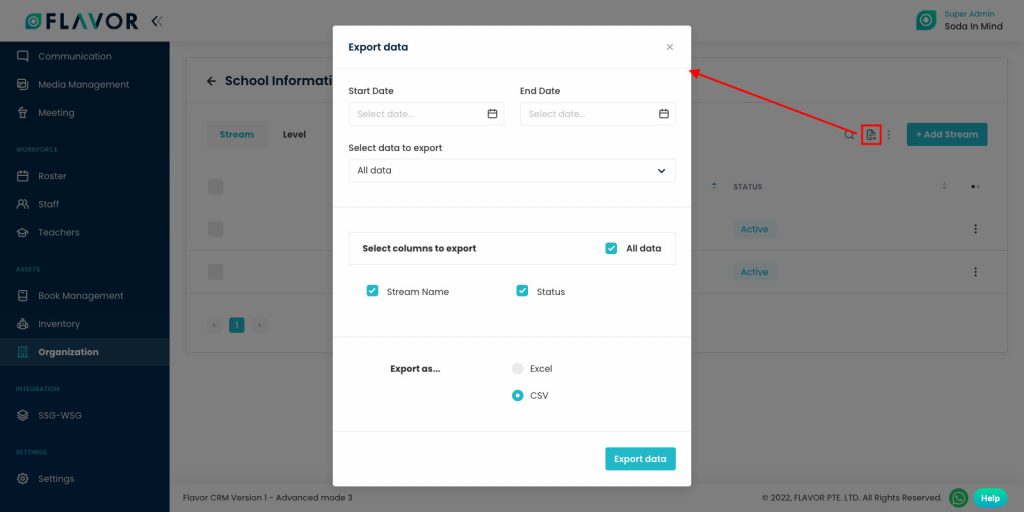
- To export all Stream data, you need to click on the Export Icon.
- After clicking on the Export icon, a pop-up form will appear on your screen.
- Start Date and End Date: Select the time period in the start date and end date column for which time period’s data you need.
- Select Data to Export: Here, you can export the data of all rows or 15 rows by simply clicking on the dropdown.
- Select Column to Export: Select columns which you need your data to export. Like if you want all the details of the stream, then simply click on “ALL DATA” and you will get all desired rows’ information in your exported file.
- Export as: Then select a format in which you want to export your data i.e (EXCEL or CSV).
- After selecting the relevant records/data, click on the Export Data button to export all the data in the selected file (Excel/CSV).
Bulk Action Button
- The Bulk Action Button is disabled by default. When you mark on the check box, which appears on the starting on each row, this action button will be enabled. You can select/deselect rows by ticking the checkbox.
- After the selection of any record go to the Action Button, click on the button, a small popup named “Delete” will appear. Click on the Delete button to delete the record, you will see the confirmation popup to delete the record.

Add Stream
To add stream click on the + Add Stream Button. You will be redirected to the Add Stream page. Fill in the Stream Details.
- Stream Name: Add the name of the stream, it could be Commerce, Science, Arts, etc.
- Status: Set status Active for ongoing class else set it inactive.
- Click on the Save button to save the stream.

Stream Records
Column Sorting
All rooms will be shown in Tabular Format. You can sort the data by clicking on Column Sorting Arrows in Table’s Header.
Column Visibility
You can sort columns by clicking on the Ellipsis icon, you will get the pop-up form named Select Data to View. Mark the columns you want to see and unmark the ones you don’t want to see in the table. After this procedure click on the Apply Filter button.
Action Button
Click on Action Button (Vertical Ellipsis), a popup box will appear on your screen with the Edit option & Delete option.
Edit Option
- Click on the Edit button.
- After clicking on the edit button, you will be redirected to the Edit Stream page.
- Update the details & click on the Save button.
Delete Option
- Click on the Delete button. A confirmation popup will appear on the screen.
- Click on the Yes button to delete the room.
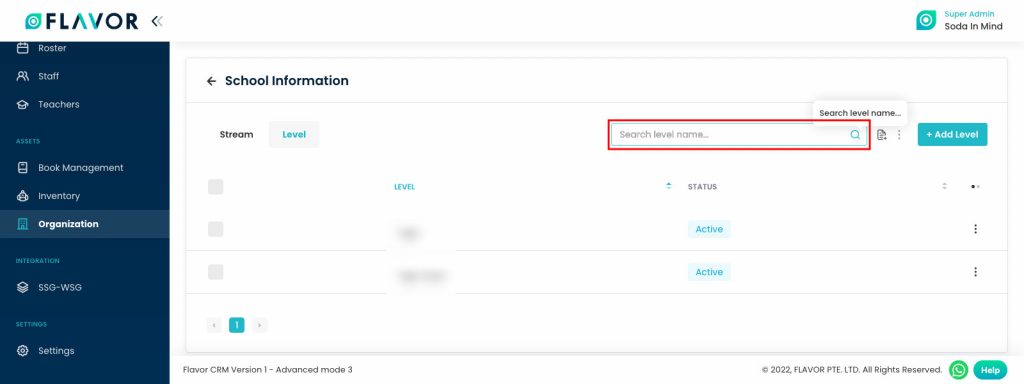
Level
Levels can be defined as Elementary, Primary, Middle & High.
Search
By clicking on the Search Icon, you can search the room by entering the level name.
Export
- To export all data, you need to click on the Export Icon.
- After clicking on the Export icon, a pop-up form will appear on your screen.
- Start Date and End Date: Select the time period in the start date and end date column for which time period’s data you need.
- Select Data to Export: Here, you can export the data of all rows or 15 rows by simply clicking on the dropdown.
- Select Column to Export: Select columns which you need your data to export. Like if you want all the details of all levels, then simply click on “ALL DATA” and you will get all desired rows’ information in your exported file.
- Export as: Then select a format in which you want to export your data i.e (EXCEL or CSV).
- After selecting the relevant records/data, click on the Export Data button to export all the data in the selected file (Excel/CSV).

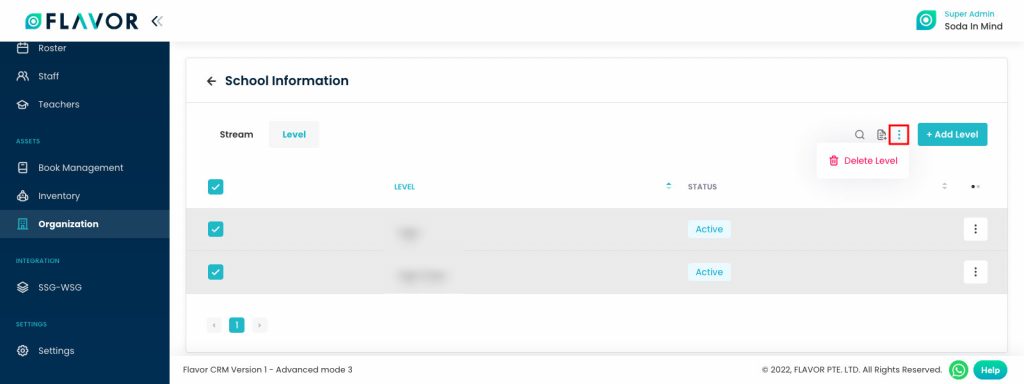
Action Button
- The Bulk Action Button is disabled by default. When you mark on the check box, which appears on the starting on each row, this action button will be enabled. You can select/deselect rows by ticking the checkbox.
- After the selection of any record go to the Action Button, click on the button, a small popup named “Delete” will appear. Click on Delete Button to delete the record, you will see the confirmation popup to delete the record.
Add Level
To add level click on the + Add Level Button. You will be redirected to the Add Level page. Fill in the Stream Details.
- Level Name: Add the name of the level, it could be Elementary, Primary, Middle & High
- Status: Set status Active for ongoing class else set it inactive.
- Click on the Save button to save the stream.

Level Records
Column Sorting
All rooms will be shown in Tabular Format. You can sort the data by clicking on Column Sorting Arrows in Table’s Header.
Column Visibility
You can sort columns by clicking on the Ellipsis icon, you will get the pop-up form named Select Data to View. Mark the columns you want to see and unmark the ones you don’t want to see in the table. After this procedure click on the Apply Filter button.
Action Button
Click on Action Button (Vertical Ellipsis), a popup box will appear on your screen with the Edit option & Delete option.
Edit Option
- Click on the Edit button.
- After clicking on the edit button, you will be redirected to the Edit Level page.
- Update the details & click on the Save button.
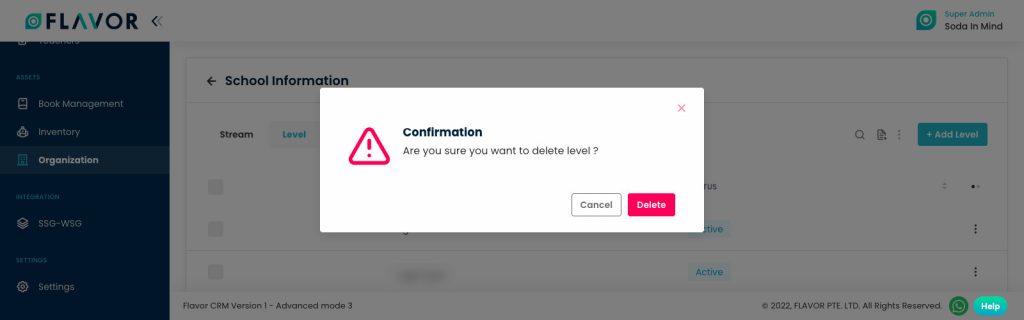
Delete Option
- Click on the Delete button. A confirmation popup will appear on the screen.
- Click on the Yes button to delete the room.
Need more help? Ask us a question
Please let us know more of your details and our team will reach out to you very shortly.