
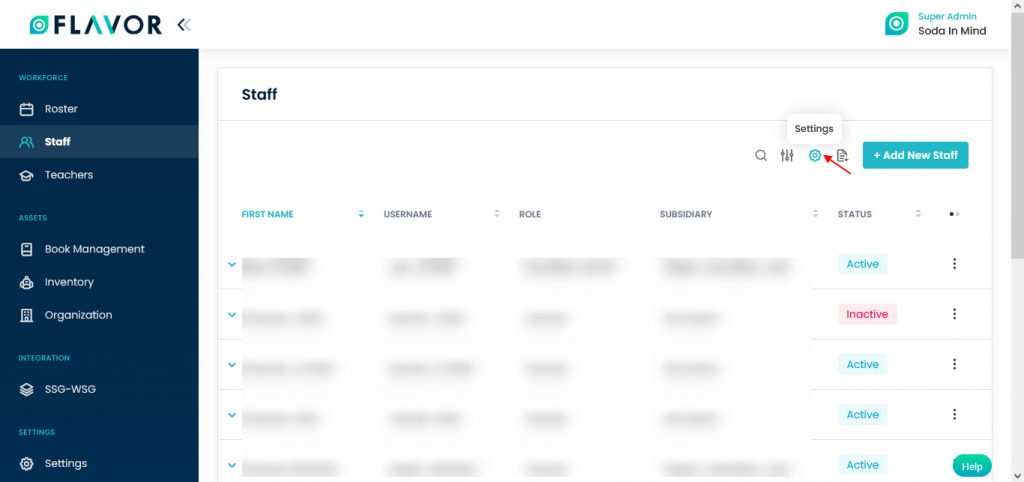
You can check the Staff by clicking on the Staff from the main navigation panel of the Flavor EduPortal. This module is provided under the Workforce section in the navigation panel.
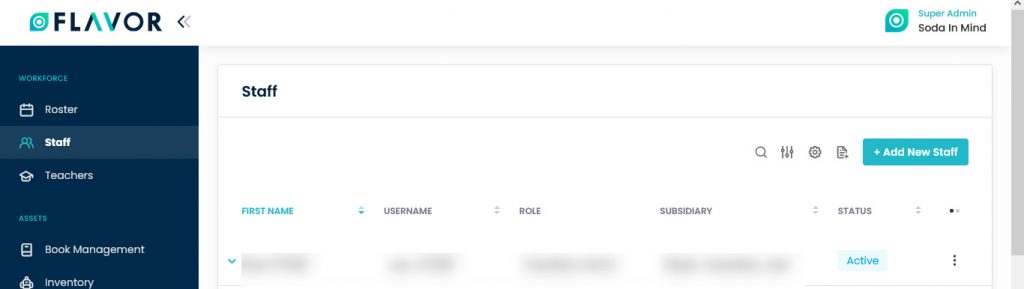
By clicking on the Staff, from the left menu you will be redirected to the Staff Page. Here, you can see the list of all staff members, irrespective of their status which is Active & Inactive.

Staff Options
Search
Search By clicking on the Search Icon, you can search the specific staff member by entering a first name, last name & user name.
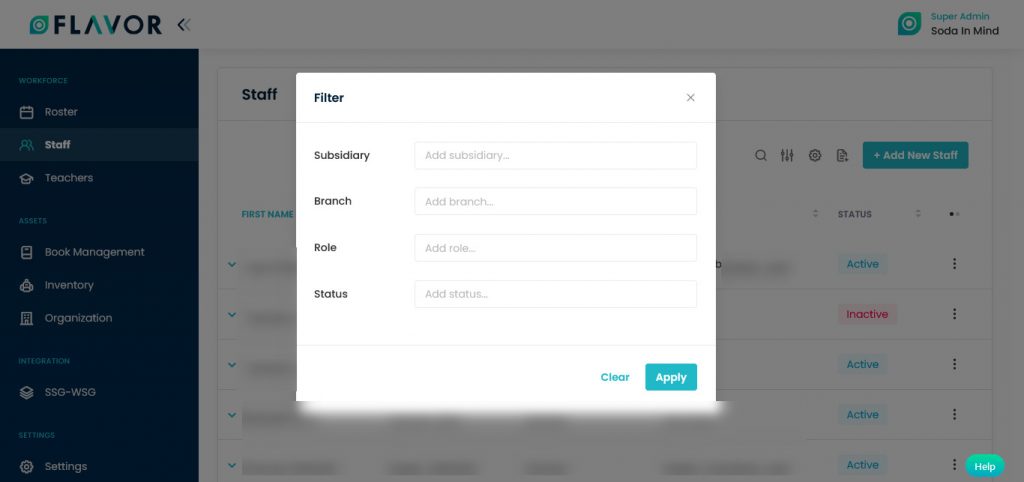
Filter
You can filter the products based on specific parameters. Click on Filter Icon, after clicking, a popup form named Filter will appear on your screen. Enter the Subsidiary, Branch, Role & Status then click on Apply button to save parameters.
Import/Export
To Import & Export Staff data, you have to click on the Import/Export Icon. By clicking on the icon, you will see the Export Data & Import Data options.

Import Data
- To import the data click on the Import Data option, after clicking a popup named “Import Data” will appear on your screen.
- Download the Sample File: If you want to download the sample file, click on the Download button. After clicking on the Download button a File Download window will be open on your screen, choose the Save File and then click on the OK button.
- This file contains the format based on which you can create .CSV file to import data.
- Upload Your File: Click on the Upload File button. A File Selector Window will be open, choose a .CSV file to upload.
- Click on the Import button.

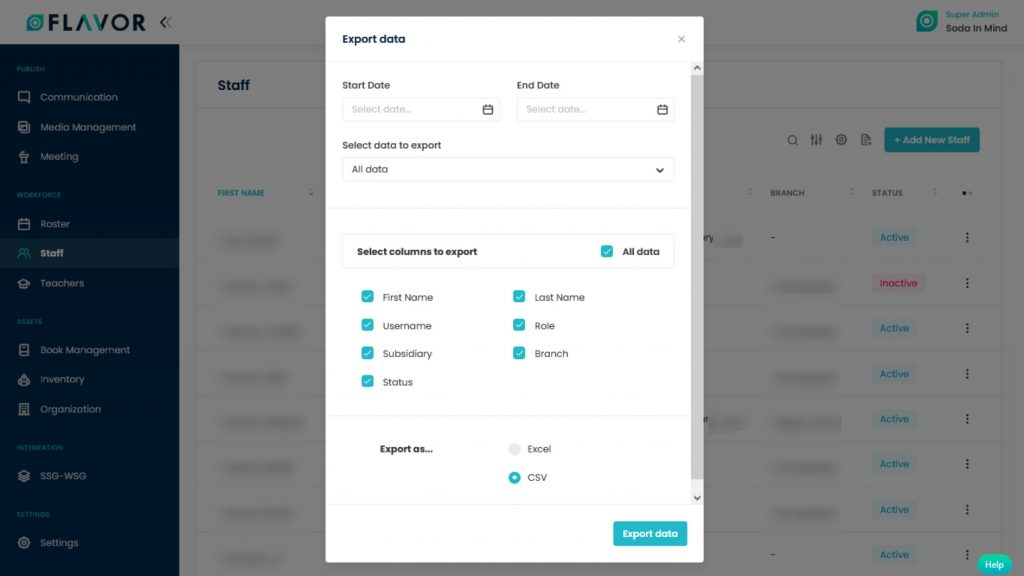
Export Data
- To export all data, you need to click on the Export Icon.
- After clicking on the Export icon, a pop-up form will appear on your screen.
- Start Date and End Date: Select the time period in the start date and end date column for which time period’s data you need.
- Select Data to Export: Here, you can export the data of all rows or 15 rows by simply clicking on the dropdown.
- Select Column to Export: Select columns which you need your data to export. Like if you want all the data of staff, then simply click on “ALL DATA” and you will get the data of the entire staff in your exported file.
- Export as: Then select a format in which you want to export your data i.e (EXCEL or CSV).
- After selecting the relevant records/data, click on the Export Data button to export all the data in the selected file (Excel/CSV).
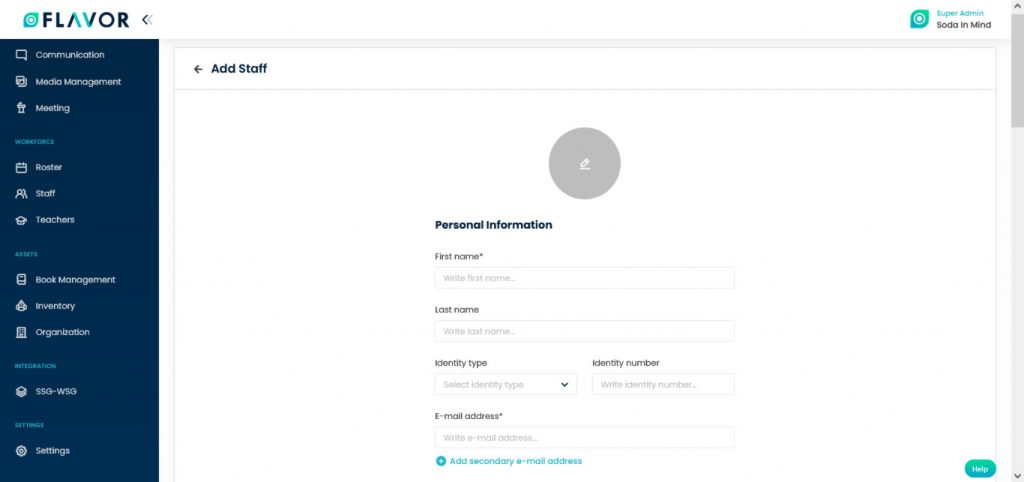
Add New Staff
To add new staff, click on the + Add New Staff button. You will be redirected to the Add Staff page. Here, you will the three sections in a form.
- Personal Information: Enter first name, last name, identity type, identity number, email id, status, address etc.
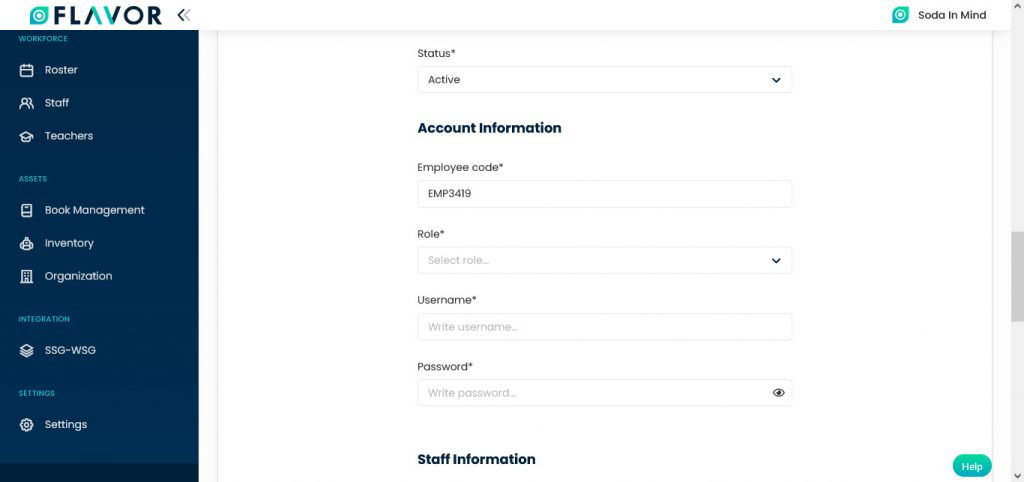
- Account Information: Employee code, role, username & password.
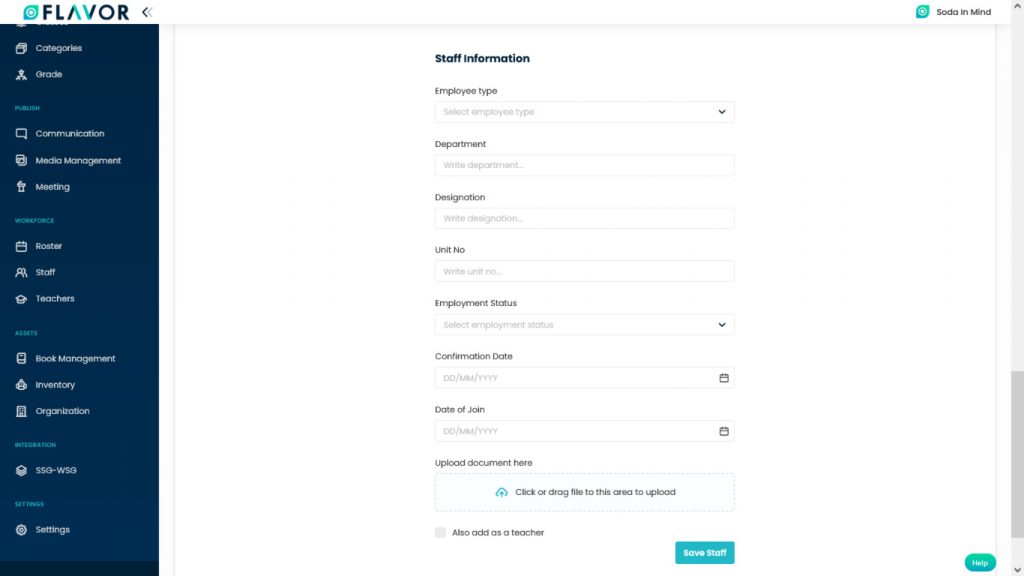
- Staff Information: Employee type, department, designation, if you are a teacher mark on the Also add as a Teacher check box.
- After filling in the details click on the Save button.
Staff Records
Expand Row
At the start of each record, there is an Expand Button (Down Arrow), by clicking on this arrow a record will be expanded. From here will get the information of particular staff. You can collapse the record by clicking on the same button.
Column Sorting
All staff will be shown in Tabular Format. You can sort the data by clicking on Column Sorting Arrows in Table’s Header.
Column Visibility
You can sort columns by clicking on the Ellipsis Icon, you will get the pop-up form named Select Data to View. Mark the columns you want to see and unmark the ones you don’t want to see in the table. After this procedure click on the Apply Filter button.

Action Button
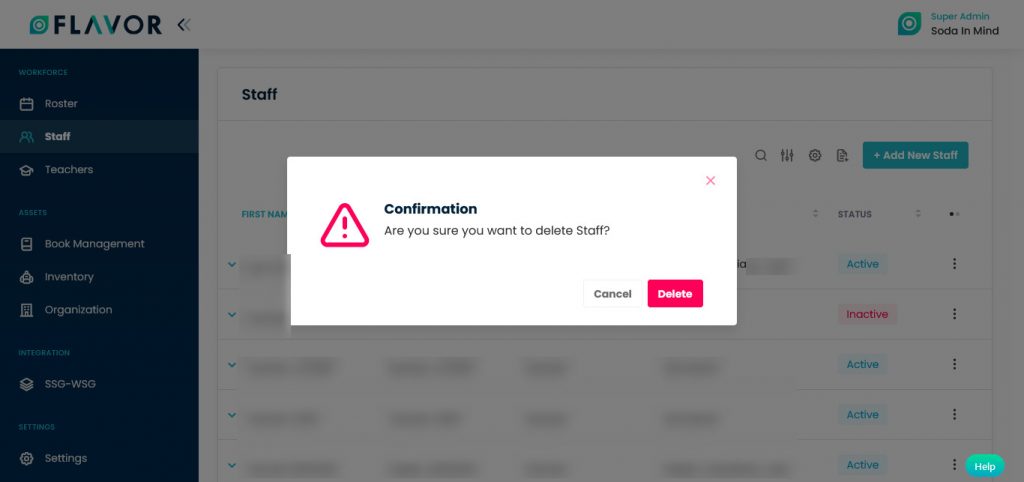
Click on Action Button (Vertical Ellipsis), a popup box will appear on your screen with the Delete option.

Delete Option
- Click on the Delete option. A confirmation popup will appear on the screen.
- Click on the Yes button to delete the staff.
Staff Details
Staff Profile
You can check any staff’s profile after clicking on the desired row. A profile will be open. You can see the details of that particular staff.
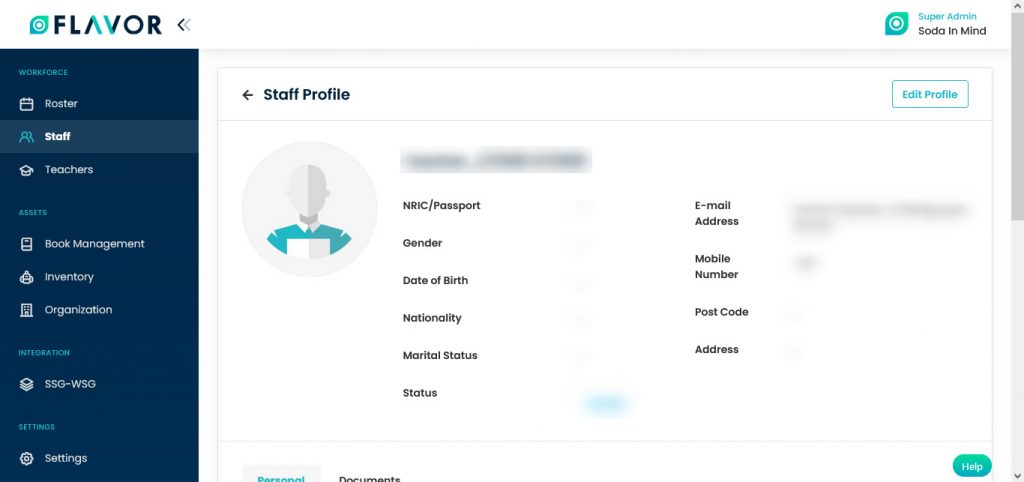
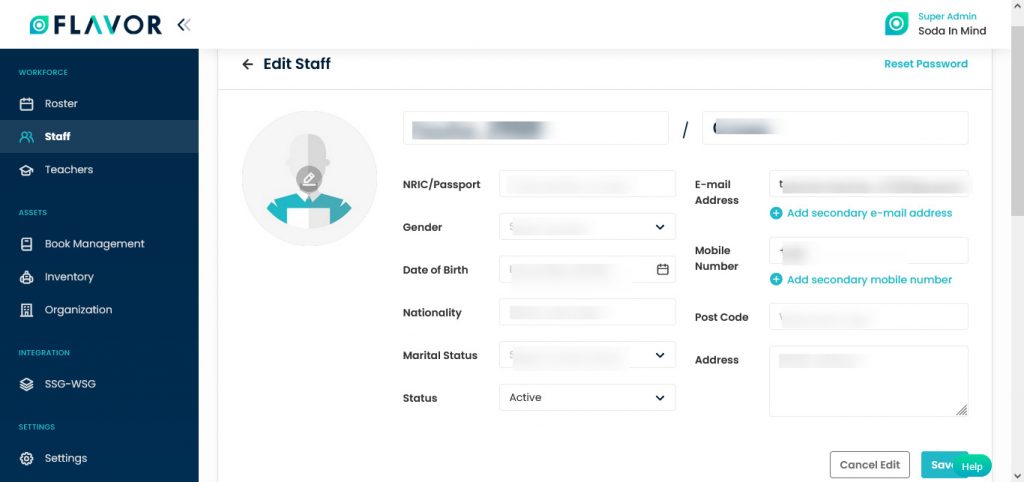
Edit Profile
- You can see the Edit Profile button in the top right corner of the Staff profile. Click on that button, after updating the information click on the Save button.
- In Edit Staff’s section, you can see the Reset Password option in the top right corner. Click on the option to change the password.
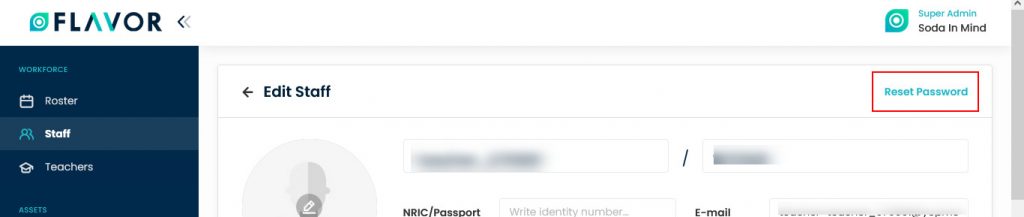
- A popup form named Reset Password will be open. Enter your Old Password, New Password & Confirm your New Password.

- Click on the Save Password button.
Personal Details
- Navigate to the Personal Details. Here, you can the Account Information & Information of the employee.
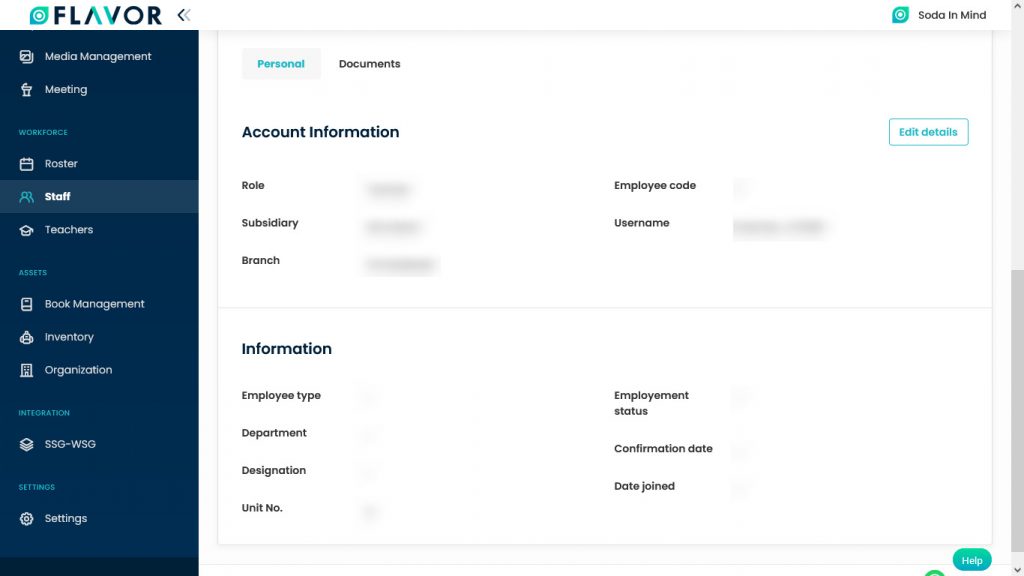
- In the right corner of the Personal Details, you can see the Edit Details button. To edit the details click on the button.

- After updating the details click on the Save button.
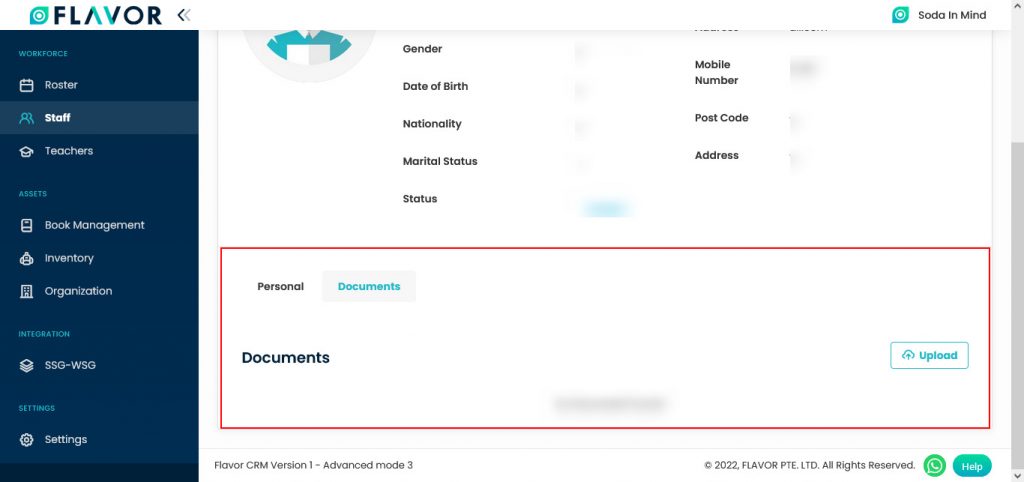
Documents
Navigate to the Documents Tab. here, you can upload any files related to an employee. File types ould be PDF, CSV, JPEG & DOC files.
Upload Document
Click on the Upload button to upload a file, a File Selector Window will be open. Click on the desired file to upload.
Settings
By clicking on the Settings Icon, you will be redirected to Staff Settings Page. Here, you will see three options General Settings, Section Settings & Field Settings.
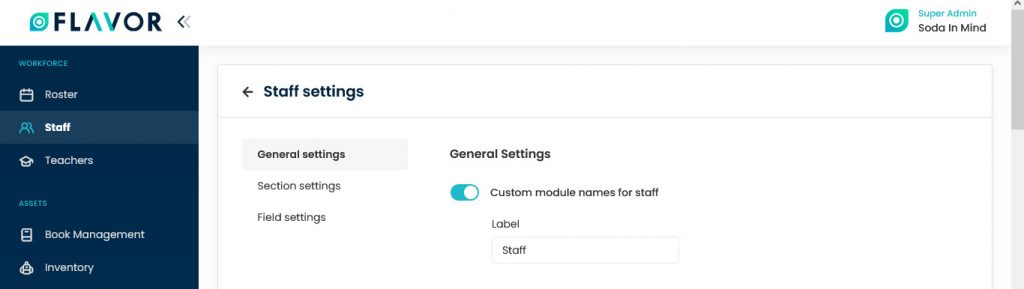
General Settings
- Navigate to the General Settings.
- Custom module names for staff: By enabling the switch, you will see a Label Box. You can change the label for staff from here.
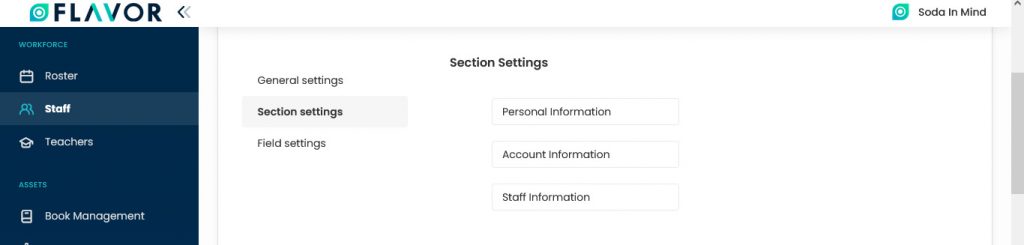
Section Settings
Here, you can see 3 options in Section Settings: Personal Information, Account Information & Staff Information.
- Personal Information: You can enter the custom heading label for the Personal Information section on the add staff form.
- Account Information: You can enter the custom heading label for the Account Information section on the add staff form.
- Staff Information: You can enter the custom heading label for the Staff Information section on the add staff form.
Field Settings
- This setting is for Personal Information. Here, you can see checkboxes before each field. You can enable/disable the fields by marking the checkbox of fields.
- Mandatory Option: First Name field is mandatory, you can’t unmark this field.
- There is also a switch at the bottom of each field to make the fields mandatory. It is up to you to make them mandatory by enabling the switch.
Need more help? Ask us a question
Please let us know more of your details and our team will reach out to you very shortly.