
Introduction
Roster is a cumulative way of listing schedule cards of the classes, holidays and make-up schedule cards in a calendar view. It has got four tabs viz. Main Roster, Teacher Roster, Room Roster, and Branch Roster. The Teacher Roster and Room Roster give the view based on teacher/room respectively. In this module, you can see Roster settings too. It can be used to customize the view based on your needs.
Main Roster
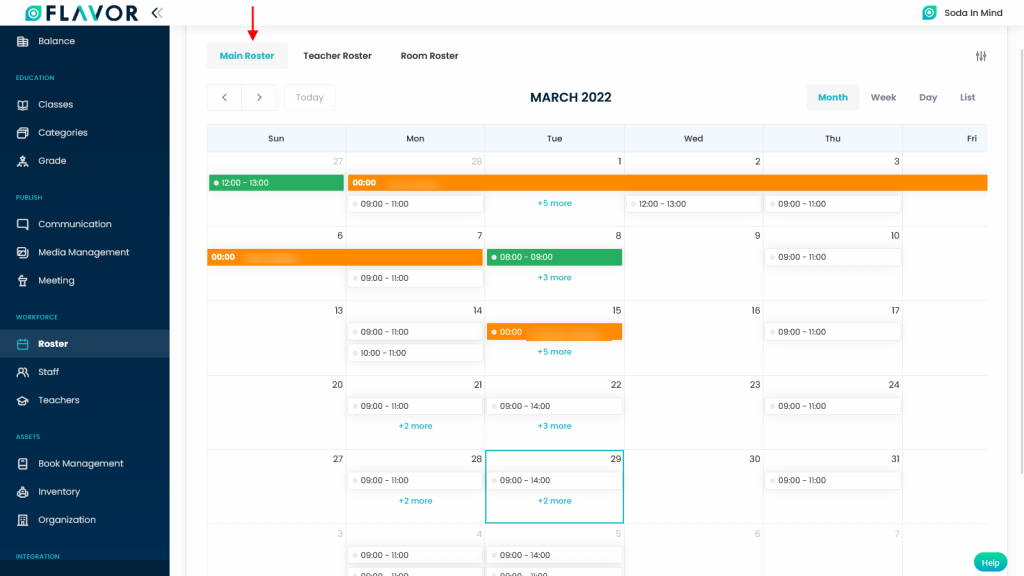
Main Roster shows the overall schedule cards of the classes. It is in the calendar view form. By default the Main Roster tab is active. To view the Main Roster go to Roster from the main navigation panel of the Flavor System.
Roster Options
Filter
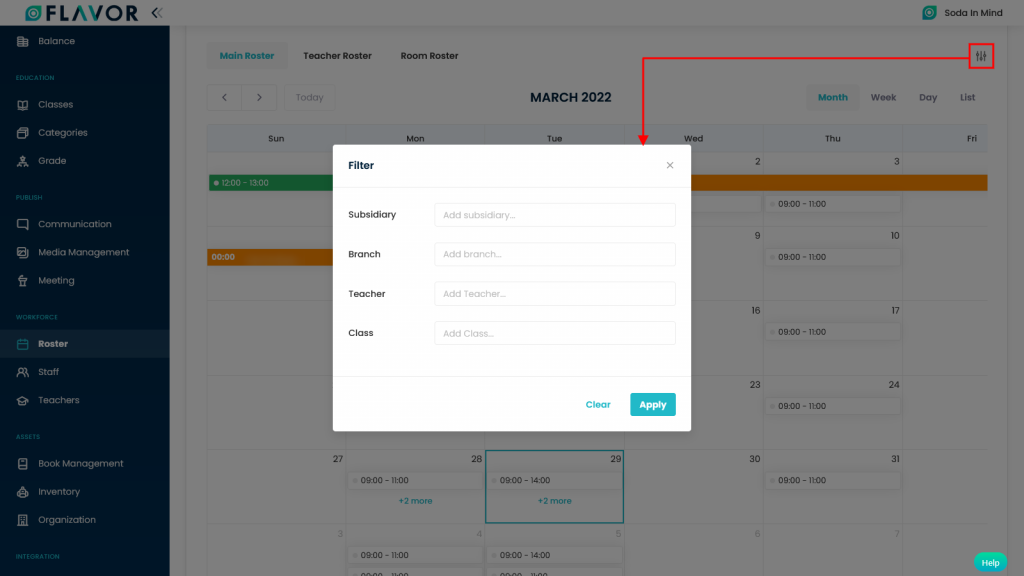
The filter option displays the classes in the calendar based on specific parameters. Click on the filter icon, a pop up form named Filter appears on your screen. Select the Subsidiary, Branch, Teacher & Class then click on the Apply button. The filtered classes will be shown in the calendar view.
Calendar View
Calendar View is the layout as to how you can see the schedule cards. It is divided into three parts viz. Active Date Label, Roster Navigation and Views part.
Active Date Label
By default it shows the current month and year. As per the different views and navigation it gets updated.
Roster Navigation
- Previous, Next & Today Button: It is used to navigate day, week or month according to active calendar view. Today button is useful to quickly navigate to Today date on calendar view. This button is only enabled if we are not on the current date.
- Calendar View Navigation: Calendar View Navigation are different formats that you can view your Calendar in. Each Calendar View will arrange your schedule cards into a different layout. You can view schedule cards by Month, Week, Day and List.
Views
Month view:
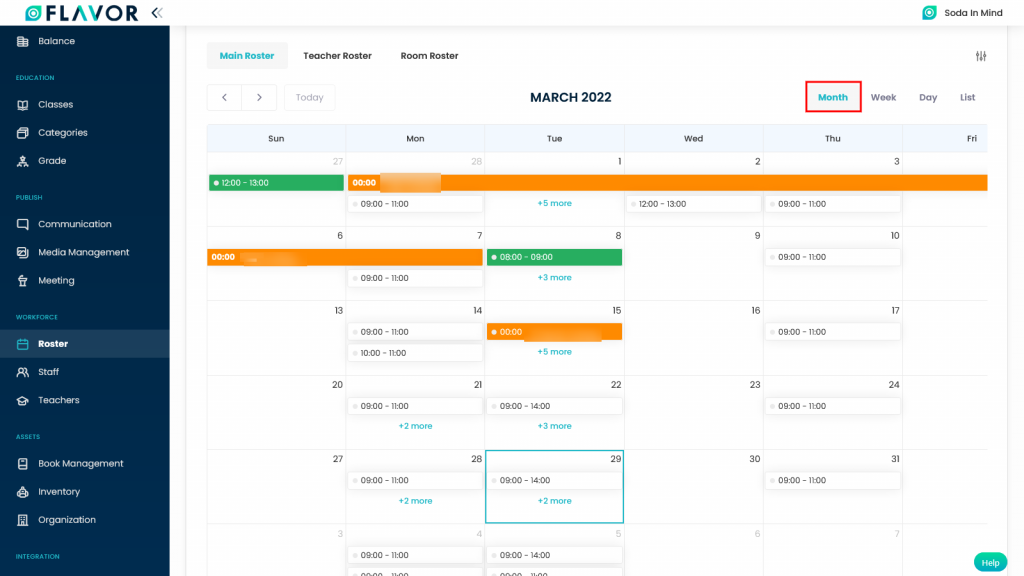
The Month view shows the schedule cards for the whole month. By default current month is active. As we navigate using buttons, month view also gets updated.
Week View:
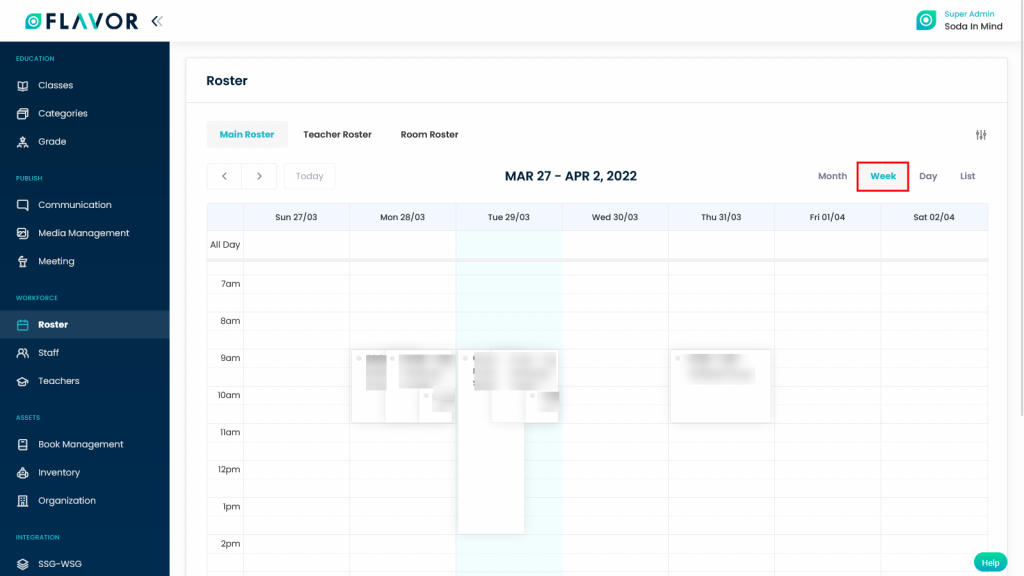
The Week view shows the schedule cards for a specific week. By default current week is active. As we navigate using buttons, week view also gets updated.
Day View:
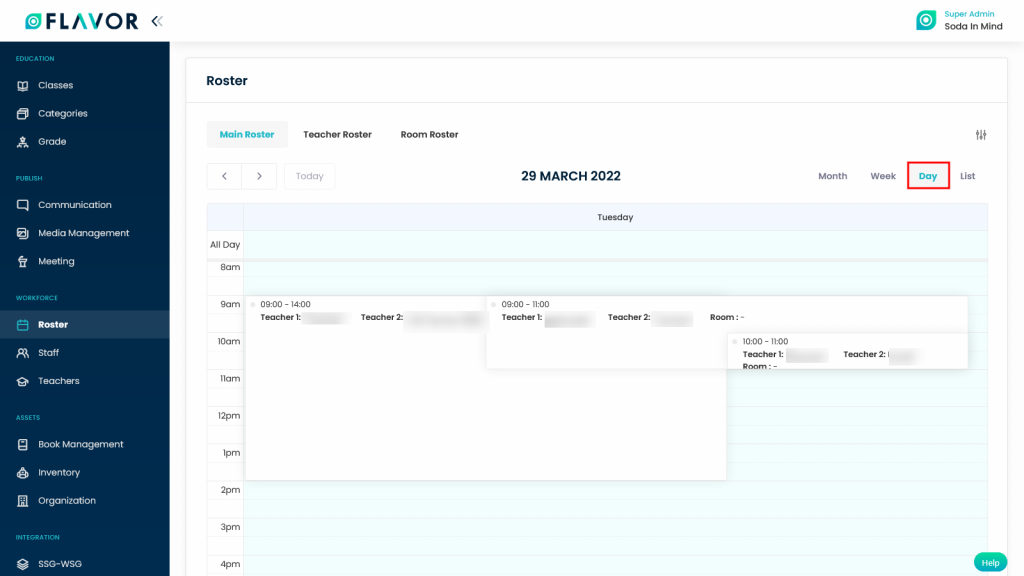
The Day view shows the schedule cards for a single day and time basis. By default current day is active. As we navigate using buttons, day view also gets updated.
List View:
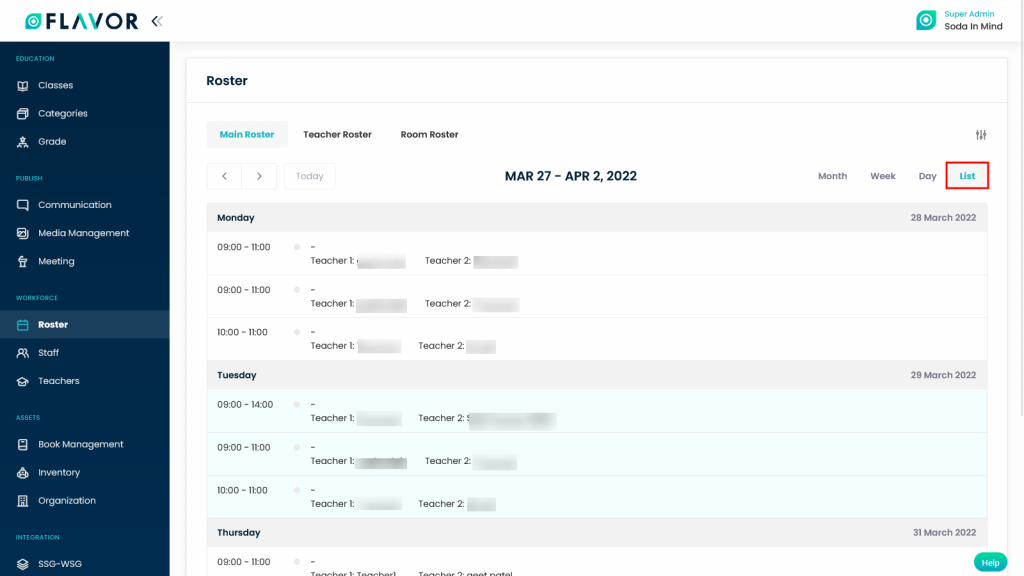
The List view shows the schedule cards in the listing on a weekly basis. In List view, day along with schedule cards timings are shown for a week. By default, current week is active. As we navigate using buttons, list view also gets updated.
Schedule cards’ colors
In the calendar view, we find different types of schedule cards. These cards are distinguished based on different colors.
- Light grey shows the expired schedule cards
- Blue shows the ongoing schedule cards
- Light blue shows the upcoming schedule cards
- Green color shows the Make up class
- Orange color shows the holiday
Note: Click on any class from any view, It will open the class information popup.
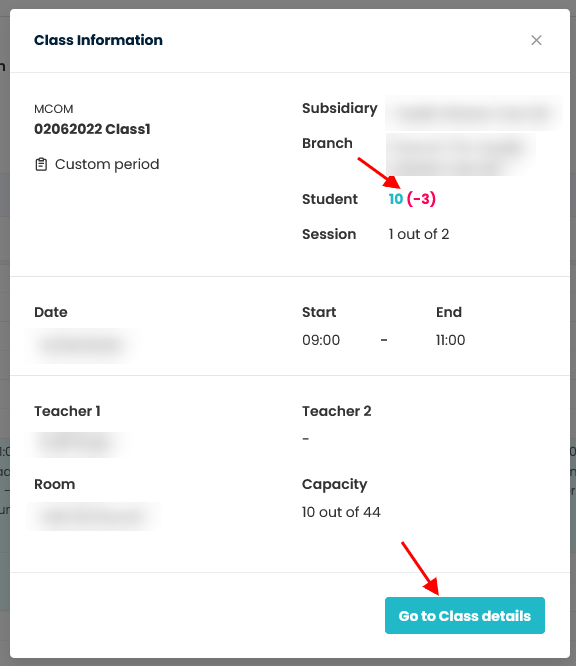
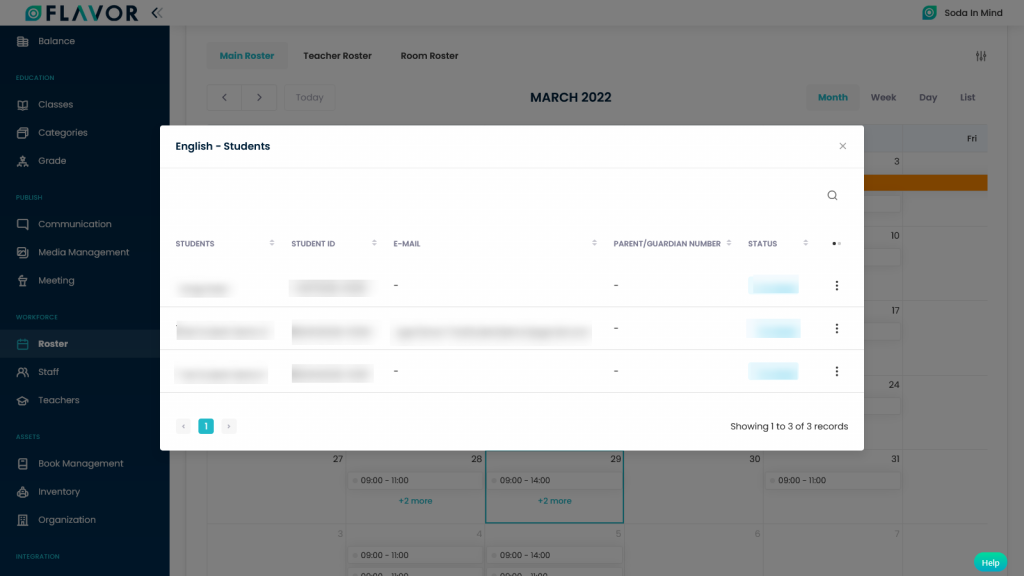
- It will show the number of students registered in the class and also the students who are rescheduled(Shown in negative number). Click on the number of students to view the registered student’s list for that particular class.
2. Click on Go to Class details button to redirect to the class details page.
Teacher/Room Roster
The Teacher Roster and Room Roster will have the same view and functionality.
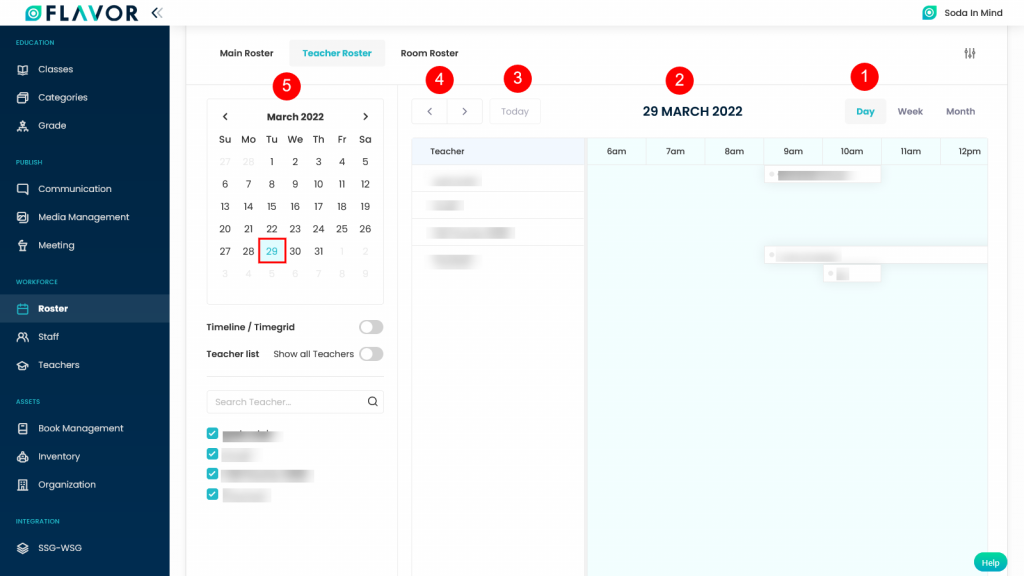
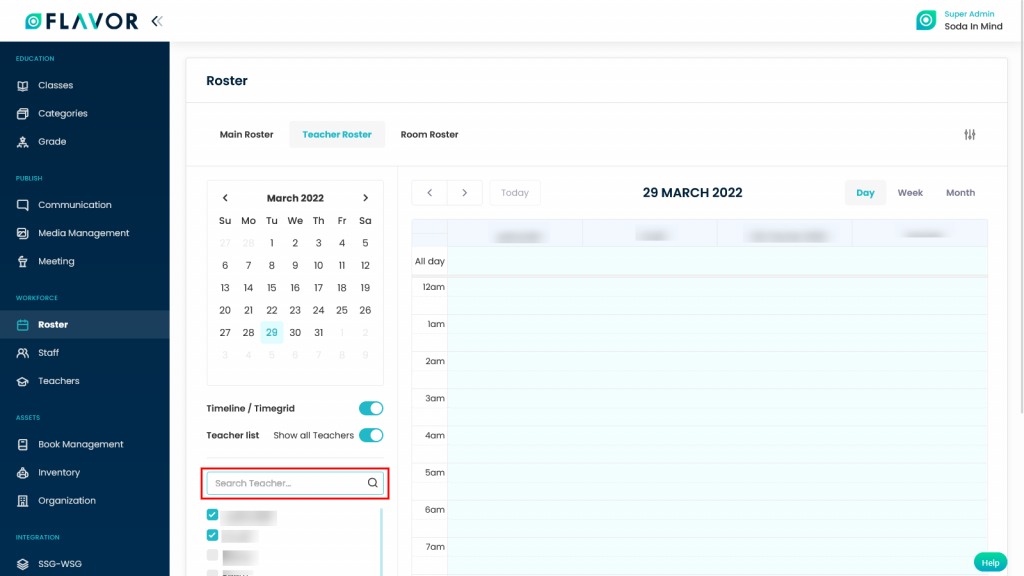
To view the schedule cards according to the teacher/room selection, go to the Teacher Roster/Room Roster Tab respectively.
- By default Day view is active.
- It is the Active Date Label.
- Today button is useful to quickly navigate to Today date on calendar view. This button is only enabled if we are not on current date.
- These are calendar navigation buttons. It is used to navigate day, week or month according to active calendar view.
- This is a mini calendar which is used to quickly navigate in the main calendar.
Week View
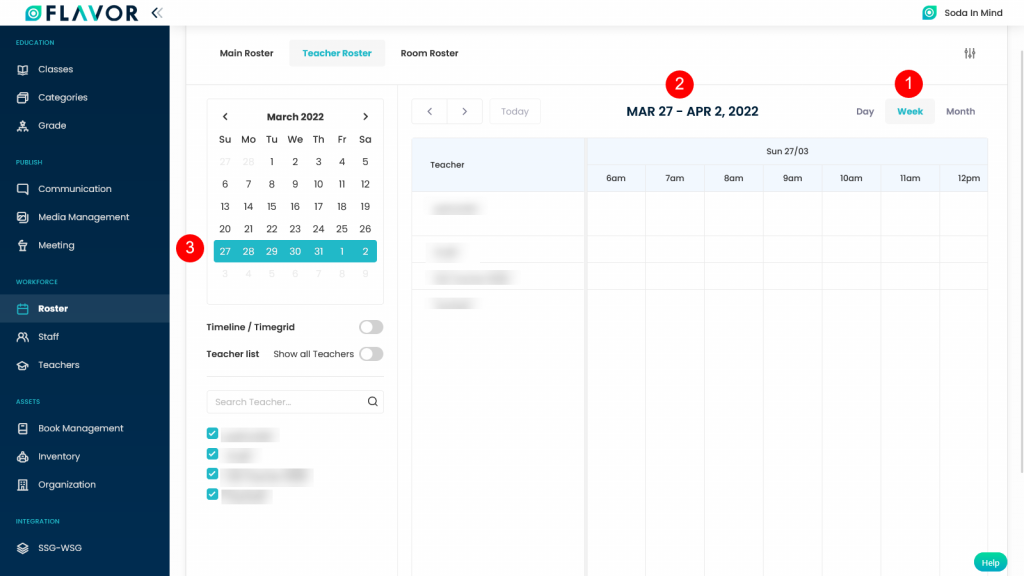
- It shows week view of the Teacher/Room Roster.
- It shows the current week range.
- It shows the week range in the mini calendar.
Month View:
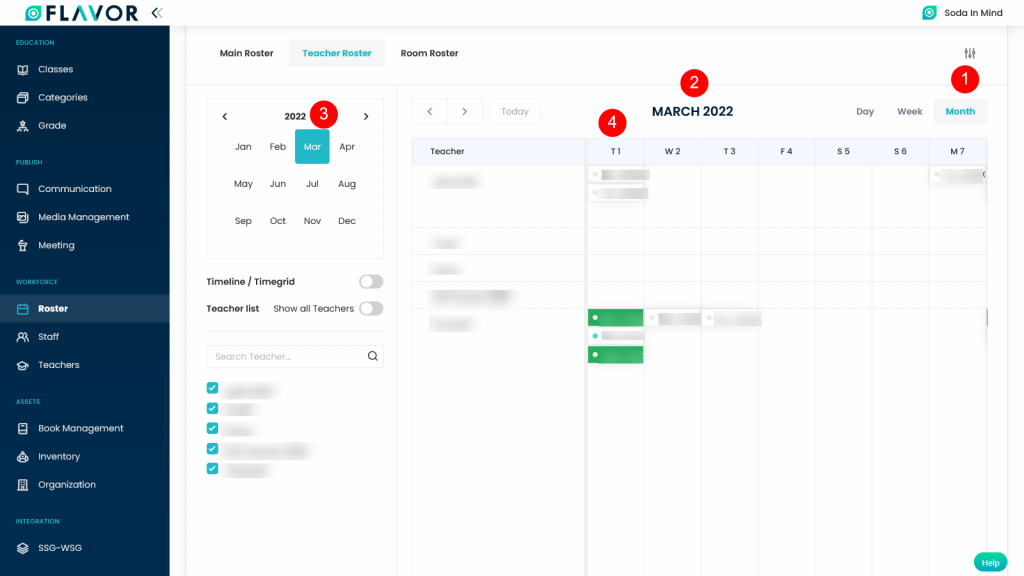
This is the monthly view of the Teacher/Room Roster.
- Click on Month to view the monthly classes as per Teacher/Room selection.
- It shows the current month and year by default. We can navigate the month by using the calendar navigation button.
- It shows the month in the mini calendar which consists of month only.
- It shows the short form of day and date.
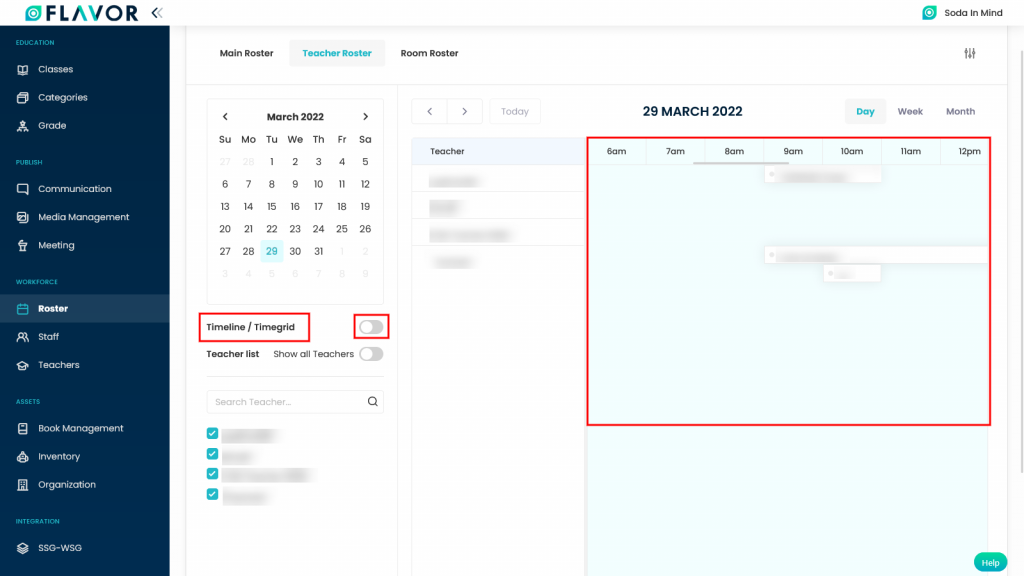
Timeline/Time grid
The Timeline/Time grid can be toggled. It is considered as TimeLine, if the switch is off and Time grid if it is on.
Timeline View
When the switch is off, it is the Timeline view. The schedule cards appear according to the time.
Time grid view
When the switch is on, it is the Time grid view. The schedule cards appear in the form of a grid with rows as time and column as teacher name.

Teacher/Room List
By default in the Teacher/Room list, the teachers/rooms will be displayed according to the current day, week or month.
All Teacher/Room list is visible if Show All Teachers/Show All Rooms is On.

Search Teacher/Room
By default, the teachers/rooms are shown checked in the teacher/room list according to the schedule classes.
Search box gives the option to search for a Teacher/Room by Teacher/Room name in that list.
Branch Roster
The Branch Roster presents schedules organized by branch and day. The timeline’s starting point aligns with the initial class’s start time for each date. Additionally, it offers filtering capabilities and the option for full-screen viewing.
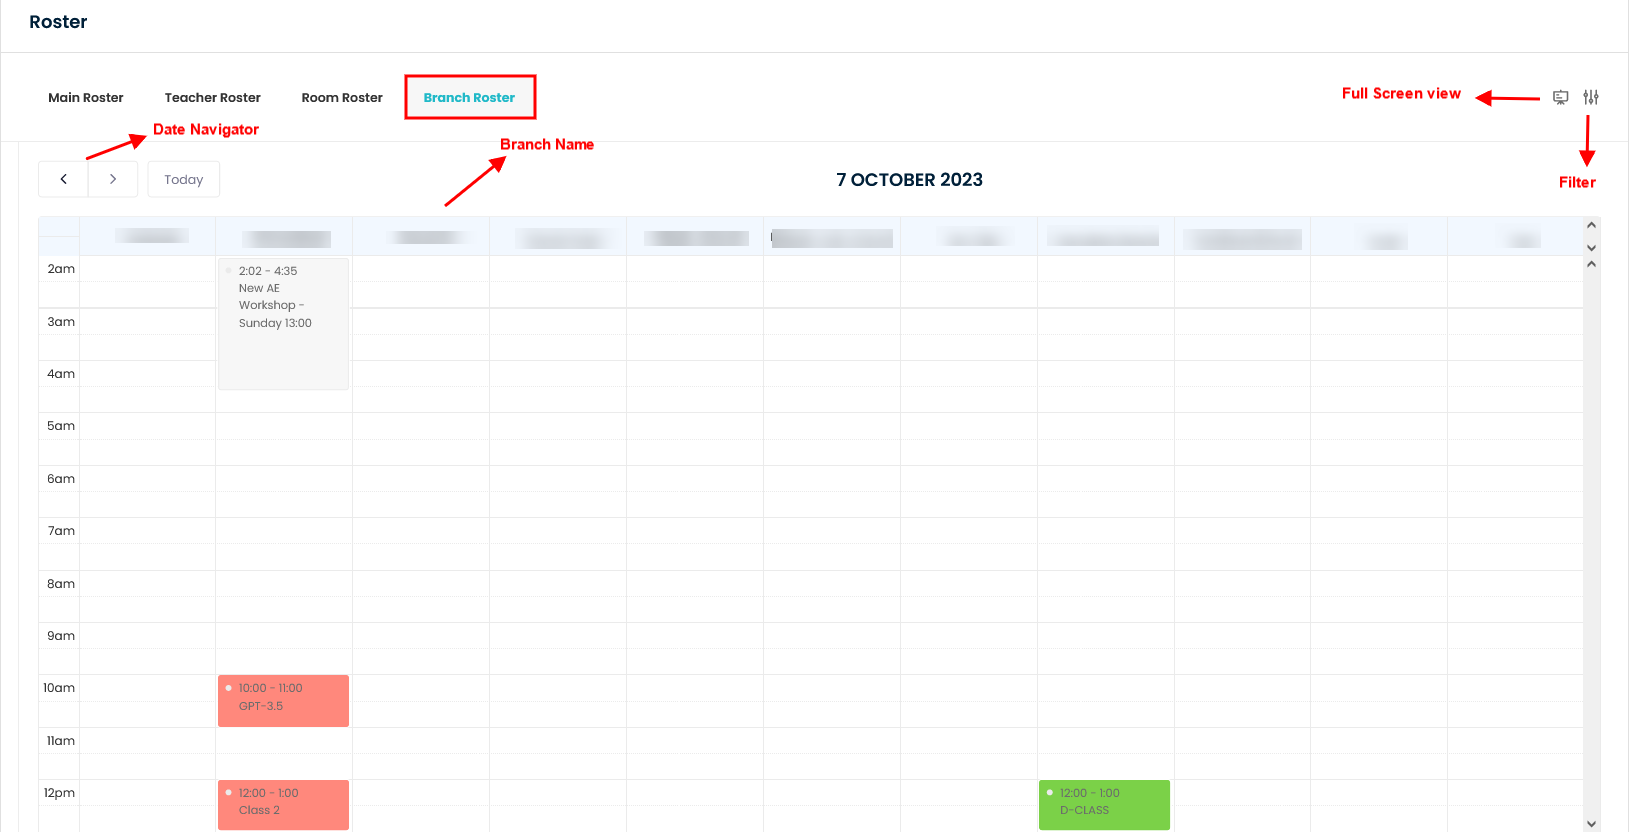
- Full Screen View: Clicking the “Full Screen” icon allows you to expand the Branch Roster to full screen. To return to the original view, simply press the Esc key or click on the “Full Screen” icon once again.
- Filter: You can filter the roster based on Subsidiary, Branch, and Class.
- Date Navigator: You can navigate the date by clicking on these icons.
- Today: Click on Today button to display current date branch wise roster.
Roster Settings
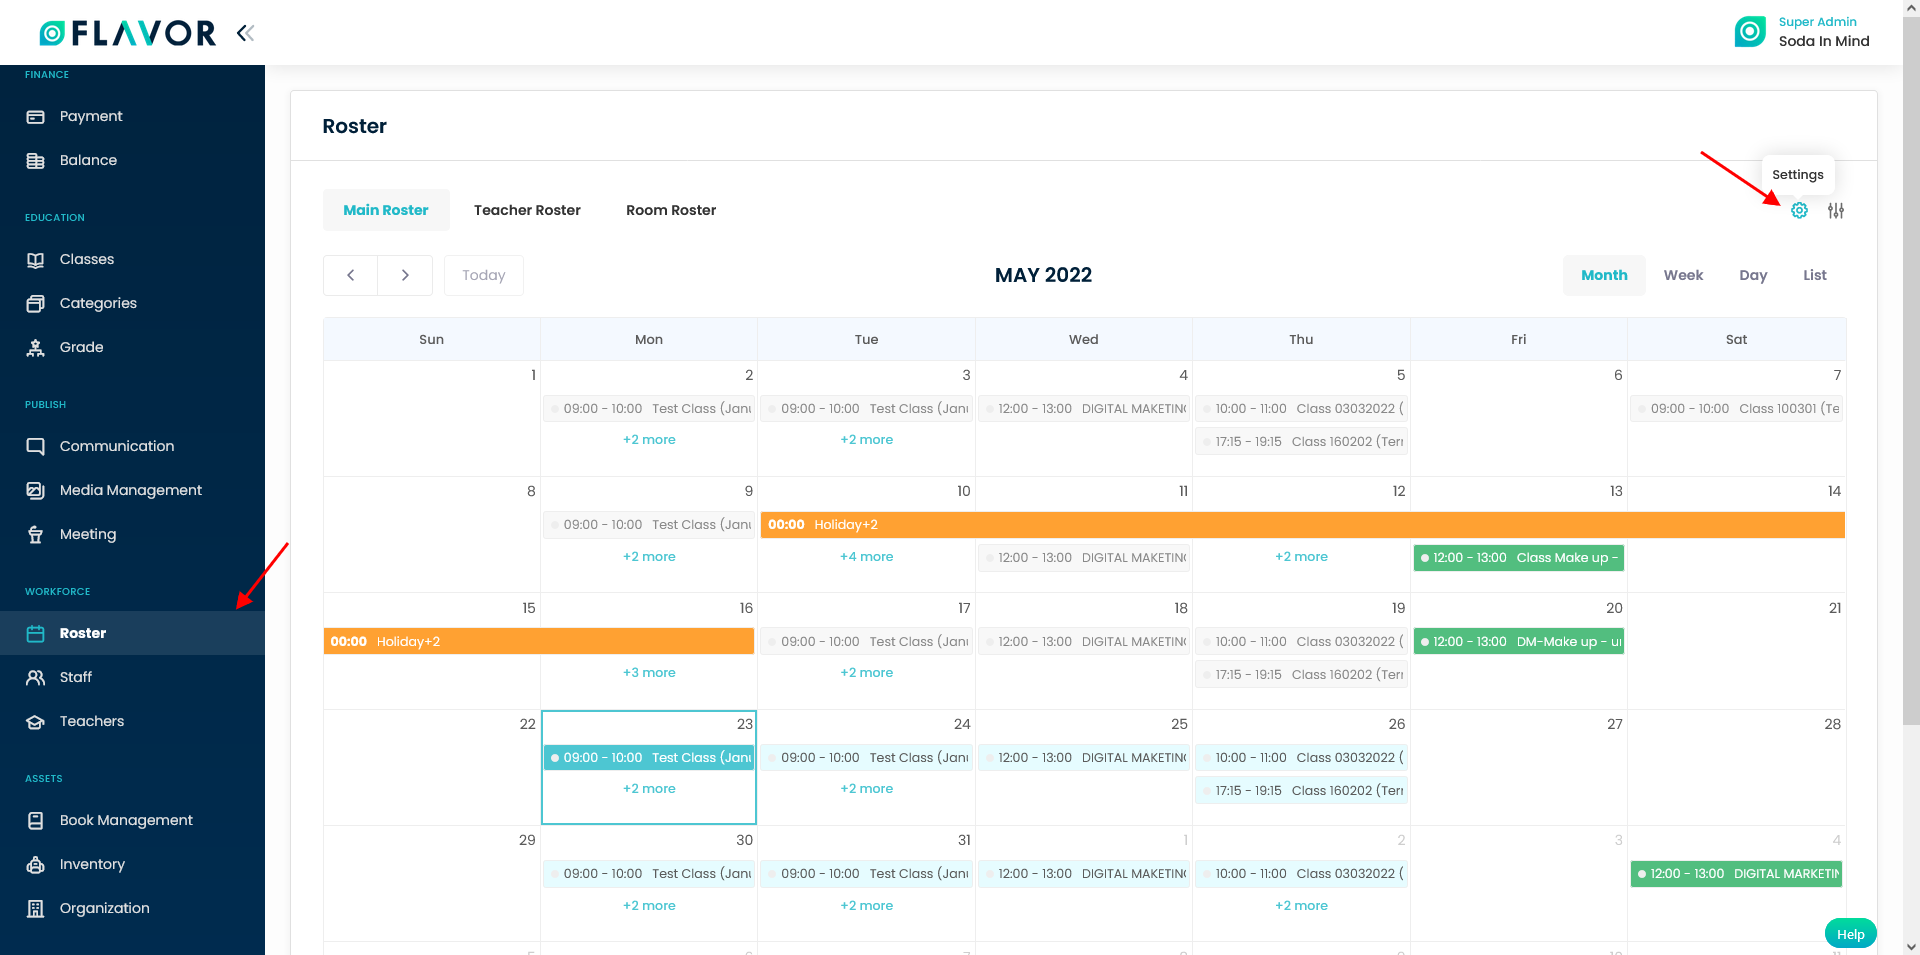
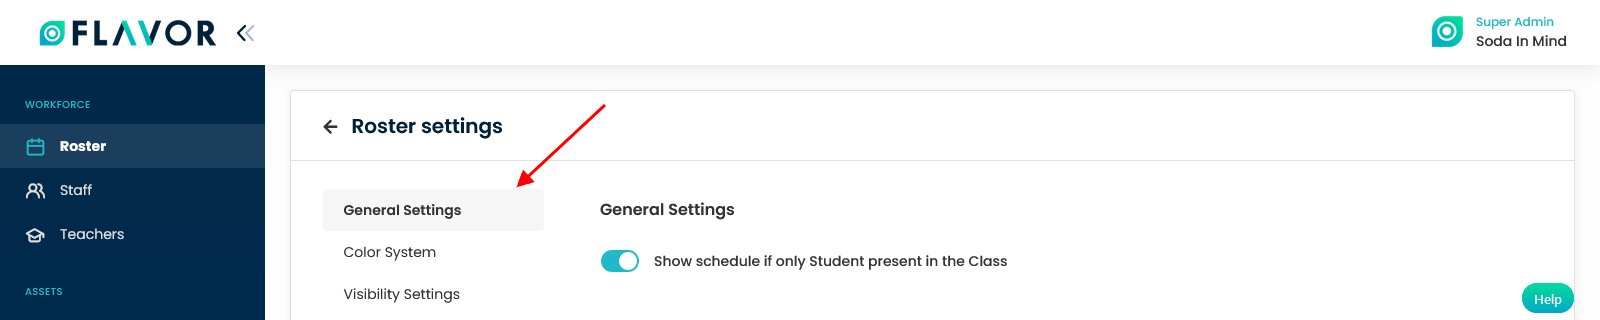
Roster settings gives you the options to customize the requirement based on your needs. In all the three tabs you can find this common Roster settings option. It has three sections. viz. General Settings, Color System and Visibility Settings.
General Settings
if you enable the switch for Show schedule if only Student present in the Class, then only the classes with registered students will be visible on the roster.
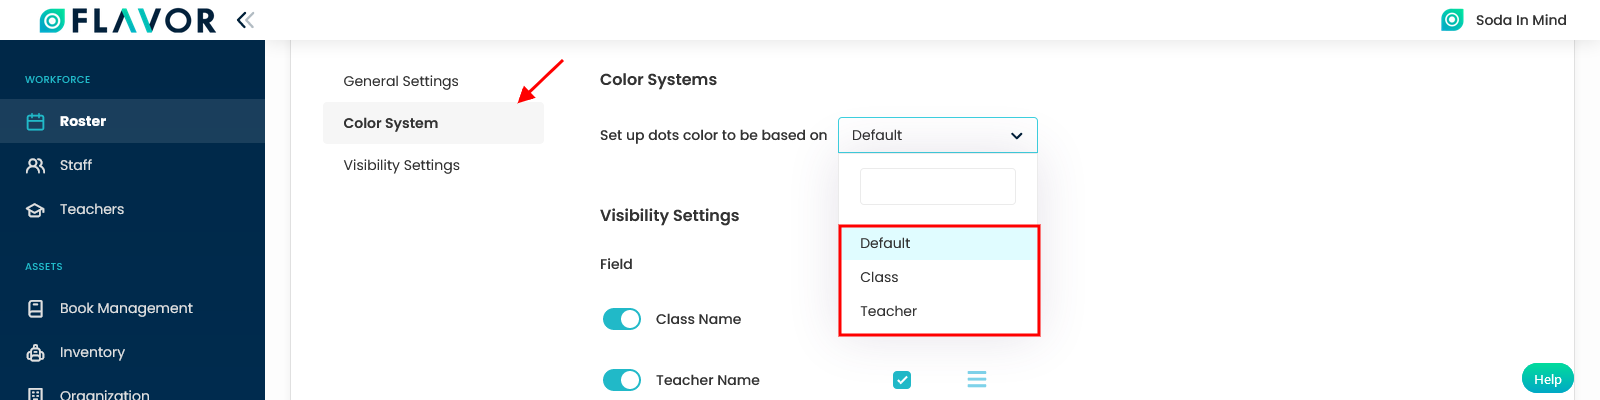
Color Systems
You can set up dots color of the Schedule cards to be based on Default, Class and Teacher on the roster.
Default color will set the dots color of the Scheduled cards as defined above Schedule cards’ colors section.
While option is set to either Class or Teacher, it will set up the dots color of Scheduled cards as Class color or Teacher Color respectively.
Visibility Settings
This gives you the options to customize the fields which will be visible on the Roster when you hover on each class.
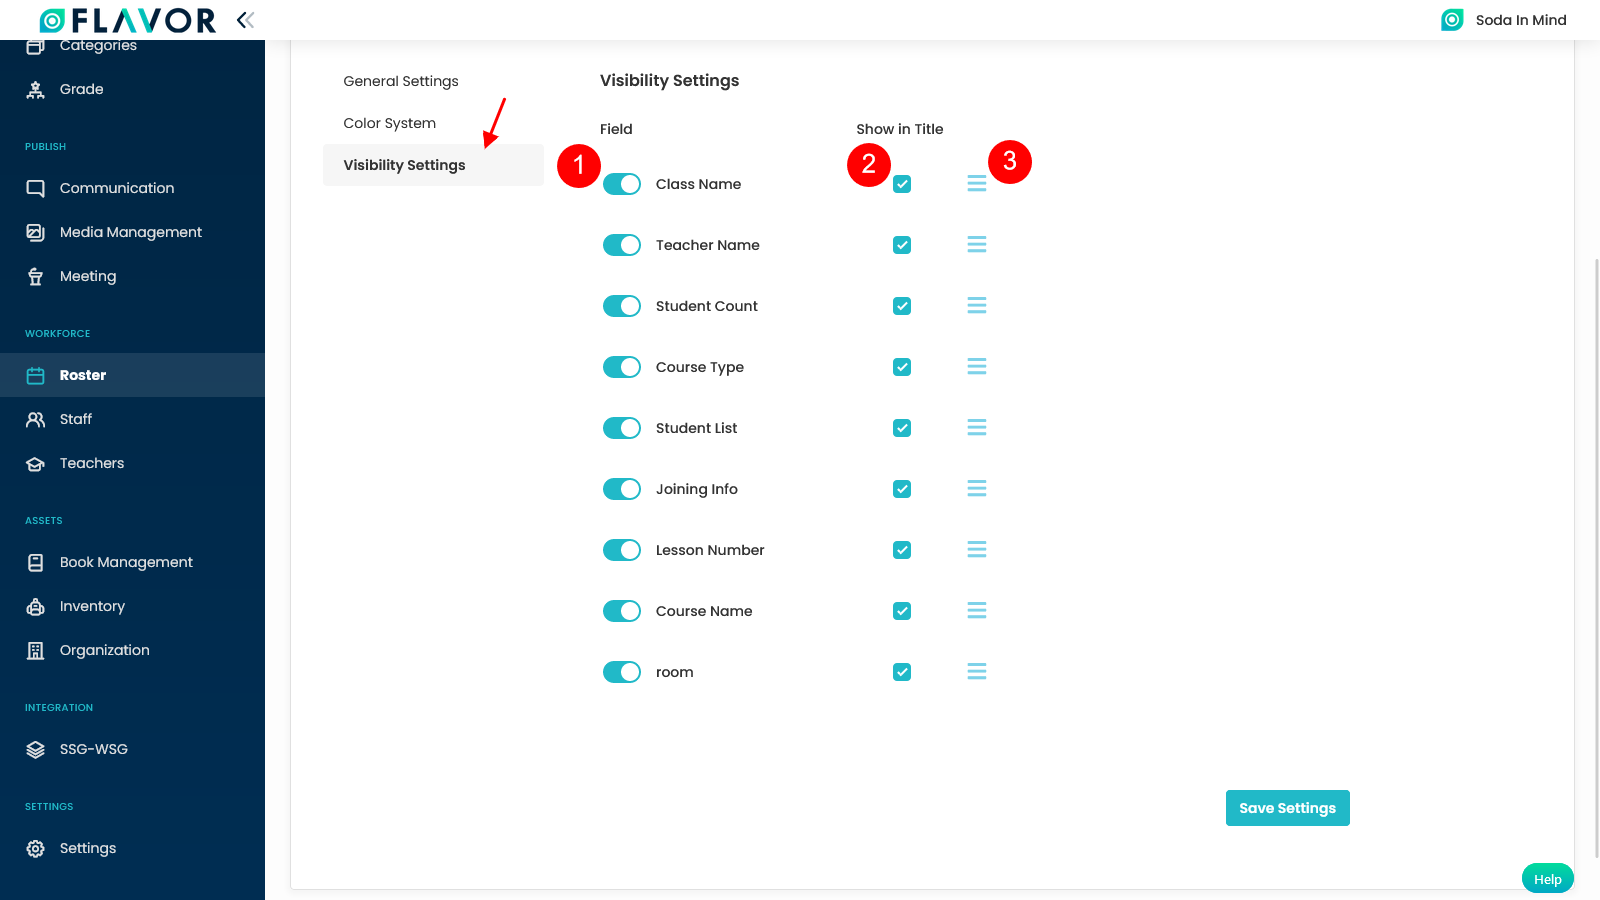
- You can enable the fields which you want to make visible when you hover on any class on the roster.
- You can check the checkbox for Show in Title if you want to show the field name visible in the title of the class on the roster.
- This gives you the option to drag and rearrange the fields according to which it will be shown when you hover on any class on the roster.
Need more help? Ask us a question
Please let us know more of your details and our team will reach out to you very shortly.