
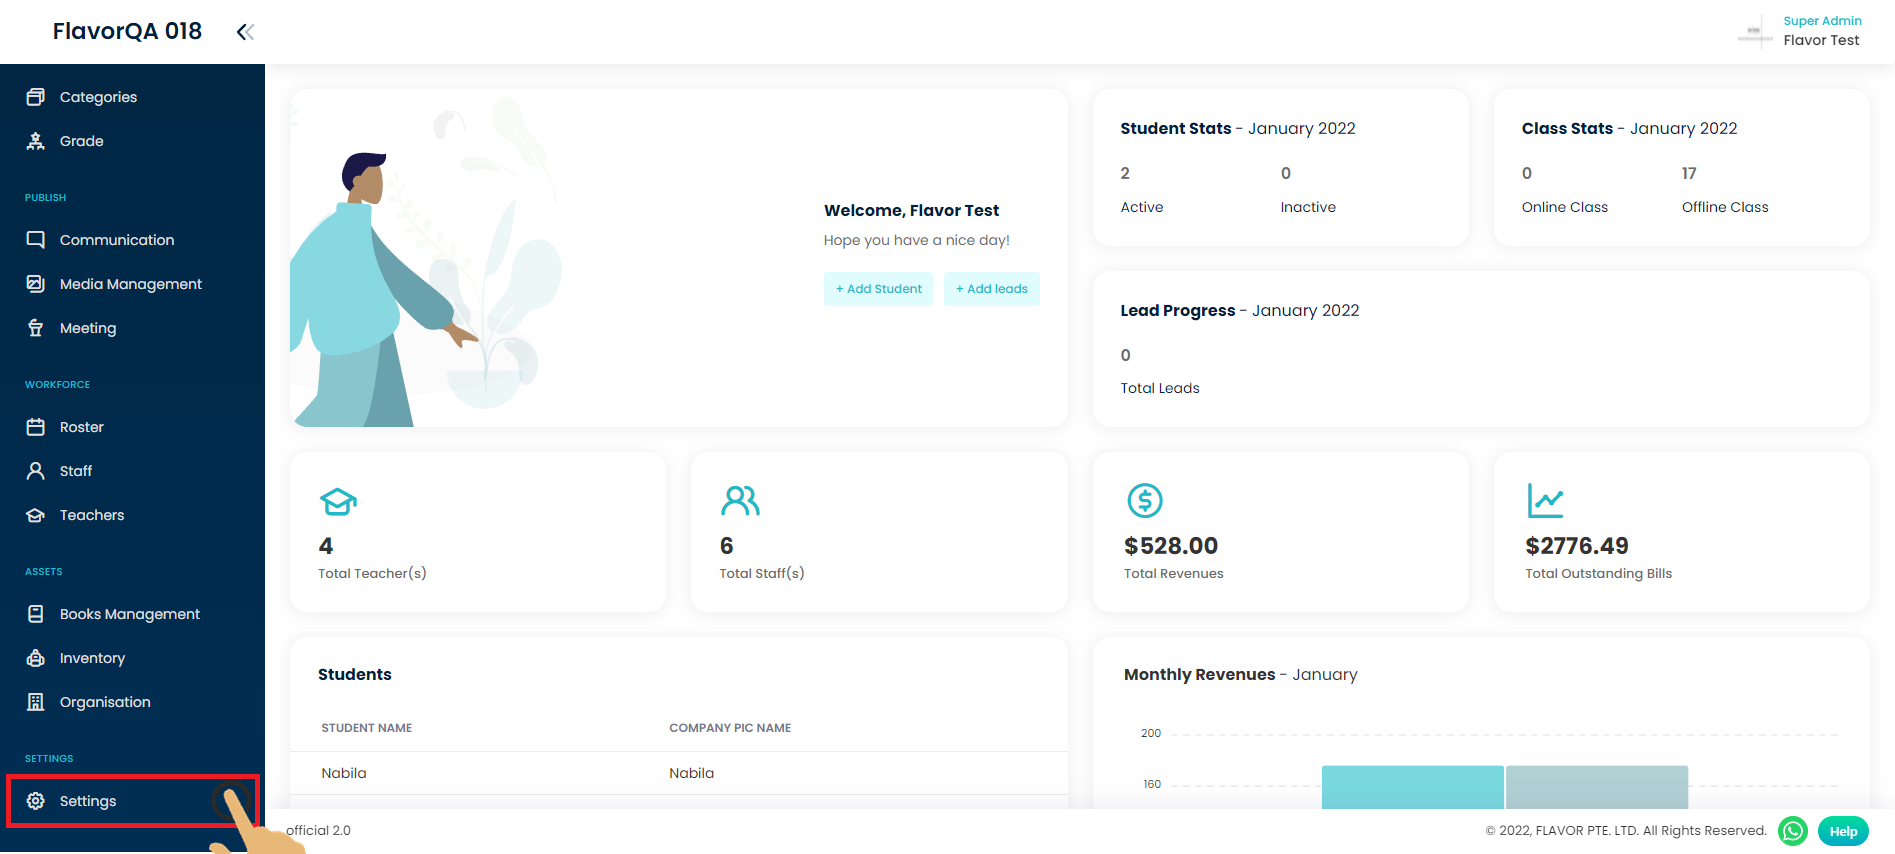
Step 1
After login, the system will direct you to the dashboard page. In the side menu, click the Settings Menu.
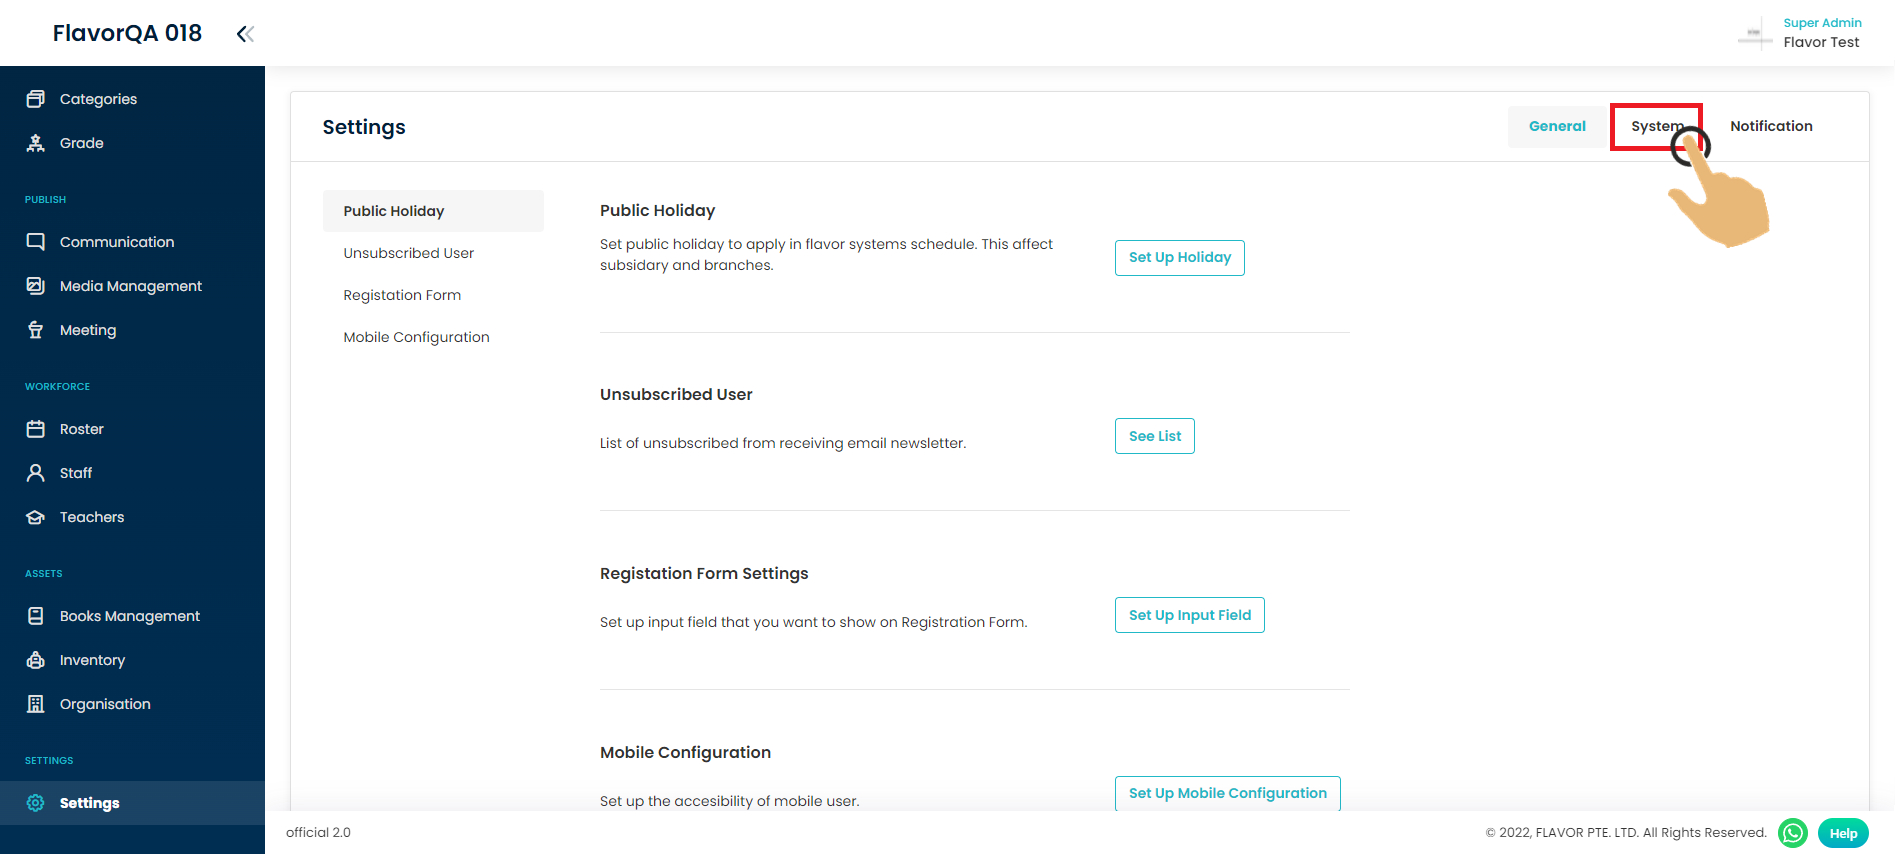
Step 2
After you click the Setting menu, the system will direct you to the setting page. Then click system setting
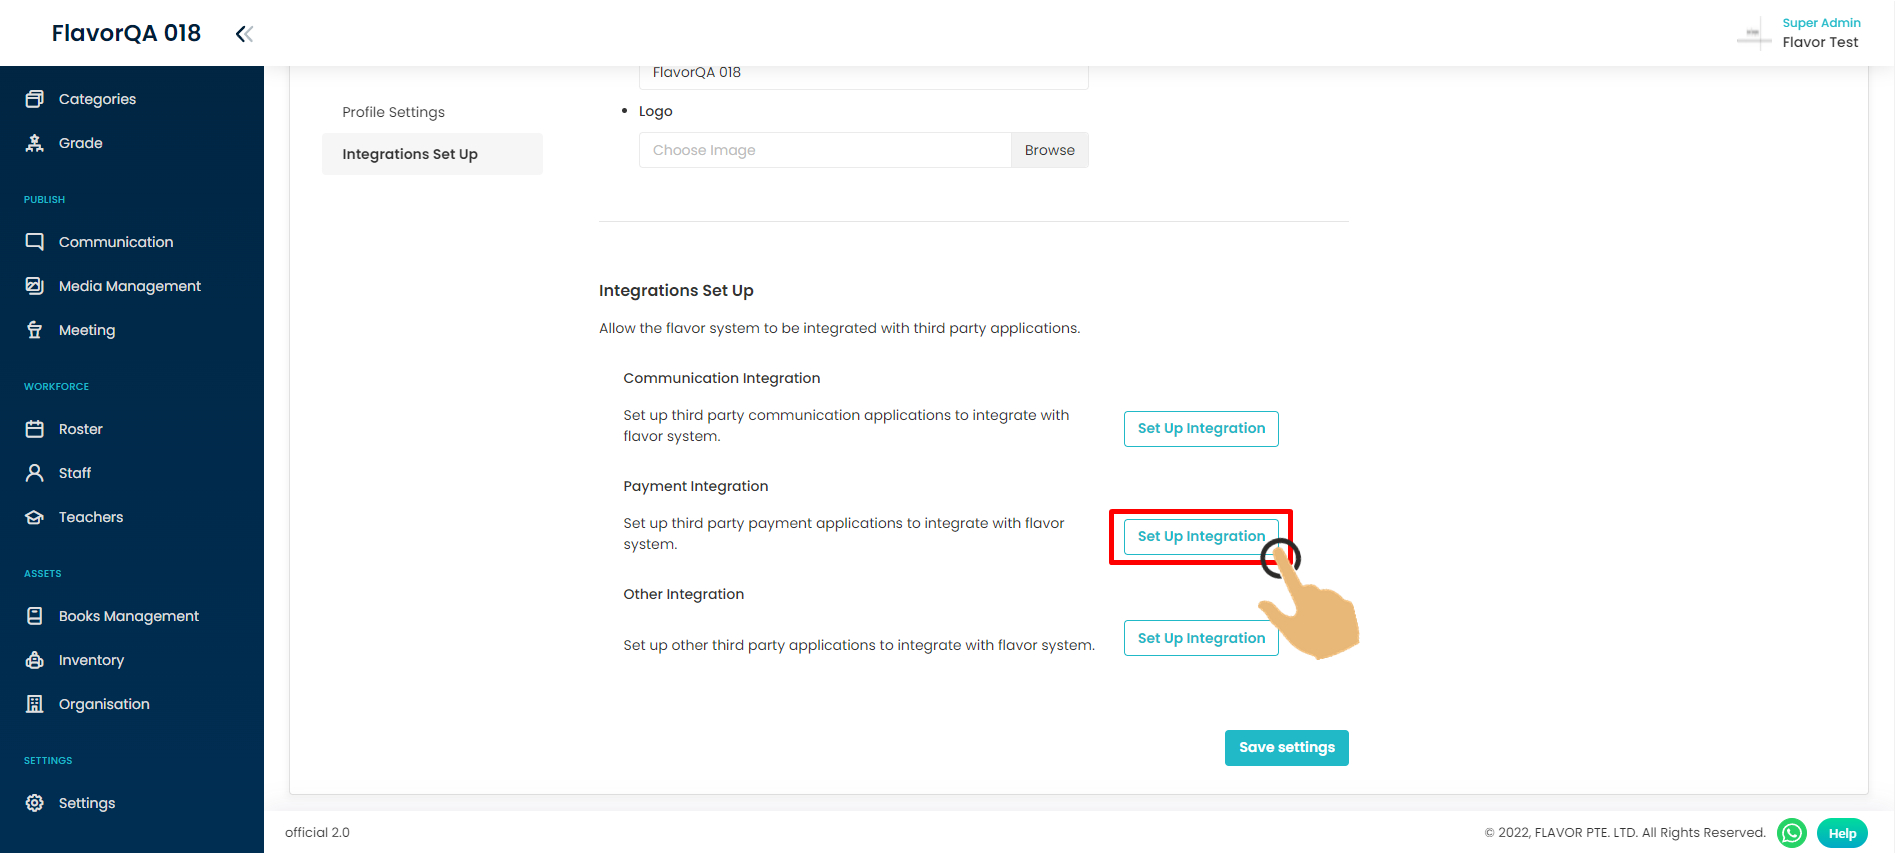
Step 3
Then choose payment integration to set Quickbooks.
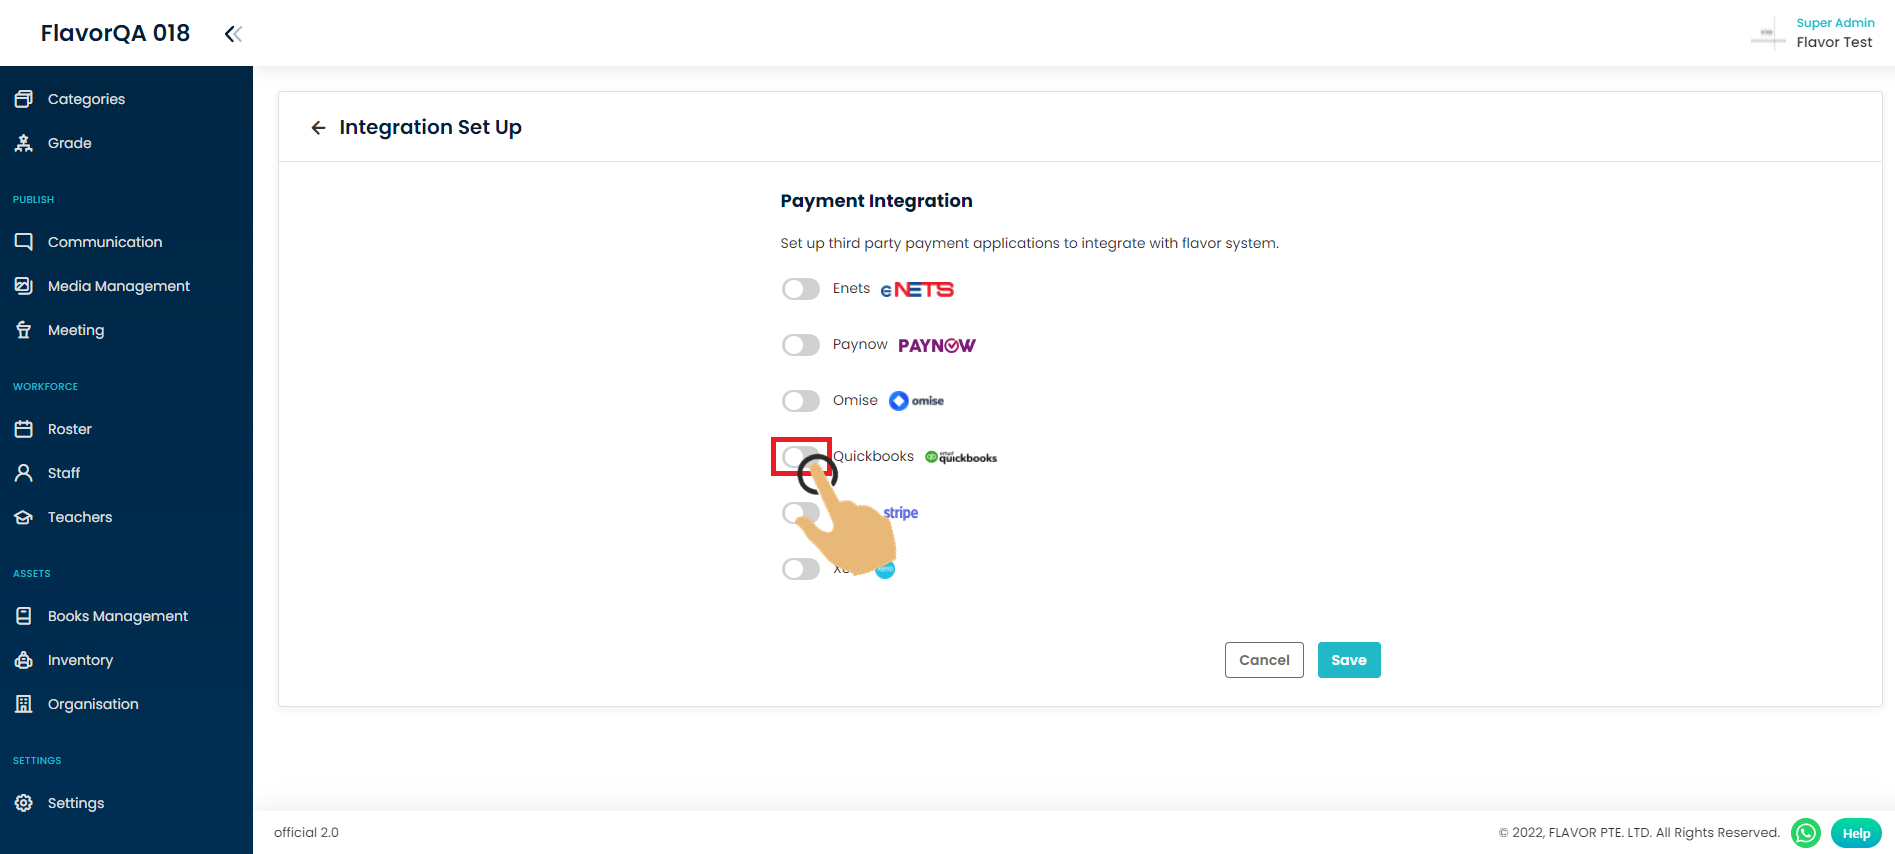
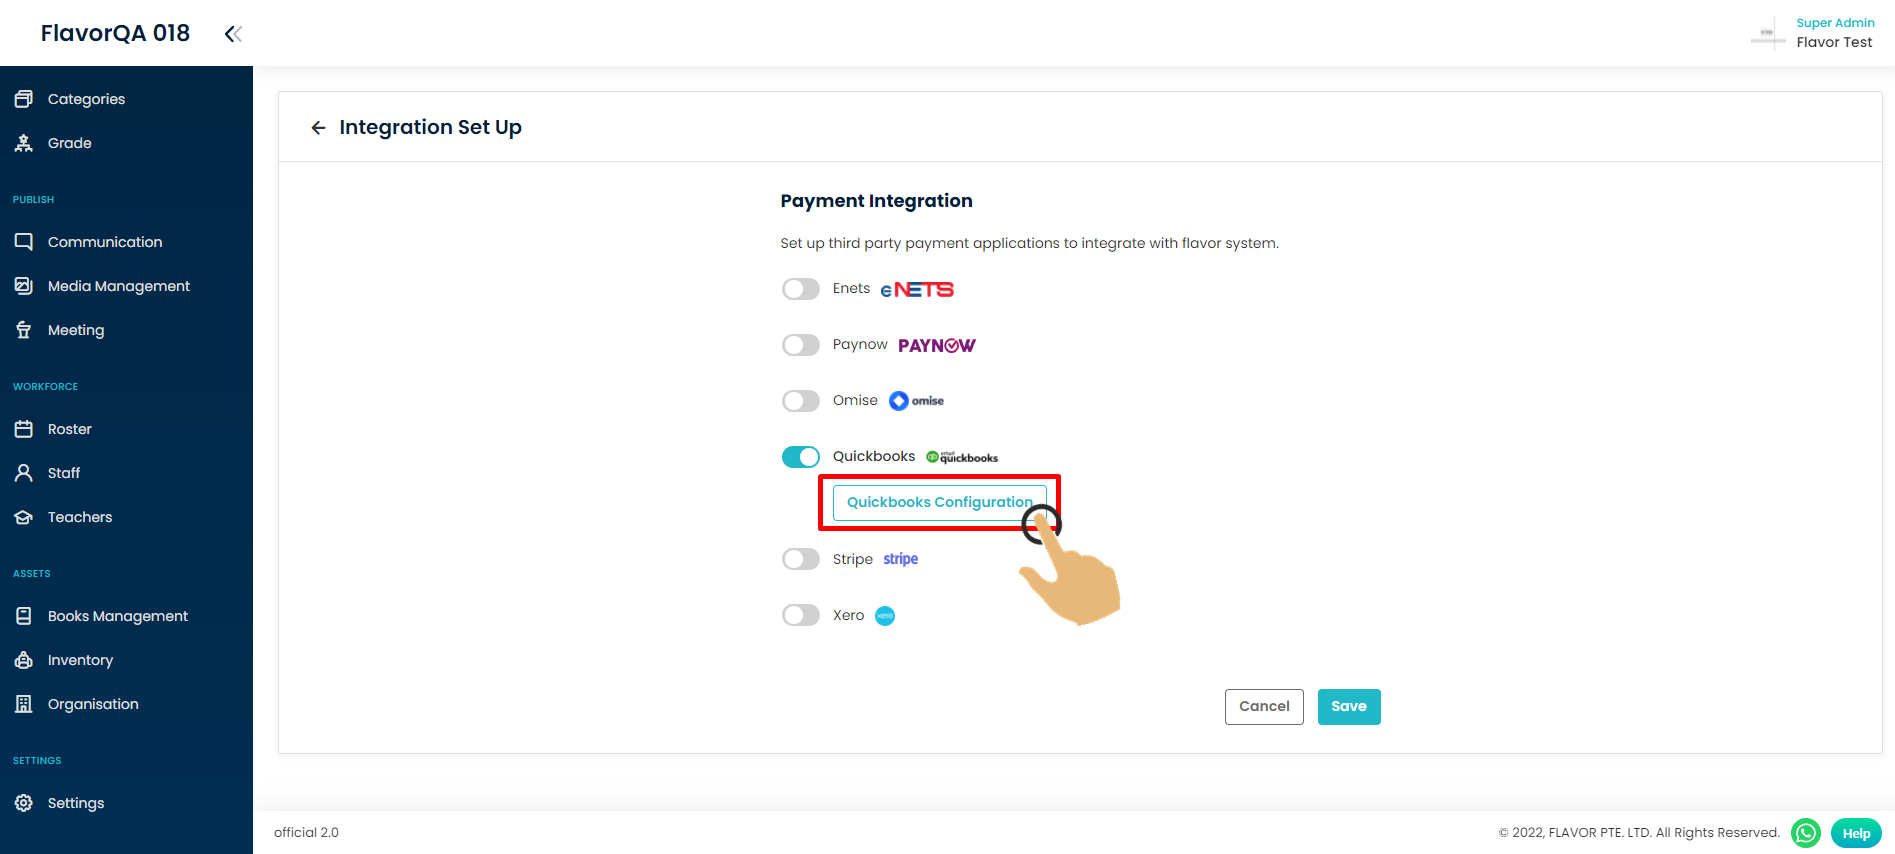
Step 4
Turn on Quickbooks setting.
Step 5
Click configuration to configure your Quickbooks.
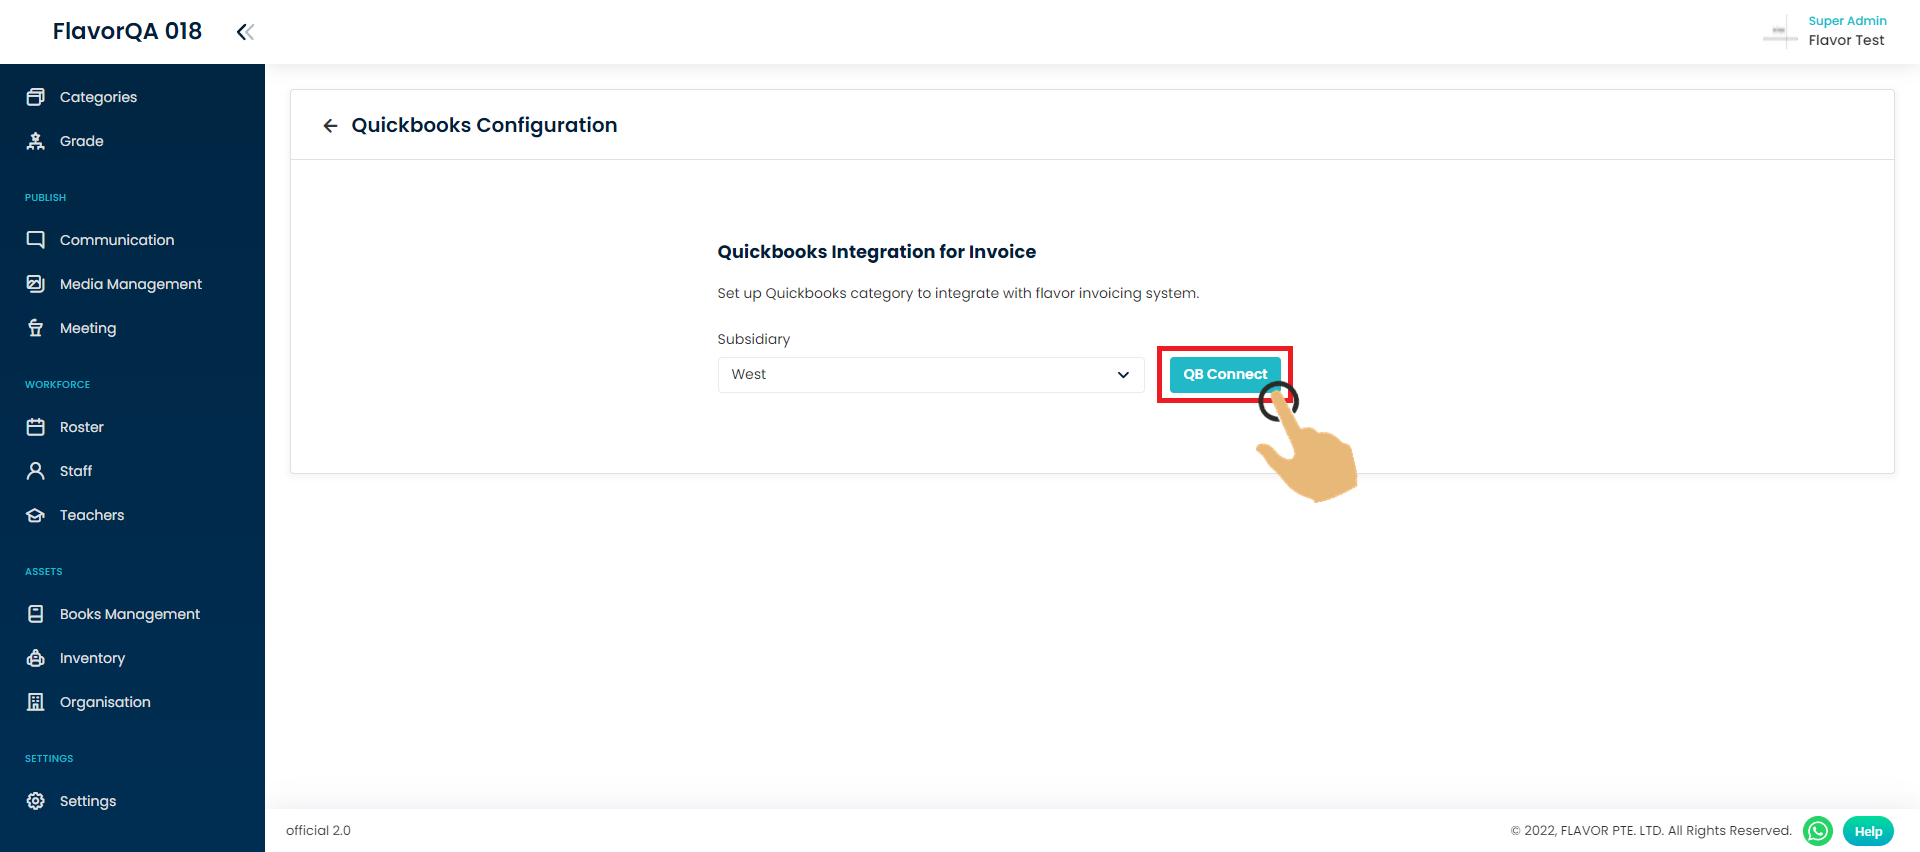
Step 6
Choose the subsidiary you want in Flavor which will set the Quickbook account.

Step 7
Click this button to login to your Quickbooks account.
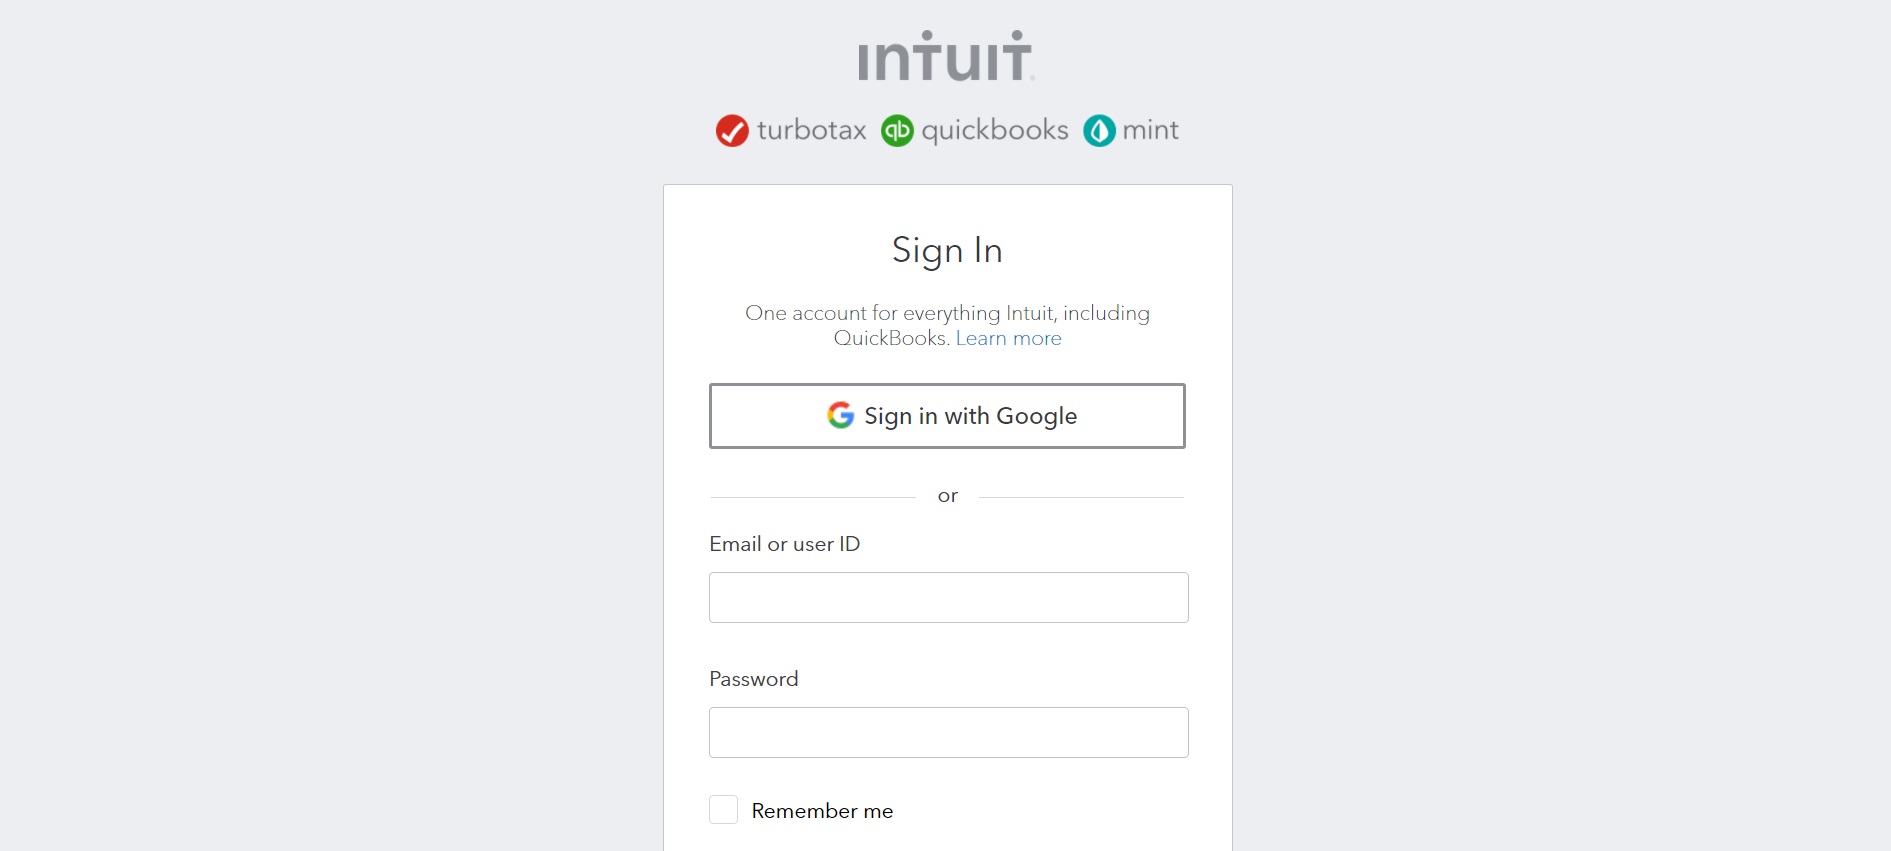
Step 8
System will redirect you to Quickbooks account, and require you to login.
Step 9
After login, the system will redirect you back to the flavor payment setting. Choose your payment setting for your particular flavor payment item.

Step 10
After that, fill out all the Quickbook settings for your particular flavor payment item.
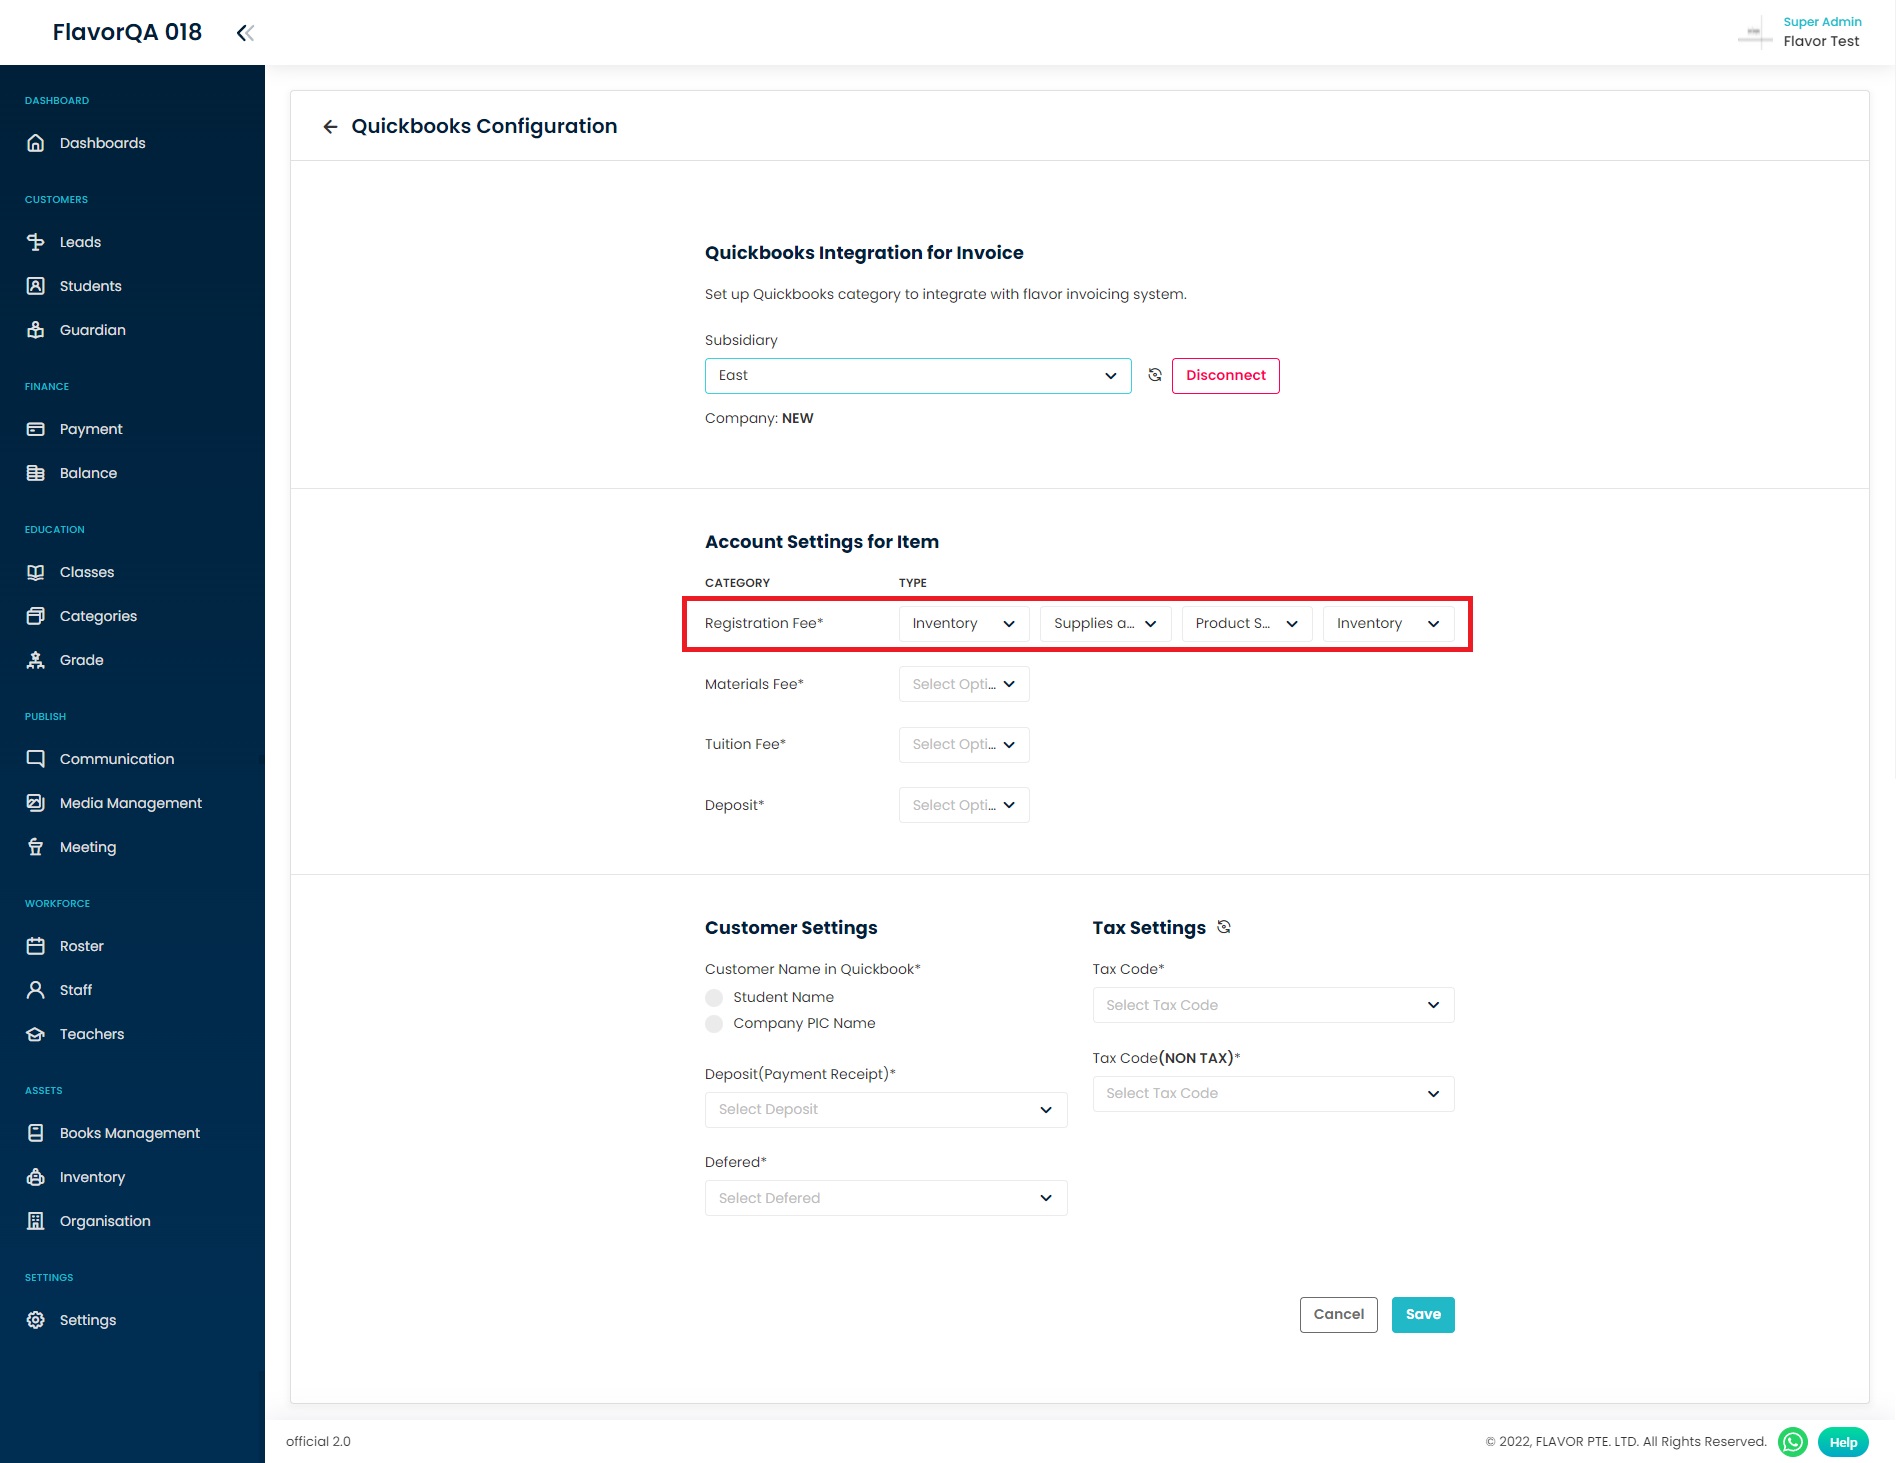
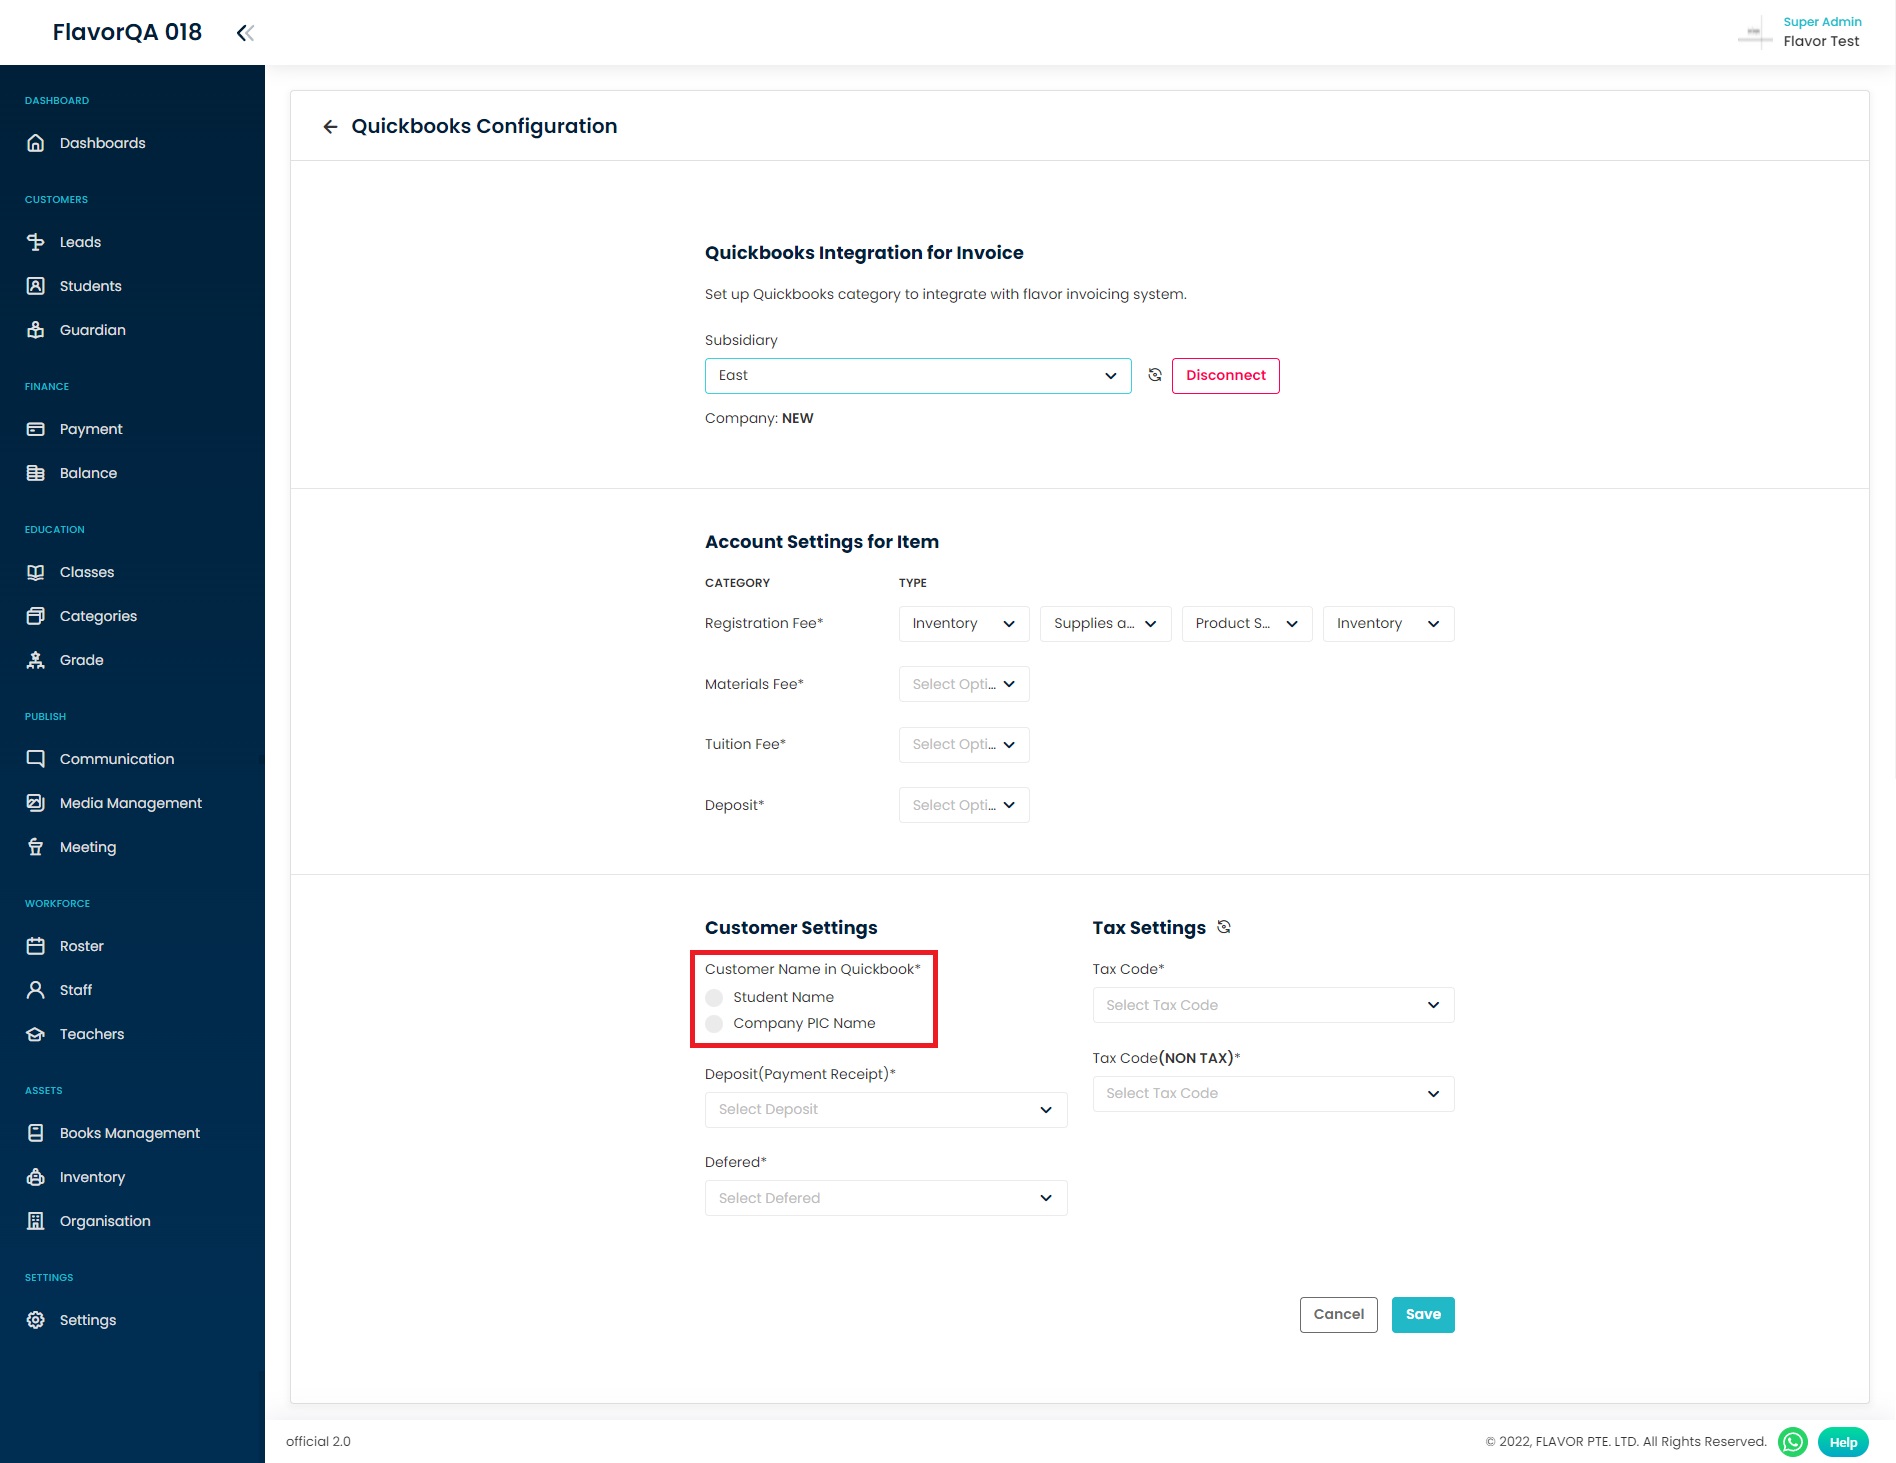
Step 11
Choose who the invoice will be under when you sync to Quickbooks.
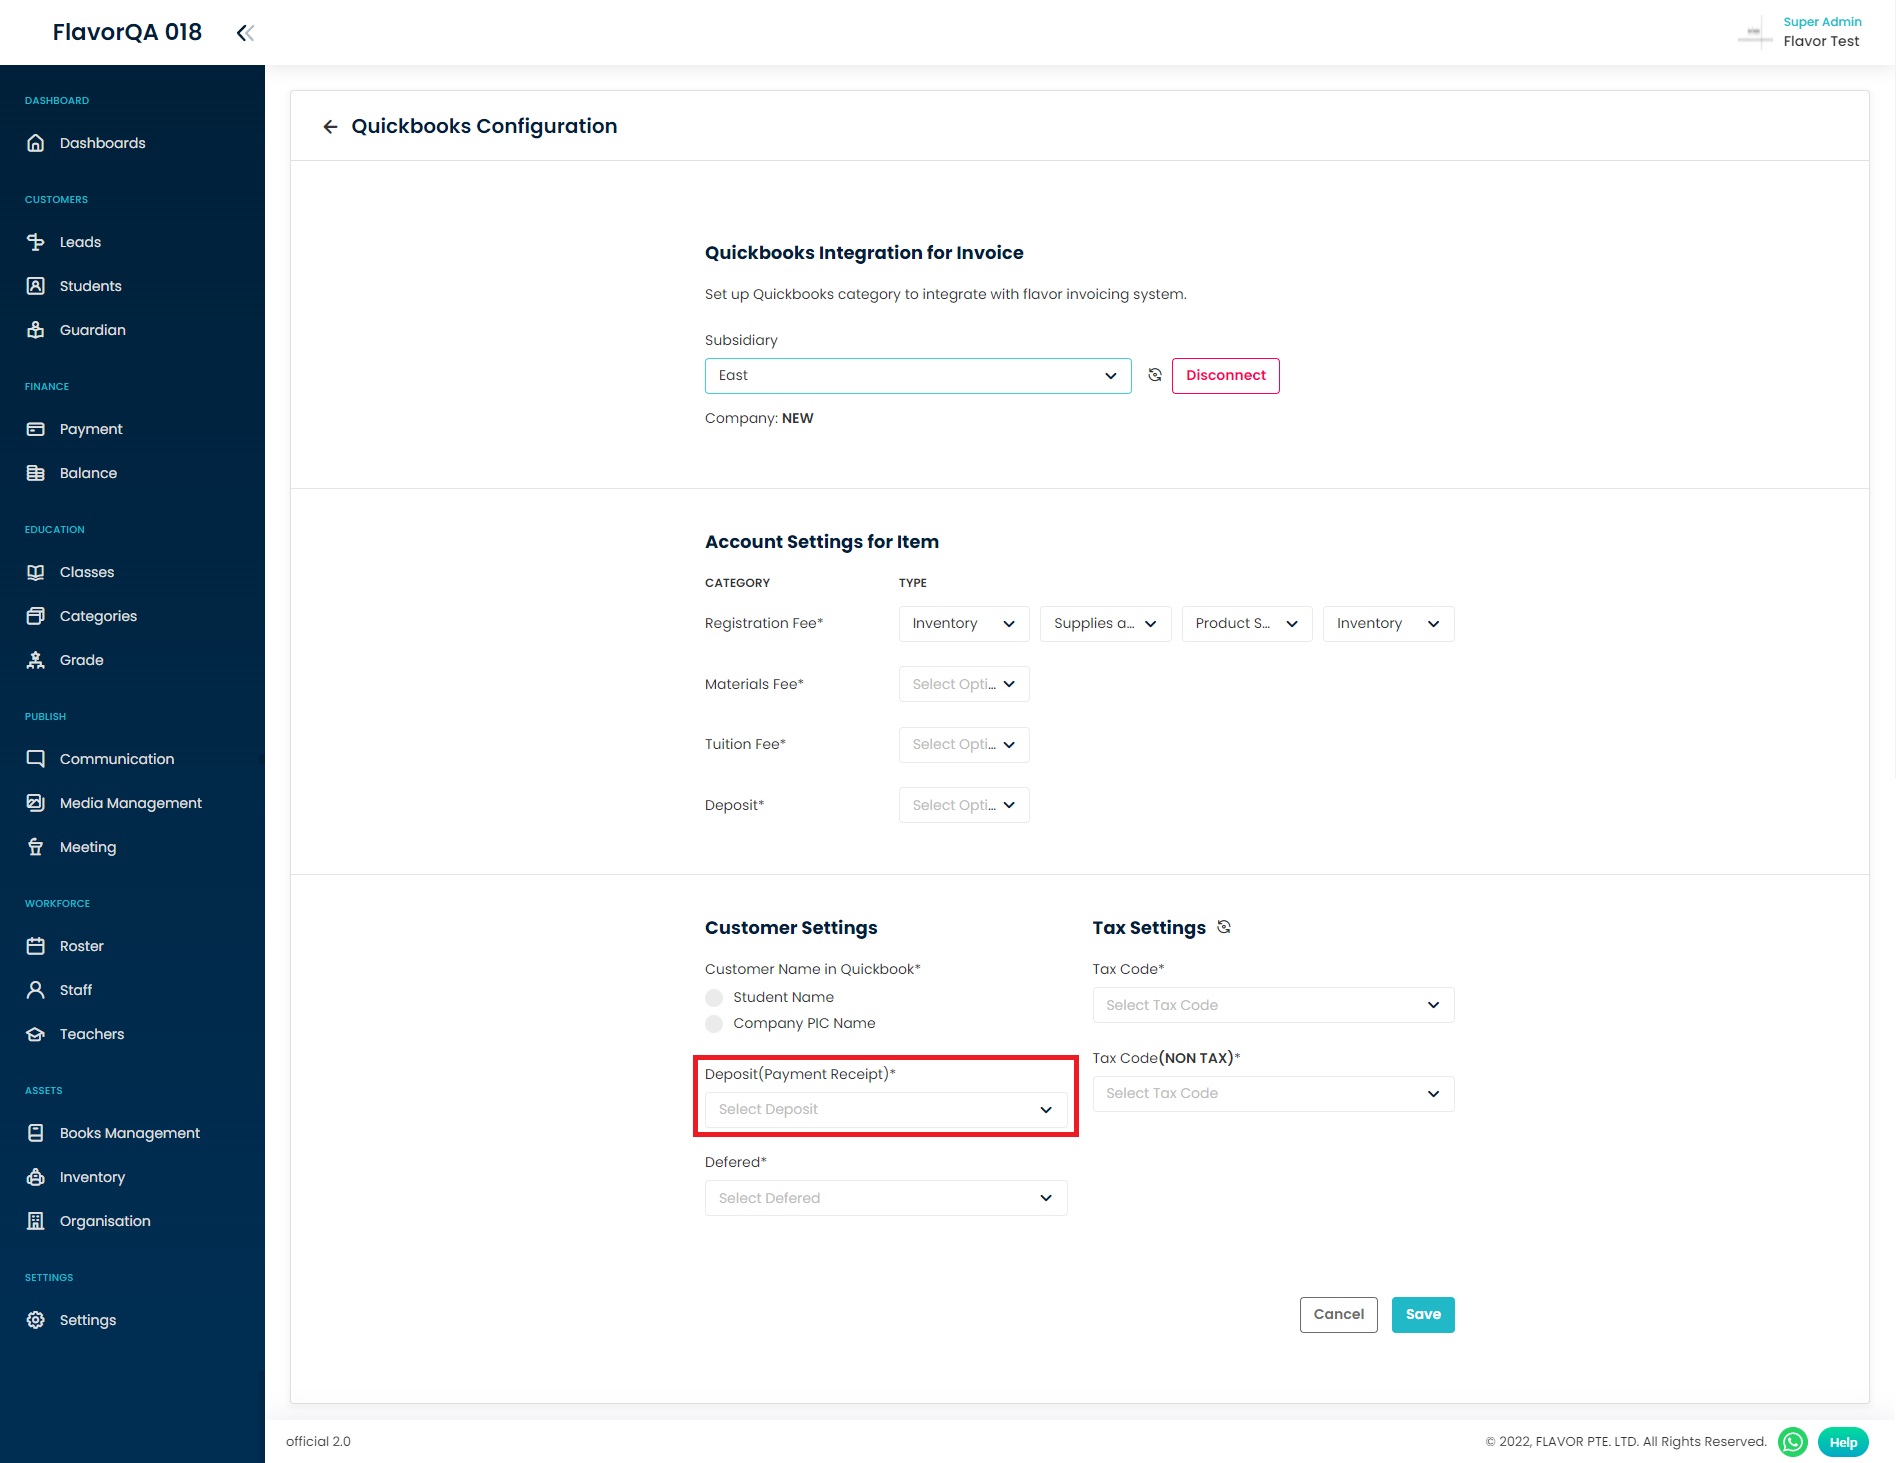
Step 12
Choose your deposit account.
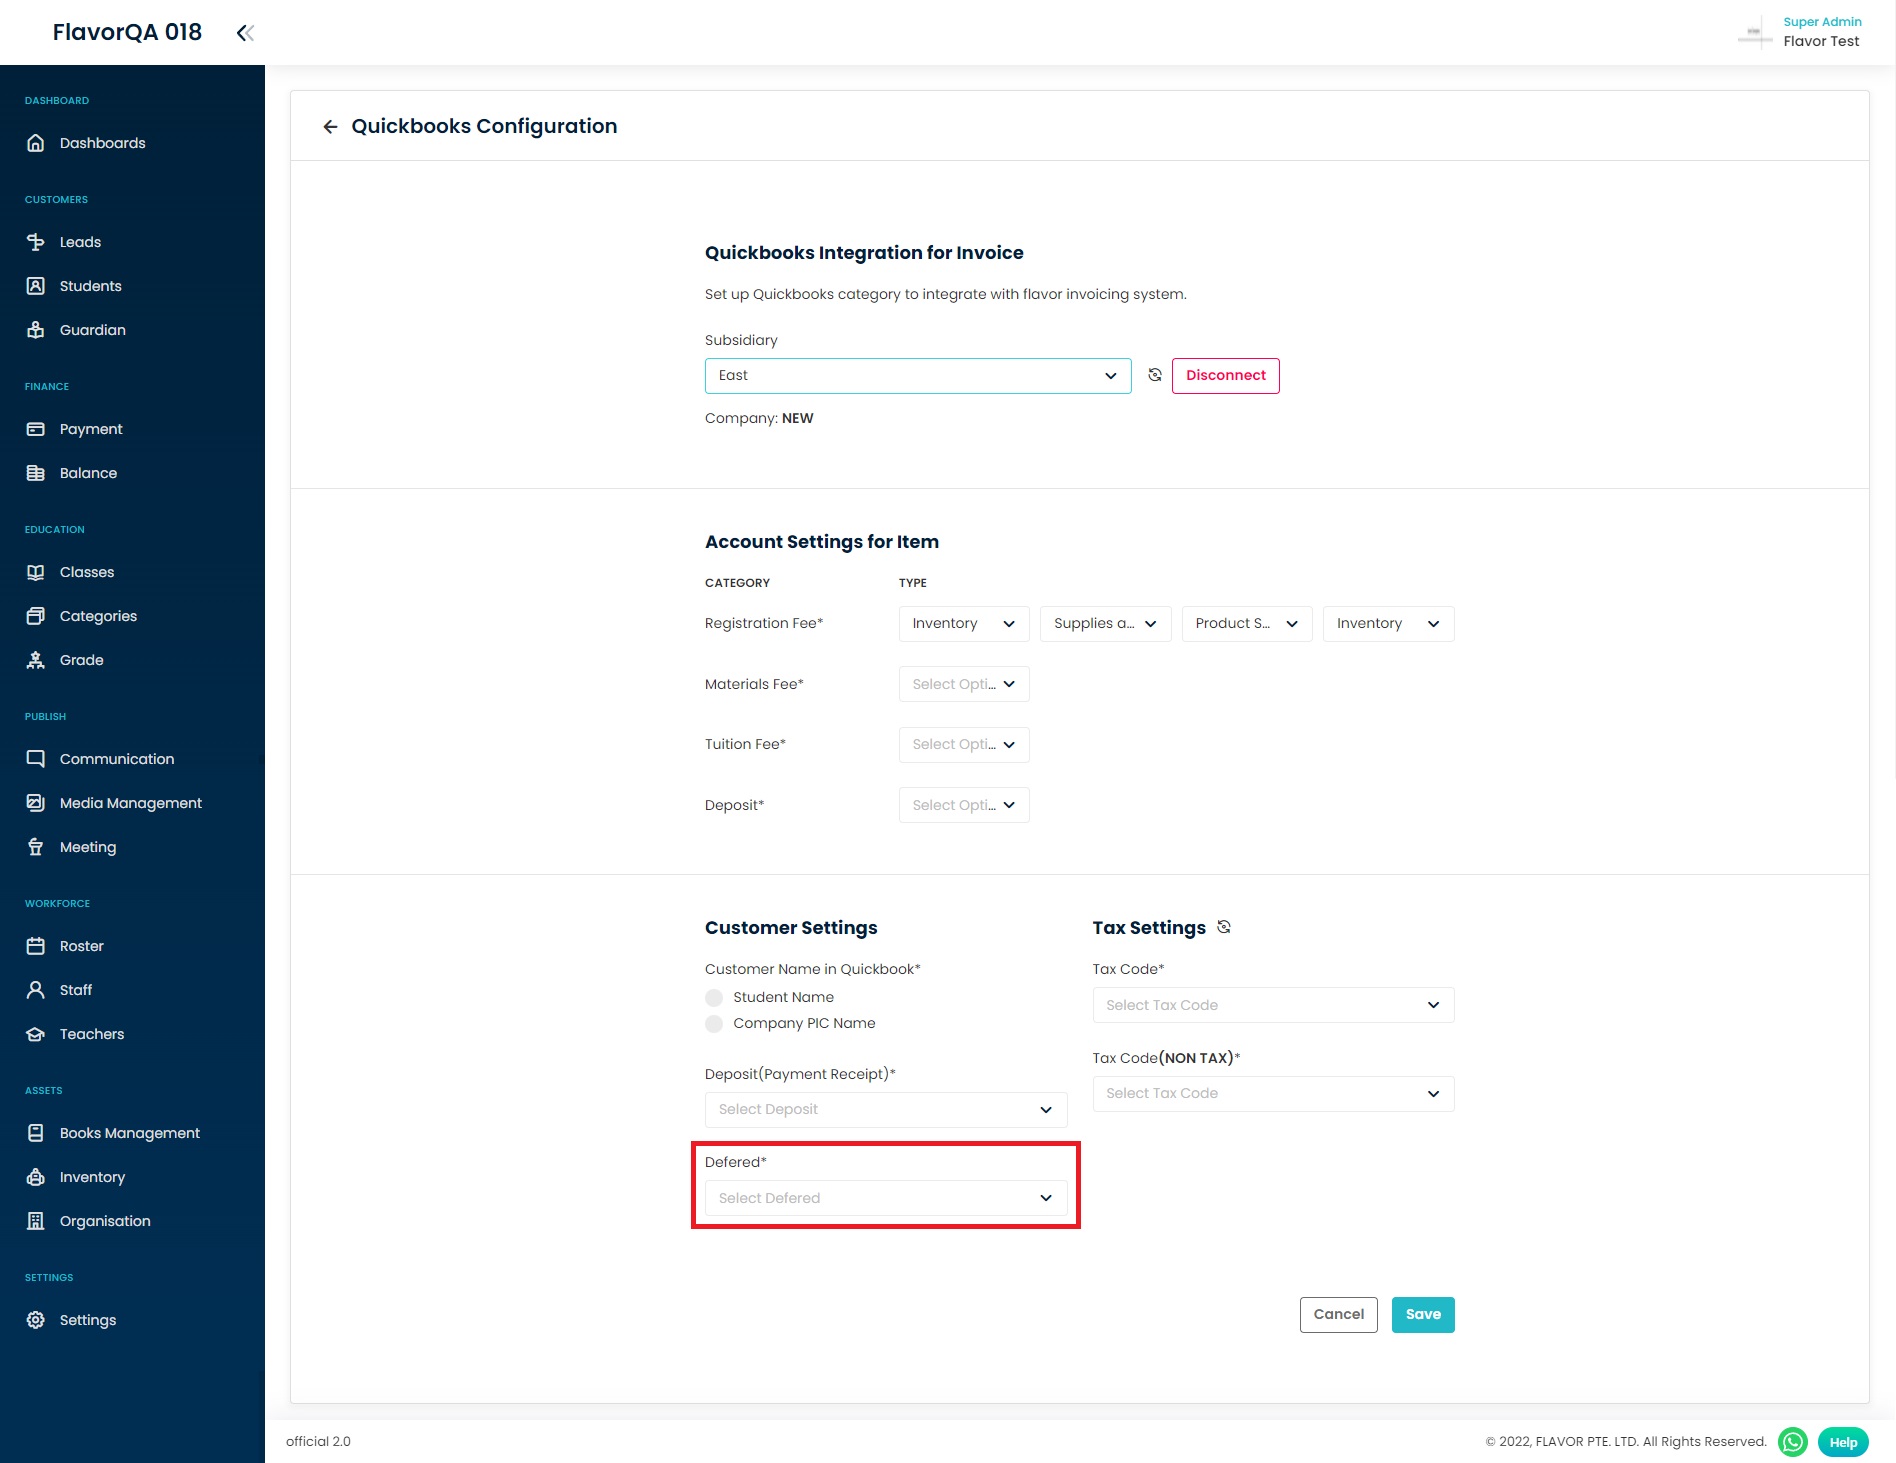
Step 13
Choose your deferred.
Step 14
Filled out your Taxes code.

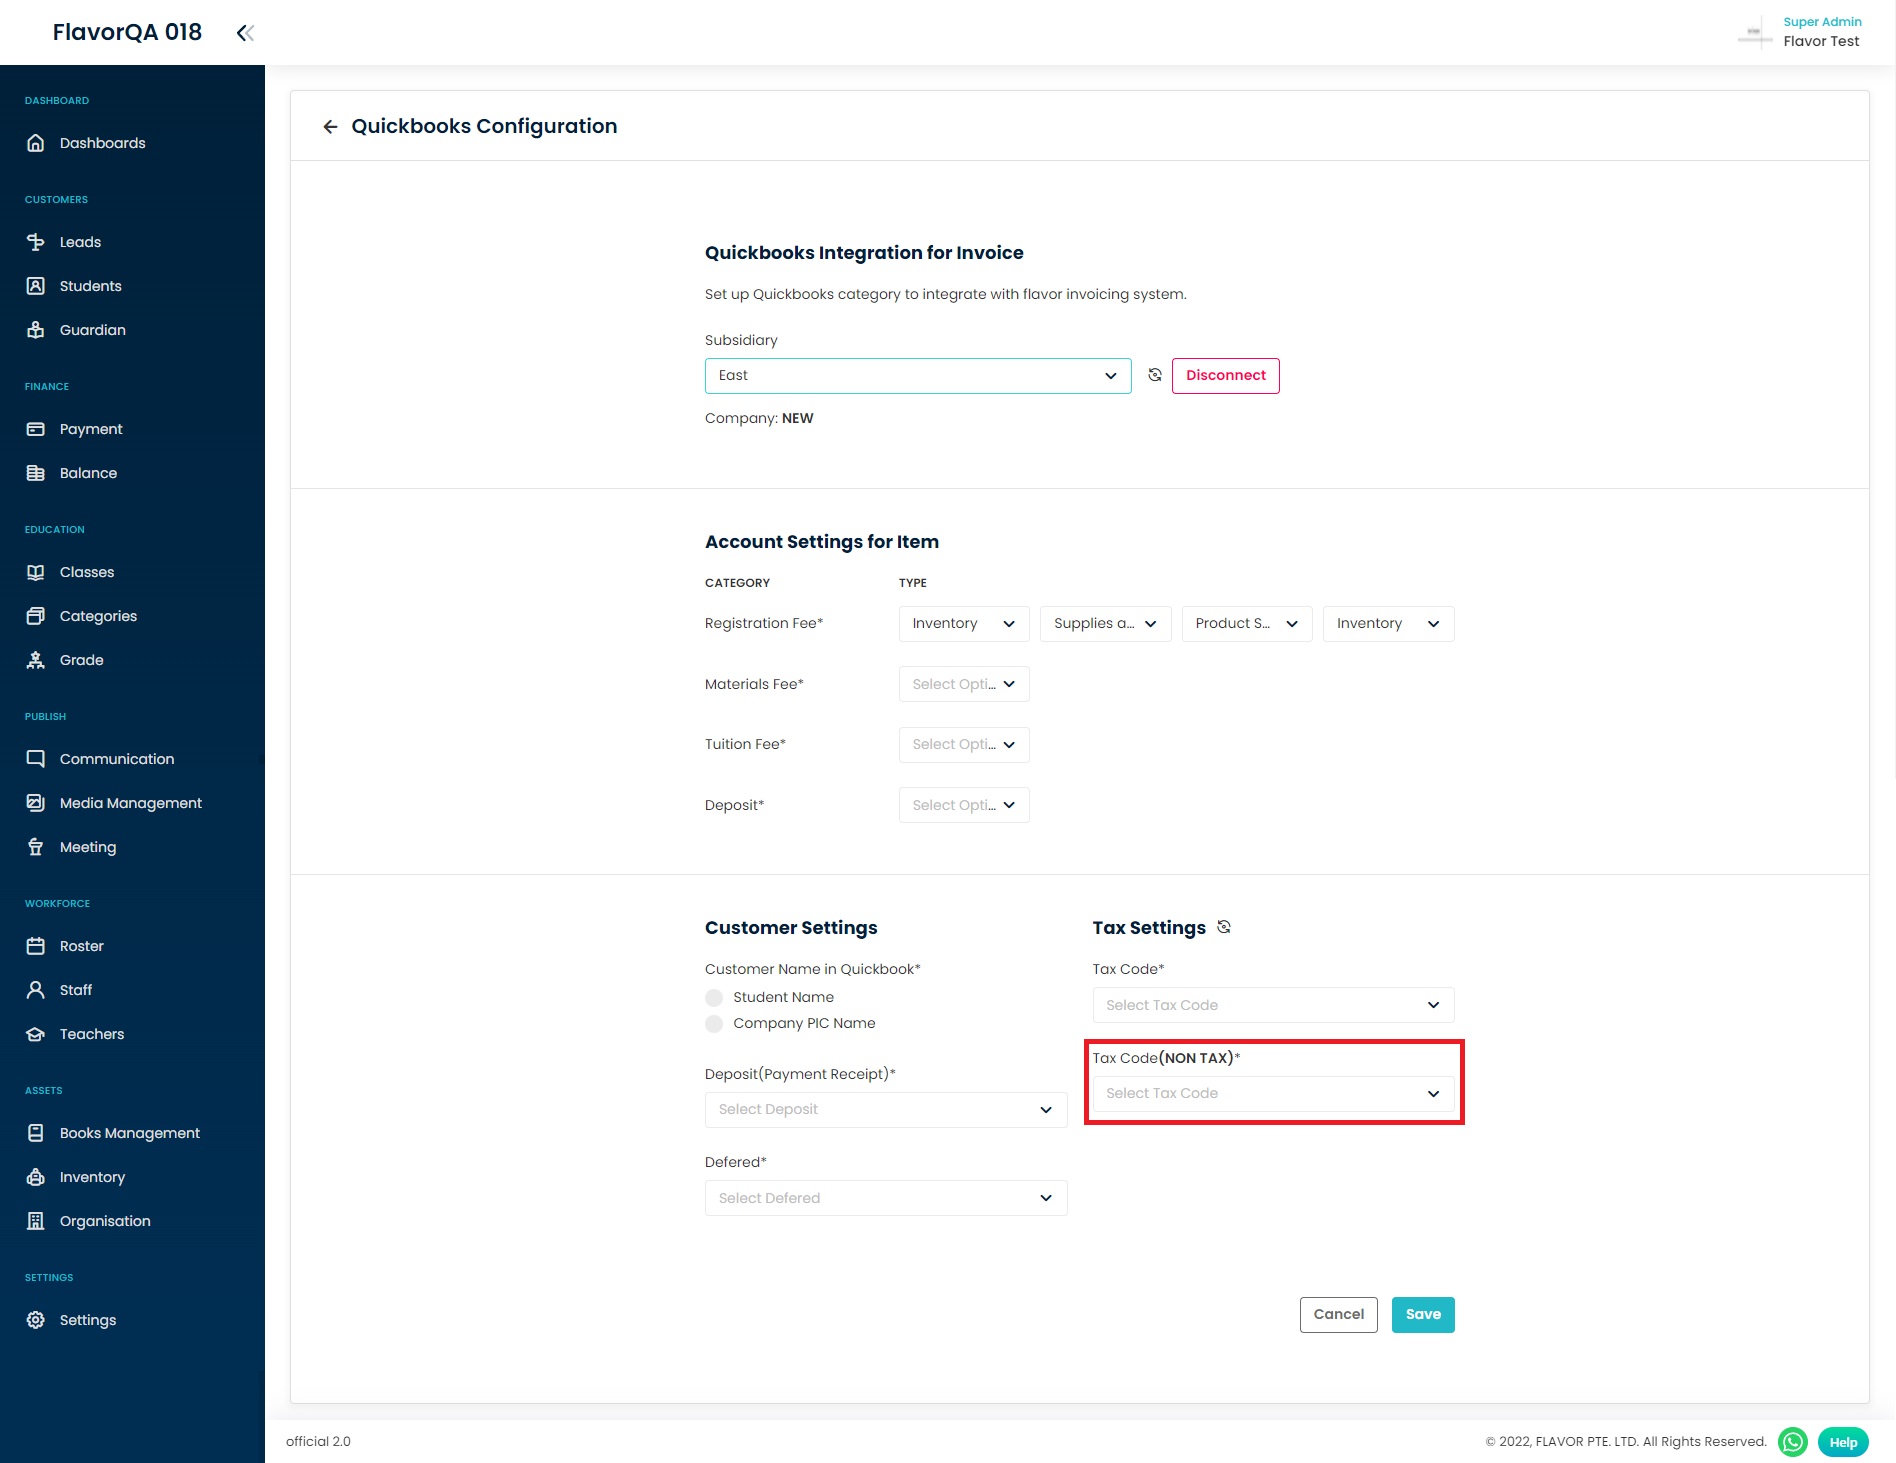
Step 15
Choose your non taxes code.
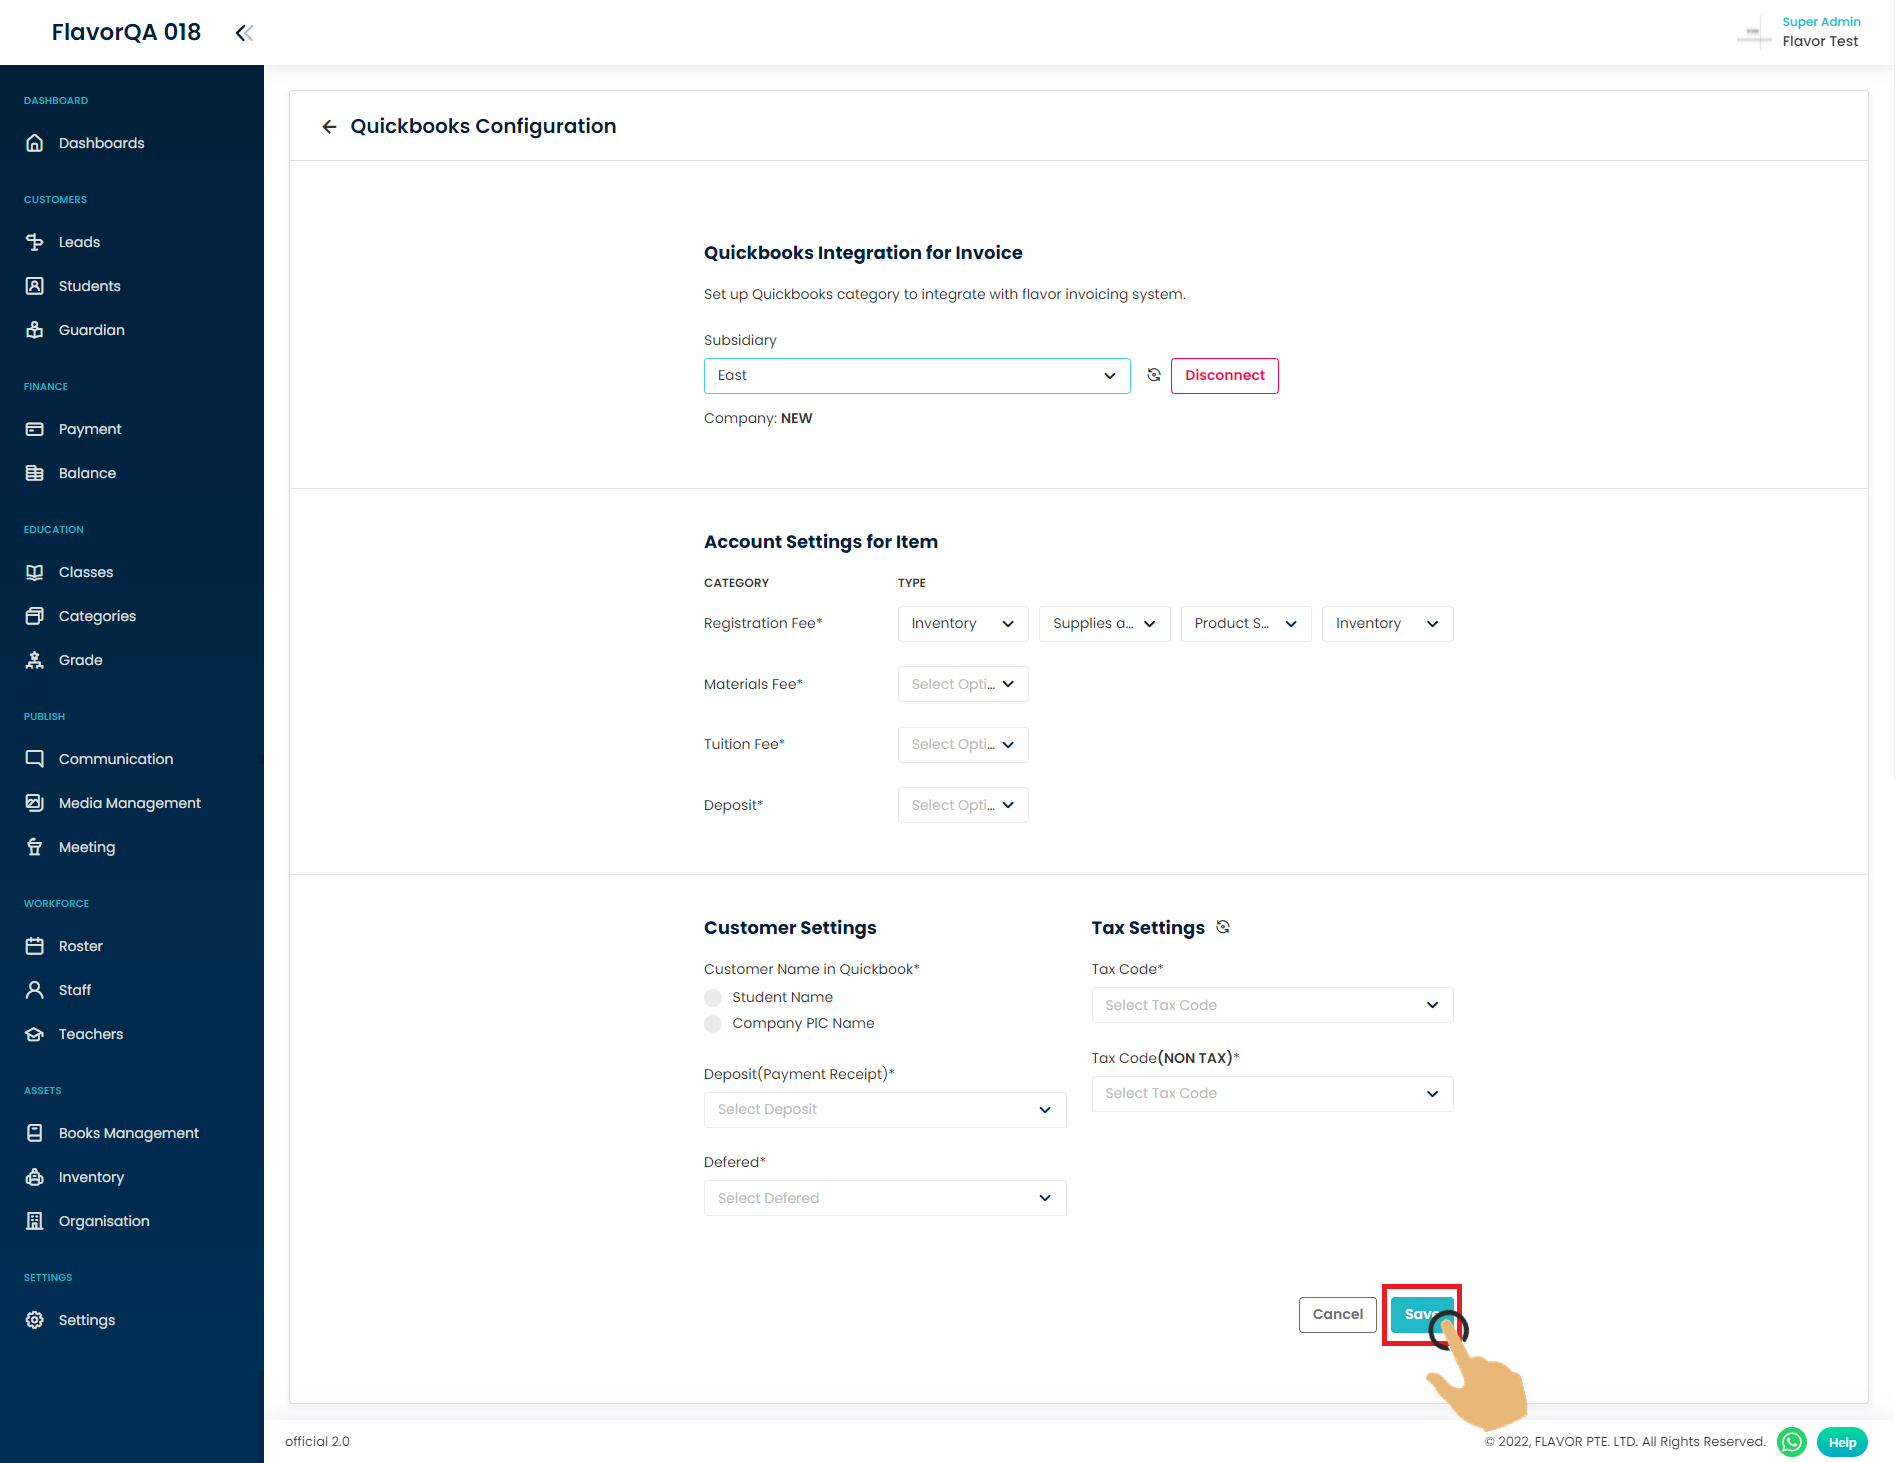
Final Result
After filling out all settings correctly, now you click save and your flavor account has been connected to Quickbooks.
Need more help? Ask us a question
Please let us know more of your details and our team will reach out to you very shortly.