Introduction
In this article, you will find how to send a receipt via email to the parents/guardian and students in their respective emails. Also, you will know the settings to set the notification template.
How to send the class receipts in bulk?
Step 1
- Go to the Payments from the left-side menu of the Flavor System.
- Click on the Receipts link.
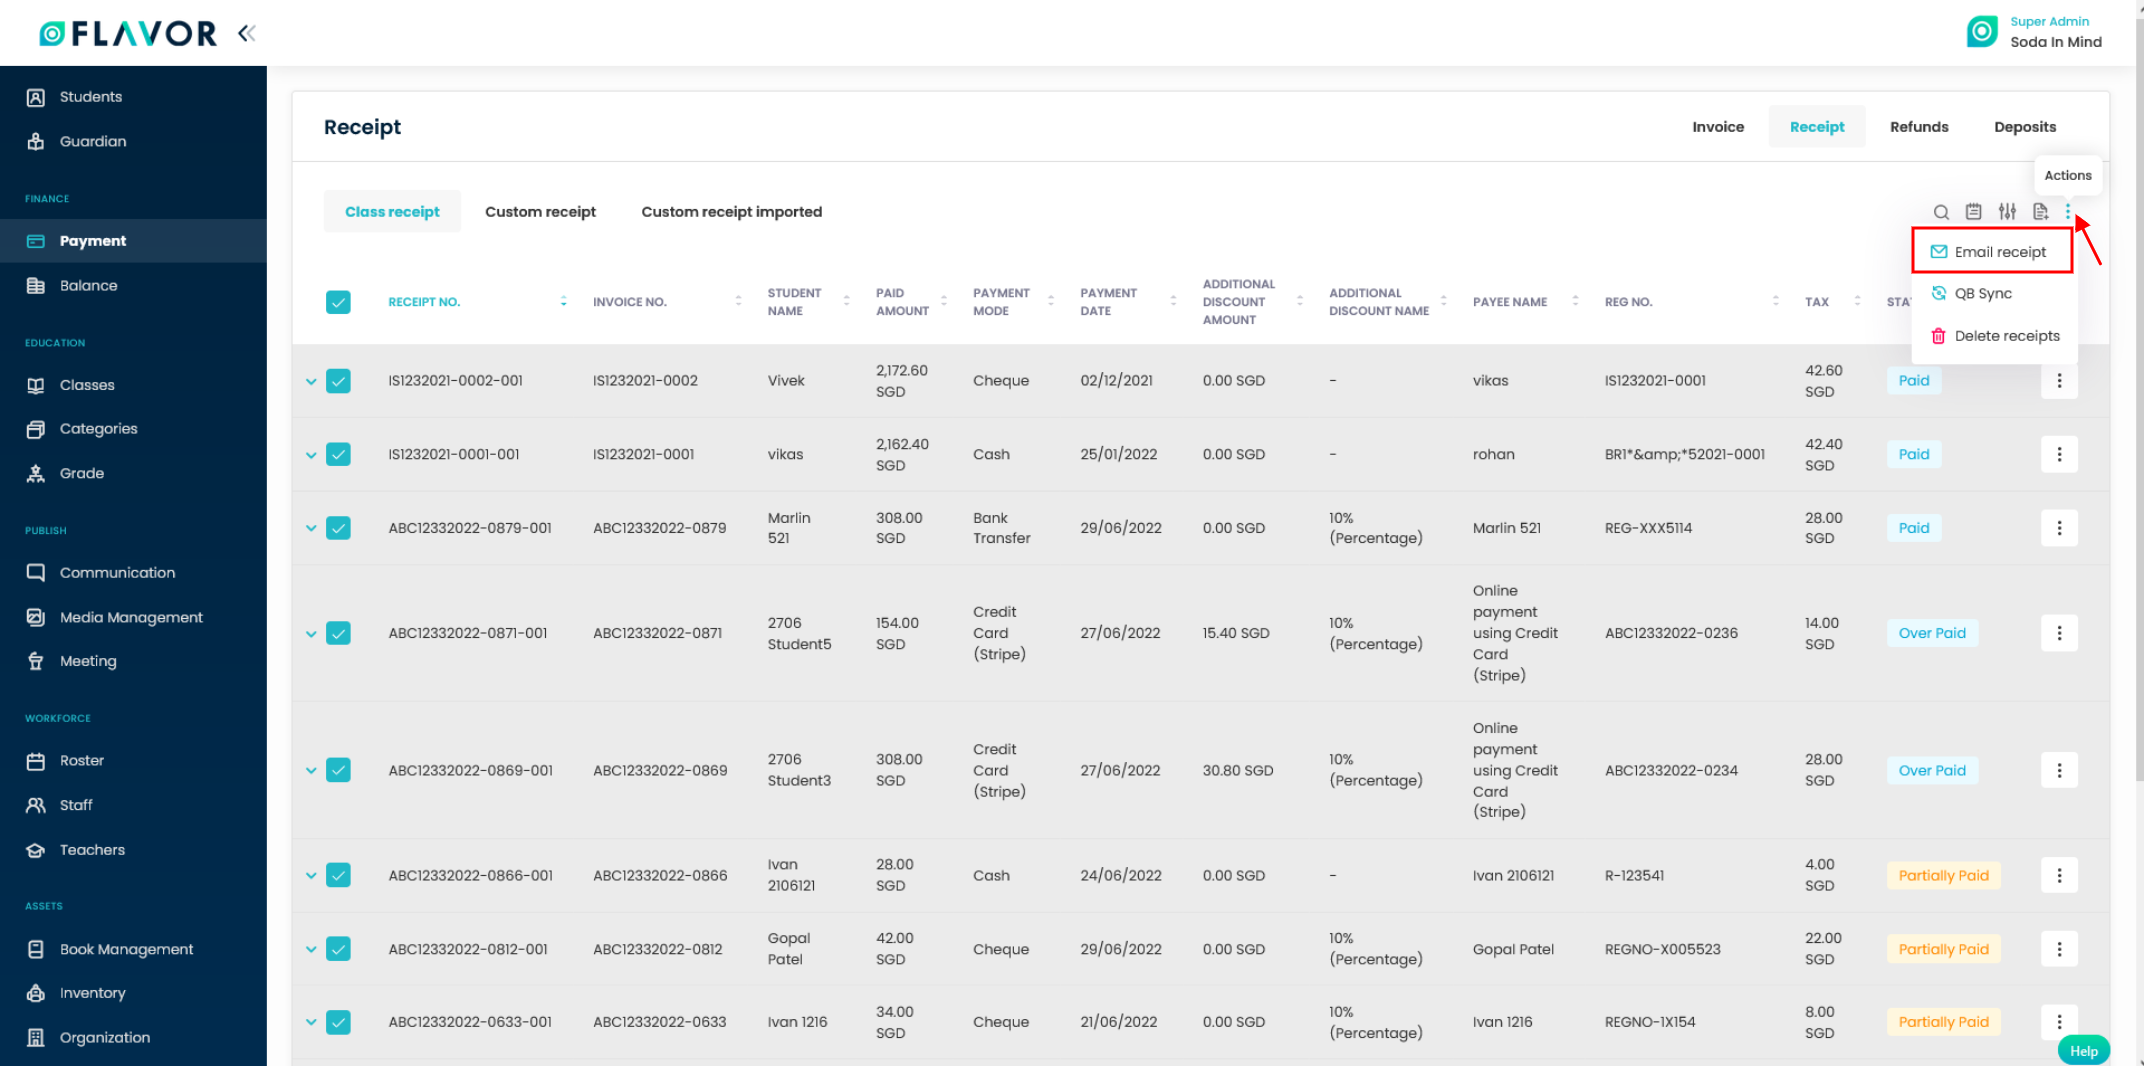
- Under the Class Receipts link, mark the receipts you want to send to the students and parents/guardians.
- Click on the Bulk Action icon button.
- An Action popup will appear on your screen.
- Click on Email Receipt.
Step 2
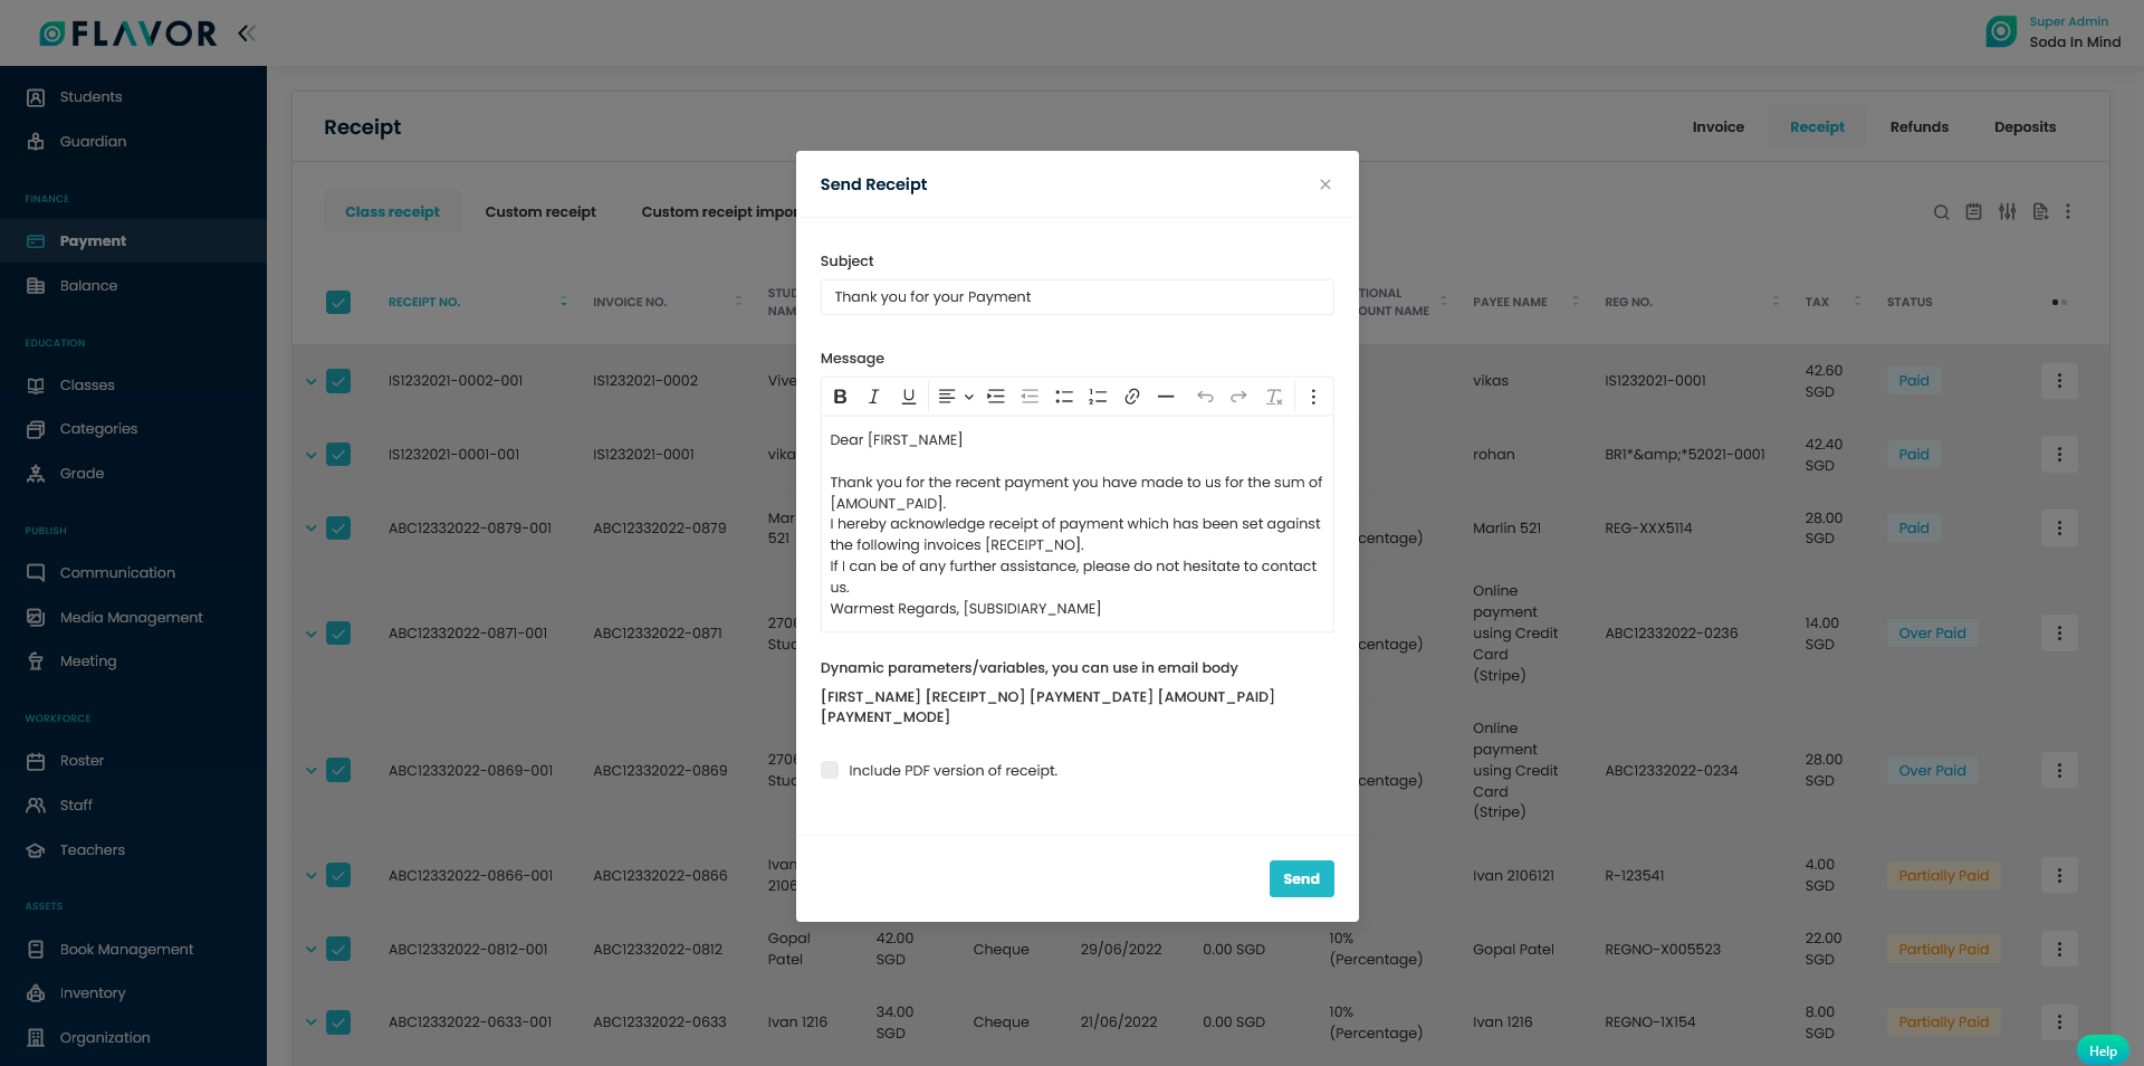
- A popup named Send Receipt will appear on your screen.
- Enter the details and click on the Send button.
- Also you can include the pdf version of the receipt by clicking the checkbox.
- The recipients will receive emails in their email accounts.
How to send the class receipt from the receipt view page?
Step 1
- Go to the Payments from the left-side menu of the Flavor System.
- Click on the Receipts link.
- Under the Class Receipts link, click on the particular receipt you want to send.
Step 2
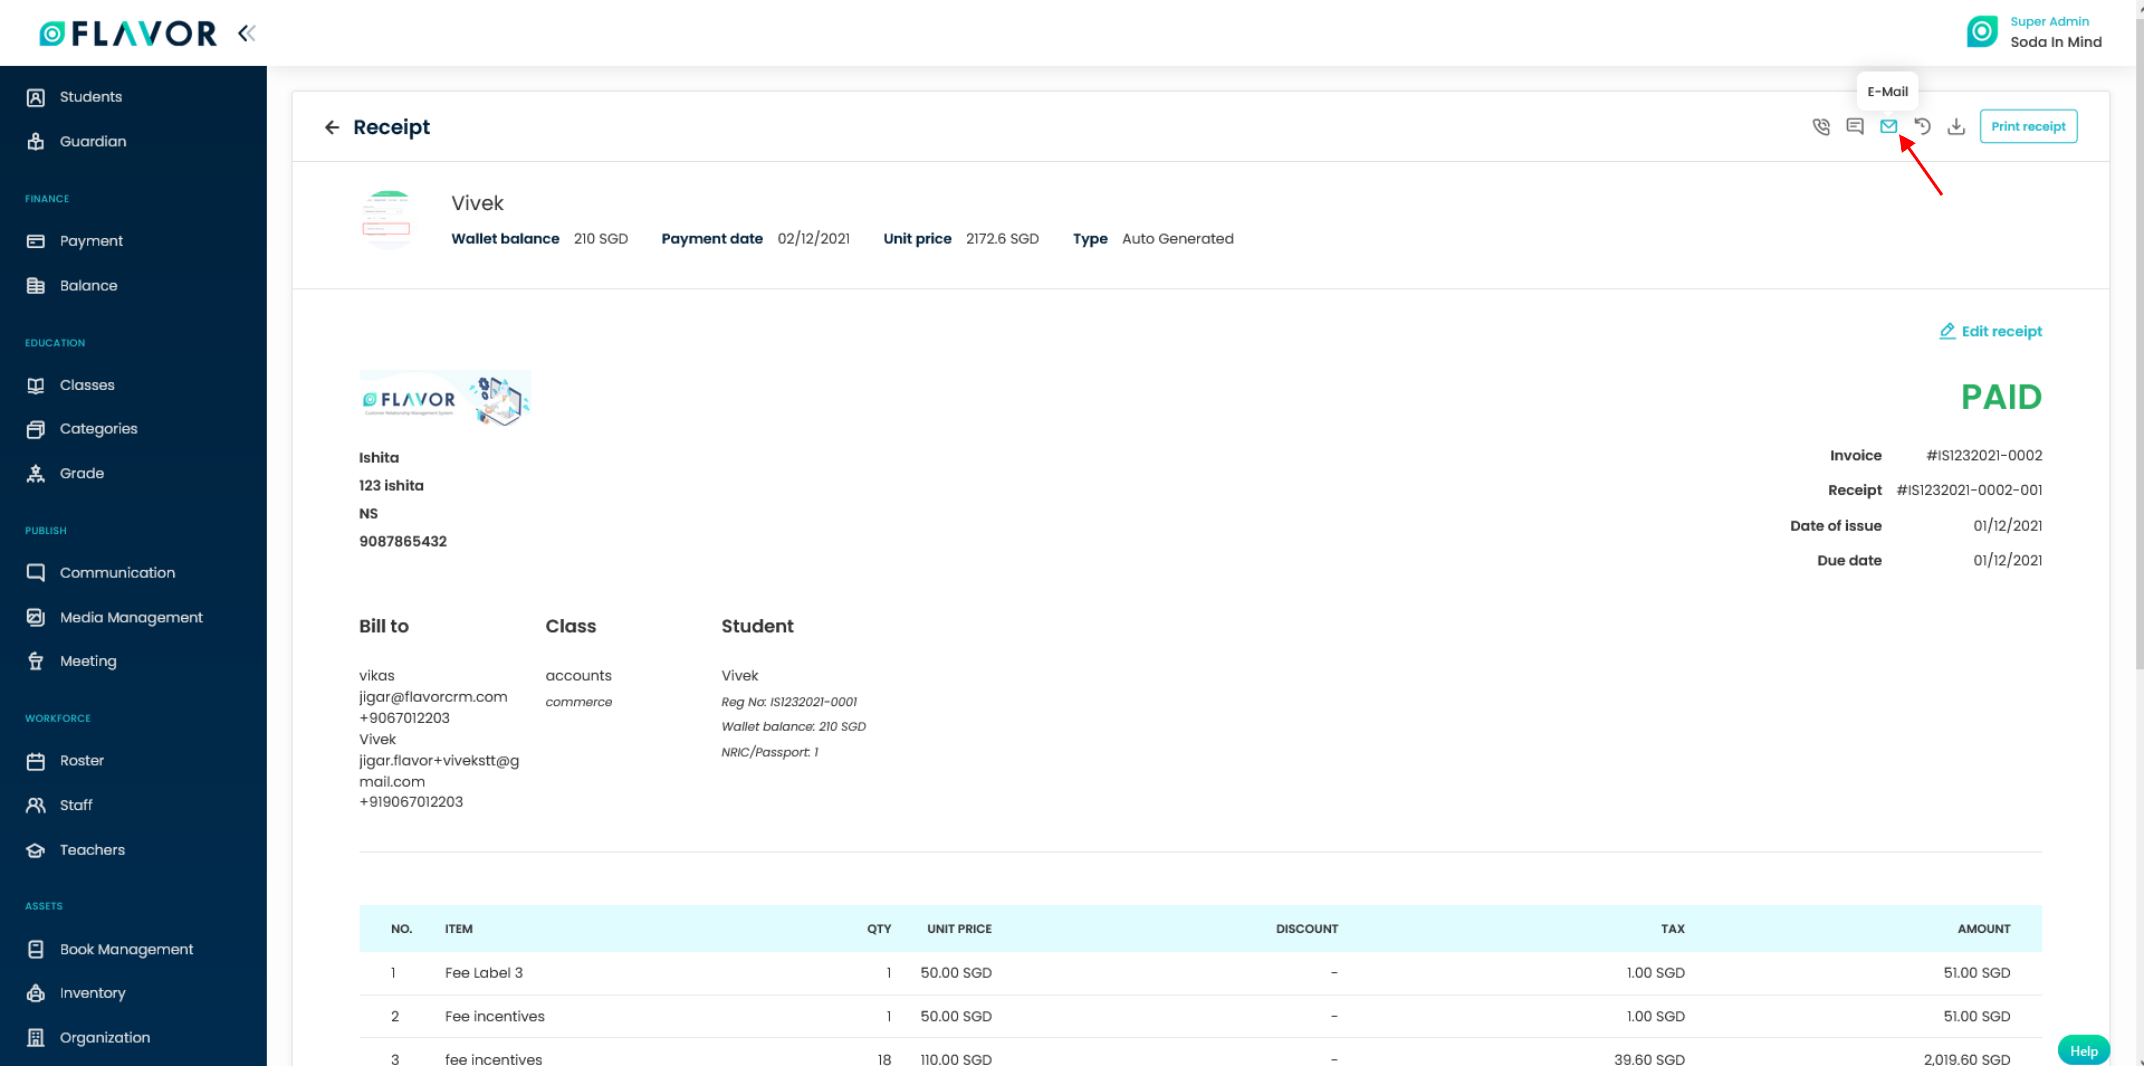
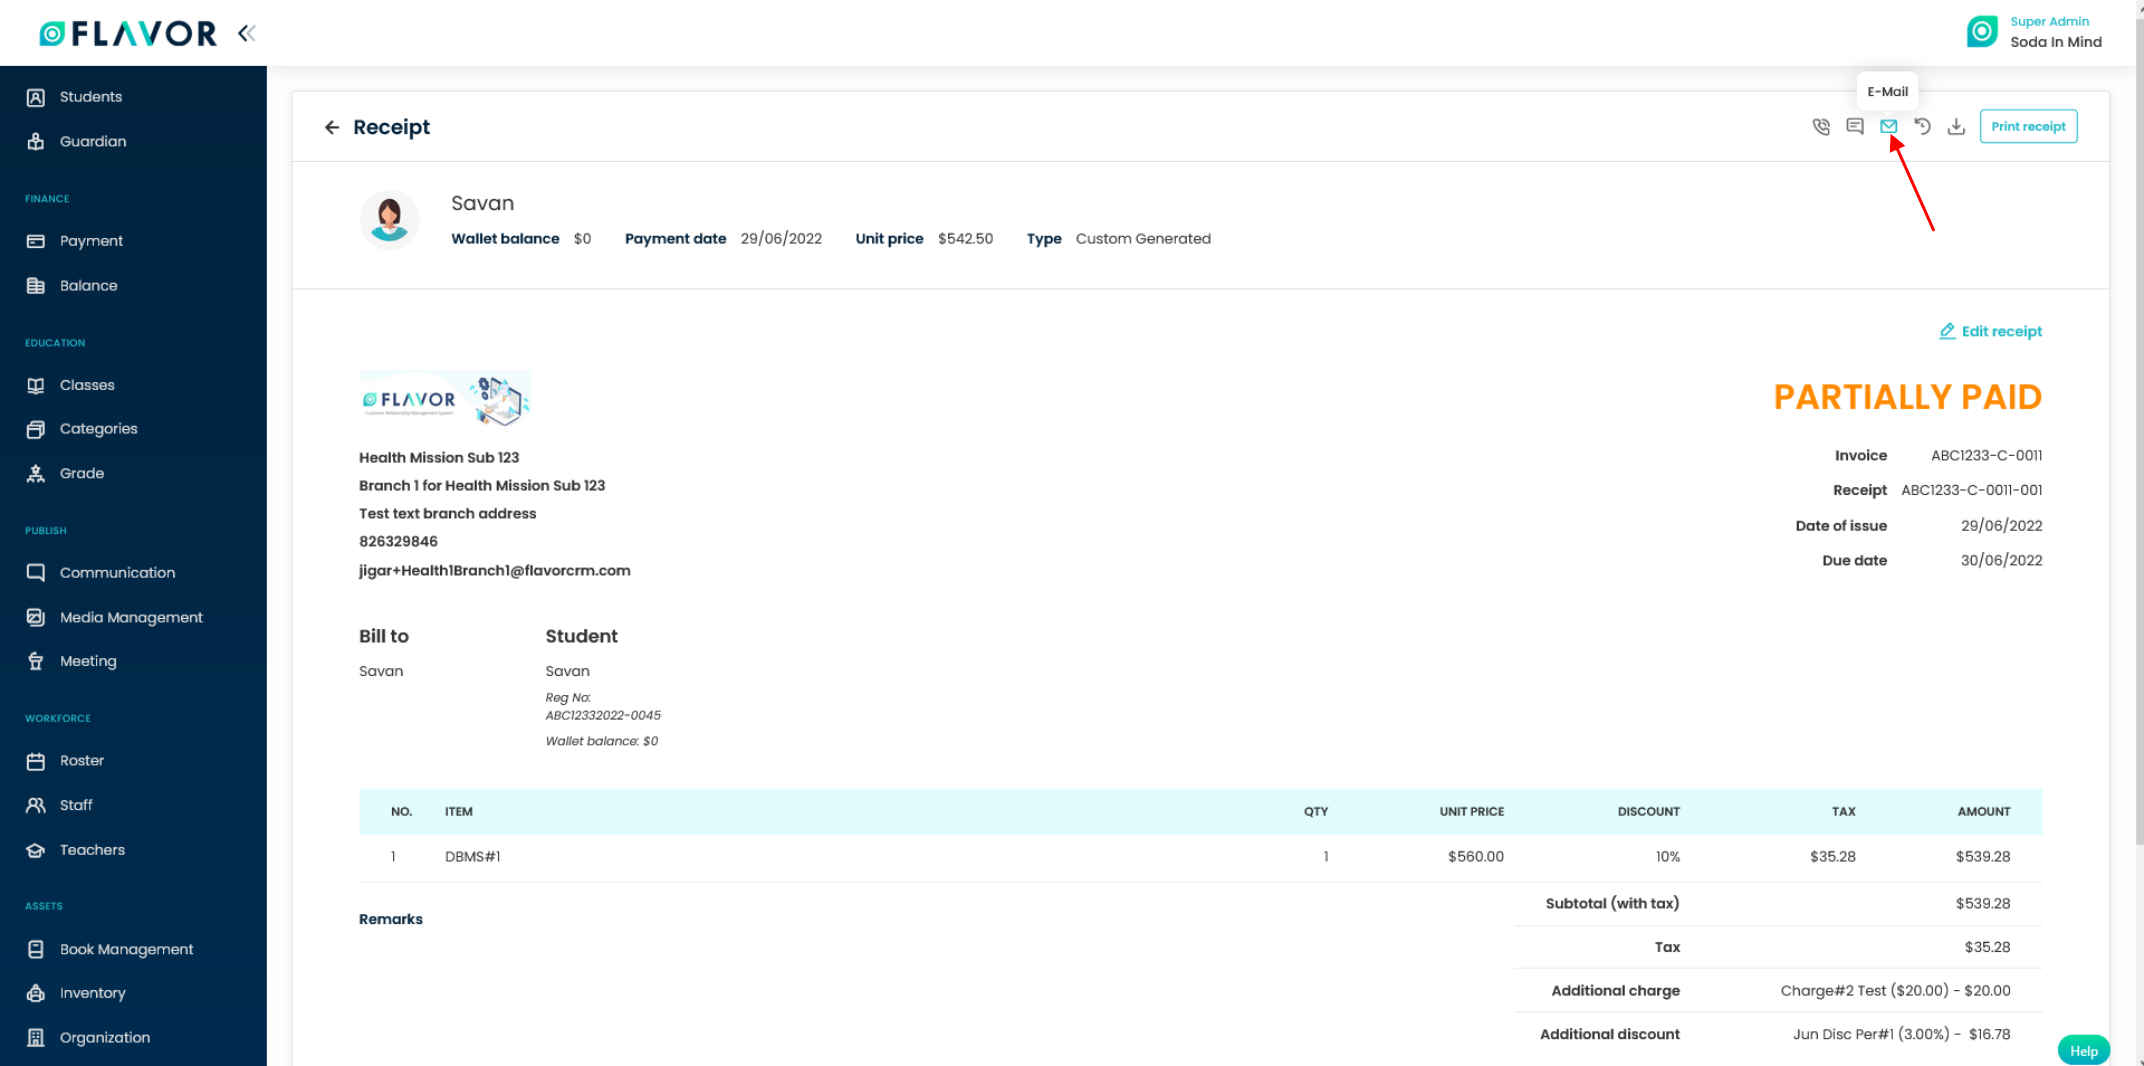
- It will navigate you to the Receipt view page.
- On Receipt view page click on the Email icon button.
- A popup named Send Email will appear on your screen.
- Enter the details and click on the Send button.
- The recipient will receive emails on their email account.
How to send the Custom receipt from the custom receipt view page?
Step 1
- Go to the Payments from the left-side menu of the Flavor System.
- Click on the Receipts link.
- Under the Custom Receipts link, click on the particular receipt you want to send.
Step 2
- It will navigate you to the Receipt view page.
- On Receipt view page click on the Email icon button.
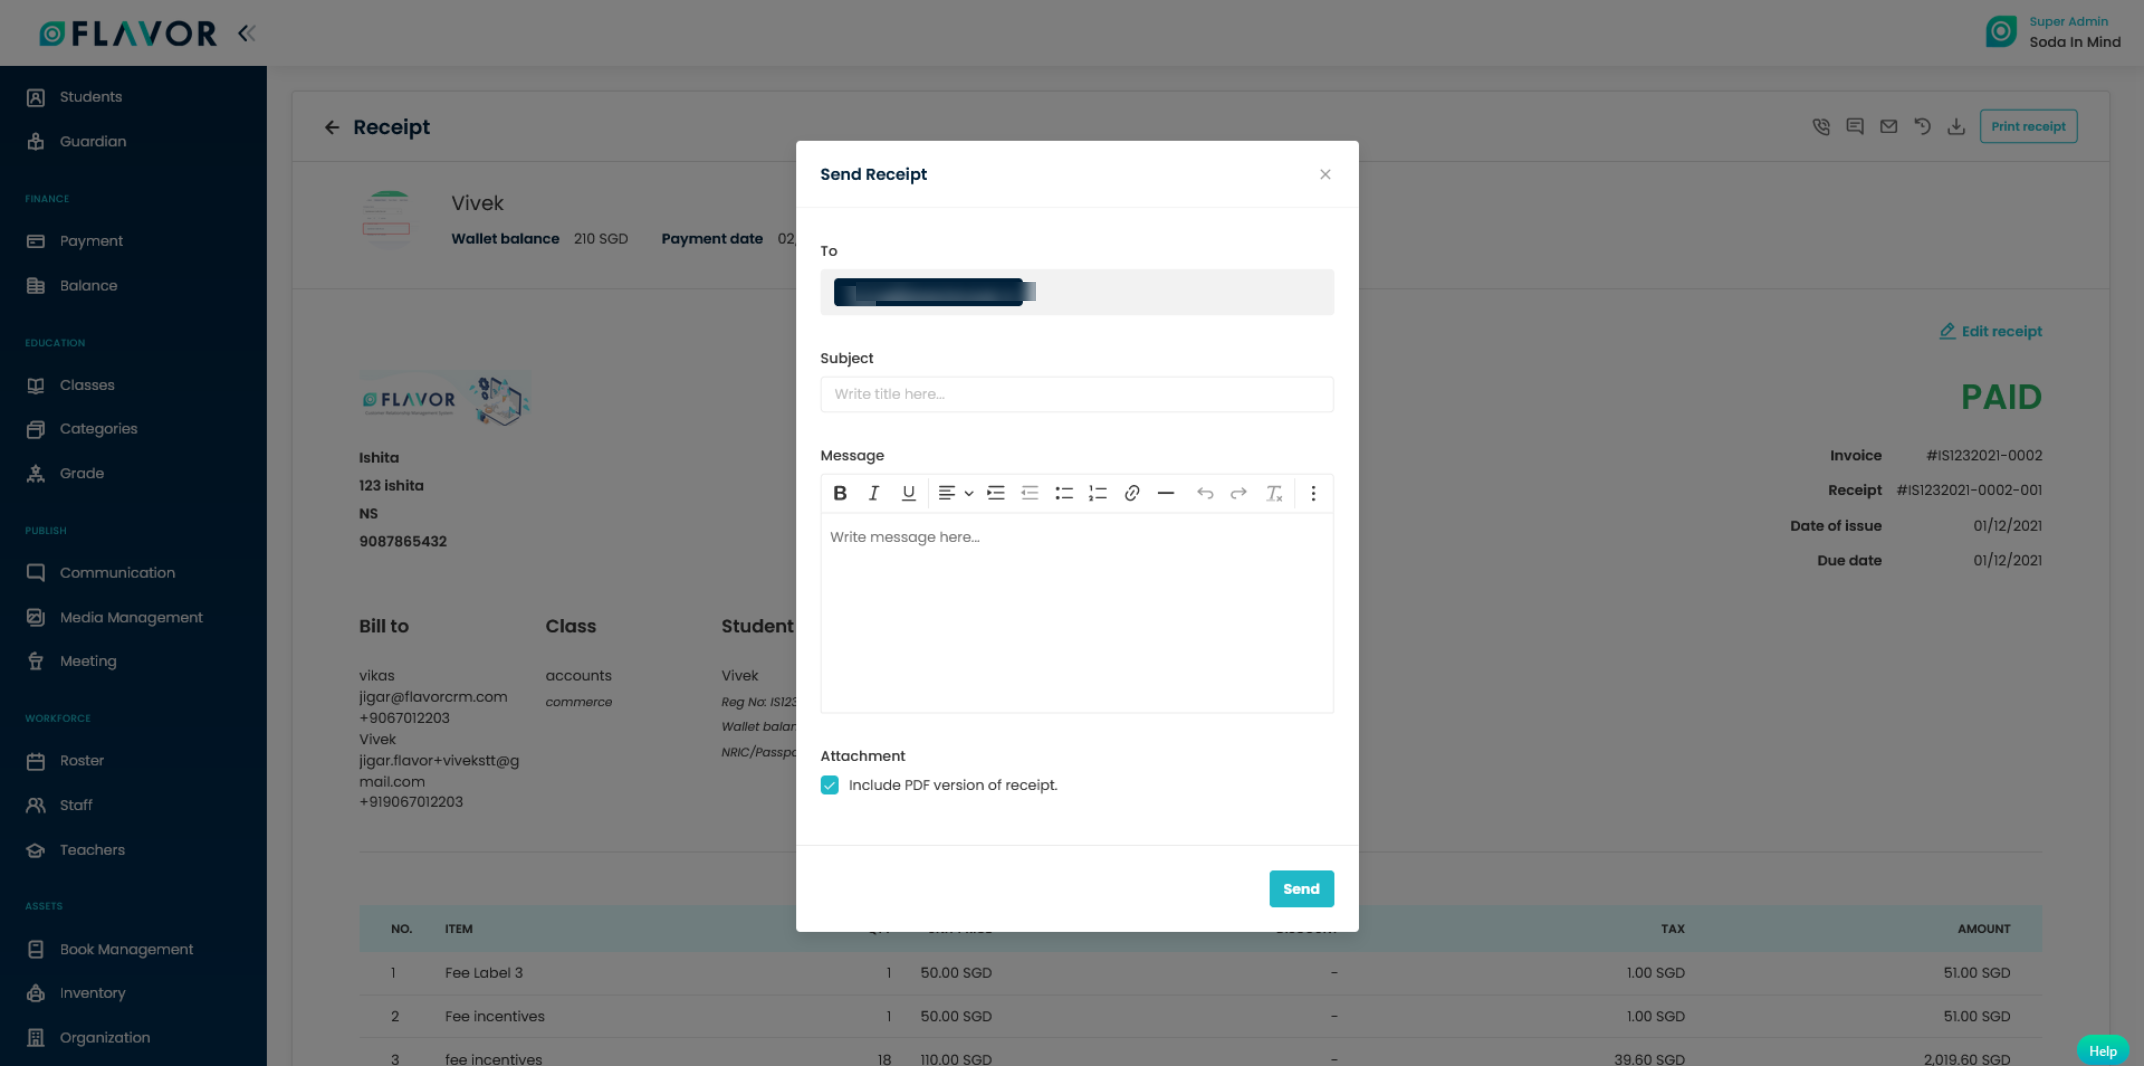
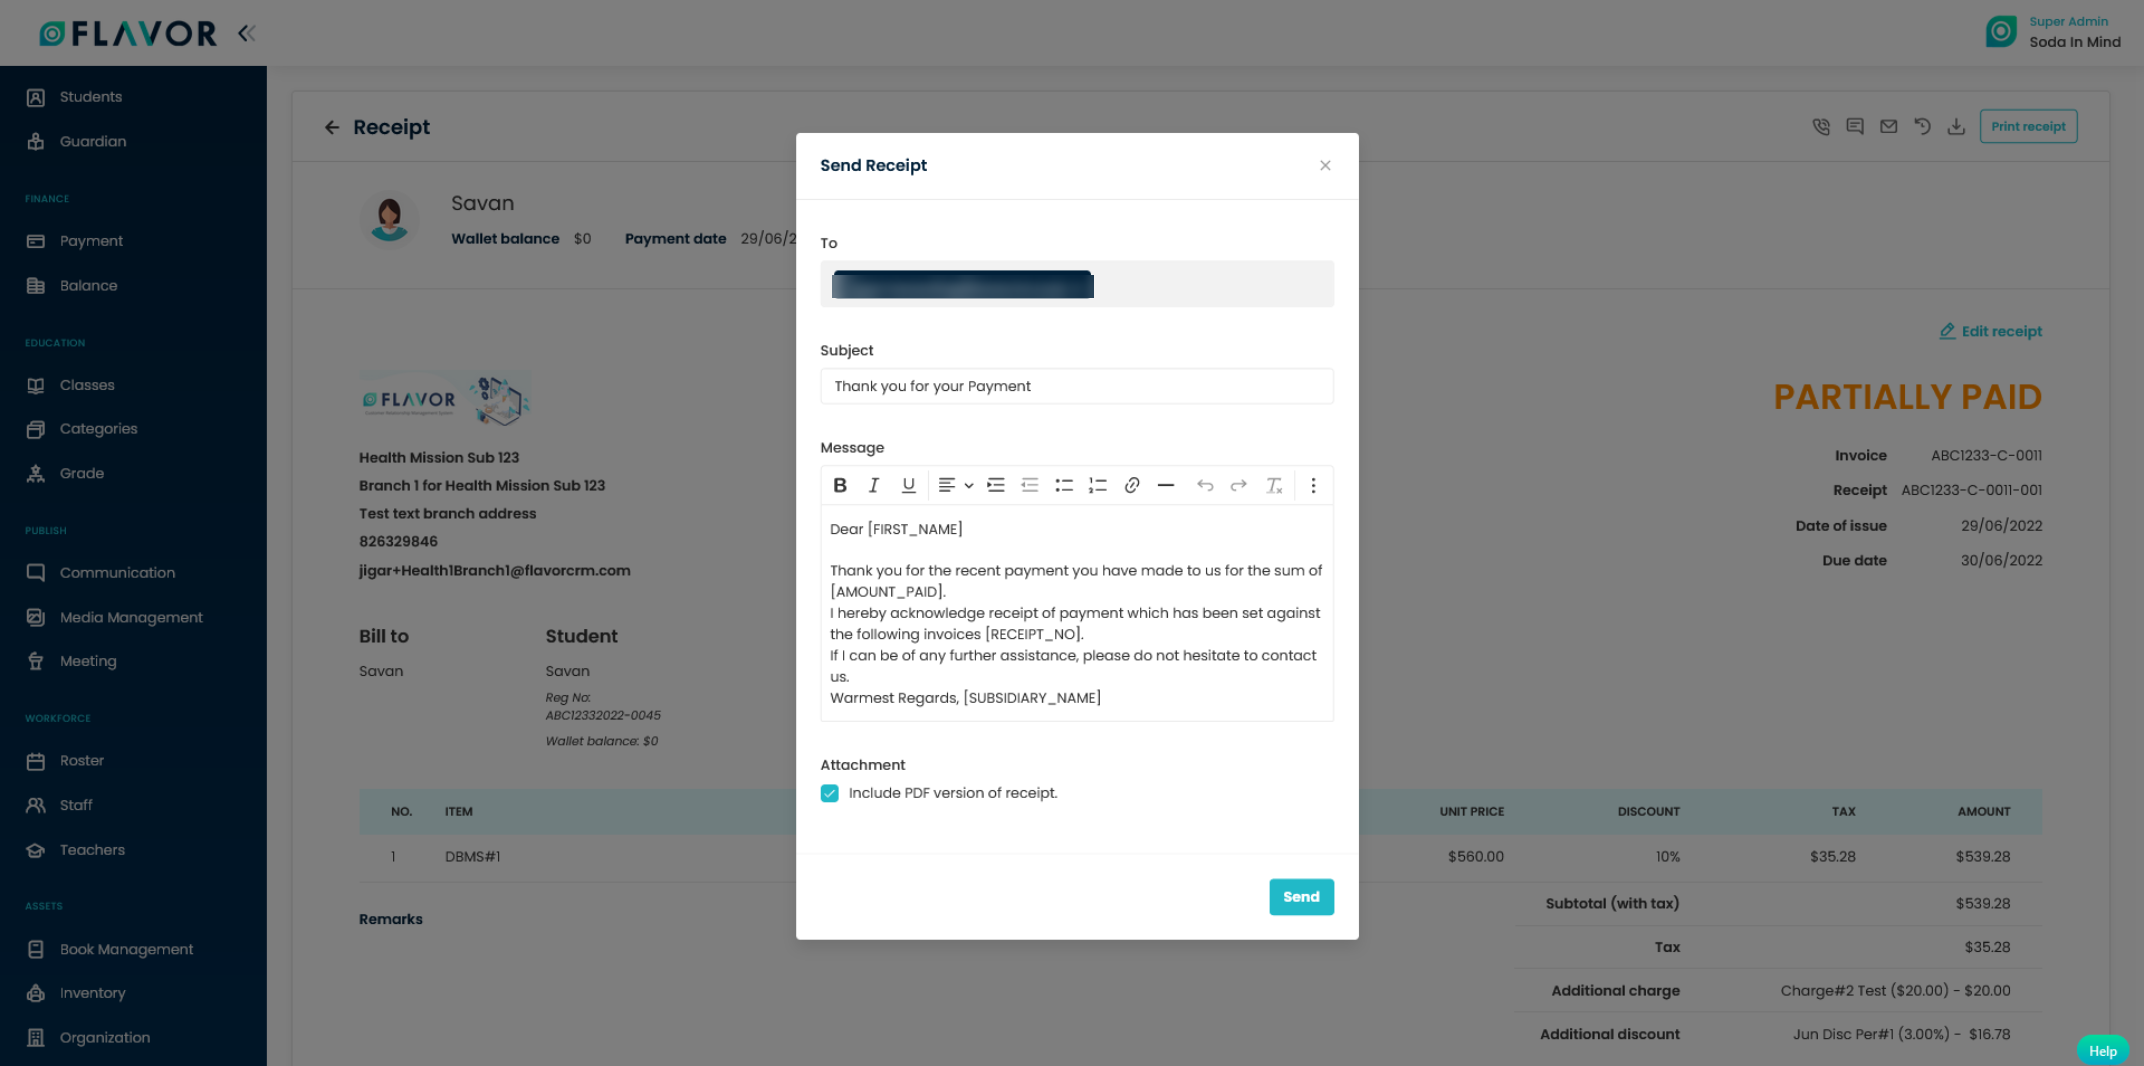
- A popup named Send Email will appear on your screen.
- Enter the details and click on the Send button.
- The recipient will receive emails on their email account.
How to settings for Send Receipt Template?
Step 1
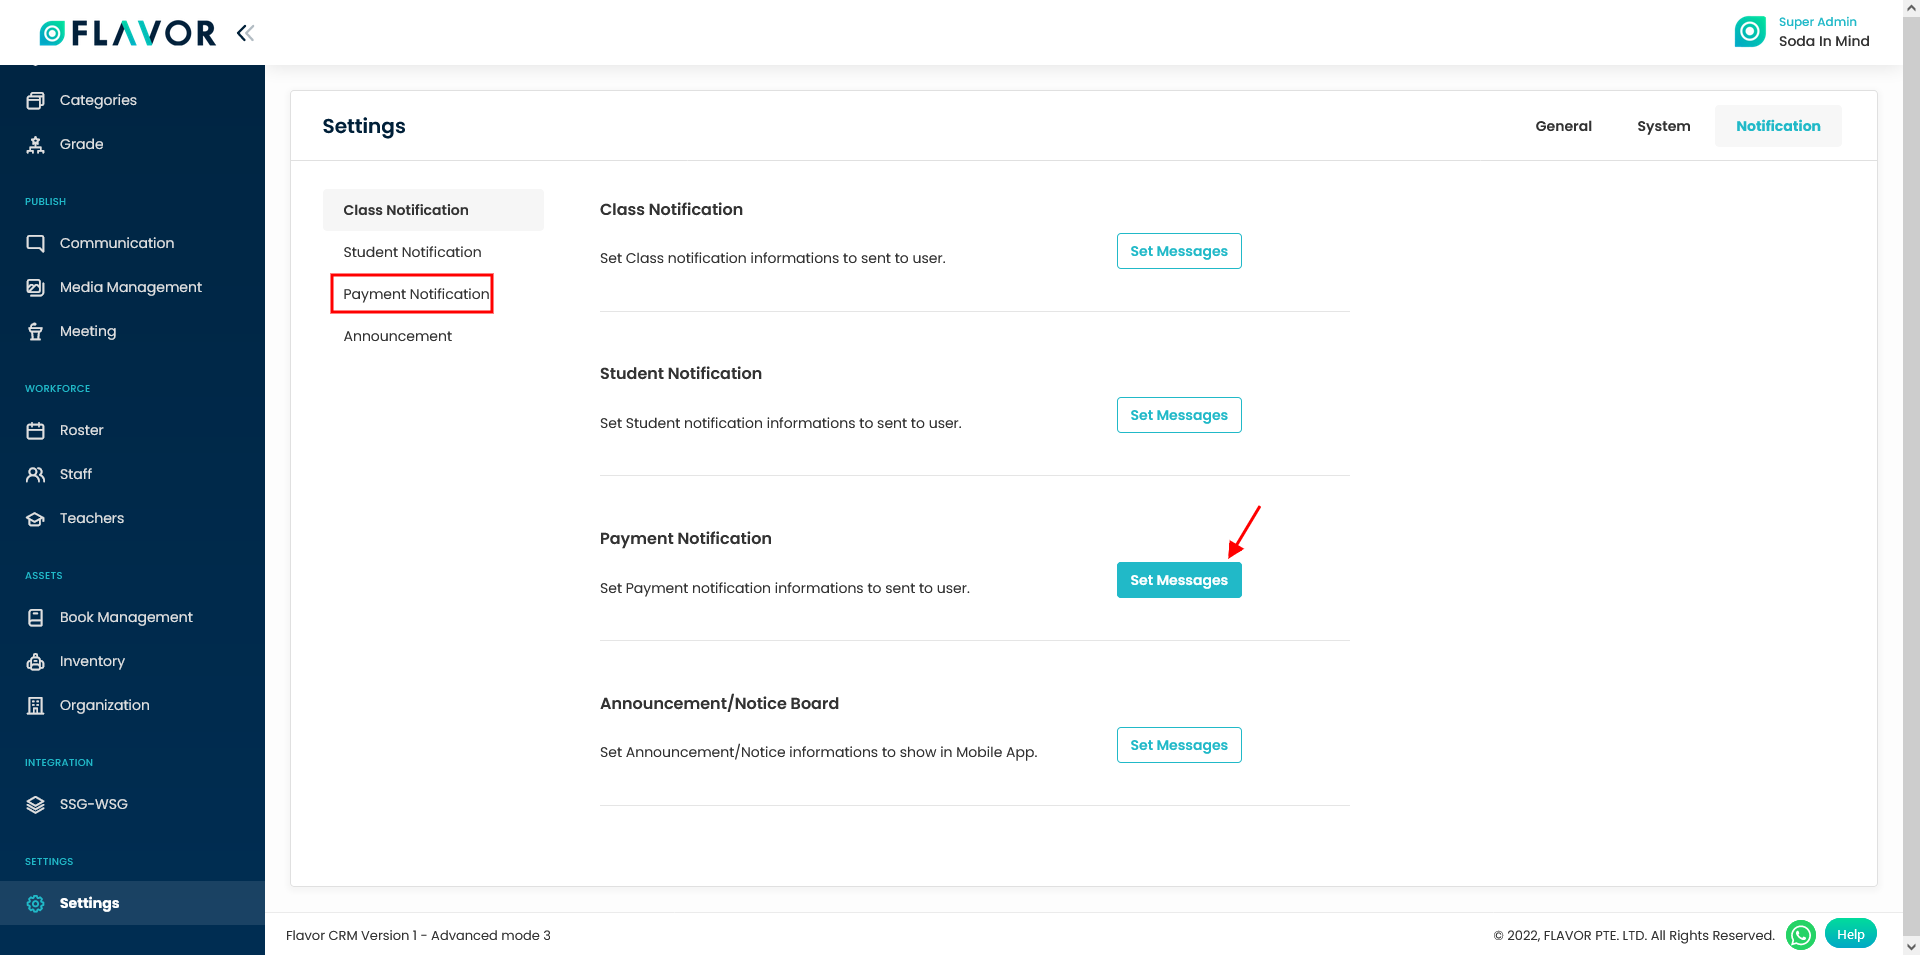
- Go to the Settings from the left-side menu of the Flavor System.
- Click on the Notification tab.
- Scroll down to Payment Notification and click on Set Messages button.
Step 2
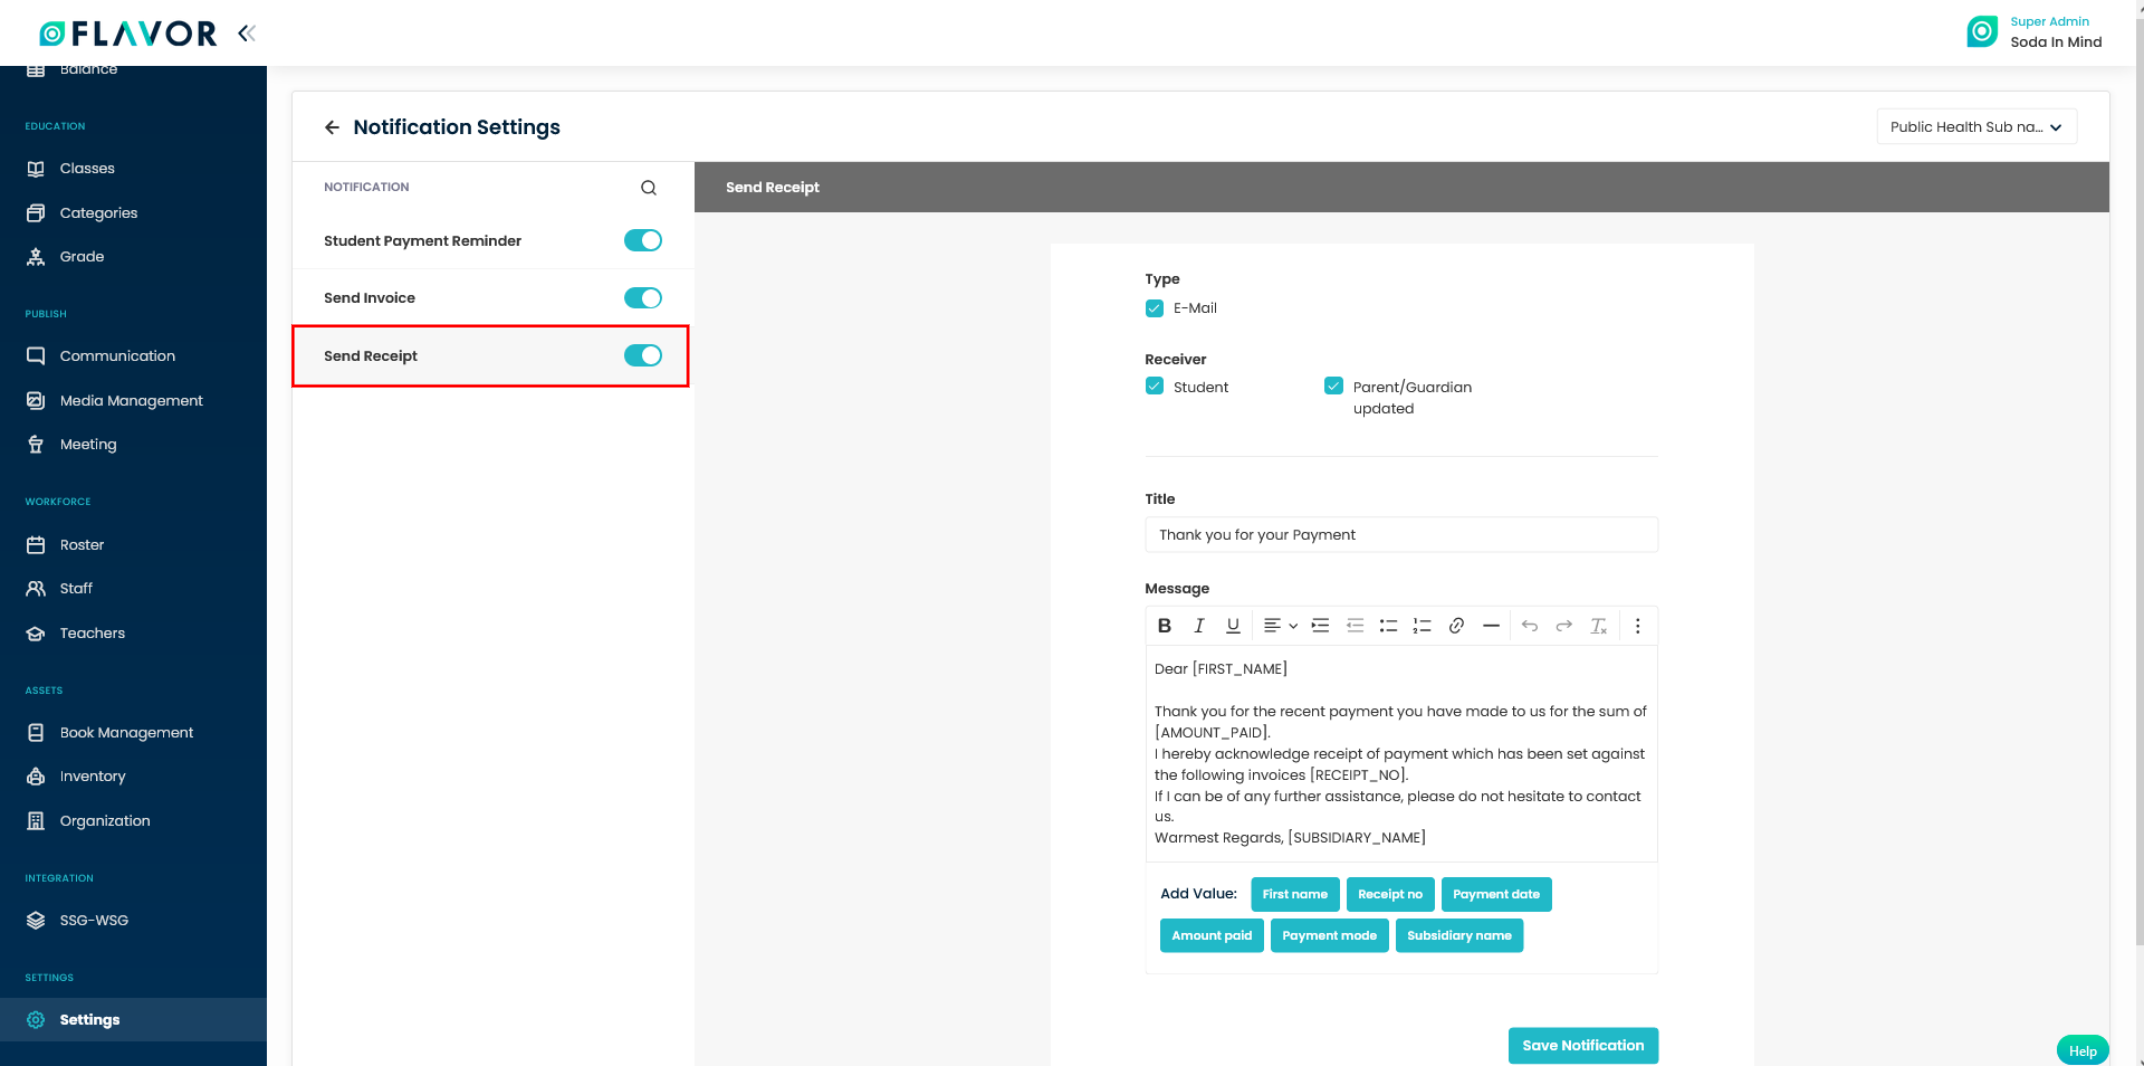
- It will navigate you to the Notification Settings page.
- Select the Subsidiary from the dropdown.
- Scroll down to Send Receipt Link.
- Click on it and enable the Send Receipt link switch.
- On the right-side, Select the Type and the Receiver.
- Set the Title and compose the Message Template by using Add value.
- Click on Save Notification button.
Need more help? Ask us a question
Please let us know more of your details and our team will reach out to you very shortly.
