
Introduction
You scan the QR code to see the details and make payment. To enable the QR code, you need to enable the settings on two different modules.
- Settings module
- Payment Setting.
Where to set on the Setting module?
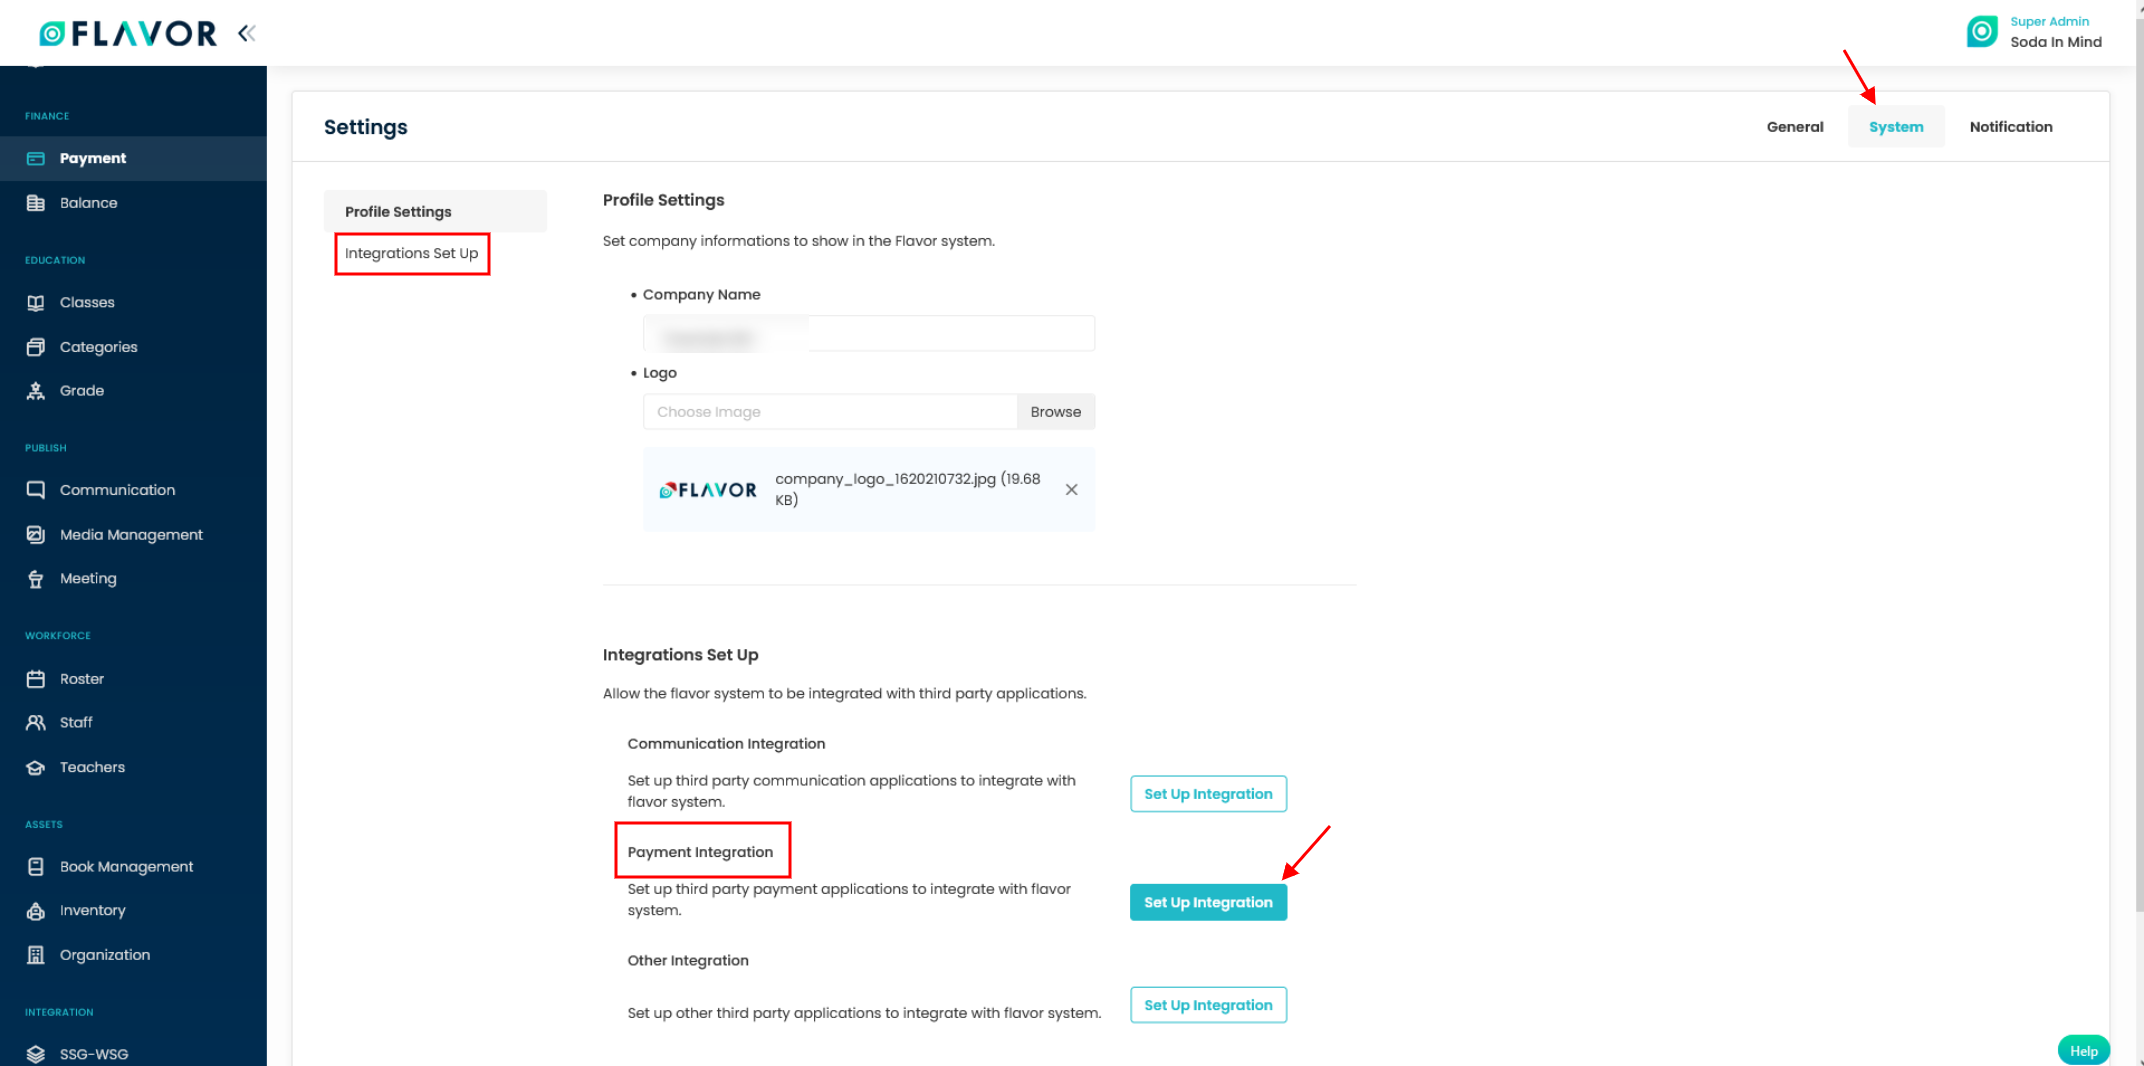
Go to Settings module from the main menu. On the Setting page, click on System Tab.
Step 1
- Scroll down to Payment Integration under Integrations Set Up section.
- Click on the Set Up Integration button.
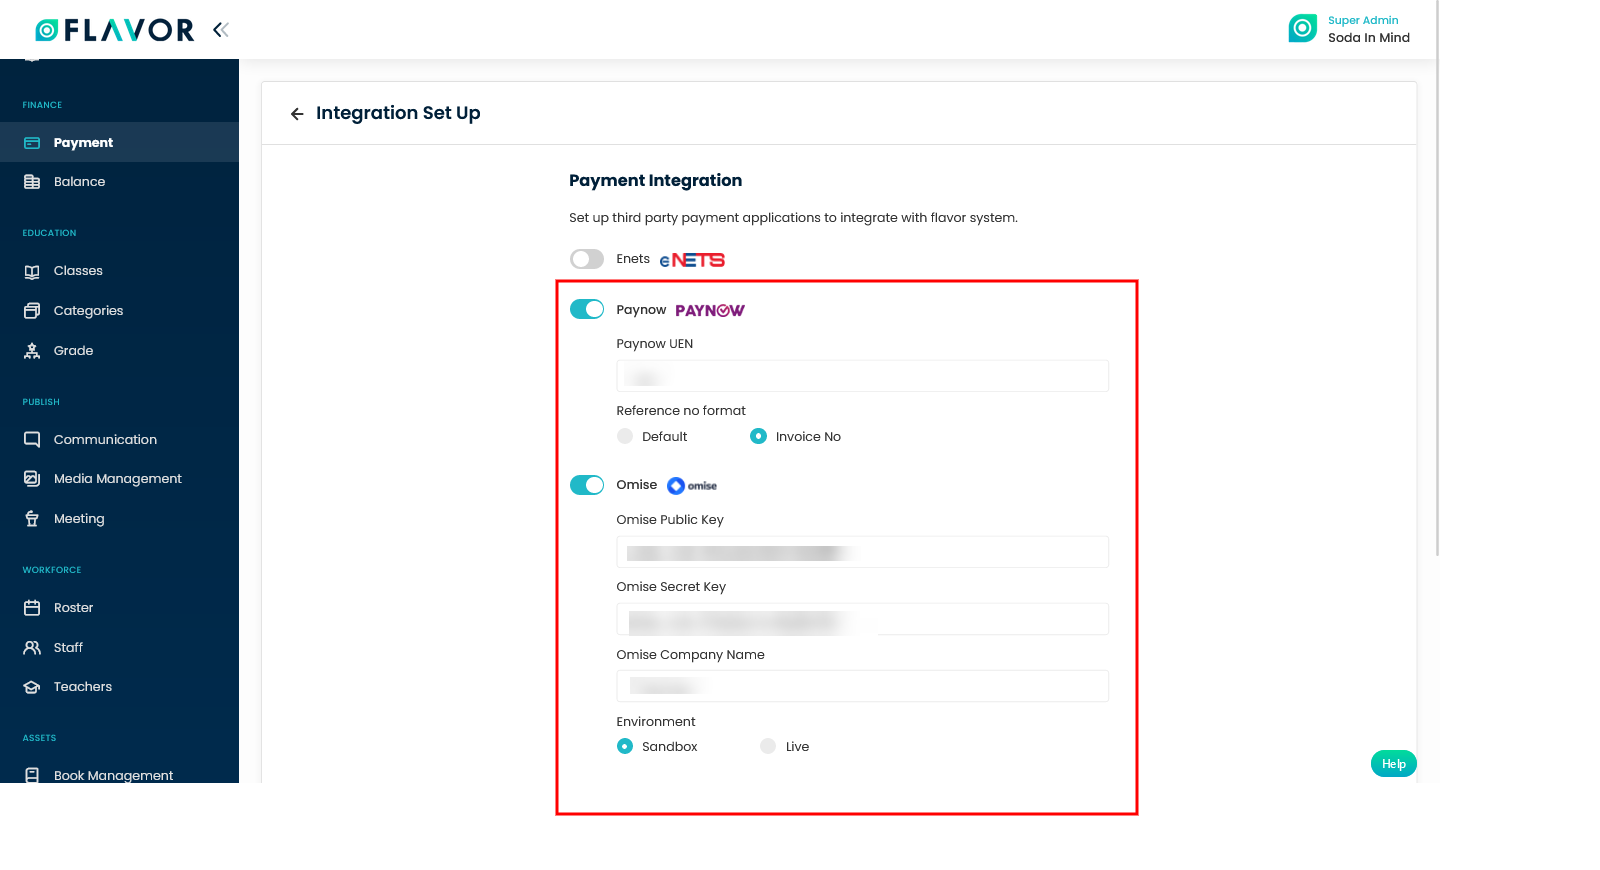
- On the Integration Set Up page, you can enable Omise and Paynow as per the requirement.
- Enter the details and click on Save button.
Where to set on the Payment Setting module?
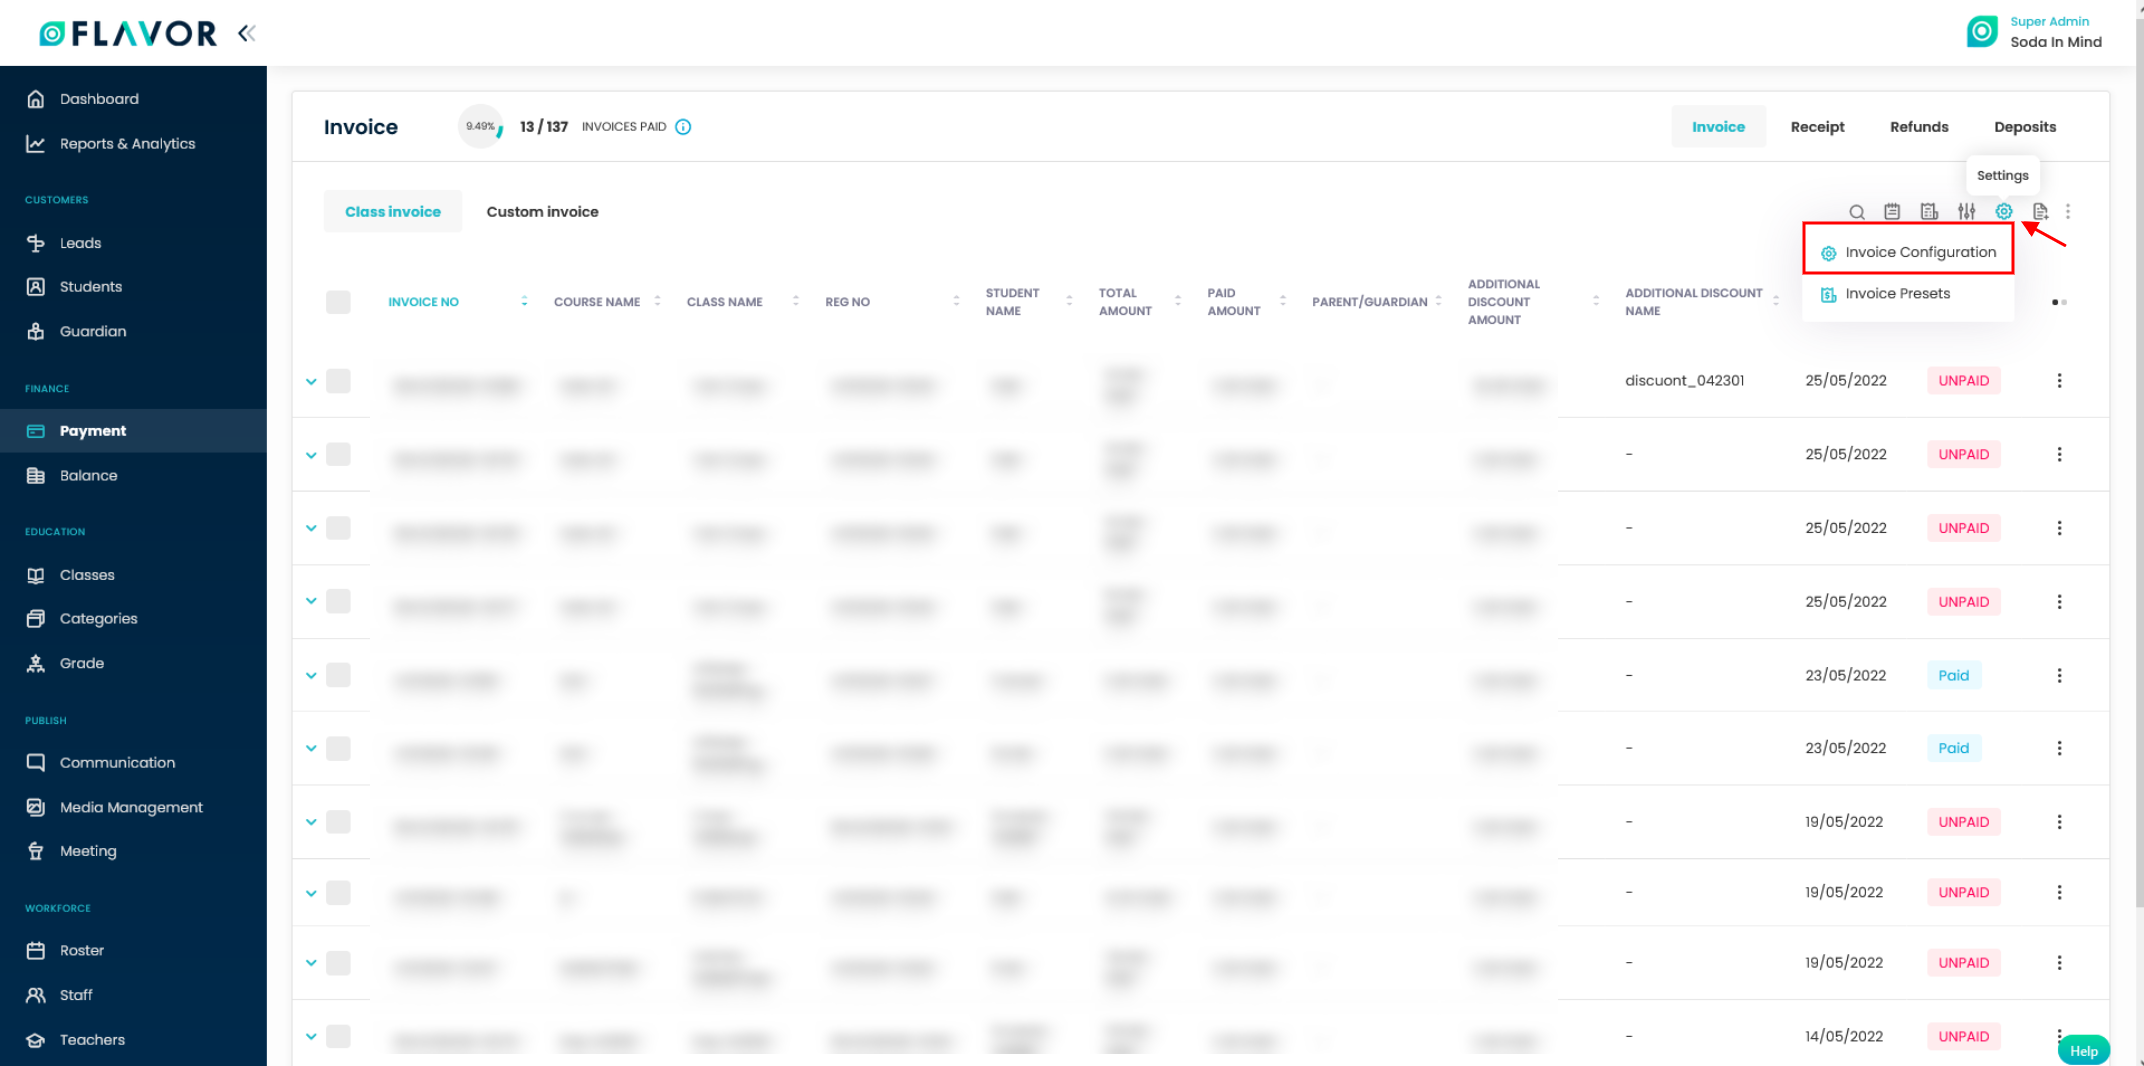
- Go to Payments module from the main menu.
- On the Payment listing page, click on Settings icon.
- Click on Invoice configuration option.
Step 1
- On the Invoice configuration, go to the Subsidiary Configuration Tab. The settings are done for each Subsidiary.
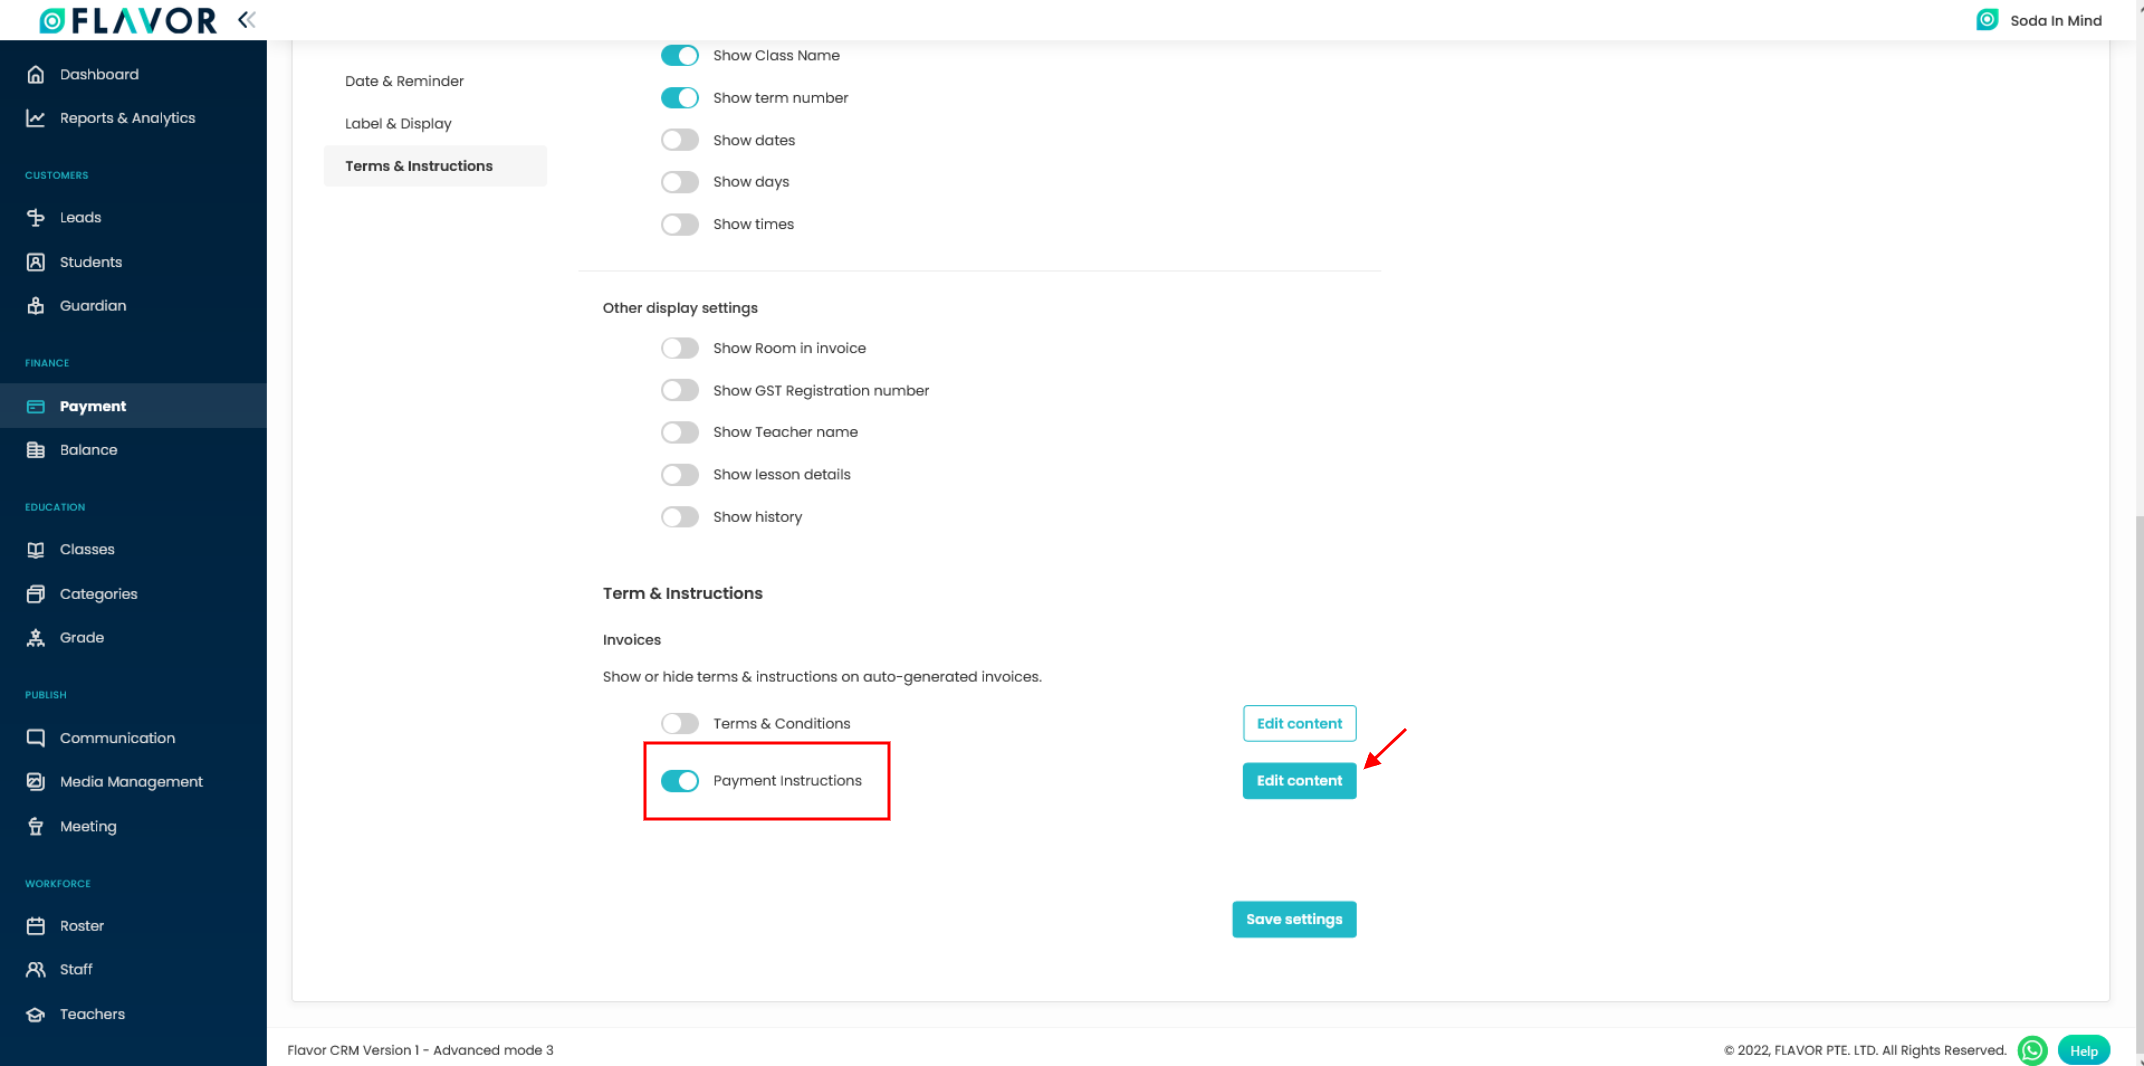
- Scroll down to Term & Instructions section.
- Enable the Payment Instructions option.
- Click on Edit content button.
Step 2
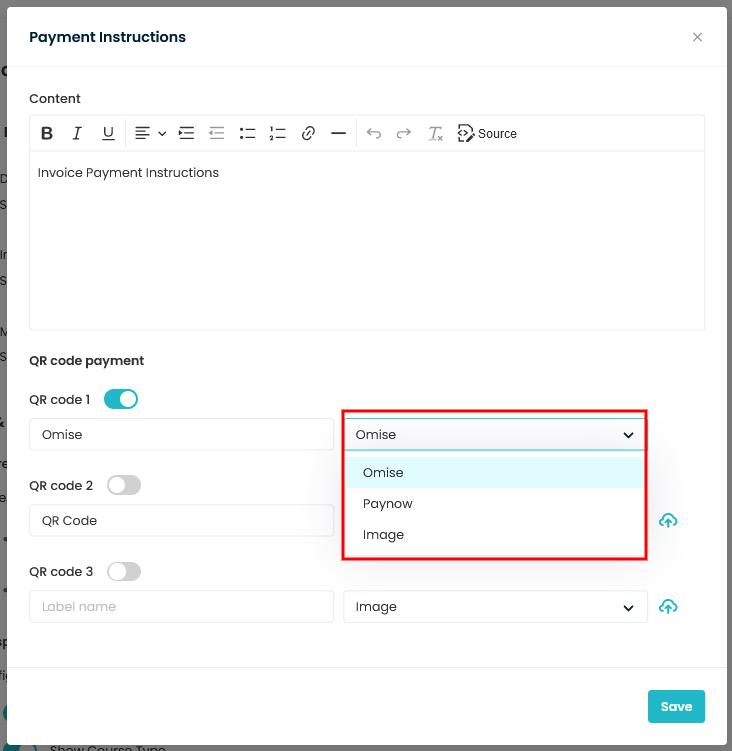
- On click to Edit content button, a pop up form named Payment Instructions will appear. You can upload three QR code at most viz. QR code 1, QR code 2, QR code 3.
- Enable the QR code 1.
- Type in the name in the QR code1 field and select the corresponding option Viz. Omise, Paynow and Image from the drop down. When you select image as option from the drop down, then upload button will be there. Click on that button to upload image.
- Click on Save button.
Note
All these content will be visible in the invoice view.
You can find the QR code or the image in the invoice information section under Payment instructions.
Need more help? Ask us a question
Please let us know more of your details and our team will reach out to you very shortly.