
Introduction
The feature is to have the branch-wise form link by which the leads can fill up their details in the form and submit them. For a branch, only one form can be created. The field can be set from the form settings.
How to do Lead form Settings?
Step 1
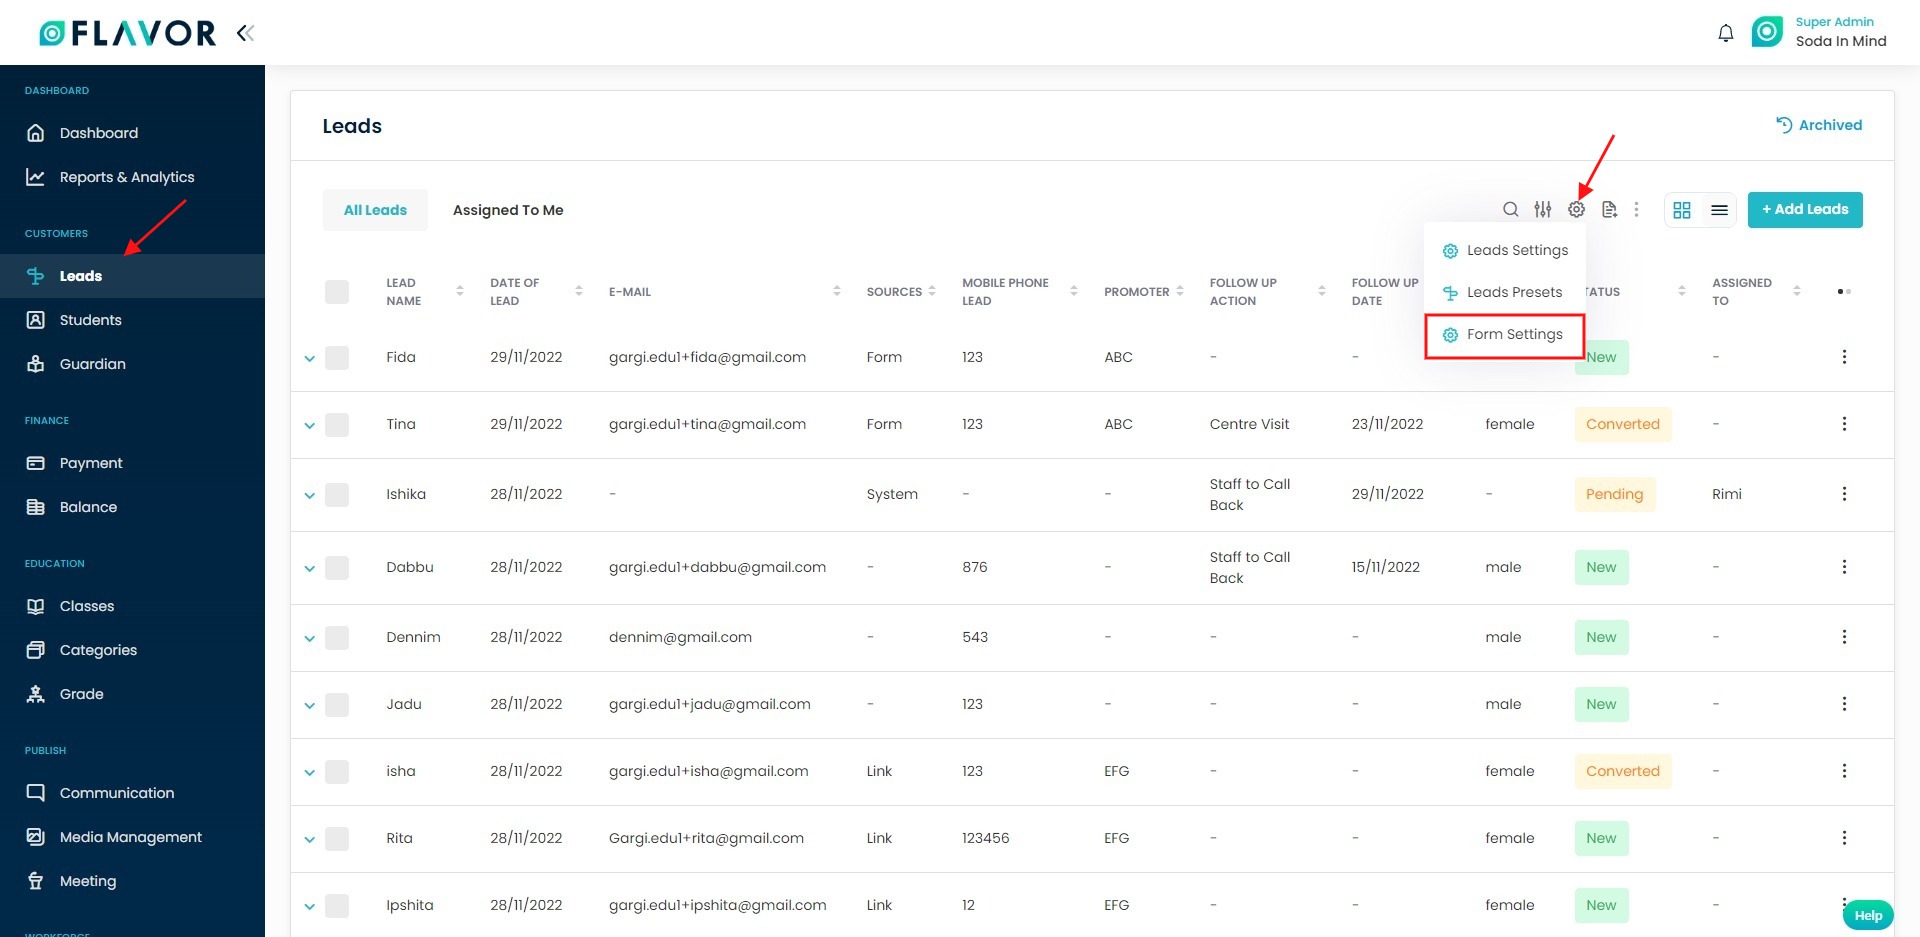
- Go to the Leads from the left side menu of the Flavor System.
- Click on settings from the Lead listing/Kanban view page.
Step 2
- By clicking on the settings, a small popup will appear.
- Click on Form Settings.
Step 3
-
Go to Lead Form Settings
From the sidebar, click on Settings > Lead Form Settings.
- Select Branch On the top right, use the Branch Configuration dropdown to choose the branch you want to configure (e.g., Bukit Timah).
- Configure Input Fields Under Input Field, toggle ON/OFF the fields you want to show on the form.
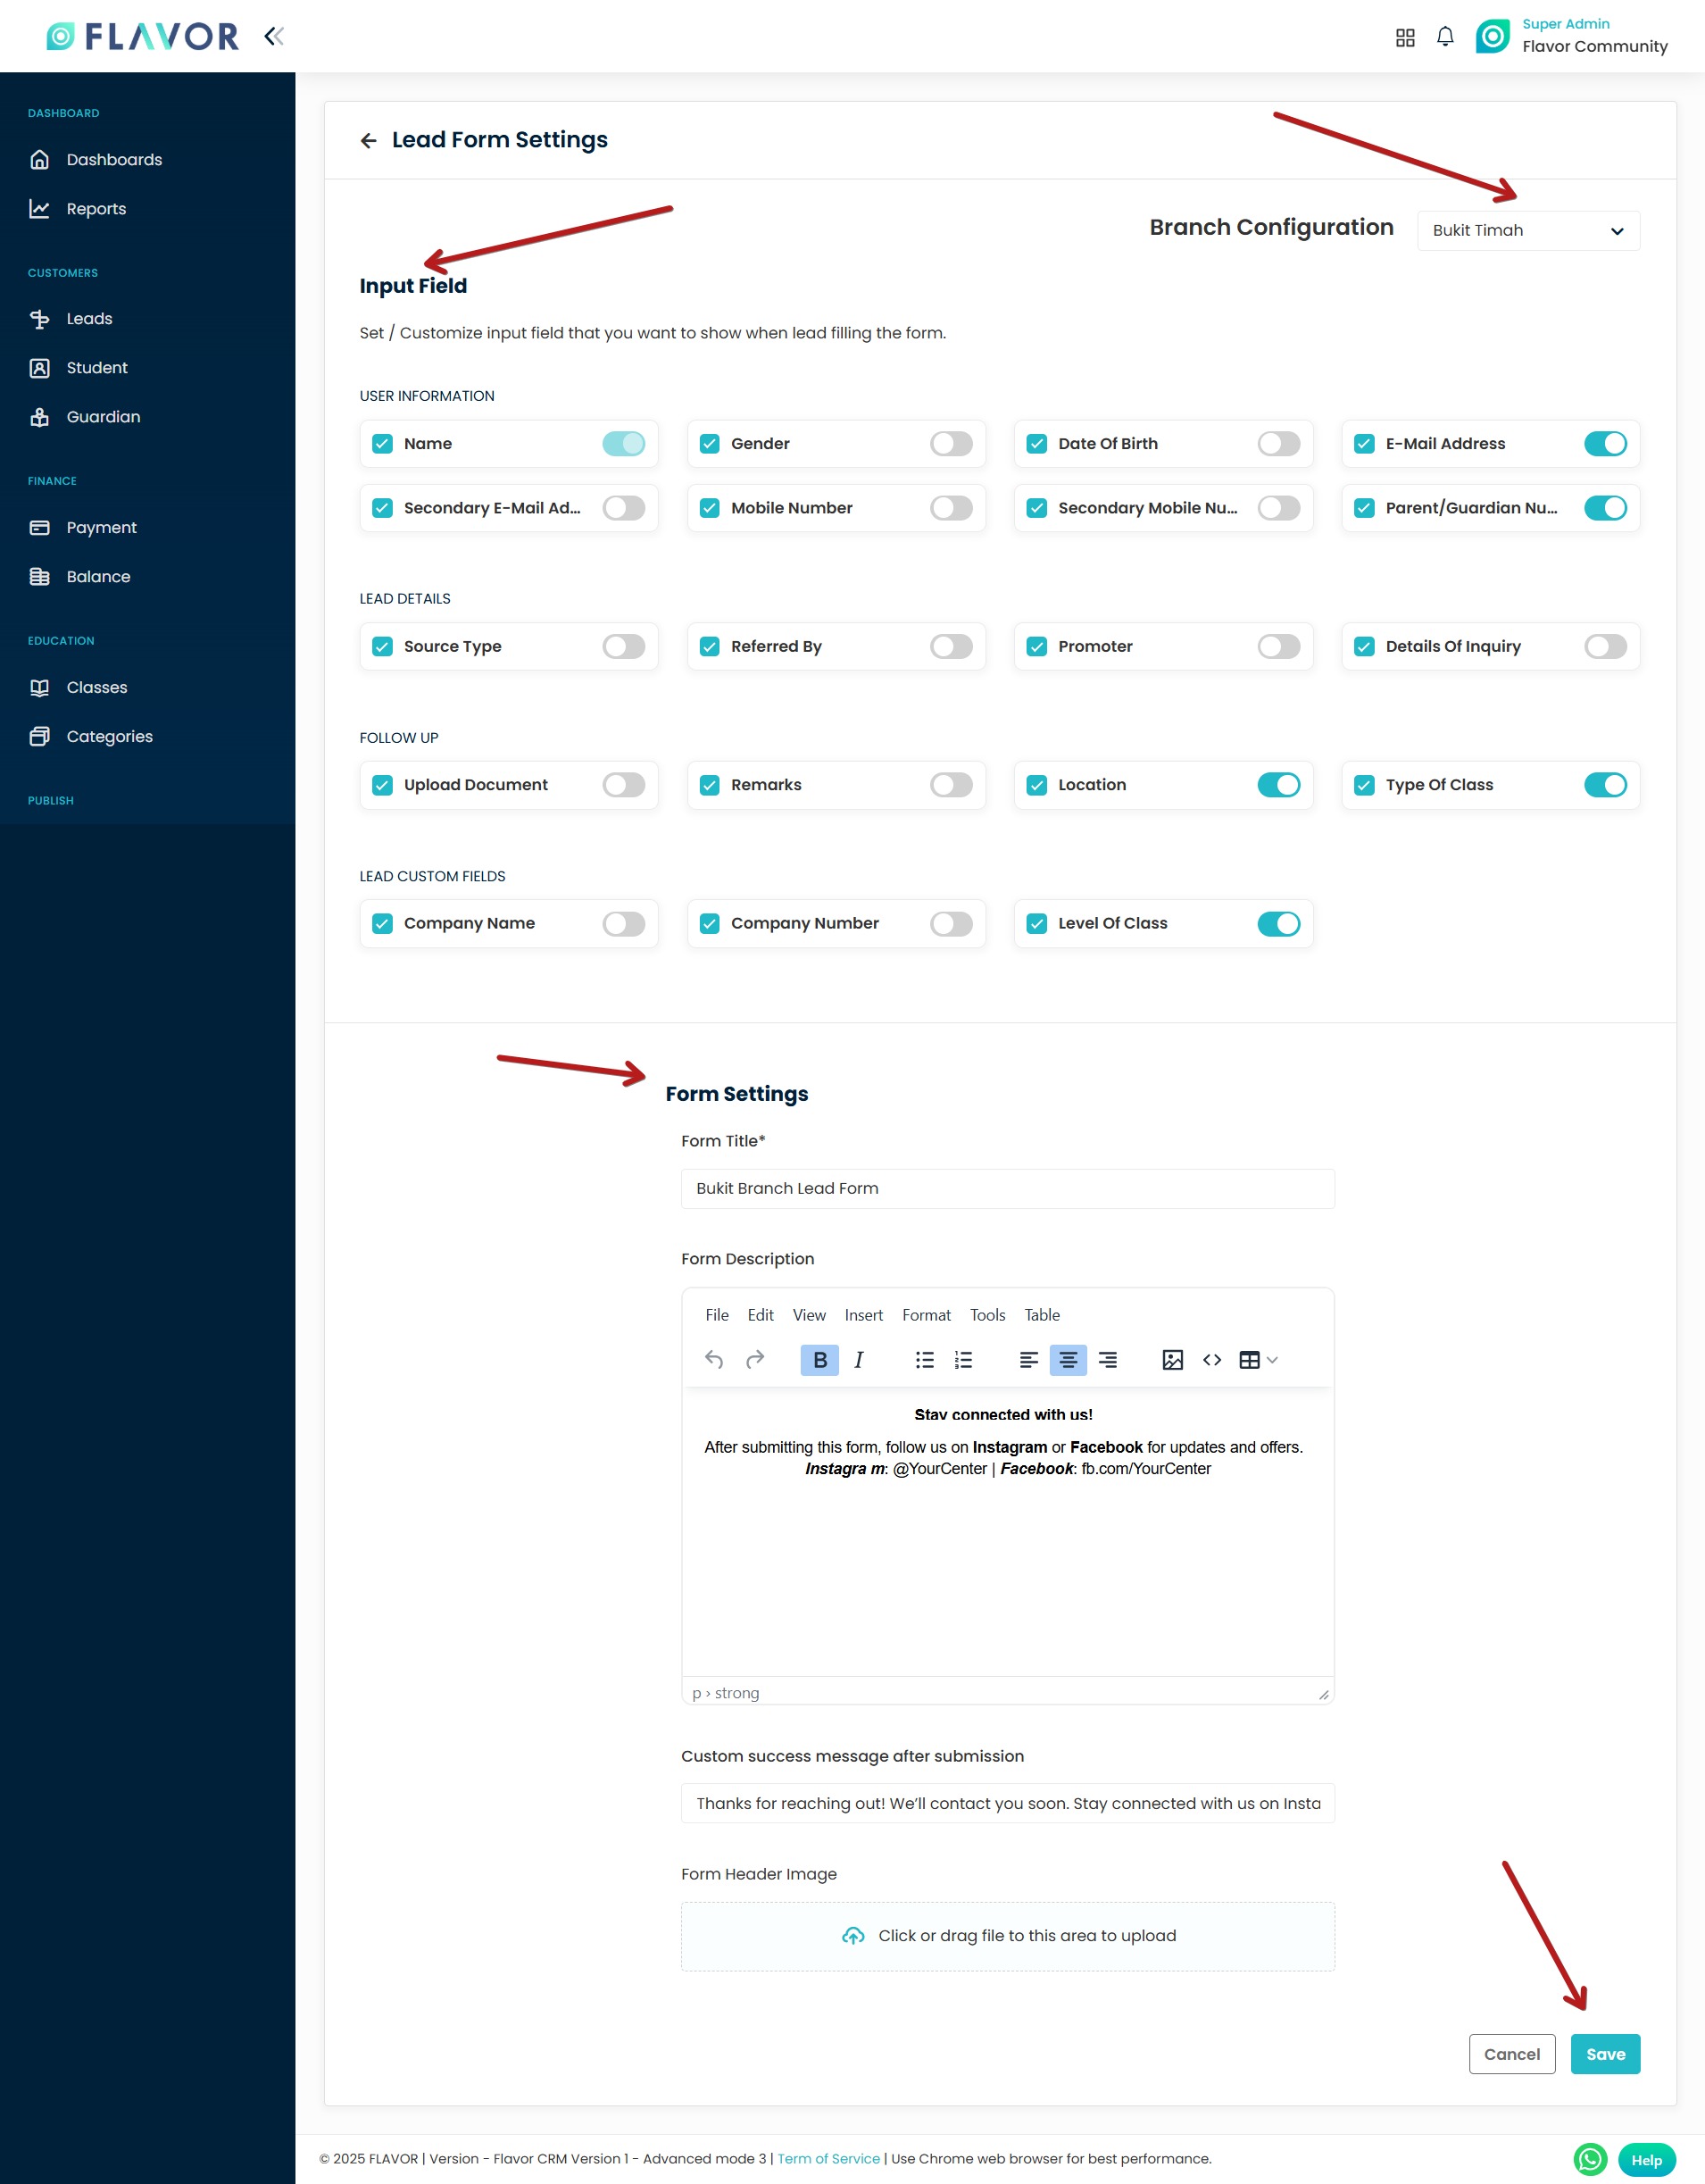
Fill Form Settings
This section allows you to customize the appearance and messaging of your lead form.
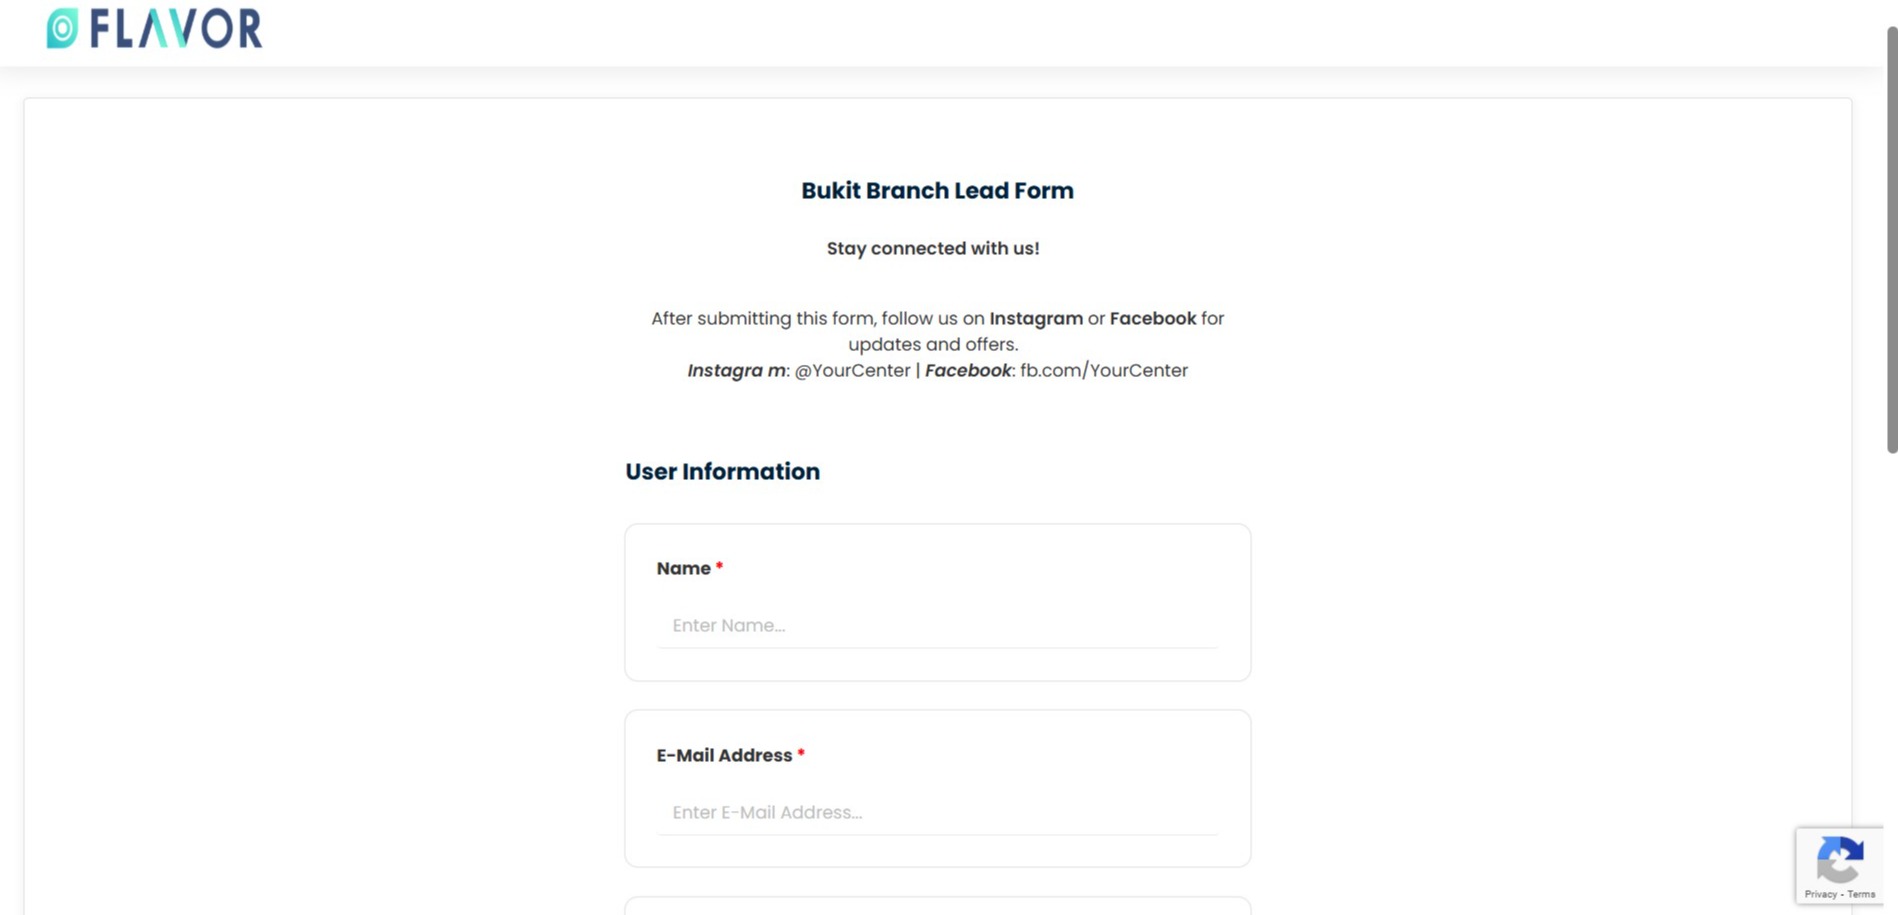
Form Title
-
Enter a clear and specific title for the form.
Example:Bukit Branch Lead Form -
This helps you identify the form later in the system, especially if you manage forms for multiple branches.
Form Description
-
Use this section to provide instructions or context to the person filling out the form.
You can include:
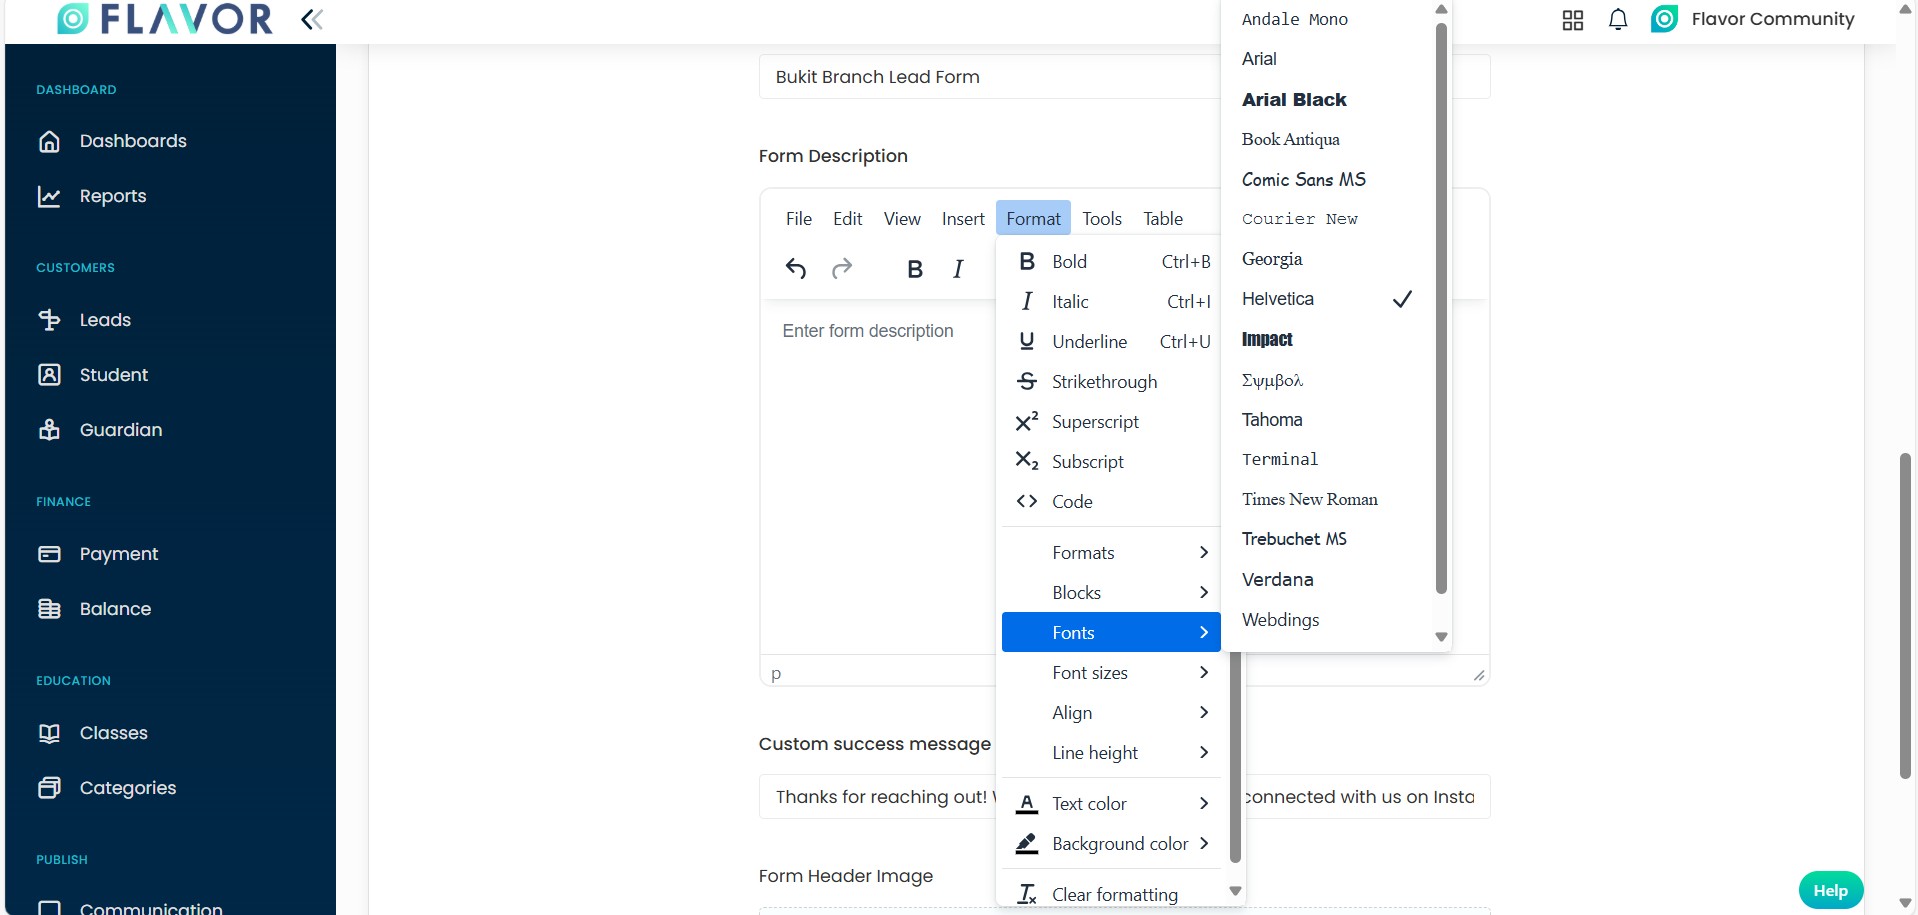
| Icon | Function | Usage Example |
|---|---|---|
| ↶ / ↷ | Undo / Redo | Go back or forward if you make changes. |
| B | Bold | Highlight important text: **Call us now!** → Call us now! |
| I | Italic | Emphasize a word: *Limited time only* → Limited time only |
| • List | Bullet List | Create easy-to-read lists of features or steps |
| 1. List | Numbered List | Great for steps or instructions |
| 🡐🡒🡑🡓 | Text Align | Align text left, center, right, or justify for layout control |
| 🖼️ | Insert Image | Add your logo or a promotional banner (JPG/PNG only) |
</> |
HTML Source Code | Add HTML directly if advanced formatting or links are needed |
| ▥ | Insert Table | For structured info like timings or pricing (not commonly used in forms) |
Example:
- **Welcome to Flavor Learning Center!**
*We’re excited to hear from you.* - 📞 Call or WhatsApp us at **(+65) 9644 7138**
📧 Or email us at *info@yourcenter.com* - **Follow us:**
Instagram: @YourCenter
Facebook: fb.com/YourCenter
🔍 How to Apply These:
- Select text → click B to bold
- Select text → click I to italicize
- Use the center alignment for titles or banners
- Use bullet points for clean, simple info
💡 Best Practices:
- Keep it short (2–4 lines)
- Always mention how users can follow up (call, email, social)
- Use bold to make contacts stand out
- Avoid large blocks of text—use spacing and line breaks
Custom Success Message after submission
-
This message appears after the form is submitted.
-
Use it to reassure the lead their submission was successful and what to expect next.
Example:
Thanks for reaching out! We'll contact you soon. Stay connected with us on Instagram & Facebook for updates.
Form Header Image (Optional)
-
Add a header image or banner to visually represent your brand or branch.
-
Drag and drop or click to upload an image (e.g., logo, center photo, etc.).
Save the Form
-
Once everything is set, click the Save button at the bottom right.
How to access the Lead Form Link?
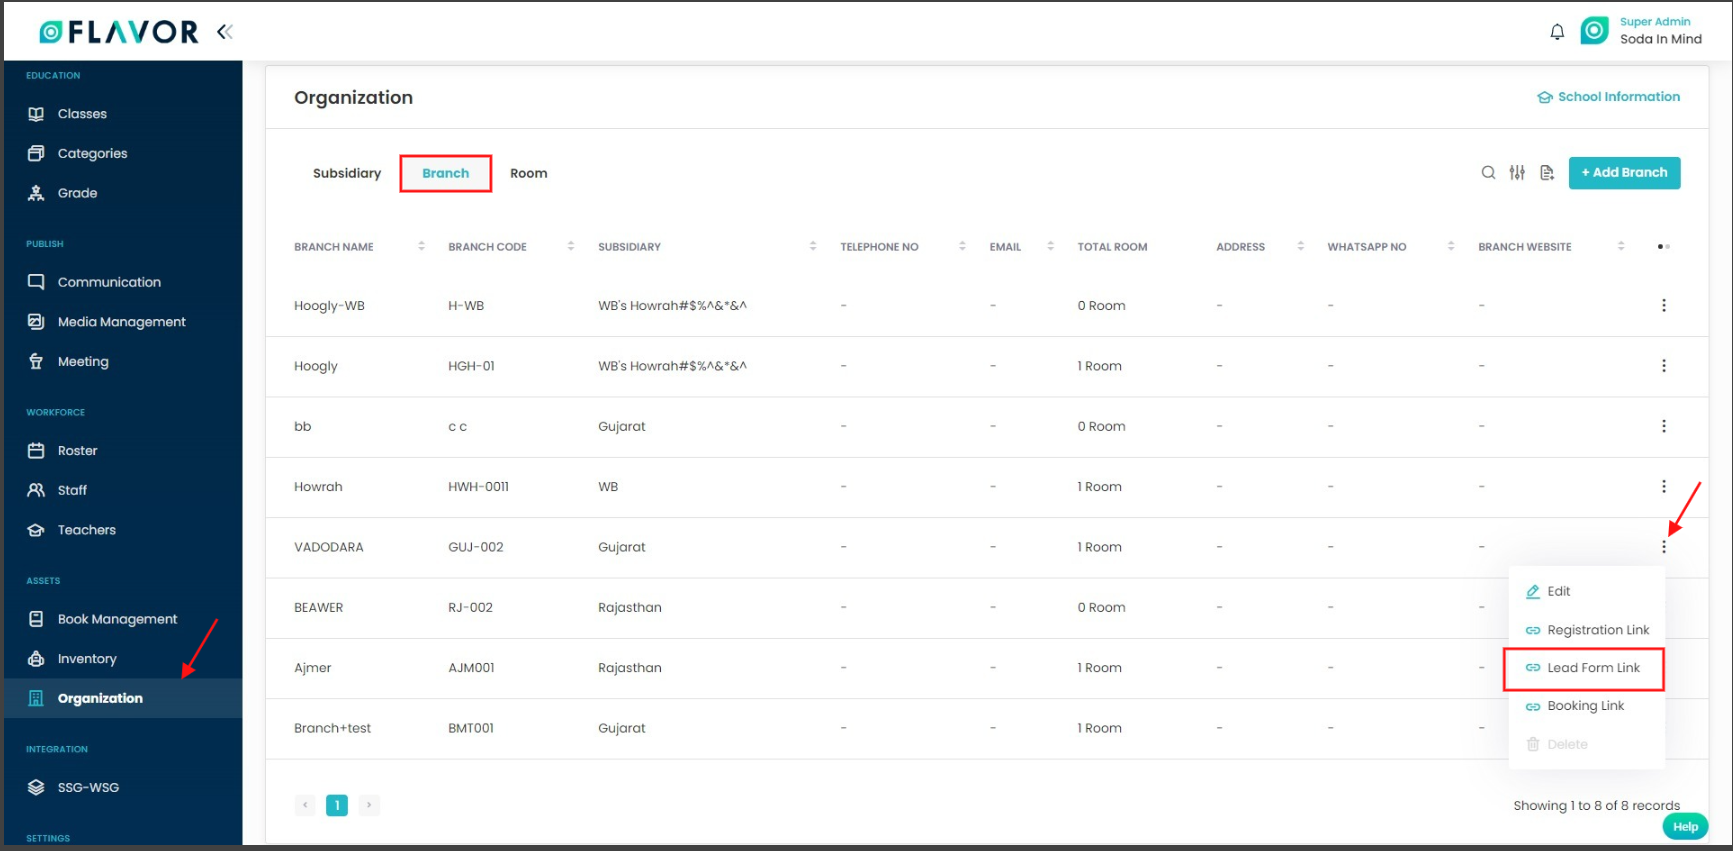
- Go to the Organization from the left side menu of the Flavor System.
- Click on the Branch Tab.
- Click on the inline action button against the respective branch for which the form setting has been done.
- From the mini popup, click on the Lead Form Link.
- It will open the Lead Form in a new tab that can be copied and used further.
- Once any lead is submitted through the form, it is listed on the Lead listing page.
Note: The Lead Form Link will remain in disabled state unless setting is done from the Lead Form Setting page.
How to Embed Flavor CRM Lead Form on WordPress
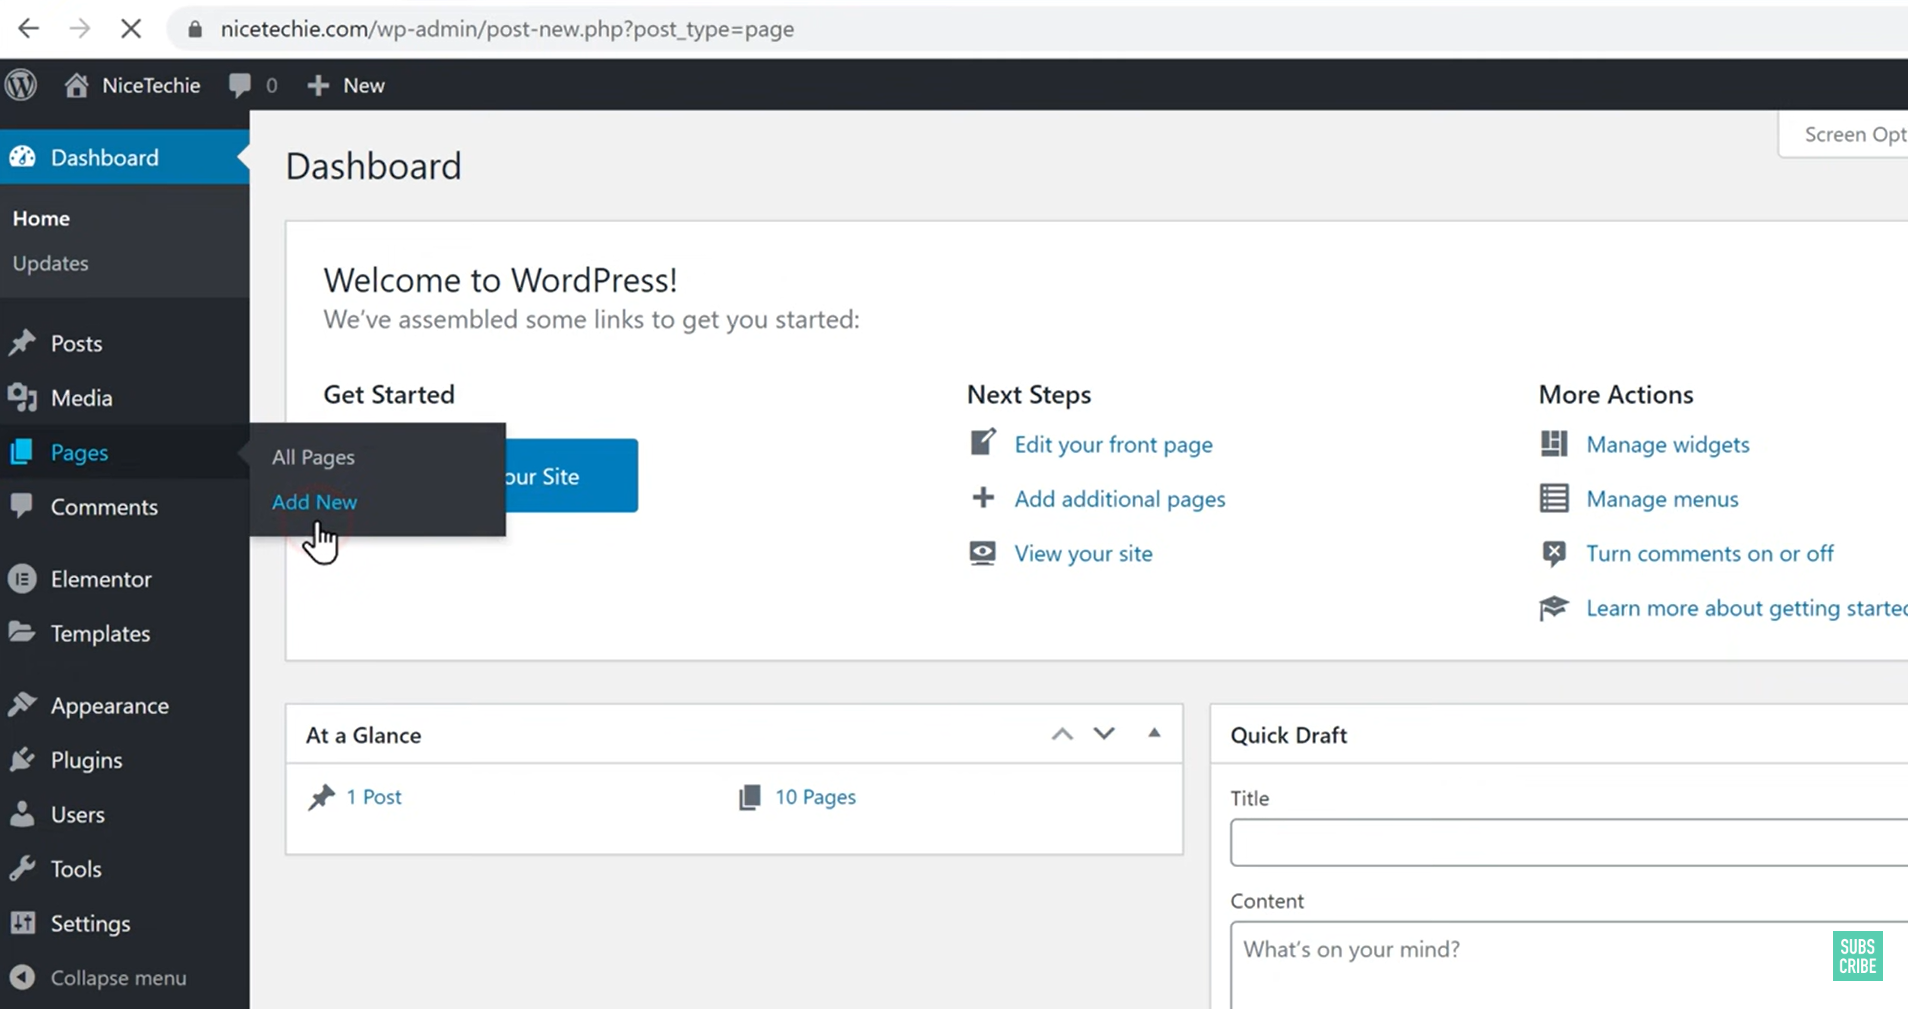
✅ Step 1: Add New Page
- Go to your WordPress Dashboard.
- Navigate to Pages → click Add New.
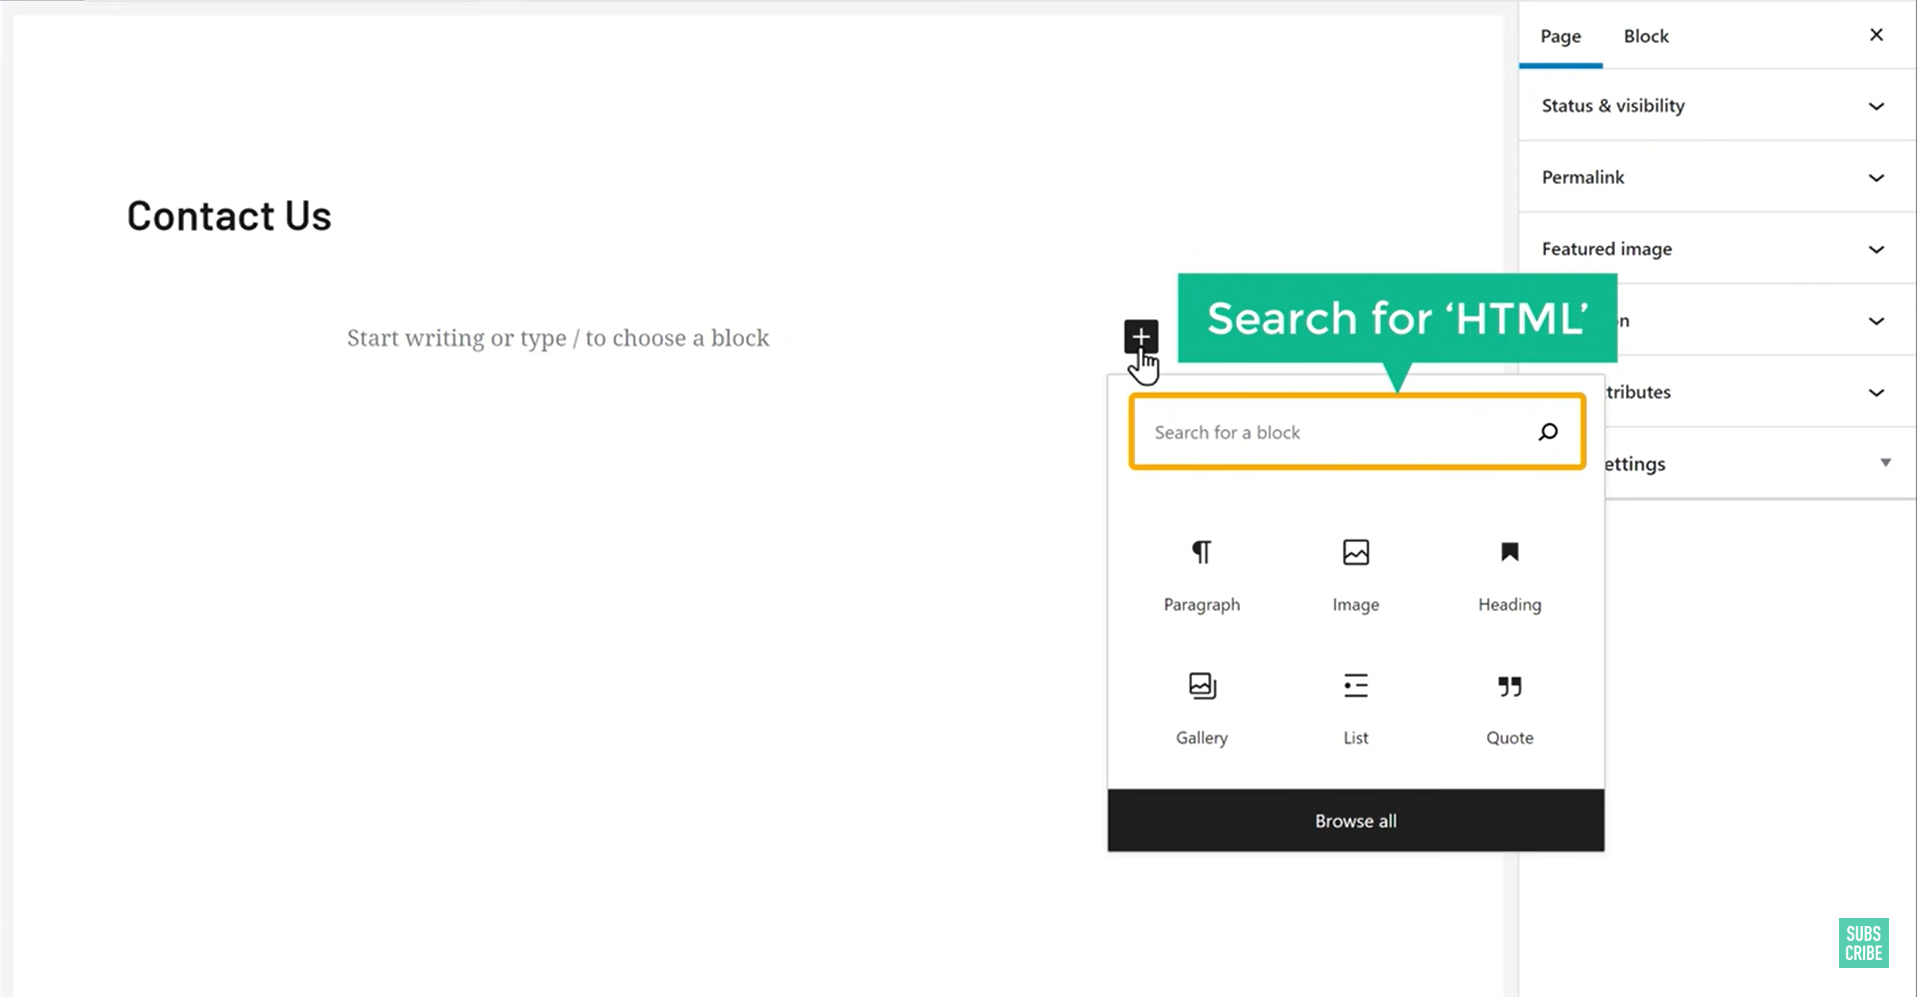
✅ Step 2: Search for HTML Block
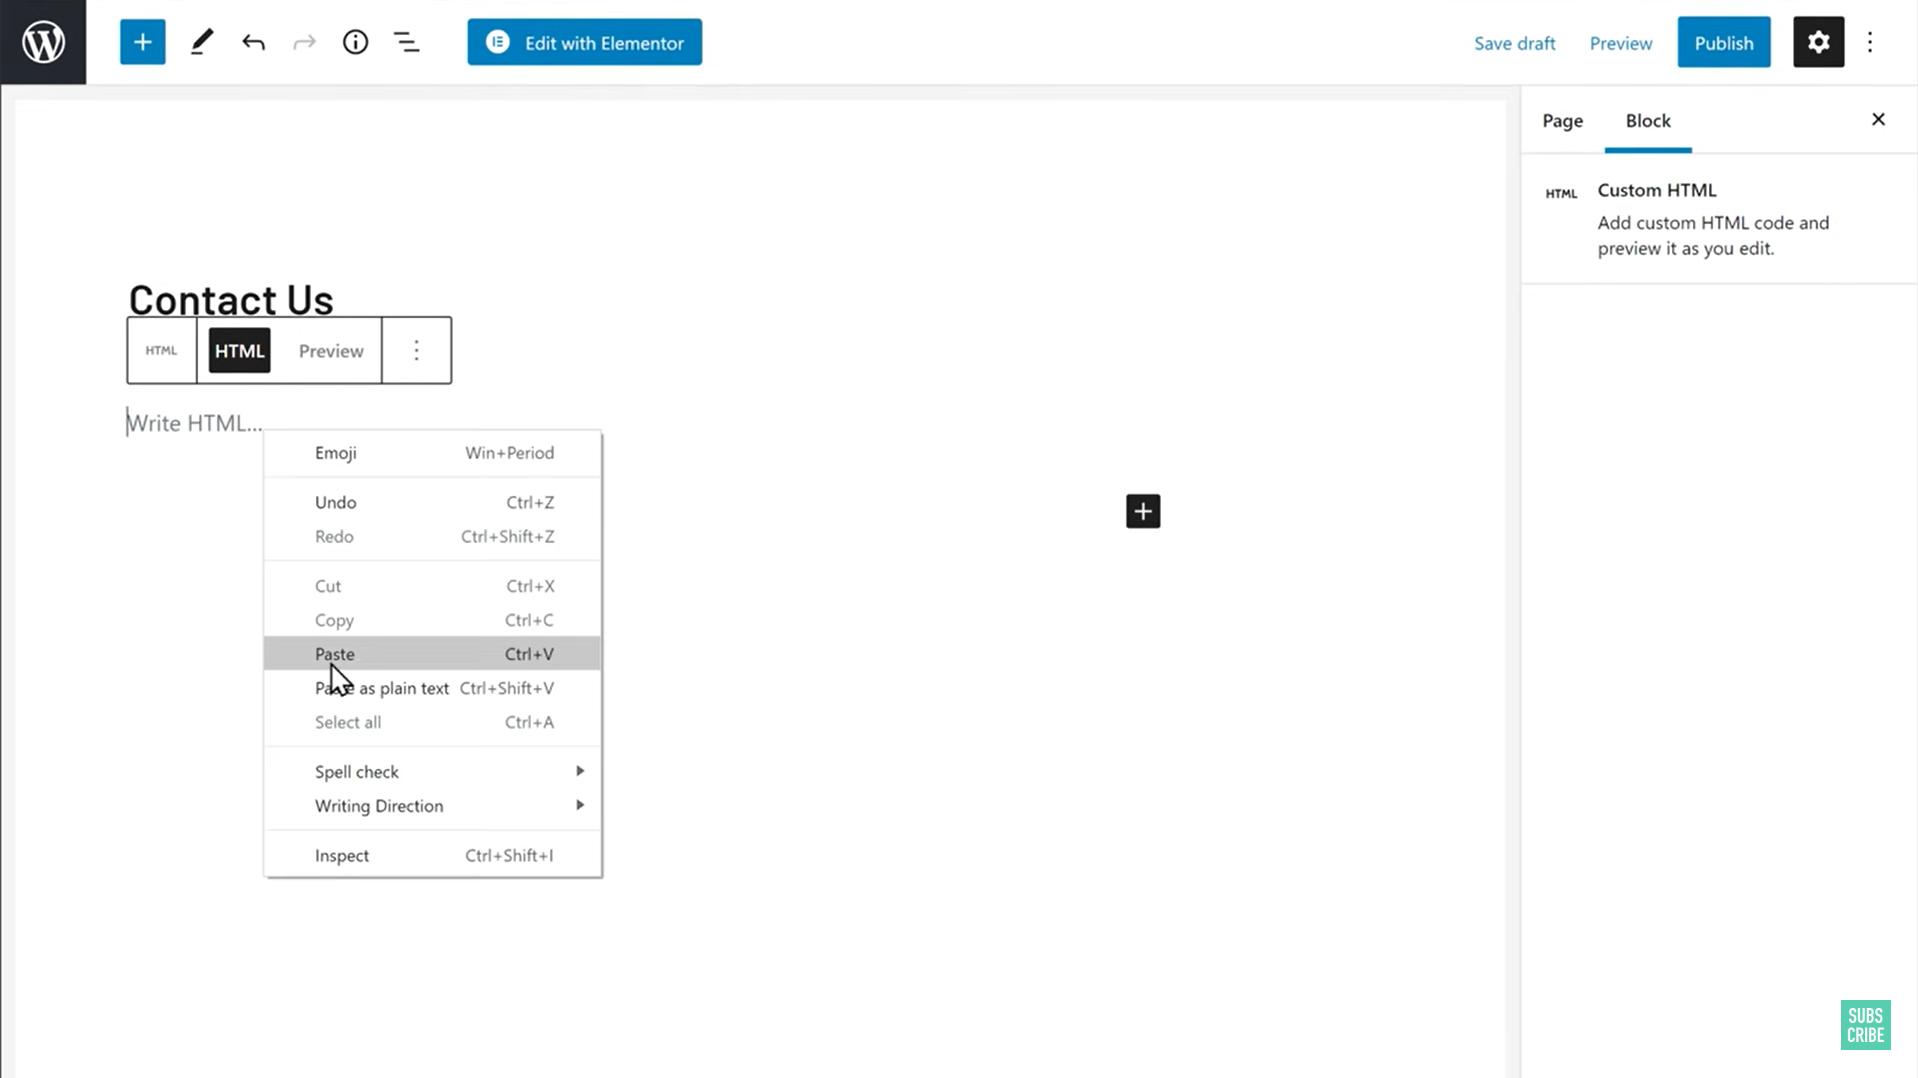
- Once on the new page editor, click the “+” button to add a new block.
- In the search bar, type “HTML” and select HTML.
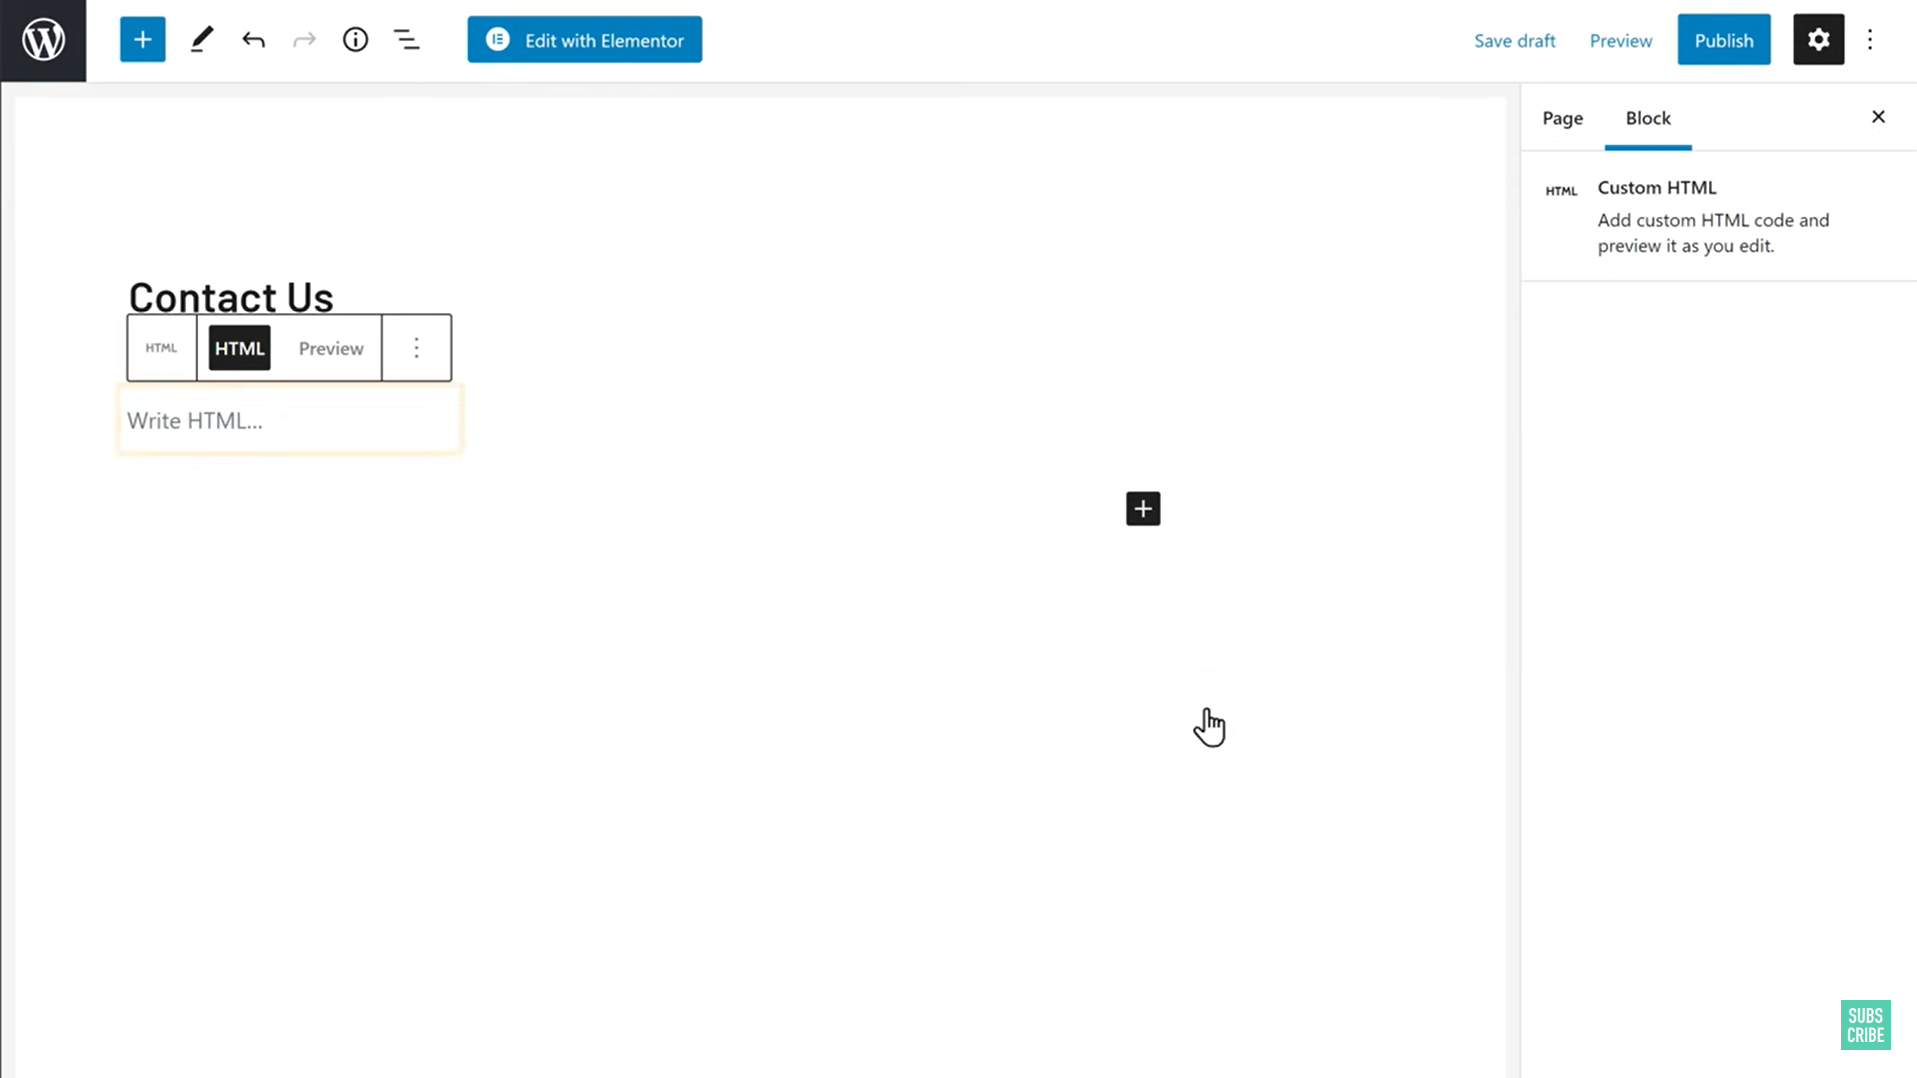
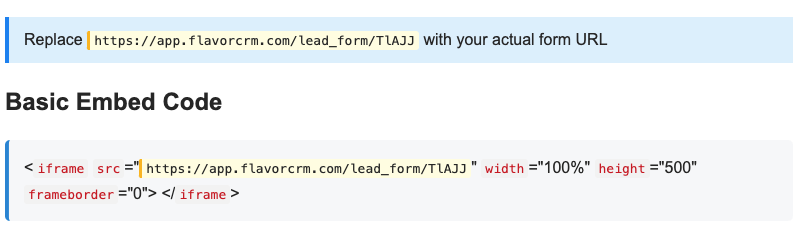
✅ Step 3: Paste Form Code or Link
- In the HTML block area, paste your Flavor CRM form link or embed code.
- You can right-click and select Paste, or use
Ctrl + V.
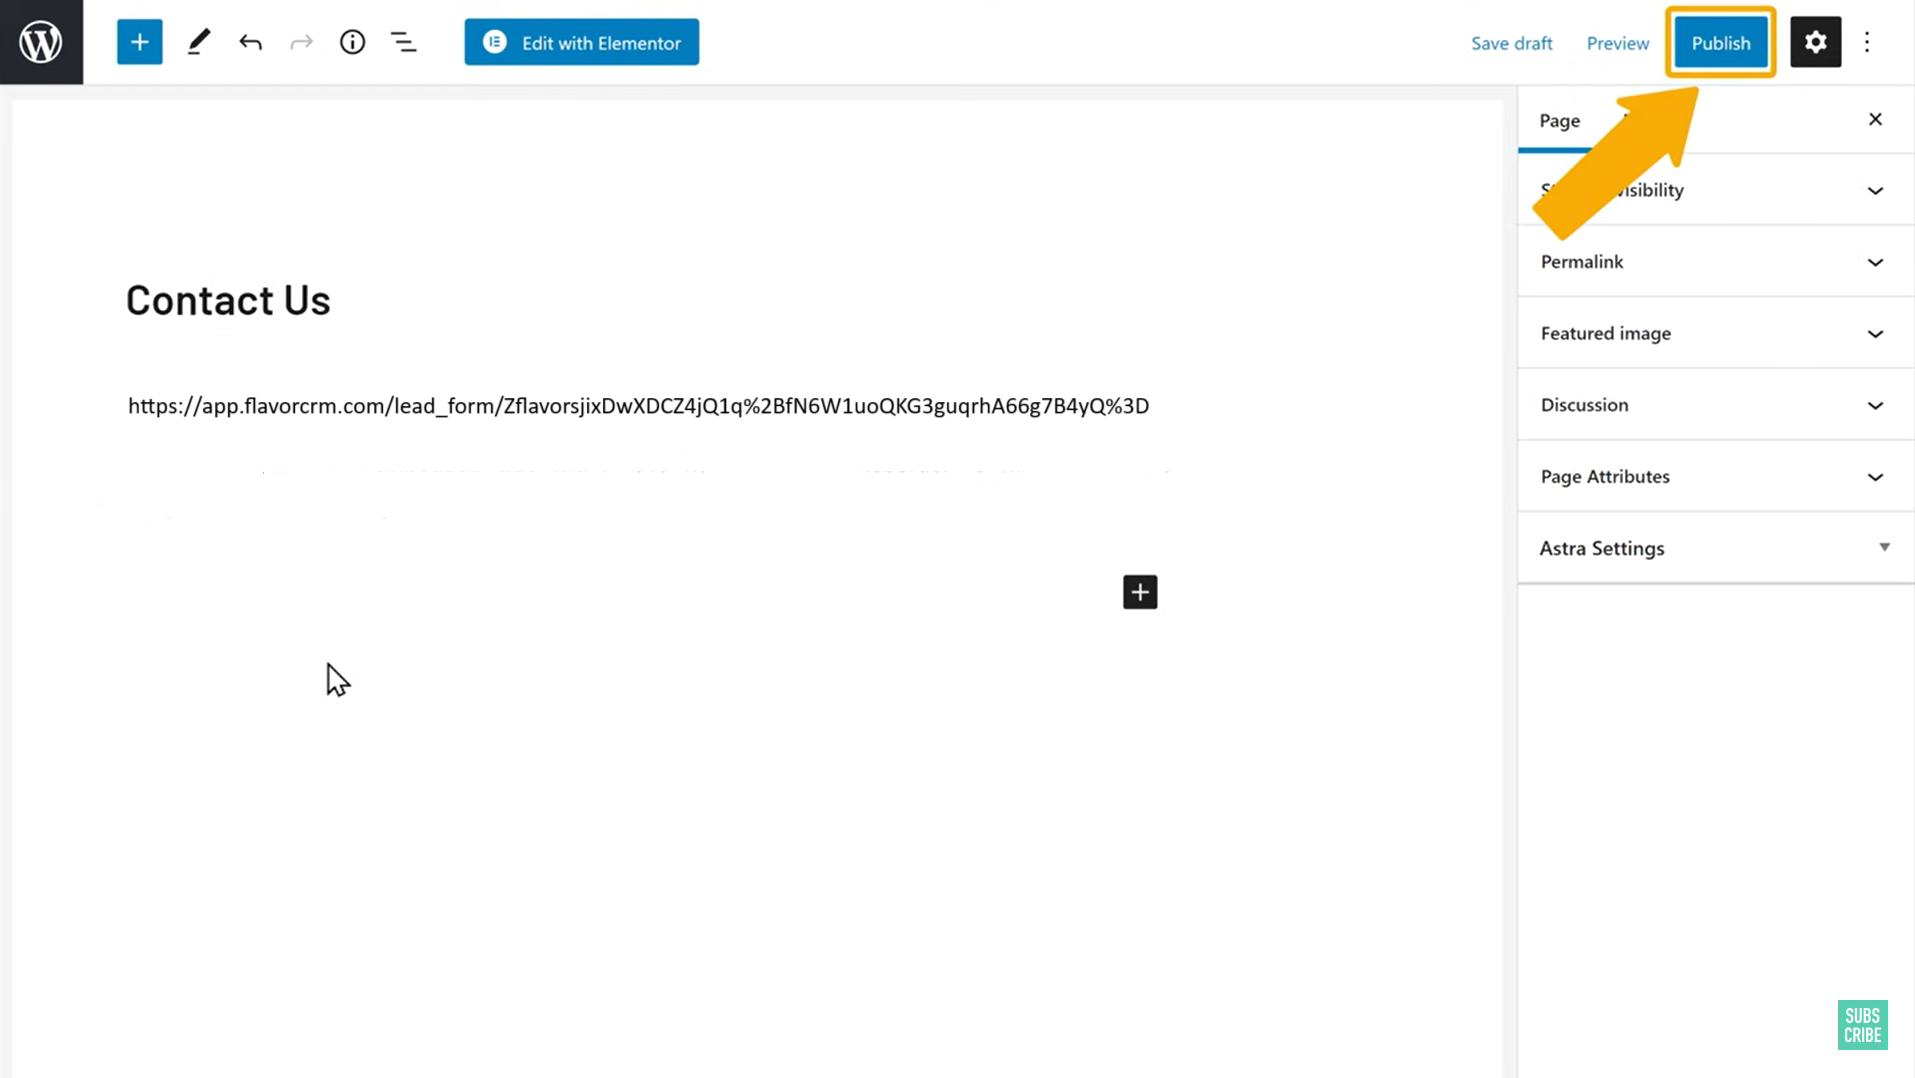
✅ Step 4: Publish Page
- Go to Organization → Branch tab → click the three dots next to the desired branch → select Lead Form Link from the popup.
- After pasting, click Publish to make the form live on your website.
- You can preview it before publishing to ensure it looks fine.
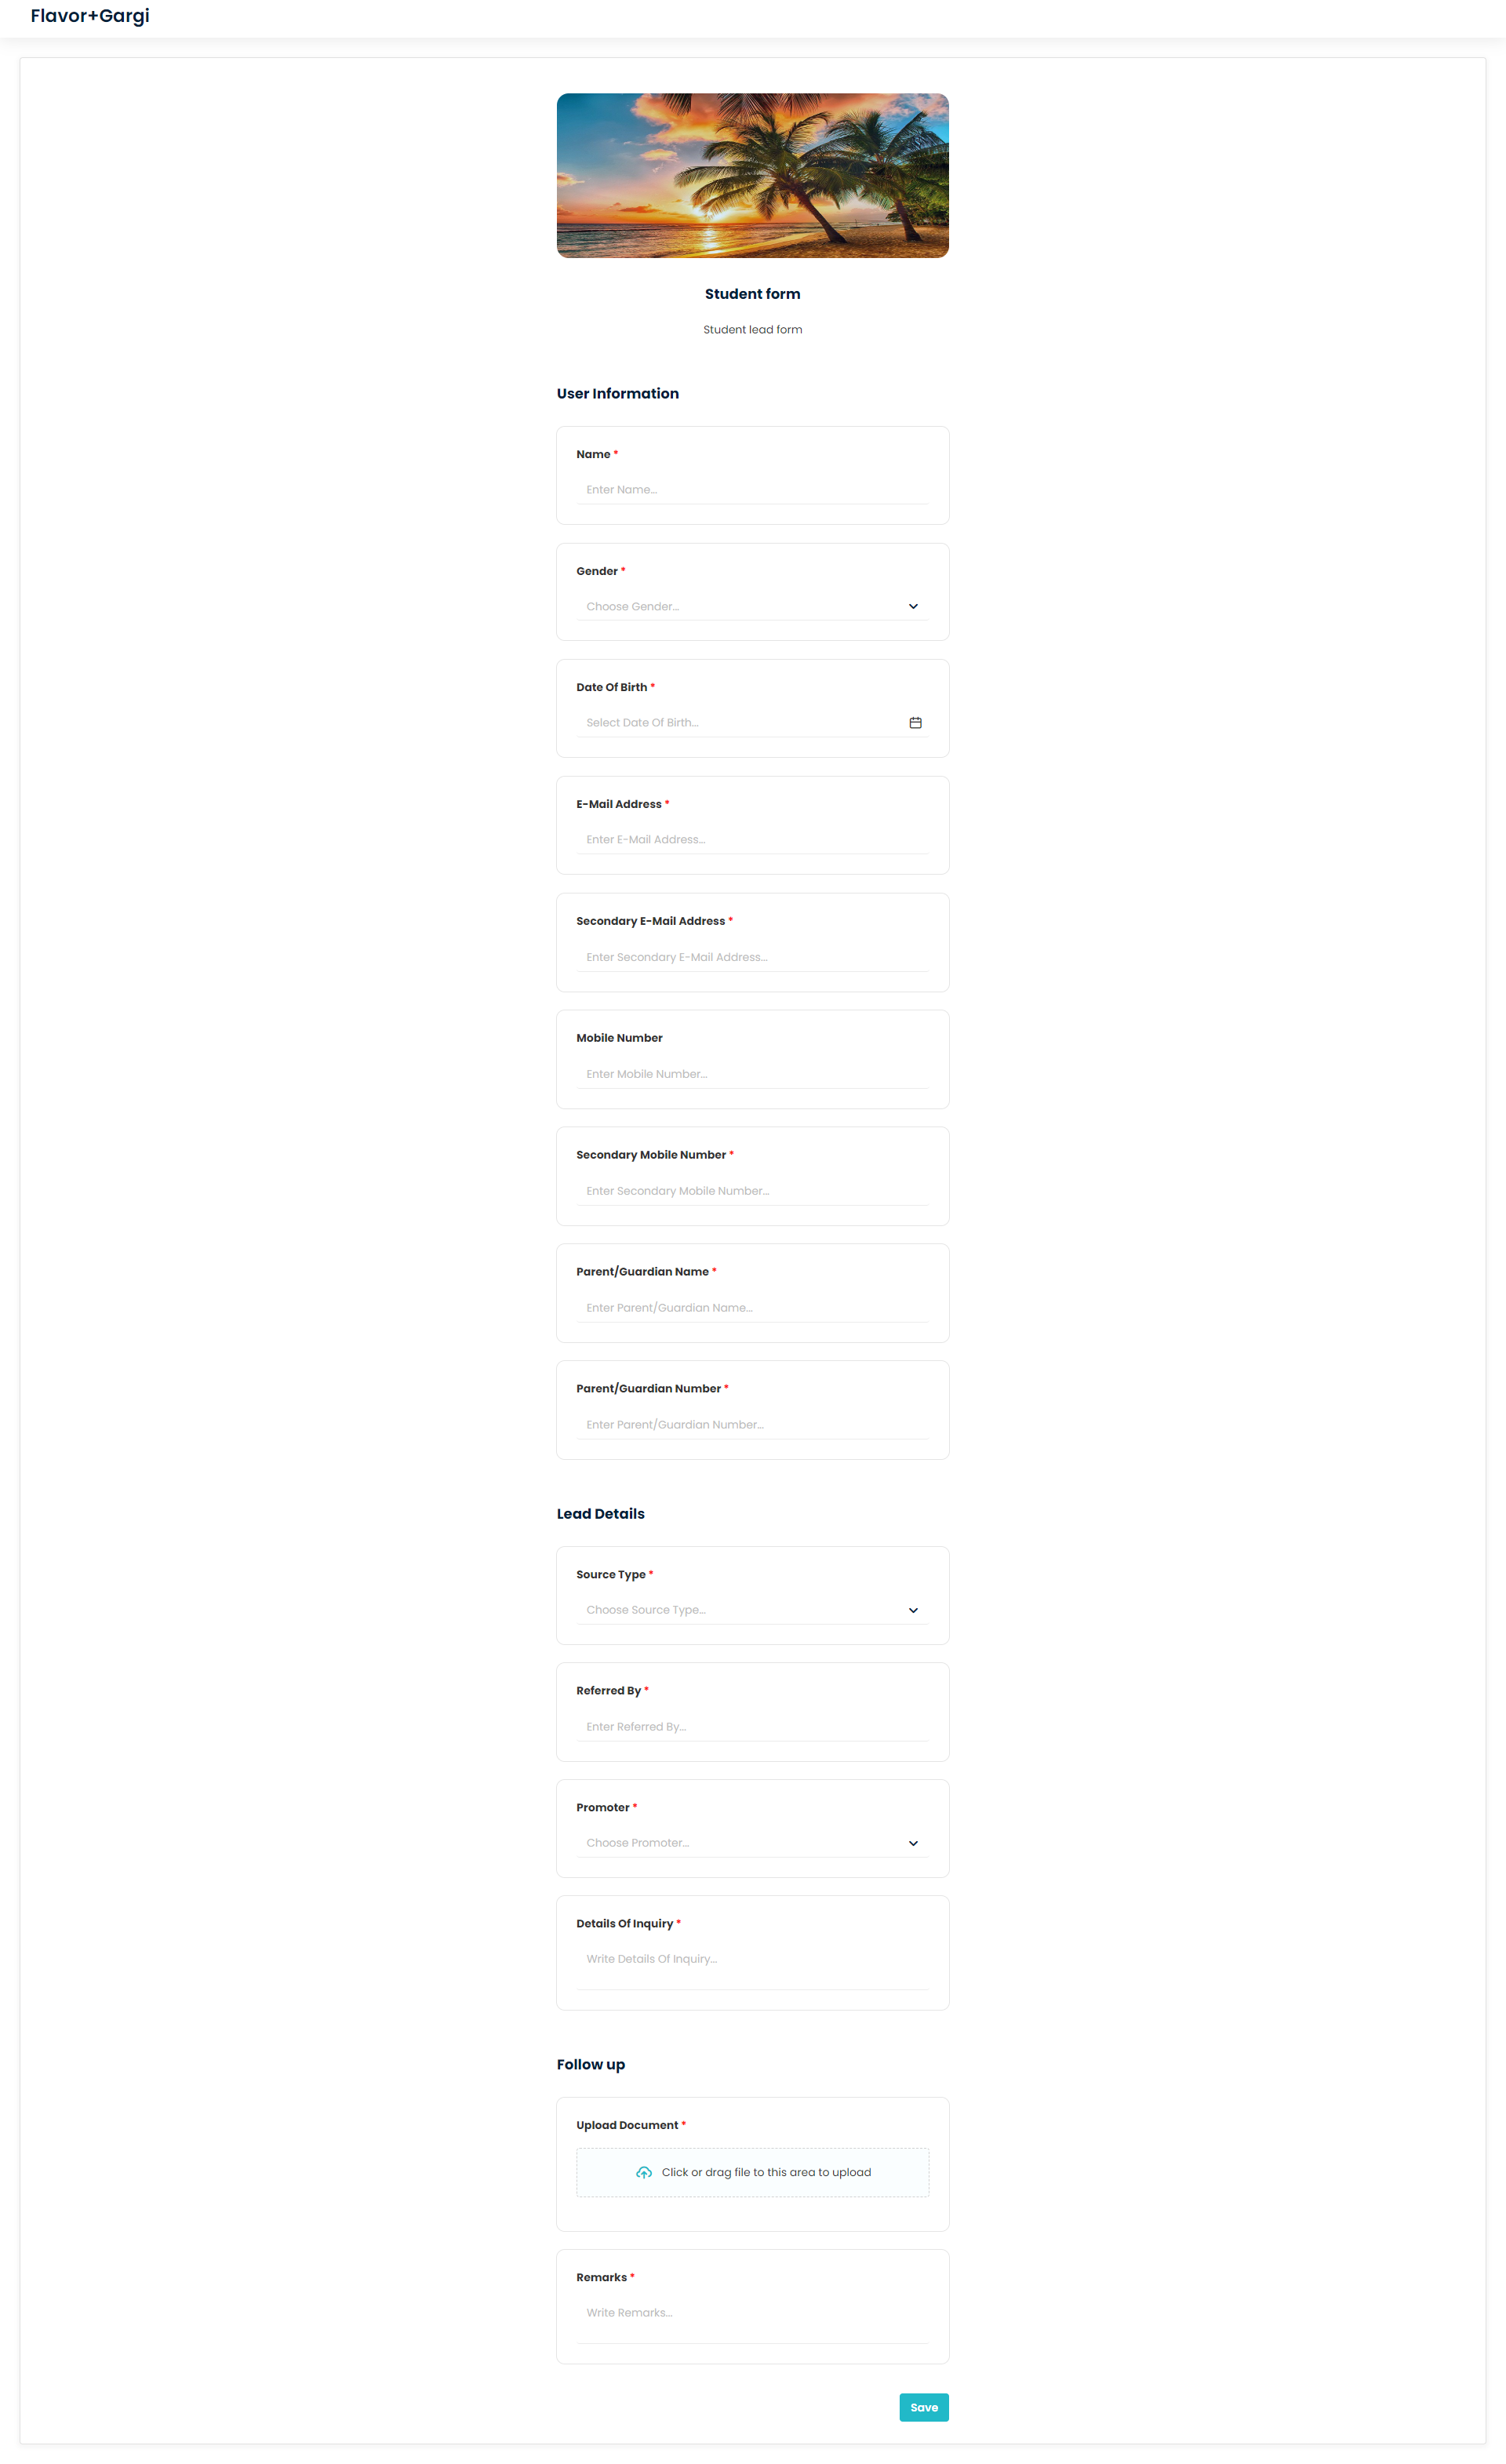
Form View
Need more help? Ask us a question
Please let us know more of your details and our team will reach out to you very shortly.