Introduction
In this article, you will find how the reschedule links are being send to the students or parent/guardian, and the settings for templates for notifications to be sent to the Branch Manager, Teacher, Students, and the parents.
Step 1
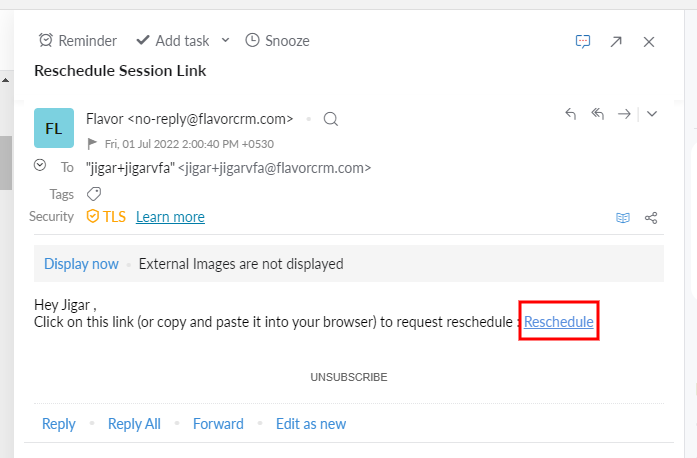
- Go to the Students from the left side menu of the Flavor System.
- Mark the checkbox to the students to whom the Send reschedule link is to be sent.
- Click on the Bulk Action icon button.
- An action popup will appear on your screen.
- Click on the Send Reschedule link.
Step 2
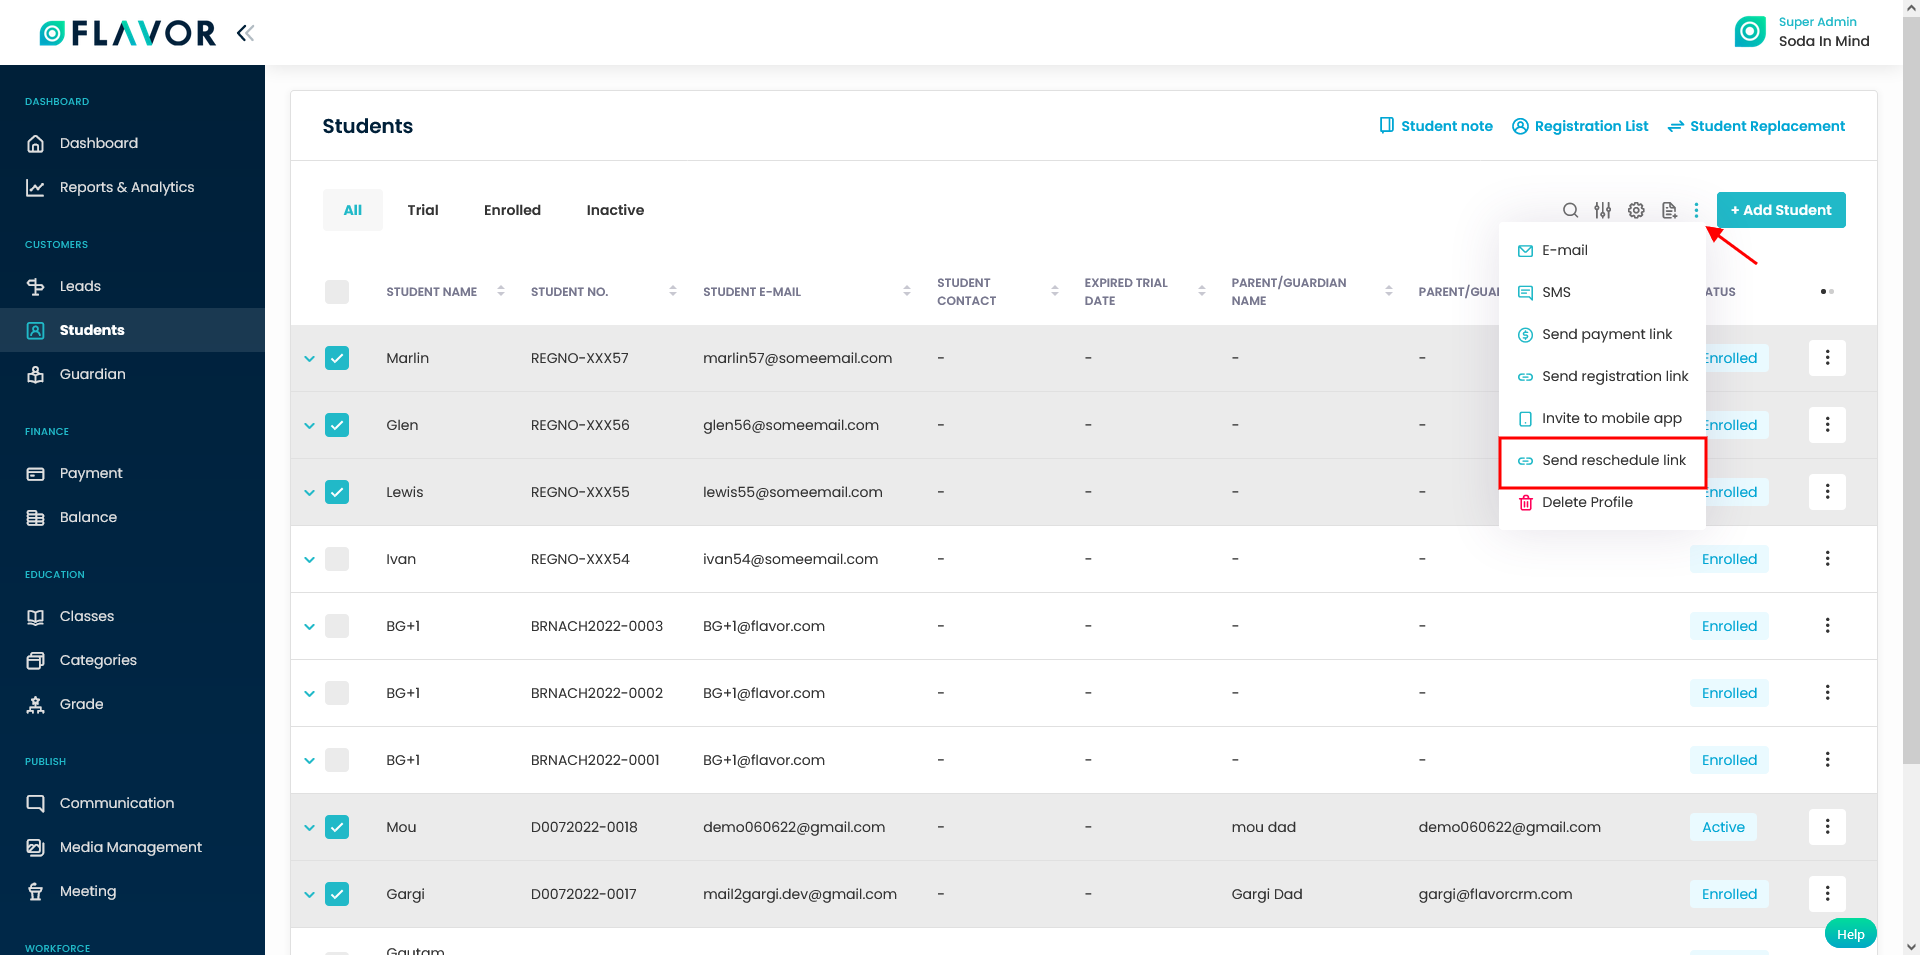
- A popup named Reschedule Session Link will appear on your screen.
- The To field will have the email ids of the parents of the selected students.
- Set the Subject in the textbox.
- Compose the email body by using the Dynamic parameters/variables.
Step 3
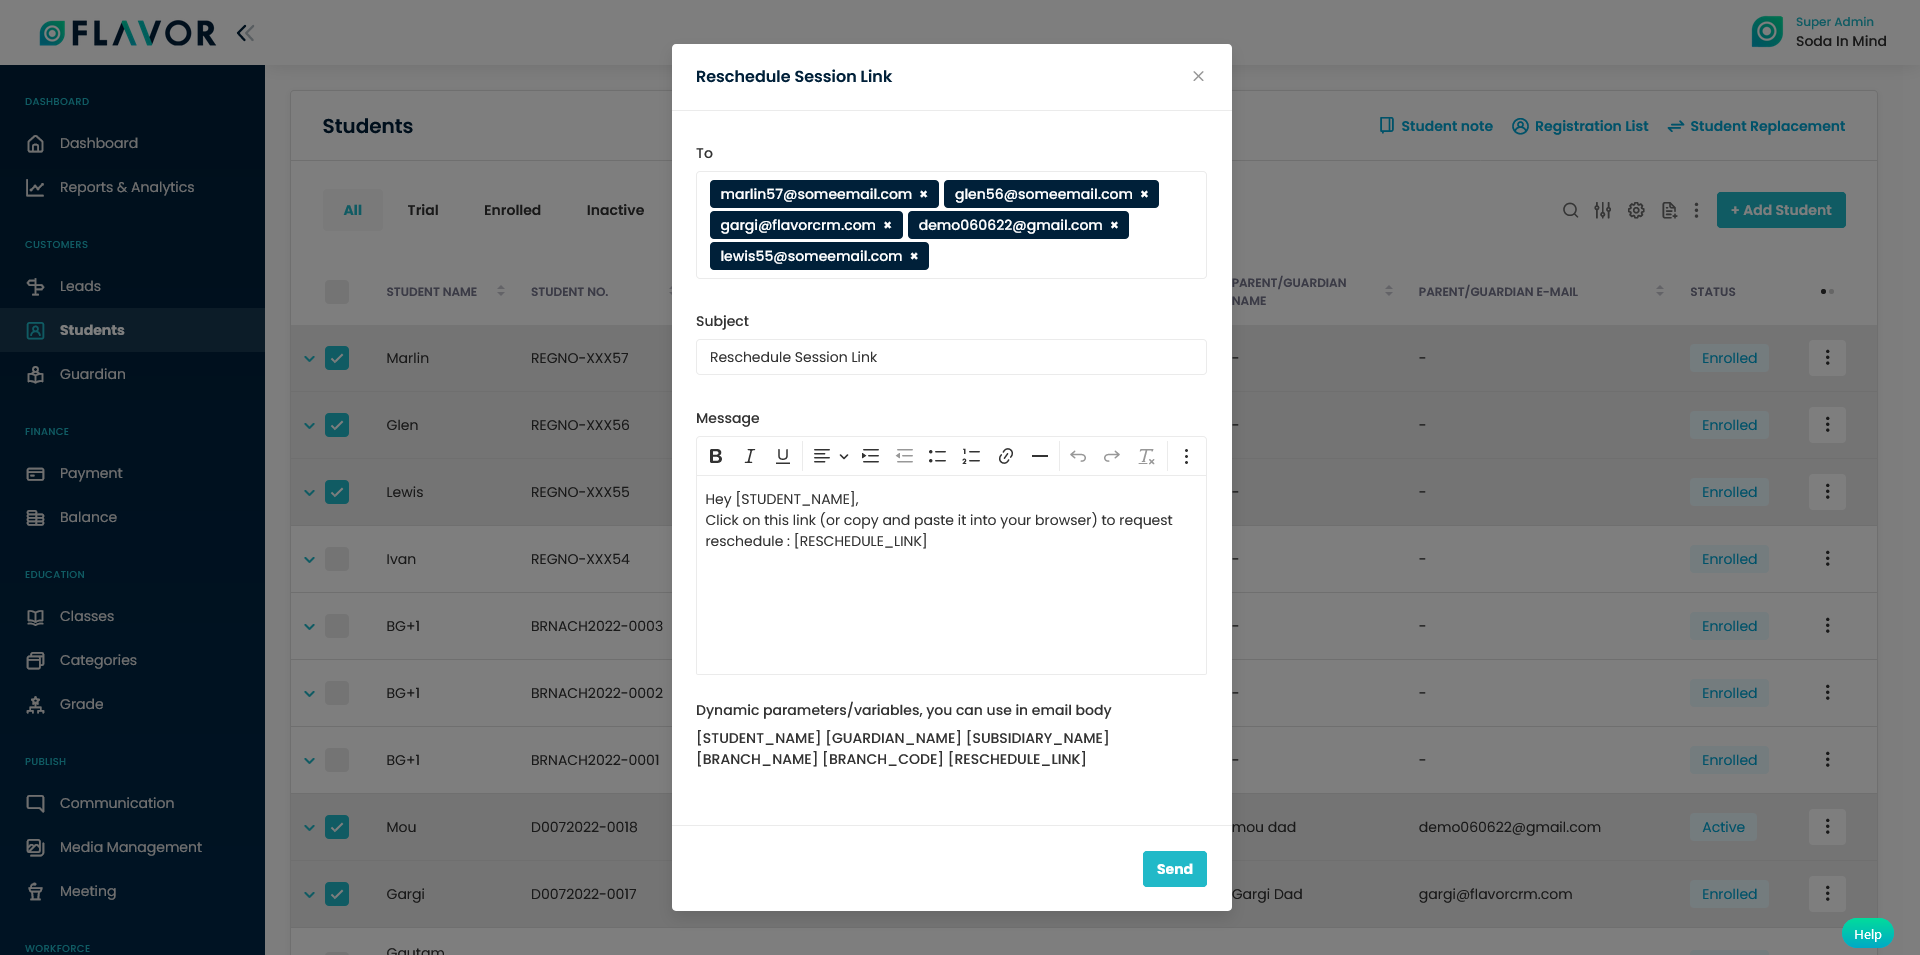
- The Email will go to the Students or Parent/Guardian’s registered email ids.
- In the Email received, the Students or Parent/Guardian need to click on the Reschedule Link.
Step 4
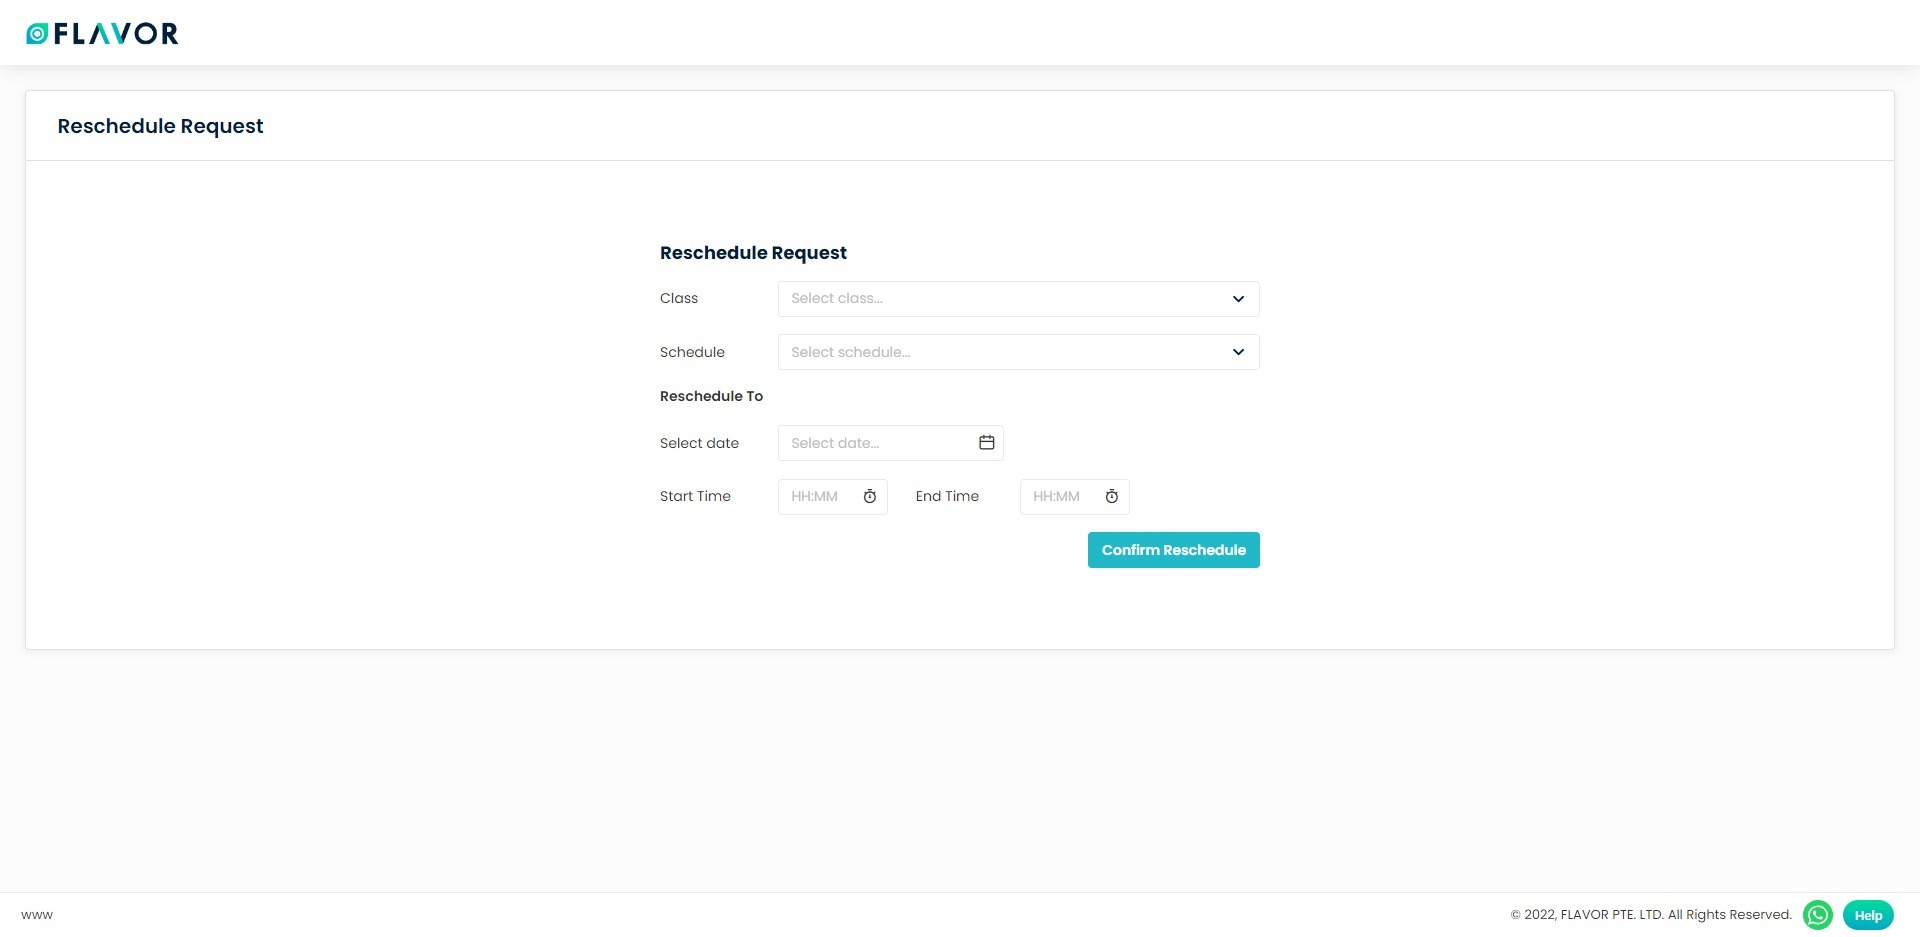
- On clicking the Reschedule link, it will navigate the user to the Reschedule Request page.
- Select the Class, Schedule and Reschedule date, Start Time and End Time.
- Click on the Confirm Reschedule button.
Step 5
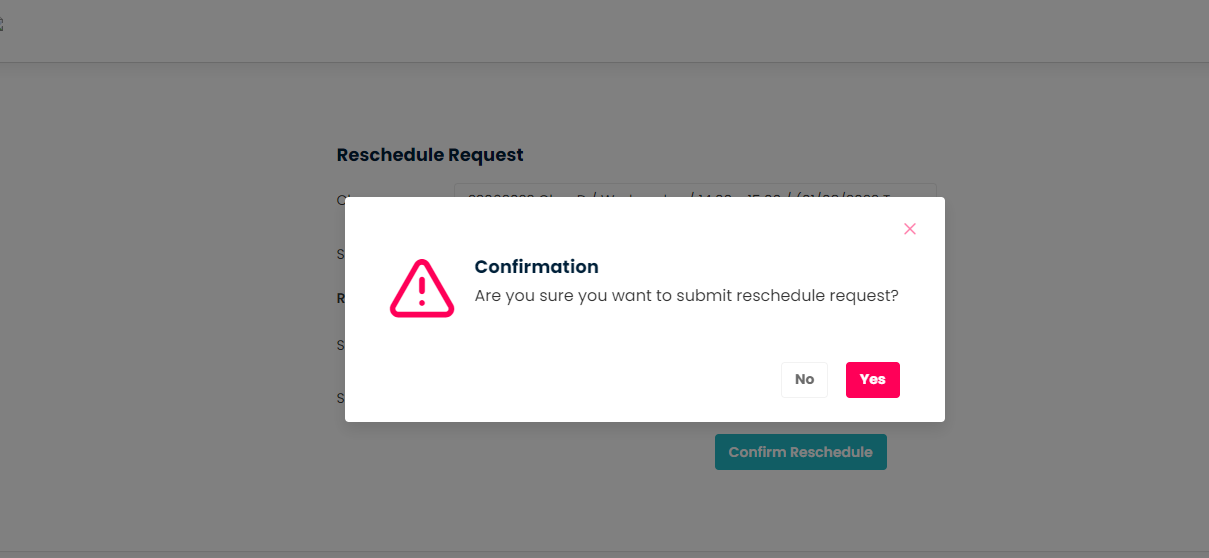
- A confirmation popup will appear on your screen.
- Click on the Yes button to confirm.
- A success notification will be displayed.
Step 6
- After this the Teacher, Branch Manager, Students and Parents Guardian(as per the settings) will receive the Emails.
- The Teacher can Approve or Reject as per the Circumstances.
- It is Approved / Rejected, the emails/notification will be sent to the receivers as per the Settings.
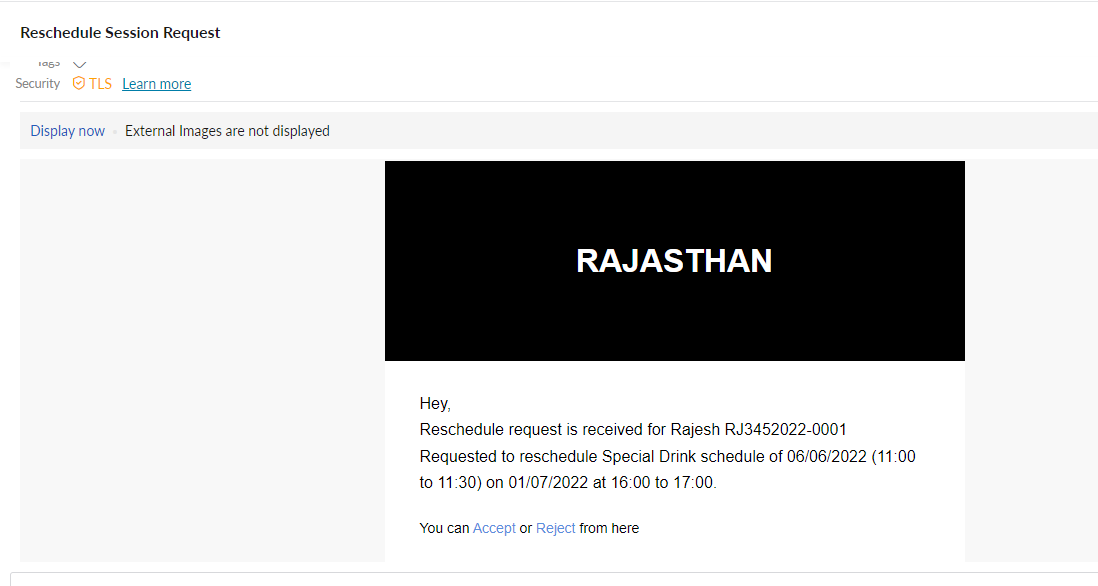
Note: A teacher can Approve/ Reject only one time per email. If the teacher clicks the Approve/Reject link second time, it will show as invalid Request. .
How to set the template for Notification for Rescheduled Session Request?
Step 1
- Go to the Settings on the left-side menu of the Flavor System.
- Click on the Notification tab.
- Under the Class Notification, click on Set Messages button.
- It will navigate you to the Notification Settings page.
- Select the Subsidiary for which you want to do the settings.
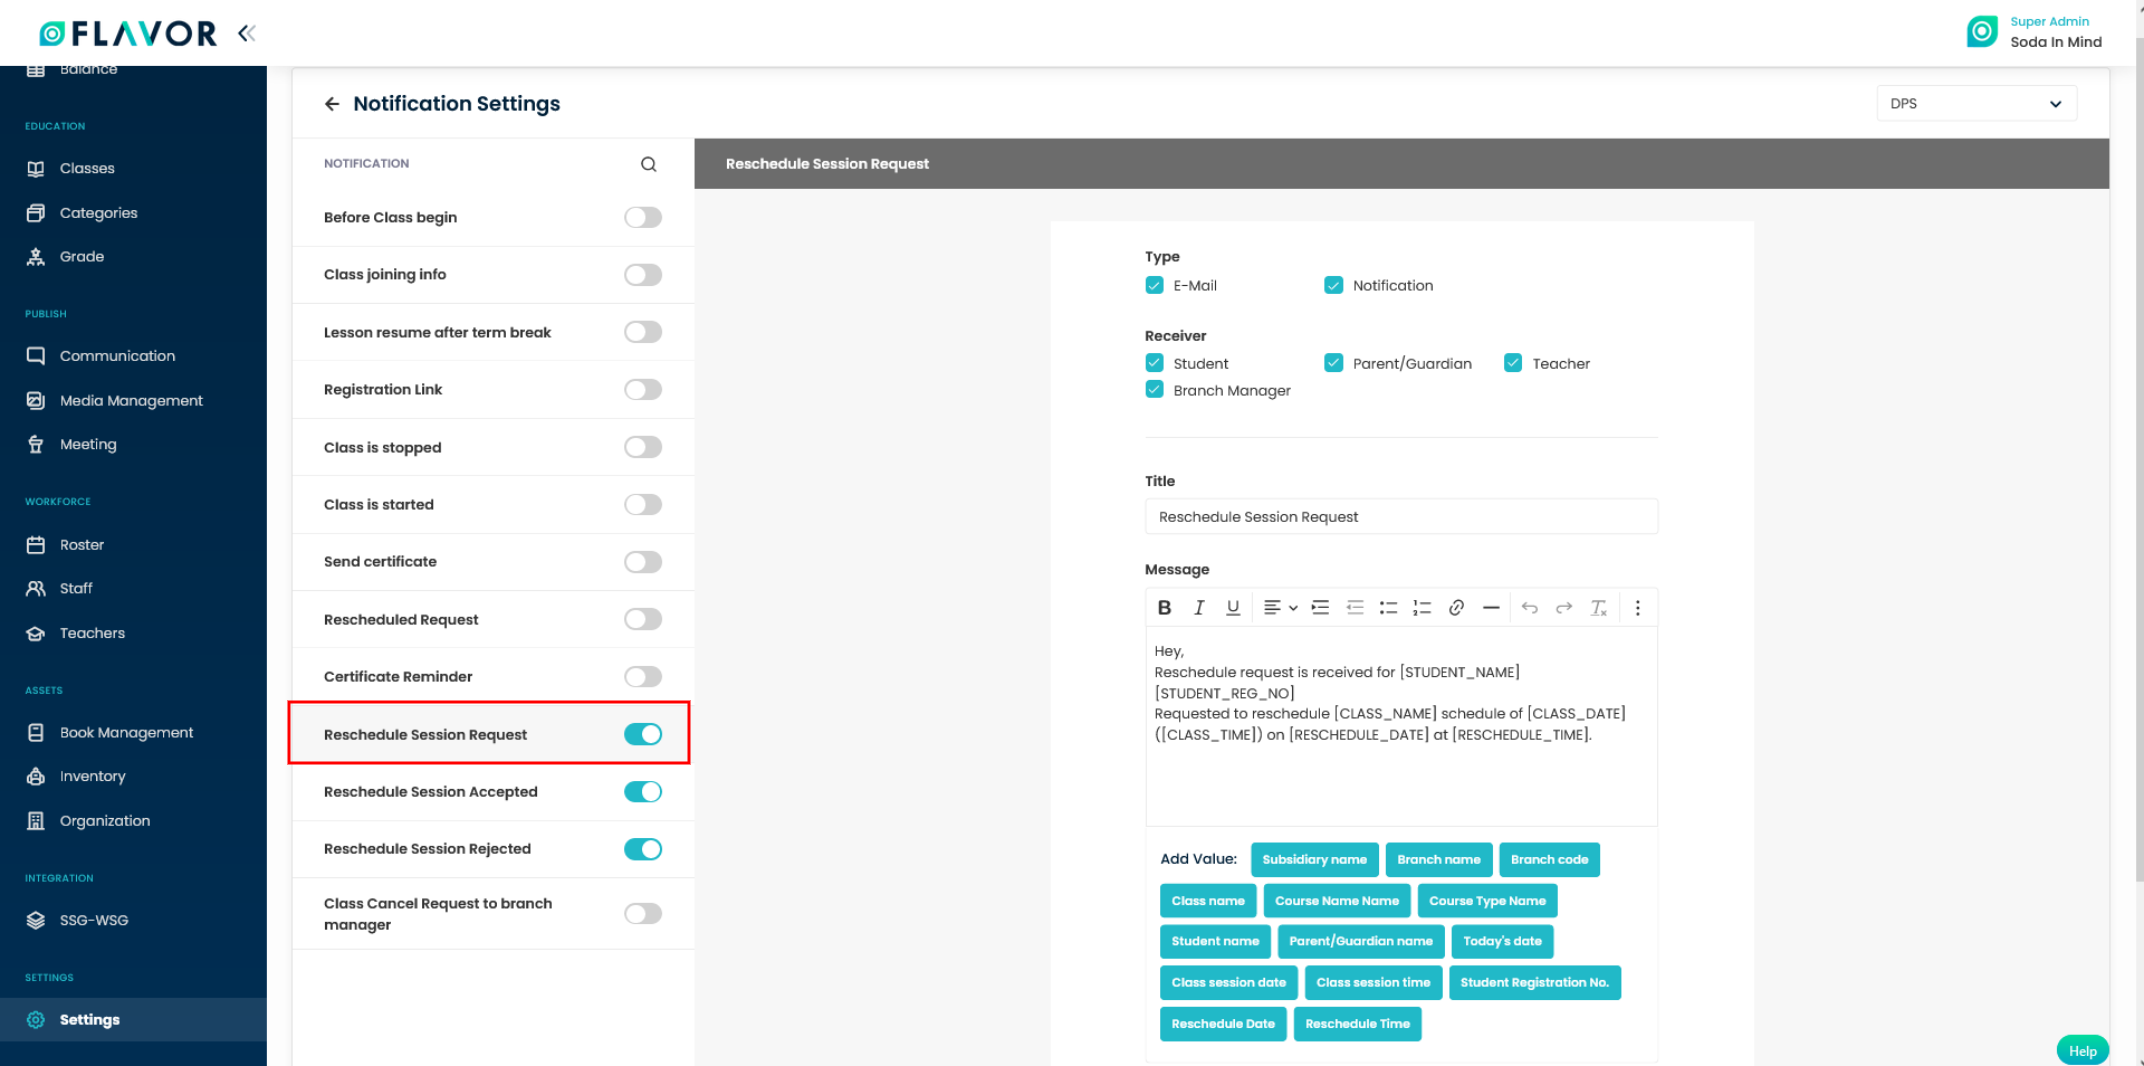
How to Set the template when a Reschedule session request is made by the parents?
Step 2
- Scroll down and click and enable the Reschedule Session Request switch.
- Select the Type and Receiver.
- Set the Title and compose the Message Template using Add value.
- Click on the Save Notification button.
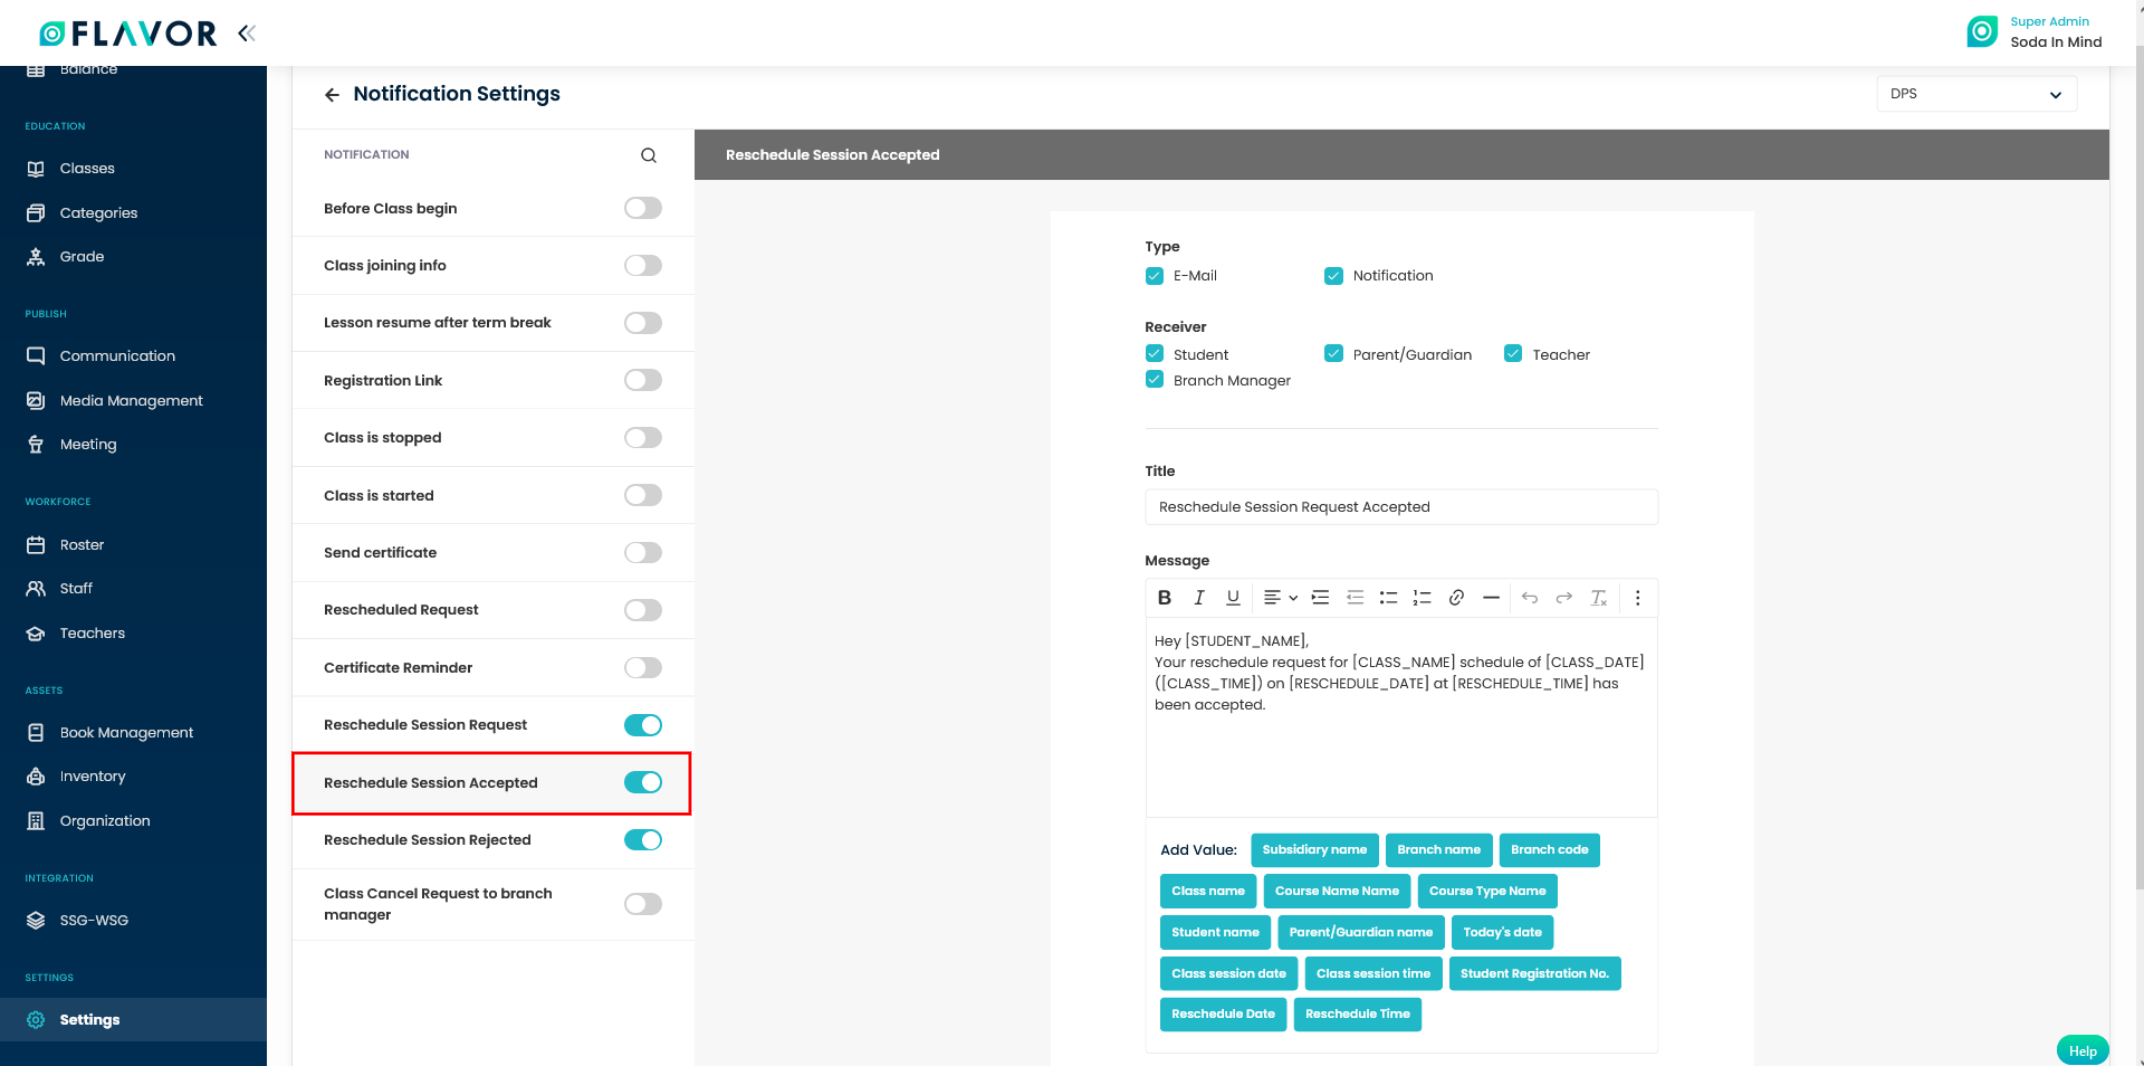
How to set a template when the Teacher approves the Reschedule Session Request?
Step 2
- On the Notification Settings page, scroll down and click and enable the Reschedule Session Accepted switch.
- Select the Type and Receiver.
- Set the Title and compose the Message Template using Add value.
- Click on the Save Notification button.
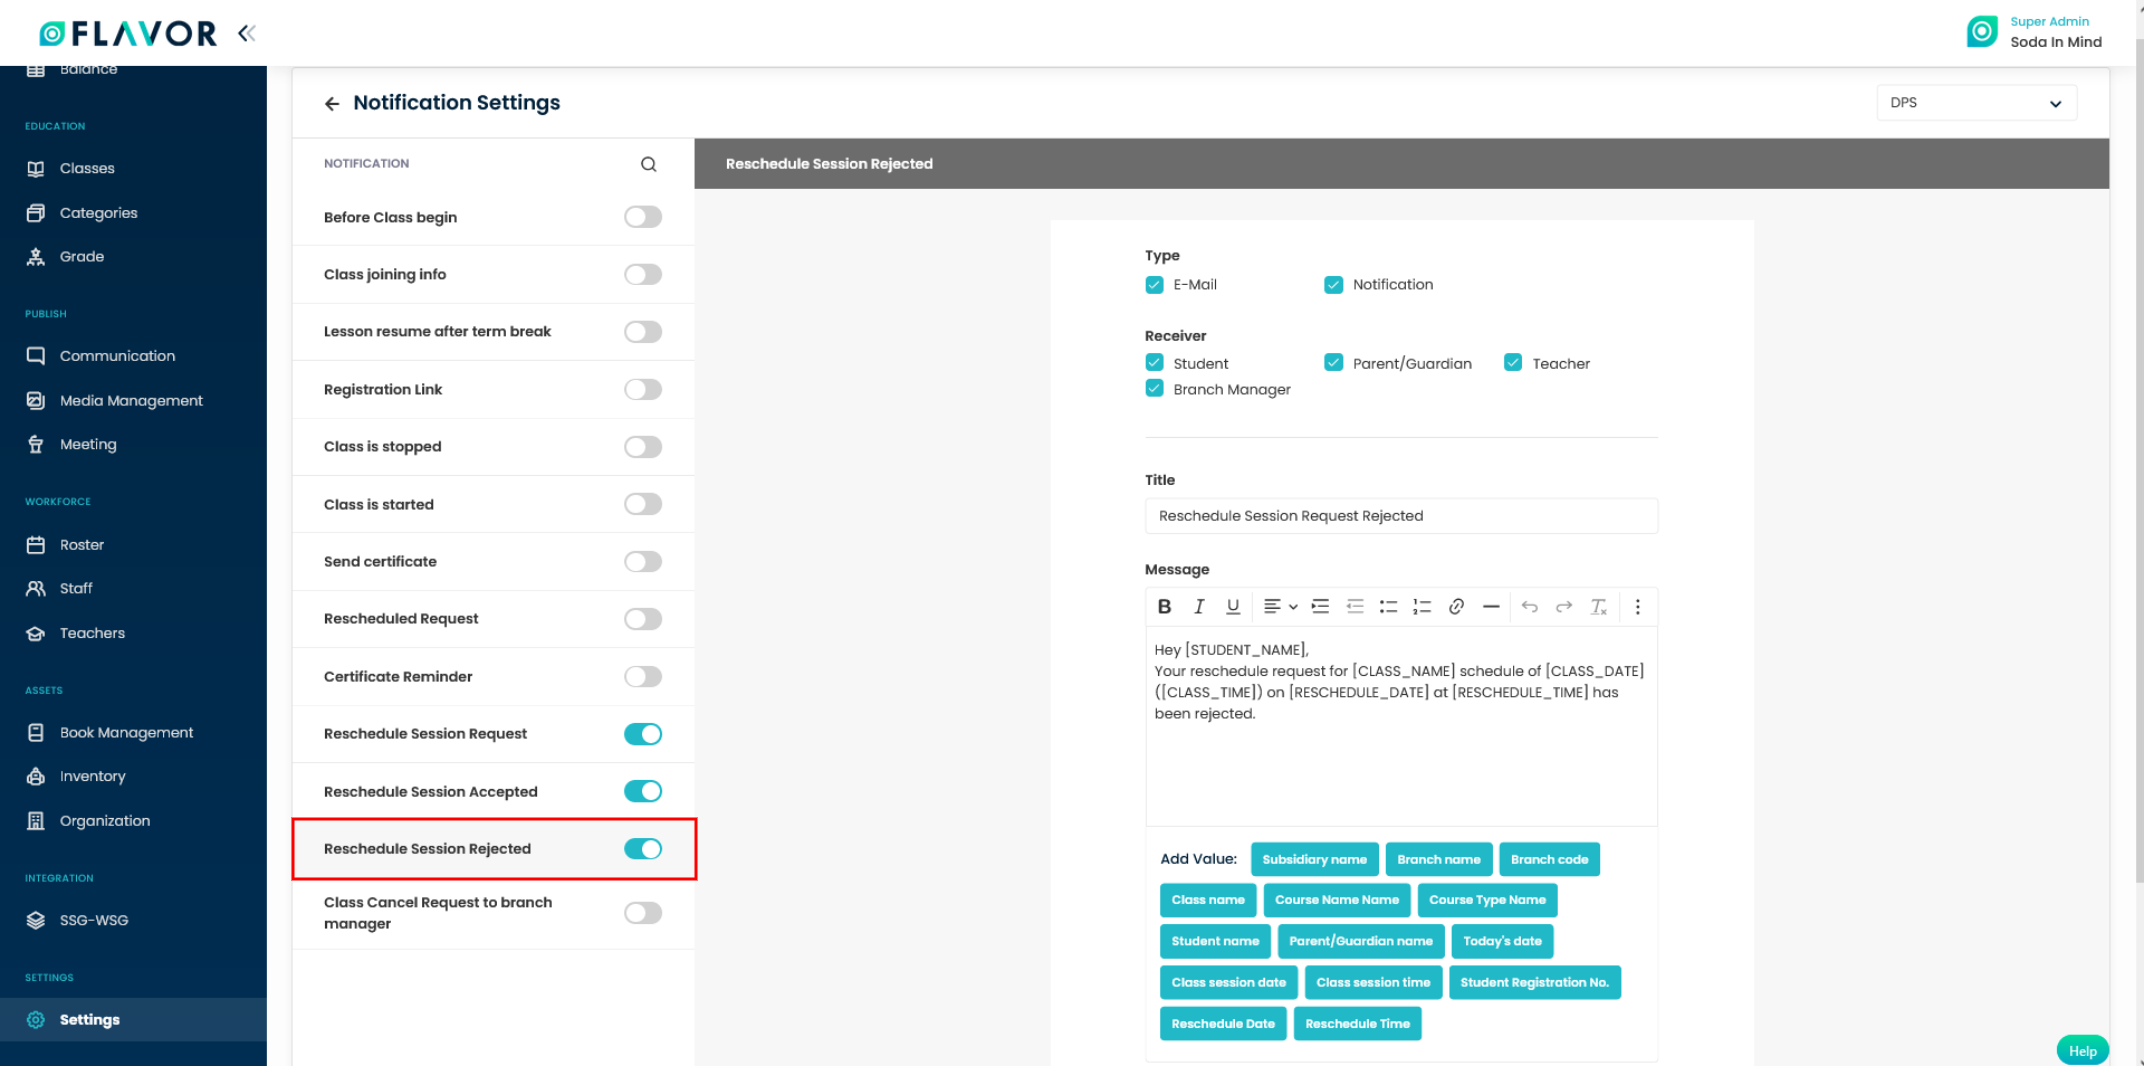
How to set a template when Teacher Rejects the Reschedule Session Request?
Step 2
- On the Notification Settings page, scroll down and click and enable the Reschedule Session Rejected switch.
- Select the Type and Receiver.
- Set the Title and compose the Message Template using Add value.
- Click on the Save Notification button.
Need more help? Ask us a question
Please let us know more of your details and our team will reach out to you very shortly.
